CategoriesProgram Design Rehab/Prehab Strength Training

Knee Pain When Squatting? A Simple, Practical Guide to Resolving It

To mirror yesterday’s conversation on training around pain, today’s post delves a little deeper into a specific area that many lifters tend to have issues with:

  • Not enough bicep curl variations in their program
  • Forgetting to remove their shaker bottle from their gym bag for week 
  • Knees.

The knees are a vulnerable joint and there are myriad of reasons why they can become achy, sore, cranky, or any other similar adjective you want to put here.

Sydney, Australia based physical therapist and trainer, Dane Ford, was kind enough to write this straight-forward article on some of the root causes of knee pain and ways to address them on your own.

Enjoy!
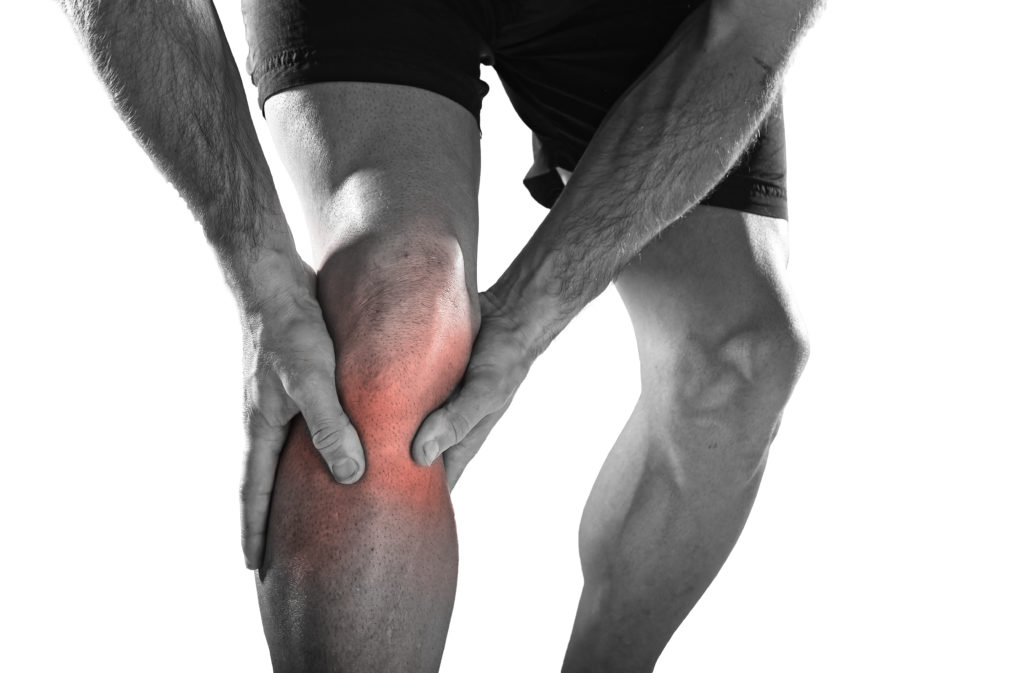
Copyright: ocusfocus

Knee Pain When Squatting?

Squatting is an essential part of most people’s fitness routine, and it can be extremely frustrating when you experience sore hips or knees when you squat.  

 Today I’m going to share four killer exercise variations that will help take some pressure off your knee joints!

No matter what level your fitness is at – whether strength training or just getting healthy again after injury – these tips should work their magic in no time flat.

Let’s get started.

The Goods

Box squat.

The first variation for those who experience knee pain when squatting is the box squat.  A box squat will strengthen your quads, glutes, and hamstrings. It’s also a great way to improve your squatting technique.


You’ll need a box squat or a bench around knee height to do a box squat.

  1. Start by placing the box behind you.
  2. Then, position your feet shoulder-width apart and push your hips back.
  3. Next, bend your knees and lower yourself until your bottom touches the box.  Pause for a second, then stand back up.

Step-Ups

Step-ups are another great variation for people who have knee pain when squatting.  This exercise works your quads, hamstrings, and glutes and is a great way to build lower body strength.


  1. To do a step up, start by placing your right foot on a box or bench.
  2. Then, push off with your right foot and raise your body up until your leg is straight.
  3. Pause for a second, then lower yourself back down.
  4. Focus on keeping the hips level.
  5. Start with a smaller step, and increase the step height as your body allows.

Hip Thrusts


Hip thrusts are a great exercise for people who want to build stronger glutes. This exercise can also help relieve knee pain when squatting by taking the pressure off your knees. 

  1. To do a hip thrust, start by sitting on the ground with your back against a box or bench.
  2. Place your feet flat on the ground and raise your hips until your thighs and torso are in line with each other.
  3. Pause for a second, then lower your hips to the starting position.
  4. Progress this exercise by adding weight at your hips, like a barbell or plate.

Banded Crab Walks

Banded crab walks are an excellent exercise for people who want to build stronger glutes and legs. This exercise can also help improve your squatting technique by making it easier to push your knees out over your toes. This is a golden exercise for dealing with knee pain when squatting.


  1. To do a banded crab walk, start by placing a resistance band around your feet.  (You could place it around your knees or ankles, but the further down your legs, the harder the exercise will be).
  2. Then, step one leg out to the side as far as the band will allow. 
  3. Keep the hips level, and the shoulders stacked over the hips.
  4. Next, step in with the other leg. 
  5. Repeat.

Causes of Knee Pain

When addressing knee pain during squats, it’s important to understand some of  the common causes.  This way, you can be sure that you’re taking the right approach to fix the underlying issue.  Here are three common factors which can contribute to knee pain when squatting:

Improper Form

Whilst there is no such thing as textbook technique, using ‘adequate’ form allows you to engage the right muscles when you lift and minimize injury risk. If you don’t utilize adequate form when you squat, the load in certain areas like your knee joints will be increased, instead of having the load evenly distributed through your entire body. 

Your ideal squat stance will be determined by the bony alignment of your joints and other anatomical factors.   

Overuse

Our body’s tissues all have a maximum tolerable capacity. This means that we need to be able to go hard enough in the gym to stimulate adaptation and promote strength, whilst not overloading ourselves to the point of tissue injury. 

Giving your body time to recover with rest or a de-load week every now and then is a great start, to allow proper cell regeneration, repair and adaptation to occur.  

 Adding variety into our movements is another great option to avoid overuse. Beyond the exercises we’ve covered above, mixing back squats with front squats, goblet squats, or other squatting variations will help to strengthen the squatting movement whilst providing a slightly different stimulus to our tissues, and reducing the overload injury risk.

Bad Shoes

If you’re wearing shoes that don’t provide adequate stability when you squat, then this can put unnecessary strain on your knees. 

1 April Fool's Day Concept

Be sure to wear shoes that provide you with a solid foundation from which to lift. 

Health Conditions Related to Knee Pain

So now that we understand some of the mechanisms that can contribute to knee pain during squats, how do we know which structure in the knee is causing pain?

Knee pain can present as a number of different conditions depending on the injured structure.  This can include:

Patellofemoral Pain Syndrome

PFPS or patellofemoral pain syndrome is a condition that affects the knee joint. It’s characterized by pain in the front of the knee and around the patella or kneecap, and is common in those who love to squat. 

 If you have PFPS, you might experience pain when climbing stairs, squatting, or sitting for long periods.

IT-Band Syndrome

ITBS is a condition that affects the iliotibial band, which is a long strip of connective tissue that runs down the outside of the thigh from the hip to the knee, and normally presents as pain on the outside part of the knee.  But squatters need not worry too much about this – ITBS is much more common in runners rather than lifters.

Patellar Tendinopathy

Tendonitis is the inflammation of a tendon, which can occur in any tendon in the body. However, Patella tendonitis presents as pain just below the knee cap.  If you perform a lot of explosive movements like box jumps, or fast tempo squats, you should be aware of patella tendinopathy.  

Arthritis

Arthritis is a condition that causes inflammation in the joints. The two most common types that can cause knee pain are osteoarthritis and rheumatoid arthritis.

  • Osteoarthritis is a degenerative disease that causes the cartilage in the joints to break down. This can cause pain in your knees, as well as other joints in your body.
  • Rheumatoid arthritis is an autoimmune disease that causes the body’s immune system to attack the joints. It may cause swelling and pain around the knee, leading to pain, stiffness, and inflammation.

Load management is key in managing arthritis. This is because we want to keep the muscles around the joint nice and strong, without irritating the joint too much.

How to Prevent Knee Pain When Squatting

Aside from performing some of the killer squat variations listed above, you can do a few other things to prevent knee pain while squatting.
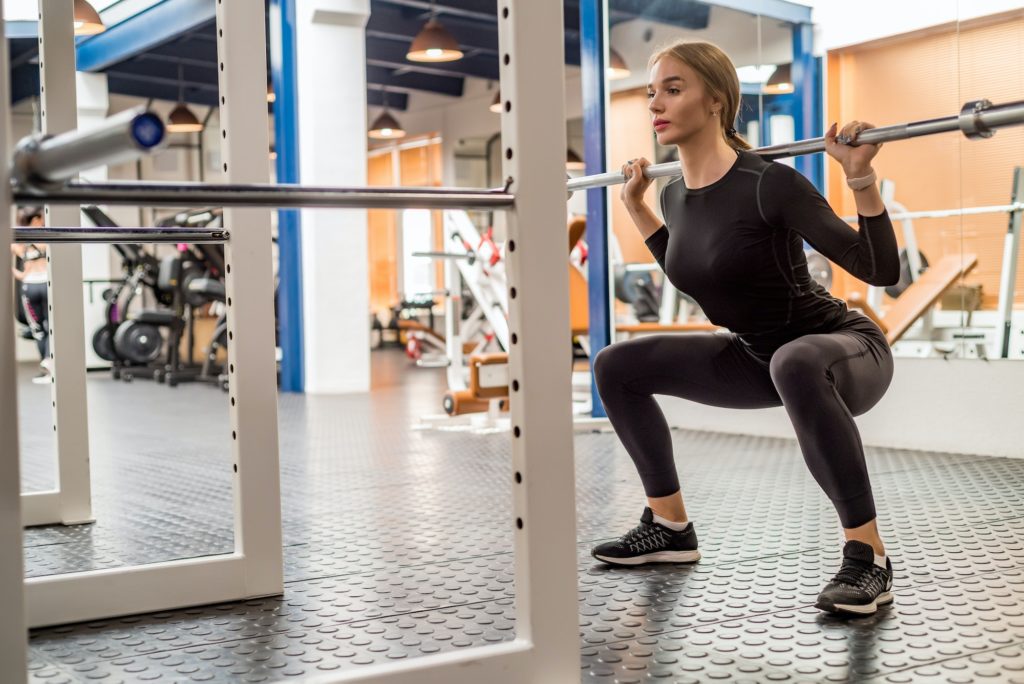
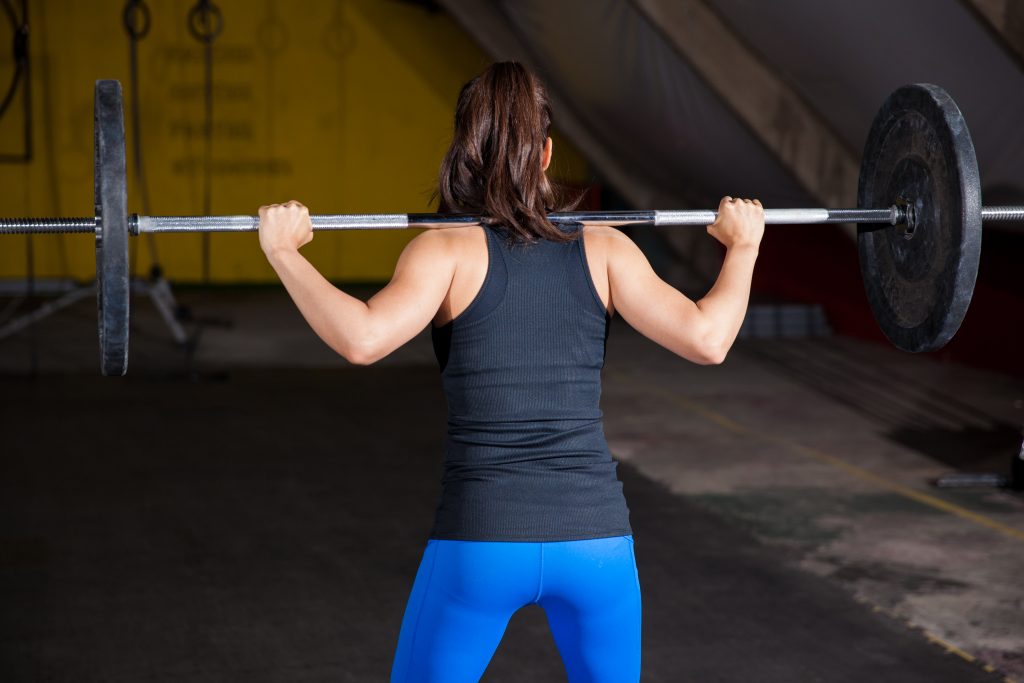
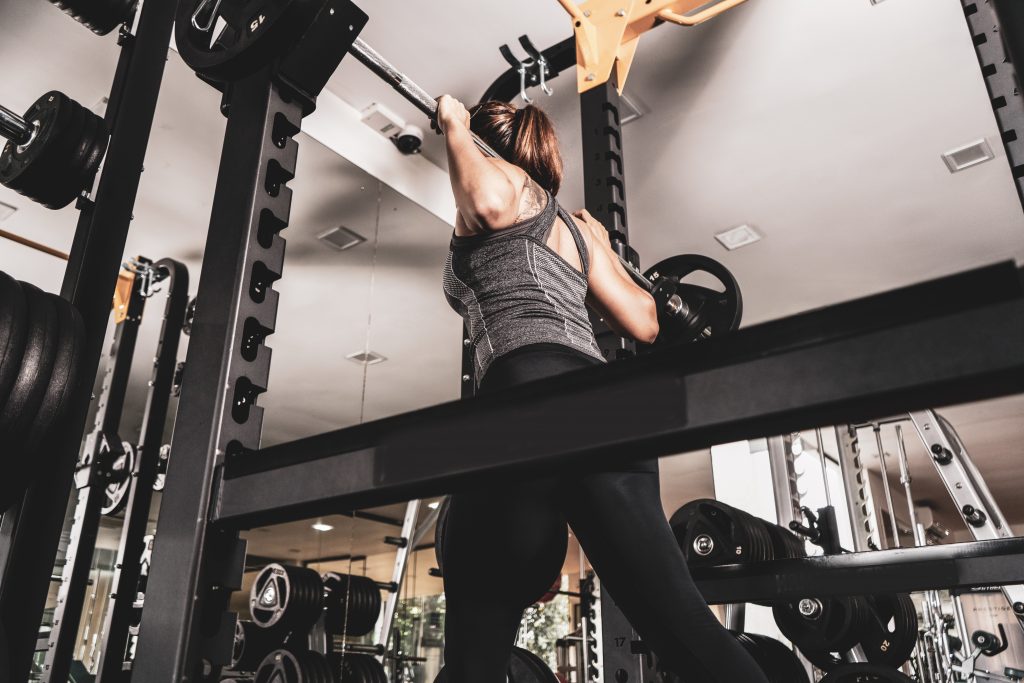
Young woman does barbell squats in modern gym

Warm Up Properly

A good warm-up will help to increase your heart rate, loosen up your muscles, and make your body’s tissues more elastic. I recommend doing a light jog or bike ride for 5-10 minutes, followed by some dynamic stretching.

Use the Correct Weight

Another important consideration to prevent knee pain while squatting is to use the right weight.  If you go too heavy too soon, it will put extra stress on your knees and could lead to pain. Utilize progressive overload by starting with a light weight and gradually increase the amount of weight you’re using as your body gets stronger.

Blood Flow Restriction Training

Another great way to improve strength whilst using light weight is by incorporating Blood Flow Restriction Training into your routine.  This involves using a BFR band to reduce venous blood return from your muscles, making them work harder. 

This means that you can use lighter loads to achieve the same result from your workout. BFR training can be a great addition if you are struggling with knee pain from squatting or trying to train with an injury.

Use a Smaller Range of Motion

Squatting through a smaller range of motion by reducing squat depth will reduce the load going through the knee joint, and is a great way to modify the exercise if you are struggling with pain.

Listen to Your Body

If you still experience knee pain while squatting, stop the exercise and rest for a few days. If the pain persists, consult a doctor or physical therapist.

Wrap Up

If you’re experiencing knee pain when squatting, try one of the variations I suggested and see how they work for you. Remember to always start light and gradually increase the weight as your body gets stronger. 

And, most importantly, have fun with it!  Squatting can be a great way to improve your fitness level and get in shape, but only if you do it correctly and safely. Give these variations a try and let us know how they work for you.

About the Author

This article was written by Dane Ford, the founder of Lift Physiotherapy and Performance in Sydney, Australia. Lift Physio aims to help you overcome injury, optimize your health, and unlock your full movement potential.

CategoriesExercise Technique Strength Training

The Bar Every Gym Should Have: Safety Squat Bar

When Dean Somerset & I created the Complete Shoulder & Hip Blueprint and the (Even More) Complete Shoulder and Hip Blueprint (both currently on sale for the next 72 hours at 40% off their regular price…wink wink, nudge nudge) our goal was to provide a resource for people to better connect the dots between assessment and performance

Too, it was to champion the idea that strength is corrective. It’s rarely necessary to send someone off to corrective exercise purgatory when their shoulder or hip is acting up. While it’s inevitable a swath of time & effort may have to be dedicated to proper breathing mechanics or improving scapular upward rotation, what I have found that often “sticks” the most and provides a greater “buy in” to rehabbing an injury…

…is to make rehab look and feel more like training.

Much of the time the “fix” is a matter tempering one’s training volume (most people are simply doing too much of something) or adjusting a specific exercise – stance, ROM, tempo – in an effort to better mirror one’s injury history and (current) ability level. <— FYI: Dean & I cover this extensively in CSHB 1.0 and 2.0.

If a part of the body hurts when someone performs an exercise it doesn’t automatically mean we have to cancel the exercise altogether.

Cancelling Nazis (and Birthday clowns)  = good.

Cancelling Squats = whoa, whoa, whoa…pump the brakes a bit.

The Bar Every Gym Should Have

This post is not meant to wax poetic on the back squat.

If you want to do it, cool.

If you don’t, that’s cool too.

No one outside of a competitive powerlifter (and maybe He-Man) HAS to perform a traditional barbell back squat. I think they’re a great option if your goal is to be brutally strong & athletic and you want to build an impressive physique.

They’re a tool in the toolbox.

I will say, however, the back squat (when performed with a straight bar) does tend to eat up a lot of lifters’ shoulders. In fact, I’d go so far as to say that straight bar back squats are more of a shoulder destroyer than the bench press any day.

Yeah, that’s right…I said it.

via GIPHY

I know the barbell back squat provides a degree of  prestige and “street cred,” and I’d be lying if I said there wasn’t a time in my career as a personal trainer & strength coach where I’d ride and die with the statement that everyone, regardless of goal, sport played, or highest Scrabble score should have back squats in their program.

Alas, with age (and experience) comes wisdom.1

That said, I’ve always prided myself in taking a middle-of-the-road approach to most things in the health/fitness industry. I know some coaches who are adamantly PRO back squat and others who are just as adamantly against.

Which brings me to the point of today’s post.

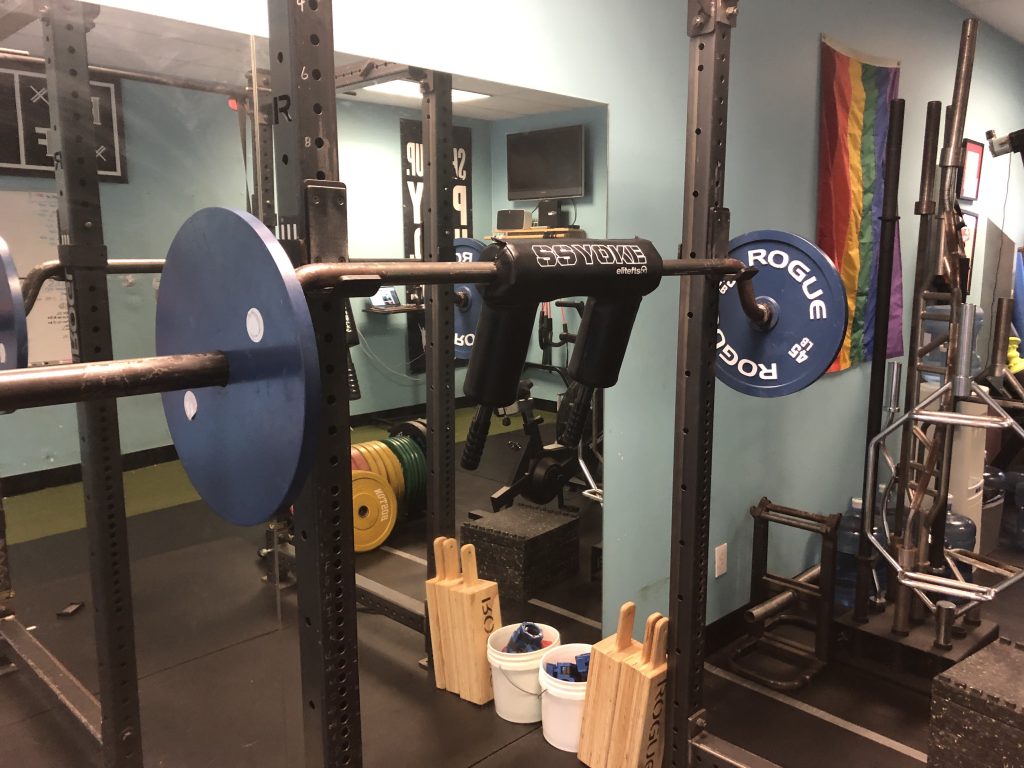
The Safety Squat Bar (also referred to as SSB or Yoke bar), while still technically a back squat, has grown into one of my preferred ways to program (back) squatting into most people’s programs. I also take the stance that it’s a bar that EVERY gym should add to their equipment arsenal.

Why Your Gym Needs an SSB Bar

1. Shoulder Friendly

Back squatting with a straight bar requires a fair bit of shoulder mobility. Many lifters lack the requisite shoulder abduction & external rotation to be able to comfortably rest the barbell on their upper traps (high-bar position) or rear delts (low-bar position).

As alluded to above, part of the appeal for me is that SSB bar coincides very well with my mantra “strength is corrective.’

There’s an element of literal synergy here; the SSB bar still allows someone to lift heavy things. However, the obvious advantage of the bar is its design, and the fact that the handles are located in FRONT of the lifter.

There’s zero shoulder mobility required. To that end, if I am working with someone who’s shoulders don’t handle the straight bar well, I can have them use the SSB bar and continue to TRAIN without irritating the joint.

2. More Upright Torso

There will ALWAYS be a degree of forward lean when squatting. This is not to suggest a more forward leaning position when squatting is inherently wrong or deleterious.

However, back squatting lends itself to more of a forward lean compared to a front squat. As a result, and as a general rule, the more of a forward lean there is, the more “shear” loading will take place on the spine.

Photo Credit: www.PowerliftingTechnique.com

The high(er) bar position with the SSB bar allows for the torso to be more upright (similar to a front squat) and as such a bit more back friendly as well.

Personally speaking, I know when my deadlift volume is high I’ll revert to SSB squats for the bulk of my squatting during that particular phase of training because my lower back will take less of a beating and thank me in the long run.

3. Increased ROM & Upper Back Strength

Pigging back on the above point, because the high(er) bar placement of the SSB bar allows for a more upright torso it’ll also equate to a more robust range of motion for most trainees as well.

In addition, the high(er) bar placement will force the upper back to work overtime because that area needs to work harder to prevent the bar from “rolling” the shoulders over.

So, in effect…we can make the case that the safety squat bar recruits the upper body more (compared to traditional squats).

4. Reneges Upper Body Injuries

The SSB bar does a splendid job at opening up one’s TRAINABLE MENU in lieu of an upper body injury. Lets say you just had surgery on your shoulder and you’re in an arm sling for several weeks. Or, I don’t know, you got in a tickle fight with an Uruk-hai and ended up busting up your wrist.

Both situations make back squatting problematic if not altogether impossible.

Not with an SSB bar, though.

LOL.

You can still train your lower body.

Nice try.

5. Hatfields!

Last but not least, the SSB bar allows you to CRUSH “supported” single-leg training like Hatfield Split Squats.


I’m certain I’m neglecting to think of other cogent benefits, but that’s what I have at the moment. Feel free to forward this post to your local gym’s owner/manager so that you can start incorporating this SSB bar soon!

CategoriesAssessment personal training Strength Training

A Tale of Two Squat Patterns: An Assessment Case Study

I know, I know.

What a dry, bland, title for a blog post.

But if I would have titled it what I wanted to title it:

“That Time I “Fixed” Someone’s Squat In Five Minutes, BOO-YAH, God Damn I’m Good. And While I’m Here Bragging About Myself: Did I Ever Tell You About That Time I Almost Single Handedly Won the Sectional Championship For My High School Baseball Team Back in 1995? Oh, And I Made Out With a Girl Once.”

…that would have been over the top.

Kudos to you for clicking on the link anyway.

You’re cool.

Copyright: saamxvr

A Tale of Two Squat Patterns (But Seriously, Though: I Did Fix It In About Five Minutes

Last week I had a gentleman come to CORE for his initial assessment. After some initial back-and-forth and pleasantries we got into the topic of his training and injury history. He had noted that he had never really participated in strength training before and after digging a bit further he also noted that he’d had a history of chronic lower back pain (L3-L4).

Most people can commiserate.

A vast majority reading these words right now have likely experienced some form of low-back pain in their lifetime.

(raises hand)

It’s never fun and can leave most people in a seemingly never-ending state of frustration and despair. In dealing with many people in the same predicament throughout my career as a coach & personal trainer my goal during their initial session isn’t to spend it telling them how much of a walking ball of dysfunction they are.

via GIPHY

Rather, my objective is to take them through a few rudimentary screens, watch them move, see if anything exacerbates their symptoms, and if so, modify things to see if we can reduce them.

Low back pain is very common and has myriad of root causes:

✅ Tight this
✅ Overactive that
✅ Inactivity
✅ Aberrant movement patterns
✅ Losing a street fight to Jason Bourne
✅ It’s Tuesday

Whatever.

It’s rarely ONE thing, which makes it altogether impossible to look someone in the eyes and say, definitively, “x is why your back hurts.”2

Which is why I prefer to get people moving during their assessment.

It’s easier for me to ascertain and glean a larger picture of things when I can watch someone show me their movement strategies through a variety of tasks.

Don’t get me wrong: I’ll perform several screens on an assessment table: Thomas Test, Craig’s Test, Slump Test, active vs. passive ROM, etc.

However, I also believe it’s important (if not crucial) to get them off the table and have them demonstrate to me how they choose to move.

It’s simply more information.

Without any prompting from me (I didn’t want to coach him on how to perform the “test”) here’s what my client’s squat pattern looked like:

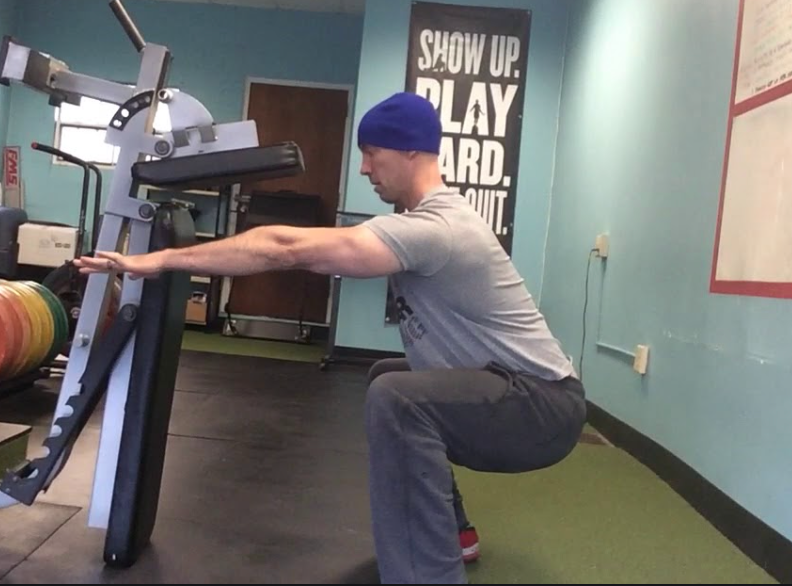
Before


Notice how he immediately “falls” into an aggressive anterior pelvic tilt as a descends toward the floor? Likewise, notice the speed or lack of control as he lowers to the ground?

Furthermore, notice anything as he finishes at the top and “locks out” his hips?

He hyperextends his lower back.

I.e., he finishes with LUMBAR extension rather than HIP extension.

I had him watch the same video above and then broke down in more detail everything I explained here (and that my suspicions were that those may be the culprit of his low-back woes).

I then spent a few minutes breaking down some simple “squat technique tenets” I like to pass along when breaking down the movement with clients.

✅ We talked about foot pressure and corkscrewing his feet into the ground (to help ramp up torque in the hips).
✅ We also discussed the abdominal brace.
✅ I broke down the canister position and how that’s ideal (rib cage down and stacked over the hips)
✅ I reiterated that the squat is equal parts breaking with the hips & knees simultaneously so the net result is squatting DOWN, not BACK.3
✅  I wanted him to think about “pulling” himself down toward the floor rather than falling.
✅  Lastly, I encouraged him to “finish tall” at top; to squeeze his glutes (lightly) rather than ramming his hips forward.

Five minutes later this happened:

After

By no means was it a perfect squat (does that even exist?), but that wasn’t what I was after.

I was seeking PROGRESS.

And I think we achieved that.

Here’s a top (before)/down (after) comparison:


The bigger indicator, though, was that he had zero pain while squatting after these minor tweaks to his technique were made. And it didn’t take me giving him a laundry list of “corrective exercises”  in order to “fix” it.

Sure, I could have told him to foam roll for 37 minutes and stretch his hip flexors, followed by an abyss of varying glute medius exercises…

…and he likely would have felt better as well.

However, we wouldn’t have really addressed anything.

In short: Help people find their trainable menu. COACH them. Show them what they CAN do, rather than barking at them what they can’t.

CategoriesAssessment Corrective Exercise personal training

How to Address a Hip Shift During Your Squat

Do you exhibit a hip/weight shift (swaying to the left or right) when you perform a squat? It’s one of the more annoying things that can happen in the weight-room.

It ranks somewhere in between people who don’t re-rack their weights and kipping pull-ups.

Admittedly, it’s rather common and almost always a benign occurrence; most people never even notice it unless they’re routinely filming their squat sessions.

And when that is the case, I can understand someone’s “itch” to want to solve the conundrum. I mean, things could go awry down the road and manifest into pesky hip or knees issues.

Copyright: antoniodiaz

A Case Study: How to Address a Hip Shift During the Squat

I received the following email earlier this week:

“I was looking to see if I might be able to send you some videos for a squat assessment. I have been having issues leaning to my right for some time and cannot for the life of me figure out what is causing the issue. I’ve followed you for years and trust your judgement!”

How could I say no?4

I responded back with a “sure, I can take a quick look,” and in swift fashion I got this in return:

“Some initial feedback would be great.

Some things to note before watching:

  • Though subtle, I find my left hip lower than my right on both the descent and ascent of the squat (as you can probably see). 
  • My right hip flexor/quad tends to be tighter than my left usually.
  • My left glute has always been tighter than my right
  • History of SI joint hypermobility (in the past) but has not caused me issues for over a year. I used to have issues with my sacrum shifting around and causing misaligned hips which was quite painful. 
  • I do not have any pain barbell squatting or semi sumo deadlifting but I do feel the unevenness when I squat especially.”

https://www.youtube.com/watch?v=-OGaW1JmADw

For Starters

That’s a pretty good lookin squat if you ask me.

After reading her “heads up” commentary before watching the video I was half expecting a dumpster fire when I pressed play.

Au contraire – all things considered, that’s a very passable squat.

However, given her past injury history, her own words of feeling the “unevenness,” not to mention you can see a subtle weight shift to the right with each repetition, I had some thoughts.

It’s funny, I perused my blog archives to see whether or not I had written on this topic in the past, and as it happens I did!

Back in 2015 I wrote THIS post where I discussed the idea “feeding the dysfunction,” a concept taken straight from renowned physical therapists (and creators of the Functional Movement Screen), Gray Cook and Lee Burton.

The gist goes like this:

You see a weight shift, say, to the right. In this scenario you grab a band and wrap it around the individual’s waist and as he or she squats, you pull the band in the direction of the shift, essentially “feeding the dysfunction.” The idea is that reactive neuromuscular training (RNT) trains the nervous system to recognize a faulty movement and to encourage body to correct course.

In the broader consciousness of health/fitness it’s an okay approach. It 100% works. In the years since writing that blog post, however, I’ve gone out of my way to reduce my use of the word “dysfunction” with clients.  I don’t like the connotation the word breeds; that the individual is in some way broken or needs fixing.

Some people hear or see the word dysfunction and they’re ordering an exorcism.

Myself?

I hear or see dysfunction and I think “well, outside of extenuating circumstances (past/current injury history, whether or not there’s pain present), it’s fairly normal.”

Everyone is a bit different and moves in different ways. What’s more, there are, what, seven billion people on this planet currently? Is the expectation that everyone, everywhere, in the history of ever, is going to squat (or move) the same exact way?

(calls my inner Commodus)

via GIPHY

Okay, Tony, We Get It, Personal Growth, Blah Blah, Blah…WTF Did You Tell Lisa To Do?

This, I said this:

“I totally see what you’re saying when you say your left side is lower than your right. I don’t think we need to get too far into the weeds as to whether or not that “needs” to be corrected (or even if it’s bad).

While slight, the hip shift IS there, and I think there are one of two things you can try”

1) Lean Into the Asymmetry

(NOTE: I actually wrote my thoughts on asymmetry HERE a few years ago).

I asked her to externally rotate (open up) her right foot more and to take note whether or not that improved her weight shift?

If so, there’s her answer.

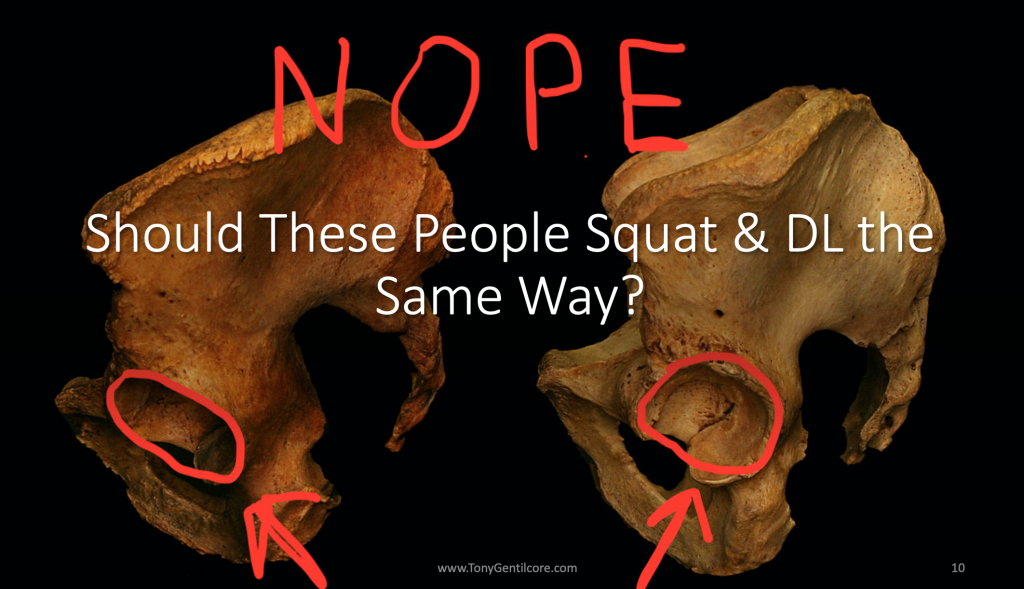
People are built differently and what this would suggest is that her right hip socket is likely more retroverted compared to her left and that that side requires a bit more ER.

For many, using a “symmetrical” stance is akin to attempting to fit a square peg into a round hole. We don’t live in textbooks, so we shouldn’t train like it either.

She tried it and (no surprise to me) saw an improvement:

https://www.youtube.com/watch?v=CcKlqEkC8EI

But Tony, Won’t Having Her Squat With An Asymmetrical Stance Lead to More Issues Later? What’s Next: Telling Her to Club a Baby Seal? No, Wait, To Go Keto?

Relax.

I truly don’t feel having someone perform a handful of sets with an asymmetrical stance is going to cause irreparable harm. I mean, I’d make the case that forcing symmetry is leading to more issues. Besides, if a certain stance feels better, feels more secure, stable, and powerful…why wouldn’t we want to lean into that?

Furthermore, the human body is a bit more resilient than that. If it can survive plagues, saber-toothed tigers, and Michael Bay Transformer movies, it can withstand a few sets of asymmetrical squats.

Further furthermore, this is why we use things such as single leg work to help fill in the gaps. There’s a reason why we write well-rounded training PROGRAMS. You know, to address stuff.

So anyway, moving her foot out a bit seemed to have solved the issue. This strategy will work for most people, but what happens when it doesn’t?

2) Listen to Katie St. Claire

This scenario reminded me of something my colleague, Katie St. Claire, discussed last year.  She showed a video of one of her clients who also had a hip shift to the right on her squat.

Katie recommended the woman perform 15 hip bridges (off the wall) on her LEFT side only.

Now, why the LEFT side only in order to fix a RIGHT sided issue?

via GIPHY

In Katie’s Words:

“To allow more posterior rotation and nutation on the left side so she can load the right side correctly.”

In non-Elvish, as you squat down into deeper hip flexion (most often in Stage 2: 60-120 degrees of hip flexion), the inability for the LEFT side to internally rotate and compress essentially “pushes” you to the right.

I don’t know, maybe that still sounds confusing.

Try this: Whatever side you shift to, perform a boat-load of bridges on the OPPOSITE side. Chances are you will see an improvement.

Cool?

Cool.

Give both options a try and see if one of them solves the issue.

I bet they will…;O)

CategoriesProgram Design Strength Training

1-Minute Deadlift Tip: Use Squats to Build Your Deadlift

I’ve always been painfully slow off the floor when I deadlift.

Like, you could be watching the movie Titanic and I’d juuuuust be getting the barbell off the floor by the time you got to the part where Rose lets go of Jack.

If this sounds like you, you may need some more squats in your life.

Copyright: spotpoint74 / 123RF Stock Photo

Squat to Build Your Deadlift

A few years ago I made a concerted effort to prioritize my front squats (and upping my squatting volume in general) and was finally able to conquer a 600 lb pull.

The additional squatting undoubtedly helped improve my quad strength and ability to push away from the floor when I initiated my pull.

Heed my warning, though. If your deadlift volume is up it’ll behoove you to opt for more front squats or high-bar back squats since both will allow you to maintain a more upright torso (less shearing on spine). If your deadlift volume is on the low end, feel free to implement more low-bar back squatting.

👇👇👇 Check out a sample training split below (after the video) 👇👇👇

Here’s a quick example of how I’d structure the deadlift to squat ratio based off deadlift frequency:

Deadlift 1x Per Week (2 Lower Body Sessions)

Day 1:

A. Back Squat: 5×2 @ 60%, 60s rest

B. Deadlift: 2×2 @ 85%

C1. Deadlift – For Gainz: 4×4 @ 70-75%
C2. Deadbug Variation 4×5/side
C3. Stab Someone in the Face 4×3

D1. Goblet Split Squat 3×12,10,8/leg
D2. 45 Degree Back Extension 3×12-15

E. Carries or Sled Work

Day 2

A. Back Squat: 1×2 @ 85%

B. Anderson Back Squat: 5×1 @ 80%, 60s

C1. Pause Back Squat: 3×5 @ 70-75%
C2. Deadstart DB Row: 3×8/arm

D1. Pull-Throughs: 4×10-15
D2. Reverse Nordics OR Sissy Squats: 3×8-10

Deadlift 2x Per Week

Day 1

A. Pull-Through: 2×10

B1. Deadlift – Rest/Pause: 3×3/2/1  (use a load you KNOW you can do for 5 reps. 3 reps, rest 15s, 2 reps, rest 15s, 1 rep)
B2. Bear Stance Belly Breath: 3×5

C1. SSB Squat: 3×8 @ 60-65%
C2. Stationary Spiderman w/ Reach: 3×5/side

D1. DB Reverse Lunge 3×12,10,8/leg
D2. Pallof Press 3×10/side

Day 2

A1. Front Squat: 3×5 @ 65-70%
A2. Pull-Ups: 3xAMAP

B. Deadlift – Speed/Technique: 6×3 @ 60-65%

C1. 1-Arm, 1-Leg RDL: 3×8/leg
C2. Split Stance Cable Chop: 3×8/side

D1. Barbell Glute Bridge: 3×10
D2. Eat a Ham Sandwich: 3xinfinity

Long story short: Don’t neglect your squats.

CategoriesAssessment continuing education Strength Training

How to Effectively Screen the Squat

Today’s guest post comes courtesy of Dr. Michael Mash.

I have a legit man-crush on him ever since I’ve started diving into his online resource Barbell Rehab. As the name implies: Its mission is to help barbell athletes (and aficionados) overcome pain and improve performance WITHOUT being forced into “corrective exercise” purgatory.

In a sense, it’s designed to use barbells (and lifting stuff) to help fix shit. What’s more Tony G than that? Okay, maybe Jason Bourne fight scenes.

Or dragons.

Or an endless cheese plate.

Regardless, Barbell Rehab speaks to my strength coach love language, and as it happens Michael is offering his course to all my readers at $50 off the regular price for this week only.

All you have to do is click THIS link and enter the coupon code TONYG50 to receive your $50 credit.

And even if you’re not keen to saving money (weirdo) you should still give his blog post below a read because it’s riddled with common sense and practical applications you can use TODAY to improve your squat screen or assessment.

Copyright: saamxvr / 123RF Stock Photo

Do You Really Need to “Screen” the Squat?

When it comes to effectively screening the squat, many personal trainers and strength coaches have different approaches. From not utilizing a screen at all, to performing dozens of assessments prior to implementing a bodyweight squat, what is the best way to screen the squat?

Before we answer this question, let’s first talk about the function of a “screen” in general.

What is a Screen and Should We Use it?

According to John Hopkins…

“…a screening test is done to detect potential health disorders or diseases in people who do not have any symptoms of disease.”

If we apply this definition to the squat, one could say that a squat “screen” is a test performed to detect potential joint, muscle, or movement impairments in those who don’t have any pain.

In order for a screen to be effective, a “failed” test must be highly predictive of future injury or pain. If it’s not, this could create a lot of false positives results (a.k.a telling someone they’re doomed for injury if they really aren’t). So on one side, you want to make sure your client is “safe” to squat before loading them up, but you also don’t want to prevent them from squatting if they don’t really need to.

Oh the dilemma!

It’s Tough to Really “Predict” Pain and Injury

As mentioned, in order to analyze the efficacy of a screen, we need to know if it can indeed accurately predict injury. As it turns out, the research isn’t so sure about this.

In fact, it has been shown that one of the most common movement screens, the FMS, is only slightly better than a 50/50 coin flip at predicting injuries. This doesn’t mean, however, that you need to throw the baby out with the bathwater. While both myself and the authors of this paper note that the FMS can be used to see HOW a person moves, it shouldn’t be used as a way to predict injury.

If the FMS can’t reliably predict injury or pain….what can?

Because pain is a multidimensional experience driven by biological, psychological, and sociological factors, it is really a reductionist mindset to blame pain solely on “tight hamstrings” or “poor form” in general.


In fact, factors such as stress, anxiety, depression, lack of social support, job dissatisfaction, and poor sleep and nutrition can ALL affect a person’s pain experience. This is why we need to zone OUT when it comes to “predicting” injury and really take a comprehensive approach. The WAY someone moves is certainly important, but it’s just one tiny piece of a much larger puzzle.

What is an Effective Movement Screen?

So how should you effectively screen the squat? In order for a screen to be effective, it needs to be SPECIFIC, and there’s no better way to be specific than to actually perform the movement itself. Yep, that’s right. The best way to “screen” the squat, is to actually have the client perform a squat.


This process will give you ALL of the information you need in order to make a decision on whether or not they are “safe” to proceed forward with loading the squat.

And guess what?

It doesn’t involve any kind of joint-by-joint assessment, specific muscle flexibility testing, or any other long drawn out processes either.

While the aforementioned approaches can be beneficial to “dig deeper” if someone already has pain, they’re rather unnecessary as part of a screening process in asymptomatic individuals.

For those without pain, here’s a simple process I recommend in order to determine if they are safe to squat.

Step 1: Show Me Your Squat

The first step of our world’s simplest squat screen is to simply ask the client to “show me a squat.” I like to do this for a few reasons. First, it will give you an idea of what they “think” a squat is and how they move in general. Two, it will also give you an idea of how hesitant they are to move.

Some will just drop it low into a perfect squat and others will hesitate to start and move really slowly. You may see the latter example if someone has a history of pain or has fear with movement in general.

This is all useful data to collect on this important first step. If the squat  looks good, congratulations!

Your job is easy today, and it’s time to load them up!

If it needs some work, it’s on to the next step.

Step 2: Coach the Squat

After asking the client to show you their squat, it’s time to coach it. While everyone is going to squat with a different stance width, degree of toe out, and torso angle, it helps to at least have a frame of reference to start from.

I recommend cueing them into a heels shoulder-width stance with a moderate 20-30° toe out, and then asking them to squat as far down as they comfortably can. While this foot placement won’t work for everyone, it’ll work for the majority of people. In this initial bodyweight squat coaching phase, some people may have discomfort or won’t be able to quite get to parallel…and that’s ok.

That’s why we have Step 3.

Step 3: Modify Stance and Depth if Needed

If you coach the client into a shoulder-width slightly toed out stance, and they have pain with this, or they can’t squat very deep, all is not lost yet. Two of the most common pains you’ll see with a bodyweight squat are hip and knee pain. And just because they have pain, doesn’t mean they are injured or need to be referred out to a rehab professional.  It may simply just be the way they are built.

For example, if you take someone with highly retroverted hips, and have them try to squat with a narrow stance with minimal toe out, they may get a “pinch” in the front of their hips at the bottom. This can usually be remedied by widening the stance a bit and turning the toes out more. This doesn’t mean anything is wrong with them…it’s simply the way they are built!

Tying it all together, if someone has pain when you coach them into a bodyweight squat, see if it’s relieved with a simple stance adjustment. This is 100% within your scope to do as a personal trainer or strength coach, as you’re not diagnosing, assessing, or putting your hands on the client at all.

Step 4: Change the Exercise and/or Refer Out

Sometimes the squat pattern itself is so sensitized, that a stance or form adjustment isn’t enough to eradicate pain. If this is the case, I’d recommend NOT proceeding forward with having the client squat, and instead, finding a similar exercise like a rear foot elevated split squat or a lunge variation that they can tolerate.

If the client’s goal is to squat, it would also be best at this point to refer out to a qualified rehab professional as well. This is why interdisciplinary care is so important in the health and fitness world. At this point, as the personal trainer or strength coach, you can continue to train your client with what they can tolerate (full upper body workouts and modified lower body exercises) while the rehab professional addresses the pain itself.

A Quick Note on Squat Depth

Sometimes no matter how much you modify stance, degree of toe out, or hip position, your client won’t be able to squat to “depth.” Depth is defined as when the greater trochanter of the hip goes below the top of the patella from a side view.

In this case, you need to find out if it’s simply because they feel “tight” or if it’s limited by pain.

If it’s limited by pain (even after stance adjustments) then you may want to refer out. If they just feel “tight,” then you can proceed forward with loading them up to tolerance….even if it’s not quite to depth. That’s right. There is no evidence to suggest that squatting above parallel is inherently dangerous.

Rather than spending six months working solely on mobility to increase squat depth, you can work on BOTH simultaneously. Train the squat to the depth the client is comfortable with and tease in mobility drills at the same time.

This one-two punch of increasing mobility and loading through it, will help your clients squat deeper (if that’s their goal) much quicker than not squatting at all.

Tying it All Together

The squat is one of the most beneficial lower body movement patterns to coach your clients through. While everyone will squat with a different stance, degree of toe out, and variation, there’s no need to take clients through an extensive “screening” process prior to loading them up.

Instead:

1️⃣ Ask them to “show me a squat” to get an idea of how they move to begin with

2️⃣ Coach the squat. Cue them into a moderate stance with slight toe out and ask them to squat as deep as they can

3️⃣ If they have pain, see if you can find a stance width, degree of toe out, and depth that is tolerable for them. If so…it’s time to load them up!

4️⃣ If they still have pain after a stance adjustment, it’s probably best to hold on squatting for now and to refer out to a rehab professional for further assessment.

About the Author

Dr. Michael Mash is the owner and founder of Barbell Rehab, a continuing education company dedicated to helping fitness and rehab professionals improve the management of barbell athletes. Check out his CEU approved online course, The Barbell Rehab Workshop at this link and use coupon code TONYG50 for $50 off.

CategoriesExercise Technique Program Design

5 Ways to Upgrade Your Skater Squats

Today’s guest post by San Diego based personal trainer, Scott Hansen, is quite fortuitous.

  1. I’m in a bit of a writing funk and this, for better or worse (likely the latter), allowed me to lean into my procrastinating ways. Thanks Scott!…;o)
  2. I posted my own version of Skater Squats yesterday on IG HERE.
  3. Pretty badass, huh?
  4. Adding chains to any exercise make it more badass.5

Anyway, check out Scott’s tweaks below. I think you’ll dig em.

Copyright: romastudio / 123RF Stock Photo

5 Ways to Upgrade Your Skater Squats

There’s more to building strong, powerful legs than just traditional barbell squats and deadlifts.

Note From TG (cue Southern Belle drawl): I do say kind sir, I have never heard such blasphemous shenanigans uttered in all my life. I feel a bit of faint coming on.

Someone.

Catch me.

CATCH ME!

While those movements certainly have their place, you know by now not to skimp on single leg work.

Single leg exercises are going to help you work out imbalances between sides, improve coordination, balance, stability, and athleticism, while helping to make you more resistant to injury.

Single leg work can be divided into two categories:

  • Supported – As in a lunge or rear foot elevated split squat
  • Unsupported – As in a single leg deadlift or skater squat

Both categories are sagittal plane dominant, meaning the body moves from front to back.

But when you do unsupported single leg exercises, the need to resist motion in the frontal and transverse plane increases significantly. You need to call in your adductors, glute medius, minimus, the intrinsic muscles of the foot, and your core musculature, to a larger degree.

The best single leg exercise is the skater squat.

Why?

Because just like with every other exercise in the world, progressive overload is the name of the game. Of all the unsupported single leg exercises, skater squats allow the greatest range of motion and the most loading potential.

Not quite a single leg squat and not quite a single leg deadlift, skater squats are the ultimate hybrid. They build lower body strength and add size to your quads and glutes, without beating up your back, hips, or knees.

The only problem with them is most people don’t want to do skater squats because:

  1. They take a little bit to get the hang of the technique, and
  2. They are really hard and humbling.

Here’s How to Master Them

1. Use a Counterbalance

Use 2.5 or 5 pound weights in your hands as a counterbalance, and squeeze a tennis ball between your hamstring and calf on the non working leg. This will help keep the back leg in a better, tighter, position and keep you from turning it into a reverse lunge.


2. The Rest

  • Reach with your hands slightly across an imaginary line coming out of your middle toe of the working leg and towards the wall in front of you as you lower your back knee down to a pad without letting your back foot touch the ground.
  • Then, use your hands like ski poles and drive them down as you push through your front foot to return to the starting position.
  • Start by stacking a few airex pads for your back knee and lower them as you get stronger to increase the range of motion.

I mentioned before that they have the greatest overload potential. After you start knocking out 8+ skaters to the floor, you need to continue upping the ante to keep building muscle and strength.

Here Are 5 ways to Take Them to the Next Level

1. Torso Weighted

Use a vest or chains to increase the load.


2. Front Loaded

Using a sandbag or weight plate increases the core challenge and emphasis the quads more.


3. Angled

Full disclosure: I picked this up from performance coach Vernon Griffith. The angled loading places more stress on the muscles involved with stabilizing you in the frontal plane: your adductor and glute complexes, QL, and obliques.


4. From a Deficit

Elevate the working leg on a 45 pound plate or two to increase the range of motion.


5. Eccentric Emphasis

Use anywhere from a 3-8 second lowering phase to increase the time under tension.


Whichever variation youre using, try these for 2-4 sets of 5-8 as either your main lower body exercise or after your heavier bilateral exercises to balance out the spinal loading.

About the Author

Scott Hansen is a Bostonian transplanted in Southern California, a strength/fitness/wrestling coach, educator, sub par surfer, and die hard New England sports fan.

He works with adult athletes, as well as an assistance wrestling coach and strength and conditioning coach for La Costa Canyon high school wrestling in Carlsbad, CA.
Instagram: Hansen_performance

Categoriespersonal training Program Design Uncategorized

4 Maybe New to You Goblet Squat Variations

Alas, I will never be a fitness influencer.

First of all, the mere thought of even calling myself something like that invokes an immediate gag reflex. But more to the point I am not nearly creative enough to fall into that camp.

I mean, a true fitness influencer would have used any of the following titles to lure you in:

“187 Goblet Squat Variations That I Made Up on a Wednesday”

“The Keto Guide to Goblet Squats”

“4 Maybe New to You Goblet Squat Variations (You Can Perform With a Chainsaw)”

See?

I’m too boring to be an influencer.

Copyright: alfastudio / 123RF Stock Photo

4 (Maybe New to You) Goblet Squat Variations

All that said, I’m a firm believer that training doesn’t always have to be a circus show. Sure, it behooves us to add a little variety and pizzazz into the mix – I.e., chainsaws? blindfolds? unstable surface? chains? a black bear? – but for most people, most of the time, what yields the best results are sticking with exercises that:

  1. Are user friendly and easily reproducible.
  2. Don’t require a bevy of speciality equipment and/or signing a liability waiver to perform.
  3. Provide carryover other than garnering “likes” on social media.

I don’t know, maybe it’s because I’m a bit old school and am kinda-sorta set in my ways, but for me and my money, the best exercises are the ones that are monotonously boring.

To that end, since we’re all sequestered and training at home and likely doing all we can to NOT toss our faces into a brick wall from too much monotony, below are a handful of Goblet Squat variations – that, for the record, can be performed with either a kettlebell or dumbbell – I tend to default to with my own programming (and that of my clients/athletes).

1. Goblet Squat w/ Lowering


Let’s be honest: It’s a bicep curl. The “lowering” part is a bicep curl.

However, WHY I like adding in the bicep curl may surprise you.

It’s not for bigger arms.6

Rather, I like how it forces you to OWN the bottom position of the squat. I find a lot of trainees tend to “relax” in the hole and either end up losing their spine position or just “hang out” on their passive restraints (ligaments and tendons). With the lowering component the idea is that they have to remain ON throughout the motion.

There’s a bit more of a mind-body connection which I find is beneficial for many.

SIDE NOTE: As you can see, my 3-year old in the background is super impressed.

2. Goblet Squat w/ Pulse

I got this one from Dan John years ago and it’s a sneaky little fucker.

The limiting factor, of course. will be shoulder endurance so err on the side of conservative when selecting a load to use.

That said, the main benefit of this variation is targeting the anterior core. Similar to above, the idea is to OWN the hole and pressing the KB out in front of the body forces you to fire your core to a very high degree.

It also forces a bit of weight shift (back), which allows for a bit of “settling” into the squat to occur. Be PURPOSEFUL with pulse part; it shouldn’t be a quick jolt back and forth.

3. Squat w/ Overhead Press


I’m just going to come right out and say it: This one suuuuuuuuuuuucks.

I picked this one up from Dr. Quinn Henoch of Clinical Athlete a few years ago when listening to him present, and was slapped in the face with intrigue when he mentioned he liked this variation to help with grooving thoracic extension with his athletes.

Once I tried it the lightbulb went off.

Try it.

You’ll get it too.

4. Goblet Kickstand Squat


Also known as a “B-Stance” Squat, all we’re accomplishing here is getting more acquainted with asymmetry and using it to our advantage. I’ve written more on my stance with regards to asymmetry in the past and you can check it out HERE.

TLDR: Asymmetry is normal. You’re going to live.

I like this variation because:

  • Everyone is a bit different – anthropometically speaking – and for many, experimenting with asymmetrical stances is a splendid way to help make the squat feel more comfortable.
  • I also view this as “fake single leg training” in that we can overload one limb over the other while not taking balance out of the equation (which can be a limiting factor for some).
  • Just because.

I’m awful at conclusions.

Categoriescoaching

Will Squatting Make You Tight?

Short Answer = No.

Long(er) Answer = Read more below.

Copyright: antgor90 / 123RF Stock Photo

Will Squatting Make You Tight?

I can’t believe we still have to have this “debate” in 2020.

While it’s not nearly as prevalent of a thought process as a decade or two ago, there are still people out there under the impression that lifting appreciable weight – and therefore, by extension, squatting – will result in big, bulky, and stiff muscles.

Merely looking at a barbell will make you tighter than a crowbar.

I don’t even think that makes sense, but whatever…you get the idea.

The same people who fall prey to this mind-trap are the ones who likely still believe lactate acid causes muscle soreness, creatine is a steroid, starvation mode exists, and that Tom Selleck doesn’t have the sexiest and manliest mustache of all-time.

I could opine judiciously on why I feel the argument that lifting heavy/squatting makes you tight is a tepid and weak one at best, but I’m not going to because 1) this is blog post and 2) it’s not a dissertation (and my 3-year old is going to wake up from his nap any minute now).

Too, I can respect and appreciate that people are at the mercy of their milieu and can often succumb to the atmosphere, anecdotal experiences, and the echo chambers that feed into their biases.

I get it: You watch one too many Tom Brady documentaries and the idea of touching a barbell (or a tomato) makes you sick to your stomach.

Nevertheless, I do feel it’s a silly stance to take.

To steal a line (and photo op) from Chris Duffin:

“Squatting doesn’t make you tight. Squatting like shit does.”

I’m  stuck

Make no mistake: There are many nuances to consider with regards to squat technique and what variation, setup, and execution will be best suited given an individual’s injury history, goals, ability level, genetics, and anthropometry.

I don’t think there’s any ONE best way to execute or coach the squat, and I lose a lot of respect for coaches and trainers who play all hoity-toity and think THEIR way of coaching it is the only way to do so.

Again, and this can’t be reiterated enough:

  • Injury/health history
  • Goal(s)
  • Ability level
  • Genetics
  • Favorite He-Man character
  • Anthropometry/leverages…

…all need to be taken into consideration when coaching up the squat.

The internet likes to argue semantics on bar position, hand position, depth, stance, what day of the week it is, barometric pressure, and a myriad of other things that may or may not matter when it comes to enhancing squat technique and performance.

For me, so long as the feet, ankles, knees, and hips are appropriately positioned and loaded (using all the info above as guidance), “neutral” spine is maintained, and we’re doing all we can to prevent any destroying back of pants…

…we’re (probably) accomplishing some good things.

Moreover, if you think about what’s required to pull off a decent looking squat:

  • Active ankle dorsiflexion, knee and hip flexion.
  • Active femoral abduction (opening the hips).
  • Maintenance of “neutral” spine.7

We could make the case that everything listed above is a splendid way to “offset” sitting at a desk all day, particularly when you consider a loaded squat will nudge or force people to adopt a little more thoracic extension, which is rarely a bad idea for that population.

By contrast, squatting (and by proxy, lifting appreciable weight) correctly can be viewed as the opposite of making someone tight.

NOTE: For some more insights on how I address squat technique check THIS and THIS and THIS out. Oh, and if your favorite He-Man character isn’t He-Man you need to check yourself before you wreck yourself.8

CategoriesExercises You Should Be Doing

Exercises You Should Be Doing: Goblet Split Squat with Coil

It’s been a minute since I’ve shared an Exercise You Should Be Doing.

Anyone who’s familiar with this series or has kept tabs on the types of exercises/movements I gravitate towards will dig this one.

Which is to say: It’s not flashy, it’s not sexy, and it doesn’t take a PhD to set up or perform.

Copyright: gekaskr / 123RF Stock Photo

Goblet Split Squat w/ Coil


Who Did I Steal it From? – My coach, Greg Robins, plugged this into my program this month. When I saw it, at first I was like “tha fuck!?!”

What’s up with this foo-fooey exercise?

But then I performed a few sets and was like “whaaaaaaaaaaaaaaaat.”

I like it a lot

(cue Dumb & Dumber voiceover).

What Does It Do? – Well, like any single leg variation it challenges balance, core/hip stability, and helps to “temper” any strength imbalances between one leg or the other. Too, it gives the spine a bit of a reprieve from aggressive axial loading.

What separates this variation, however, is the addition of the COIL (or rotation of the upper torso). This subtle tweak offers a bit of a varying training stimulus in that it takes us out of the traditional up/down, forward/back nature of exercise we’re accustomed to and adds rotation into the mix; or transverse plane motion.

The twisting action also leads to a bit more internal rotation of the front hip which feels divine (unless you’re someone with a history of FAI; in that you’ll probably want to avoid this one).

As a quick aside I had my wife perform this exercise the other day after she tweaked her lower back/SI joint and she loved it. As noted in THIS article written by Dr. Erika Mundinger on this site a few years back, introducing rotation can be a game changer for those with chronic SI joint issues.

Key Coaching Cues – This exercise is pretty self-explanatory.

  • Assume a split squat position.9
  • Whichever foot is in front rotate the opposite shoulder TOWARDS that direction making sure to keep the torso upright and shoulders back.
  • Perform the drill “squatting” up and down while maintaining the same torso position throughout. Perform  allotted reps (6-10) and then switch sides.
  • My god, you’re so hot.