5 Exercises to Help You Perform More PullUps Without Doing PullUps
It’s common practice to think the only way to get better at performing pull-ups (especially more of them) is to only do pull-ups.
While specificity is important, there’s more than one way to Rome.
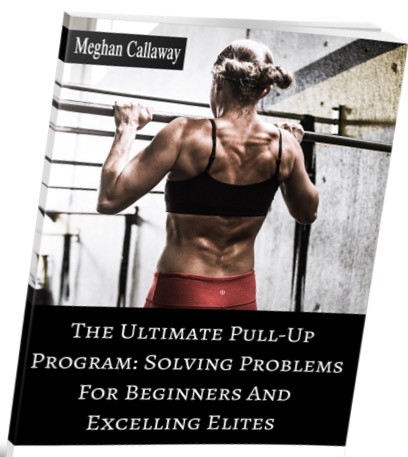
It’s today’s guest post by The Ultimate Pull-Up Program creator, Meghan Callaway, dives deep into some alternative exercises to add to your exercise repertoire.
If you’re looking for a baller (<— who isn’t?) program to help turn you into a pull-up Terminator than Meghan’s your coach. It’s incredibly thorough and has already helped thousands of people. It’s on SALE at a heavily discounted price this week and now includes 40+ pages of new content and material.
When it comes to excelling at pull-ups, many people have fallen prey to the mindset that in order for them to get better at pull-ups, they have to do pull-ups, and literally nothing but pull-ups. A lot of coaches even dole out this unhelpful advice.
Unfortunately, this shortsightedness has led countless people down a path of endless frustration, and has definitely driven a lot of extremely capable individuals to abort their pull-up mission before they have achieved their goal.
Make no mistake, pull-ups are an extremely technically demanding full body exercise that involve so much more than simply propelling the body to and from the bar.
In order to excel at pull-ups, you need to possess a strong upper body, be able to control the movement of your shoulders and shoulder blades, and generate enough tension and stability in your lumbo-pelvic region and lower body so you can maintain a body positioning that will help you travel to and from the bar as easily as possible.
Even if you aren’t able to perform a regular pull-up just yet, do not despair. There are many other components of the pull-up that can be trained.
The exercises I am about to describe are absolutely beneficial for individuals who can already perform one or many pull-ups. Without further ado, here are 5 of my favorite exercises for improving pull-up performance that don’t involve performing actual pull-ups.
While some of these exercises are unique, they are very effective.
#1) Inverted TRX/Ring Rows With Feet Elevated On Wall
Key Points:
- Set your grip so your palms are facing away from you (pronated), and are slightly greater than shoulder width apart. You can also use a neutral grip where your palms are facing each other.
- Place your feet up a wall. Make sure the TRX/rings is stable so it does not slide on you.
- Set your body so your head, torso and hips are in a stacked position. Aim to keep your knees as straight as possible, but due to your feet being up the wall, you might need to keep your knees slightly bent.
- Before you go, take a deep breath in (360 degrees of air around your spine), brace your core (360 degree brace around your spine), tuck your ribs towards your hips (close the space in your midsection), and squeeze your glutes. This will help stabilize your pelvis and spine.
- Initiate the movement by using the muscles in your mid and upper back and bring each shoulder blade in towards the spine (retract). Do not initiate the movement with your arms. The main focus here is scapular retraction.
- In the top position, do not allow your elbows to flare. If you are using a neutral grip, your elbows will be closer to your sides.
- Lower yourself to the bottom position with control. During the lowering/eccentric component, do not keep your shoulder blades pinned. They are meant to move, and should perform the reverse movement (protraction) as they did during the ascending/concentric component.
- In the bottom position, your elbows should be close to fully extended, but not hyperextended.
- For the duration of the exercise, your head, torso and hips should remain in a stacked position. Do not allow your lower back to hyperextend, or ribcage to flare.
- Exhale just after you have initiated the scapular movement and as your body is traveling towards the top position; you may inhale and “reset” as you are descending, or do a full reset when you are in the bottom position. Figure out what works and feels best for you.
- Do not use momentum.
This innovative horizontal rowing exercise is more challenging than your traditional TRX/ring rows, including when the feet are elevated on a bench, box, or other surface. Like all inverted rowing variations, this exercise develops upper body strength, shoulder and scapular controlled mobility, and lumbo-pelvic stability.
Regression:
Make this exercise easier by walking your feet lower down the wall so your body is in more of a horizontal position, or by performing regular feet elevated rows, or rows where your feet are on the floor.
Progression:
Make this exercise more challenging by walking your feet higher up the wall so your body is in more of a decline position, or by performing negative reps and taking 3-5 seconds to lower yourself.
#2) Dead Bug With Single Arm Landmine Presses
This exercise combines dead bugs with single arm landmine presses, and develops lumbo-pelvic stability, shoulder and scapular controlled mobility, and to some extent, upper body strength. With the landmine presses, I was using a negative speed so I could maintain the slow tempo of the leg lowering.
Key Points:
- Set up a barbell so it’s lengthwise and is in line with your armpit.
- Lie on the floor. Lift up your legs so they are in a vertical position, straighten your knees, and point your feet towards you (dorsiflex). If you cannot fully extend your knees, or if you are unable to maintain proper form, you can keep your knees bent at a 90 degree angle. Make sure they remain at a 90 degree angle for the duration of the exercise.
- Keep your chin tucked and neck in a neutral position, extend your arms so they are above your chest, and tuck your ribs towards your hips (close the space in your midsection).
- Before you go, take a deep breath in (360 degrees of air around your spine). Now contract your anterior core muscles as hard as you can, and slowly ‘’row’’ the barbell down towards your body and simultaneously lower the leg that is on the same side of the body as the barbell, and to a range where you are able to maintain proper form. Return to the starting position.
- As you are lowering your leg towards the floor and are lowering the barbell, I like to steadily exhale through the mouth. That being said, figure out what breathing works and feels best for you.
- For the duration of the exercise, make sure the barbell stays in line with your armpit.
- For the duration of the exercise, your head, torso and hips should remain in a stacked position. Do not allow your lower back to hyperextend, ribcage to flare, or pelvis to move.
- Keep your legs relaxed so they do not dominate.
- Make sure that your knee remains in a fixed position and that the movement occurs from your hip.
- Pay attention that you are not “cheating” by using the muscles in your neck and/or upper body in place of the muscles of the anterior core.
- You may also perform this movement by lowering the leg that is on the opposite side of your body as the barbell. While I chose to keep my non-working arm in a fixed vertical position, you may also lower your arm towards the floor while you simultaneously lower your leg and the barbell. This will be even more advanced.
Regression:
Make this exercise easier by using less resistance, by decreasing the range of the leg lowering, or by bending your knees.
Progression:
Make this exercise more challenging by using more resistance, by increasing the range of the leg lowering, or by lowering the non-working arm towards the floor versus keeping it in a fixed vertical position.
#3) Dumbbell Overhead Loaded Carries + Band Resisted Scapula Retraction
This unique loaded carry variation develops shoulder and scapular stability (both remain in a fixed position for the duration of the exercise), lumbo-pelvic stability, and to some extent, grip strength. With the addition of the band and the scapular retraction, you should really feel the muscles around your shoulder blades more than during traditional overhead loaded carries.
Key Points:
- Place a resistance band around your wrists.
- Grab a pair of dumbbells and press them into an overhead position. Once the dumbbells are in an overhead position, lightly press your wrists out against the band and draw your shoulder blades in towards your spine (retract). Maintain this position for the duration of the exercise.
- Now perform a loaded carry and walk 25-50 meters.You can either walk in a straight line, or walk halfway and turn around.
- For the duration of the exercise, your head, torso and hips should remain in a stacked position, and your hips should remain level. Do not allow your lower back to hyperextend, ribcage to flare, or body to lean to the side.
- Make sure that you press evenly through all of your toes on the side that is pushing off, and maintain a tripod base on the side that is planted (weight on the mid to back of the foot and toes in contact with the floor, especially the big and baby toes).
Figure out what breathing works and feels best for you.
Regression:
Make this exercise easier by using lighter weights, or by using a band with less tension.
Progression:
Make this exercise more challenging by using heavier weights, or by using a band with more tension.
#4) Band Resisted Scapula Pull-Ups
Scapula pull-ups are a great pull-up specific regression that develop shoulder and scapular controlled mobility, lumbo-pelvic stability, and grip strength. Adding in the band resistance challenges the muscles that control the movement of the shoulder blades even more.
Key Points:
- Place a resistance band around your wrists.
- Grab onto the bar and adopt your preferred hand width. While I prefer going just outside of shoulder width apart, figure out what works and feels best for you.
- Adopt a slight hollow body position. Your head, torso and hips should be in a stacked position, your knees fully extended, and feet crossed one over the other and dorsiflexed. If you don’t have the space to fully extend your legs, keep your knees bent, and feet behind you.
- Now lightly press your wrists out against the band and maintain this tension for the duration of the exercise.
- Before each rep, take a deep breath in (360 degrees of air around the spine), brace the core (360 degree brace around the spine), tuck your ribs towards the hips, squeeze your glutes, and contract your quads.
- Now initiate the movement by using the muscles in your mid and upper back and draw each shoulder blade in towards the spine and down towards the opposite hip. Do not perform the movement by pulling with your arms. As you do so, your body should elevate a slight amount. Once you reach the top position, pause for a count and return to the starting position.
- During the lowering component, do not keep your shoulder blades pinned. They are meant to move, and should perform the reverse movements as they did during the ascending portion of the movement.
- In the bottom position, your elbows should be close to fully extended (but not hyperextended).
- For the duration of the exercise, your head, torso and hips should remain in a stacked position. Do not allow your lower back to hyperextend, or ribcage to flare. Also, do not allow your elbows to move. This is a telltale sign that you’ve performed the movement by pulling with your arms.
- Do not use any momentum.
- I prefer to exhale immediately after I have initiated the scapular movement and as my body is elevating, and I will inhale as my body is returning to the starting position. Figure out what breathing works and feels best for you.
- For the duration of the exercise, do not allow the band to lose tension.
Regression:
Make this exercise easier by using a band with less tension, or by using no band.
Progression:
Make this exercise more challenging by using a band with more tension, or by performing negative reps and taking 3-5 seconds to perform the lowering component of the movement.
#5) Scapula Push-Ups From A Bear Crawl Position
This extremely challenging exercise develops shoulder and scapular controlled mobility, and lumbo-pelvic stability.
Key Points:
- Get into a bear crawl position. Your head, torso and hips should be in a stacked position, your thighs in a vertical position, knees several inches above the floor, and hands directly below your shoulders. Spread your fingers and pretend to suction or screw them to the floor.
- Before each rep, take a deep breath in (360 degrees of air around the spine), brace the core (360 degree brace around the spine), tuck your ribs towards the hips, and squeeze your glutes.
- Now perform the movement by drawing your shoulder blades in towards your spine (retract). As you do so, your body will lower towards the floor. After you hit a range where you are able to maintain proper form, perform the reverse movement with your shoulder blades and move them away from your spine (protract) and press your body away from the floor.
- For the duration of the exercise, your head, torso and hips should remain in a stacked position. Do not allow your lower back to hyperextend, ribcage to flare, torso or hips to rotate, weight to shift from foot to foot, or hips to collapse or pike.
Regression:
Make this exercise easier by performing the exercise in a regular plank position, or by performing the modified variation where the body is in a regular plank position and the hands are elevated on a box, bench, or other surface.
Progression:
Make this exercise more challenging by adding band resistance, by performing negative reps and taking 3-5 seconds to perform the lowering component of the movement, or by performing the single arm variation.
The Ultimate Pull-Up Program
If you want to become an OG of pull-up badassery you’d be hard pressed to find another coach more knowledgable on the topic than Meghan Callaway.
In short: she’s the shit.
Plus, you know, she’s a little bit obsessed with pull-ups. My brain doesn’t operate like hers and another reason why I appreciate her so much is because she’s willing to challenge conventional wisdom and think outside the box.
Her Ultimate Pull-Up Program is excellent and a great fit for anyone – XX chromosome or not – looking to either perform their first pull-up or many.
I’ve used the program with several of my own clients and have seen excellent results. This is an UPDATED version of the program and Meghan’s added 40+ pages of additional content and upgrades.
It’s currently on SALE and you’re silly if you pass on this; especially if you’re a coach interested in getting your clients results.


Comments for This Entry
Sport- und Fitnessblogs am Sonntag, 28.10.2018 – Eigenerweg
[…] Gentilcore stellt auf seinem Blog fünf Übungen vor, um mehr Klimmzüge zu schaffen, ohne wirklich Klimmzüge […]October 28, 2018 at 3:44 am |