Who Did I Steal it From? – My coach, Greg Robins, plugged this into my program this month. When I saw it, at first I was like “tha fuck!?!”
What’s up with this foo-fooey exercise?
But then I performed a few sets and was like “whaaaaaaaaaaaaaaaat.”
I like it a lot
(cue Dumb & Dumber voiceover).
What Does It Do? – Well, like any single leg variation it challenges balance, core/hip stability, and helps to “temper” any strength imbalances between one leg or the other. Too, it gives the spine a bit of a reprieve from aggressive axial loading.
What separates this variation, however, is the addition of the COIL (or rotation of the upper torso). This subtle tweak offers a bit of a varying training stimulus in that it takes us out of the traditional up/down, forward/back nature of exercise we’re accustomed to and adds rotation into the mix; or transverse plane motion.
The twisting action also leads to a bit more internal rotation of the front hip which feels divine (unless you’re someone with a history of FAI; in that you’ll probably want to avoid this one).
As a quick aside I had my wife perform this exercise the other day after she tweaked her lower back/SI joint and she loved it. As noted in THIS article written by Dr. Erika Mundinger on this site a few years back, introducing rotation can be a game changer for those with chronic SI joint issues.
Key Coaching Cues – This exercise is pretty self-explanatory.
NOTE: Due to space we are limiting this to 35 attendees only. We aren’t saying this to be marketing sleezeballs and to create a false sense of urgency. Like, for real, space is limited. You better jump on this quick if you’re interested.
This workshop is “user friendly” for the masses. Whether you’re a personal trainer, strength & conditioning coach, physical therapist, or just someone who likes to dabble in the lifting of heavy things…you’re bound to benefit and learn something that will help you better serve your clients and athletes.
This is a Tony Gentilcore & Matthew Ibrahim collaborative post.
Or, as I like to call it: A Gentilhim (or Ibracore?) production.
The Safety Squat Yoke Bar (also referred to as “SSB”) is a popular speciality bar that’s most often affiliated with collegiate strength & conditioning facilities, powerlifting gyms, or gyms that are a bit more “serious.”2
However, the Safety Squat bar has grown in popularity in recent years and it’s popping up in more commercial and boutique style gyms as well.
This is great because Matt and I both feel the Yoke Bar is a valuable piece of equipment, one that should be in every gym, with a variety of training applications.
Before I proceed it would make sense to show you a picture of the bar so you know what we’re talking about.
Advantages
1. The SSB is a more “shoulder friendly” way of squatting. Because you grab the bar by the handles which, when the bar is on your back, are located below your shoulders and a smidge in front of the body, it doesn’t require as aggressive of a set-up as a traditional back squat.
Traditional Back Squat (Straight Bar) = Shoulders maximally abducted and external rotated. Many lifters don’t have access to this range of motion and as a result their shoulders are like…
SSB/Yoke Squat = Not the above.
2. The SSB is more of a “hybrid” squat. As Matt notes:
“Since the SSB has a longer bar camber from side to side (as opposed to a traditional barbell) plus a unique loading position for weight plates, it offers the lifter a fine balance between what they would expect from a barbell back squat and from a barbell front squat.“
3. The SSB “fixes” your squat. Mirroring what Matt mentioned above, because of how the bar is designed, you have to fight like hell to stay upright (which, not coincidentally, makes it a great option to strengthen the upper back AND help work on thoracic extension; two things most people need more of).
As you get stronger with the SSB/Yoke Bar it’ll make things infinitely easier to stay upright if or when you revert back to a straight bar.
4. The SSB = 110 Power Boost in World of Warcraft (but only with a +1 Shield and Infinity Cloak).
Nerd.
5. The SSB helps with depth. Because the bar is situated higher up on the back it promotes more of a “squat down” pattern rather that “squat back.”
This, in turn, will often help a lot of people squat deeper (if that’s something they’re interested in).
Here’s an SSB Squat in action.
The SSB Squat exercise is quite common and frequently used.
We wanted to delve a bit deeper to provide several other lower body training exercises you could perform with the SSB that you may not be using already in your overall strength and conditioning program.
1. SSB Hatfield RFE Split Squat (Matt)
Description: This exercise targets lower body strength and power, primarily in the quadriceps, hamstrings and glutes.
The trunk stability challenge here is the real deal as well, since you’re holding on to each side of the squat rack with your hands while the SSB rests on your shoulders. Be sure to press the entire surface of the working foot down through the ground as you power up from the bottom position to the top during each rep.
I’m a monster fan of this exercise due to the strength and power development components.
2. SSB Reverse Lunge (Tony)
Description: This was a staple exercise we utilized when I was coaching at Cressey Sports Performance due to it’s shoulder friendliness in addition to the fact we could be more aggressive with loading compared to dumbbells (grip becomes less of a limiting factor).
As with any single leg exercise there’s also a hefty balance and coordination component as well. I prefer a bit of a forward lean when executing this exercise as it places less stress on the lower back and also allows for more emphasis to be placed on the hips.
3. SSB 1-Leg RDL (Matt)
Description: This exercise targets lower body strength, primarily in the posterior chain muscle group (hamstrings and glutes). As the SSB rests on your shoulders, be sure to hold the handle grips tight with each hand to ensure trunk stability.
It’s important to also mention the relevance of keeping a neutral-ish spine as you descend down into the bottom position due to the orientation of the load on your shoulders. I like this exercise due to the single leg strength and stability demand it poses to the athlete.
4. SSB Front Squat (Tony)
Description: This is a variation I first witnessed my man Jim Smith – of Diesel Strength – recommend a few years. ago. I won’t go into the weeds on the benefits of a front squat
– you can read more HERE – but what I will say is that this variation is a wonderful way to counterpoint any client/athlete who insists that barbell front squats are too uncomfortable for him or her to perform,
I get it.
They suck.
They’re uncomfortable.
I don’t care, do this instead.
5. SSB Good Morning (Matt)
Description: Talking about posterior chain development without mentioning the Good Morning exercise is like eating eggs without the bacon; you just don’t do it.
The Barbell Good Morning has been a staple training tool for years when attempting to develop the glutes and hamstrings of the posterior chain muscle group. The SSB offers a slightly anterior loaded position when compared to the traditional barbell loaded version, which forces you to hinge your hips back even more than usual. I enjoy using this exercise as a way to really “feel” the hamstrings under load.
6. SSB Pin Squat (Tony)
Description: I loooooooooove3 this variation as an accessory movement to the deadlift.
The key is to try to approximate the pin height to one’s hips height so that it “matches” their deadlift setup. In other words: the starting position of the Pin Squat should mirror their deadlift setup.
Factor in the increased demand to maintain an upright torso (t-spine extension) and your entire posterior chain is going to be challenged with this exercise.
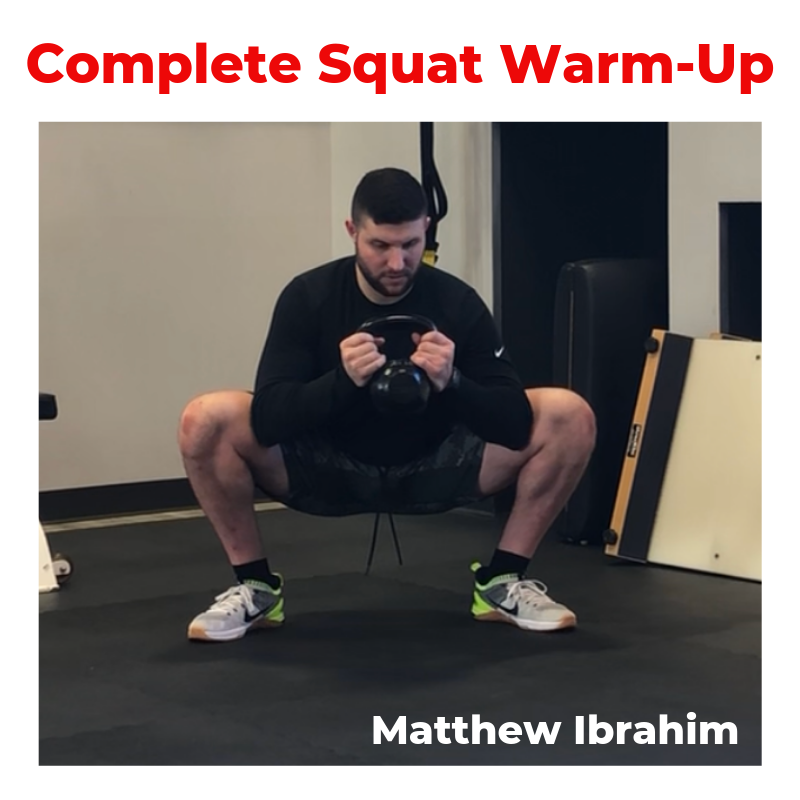
One of the top priorities to focus on when warming up prior to performing your squat in training is to spend time in the ACTUAL squat position itself.
Most people miss the boat here.
Why?
Well, it’s important to actually groove the pattern with repetition in the warm-up that you plan to load in your training.
Crazy talk, I know.
A handful of other components to address in your warm-up when preparing to squat will be to work on trunk stability, hip mobility, groin flexibility, ankle mobility and upper back (thoracic) extension.
The cool thing about this is that you can work on ALL of those things in the ACTUAL squat position itself in your warm-up, too!
All 8 exercises below provide your body with the opportunity.
1) All Fours Rockback – x10
2) Catcher Rockback w/ Toe Turn – x8 each side
3) Alternating Spiderman – x5 each side
4) Windowpane Squat – x8
5) Squat-to-Stand – x5
6) Alternating Cossack Squat – x8 each side
7) KB Horns-Grip Prying Squat – x30 seconds
8) KB Horns-Grip Squat w/ Press – x8
About the Author
Matthew Ibrahim is the Co-Owner & Lead Performance Coach of TD Athletes Edge in Salem, MA.
He has been an invited guest speaker nationally in over 10 U.S. states, which was highlighted by his presentations at Google Headquarters and Stanford University, in addition to guest speaking internationally in Milan, Italy.
His work has been featured in Men’s Fitness, STACK Media and The PTDC. Currently, he is completing his masters degree at Rocky Mountain University with a direct track into their PhD program. He is a big fan of interacting on Instagram and regularly posts about training, performance and recovery.
I’ve often championed the notion that there’s “no such thing as textbook technique.”
How we’re taught to execute certain exercises in a textbook often won’t translate to the real world because, well, we don’t live in textbooks.
This is a theme that’s hit on several times in The Complete Trainers’ Toolbox. Sam Spinelli, one of the contributors, was kind enough to share a bit of an amuse bouche from his presentation “All Things Squats, Knees, and Hips” with everyone today.
To check out the full presentation, as well as contributions from eight other renowned industry leaders, go HERE for more information.
Humans are these incredibly awesome, adaptable, and diverse creatures.
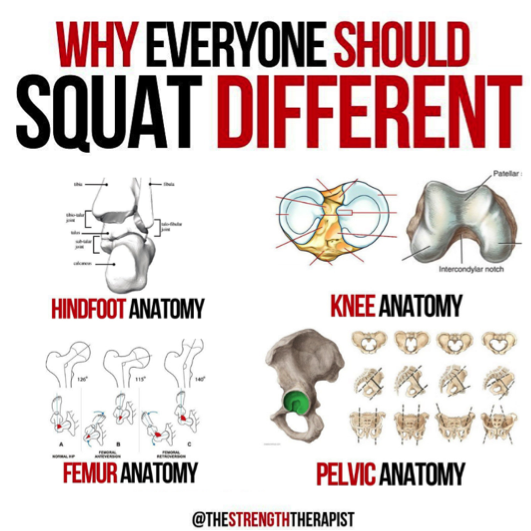
Within our awesomeness, over time we have adapted to have a diverse set of unique features in our anatomy that provides for a wide range of movement from person to person. This is something that we did not readily acknowledge for a long time and tried to fit people into square holes.
The squat is a perfect example of this topic.
For such a long time it has been advocated to squat with your toes forward and perfectly hip width apart. The unfortunate thing is that this limits a significant majority of people from being able to squat comfortably – or to an appreciable depth.
While some people may be able to do so with practice and working on range of motion, for a vast majority it is just not realistic due to their bony anatomy.
As we examine the ankle, knee, and hip, we can see that there is significant variation within the bones forming them and the resulting joints.
For example, at the hip we have an acetabulum that can vary in depth of which will impact how much motion a set sized femoral head can have. This will impact the capacity of motion for hip range between individuals, leading to diverse squat stances already. When we begin to layer on the other ways our anatomy differs, it compounds and leads to a breadth of variations in how people may squat.
How Should I Squat Then?
There isn’t a set stance that will accommodate everyone – some people will do well with a hip width stance and slight toe out, others may do better with a narrower stance and feet directly forward. Finding what works best for you can be a challenge at first and require some experimentation.
To help expedite the process, try out these four methods:
1) Find Your Squat Stance – Standing
2) Find Your Squat Stance – Supported
3) Find Your Squat Stance – Seated
4) Find Your Squat Stance – Kneeling
The goal with each is to start with feet together and progress foot/knee width. You will find that one width generally feels better than the others, that’s the one to stick with for now. Then you can start playing around with foot/knee angle and continue experimenting.
This will get you a great head start on your squat stance and making it unique to you.
Two additional details – you may find your stance more comfortable with your feet not symmetrical and you may find that your stance changes with time. These things are normal for many people.
Did I Just Blow Your Mind?
This is just the tip of the iceberg in terms of stuff I cover in my presentation “All Things Squats, Knees, and Hips” in the Complete Trainers’ Toolbox, an online resource that became available this week that also features presentations from eight other industry professionals – including Tony Gentilcore, Dean Somerset, Dr. Lisa Lewis, Alex Kraszewski, Kellie Davis, Meghan Callaway, Dr. Sarah Duvall, and Luke Worthington..
It includes 17 total hours of content covering a wide range of topics every health/fitness professional is bound to relate with. It’s on sale this week at a significant discount, but only until Sunday, February 17th at midnight.
Two things with regards to the title of today’s post:
I’m thinking it could pass for the title of the next big children’s book.4
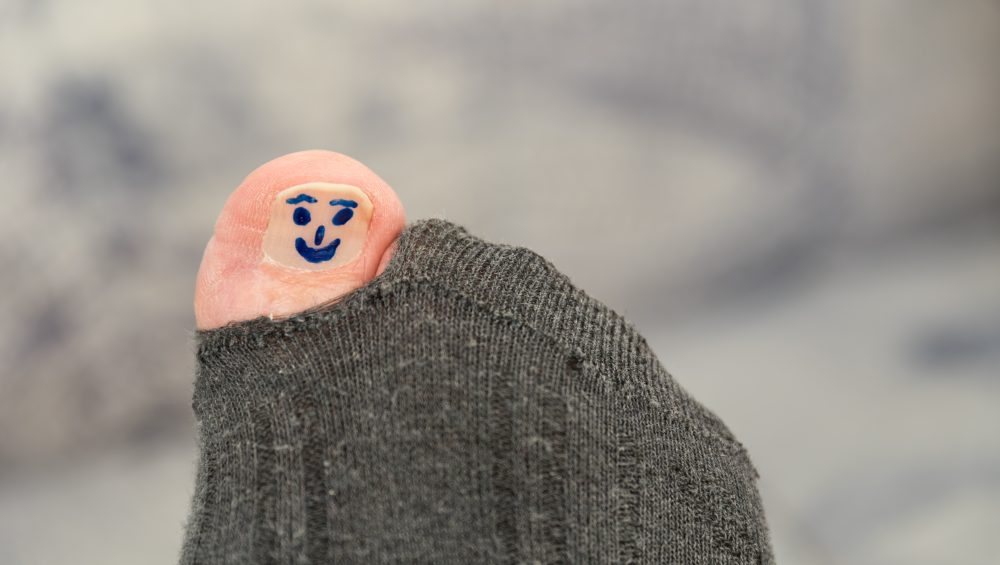
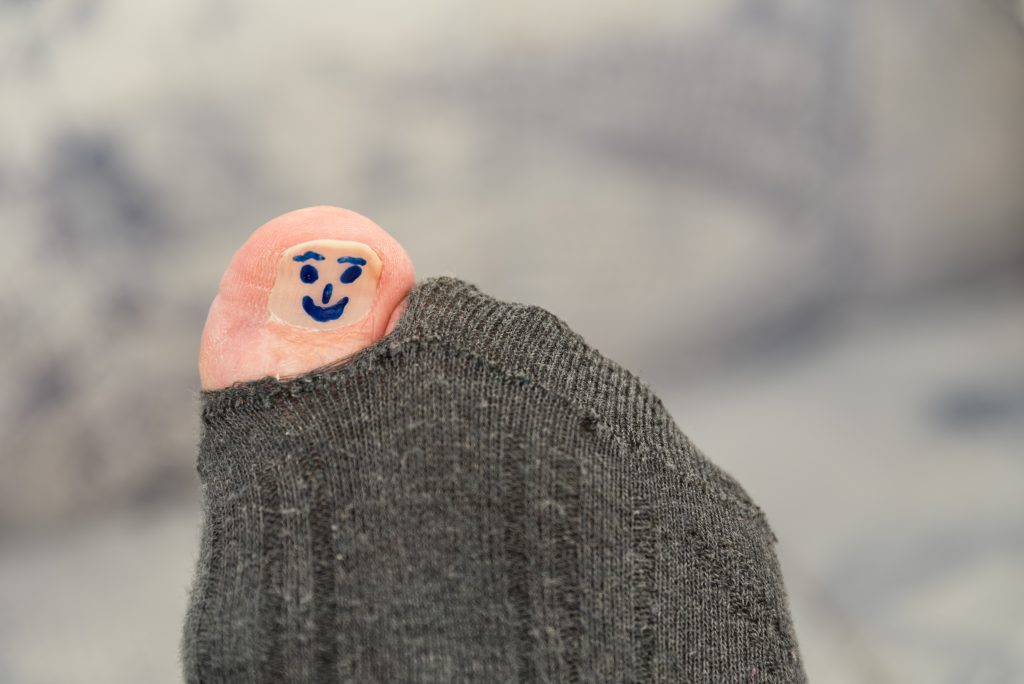
Searching stock images for “big toe” pretty much made me want to throw up a little in my mouth. I’d place it somewhere between kipping pull-ups and gonorrhea in terms of stuff I’d rather not see with my eyes ever again.
There’s a lot to consider and that can go awry when discussing the squat. To say there’s a plethora of moving parts – not to mention positional considerations (hand position, stance, bar position, etc) – would be an understatement.
One of the last things you’d probably ever consider when it comes to your squat performance is your big toe. Well, I’m here to tell you that it’s a pretty damn important and something you should consider considering.
Also, this is about as non-pukey of a picture as I could find of a toe.
What inspired this post was an interaction I had with a new client recently. During his initial evaluation I had him show me his squat because he had mentioned the movement has always bothered his lower back.
He’d worked with previous trainers in the past who had attempted to “fix” things, more often than not resulting in him stretching this, smashing that, performing a cornucopia of positional breathing drills while repeating the Elvish alphabet backwards, and otherwise being over corrective exercised to death
In fact, I’d be surprised if I’m not nominated for a Nobel Prize for how revelatory what I did was.
Are you ready?
Wait for it…
Wait for it…
I watched him squat.
https://www.youtube.com/watch?v=a1Y73sPHKxw
I’m flummoxed as to why this seemingly obvious “intervention” is often overlooked. I think a lot of it has to do with something John Rusin spoke about during his keynote talk at the SWIS 2018 Symposium:
“We’re in an industry that gets too distracted by bright, shiny objects.”
Watching someone squat is boring.
Having someone stand in a zero gravity chamber while a bunch of lasers attempt to release their psoas isn’t.
We’ve become infatuated with gadgets and gizmos so much so that it’s become much harder to galvanize the masses into trusting what it is they do best……
………..COACH.
To that point, I’m old school and I just wanted to watch my man squat.
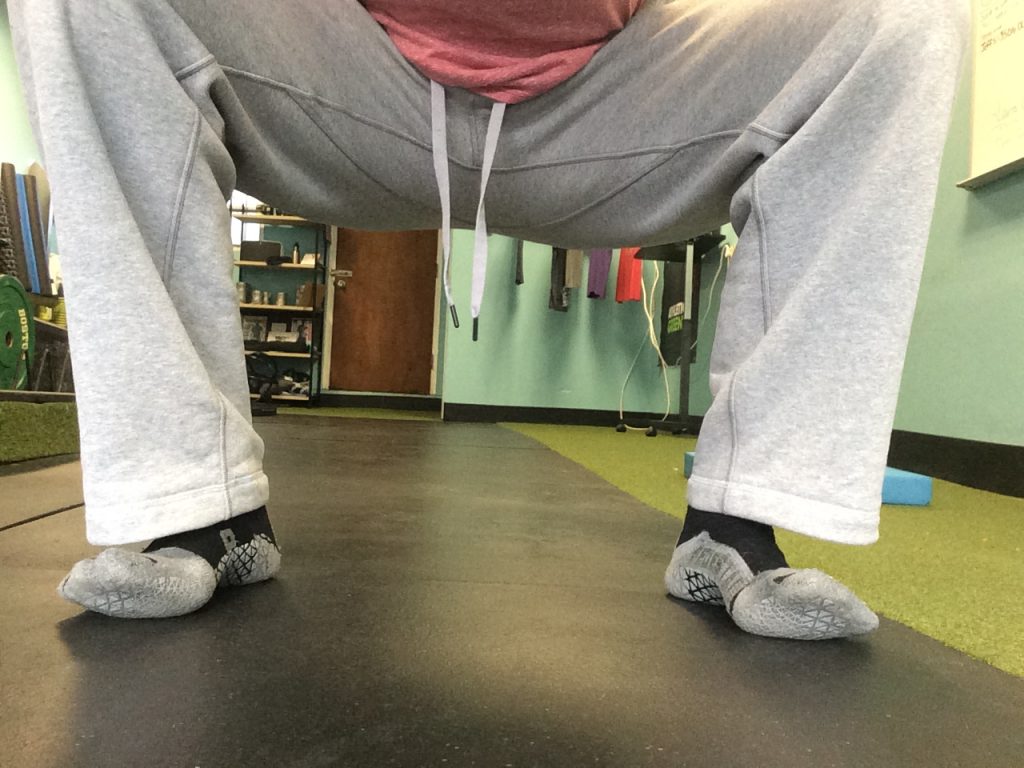
I had him take off his shoes and pants, and it’s here where I noticed something.
I watched his feet and saw that with every repetition his toes would come up off the ground, like so:
FYI: this is a picture of me doing a reenactment. See you in a few weeks at the Oscars.
Now, for the sake of brevity, it is a conversation to have as to whether or not he was cued into lifting his toes off the ground or not? I’ll nip this in the bud and say for the record that he wasn’t.
He was just never coached on how to squat properly.
As such, it became glaringly clear why his back had always been flipping him the middle finger whenever he attempted to squat (Goblet, front, back, all of them).
When your toes – most often the big toe – comes off the ground you lose your core.
Bullet Points (for those of you too lazy to watch):
When toes come up, you lose canister position (ribs stacked on pelvis) and thus lose your core and stability.
When toes comes up, you crank into lower back.
Think more about foot pressure (pushing into floor and even weight distribution on big toe/metatarsal, small toe, AND heel).
Cement toes to the floor.
Take your clients’ shoes off when they squat. It will tell you a lot.
My biceps looks amazing in salmon colored t-shirts.
But Wait Tony, Some Coaches Cue People to Squat With Big Toe Up on the Way Down, and Then to Push It Into the Ground on the Way Up. Are You Saying They’re Assholes?
No.
Coaches such as Mark Cheng and Cal Dietz – who are both the shit – often advocate the big toe stays up on the way down during a squat (but the ball/metatarsal still stays glued to the floor) and then press the toe down on way up.
I find this to be okay – and far be it from me to say they’re wrong. They’re both developing outstanding athletes and making people better.
I just find that with all the other mental gymnastics that come along with the squat – big air, ribs down, sit down, not back, spread the floor, drive your chest into the bar, hips through, don’t poop your pants – that it gets a little crowded when you add in the “toes up on the descent, toes down on the ascent” cue.
As I note in the video above I like to cue the idea of foot pressure – with three points of contact – and to cement the toes down during the squat.
Moreover, the objective is not to grip or dig into the floor with your toes.
“I don’t like “digging” because you don’t want to press the tip of the toe to the ground, more the pad of the toe. Big toe, ball of the foot, 5th metatarsal, heel. Pressing big toe helps the windlass mechanism as well.“
Here’s a nice demonstration of everything in action by Essex, Vermont based strength coach, Jess Voyer (who was kind enough to refer to me as a genius in her IG post. 4,000,000 points to Gryffindor):
The beauty of fillers is that, much like tv shows based in the city of Chicago – Chicago Fire, Chicago Med, Chicago Justice, Chicago Sanitation, Chicago Teacher’s Union7 – there’s an endless array to pick and choose from.
What follows isn’t close to an exhaustive list.
What’s more, fillers can serve as a splendid opportunity to individualize someone’s program to hone in their unique injury history or their unique mobility/stability deficits.
QUICK ASIDE: When it comes to writing training programs for people, there are more similarities across the board than there are differences.
Far too often I find coaches/trainers making things more complicated than they have to be. Mike Boyle spoke to this not too long ago on social media:
People really want training to be complicated? Same group today 1 Euro BBall, 2 MLB pitchers, 2 position players, 2 national caliber female lacrosse players, 1 national level field hockey player, 1 NCAA female ice hockey player. 90% same. #sportspecific ?
Training programs, more often than not, revolve around these movement patterns, and the individualization generally comes down to what iteration of said movement pattern best fits the goal(s), injury history, and ability level of the athlete/client.
More to the point, instead of focusing on the facade of “sport specific training,” the better moniker should be centered on “people specific training.”
But that’s a hefty conversation for another time.
In the end, like I said, fillers are an ideal way to provide some semblance of customization into a program.
Fillers For Squats
Much like the deadlift, there are many moving parts to a squat which the body requires access to.
Starting from the bottom-up:
Ankle Dorsiflexion
Hip Flexion, in addition to Hip Internal Rotation
T-Spine Extension
Shoulder Mobility (specifically glenohumeral external rotation with regards to back squats)
Here are a handful of fillers for your consideration:
1) Hip Flexor Mobilization with IR/ER
The plain ol’ vanilla Wall Hip Flexor Mobilization is still one of my all-time favorite fillers, but this variation, which I stole from my boy Dean Somerset, adds another level to it.
Squatting requires hip flexion, and deep(er) hip flexion also requires hip internal rotation. Adding this in between sets of squats will make your hips feel nice-n-juicy.
The key, though, is to actually get motion from the HIP and not just crank through your lumbar spine. I like to put my hand on my ASIS and then “drive” that towards and away from my opposite (up) knee. In short, I think about opening and closing my pelvis.
There isn’t a ton of range of motion with this drill, but serves as a nice way to “unglue” the hips.
5 reps per direction/side is money.
2) Seated 90/90 Hip Switch (Progressions)
What I like most about this drill is that it hits both hip INTERNAL and EXTERNAL rotation simultaneously. The objective is to keep your chest up as best you can, along with your feet staying cemented to the floor.
1st Progression = Supported (hands)
2nd Progression = Unsupported (no hands)
3rd Progression = Adding in additional end-range Hip IR on the trail leg (be sure not to crank through your QL).
4th Progression = I don’t know, blindfolded? A new Bird Box challenge?
Shoot for 5-8 repetition per side (depending on which progression you’re doing). Hands Supported = high(er) reps. End Range Hip IR = you’ll hate life.
3) Side Lying Open Book
This one is pretty self-explanatory, and a great drill to help open up the chest and work on mid-back mobility.
Lie on the floor with a foam roller (or yoga block) underneath your top knee to prevent you from falling into excessive lumbar rotation. With your hips & shoulders starting stacked, “open” your top side by following your hand with your eyes.
BE SURE YOU’RE BELLY BUTTON DOESN’T GO ALONG FOR THE RIDE (it should stay put).
On an almost daily basis I read or watch something one of my colleagues posts on the internet and I am not-so-subtlety reminded of how inadequate I am.
I mean, granted, I have a deadlift most guys covet, and pecs that can cut diamonds, but even still…it’s not enough.
My brain just doesn’t work in the say fashion as some of my fitness brethren.9
Today’s installment of Exercises You Should Be Doing is a gleaming example of this fact.
** No fluff here, Robert is an outstanding coach and someone you should be following (especially if you work with older clients).
What Does It Do? – When I first saw this exercise being performed on Robert’s Instagram feed I instantly thought of my IN-SEASON high-school basketball players. They were coming in to train at CORE the following day and I knew they were going to be a bit beat up from a hectic week of games and practices.
I wanted them to come in and get a good training session in, but I also wanted stay cognizant of the fact they would have likely given me the look of death if they walked into the studio and saw “squats” on the docket.
With this iteration I was able to still have them squat, albeit with minimal axial loading on their spine. Too, as I found out myself after performing a few sets, it torches the anterior core.
I receive a high training effect with minimal joint stress with this exercise, and like I said, for in-season athletes this is money.
In reality, though, this is a great exercise for anyone: athlete, non-athlete, in-season, off-season, centaur, whatever.
Other things to note:
– The added “pull” of the band during the eccentric phase of the exercise provides a unique training stress in that the trainee must now learn to CONTROL the lowering portion and not just let the band take over.
– Moreover, I see some value in using this variation with beginners. Getting a beginner to appreciate TENSION and body position during a squat (abs on, ribs down, hips tucked under) is paramount. Far too often they’re “loosey-goosey” and have a hard time comprehending the concept. Here, the band gives them all the feedback they need to FEEL what it is I’m after.
– Lets quit it with the formalities shall we? You know and I know that there’s one thing, and one thing only, we’re both thinking of when it comes to this exercise.
We’ve finally figured out a way to combine squats and bicep curls, baby!
Key Coaching Cues: I’m using an EZ Curl bar in the video, but if you wanted to up the bad-ass factor you could use a straight bar or, I don’t know, an ax.
I’d err on the side of conservative here.
A 1/4″ band will be more than enough resistance for most people, but I can see a case being made for 1/2″ band for stronger individuals.10
Programming wise this exercise fits well with high(er) rep schemes (8-15) so don’t be bashful.
SIDE NOTE: Grip will be the limiting factor for the bulk of trainees with this exercise, so please take that into consideration. The last thing you want is someone letting go of the barbell from the top position due to fatigue and then they break their foot.
What follows is what works for ME and MY clients. This shouldn’t be taken as a personal attack against YOU, your favorite coach, or any methodology that’s seemingly at odds with my point of view.
By all accounts you’re still a decent human being, even if you happen to disagree with what I’m about to say.11
Here goes.
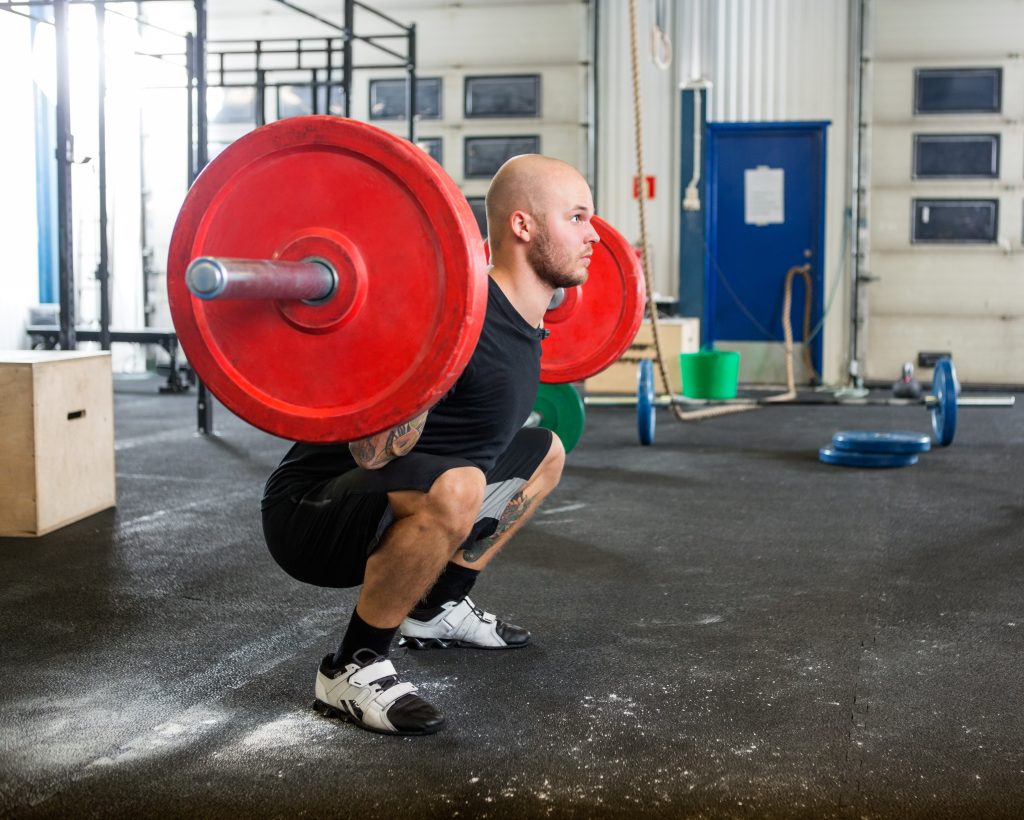
I prefer people to squat down rather than back.
I want the squat to look like a squat.
I Can Hear the Cacophony of Moans Now
But, “moment arms!“
And, “hip extension torque!“
“Biomechanics, Tony. WHAT ABOUT THE FUCKING BIOMECHANICS!?!U?!!!AHHHHH!??!JUMPSOFFCLIFF“
Relax: In no way, shape, or fashion am I discounting any those things, nor turning a blind eye to science or evidence-based approaches and modalities.
I’m on your side my fellow anthropometrical nerds.
What I AM discounting, however – but not necessarily turning a blind eye towards (maybe tossing some shade?) – is the fact that, while all those things mentioned above – moment arm lengths, hip extension torque, biomechanics – can be used to make a solid case for squatting the most amount of weight possible, as coaches we often forget two things:
1) Many people could give two shits about squatting the most amount of weight possible.
2) Most people aren’t powerlifters.
Don’t get me wrong: I am all for people training with intent, striving to get strong(er), and pushing some appreciable iron. The tagline for this site is “Because Heavy Things Won’t Lift Themselves” for crying out loud.
That said, I’m also very much interested in the long-game. I want to keep my clients/athletes healthy and set them up for the most long-term training success possible.
One such way I accomplish this is how I prefer to coach the squat. Again, what follows is what works for me and what I feel fits the needs/goals of the bulk of MY clients and athletes.
If you disagree you’re wrong hopefully we can hug it out if we ever meet in person.
Squat Down, Not Back
The video above demonstrates me initiating the squat by pushing my hips back, but specifically getting a lot of motion via the lumbar spine.12
This won’t bode well for most lifters.
Is it wrong?
Well, no.
Plenty of lifters do this and move a lot of weight. However, what often works for powerlifters, wearing squat suits, won’t be the best fit for “natural” non-powerlifters, not wearing squat suits.
Plus I’m pretty sure a a piece of my soul dies every time I see it.
Instead, I prefer this approach:
Take in your air at the top, create a flexion moment (clamp down abs to prevent excessive lumbar movement), and squat DOWN by breaking with knees and hips simultaneously.
For most lifters, most of the time, this will be the better long-time fit in terms of being able to 1) not only squat a decent amount of weight, but also 2) make it less likely your lower back will hate you.13
I’m currently in the throes of jet-lag sucktitude.
I’ll be back on my writing content horse next week, but I’ve got a treat for you today. TG.com regular contributor, Dr. Nicholas Licameli, is subbing in for me today and he went to TOWN in today’s guest post.
This is one of the most thorough articles I’ve read in a while on the topic with a metric shit ton14 of information with many additional links to help you nerd out a bit more if you so choose.
The squat is a topic that has gotten a great deal of attention among many fitness and medical professionals since mankind first started lifting heavy things against gravity. Since then, much of the conversation has changed (with the advent of civilizations, roads, running water, Instagram.
However much has stayed the same.
I understand this isn’t the first article written about the squat.
Some of the greatest minds in fitness and strength and conditioning have written on the topic, and I encourage you to dive into the multitude of references that I’ve provided.
My goals for this article are to help make your squat look and feel better, improve performance and effectiveness, un-complicate the complicated, and give you the confidence to perform this foundational movement without fear.
Unfortunately, there are those that say to avoid squatting.
As a physical therapist, I have to apologize because much of that flawed thinking stems from misinformed and unqualified professionals in the medical field that are pleasantly ignorant to current practices.
The squat and hip hinge are foundational to basically all movements in and out of the gym.
Whether you’re hitting a PR on the platform or sitting down on the toilet, you are squatting and you better be using proper technique. I’ve treated injuries as a result of poor squatting in both of those previously mentioned instances. Why avoid the squat in the gym if we’re going to do it constantly throughout our day anyway?
I say train it rather than avoid it.
Why not be prepared and do it right?
The squat and hip hinge require total control of the deep abdominals as well as the hips, pelvis, and entire spinal column. We can all agree that teaching proper abdominal bracing, pelvic positioning, and proper lifting mechanics are of utmost importance for the treatment of musculoskeletal injuries including knee, hip, and low back pain. For some reason however, we don’t all agree that squatting is necessary.
Newsflash…when done correctly, THEY’RE THE SAME THING!
As both a doctor of physical therapy and professional natural bodybuilder, it should come as no surprise that in my opinion, people of all ages and from all walks of life should be squatting. This includes the young athlete just starting his/her training career, those recovering from injury, those trying to prevent injury, and even (and especially) the elderly.
No matter if you are an athlete or a great grandparent, we are all essentially “squatting” multiple times throughout our day, so why not train it, strengthen it, and perfect it?
You can release this muscle or stretch that muscle but if patients and clients don’t know how to squat and hip hinge, we are spinning our wheels and wasting valuable time.
How to Squat
While this isn’t a step by step “how to squat” article, here is a quick and dirty rundown of some things to keep in mind.
There is a plethora of information out there about thoracic spines, knees, ankles, spinal positioning, foot placement, etc., and sometimes it can complicate things, make people fearful, and mystify the movement.
Basically, a proper squat and hip hinge starts (obviously) at the hips with the spine in a neutral position (more on this later). After a breath in, tension should be kept throughout the body and throughout the movement. The entire spine, including the neck, mid back, and lower back, should be kept in a relatively stable and neutral position. The feet should remain actively planted on the floor with the weight evenly distributed.
More on all of this to come.
In the beginning of my lifting career, I struggled with finding the “groove” of the squat. This is partially due to improper mental cueing during the movement. Some of my mental cues during the squat were:
“Arch the back hard to avoid spinal flexion.”
“Keep the head and chest up so they remain in line with the horizon.”
“Sit back and push through the heels.”
“Always squat below parallel.”
While there could be worse things, especially considering that, like most beginners, my sources of information were muscle magazines and of course the biggest guy(s) at the gym, I think these cues can be quite misleading and detrimental to squat technique.
Here’s why.
“Arch the Back Hard to Avoid Spinal Flexion.”
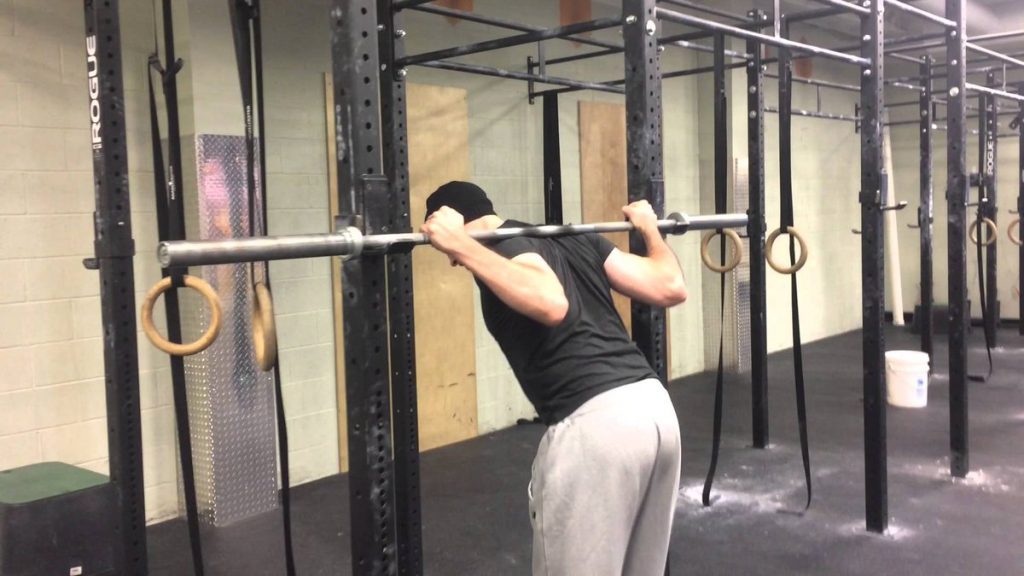
Avoid a hard arch in the lower back.
Don’t let the lower back round of course, but rather maintain the natural arch of the lumbar spine.
Hard lumbar extension will crunch down on the delicate structures of the spine, put the glutes in a less than optimal position to stabilize the pelvis, and place the hip in slight flexion before the movement even starts.
Starting in hip flexion will cause the femur to run out of room in the acetabulum for hip flexion when you want it most…at the bottom range of the squat. This could result in femoral acetabular impingement (FAI) and labrum pathology.
Get out of that hard arch and find your neutral.
“Keep the Head and Chest Up So They Remain in Line With the Horizon.”
Keeping the head and chest up isn’t necessarily a bad thing, however if we achieve that position by hyperextending our backs and flaring our ribs forward, it becomes problematic and essentially unstable.
Cueing a slight posterior pelvic tilt prior to un-racking the weight and maintaining that position throughout should do the trick. This will place the spine and ribcage in more of a neutral position.
We maintain the position by taking a breath, contracting the upper back, lats, mid section (as if putting on a tight belt or walking into cold water up to your navel), pelvic floor (as if holding in gas or urine), and even the feet (more on this to come).
Check out my explanation of what it means to “contract your core” right here. Tony does an awesome job of explaining this here, as does John Rusin here. Quinn Henoch and Ryan Brown also hit the point home here. Eric Cressey nails the upper body and lat set up here.
“Sit Back and Push Through the Heels.”
It’s true that we don’t want to push through our toes and allow our heels to rise off the floor, however it is also true that we don’t want to shift our weight so far backward that the toes lose contact with the floor and most of the force goes through our heels.
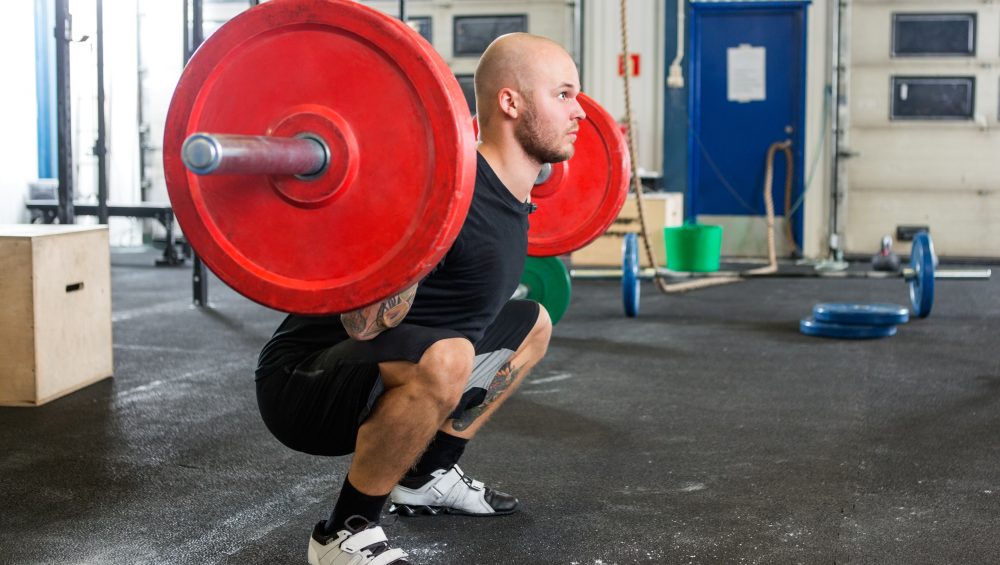
Yes, we want to descend slightly backward, but the focus should really be on descending down between our hips.
When we say we put an adversary on “his/her heels,” we are saying that we put them in a vulnerable position and on the defense, which will likely lead to a step backward. Why would we want to put ourselves on our own heels while squatting?
A better cue is to have an “active foot,” evenly maintaining 3 points of contact with the floor: base of big toe, base of little toe, and heel. Tony explains this really well here. This foot position will help stabilize the hips and knees, as well.
Mastering the “active foot” takes practice, but once you feel it, there’s no going back.
For everything you (and your children and their children’s children) will ever need to know about squatting, check out this bad boy by Greg Nuckols.
Find Your Squat
Hey fellow millennials!
Remember what our mothers taught us…we are all special, we are all unique, everyone is a winner, Mufasa died of natural causes, and most importantly, we are all different!
When it comes to the squat, this last point is key.
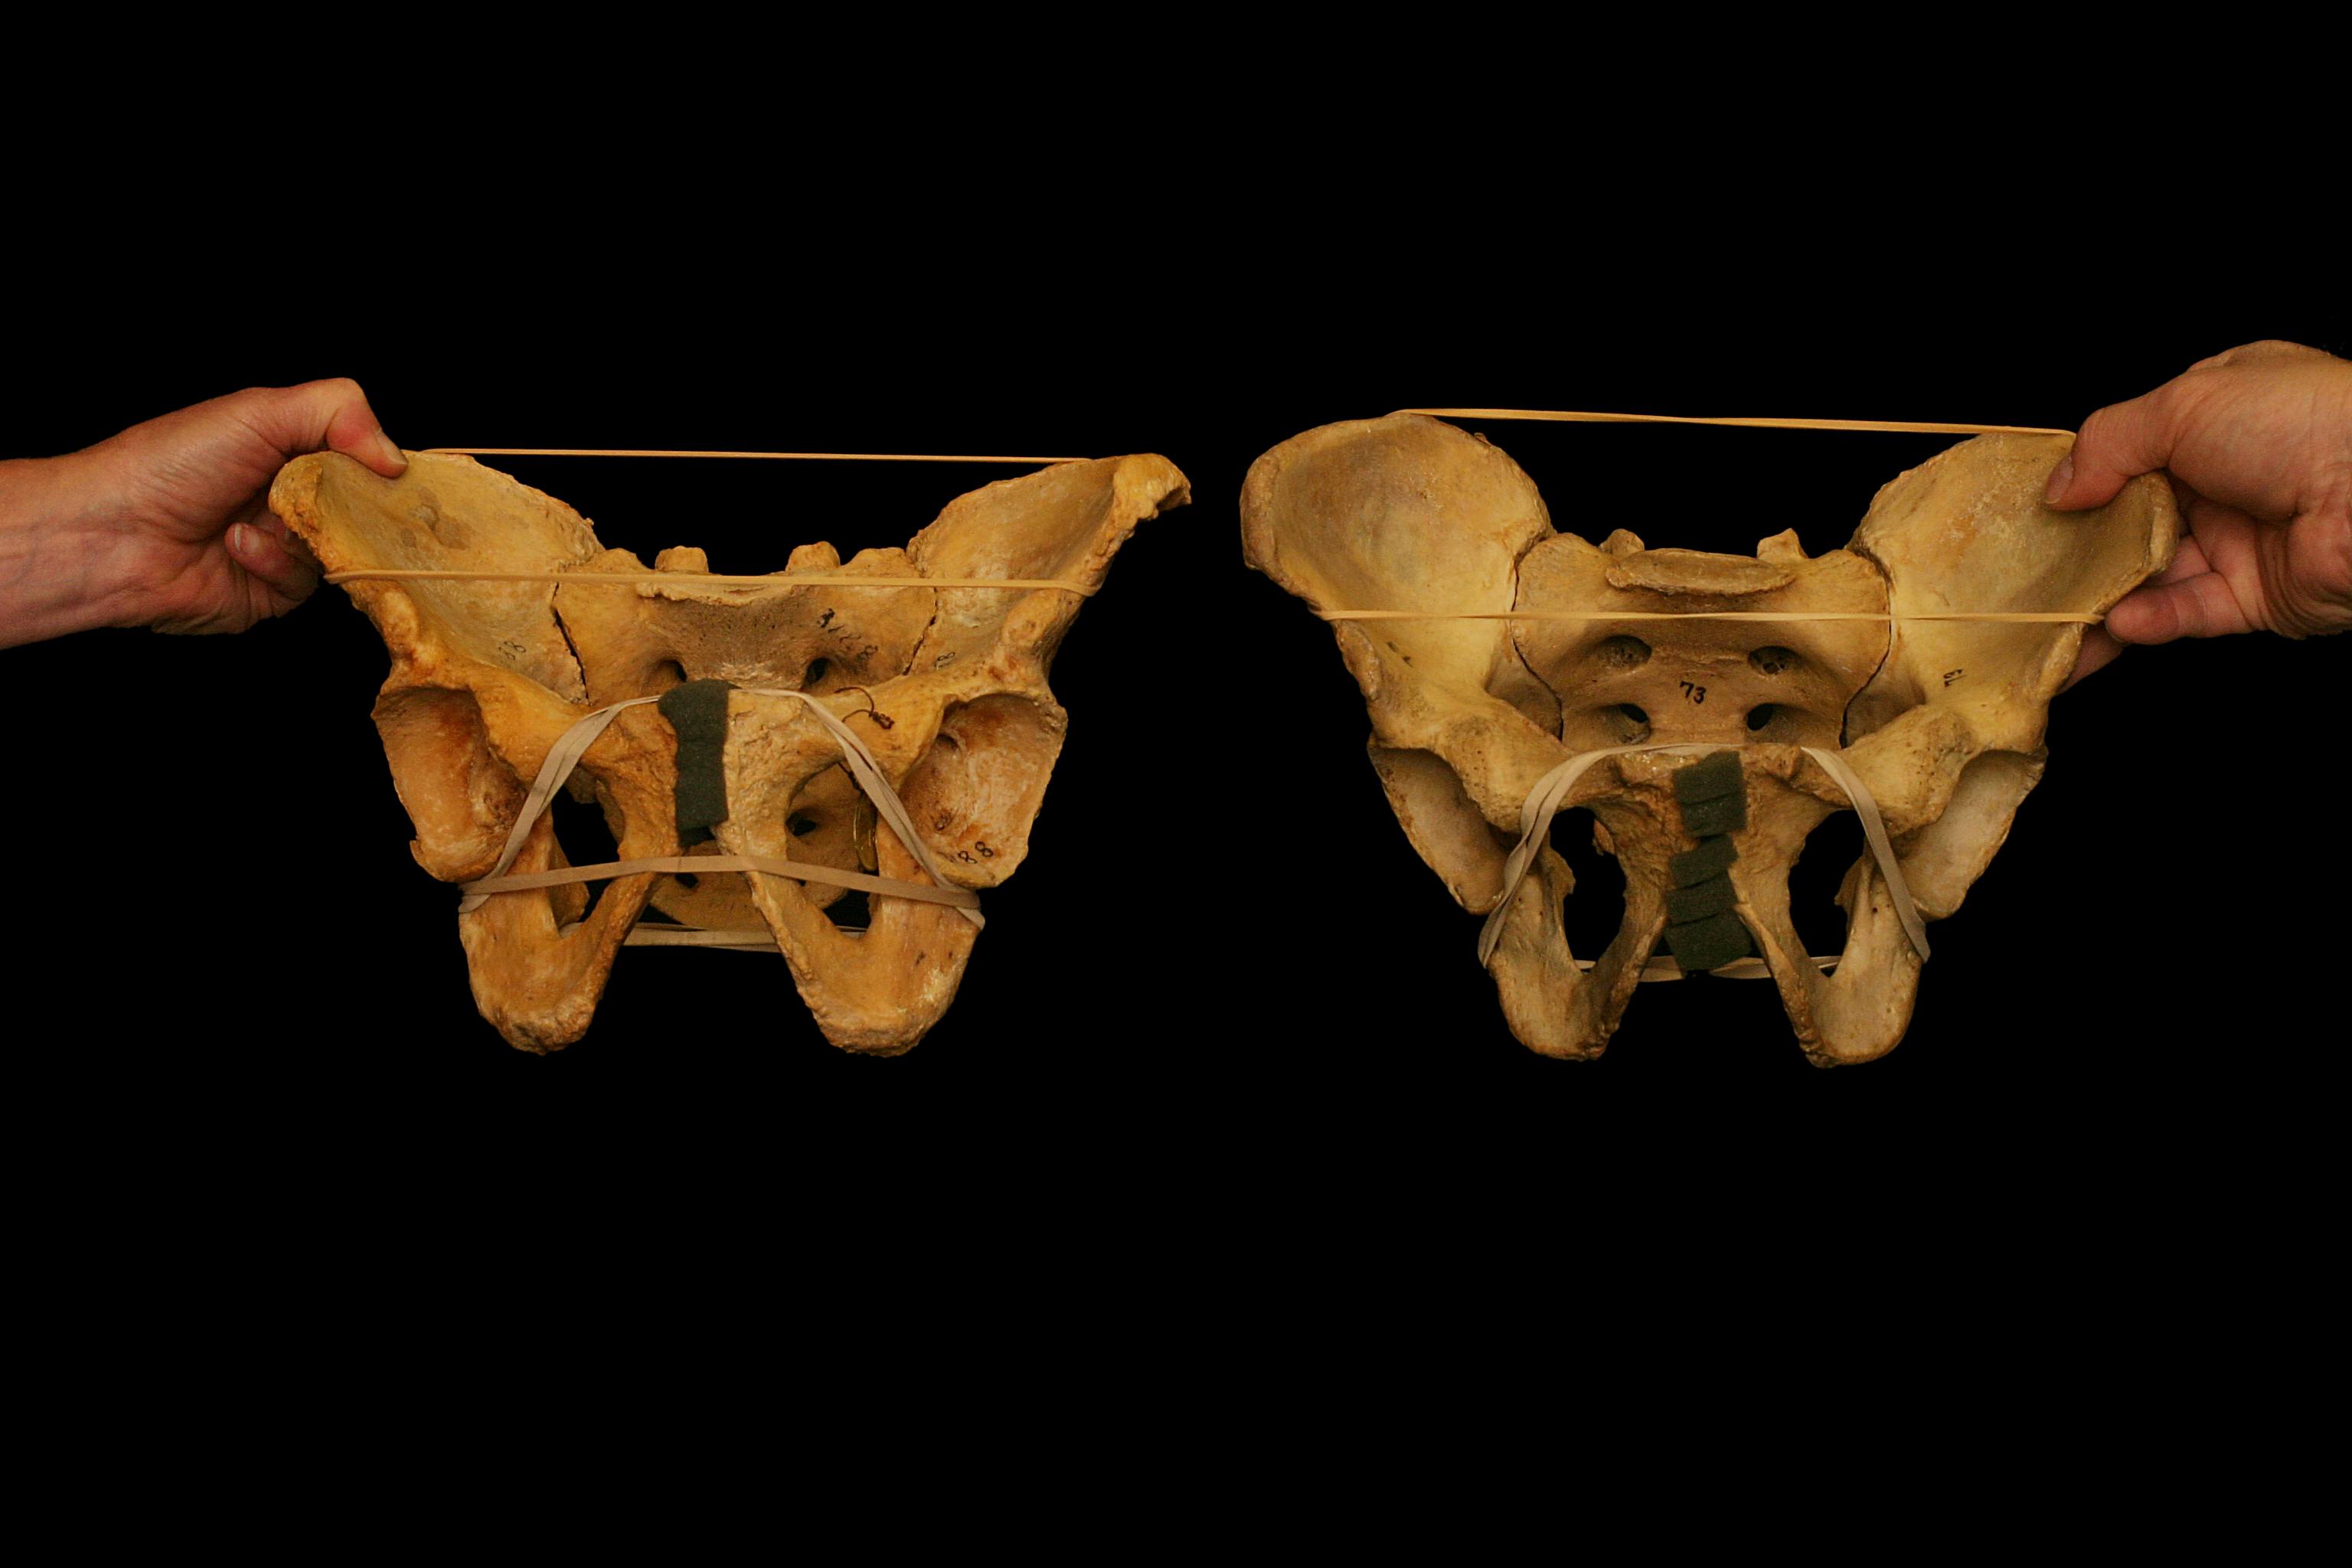
We are all structured differently, which is why there is no particular squat that is perfect for everyone. Things like foot position, stance width, and squat depth will all be impacted by things like the size of our torsos, length of our femurs, and the structure of our hips and pelvis. We need to find the squat variation that best “speaks” to us.
The classic example of this is hip flexion range of motion and lumbar compensatory spinal flexion.
Much has been written about this topic, and to avoid making this more like a Harry Potter book rather than a guest post, I’m going to refer you to some excellent articles down below.
Keep in mind that a range of motion measurement taken while lying on a treatment table DOES NOT always necessarily correlate to what we observe during an actual movement pattern like a squat and vice versa.
That being said, a 2008 study (stolen by me from afantastic articleby Bret Contreras) showed a 60 degree difference in hip flexion range of motion between the least flexible (80 degrees) and most flexible (140 degrees) subjects out of a total of 200 hips.
That’s quite a large difference, considering exercises like a deep squat require about 120 degrees of hip flexion. Differences in femoral anteversion/retroversion (how much the head of the femur faces forward or backward), acetabular anteversion/retroversion (how much the the hip socket faces forward or backward), and inclination angle of the femoral neck (angle of the neck and shaft) are seen from individual to individual as well as from hip to hip within the same person.
These genetic structural differences all change an individual’s ability to squat.
Thanks Mom and Dad…
Pushing past end range hip flexion in the descent of a squat for the sake of going deep will cause compensations up and down the chain, particularly flexion of the lumbar spine, AKA the dreaded “butt wink” (cue the tire screech and screams).
While some amount of lumbar flexion and “butt wink” is acceptable (we’ll get to that in a minute), too much, too often, in an uncontrolled manner, can be problematic.
So you can see why being married to a certain squat variation can be inappropriate.
If you are an individual that is unable to squat deeply but force yourself to perform deep barbell squats because your lifting partner says so, you’re setting yourself up for injury and a faulty and uncomfortable squat.
When it comes to varying your squat type, be sure to know your goal.
Why are you squatting?
To improve overall strength?
Hypertrophy?
To get a stronger squat?
To impress a member of the opposite sex (spoiler alert, they don’t care)?
To be able to pick up your child without pain?
There are many variations of the squat.
The conventional barbell back squat is just one option and unless you are training for a powerlifting meet, where you will be required to perform the conventional barbell back squat, there is no reason to lock yourself into only one type of squat.
Why not try a goblet squat? Or a sumo squat? Or a front squat? Why not use dumbbells or kettlebells instead of a barbell? If structured correctly, any variation of the squat will improve strength and hypertrophy as well as train the hip hinge and proper bending/lifting mechanics.
What’s the take home? We are all structurally different and it is important to find the squat pattern that works best of us.
Here are some great resources that will help you find the squat pattern that works best for you and your anatomy:
Note From TG: Nicholas is kind to include me amongst such elite company (Note to Self: you owe Nick 1000 Predator handshakes), but mine is easily the least pithy of the bunch.
Neutral Spine…Does It Exist?
Yes and no.
Research has shown that lumbar flexion, particularly at the bottom of a squat (the previously mentioned butt wink), is quite natural in a squatting pattern, particularly at the point in the movement where the hips start to run out of space for further flexion.
I agree with Quinn Henoch that neutral spine is more of a range rather than a set position, so don’t lose sleep over a little spinal flexion.
How much excursion is too much?
You knew the answer before you asked it.
It depends!
That being said, you definitely want to avoid movement at the spine and pelvis as much as possible. A moving base causes leaked energy and therefore less stability and built up tension. This means less force produced, less strength, and less Instagram pictures with a bumper-plate loaded bar on your back.
Don’t Stop Squatting Because You Have Pain Or Feel Restricted
If you experience pain during a squat, SEE A QUALIFIED HEALTHCARE PRACTITIONER.
You want someone that will question the type of squat that hurts, ask when in the range of motion the pain occurs, analyze your squat pattern, ask about weekly volume and load, inquire about recovery and sleep, and do everything in his/her power to keep you squatting.
There are always ways to modify the squat in order to keep training this key movement pattern while training with an injury.
Sharp pain at the bottom of a squat?
Try using a more neutral spine with slight flexion using a goblet squat to free up some space in that acetabulum.
No good?
Try adding a band around the knees during a few warm up sets.
Still no good?
Add a box to squat to at a level just above where the pain is felt.
The point is, you deserve better than a rushed, “Stop squatting for 4 weeks, take these anti-inflammatories, and see me in a month.
Oh, and if that doesn’t work, try foam rolling, cupping, turmeric, an oxygen deprivation mask, and VooDoo floss bands in a bath of apple cider vinegar and creatine.”
Fixing the symptoms with things like medication and surgery without considering the cause is an all too common theme.
These things have their place, of course, however they must be used appropriately. For example, surgery to repair a labrum that was damaged after repetitive impingement due to faulty lumbo-pelvic mechanics would be like fixing ceiling tiles in your living room instead of fixing the leaky roof.
After the surgery, if the individual returns to squatting with the same mechanics that got him/her under the knife in the first place, what good has been accomplished? Doesn’t make sense to repair, install, and paint shiny new ceiling tiles without fixing the roof first. Check out a video I made on this a while back right here.
So What Can We Do To Improve How The Squat Looks And Feels?
This is a tough question, because, as you probably guessed, everyone is different and it depends.
I recommend seeking out a qualified healthcare practitioner that will assess, reassess, and give you the tools to improve your individual squat.
Gone are the days of performing long, drawn out warm ups in the name of injury prevention, mobility, and movement optimization. A warm up should increase your heart rate and mentally and physically prepare you for the specific movements of the day.
The warm up should be active, specific and purposeful, not a cookie cutter series of activities like flailing around on the dirty gym floor or jamming a lacrosse ball into your sciatic nerve in hopes to break up adhesions in your piriformis.
Things like static stretching and foam rolling are passive activities.
In contrast, light cardio, dynamic stretching, loaded eccentrics, and actually getting under the bar and grooving the squat movement with sub-max loads are all active.
Passive activities like foam rolling do have their place, but they should be used appropriately. The benefits of foam rolling are short-lived, so if you’re going to foam roll, I’ve found it best to do it in between warm up sets. Of course, the specific muscles you target will be individual to you, your body, and your squat. For more on this, check out my article and videoas well as this fantastic episode of Mobility Mythsby Quinn Henoch.
Don’t feel obligated to use cardio as the only way to increase heart rate.
A dynamic series/circuit of exercises, combined with specific mobility work using active techniques such as loaded eccentricsand reciprocal inhibition (here and here), followed by some squatting with bodyweight or just the bar, will increase your heart rate just fine, not to mention both physically and mentally prime your system.
You get more bang for your buck.
For more on a proper warm up, including explanations of how to put it all together, check out my current lower body warm up right here as well as a great hip mobility exercisenot in included in my warm up video.
Also, Quinn Henoch (<— can you tell I have a little man-crush on him?) nails it in this episode of Mobility Myths about stretching.
And That’s That
I hope this helps in your journey to finding and perfecting your individual squat.
Remember, there is nothing to fear about the squat and there is no need to overcomplicate this foundational movement. Don’t forget to take advantage of all the resources provided in this article, as they are from some of the greatest minds this field has ever seen. Happy squatting!
Oh, and one more thing…knees drifting over toes is OK.
About the Author
Nicholas M. Licameli
Doctor of Physical Therapy / Pro Natural Bodybuilder
Every single thing he does, Nick believes in giving himself to others in an attempt to make the world a happier, healthier, and more loving place.
He wants to give people the power to change their lives. Bodybuilding and physical therapy serve as ways to carry out that cause. Nick graduated summa cum laude from Ramapo College of New Jersey with his bachelor’s degree in biology, furthered his education by completing his doctoral degree in physical therapy from Rutgers School of Biomedical and Health Sciences (previously the University of Medicine and Dentistry of New Jersey) at the age of 24, and has earned professional status in natural bodybuilding.
His knowledge of sport and exercise biomechanics, movement quality, and the practical application of research combined with personal experience in bodybuilding and nutrition allows him to help people in truly unique ways. Love. Passion. Respect. Humility. Never an expert. Always a student. Love your journey.




 Matthew Ibrahim is the Co-Owner & Lead Performance Coach of TD Athletes Edge in Salem, MA.
 Nicholas M. Licameli


