I know, I know…
I’m a dude.
What could I possibly have to say when it comes to the delicate intricacies of postpartum anything?
Well, as it happens, I’ve worked with many women during and after their pregnancies throughout the years, and have had pretty good success with mansplaining the inner workings of a uterus helping them understand that, whether they’ve given birth seven months ago or seven years ago, strength training can help with myriad of postpartum issues.1
*cue the trumpets*
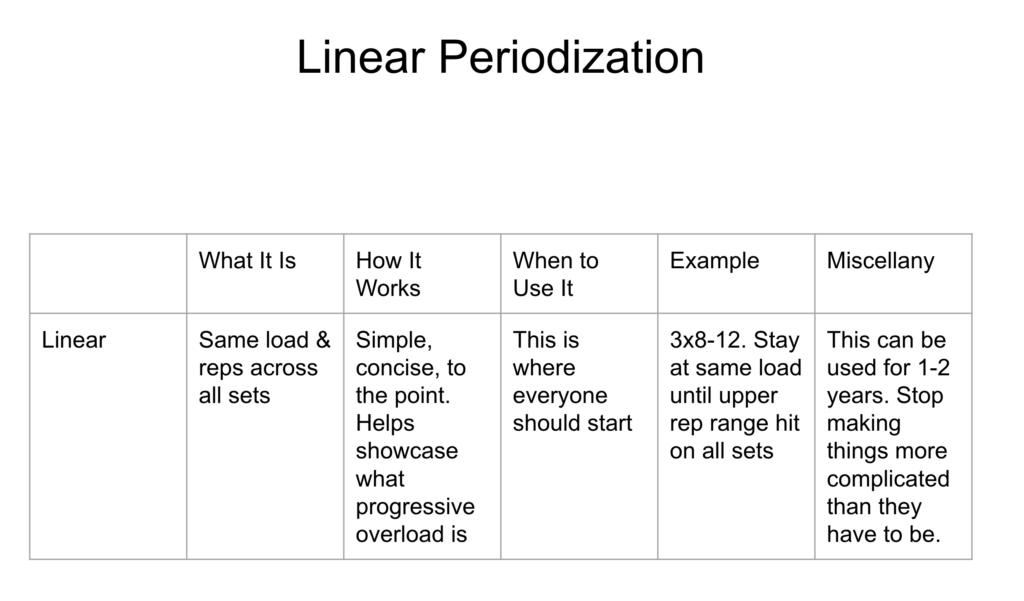
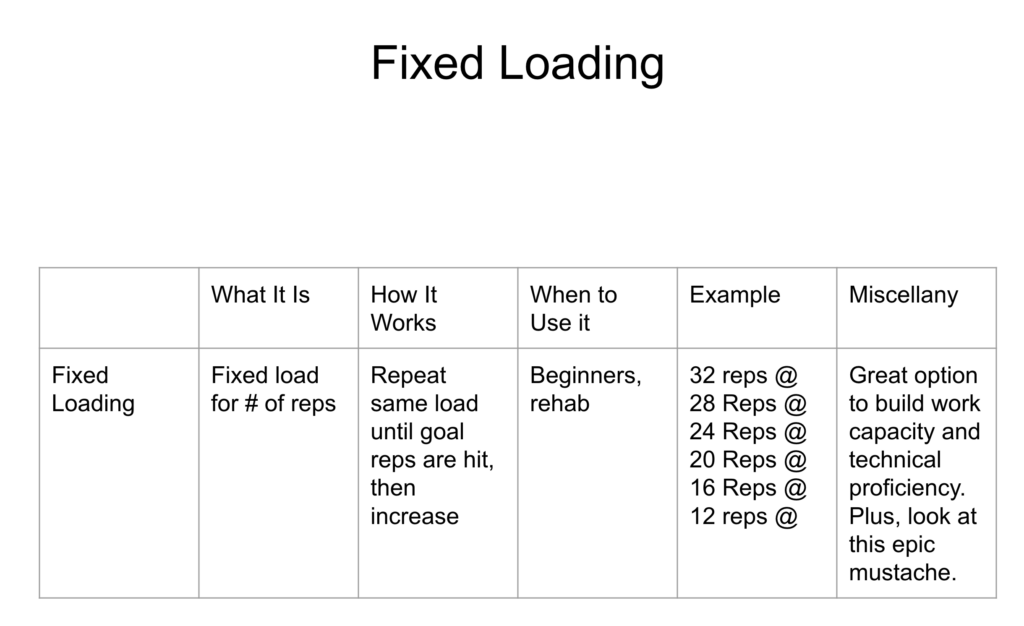
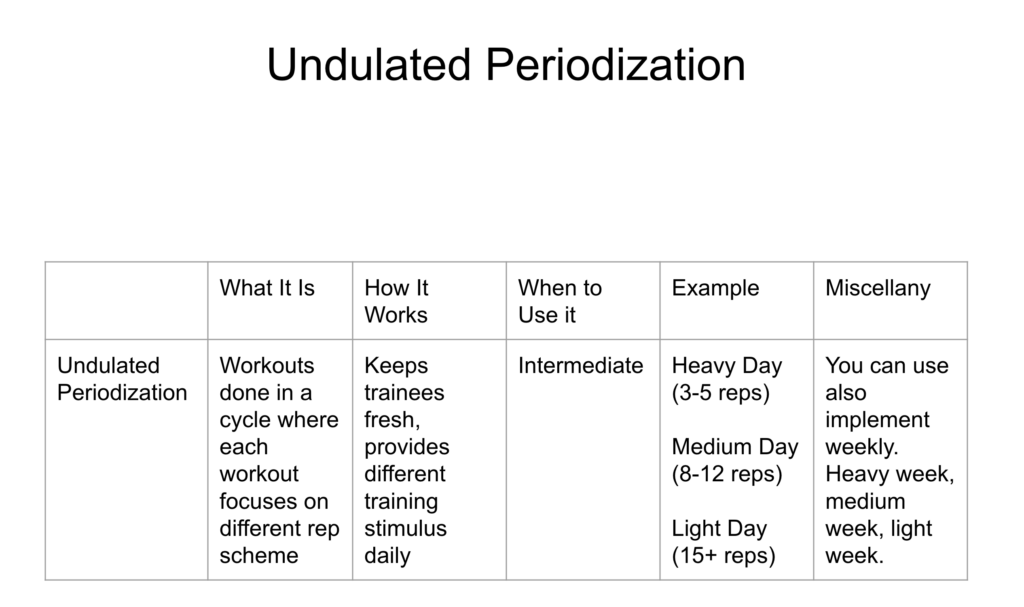
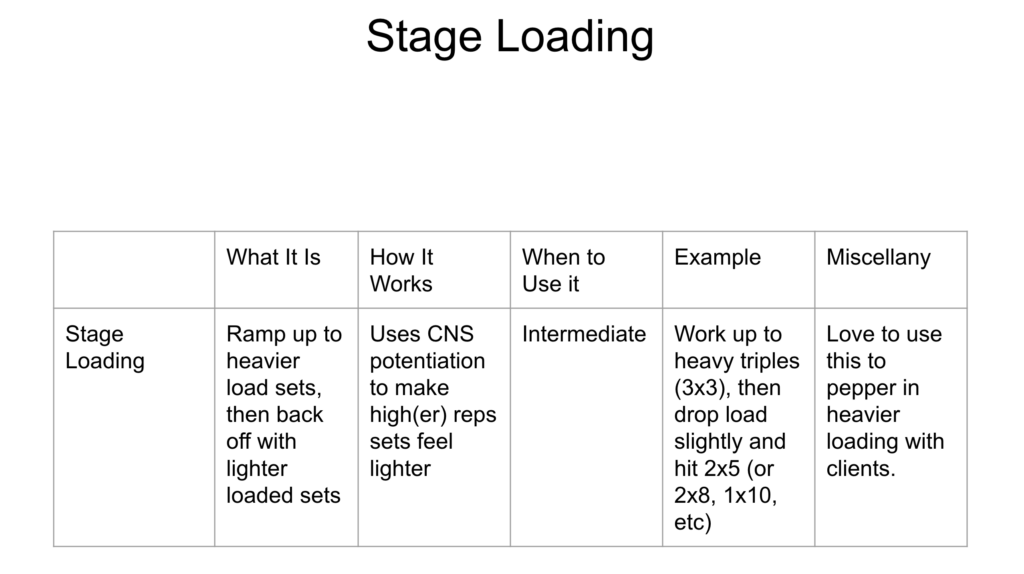
You Need to Lift Shit to Fix Shit
Just so we’re on the same page…
…when I say “lift shit” this DOES NOT insinuate anything close to maximal effort.
For starters: I’m not an asshole.
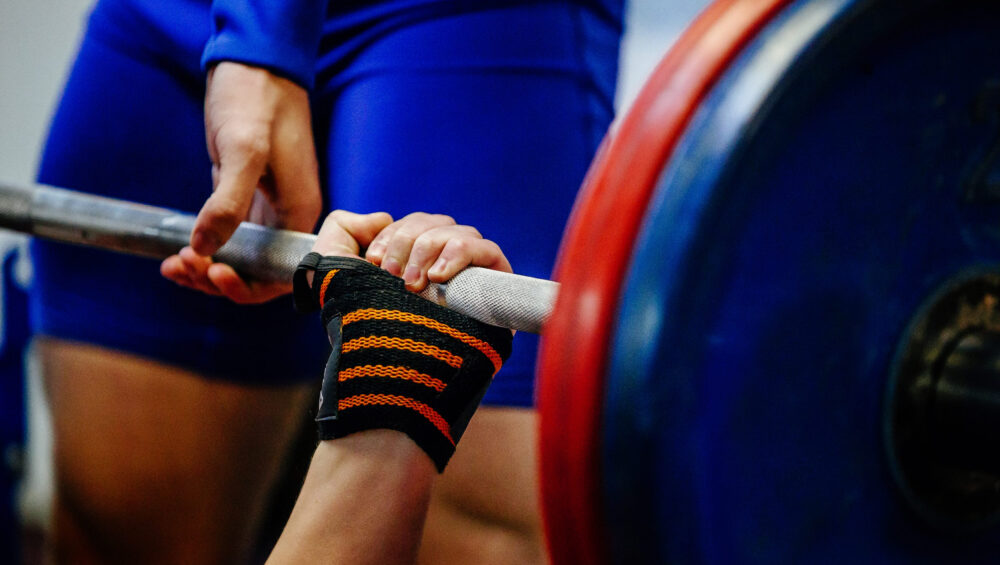
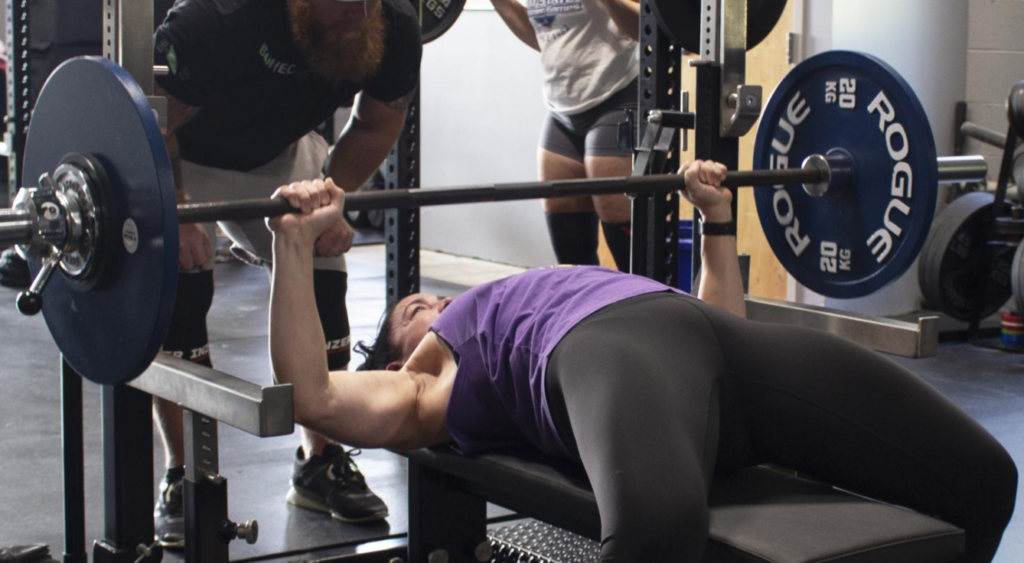
Secondly: All strength training is not powerlifting. It’s still feasible to have someone lift appreciable loads – even postpartum – and not assume I’m attempting to turn them into Sheila McDeadliftMyFaceOff.

via GIPHY
But more to the point: I’m not an asshole.
I understand, to the best of my Y chromosome having abilities, the intricacies and delicateness that coincide with the months postpartum. It’s not a time to rush back into things and to race oneself back to pre-pregnancy gym numbers.
The first few months are all about rebuilding the base (specifically to address the pelvic floor and diaphragm, to get the “core” connected again, and to progress from there).
After that, a person’s capabilities and foundation matter more than whatever time frame it takes to get them deadlifting appreciable weight again.
As far as the BIG no-no’s to avoid immediately postpartum:
- Plyometrics – burpees (please, stop), jumping, stairs, and running.
- Anything coming close to max-effort loading.
- Front abdominal exercises (planks, sit-ups, push-ups, leg lifts, or anything that makes the abdominals bulge anteriorly or uses the core to support a lot of bodyweight).
- FWIW: Any sort of Fight Club is out of the question during this time as well.

via GIPHY
It’s Not Just About Kegels
Kegel exercises are amazing, but as Dr. Sarah Duvall notes in her spectacular Pregnancy & Postpartum Corrective Exercise Specialist 2.0 course they’re often OVER used.
Or, more often that not…the ONLY thing used.
For many women their postpartum approach = kegels (and that’s it).
Alternatively, a more germane (and, not coincidentally, successful) approach to postpartum training is:
- Kegels
- Teaching a GOOD breath – focusing on the canister position.
- Cementing all of the above with “strength.”
Kegels are a fantastic (and proven) tool to use to help with pelvic floor dysfunction. Teaching them the right way (and when appropriate) helps to connect and educate the pelvic floor. As it stands, women who did dedicated pelvic floor training = 17% less likely to report incontinence.
However, when OVER used kegels can lead to an overactive pelvic floor. Compound that with the all too common scenario of very little attention being made toward the efficacy of positional breathing drills – I.e., emphasizing the canister position (pelvis stacked underneath the ribcage; or reduced rib flare) – and you have a recipe for disaster.
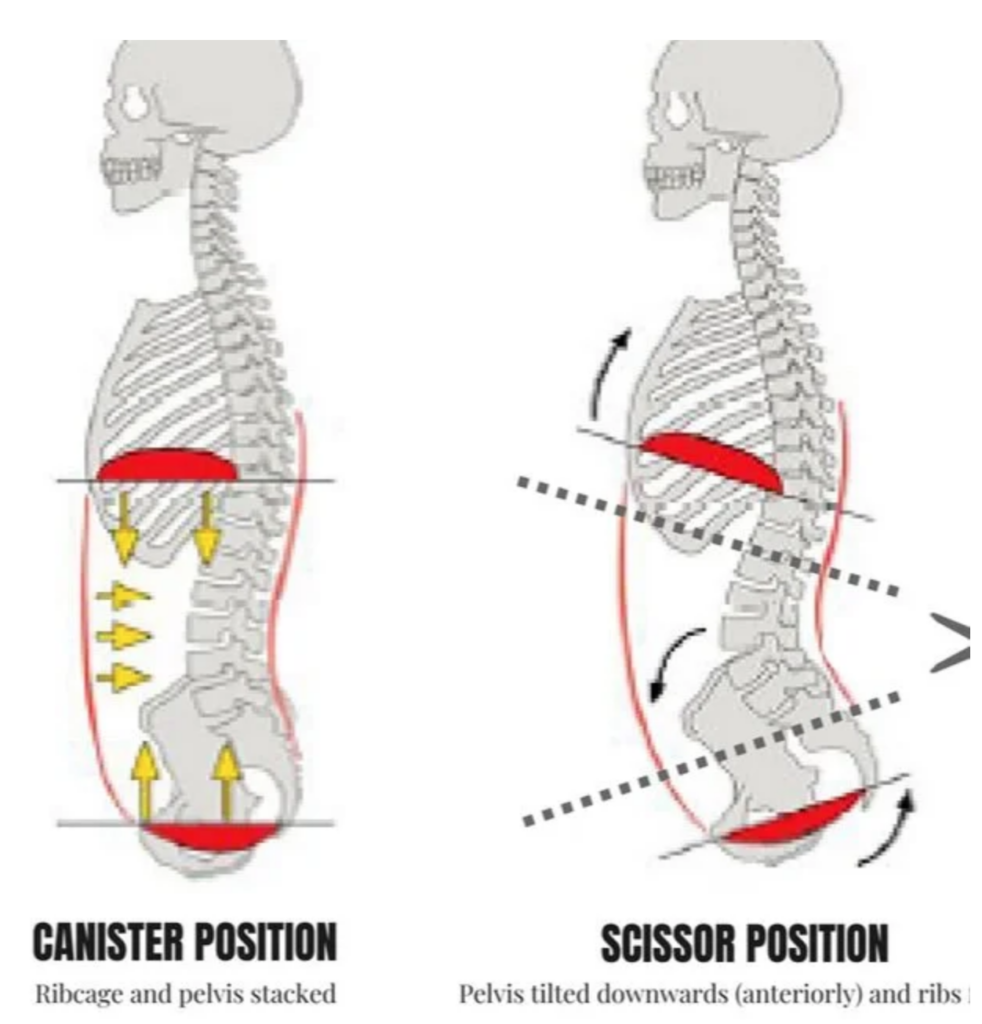
Photo on Left = Canister position.
Photo on Right = not that.
Positional breathing begins with teaching a GOOD inhale. This entails 3D (360 degree) expansion of the ribcage. With a good inhale the diaphragm contracts down and it able to “let go” and relax. Moreover, as Sarah notes in her course, every (good) inhale can push down on the pelvic floor which is okay.
Bearing down is one thing. This is not ideal.
However, with a proper inhale, the idea is to push the “ground floor of the house to the basement.” In other words: the inhale EXPANDS pelvic floor. Then, a full, accentuated exhale brings everything back to the ground floor.
For the visual learners out there this may help (graph taken from Sarah’s course):

Again to reiterate:
“Inhale = pushes down onto pelvic floor (get it to the basement)….exhale = RELAXES.”
Taking the time to really build context and to hammer home the importance of the canister position will be a home run for many (if not most) postpartum women.
A simple example would be something like a deadbug, performed with a full 360 degree inhale followed by a drawn out, full exhale (without aggressive bearing down of the abdominals):
Tony, Did You Forget About Lifting Things?
Puh.
Not at all.
Strength training is the part where we “cement” all of the above into place. It’s crucial to build pelvic floor awareness (kegels) as well as function (positional breathing drills). If someone is unable to do this right, I am NOT going to load them.
However, assuming the work has been done I see no reason not to.
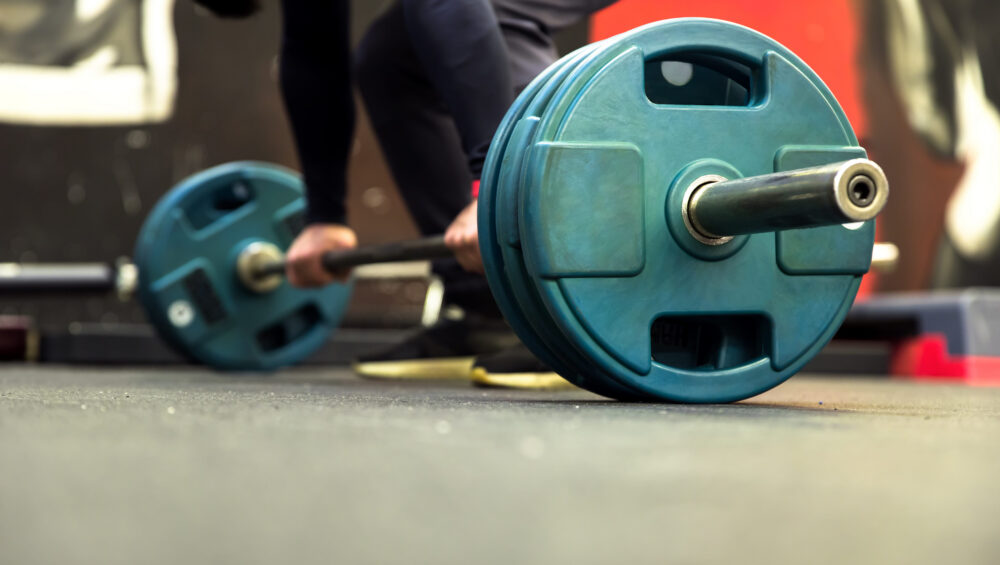
First we start with TIMING of the breath with the bodyweight squat. Inhale on the way down (pelvic floor expands and relaxes).
Exhale on the way down (pelvic floor comes back up and contracts).
Once that is mastered, then we can begin to THIS IS SPARTA. BACK SQUAT MAX EFFORT, BABY.
Just kidding.
I just use common sense and progress accordingly with something like Goblet Squats and always remain cognizant that I DO NOT want any aggressive bearing down of the abdominals and to keep IAP in check. The pelvic floor is just like any other muscle and needs progressive overload too.
Being postpartum is not a disease and I find it increasingly frustrating that many women are programmed into thinking that the only approach is with kegels and kegels only.
It’s a far more multi-faceted approach that requires attention to detail and dare I say…
…lifting shit.