In my career as a strength coach I’ve worked with numerous athletes and non-athletes alike dealing with back pain. And while much of the time my initial “go to” exercises are things like the McGill curl-up, birddogs, deadbugs, and various planks I also recognize that, after awhile, some people would rather wash their face with broken glass than perform another rep of any of those exercises.
Curl-ups, birddogs, and planks work. There’s no denying that. Coaching people up on those three movements alone and having them perform them on a consistent basis will clean up a lot of aberrant movement reduce pain in a symptomatic back.
However, it’s just, you know, they get boring after a while. As much as I’m a fan of those movements (and could care less how bored someone gets if it’s what they need to be doing to get better), part of my job as a coach is to help people not feel like a patient and to find other means to elicit a training effect.
I mean, raise your hand if this sounds familiar:
Athlete/Client:“Ready to train coach. What are we doing today?”
Coach:“You’re in for a treat. We’re getting after it with birddogs today. Holla!”
Like I said, it’s not to bemoan the birddog – it’s lovely exercise – but it’s not to say we can’t toss in alternative exercises that are just as conducive to working through low back pain AND more palatable for those looking to actually train.
HBT Front Squat March
Who Did I Steal It From? – a combination of Dr. Joel Seedman and MA based strength coach, Ryan Wood.
What Does It Do? – I’ve discussed the concept of HBT before in THIS article, but to reiterate:
“HBT = Hanging Band Training.
It’s exactly what is sounds like. You take some bands, hang some stuff off them, and do stuff. Because, science.
While at first glance it comes across as a bit gimmicky, HBT training does have a fair amount of efficacy. As Dr. Seedman explains in the article linked to above, the oscillatory characteristics of this brand of training provides a unique training stimulus that challenges stabilization, increases core demand, helps “excite” the CNS, and also has a bit of carryover to muscle gain due to the increase in time under tension.”
Germane to this exercise, the oscillatory effect of the kettlebells (or plates if you don’t have access to KBs) works wonders with regards to challenging the core musculature to stabilize and in helping to build a more resilient back.
The exercise itself can work in one of two ways:
1) If you have the space to do so, you can have someone unload a barbell from a rack and have him of her walk a specific distance.
2) Or, if you’re like me, and have a smaller studio, you can just as effectively have someone stand in place and march it out, like my client Dima is doing in the video above. Like a boss.
Key Coaching Cues: This is a fairly intuitive exercise. The KBs hanging from the bands is going to jostle the individual every which way if they’re too lazy and not CONTROLLING the barbell. The objective is to resist the movement of the KBs.
I like to tell my clients to “keep the KBs quiet.”
Some other things you want to be on the lookout for is too much leaning back and/or any excessive lateral flexion (side bending). The idea is to “stay tall” as one alternates back and forth from foot to foot.
You can either shoot for a specific time (say, 30-40seconds) or a specific number of steps. Give it a try and let me know what you think.
I hate the term “girl push-up.” I hate the connotation it breeds; that girls are weak and that they should do these kind of push-ups instead (performed from the knees). Coaches who use it are 1) lazy and 2) are definitely worthy of the stink eye.
But what about squats? Is there such a thing as “squatting like a girl?” Does the term equally make me want to toss an ax into my face? Well, not exactly. In today’s excellent guest post, NY based coach, Meg Julian, provides some insight on why, sometimes, there is such a thing as squatting like a girl.
I’d like to start off by saying that I’m truly honored Tony named his firstborn child, Julian, after me. I hope to inspire the masses as much as I’ve affected Tony. But I’m not here to talk about Baby Julian; I am here because of Baby Julian (yay!).
We are here to talk about why “squatting like a girl” can be different than squatting like a boy.
After working in a female-only gym for five years and training many females clients during the past seven years (not to mention being a woman myself), I’ve found that we often don’t hear about how tips for men might not work perfectly for women, because our bodies (shocker!) are different.
This is one major reason why when I ask new clients to squat, they often struggle to squat, or even look back blankly (really!) Why? Because squats can be complicated, and most exercise science was developed for men by men.
Photo Credit: T-Nation.com
And that’s no way to live, as a great squat can help women with overall strength and weight-loss, which are frequently among the goals I hear from clients.
So, whether you want to put an Olympic barbell on your back or just get in and out of a chair, you’ll want learn how to properly squat. Here are four important ways that women can improve their squat:
#1: Use Your Butt
Squatting is widely considered a phenomenal exercise for building your butt, but many women don’t effectively engage their glutes when they squat. Counter-intuitive, right?
That’s partly because most people sit for much of the day and thus over-stretch their posterior chain, which is the butt and hamstrings; we also tend to over-work the front of our bodies, rather than the posterior.
It’s no surprise, then, that the little elves in your muscles don’t stand a chance.
This condition is called “glute amnesia,” and it’s a term coined by back specialist Stuart McGill — I’m not kidding! If you don’t engage your glutes when you squat, the connection between your muscles and brain will fade, which will make it even harder to use your bum when you want to. In other words, if you don’t use it, you lose it.
To remedy this, the cue we often hear when squatting is to “sit back.”
But this often turns into a balancing act of:
Gripping the ground with your toes and hanging on for dear life;
Sticking your butt back;
Leaning forward and hoping to not fall over; AND
Doing nothing positive for your body.
Instead, I tell clients to pick their toes up off the ground.
Picking your toes off the ground, and putting the weight in your heels, makes the connection between the brain and posterior chain stronger. This is often what is meant by “sit back,” but our bodies tend to take the path of least resistance, so instead of truly using your glutes, it’s common to become a bit of a surfing expert.
Note from TG: Nice cue to get people to “feel” their glutes work and to understand their role in squatting. While I don’t want to speak for Meg, it’s not one I’d use long-term, especially if the goal is to lift more weight.
If this seems weird and awful, or you topple over, you’re probably not doing it incorrectly; you just haven’t built the strength yet. Keep trying. And you might want to practice over a bench until you get the hang of it.
#2: Redefine the Relationship Between Your Knees and Your Toes.
The misinformed cue we often hear is “Don’t let your knees come past your toes.”
The idea, again, is that your weight should be in your heels and mid-foot instead of being perched up on your toes. The cue has it’s heart in the right place, but it’s just misdirected, much like this meme:
But I love home; that’s where I keep my bed, food and dog.
The problem? Again, everyone is built differently. For example, if you have long femurs (thigh bones), it’s going to be better for your squat to let your knees come past your toes.
The focus, instead, should be on having your shoulders go straight up and down as you squat.
So instead of focusing on your knee placement, double-down on your efforts to keep your weight back, barbell over mid-foot, and your back upright.
#3 And One More Thing About Your Feet.
It’s common to be told “Squat with your toes facing forward,” but most women will feel more comfortable turning their toes out a bit when they squat. The female hips and the way the leg bones fit into them are built to be a little wider; you know, “birthing hips” and all.
So instead of focusing on your feet facing forward, focus on aligning your knees above your toes, and for women, this likely means turning your feet slightly outward — and your knees along with it.
Trying to force a more narrow stance or twist the toes in a direction they don’t naturally want to go will cause a lot of tension in the knees. It’s like trying to jam a drawer shut that’s off its runners — not pleasant.
This may be perfectly fine for some and even how most assessments are done, but it’s possible that this is not the ideal form during every workout. Just look at the way a little kid naturally sits in a sandbox (do they still have those?): knees are wide and toes are turned out.
Not sure how wide to point your toes? I recommend standing barefoot with your heels together on a smooth surface like wood, and squeeze your glutes. Then, separate your feet until your heels are under your shoulders. This is likely the most comfortable position for a squat for your body. Play around and see what feels best.
#4: Show Your Ankles Some Love.
Tight calves can lead to a lack of dorsiflexion, which is the ability to flex the toes up toward the shins. It’s a problem I often see in women who wear high heels or flip flops and never stretch.
Lacking range of motion in your ankles is terrible for nailing a squat. By limiting the bend, your body will find a way to compensate by flattening arches, caving knees in toward each other or leaning too far forward.
Here’s a simple test of ankle mobility: Place your toes four inches from a wall. Without lifting your heel, can you bend your knee until it taps the wall. If yes, you’re good! If no, keep practicing twice a day until you can. Keep it up until you can consistently hit a wall. In a good way.
Wrapping It Up
Most women have goals of losing weight, improving their backsides and getting stronger. While these goals are a bit vague, I do have a specific answer: Squat as much as you can handle — after you master squatting like a girl.
Author’s Bio
If you enjoyed what you read, want to learn more or just need to know where to send the hate mail, visit me HERE, where you can subscribe to my weekly email dedicated to tips like these and improving technique and strength for obstacle course racing. You can also follow me on Instagram HERE.
Megan Julian is a New York-based NASM Certified Personal Trainer, with additional certifications such as, FMS L2, NASM-CES and CFSC. She specializes in preparing brides for the big day, helping obstacle course racers improve their times and working with clients of all ages overcome injuries. In her free time, she enjoys running through the woods, jumping over walls and crawling under barbed wire — sometimes at events such as the World Championship Obstacle Course Race in Canada.
Of course, I love the Goblet squat. As you should too. It’s a wonderful little exercise that serves as a “catch all” to groove a better squat pattern. And on top of that…it’s super versatile. As you’ll come to realize after reading this excellent guest post from Shane McLean.
The Goblet squat has revolutionized the way the squat is being performed and taught throughout the world. If don’t know what a Goblet squat is, I’m getting Dan John to come over to your house and slap you upside the head.
If you don’t know even who he is, I suggest you Google him. Pronto.
Dan John stumbled upon this excellent exercise by chance.
“Years ago, I was faced with teaching 400 athletes to squat correctly. I attempted move after move and lift after lift, yet I failed every time.
I saw glimmers of hope from teaching one kid the Zercher squat and a few picked up the pattern when we lifted Kettlebells off the ground but nothing was really working.
The answer was somewhere in between a Zercher and a Potato squat. It came to me when I was resting between swings with the weight held in front of me like I was holding the Holy Grail.
I squatted down from there, pushed my knees out with my elbows and behold, the goblet squat.” (1)
I guess you can say he choose wisely.
Thanks to Dan’s discovery people in gyms everywhere have discovered the joys of squatting. The Goblet squat is an exercise that’s great for beginners and advanced exercisers alike.
But what makes the Goblet squat so good?
Holding the weight anteriorly encourages you to stand up straighter, get that upper back tight and puff out that chest which sets the table for good squat. Furthermore, the weight acts as a counter balance that encourages you to sit between your legs and not over your knees.
For most gym-goers, the Goblet squat may be the only squat you’ll ever need. It beats squatting on a stability ball by about a trillion. Why do people do that?
Now that I’ve established the Goblet squat is the bomb, let’s look at some variations so you can squat like a boss.
1. Goblet Box Squat
If it’s been a while since you’ve squatted or you’ve never done a Goblet squat before, this variation is a good starting point. Reducing the range of motion combined with a reference point with the box will help you groove proper technique.
Pairing this with single arm press/pull combined with a mobility drill works like a charm. For example:
1A. Goblet Box Squat
1B. Single Arm Row
1C. Half Kneeling Hip Flexor Stretch
2. KB Goblet Squat with Lowering
Tony calls this lowering but I’d prefer to calling this a biceps curl. Any excuse to work on the guns, right?
The pause at the bottom of the squat with the ‘curl’ helps you ‘own’ the bottom position and creates extra tension in the anterior core and the posterior chain. It’s going to tickle the legs a little also.
Pairing this with a suitcase carry will provide a greater challenge for your lungs and grip strength. Try this little finisher that I borrowed from Dan ‘the man’ John.
How do you make Goblet squats more enjoyable? By adding a looped resistance band of course. Adding a band to the kettlebell helps you control the eccentric portion of the movement and provides extra resistance on the concentric portion also.
Furthermore, some gyms don’t have big enough kettlebells to challenge advanced lifters and adding a band helps…… or hurts depending on your perspective.
This exercise can be done for straight sets but if you’re feeling ambitious you can pair this with a little exercise called the Goblet lateral walk. For example
1A. Goblet squat with band 8-12 reps
1B. Goblet lateral walk 8-12 steps each side
1C. Your grip will love you
4. Goblet Squat 1 ½
Adding a half a repetition to this exercise will make you hate life but will increase tension in your legs, anterior core and the posterior chain. These factors will give you a lower body of steel.
This exercise can be used as a finisher at the end of your leg training or can be super-setted with a core exercise for a rousing good time. For example:
1A. Goblet squat 1 ½
1B. Push up position plank
5. TG Addition: Goblet Elevator Squats
A nice progression for 1-1/2 rep Goblet squats would be elevator squats. I learned this one from my good friend Ben Bruno.
Here you’ll squat down into the bottom position, come 1/2 way up, back down again, then 3/4 of the way up, back down, and then stand tall. This is a great option for those who A) can’t think of any other way to make them hate life more and/or B) have limited options in terms of load you can use (the increased time under tension is a leg killer).
Wrapping Up
The Goblet squat makes it possible for most people to squat with good form and to reestablish the squat pattern for those who have ‘lost’ it. This also doubles as an excellent mobility exercise for the lower body.
Start choosing squats wisely. Incorporate the Goblet squat into your routine pronto and make Dan a happy man.
About the Author
Shane “The Balance Guy” McLean, is an A.C.E Certified Personal Trainer working deep in the heart of Texas. Shane believes in balancing exercise with life while putting the fun back into both.
Teaching a beginner how to squat well can be challenging. There’s no denying there are a lot of moving parts that can derail our best efforts to do so.
My intention of this quick-n-dirty post isn’t to break down the squat in its entirety. For that I’d encourage you to check out Greg Nuckols’ How to Squat: The Definitive Guide.
It’s basically the War and Peace of squat biomechanics and technique. Except, you know, not written by a Russian.
Instead, my goal today is to hammer home a few candid points when working with beginners on their squatting technique.
1. “Beginners” in this sense could mean a 13 year old who’s never touched a weight or a 57 year old who’s had a few decade hiatus. And everything in between. Male, female, athletes, non-athletes, centaurs, you name it.
2. The squat is a basic human movement pattern. Unfortunately, in today’s world, we don’t move as much as we used to, and subsequently many struggle with the movement. Oftentimes one’s only source of physical activity is if or when they get their butts to the gym.
And even if they do that, there’s no guarantee they exercise in a range of motion below a certain degree of hip flexion.
There’s truth to the common phrase “if you don’t use it, you lose it.”
This isn’t to insinuate that everyone has to squat to a certain level or that you’ll lose some street cred if you happen to not squat ass-to-grass. As I’ve repeatedly stated on this blog everyone is different (leverages, anthropometry) and it’s silly, nay, fucking moronic to think everyone has to squat deep.
So whenever I work with a beginner or someone coming off a significant injury it’s on me – the coach – to take the time to groove a solid squat pattern.
This rarely (if ever) involves placing a barbell on someone’s back on Day #1.
Why?
Because I said so….;o)
Many people lack the requisite t-spine (extension) and shoulder mobility (abduction/external rotation) to hold a barbell in that position without it feeling weird of wonky.
Many lack the kinesthetic awareness to sit back (and down) in a fashion that emulates a squat.
There’s no Golden Rule that we have to load people right away.
I’m more concerned with teaching proper position.
It’s that last point – teaching proper position – that’s a game changer in my eyes. You see, many people tend to “sit” in a state of perpetual (excessive) extension where their pelvis tilts forward, otherwise known as anterior pelvic tilt (APT)
To be clear: APT is not bad or wrong or needs to be fixed. It’s normal. However, when it’s excessive it not only places more strain on the spine (particularly the facet joints), but it also leads to poor alignment where the diaphragm and pelvic floor point in different directions.
Within PRI (Postural Restoration Institute) circles (<— total nerd fest) this is called the “Scissor Position.” What we’d like to strive for is what’s known as the “Canister Position,” where the diaphragm and pelvic floor are aligned or stacked on top of another.
Another way to think of it, is something I stole from Dr. Evan Osar.
“Think of your pelvis as one ring and your rib cage as a bunch of more rings. What you want is to stack those rings on top of one another.”
Mike Robertson is also a fan of this approach and even goes a step further and notes the importance of reaching, and how that can have a positive effect on one’s overall positioning. When we “reach” we nudge ourselves into a little more posterior pelvic tilt (back to “neutral”) and we then achieve proper diaphragm/pelvic floor alignment. Bada bing, bada boom.
If all of that comes across as me speaking Elvish, watch this video.
Plate Loaded Front Squat
The plate loaded front squat is now my “go to” squat progression when working with beginners. It’s something I’ve used for years for a few reasons:
1. The plate serves a counterbalance as one squats down towards the floor helping them to learn proper torso positioning and balance. It’s makes things infinitely easier with regards to sitting back & down into a squat.
2. Pressing the plate out front also helps to better engage the anterior core musculature. This is so crucial. I can’t tell you how many times people have come in for an assessment telling me stories of trainer upon trainer telling them how “tight” they are because they couldn’t squat past parallel. Prior to coming to me they had spent years, years stretching and working on any number of hip mobility drills.
Thing is: they weren’t tight. People rarely are. Or, at least it’s rarely ever that cut and dry (tight vs. not tight). In reality most are weak and unstable. For many, their nervous system is putting on the brakes because it perceives a lack stability. By having trainees press the plate out front it automatically forces the core to fire – thus providing more stability. And miraculously they’re able to squat deeper.
And I come across as the next Professor Dumbledore.
Moreover, it was Mike Robertson who pointed out to me the added benefit of the plate loaded front squat. The “reach” results in better diaphragm and pelvic floor alignment.
It teaches people context, and to own the “canister” position (preventing the ribs from flaring out). That way, when they progress to barbell variations, they’ll have a better understanding of what we’re after and what will (in all likelihood) allow them to perform at a higher level for longer periods of time reducing the risk of injury.
Want More Mike Robertson Nuggets of Programming Badassery?
I owe much of my programming savvy to Mike Robertson. It’s little nuggets of wisdom (as demonstrated above) that helps to separate him from the masses. I’ve always enjoyed his approach and way of explaining things. There aren’t many coaches who have the innate ability to take complex topics and “dumb them down” for the masses (like myself).
His excellent resource, Physical Preparation 101 is currently on sale at $100 off the regular price from now through this Friday (2/10).
It’s basically his entire philosophy on program design. 12 DVDs of Mike Robertson knowledge bombs. I have zero doubts the money you invest in this will pay for itself tenfold in client retention.
At the expense of sounding like an uber meathead, squats pretty much solve anything. You want to be stronger? Squat. You want more muscle? Squat. You want to lose fat? Squat. You want to beat Captain America in an arm-wrestling match? Squat.
About the only thing squats can’t do is help you grow hair, make you an omelet, and cure cancer1.
There’s a reason squats are a staple in most weight training routines, and today’s guest post by strength coach, George Kalantzis, breaks down the proper progressions most people should consider when starting for the first time.
Enjoy.
The Squatzzzz
“If you want bigger arms- squat. Squatting makes everything grow.”
Sergio Olivia, 3 time Mr. Olympia, on offering advice on how to get bigger.
Squatting has been around for centuries. It is one of the primary movements that Dan John says can impact your life, and also one of the best movements for mass strength and muscle development. Yet unfortunately squats are still one of the most neglected and butchered exercises in the gym.
But Why?
Squats are tough and working hard separates the strong from the weak. Squatting heavy stresses the entire body and it takes a lot of will power and strength to put something heavy on your back, drop down, and stand back up. Therefore most people neglect them altogether.
Then you have some people who claim squats are bad for your knees and stick to leg extensions and leg presses. While it is true that squats can place a lot of stress on the knees, it is typically the form and amount of volume that is the cause of knee pain.
In fact, from a exercise science point of view leg extensions can actually place more stress on the knees than squats because they are an open chained exercises. Open chained exercises like leg extensions cause the quadriceps to contract and pull on the knee ligaments and surrounding muscles without counteraction of the hamstrings. Squats actually recruit both the hamstrings and quadriceps.
Research (Escamilla, 98) supports that squats generate twice as much hamstring activity as leg presses and leg extensions. That same research suggests hamstring recruitment is advantageous to enhancing knee stability and functional capacity of the hips. Squatting does not sound that bad now does it?
Ok, I’m Ready Where Do I Start?
It is always important to start with an assessment to figure out where the you will stand in reference to squatting. Tony wrote an in depth post on that HERE.
Mobility Drills
After establishing a baseline, it is time to begin start preparing the body to squat. Starting with some light soft tissue work and warm-up drills will help prepare the body for full ranges of motion needed to squat and prime the nervous system.
Most people have a hard time reaching full depth in a squat and I have found that it is usually a lack of mobility in the areas of the hips and ankles often leads to compensations in the squat..
Core Engaged Deadbug
A deep squat requires proper pelvic position. If you arch your back to hard during a squat , your femur will have a hard time moving around in the hip socket. This is often the cause of the butt-wink.
A core engaged deadbug will help you learn how to keep the ribs down and control the pelvis which are needed for a good squat pattern.
Wall Hip Flexor Mobilization
This drill really teaches you how to keep your glutes tight, extend the hip and flex the knee at the same time to get a deep stretch in the quads. You should focus on getting the range of motion through your hips and not lower back.
Kneeling Glute Mobs
I love this mobilization drill because it really looses up the posterior chain and allows you to safely work on hip internal rotation without cranking on the knee.
Ankle Mobilizations Drill
An often-overlooked area of squatting tends to be the ankles. In order to squat to full depth the ankle needs around 4 inches of dorsiflexion. If the ankle is lacking the appropriate mobility, you may see yourself coming up n your toes, or not hitting appropriate depth.
Squat To Stand With Reach
By the time you have complete the other drills your body should be primed to squat. The squat to stand synchs the entire body and recruits all the muscles needed to perform a good squat. If you have a hard time getting into this position, you may no the ready to squat to full depth.
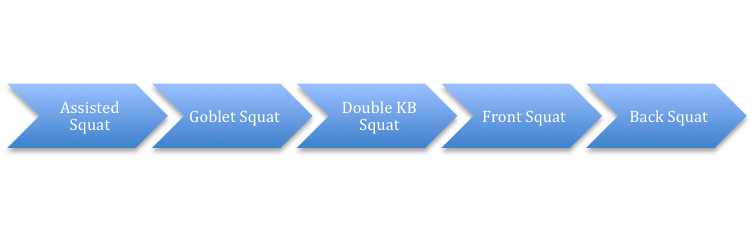
Assisted Squat
Assuming no pain or restrictions are present a great place to start is an assisted version of the squat. There are many ways you can do an assisted squat, but I like using a suspension trainer for assistance.
Holding a suspension trainer allows the trainee to work on static stability and groove a great pattern. Make sure the trainee maintains a neutral back position and uses as much assistance as needed in order to get to the bottom position.
Bodyweight Squat Versions
Once someone has mastered the assisted squat, it is time to move onto a bodyweight squat. Here you can really learn how to squat to full depth and drive up under control.
Sometimes people will have trouble with their heels coming up of the ground. If that is the case, you can create a little heel lift with plates or shoes to help the body recognize how to sit back onto the heels and reduce coming up off the floor.
Another common error for someone just learning to squat is a knee collapse. A great trick for that is to put a mini band around the knees. The bands feeds into the bad movement pattern by pulling their knees farther in and the body reacts by correcting the movement.
Goblet Squat
For most people, a goblet will be the basis of a squatting program. Legendary coach Dan John says that goblet squat is all a lot of people will need and there is a good reason behind that.
Grab a Kettlebell or dumbbell and hold it close to your chest. With your elbows pointing down, lower your body into a squat. Allow your elbows to be inside your knees and put pressure on the outside of your heels to help keep your knees out. Return to the starting position.
Many people are under the assumption that the Goblet Squat is just this plain ol’ vanilla squat variation that offer no variety. Au contraire! There are any number of ways to make it more challenging.
Goblet Squat Against Wall
Cannot seem to keep your back straight and knees from caving in? Try the goblet squat against the wall. Face a wall with your feet around 6-12 inches away from it and work to actively pull down into the squat.
Start further away and work closer to the wall, as you get more comfortable with the position.
Goblet Squat With Pause
Mastered the regular goblet squat? No problem, try a pause in the bottom of the squat. Pause reps will keep you honest, and really challenge your strength because you cannot rely on the momentum to pop back up from the bottom.
Goblet Squat With Heartbeat
This is one of my favorites to use with people, and it is one version that is not used that much. I first saw it from Mike Robertson when I was learning progressions for group training. It is great for people who have shoulder issues and really challenges the core.
Offset KB Squat
Holding a kettlebell on one side of the body will expose any asymmetries from side to side and really teach the body to own the position. Try to really focus on driving through the entire foot rather then shifting to the side of the kettlebell.
Double KB Front Squat
It only makes sense that once you have mastered the above it is time to load up. The double KB front squat is a great squat version because it really teaches you to sit down rather than back and down.
Essentially what you get is all abs and quads without demanding mobility requirements. It can be very humbling if you have never tried this before.
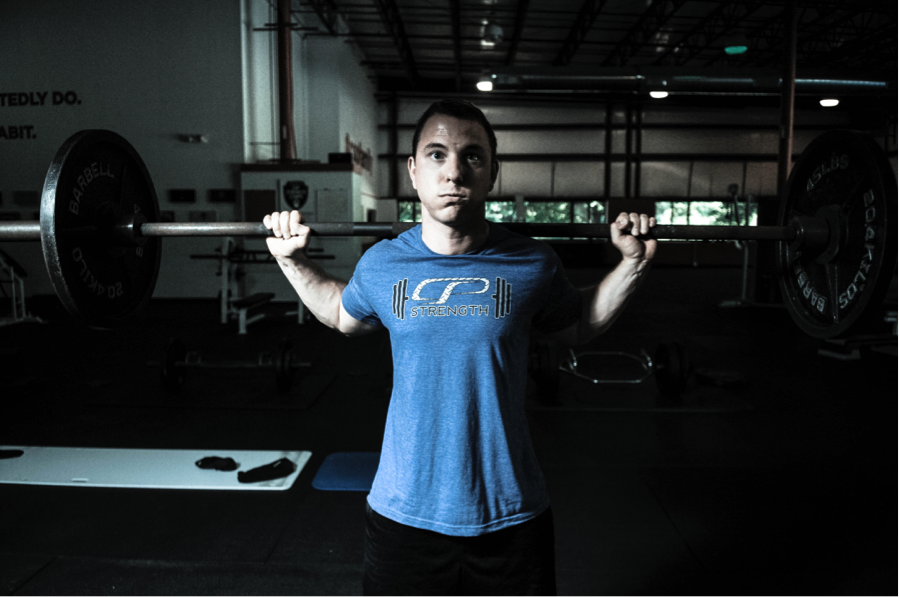
Front Squat
If you have become comfortable with the KB front squat and are ready for more of a challenge it is time to move on the barbell front squat.
Just like the KB, barbell front squats are all abs and quads. They are great because you have to really sit down into the squat rather than sit back or you’ll loose the bar. Due to the position of the bar your body must learn to stabilize the core instead of using back muscles to stand up. If you constantly get stuck hitting depth on a back squat this is a great exercise for you.
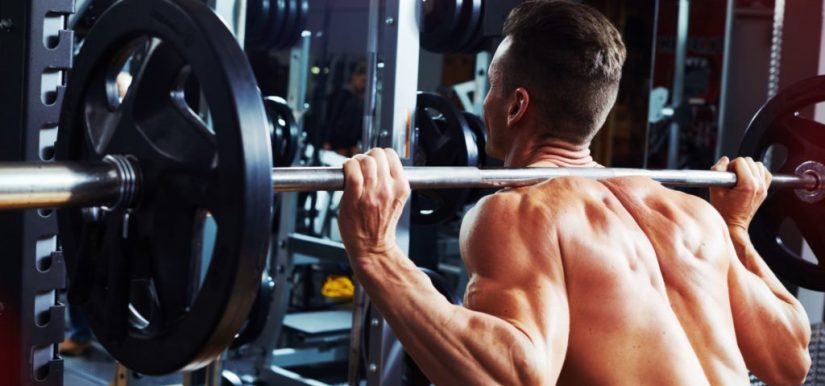
Back Squat
At this point, we have covered a lot of information on squatting. The back squat requires tremendous strength throughout the quads, hamstrings, glutes, hips, abs, and back. There is a reason why most people mess the exercise up or neglect it all together. If you have truly mastered the above exercises then it might be time to try a back squat out.
If you want to learn how to set-up, Tony wrote an awesome post HERE.
Conclusion
Squatting is a lot tougher then it seems. Consider hiring a coach for help on some of the barbell work, and if you are just starting out, goblet squat variations will surely get the job done. Try not to be a hero and start with something that is in between.
Quick things to consider before squatting:
If it hurts, you should hire a coach for an assessment and or see a qualified physical therapist.
Not everyone is made to squat to full depth or made to squat.
Squatting with a bar is not for everyone
When you first start out, you will not need that much weight, typically 45-55 % of your true max. Working on technique and conformability with the different squatting positions should be your first goal before trying more advanced versions.
References
1) Escamilla RF, Fleisig GS, Zheng N, Barrentine SW, Wilk KE, Andrews JR. Biomechanics of the knee during closed kinetic chain and open kinetic chain exercises. Med Sci Sports Exerc. 1998 Apr;30(4):556-69.
About the Author
George began his time at Cressey Sports Performance as an intern in the fall of 2013, and returned in 2014 as CSP’s Group Fitness Coordinator, overseeing all Strength Camp coaching and programming responsibilities.
George is a veteran of the United States Marine Corps and was awarded an honorary discharge after eight years of service. He possesses an MBA from Southern New Hampshire University and is currently attending massage school to become a licensed massage therapist.
Outside of CSP, George maintains a fitness-related blog that can be found at www.sgtkfitness.com.
Another fantastic guest post today from Shane McLean. This time he tackles the importance of unilateral strength training and offers some neat ideas as to the best accessory movements to compliment the “big 3.”
Don’t you love “that” guy who always stands between you and the dumbbells while doing single arm curls and making faces only his mother could love? What if I told you that he’s actually on to something, minus the faces and grunting?
Bilateral exercises (not biceps curls) should form the foundation of your strength program because this is where you’ll get most of your gains. However, unilateral training often gets neglected in the quest to get bigger and stronger because it’s just not as sexy (or cool) as a big squat, deadlift or overhead press.
However, unilateral training will help you get stronger, improve the big lifts (by shoring up weakness) and provide the following benefits.
Reduce Muscle Imbalances
Due to activities of daily living almost everybody has a dominant and non-dominant side. For instance, carrying more groceries on one side over the other over time may get one arm stronger.
During bilateral exercises such as a press or squat variation, your dominant side can pick up the slack for the weaker side.
Have you ever seen a lifter struggle to lock out one side over the other during a barbell bench press? I rest my case. Improving your “weaker” side will reduce your injury risk and help increase overall lifting numbers.
Improved Muscle Recruitment
Unilateral training makes you work harder and recruit more muscle fibers to perform the exact same movement, such as a split squat.
Taking one leg out of the equation forces your abductors and core to stabilize your pelvis while the working leg performs a split squat. Working more muscle with less weight will help correct strength imbalances between sides, also.
Core Work Without Crunches
When training unilaterally, you automatically throw your body off balance, forcing your core muscles to engage in order to keep yourself upright.
Trust me when I say that’s a good thing.
And we can double-down on the core training ante by utilizing offset loading:
Programming Guidelines
Unilateral exercises are best performed as an accessory movement after your big lift for the day.
Choose one or two single limb movements per session and perform three to four sets on both sides. The repetitions performed will depend on your goal.
For example:
Strength: 4 – 6 reps
Hypertrophy/Fat Loss: 8 – 15 reps
If you have a strength or muscle size imbalance always start with the weaker/smaller side first and let the weaker side determine the weight/reps you do on the stronger side.
Without further ado, here are my top two accessory exercises you should be doing to improve your squat, dead lift and press numbers. Sorry, this is a biceps curl free zone.
1) Deadlift
Suitcase Carries
Not only will carries change your life in three weeks, according to Dan ‘the man’ John, they can strengthen grip imbalances between hands which can be a limiting factor when pulling heavy from the floor or opening the pickle jar.
When you’re doing carries (you do, right?), pair them with a movement that doesn’t demand a lot of grip strength, so you can get more out of it. For example:
1A. Goblet squat/press variation.
1B. Suitcase carry- (25-50% of your bodyweight) 30 steps one hand then 30 steps with the opposite hand.
Form considerations – cues “shoulders down and back” or “chest up” work well here. Checking your form in a mirror will help if you having trouble knowing if you’re overcompensating or not.
Front Racked Kettlebell Bulgarian Split Squat
These were first introduced to me by Anthony Dexmier to improve my pulling ability from the floor. Let’s just say after doing them, we weren’t the best of friends.
Hardcore dead lifters knows that hip mobility, upper back strength and leg drive are essential elements for pulling heavy, and this exercise covers all those bases, if somewhat brutally.
Pairing this exercise with a single arm row variation is a real upper back whammy that you’re sure to enjoy. For example
1A. Front racked kettle bell elevated split squat – 12 reps on each leg
1B. 3 point dumbbell row – 12 reps on each arm
Form considerations – Perform a bodyweight elevated split squat and notice where your big toe is, and then place weight plate in front of it. This will give you a reference point and shorten your set up time between sets. This is courtesy of the one and only Jordan Syatt.
Keep a nice tall chest and your wrists in neutral during this entire movement and smile through the pain.
2) Bench Press
Landmine Press
The single arm landmine press is a mix between a vertical and horizontal movement which makes this great for individuals who lack the shoulder mobility for overhead pressing and for those looking to improve their press numbers.
Note From TG (to Shane): How could you not include a link to THIS article I wrote discussing how to assess overhead mobility and drills to help improve it?
Why Shane…….WHY?!?!?
The beginning of this exercise (initial push of the shoulders) is the hardest part of the movement. This will assist you with pushing the bar off your chest during the bench press or pushing the barbell overhead from a dead stop. The extra core work doesn’t go astray either.
This press can be done from a variety of positions. For example, it can be done standing, tall kneeling and this half kneeling variation courtesy of Eric Cressey:
Pairing this landmine variation with a hip flexor stretch works well and provides an active rest between sides and sets. For example
Form considerations- Make sure the barbell is close to the front of your shoulder and actively squeeze the barbell. This provides Irradiation, allowing you to produce more force and lift more weight. This also turns on the rotator cuff, which helps with shoulder stability.
Single Arm Dumbbell Floor Press
The reduced range of motion of the floor press makes this a great triceps builder (when the elbows are close to your side) and will assist you in getting stronger with the lockout part of any press variation.
The single arm variation will turn on your core and shoulder stabilizers due to the offset load that can get neglected during bench/overhead pressing. It’s a shoulder saver because it eliminates the lower half of the press where the shoulder is externally rotated and nasty things like shoulder impingements can happen.
Pairing this with a side plank or a suitcase carry gives your shoulders and core the extra work they deserve. For example
1A. Floor press
1B. Side plank variation 30 sec/ Suitcase carry – (25-50% of your bodyweight) 30 steps one hand then 30 steps in the opposite hand.
Form considerations- Grip the dumbbell tight or strangle the handle and keep the elbow close to your side but not touching. Touch the entire upper arm to the ground at the start of each rep.
3) Squat
Single Leg Negative Calf Raise
It’s a common issue to lack ankle mobility as we wear shoes that inhibit the movement of the ankles, like wearing high heels, for example. The ability to dorsiflex the ankle (how far the knees can go over the toes without raising the heel) can get compromised and this can show up in the squat.
As the squat movement has to come from somewhere, lacking dorsiflexion can negatively affect the joints further up the kinetic chain especially the knee, and who hasn’t had sore knees (and everything else) at the end of an intense squat session?
If hammering away at ankle mobility isn’t working for you, try this single leg negative calf raise drill from Dr. Ryan DeBell before your squat session. This will help with ankle dorsiflexion under load.
Form considerations- Having something solid to hold on to is a must. If you have pain bending the knee during this drill, please use a pain free range of motion. Do 5-10 reps on each leg before you squat. Your knees will thank you.
Barbell Reverse Lunge- Front Squat Grip
Most lunge variations are interchangeable because they work on knee stability (knees that go out instead of in) and core (reduced base of support) hip mobility (active stretch of the hip flexors) and help build your quad strength and size. Sounds like everything a good squat needs, right?
This variation does this and more. The front squat grip works on your anterior core upper back strength and thoracic mobility which are also needed for a strong squat.
Pairing this with an upper back or anterior core exercise in a superset works well. For example
1A. Barbell Reverse Lunge – Front Squat Grip – 8-12 reps on both legs
1B. Chin up
Or
1A. Barbell reverse lunge- Front squat grip 8-12 reps on both legs
Form considerations- Start on the light side until you nail the technique and feel confident that you’re not going to bite the floor. Keep the ears away from the shoulders and maintain an upright torso during this exercise.
Wrapping Up
Don’t forget about unilateral training when it comes to getting bigger, stronger and more awesome. Including these exercises into your routine will improve your lifting numbers and overall balance and will help keep you off the lifting DL.
You can throw in some single arm curls (for the girls) to keep Ron happy, if you must. J
Author’s Bio
Shane “The Balance Guy” McLean, is an A.C.E Certified Personal Trainer working deep in the heart of Dallas, Texas.
No, Shane doesn’t wear a cowboy hat or boots. After being told that his posture blows by Eric Cressey, he has made it his mission to rid the world of desk jockeys and have fun while doing so.
After all exercise is fun and never a “work” out.
You can follow Shane on Twitter HERE, and Facebook HERE.
I often joke I’m the worst handyman in history. Something breaks in our apartment? I’m the first one calling the landlord. A picture needs hanging? My wife is the go to aficionado in that realm.
A task calls for a Phillips screwdriver? Well, I’ll hand you a Phillips screwdriver. I’m not that much of a moron.
Suffice it to say: I am not great at fixing things. As a matter of fact – and at the expense of losing a few points off my man card – the risk of me setting a fire increases exponentially with the arduousness of the task being asked of me.
Replace a knob on a cupboard = relatively safe. The cat may end up with her fur singed, but the building is still standing.
Change oil in the car = Obama may as well hand me the nuclear codes.
Outside of the weight-room I’m a HAZMAT accident waiting to happen. Put me within four walls, however, surrounded by squat racks, deadlift platforms, barbells, kettlebells, selectorized machines, and maybe a movie quality Chewbacca mask for good measure, allow me the opportunity to watch people exercise and gauge movement quality, and I miraculously turn into Gandalf.
Well, I like to think I have a good eye and can catch wonky movement and fix it.
That’s Assuming Something Needs Fixing
I had a very interesting interaction last weekend at CORE. I was contacted by a dude here in Boston who reached out asking if he could stop by the studio to have me look over his squat and to discuss a few ideas that had been reverberating in his head about bar path, acceleration, and power development.
Specifically he noted he was a high-level powerlifter (600+ lb squat at 181) and that he had been tinkering with his technique of late and wanted another set of eyes on him to see if there was something he was missing.
My first thought was “holy fucking shitballs, that’s a sick squat,” and more importantly I felt compelled to tell him “um, just so you know…I’m not a competitive powerlifter and maybe you’d be better off contacting my boys at The Strength House for more detailed badassery?”
“Nah, I respect the way you’re able to analyze movement and feel you take a balanced approach.”
High praise.
What transpired was pretty cool. It was every bit an educational/learning experience for me as it was for him (I think. He left happy).
To Repeat: this guy squats over 600+ at a competing bodyweight of 181 lbs. An advanced lifter indeed. His approach is unconventional to say the least.
Take this little tidbit of our conversation as an example (not taken verbatim, but it’s close):
“So we see guys all the time squatting 225 lbs in the squat rack, often with poor technique, but then are able to walk over to the leg press and perform 800+ lbs for reps. What gives? How is that possible? I thought to myself “there has to be something there.” I train alone in my home gym which allows me all the time in the world to play mad scientist and to tinker with my technique.
Then it dawned on me: why not leg press my squat?”
Of course, in my mind I’m thinking “well the leg press provides a ton more external stability to the body so there’s your answer.” What’s more there’s typically less ROM involved too.
I was intrigued to see this in action nonetheless, anticipating some sort of leg press to squat Transformer to appear.
I ended up witnessing a meticulous set-up, as well as a masterful demonstration of someone who knows what his body is doing at all times. Unconventional without question. But it worked. A few highlights:
His “low bar” position was lower than low bar position. I’m talking mid-arm.
A flexed spine. In deep hip flexion, he’d go into lumbar flexion.4
He used a staggered stance (left side was a bit behind the right).
For all intents and purposes, many coaches would look at squat like that and start hyperventilating into a paper bag and immediately go into “I gotta fix this” mode.
Guess what I didn’t fix?
My point: everyone is different. No one has to squat the same way. And he’s an a-hole for being a freak…..;o)
Besides, he squats 600+ freaking lbs. He’s obviously trained himself enough to be able to get into (and out of) precarious situations; and he’s never been hurt or in pain.
It was the last point, though, the staggered stance, that he had never noticed or considered.
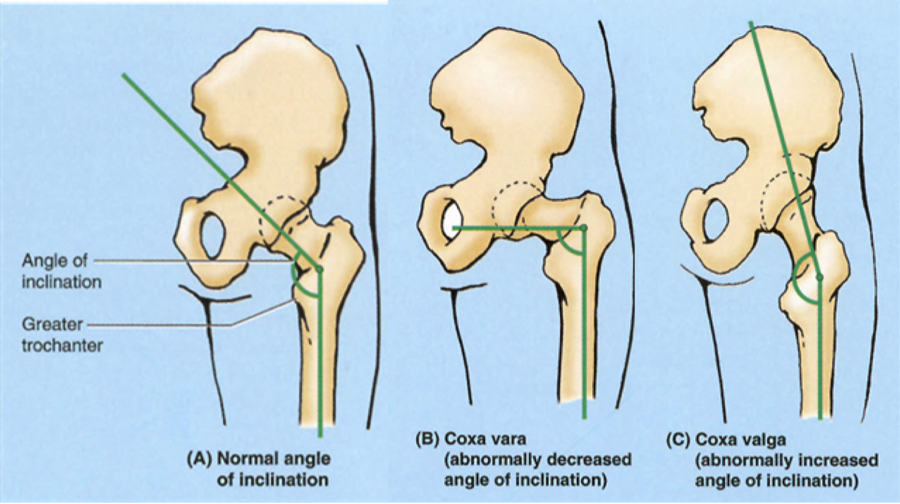
I don’t fall into the camp that says everyone must squat with a symmetrical stance. This defeats the purpose of individuality and respecting each person’s anatomy. When you factor in varying hip anatomy (varying degrees of APT/PPT, how this affects the ability to both flex and extend the hip, anteverted/retroverted acetabulums, anteverted/retroverted femurs, and varying femoral neck lengths), not to mention that you have two of them, not to mention other anthropometrical factors too, like torso length, femur length…it doesn’t take a genius to understand there’s no one right way to squat.
If a certain squat stance, width, depth, (whatever) feels better and more stable, why not run with it?
NOTE: I’d be doing a disservice by not linking to THIS article by Dean Somerset on the topic. He does a much better job at explaining things.
Back to the staggered stance.
600 lb squatter guy was trying to figure out why it seemed he couldn’t keep the barbell over mid-foot on his descent. I noted the staggered stance and he was like, “huh, I never thought of that.”
He then noted how he had always filmed his squats from the RIGHT side. I filmed from the left and his bar path looked to be on point. So maybe he was being a bit overcritical? Maybe the staggered stance evened things out? I’m sure there’s a biomechanical rabbit hole to be explored here (calling Greg Nuckols?).
When To “Fix” Someone’s Squat
I get it: Many of you reading aren’t elite level squatters, and much of the dialogue above has little merit in your training. The bigger picture, though, I think, is to avoid confirmation bias and sticking solely within camps that always agree with you. Everyone is a different, and there’s always more than one way to do something.
Last weekend, for me, was proof of that.
But I’d be remiss not to point out my standard or “comfort zone” is vastly different between an elite lifter and beginner/intermediate lifter.
Elite level lifters get much more leeway to mess up. More to the point: they’ve messed up enough to know what to do to not to mess up. Yeah, that makes sense. When I am coaching a beginner/novice, though, they’re rope for messing up is much, much shorter.
I still feel it’s important to avoid over-coaching and to allow an opportunity for newbies to figure things out.
As a coach, it’s okay to allow clients a window to perform a bad rep. Don’t be quick to correct. Let them figure it out & learn themselves
But when it comes to squats I tend to have a few “No-No’s” initially.
1) You Round Your Back, a Part of My Soul Dies
Loaded spinal (end-range) flexion doesn’t do anyone any favors. Pick up a McGill book and join the party. I’d prefer to avoid it as much as possible in the beginning. If I see someone flexing their spine during a squat, it’s my job to figure out why?
From there I’m going to try my best to implement the modality or variation that’s going to best set them up for success.
Much of the time it’s getting someone to appreciate how to adopt a better bracing strategy and stabilize.
Brace your abs. <— Get “big air” and act as if someone’s going to punch you in the stomach.
Learning Active vs. Passive Foot, or spreading the floor with your feet (better yet, a cue I stole from Tony Bonvechio is “find the outside of your heels.”
Full-body TENSION (trying to touch your elbows and pulling down on the bar helps here too) is the name of the game. The sooner a trainee learns this, the sooner he or she will clean up a lot of snafus in their squat technique.
Another easy fix is to implement an anterior load.
This is part of the reason why Goblet Squats or Plate Loaded Squats are so user-friendly and help to maintain a better torso position. The load is in FRONT which then forces the trainee to shift their weight and recruit/engage more of their anterior core, which then helps them remain more upright.
2) Knees Caving In (Past Neutral), Heels Coming Off Ground
The knees caving in aren’t always a deal breaker. Many trainees when they first put a barbell on their back and begin to squat for the first time resemble Bambi taking his first steps.
I don’t mind a little knee movement. Much of the time it’s just a matter of getting some reps in and whammo-bammo, the issue resolves itself.
It’s when it hits the point where they go past neutral and/or the heels come off the ground that it can become problematic.
Some things that have worked for me with knees caving:
Hey, don’t do that.
Think of your knee caps tracking with your pinky toe.
Place a band around the knees to provide some kinesthetic awareness. The band wants to push the knees in, they have to push the band out.
I want a squat to look like a squat. It requires ample ankle dorsiflexion, hip flexion, hip internal/external rotation, t-spine extension, among other things.
Grooving the hip hinge and using props such as a box (box squats) to get someone to learn to “sit back” and use more of their posterior chain is a nice option. This will help keep the heels cemented to the floor.
NOTE: once they master that, the idea is to then perform an equal parts “knees forward, hips back” motion, learning to sit down into the squat (not so much back, back, back). Again, the squat should look like a squat
And That’s Really It
I’m not TRYING to find something wrong with everyone’s squat.
If the 2-3 things above are met from the get go we’re in a pretty darn good spot.
Things like bar position, foot stance/width, hand position, and everything else in between, while significant considerations for some people and staples for entertaining internet arguments, are all going to depend on several other factors (goals, anatomy, experience, ability level, injury history), and in the grand scheme of things are minute comparatively speaking.
Hope everyone had a lovely July 4th weekend this past weekend. We sure did.
Lisa and I were up in Maine – Pemaquid Point to be exact – for a wedding, and it was a stark reminder that it’s the perfect anecdote to the hustle and bustle of Boston.
Having a few day’s reprieve from honking horns, sirens, and people in general was amazing. Plus, the air in Maine is so much more crisp and clean. I highly recommend going if you ever get the chance.
We got back into Boston early yesterday so that we could partake in our annual July 4th Epic Walk of Epicness.
Nothing out of the ordinary since we walk around the city all the time. However, going for a “long-ass walk” on the 4th is something Lisa and I started doing a few years ago and we’ve continued on with the tradition.
Plus, there aren’t many cities that do July 4th better than Boston.
We left our apartment around noon and when it was all said and done we covered nine miles and had our fair share of cookie and pizza pit-stops.
That’s how we roll.
Anyways, as thrilling as it is reading about my walking prowess, I’m sure you’d rather me get to the meat and potatoes of today’s post.
Barbell Rolling Squat
https://www.youtube.com/watch?v=4YsTS1Nq4tU
This can also be considered a poor man’s version of the hack squat. Except, you know, without the $1000+ piece of equipment involved that can only be used for one thing.
So, a more apropos way of putting things is that this is the “savvy business man’s” version of the hack squat.
Who Did I Steal It From: Greg Nuckols during one of his and Omar Isuf’s Lifting Lyceum presentations.
NOTE: If you have a chance to hop in on their next go-round, you’d be stupid not to. It’s a wonderfully detailed resource that goes into the nitty gritty on squat, deadlift and bench press technique as well as program design.
NOTE II: I receive no monetary value or kick-back in telling you to check it out. Unless you count a video of Greg lip-syncing Justin Bieber’s “Love Yourself” as a form of compensation. Which it should.
NOTE III: Lets make it happen Greg….;o)
What Does It Do: The rolling squat serves as a nice accessory movement to better target the quadriceps.
As Greg noted during his squat presentation, and I agree with him if that means anything6, many lifters have been programmed into thinking the squat is ALL posterior-chain, to the point where having weak quads may become a limiting factor.
When the goal is to lift as much weight as humanly possible, there’s definitely merit to utilizing the posterior chain to a higher degree. However, this doesn’t imply the quadriceps should be ignored.
As far as the quads being a limiting factor is concerned, this is most apparent when you witness someone come out of the hole on their squat and their hips shoot up way too fast, to the point where they run the risk of falling too far forward onto their toes.
Having stronger quads (or the ability to engage them to a higher degree) will help people better put force INTO the ground and maintain a more upright torso.
READ: This IS NOT to imply a forward lean is frowned upon or wrong. It isn’t. Just, you know, falling forward onto your face will tend to stagnate things.
Key Coaching Cues: You won’t need a lot of weight with this. For most guys, 95-135 lbs will be more than enough. For women, 45-85 lbs will suffice.
Also, use BUMPER plates.
In addition, it helps to have a very forgiving training facility to perform these. A brick or cement wall is best. Doing this exercise against a drywall won’t end well.
Hoist the barbell overhead and set up as you would for a normal squat. Lean back towards the wall until the plates are resting, adjust feet to shoulder width apart, scoot a few feet forward, and then squat down as low as you can.
These are best done for high(er) reps, in the 10-20 range.
PS: I’ve gotten a few comments from people on why this exercise is any different than “regular” squat, even with the suggestion of moving my feet forward a bit away from the wall?
Answer: Because I’m LEANING INTO THE WALL. Hence the name “barbell ROLLING squat.” Apologies for not making that more clear on my end….;O)
Today’s “Exercise You Should Be Doing” has a unique flavor compared to exercises in the past.
1. It’s as miserable as it sounds.
2. The word “deep” is going to be contingent on individual anatomy, overall mobility (ankle dorsiflexion, hip flexion, t-spine extension), and one’s ability level to actually squat. Basically, unlike the internet, I’m not an a-hole and expect everyone to squat ass-to-grass.
Likewise, as I’ve stated 717 (+/- 203) times on this site, not everyone can/should press overhead. You have to earn the right to press overhead. Limitations in shoulder flexion have to be taken into heavy consideration here.
That said this exercise is pretty baller, albeit a fairly advanced variation.7
3. It’s two exercises in one! Two is always better than one. Two ninjas are better than one, two pairs of clean underwear are better than one, hell, two sandwiches are better than one.
I mean, when isn’t it?
About the only time two isn’t better than one is Michael Bay movies.
So lets jump into it.
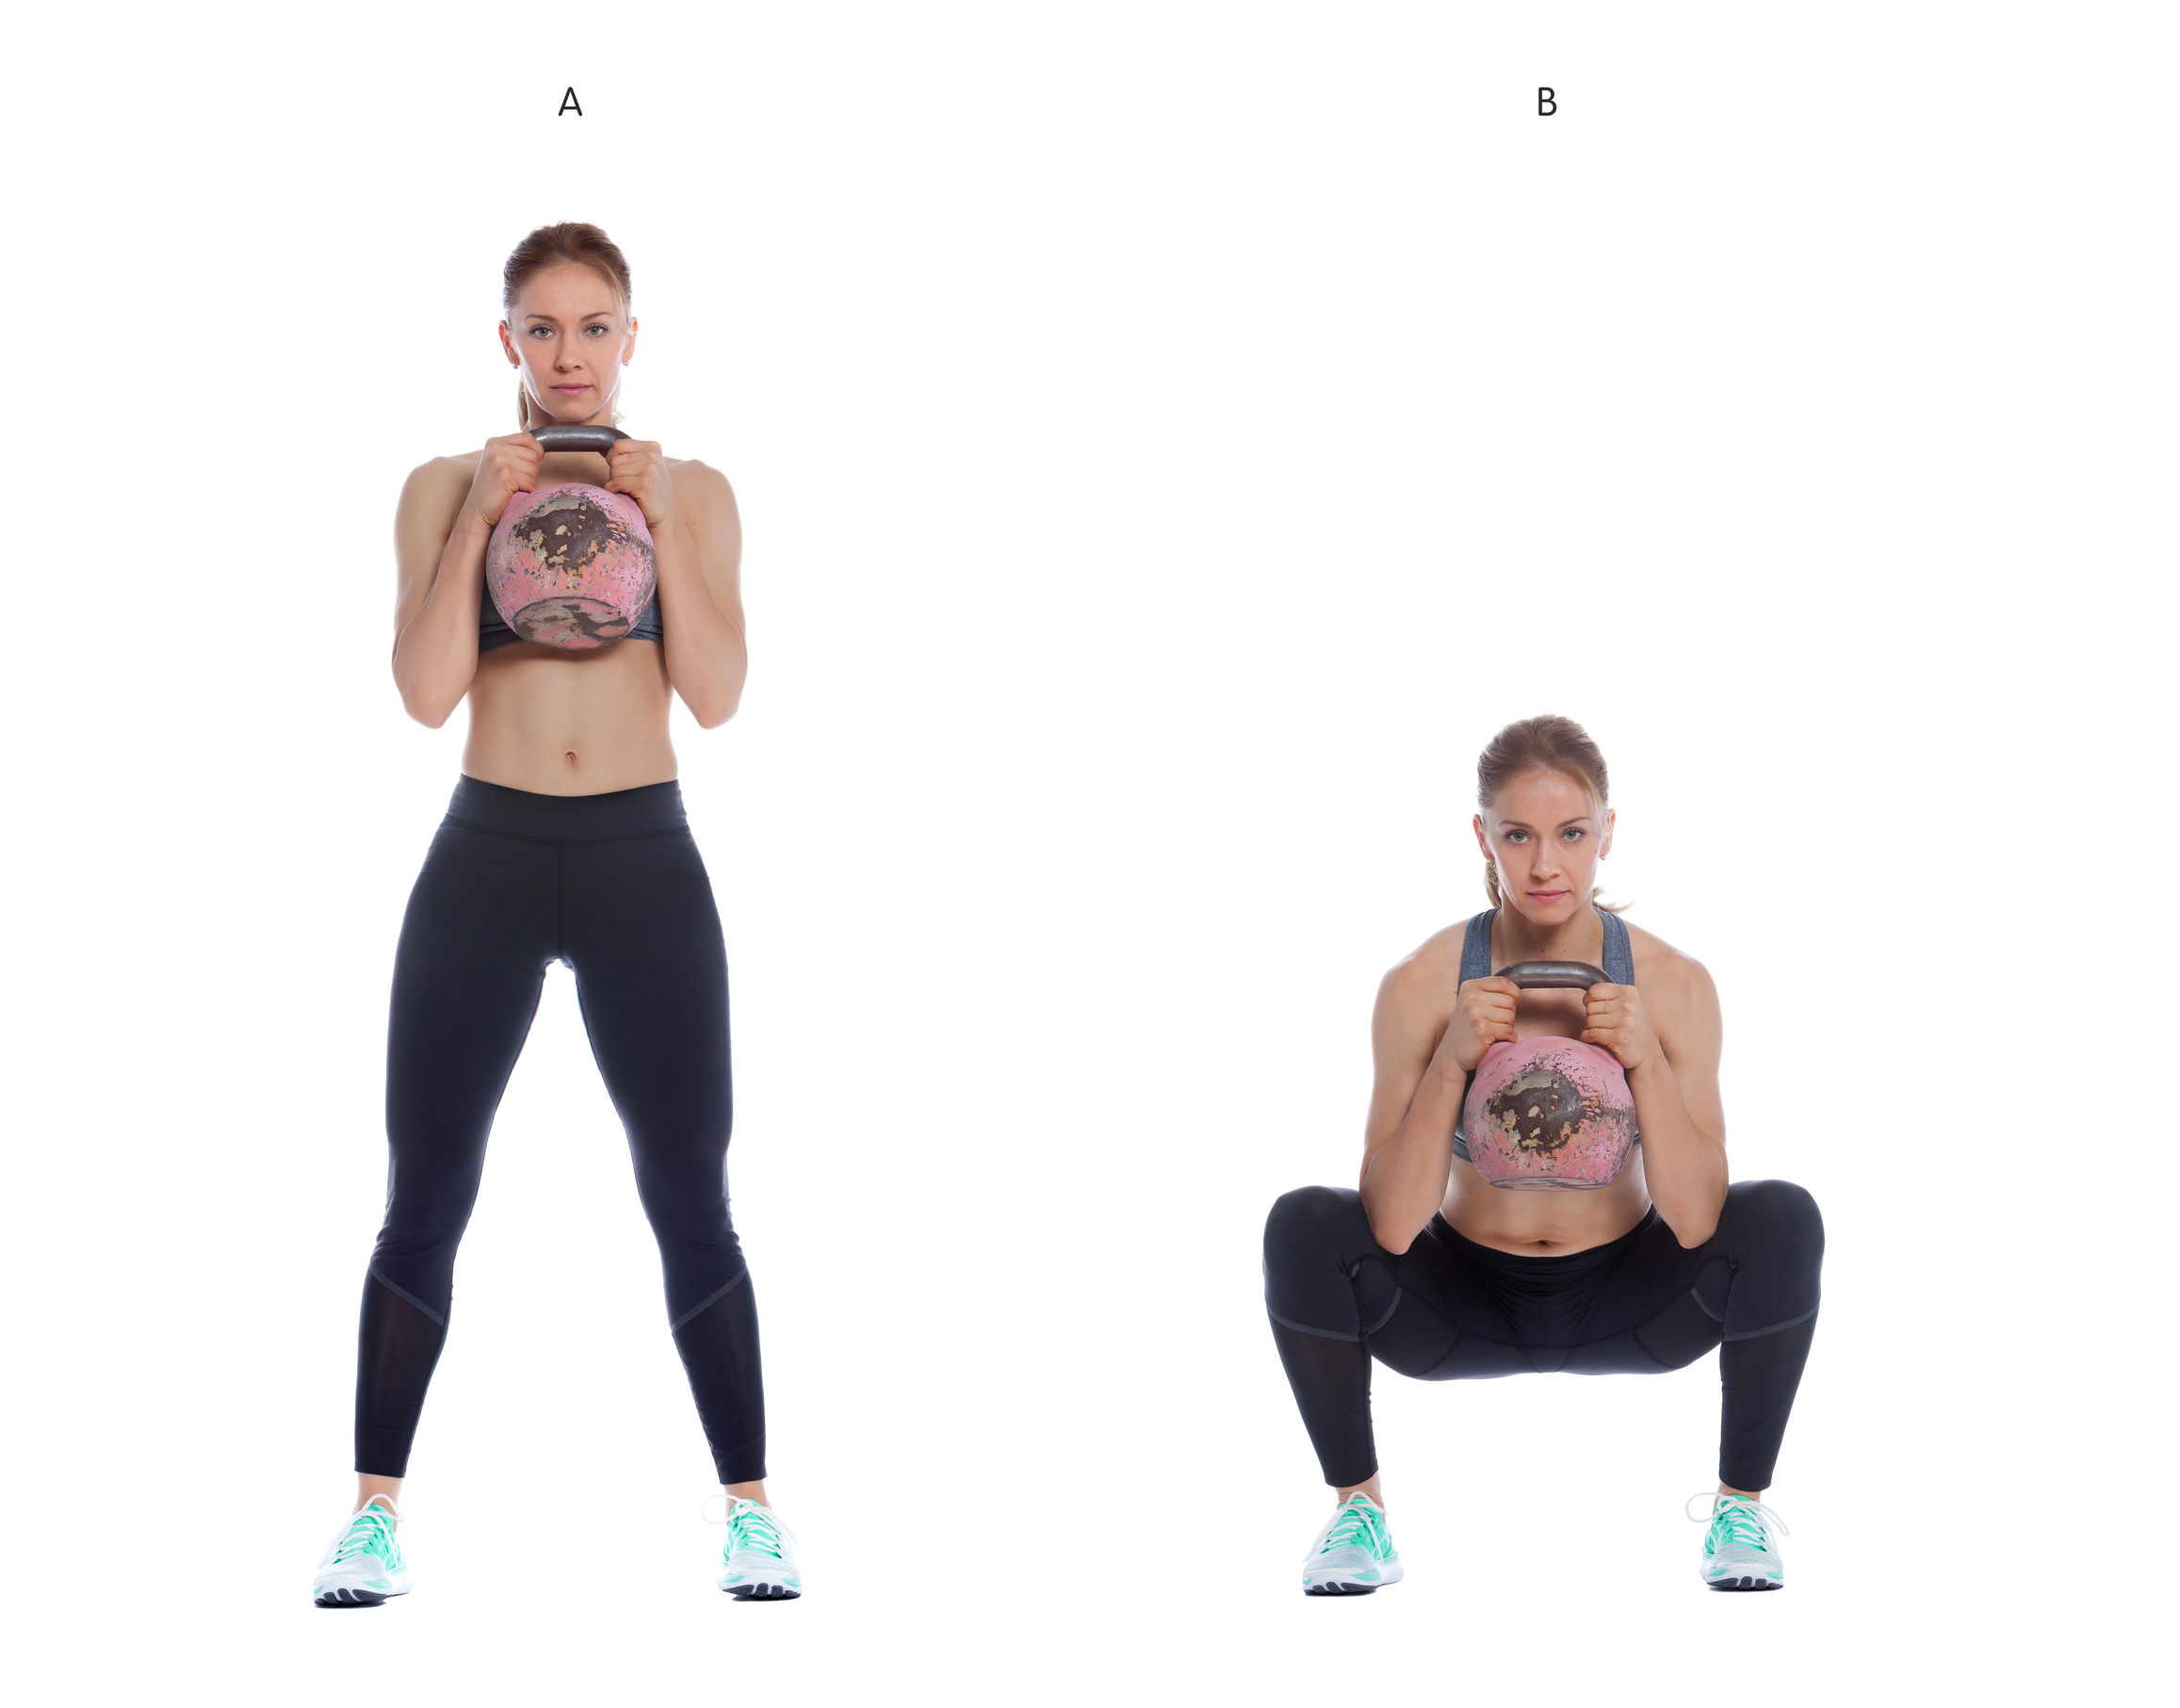
Deep Squat Press
Who Did I Steal It From: Can’t say I recall. But for shits and gigs I’ll say Ben Affleck.
What Does It Do: Works as a nice progression with regards to squat patterning. The asymmetrical or “offset” load provides a fantastic rotary stability component to the exercise. And, of course, the pressing component incorporates the upper body making this a full-body exercise to be reckoned with.
Key Coaching Cues: First and foremost I’d make sure to audit your clients and ensure they can perform a standard Goblet Squat before tossing this into the mix.
Can they maintain proper alignment – in that there’s no excessive rib flair throughout the duration of the set. The anterior load of the KB or DB should help offset this.
Chest Up.
Push knees out (heels stay glued to the floor), squat DOWN not necessarily BACK.
Maintain abs, and think about “pulling” into the deep squat position.
End result should be elbows inside knees, chest up, natural arch in lower back.
If they hit all the checkmarks above, your client(s) are probably good to go with this variation.
HOWEVER:screening them for ample shoulder flexion is crucial. If they lack sufficient overhead mobility the “press” component of this exercise may be contraindicated.
HOWEVER (PART II): Squat depth will be highly individualized. Some people lack the requisite mobility to squat below parallel. Others, however, lack stability in the form of protective tension, which more or less tells the CNS to put on the emergency breaks. So, what may seem like a mobility restriction is just lack of stability.
[^^^ There’s more to this screen that I’ve added since writing the post above (I should update it), but this should provide ample insight].
Do you or your client pass the above caveats? Good, you’re good to go.
Grab a kettlebell and start in the racked position. With your free hand make a fist and squeeze like a mofo. This will help create more bodily tension.
Squat down to your “usable” ROM and once there, maintain tension (don’t relax), pause for a 1s count, own the position, and then press the KB up towards the ceiling making sure to follow with your eyes.
Now that I think about it: this is also a great t-spine rotation exercise!
Perform 5-8 repetitions, and repeat the same process on the other side. Alternatively, you could perform this exercise as squat, press, stand back up, squat, press, stand back up, etc.
You get to pick your poison here. Give it a try and let me know what you think
We all know that squats are a staple movement that span the gauntlet when it comes to helping people get stronger, leaner, and faster.
Blah, blah, blabbidy, blah.
That’s all well and good. But lets be honest.
Squats also help build bodacious bottoms.
There’s a reason why no one has ever written a song titled “Flat Bottomed Girls” or “I Like Average-Sized Butts.”
We like our derrieres fat and big, baby!
Alas, this article isn’t about the human form, appreciating the backside, and how squats help build bottoms.
No, this article is about something else entirely.
How to Build the Squat FROM THE BOTTOM
Dean Somerset and I spent this past weekend up in Kitchener, Ontario (<– that’s in Canada) just outside Toronto co-teaching our Complete Hip and Shoulder Workshop.
Note: you can check out to see if we’re coming to your neck of the woods HERE.
One of the main bullet points Dean and I hit on was squat patterning and how coaches and personal trainers can go about cleaning up their athlete’s or client’s squat technique.
Or, better yet: demonstrate to them some semblance of success.
Just so we’re clear: I think the squat is a basic movement pattern that everyone should be able to perform. I’m not insinuating that everyone should be able to walk into a gym on day #1 and drop it like it’s hot into a clean, deep squat and/or be able to load it to a significant degree.
Not everyone can (or should) squat deep. I’ve written on the topic several times, and for those interested you can go HERE and HERE.
That said, it is a movement pattern that’s important and one that can help offset many postural weaknesses, imbalances, not to mention more colloquial goals like athletic performance and aesthetics.
Assessment
Squat assessment is a crucial component to figuring out what’s the right “fit” or approach for each individual.
I can’t stress this enough: Not everyone is meant to squat to ass-to-grass on day one. Not everyone has the anatomy or hip structure to do it!
But it’s also important to figure WHY someone can’t squat to depth? Is it a mobility issue (which many are quick to gravitate towards) or a stability issue?
Digging deeper on the mobility-stability conundrum, Dean hit on a few important points this past weekend in trying to differentiate what mechanism(s) prevent someone from A) squatting deeper than that think they can squat and B) squatting with a better, more efficient pattern.
It’s a concept I’ve used myself with my own athletes and clients, but Dean did a really great job at peeling back the onion and helping the attendees better understand where they should focus their efforts.
Is it a Structural Issue?
Say someone makes the Tin Man look hyper-mobile when they squat. No matter what they do or how they position themselves, they just can’t seem to squat to an appreciable depth.
Most trainers and coaches would chalk it up to something lame like “tight hip flexors” or lack of hip mobility (which certainly could be the case), and revert to any litany of drills to improve either of the two.
This could very well be the correct anecdote, but I do feel it’s an often simplified and overused approach. I can’t tell you how many coaches have taken this route only to end up barking up the wrong tree.
It’s imperative to dig a little deeper.
Structural issue(s) = bony growth (FAI?), bone spur, and/or geometry of the hip joint itself.
As a trainer or coach you’re not diagnosing anything, and unless you’re Superman8 and have X-ray vision you’re more or less speculating anyways.
Assuming you have the knowledge base and are comfortable doing so, you can ascertain of what each person’s (general) anatomy is telling you by using a hip scour.
Supine (Passive): Have an individual lay on his or her’s back and bring knee into hip flexion. Is it uncomfortable or do they feel any pinching at or near the hip joint? If so, abduct the hip. Does the pinching go away? Do they gain more hip flexion?
This can speak to what their ideal squat-stance width should be.
You can also check hip internal/external rotation. Do they have more or less ROM in either direction? This could speak to more retroversion/anteversion of the acetabulum itself.
In general: those with an anteverted acetabulum (more than enough IR) are going to have crazy amounts of hip flexion. These are people are the ones who can squat ass-to-grass without blinking an eye. Of course, whether or not they can control that ROM is another story.
Conversely, those with a retroverted acetabulum (more ER) may struggle with hip flexion (bone hits bone earlier) and will likely never live up the all the internet trolls’ expectations regarding squat depth.
They’ll likely dominate hip extension ROM, however.9
Supine (Active): You can also have someone test their hip flexion ROM actively (meaning, they’re the ones doing the work). The key here, however, is making sure they use their hip flexors to actively “pull” their knees towards their chest.
Can they do it? Any restrictions?
https://www.youtube.com/watch?v=k3TI-GJNl9w
Prone/Quadruped: Another “screen” to add is in the quadruped position where, again, the person is more stable.
Here you’re checking to see at what point do they lose control of lumbar positioning?
Some people, due to their anatomy, and despite 698 coaching cues being tossed their way, will lose positioning before they hit 90 degrees of hip flexion. You can be the most well-intentioned coach in the world, but unless you’re Professor Dumbledore you’re never going to be able to fit a square peg into a round hole.
So, you work with what’s presented to you. This person will need to squat at or above parallel.
I’m fairly certain the Earth will still continue to spin.
However, what you’ll often find is that they’re able to get into what would be equivalent to a “deep squat” position. Further, if you have them dip down and extend their arms above their head it’s akin to the same position as an overhead squat.
If they’re able to assume this position, it’s a safe bet (although not entirely exclusive) they it’s not a structural issue that’s preventing them from assuming a deep(er) and “clean” squat pattern.
All of it’s information – which may or may not stick – but it’s information nonetheless. And it’ll all help guide you as a coach to figure out what’s most suitable approach for your athletes and clients.
When assessing someone’s active squat pattern they may present as a walking ball of fail and demonstrate a whole host of compensation patterns. This is where some fitness professionals are quick to jump on the “it’s a mobility issue” bandwagon.
Taking the time to perform a more thorough screen (like the ones suggested above), though, is an excellent way to glean whether or not that is indeed accurate.
Squat From the Bottom
Lets assume you figured out it’s NOT a structural issue. You assess/screen someone in the supine/prone/quadruped positions and find they’re able to exhibit a passable squat pattern.
Yet, when they stand up and attempt to squat they resemble a stack of crashing Jenga pieces.
One of the best strategies I’ve found to help address this is to teach/re-groove the squat pattern FROM THE BOTTOM. Basically, start in the end position.
It helps to build context and confidence. In addition, it engrains the CNS to inform the brain “dude/dudette, relax, we got this!”
Assisted Squat Patterning
If I’m working with someone in person, I’ll hold my hands out in front of me (palms up), ask them to place their hands on top of mine (palms down), assume a squat stance, and “groove” their squat pattern (sit back with the hips, push the knees out), and “pull” themselves down into the bottom position of the squat.
I’ll then have them let go, hold that position for a good 3-5 second count, and then stand back up. We start them where we want them to finish. As a result this BOTTOMS-UP approach helps groove technique, but more importantly helps improve people’s confidence at sitting in the hole.
Some other variations you can use:
Squat Walk Down
Suspension Trainer Assist
Have someone grab the side of a squat or power rack (or use a suspension trainer – TRX, Jungle Gym) and use as much assistance as they need in order to get into the bottom position.
Note: Make sure they maintain a good back position.
Once they get into a position they feel they can control and “own,” have him or her let go and hold that position for a 3-5s count.
Then, stand up.
Have them repeat for several repetitions.
You’ll often find that after a few reps things start to click.
Boom
When it comes to squatting, not everyone should be held to the same standard.
Perform the screens mentioned above. Do your job.
Figure out what the best “fit” is for each person – depth, stance width, foot placement, etc.
Use pattern assistance if necessary. Start from the bottom. Build success into people’s training.
Either approach you use – whether it’s partner assisted or with external assistance (rack, TRX) – the main advantage is that it forces anterior core engagement, which in turn helps improve stability, which in turn improves motor control, which in turn makes people into rock stars.
Except without the fame, money, and glory. And amphetamines.


 George began his time at Cressey Sports Performance as an intern in the fall of 2013, and returned in 2014 as CSP’s Group Fitness Coordinator, overseeing all Strength Camp coaching and programming responsibilities.