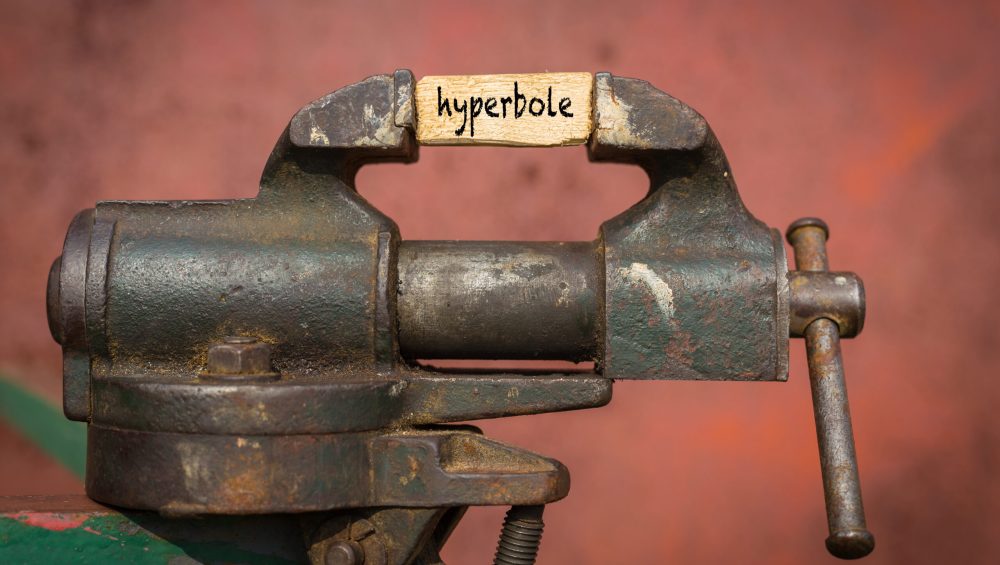
In general, it’s purposeful use of exaggeration as a rhetorical device or figure of speech. It’s often used in writing (and communication as a whole) to evoke strong feelings and reaction from the audience. These reactions can range from a chuckle and an “aww shucks” eye roll to someone getting punched in the throat.
Hyperbole is everywhere (politics, dating, sports, Thanksgiving dinner) – for better or for worse.
More innocuous and inane examples of hyperbole – the “aww shucks” variety – would be:
I’m so hungry I could eat a horse.
“So and so” is about as intelligent as a ham sandwich.
As a writer I love hyperbole because it can be a useful tool to add a bit of panache and entertainment value to a blog post or article in order to maintain people’s attention for more than 27 seconds.
Where I hate it is where this particular blog post comes into play.
A few weeks ago I was perusing Twitter when my feed fed me this piece of gargantuan eye wash (because, of course):
“STOP DOING BARBELL SQUATS!!! It’s a useless exercise that does way more harm than good to your body.”
This, my dear reader, is a choice example of the latter example of hyperbole mentioned above. You know, the kind that makes you want to wash your eyes with broken glass.
Now, I don’t know the person who wrote it (I’m choosing not to directly mention them here), and I have zero insights into why this person is so vehemently against barbell squats. What I do know – from checking out this person’s profile – is that they’re a Chiropractor, they seem to build a lot of their online persona around this idea that most people lack mental toughness, and that “bad posture” is the reason why most people are in pain.
Not for nothing, but…
…I’d make the case that the reason why a lot of people are in pain is because they’re chronically weak (muscularly), not because their TL junction needs adjusting every two weeks.
(Which, not ironically, can be improved, drastically – and long-term – with some properly progressed strength training.2 If you don’t force the body to adapt to load or stress, then how can you really expect meaningful change? If the only intervention is adjusting and cracking someone’s bones to fit some “textbook perfect posture” narrative, and it’s something that needs to be repeated over and over and over again, to me, this is akin to using nothing but a band-aid to address a knife wound).
But let’s move beyond that.
The thing that rubs me the wrong way with this person’s train of thought is that it’s so egregiously self-aggrandizing. One thing that I despise in this industry – and something that makes me lose a lot of respect for someone when they do it – is thinking that THEIR WAY is the ONLY way to do something.
The easy comparison here is Mike Boyle.
I was in the room when, back in 2005, while recording Functional Strength Coach, he revealed to the strength & conditioning world that he no longer included back squats in his athletes’ programs.
I’m pretty sure this was the collective mood in the room when he said it:
He wasn’t tarred and feathered by the entirety of the profession, but in the years since he’s routinely received flak for his stance.
However, I’ve always respected his take and have never taken issue with it.
Why?
Because he’s never said:
“Stop doing barbell squats with YOUR athletes.”
He’s only said:
“I’ve stopped doing a barbell squats with MY athletes.”
Moreover, he’s always followed that up with a sound rationale & explanation of why he came to that decision in the first place. And whether or not you agree with him isn’t the point:
They’re HIS athletes.
My man is still producing bonafide beasts in the weight-room and on the playing field.
Hard to argue with results.
Bringing things back to our friend from above.
Where I take issue is the insinuation that barbell squats – of any kind, in any situation, with any person, at any moment in time, even if they’re YOUR client and not mine – is dangerous or turning everyone into spinal compression walking balls of dysfunction.
To steal a quote from strength coach Gerry DeFilippo on that matter:
“How about this. Do exercises that fit your anatomical parameters and needs. More information, less fear mongering/cancelling of exercises.”
To mirror yesterday’s conversation on training around pain, today’s post delves a little deeper into a specific area that many lifters tend to have issues with:
Not enough bicep curl variations in their program
Forgetting to remove their shaker bottle from their gym bag for week
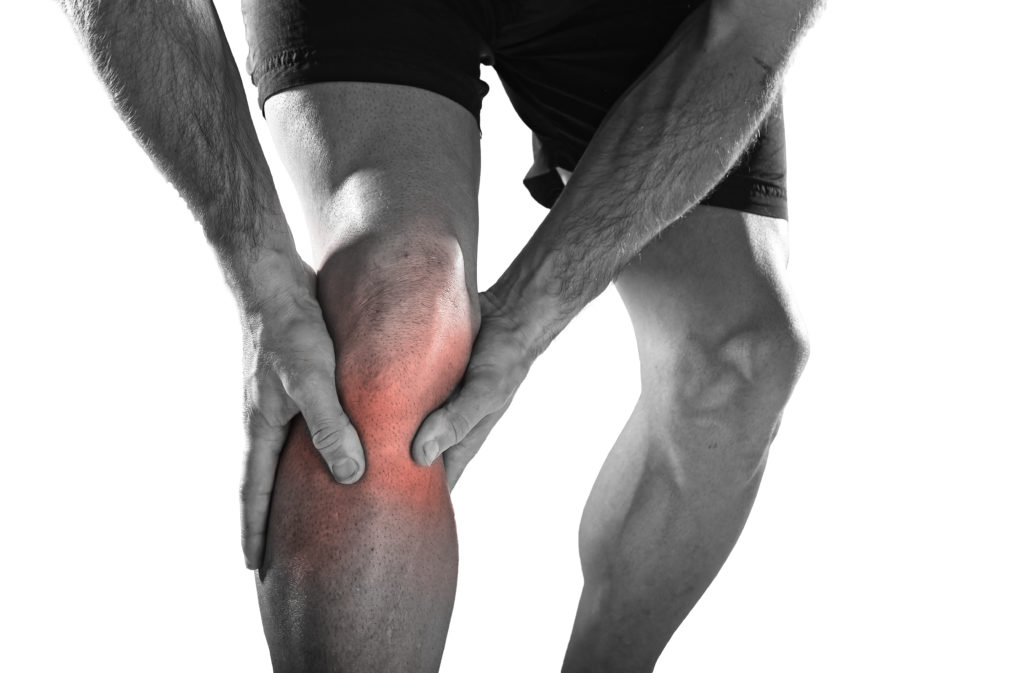
Knees.
The knees are a vulnerable joint and there are myriad of reasons why they can become achy, sore, cranky, or any other similar adjective you want to put here.
Sydney, Australia based physical therapist and trainer, Dane Ford, was kind enough to write this straight-forward article on some of the root causes of knee pain and ways to address them on your own.
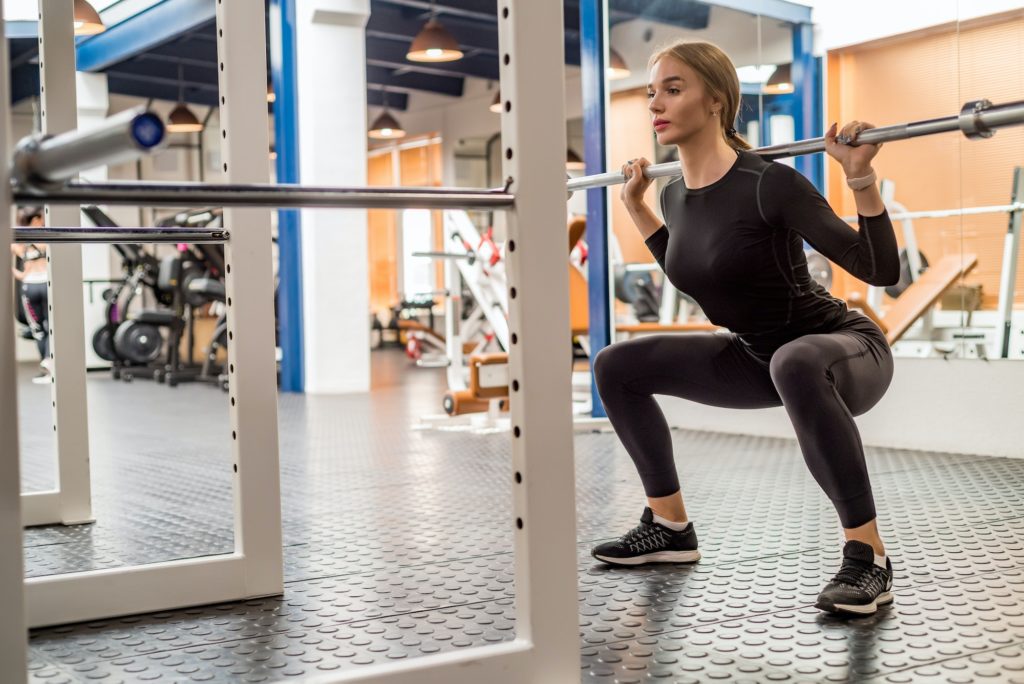
Squatting is an essential part of most people’s fitness routine, and it can be extremely frustrating when you experience sore hips or knees when you squat.
Today I’m going to share four killer exercise variations that will help take some pressure off your knee joints!
No matter what level your fitness is at – whether strength training or just getting healthy again after injury – these tips should work their magic in no time flat.
Let’s get started.
The Goods
Box squat.
The first variation for those who experience knee pain when squatting is the box squat. A box squat will strengthen your quads, glutes, and hamstrings. It’s also a great way to improve your squatting technique.
You’ll need a box squat or a bench around knee height to do a box squat.
Start by placing the box behind you.
Then, position your feet shoulder-width apart and push your hips back.
Next, bend your knees and lower yourself until your bottom touches the box. Pause for a second, then stand back up.
Step-Ups
Step-ups are another great variation for people who have knee pain when squatting. This exercise works your quads, hamstrings, and glutes and is a great way to build lower body strength.
To do a step up, start by placing your right foot on a box or bench.
Then, push off with your right foot and raise your body up until your leg is straight.
Pause for a second, then lower yourself back down.
Focus on keeping the hips level.
Start with a smaller step, and increase the step height as your body allows.
Hip Thrusts
Hip thrusts are a great exercise for people who want to build stronger glutes. This exercise can also help relieve knee pain when squatting by taking the pressure off your knees.
To do a hip thrust, start by sitting on the ground with your back against a box or bench.
Place your feet flat on the ground and raise your hips until your thighs and torso are in line with each other.
Pause for a second, then lower your hips to the starting position.
Progress this exercise by adding weight at your hips, like a barbell or plate.
Banded Crab Walks
Banded crab walks are an excellent exercise for people who want to build stronger glutes and legs. This exercise can also help improve your squatting technique by making it easier to push your knees out over your toes. This is a golden exercise for dealing with knee pain when squatting.
To do a banded crab walk, start by placing a resistance band around your feet. (You could place it around your knees or ankles, but the further down your legs, the harder the exercise will be).
Then, step one leg out to the side as far as the band will allow.
Keep the hips level, and the shoulders stacked over the hips.
Next, step in with the other leg.
Repeat.
Causes of Knee Pain
When addressing knee pain during squats, it’s important to understand some of the common causes. This way, you can be sure that you’re taking the right approach to fix the underlying issue. Here are three common factors which can contribute to knee pain when squatting:
Improper Form
Whilst there is no such thing as textbook technique, using ‘adequate’ form allows you to engage the right muscles when you lift and minimize injury risk. If you don’t utilize adequate form when you squat, the load in certain areas like your knee joints will be increased, instead of having the load evenly distributed through your entire body.
Our body’s tissues all have a maximum tolerable capacity. This means that we need to be able to go hard enough in the gym to stimulate adaptation and promote strength, whilst not overloading ourselves to the point of tissue injury.
Giving your body time to recover with rest or a de-load week every now and then is a great start, to allow proper cell regeneration, repair and adaptation to occur.
Adding variety into our movements is another great option to avoid overuse. Beyond the exercises we’ve covered above, mixing back squats with front squats, goblet squats, or other squatting variations will help to strengthen the squatting movement whilst providing a slightly different stimulus to our tissues, and reducing the overload injury risk.
Bad Shoes
If you’re wearing shoes that don’t provide adequate stability when you squat, then this can put unnecessary strain on your knees.
Be sure to wear shoes that provide you with a solid foundation from which to lift.
Health Conditions Related to Knee Pain
So now that we understand some of the mechanisms that can contribute to knee pain during squats, how do we know which structure in the knee is causing pain?
Knee pain can present as a number of different conditions depending on the injured structure. This can include:
Patellofemoral Pain Syndrome
PFPS or patellofemoral pain syndrome is a condition that affects the knee joint. It’s characterized by pain in the front of the knee and around the patella or kneecap, and is common in those who love to squat.
If you have PFPS, you might experience pain when climbing stairs, squatting, or sitting for long periods.
IT-Band Syndrome
ITBS is a condition that affects the iliotibial band, which is a long strip of connective tissue that runs down the outside of the thigh from the hip to the knee, and normally presents as pain on the outside part of the knee. But squatters need not worry too much about this – ITBS is much more common in runners rather than lifters.
Patellar Tendinopathy
Tendonitis is the inflammation of a tendon, which can occur in any tendon in the body. However, Patella tendonitis presents as pain just below the knee cap. If you perform a lot of explosive movements like box jumps, or fast tempo squats, you should be aware of patella tendinopathy.
Arthritis
Arthritis is a condition that causes inflammation in the joints. The two most common types that can cause knee pain are osteoarthritis and rheumatoid arthritis.
Osteoarthritis is a degenerative disease that causes the cartilage in the joints to break down. This can cause pain in your knees, as well as other joints in your body.
Rheumatoid arthritis is an autoimmune disease that causes the body’s immune system to attack the joints. It may cause swelling and pain around the knee, leading to pain, stiffness, and inflammation.
Load management is key in managing arthritis. This is because we want to keep the muscles around the joint nice and strong, without irritating the joint too much.
How to Prevent Knee Pain When Squatting
Aside from performing some of the killer squat variations listed above, you can do a few other things to prevent knee pain while squatting.
Warm Up Properly
A good warm-up will help to increase your heart rate, loosen up your muscles, and make your body’s tissues more elastic. I recommend doing a light jog or bike ride for 5-10 minutes, followed by some dynamic stretching.
Use the Correct Weight
Another important consideration to prevent knee pain while squatting is to use the right weight. If you go too heavy too soon, it will put extra stress on your knees and could lead to pain. Utilize progressive overload by starting with a light weight and gradually increase the amount of weight you’re using as your body gets stronger.
Blood Flow Restriction Training
Another great way to improve strength whilst using light weight is by incorporating Blood Flow Restriction Training into your routine. This involves using a BFR band to reduce venous blood return from your muscles, making them work harder.
This means that you can use lighter loads to achieve the same result from your workout. BFR training can be a great addition if you are struggling with knee pain from squatting or trying to train with an injury.
Use a Smaller Range of Motion
Squatting through a smaller range of motion by reducing squat depth will reduce the load going through the knee joint, and is a great way to modify the exercise if you are struggling with pain.
Listen to Your Body
If you still experience knee pain while squatting, stop the exercise and rest for a few days. If the pain persists, consult a doctor or physical therapist.
Wrap Up
If you’re experiencing knee pain when squatting, try one of the variations I suggested and see how they work for you. Remember to always start light and gradually increase the weight as your body gets stronger.
And, most importantly, have fun with it! Squatting can be a great way to improve your fitness level and get in shape, but only if you do it correctly and safely. Give these variations a try and let us know how they work for you.
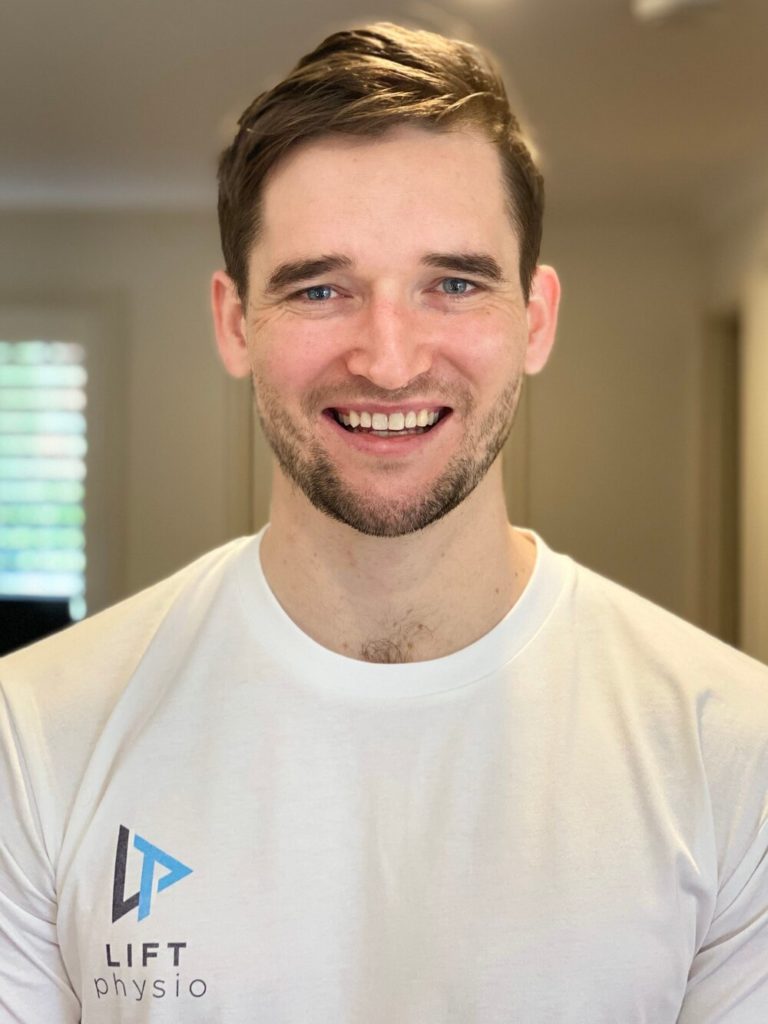
About the Author
This article was written by Dane Ford, the founder of Lift Physiotherapy and Performance in Sydney, Australia. Lift Physio aims to help you overcome injury, optimize your health, and unlock your full movement potential.
I’ve always been painfully slow off the floor when I deadlift.
Like, you could be watching the movie Titanic and I’d juuuuust be getting the barbell off the floor by the time you got to the part where Rose lets go of Jack.
If this sounds like you, you may need some more squats in your life.
A few years ago I made a concerted effort to prioritize my front squats (and upping my squatting volume in general) and was finally able to conquer a 600 lb pull.
The additional squatting undoubtedly helped improve my quad strength and ability to push away from the floor when I initiated my pull.
Heed my warning, though. If your deadlift volume is up it’ll behoove you to opt for more front squats or high-bar back squats since both will allow you to maintain a more upright torso (less shearing on spine). If your deadlift volume is on the low end, feel free to implement more low-bar back squatting.
👇👇👇 Check out a sample training split below (after the video) 👇👇👇
Here’s a quick example of how I’d structure the deadlift to squat ratio based off deadlift frequency:
Deadlift 1x Per Week (2 Lower Body Sessions)
Day 1:
A. Back Squat: 5×2 @ 60%, 60s rest
B. Deadlift: 2×2 @ 85%
C1. Deadlift – For Gainz: 4×4 @ 70-75%
C2. Deadbug Variation 4×5/side
C3. Stab Someone in the Face 4×3
We all know that squats are a staple movement that span the gauntlet when it comes to helping people get stronger, leaner, and faster.
Blah, blah, blabbidy, blah.
That’s all well and good. But lets be honest.
Squats also help build bodacious bottoms.
There’s a reason why no one has ever written a song titled “Flat Bottomed Girls” or “I Like Average-Sized Butts.”
We like our derrieres fat and big, baby!
Alas, this article isn’t about the human form, appreciating the backside, and how squats help build bottoms.
No, this article is about something else entirely.
How to Build the Squat FROM THE BOTTOM
Dean Somerset and I spent this past weekend up in Kitchener, Ontario (<– that’s in Canada) just outside Toronto co-teaching our Complete Hip and Shoulder Workshop.
Note: you can check out to see if we’re coming to your neck of the woods HERE.
One of the main bullet points Dean and I hit on was squat patterning and how coaches and personal trainers can go about cleaning up their athlete’s or client’s squat technique.
Or, better yet: demonstrate to them some semblance of success.
Just so we’re clear: I think the squat is a basic movement pattern that everyone should be able to perform. I’m not insinuating that everyone should be able to walk into a gym on day #1 and drop it like it’s hot into a clean, deep squat and/or be able to load it to a significant degree.
Not everyone can (or should) squat deep. I’ve written on the topic several times, and for those interested you can go HERE and HERE.
That said, it is a movement pattern that’s important and one that can help offset many postural weaknesses, imbalances, not to mention more colloquial goals like athletic performance and aesthetics.
Assessment
Squat assessment is a crucial component to figuring out what’s the right “fit” or approach for each individual.
I can’t stress this enough: Not everyone is meant to squat to ass-to-grass on day one. Not everyone has the anatomy or hip structure to do it!
But it’s also important to figure WHY someone can’t squat to depth? Is it a mobility issue (which many are quick to gravitate towards) or a stability issue?
Digging deeper on the mobility-stability conundrum, Dean hit on a few important points this past weekend in trying to differentiate what mechanism(s) prevent someone from A) squatting deeper than that think they can squat and B) squatting with a better, more efficient pattern.
It’s a concept I’ve used myself with my own athletes and clients, but Dean did a really great job at peeling back the onion and helping the attendees better understand where they should focus their efforts.
Is it a Structural Issue?
Say someone makes the Tin Man look hyper-mobile when they squat. No matter what they do or how they position themselves, they just can’t seem to squat to an appreciable depth.
Most trainers and coaches would chalk it up to something lame like “tight hip flexors” or lack of hip mobility (which certainly could be the case), and revert to any litany of drills to improve either of the two.
This could very well be the correct anecdote, but I do feel it’s an often simplified and overused approach. I can’t tell you how many coaches have taken this route only to end up barking up the wrong tree.
It’s imperative to dig a little deeper.
Structural issue(s) = bony growth (FAI?), bone spur, and/or geometry of the hip joint itself.
As a trainer or coach you’re not diagnosing anything, and unless you’re Superman3 and have X-ray vision you’re more or less speculating anyways.
Assuming you have the knowledge base and are comfortable doing so, you can ascertain of what each person’s (general) anatomy is telling you by using a hip scour.
Supine (Passive): Have an individual lay on his or her’s back and bring knee into hip flexion. Is it uncomfortable or do they feel any pinching at or near the hip joint? If so, abduct the hip. Does the pinching go away? Do they gain more hip flexion?
This can speak to what their ideal squat-stance width should be.
You can also check hip internal/external rotation. Do they have more or less ROM in either direction? This could speak to more retroversion/anteversion of the acetabulum itself.
In general: those with an anteverted acetabulum (more than enough IR) are going to have crazy amounts of hip flexion. These are people are the ones who can squat ass-to-grass without blinking an eye. Of course, whether or not they can control that ROM is another story.
Conversely, those with a retroverted acetabulum (more ER) may struggle with hip flexion (bone hits bone earlier) and will likely never live up the all the internet trolls’ expectations regarding squat depth.
They’ll likely dominate hip extension ROM, however.4
Supine (Active): You can also have someone test their hip flexion ROM actively (meaning, they’re the ones doing the work). The key here, however, is making sure they use their hip flexors to actively “pull” their knees towards their chest.
Can they do it? Any restrictions?
https://www.youtube.com/watch?v=k3TI-GJNl9w
Prone/Quadruped: Another “screen” to add is in the quadruped position where, again, the person is more stable.
Here you’re checking to see at what point do they lose control of lumbar positioning?
Some people, due to their anatomy, and despite 698 coaching cues being tossed their way, will lose positioning before they hit 90 degrees of hip flexion. You can be the most well-intentioned coach in the world, but unless you’re Professor Dumbledore you’re never going to be able to fit a square peg into a round hole.
So, you work with what’s presented to you. This person will need to squat at or above parallel.
I’m fairly certain the Earth will still continue to spin.
However, what you’ll often find is that they’re able to get into what would be equivalent to a “deep squat” position. Further, if you have them dip down and extend their arms above their head it’s akin to the same position as an overhead squat.
If they’re able to assume this position, it’s a safe bet (although not entirely exclusive) they it’s not a structural issue that’s preventing them from assuming a deep(er) and “clean” squat pattern.
All of it’s information – which may or may not stick – but it’s information nonetheless. And it’ll all help guide you as a coach to figure out what’s most suitable approach for your athletes and clients.
When assessing someone’s active squat pattern they may present as a walking ball of fail and demonstrate a whole host of compensation patterns. This is where some fitness professionals are quick to jump on the “it’s a mobility issue” bandwagon.
Taking the time to perform a more thorough screen (like the ones suggested above), though, is an excellent way to glean whether or not that is indeed accurate.
Squat From the Bottom
Lets assume you figured out it’s NOT a structural issue. You assess/screen someone in the supine/prone/quadruped positions and find they’re able to exhibit a passable squat pattern.
Yet, when they stand up and attempt to squat they resemble a stack of crashing Jenga pieces.
One of the best strategies I’ve found to help address this is to teach/re-groove the squat pattern FROM THE BOTTOM. Basically, start in the end position.
It helps to build context and confidence. In addition, it engrains the CNS to inform the brain “dude/dudette, relax, we got this!”
Assisted Squat Patterning
If I’m working with someone in person, I’ll hold my hands out in front of me (palms up), ask them to place their hands on top of mine (palms down), assume a squat stance, and “groove” their squat pattern (sit back with the hips, push the knees out), and “pull” themselves down into the bottom position of the squat.
I’ll then have them let go, hold that position for a good 3-5 second count, and then stand back up. We start them where we want them to finish. As a result this BOTTOMS-UP approach helps groove technique, but more importantly helps improve people’s confidence at sitting in the hole.
Some other variations you can use:
Squat Walk Down
Suspension Trainer Assist
Have someone grab the side of a squat or power rack (or use a suspension trainer – TRX, Jungle Gym) and use as much assistance as they need in order to get into the bottom position.
Note: Make sure they maintain a good back position.
Once they get into a position they feel they can control and “own,” have him or her let go and hold that position for a 3-5s count.
Then, stand up.
Have them repeat for several repetitions.
You’ll often find that after a few reps things start to click.
Boom
When it comes to squatting, not everyone should be held to the same standard.
Perform the screens mentioned above. Do your job.
Figure out what the best “fit” is for each person – depth, stance width, foot placement, etc.
Use pattern assistance if necessary. Start from the bottom. Build success into people’s training.
Either approach you use – whether it’s partner assisted or with external assistance (rack, TRX) – the main advantage is that it forces anterior core engagement, which in turn helps improve stability, which in turn improves motor control, which in turn makes people into rock stars.
Except without the fame, money, and glory. And amphetamines.
Among the many gems that I gleaned this past weekend during Greg Robin’s Optimizing the “Big 3” workshop was the notion that, contrary to popular thought, the purpose of supplemental work (or exercise) isn’t so much to make an exercise harder, but rather to address a some form of “kink” in one’s technique.
One such example would be deficit deadlifts. These are a very popular supplemental lift for those who are slow off the floor with their pull. The i
dea being that by elevating yourself on some form of platform or elevated surface you increase the ROM the bar must travel, and thus make the lift harder (and build explosiveness off the floor).
Is that really what’s happening?
Think about it: you’re decreasing the weight of the bar. If progressive overload is the rule to live by, how can taking weight off the bar help?
For the more visual learners in the crowd here’s a video of me pulling 505 lbs from a deficit to help.
Now, I’m not suggesting that performing deficit pulls – with lighter loads – doesn’t help with building explosiveness off the floor. Rather, all I’m suggesting is a slight paradigm shift and change of view.
Performing deficit pulls forces me to address my TECHNIQUE!! Honing my technique and addressing kinks in THAT is what’s going to help me pull more weight in the long run.
I naturally pull with my hips a bit higher than most people – it’s how my body is built. I’m also very slow off the floor. So is the increased ROM helping me be more explosive off the floor or is it the fact I’m forcing myself to dip a tad lower and engage my quads a bit more?
Note: I admit this would be even more applicable if I were puling conventional.
Now lets direct the discussion towards squats and what supplemental (squat) movements help with improving our technique in that realm.
Paused Squats
Anderson (Deadstart) Squats
1-1/2 Squats
In my latest article on BodyBuilding.com I discuss all three variations and why they’re a good choice to help with your squatting performance.
I recently had the pleasure (and honor) to have my very first article posted up on BodyBuilding.com at the tail end of last week. As it happened I was contacted by one of their fitness editors asking if I’d be interested in providing some monthly content, and I of course jumped at the chance.
But only under two conditions:
1. That I’d have a fair amount of autonomy and be able to focus my writing towards universal themes such as placing a premium on strength as well as having the opportunity to teach/coach people on proper exercise technique (in addition to addressing common myths and fallacies such as squatting deep is bad for your knees or that Keanu Reeves is somehow, somewhere, considered a good actor.)
2. That they’d include a link to my blog on my bio page. Their Alexa ranking (a site which ranks websites off of traffic and popularity) is 693 in the world!
That’s a crap load of traffic!
So, in case there’s anyone new visiting the site today – welcome! Hopefully you’ll stay around awhile…;o)
Nonetheless, I submitted my article last week and it’s already up – so they must have thought it was sorta good.
So far the responses it’s been receiving has been great, and I’m really happy to see that many who have read it are on the same page as myself.
They’re obviously very smart and good looking….;o)
That said there have been numerous comments on MY comment concerning head positioning during the squat, and I’d like to take a few moments to address it.
A handful of people were a bit perplexed that I advocated to NOT look up when squatting. Apparently all their football coaches told them otherwise, and then I had to come out of no where and ruin their world…..;o)
By that same token, some felt (and misinterpreted) that what I was actually advocating was for people to look down, which is also false.
In short, as coaches and fitness professionals, we’re constantly stressing the importance of maintaining the spine’s natural curvature (a certain amount of lordosis in the lumbar spine, and kyphosis in the upper spine) while training.
In my experience coaching people to look up and to hyperextend their cervical spine isn’t a great idea in the grand scheme of things. We’re always telling people not to deadlift or squat with a rounded LOWER back (which is part of the spine last time I checked) for fear of compromising its integrity and causing injury.
Why, then, is it perfectly okay to disregard the cervical spine? Do we not want to prevent anything bad from happening in our neck?
Simply put, and as renowned strength coach and therapist Charlie Weingroff has repeatedly stated, maintaining a neutral or “packed neck/chin tucked” posture while squatting or deadlifting is a fantastic way to not only prevent injury, but it also makes you more stable, which in turn will allow you to lift more weight.
And as we all know when you lift more weight, you’re more capable to fighting off zombies when they inevitably attack. It’s standard procedure, really.
This teeny tiny deviation from the norm may throw people off guard, and it will definitely take some practice and some getting used to if you’re not accustomed to it, but in the long run it will pay huge dividends as far as overall squatting performance.
Outside of that, give the article a read and let me know what you think!
Whenever people think of Cressey Performance, there are probably two things that immediately pop into their heads:
1. Deadlifts. And….
2. Baseball.
And neither of the two should come as a surprise. For starters, we kinda have an affinity for deadlifts. Walk into the facility at any given moment throughout the day and you’re bound to find someone pulling something heavy off the ground.
Likewise, and with respects to the latter, roughly 85% of our clientele are Victoria Secret models baseball players.
And while many people are under the impression that we solely train baseball players, that couldn’t be further from the truth. I mean come on: I literally just said that 85% of our clientele are baseball players. You weren’t listening were you? WERE YOU!?!?!??!
Sometimes it’s like I’m talking to a brick wall.
In fact, we’ve had every sport imaginable train underneath our roof. You name the sport, and it’s likely we’ve worked with them: softball, tennis, volleyball, football, ultimate frisbee, hockey, basketball, wrestling, boxing, field hockey, swimming, lacrosse, and you can even add fencing into that pile. Totally not kidding.
About the only sport(s) that haven’t made an appearance are ice curling, synchronized swimming, and competitive eating (if that can even be considered a “sport”).
But lets dial in the conversation to soccer. We’ve trained our fair share of soccer players at CP ranging from high school players to recreational players to even having a cameo appearance by the likes of USA Women’s team member Lori Lindsey on occasion. What what!
Given that soccer is the most popular and widely played sport in the world, I thought I’d share a guest post by both Eric and Chris Martinez (AKA: the Dynamic Duo).
I probably shouldn’t admit this, but I enjoy reading research about as much as I enjoy getting dropped kicked in the face. Which is to say: I freakin hate it.
This isn’t to say that I don’t do it: I just don’t like it. At all.
But thankfully Eric and Chris were kind enough to review a recent squat study as it relates to soccer players, and I felt I’d share here on my blog.
Enjoy!
Soccer Players: To Squat or Not to Squat?
GOOOOAAAALLL! We’ve got one question for all of you soccer players…Do you SQUAT? Although we are not expecting any answers back at the moment, we do hope you are saying yes to your computer screen while reading this.
It’s not a coincidence if you are reading this and questioning, “Well, why should I squat if I do indeed play soccer?”
In all honesty, we could sit here and explain all the great benefits of squats, but that could take a whole other article itself to school everyone on. Instead, we would like to breakdown a study that the great Chris Beardsley and Bret Contreras discovered and dissected on their fantastic Strength and Conditioning Research.
The aforementioned study revolves around how strength training can lead to increases in power and speed for elite soccer players.
So, if you’re a soccer player or coach soccer players we highly recommend you sit back, relax, turn off the FC Barcelona game on the flat screen for a bit and take some notes.
If you are a current soccer player or former soccer player, you should know that the sport involves movements that involve speed and power. Ask any Strength and Conditioning coach how important those two elements are for athletic performance. We promise they will tell you it is very damn important for sports performance. If you want to be the best, you have to train like the best!
Back to our original question: If you play soccer do you squat?
We asked this question because the study we are about to break down by Keiner et al. shows strong correlations that sprint performance and leg strength can improve by doing both back squats and front squats. Man, if only we knew this back in our days when playing futbol, aka soccer. We probably would have been bending it like Beckham 😉
So What Did the Researchers Do?
The researchers wanted to track the development of 30m sprint performance in youth soccer players over a 2-year strength training intervention. So, they recruited 134 elite soccer players, not world cup stars ladies and gents.
The players were subdivided into three age-groups (A, B and C cohorts) and the average ages of each group were 17, 15 and 13, respectively.
To be very clear here, the participants in each cohort were divided into two groups. One group (Strength training group [STG]) was subjected to regular soccer training in addition to strength training twice a week for 2 years. The other group (Control group [CG]) completed only the regular soccer training.
The strength training group performed their workouts on non-consecutive days and the exercises varied between the parallel front and back squats during the week and also performed bench presses, deadlifts, neck presses, and exercises for the trunk muscles as well as the standing row.
Squat training for the strength-training group was periodized such that following initial technique training, the subjects started with a hypertrophy training block, which comprised 5 sets of 10 repetitions with 3-minutes rest between each set.
The next training block comprised a strength period of 5 sets of 6 repetitions with 3-minutes rest between each set followed by an additional training block of 5 sets of 4 repetitions with 5-minutes rest between each set.
The researchers measured 30m sprint times, including splits every 5m, and maximum 1RM front and back squat strength after two years of training.
So What Happened After All of This?
For Maximum Strength, the researchers reported that the strength-training subgroups of all three age-groups displayed greater improvements in the front and back squat 1RMs than the control sub-groups.
For 30m Sprinting Performance, the researchers found that in the A and C groups, the strength-training sub-group displayed significantly better reductions in sprint time than the control sub-group at each 5m split time between 5m and 30m. They found that in the B group, there was a significant difference between the strength-training and control sub-groups at the 5m, 20m and 25m splits.
Correlations; the researchers performed a correlation analysis and found that there was a significantly positive but moderate relationship between strength gains in 1RM expressed relative to body weight and improvement in sprint performance in all age groups.
The correlations were highest for the first 15m of sprinting, indicating the greater importance of squat strength for accelerating rather than maximal speed sprinting.
What Did the Researchers Conclude?
The researchers concluded that a strength training program involving front and back squats led to a positive improvement in the sprinting performances of young soccer players. Pretty cool. Right?
Wrapping It All Up
As you can see the research doesn’t lie. Of course there were limitations, but all studies have limitations. And, at the end of the day if those do not agree with these findings, that’s ok too because science is always open to debate.
We can definitely tell you from anecdotal experience that squats and front squats will 99.9% of the time increase speed, power, hypertrophy, strength, and overall athletic performance. In other words, we highly agree and approve of this study by Keiner et al.
So, just too briefly recap, if you are a soccer player, coach, or just an overall jock, we highly recommend you implement some sort of squat variations into your training regimen to maximize your full potential.
Don’t get us wrong here ladies and gents, we are not asking you to go load up a squat bar and max out for 500 lbs. We are simply saying whether its conventional back squats or front squats that you chose to do, do them with proper precautions, make sure you squat deep, and don’t be afraid to progressively overload.
And hey, if you squat more often, maybe you will score more GOOOOOAAAAALLLLLSSSS than the famous “Pele” did.
“No Excuses, Only Solutions”
References:
1). Influence of a 2-year strength training programme on power performance in elite youth soccer players, by Sander Keiner, Wirth and Schmidtbleicher, in European Journal of Sport Science, 2012.
2.) Chris Beardsley and Bret Contreras, 2012.
About the Authors
Chris and Eric Martinez, CISSN, CPT, BA, also known as the “Dynamic Duo” operate a world class personal training and online training business “Dynamic Duo Training.” They’re also fitness and nutrition writers, fitness models, and coaches that love helping people reach their goals. Their philosophy is “No excuses, only solutions.”
So, yesterday marked the start of a new “plan,” in a manner of speaking. Outside of posting the occasional video of me lifting heavy things off the floor or just my general awesomeness, I never really go into any great detail on my training or what my goals are.
Believe it or not, it’s not just always about having a steel plate for a chest 24/7.
As it stands now, I spent the past few weeks following Lean Hybrid Muscle, and while it kicked the living piss out of me (a good thing), I’ve decided I need a little more focus and something specific to train for. To that end, I’ve decided that I’m going to do something similar to what I did roughly two years ago when I did Project Tony Gets Sexified.
To review, back in January of 2009, I put myself through a short, planned out, six-week phase where I was going to get as lean as possible and then, like an idiot, not take pictures. In hindsight, it was a horrible time to do an experiment like that. I mean, who gets shredded right smack dab in the middle of winter, anyways?
Anyways, I had a few stipulations:
1.I couldn’t get too sexy. It would have been unfair to all the other guys out there.
2.I didn’t want my bodyweight to drop below a certain threshold – 195 lbs to be exact (starting weight was around 205 lbs at the time).
3.And, maybe most important of all, I wanted to maintain my strength levels. Simply put, I didn’t want to end up looking like an emaciated Abercrombie model that couldn’t punch his way through a wet paper towel.
That was about it, really.
Looking back – while there was definitely some structure (my good friend, Jen Heath, wrote my nutrition plan) – there was no real end-goal other than to diet for six weeks, hate life, think about carbs all…..the…..time, and say that I did it.
In the end, I was happy with the results and I looked pretty damn good if I do say so myself. Well, as good as you can expect in mid-February with no tan.
So, here’s the dealski. I’m going to give it another go, but not until mid-May/early-June. I’m saying this NOW because by writing it here on my blog, I’m hoping that the sense of accountability will actually force me to go through with it – because unlike two years ago, there IS an end-goal this time around.
The game plan is as follows:
Take the next three weeks and clean things up a bit. My girlfriend and I booked a flight down to Florida at the end of the month for a week, and I can’t, in good conscience, be walking around on a beach in the shape I’m in right now. In the grand scheme of things, this is nothing more than dialing in my nutrition for a week or two, and maybe throwing in some quick, ten-minute finishers at the end of my training sessions. Although, on an a side, I trained with EC yesterday and it was a doozy, so I may not have to worry about it.
A1. Front Squats vs. Chains (3 per side) 2×3, 2×6
A2. Stretch/activate something (which we didn’t do, LOL)
Once we’re back from Florida, I’m going to spend the next 6-8 weeks getting after it. Eric is currently doing a 5-6 day per week split (two upper body days, two lower body days, one “specialty day**,” and one carry/strongman day), and I’m just going to follow suit….I think. Personally, I want to take this time and really “bring up” (yes, I just used a bodybuilding term. And yes, a little piece of my soul just died) my lower body, so I may just toy around with a Smolov squat cycle, depending on how sadistic I feel.
By the time mid-May/early-June hits, it’s go time! There’s no need to go into the details now (truthfully, I don’t even know what they are yet), but suffice it to say, I’m thinking I’m going to do it right this time. Which is to say, I’m going to diet down, do an actual water manipulation/deplete/carb up the final week, and possibly hire a professional photographer to come to the facility and take pictures. If you play your cards right, I may even show them to you. You’ll have to beg, though……;o)
And no, I’m NOT stepping on a stage – so save your breath.
Then, after all of that, I’m going to make a run at that 600 lb deadlift I’ve been talking about for a while now. Time to put up or shut up.
So, um, yeah, that’s it. This should make for an interesting next few months in terms of my training. Having some focus – a plan – will undoubtedly light a fire under my ass. What about you? What’s your game plan? If anything, I hope this post got you in the mindset that having some kind of plan is kind of important.
* I pulled heavy last Friday, working up to 495 lbs for 4×3, and this was absolute torture. Anything over five reps is cardio to me, and I can’t remember the last time I did ten reps on deadlifts. Jesus, that sucked.
** Translation: arm day. ROTFLMAO. No but seriously, though, I’m on it.


 Chris and Eric Martinez, CISSN, CPT, BA, also known as the “Dynamic Duo” operate a world class personal training and online training business “Dynamic Duo Training.” They’re also fitness and nutrition writers, fitness models, and coaches that love helping people reach their goals. Their philosophy is “No excuses, only solutions.”

