Categoriescoaching

Addressing My Coaching Gaps

I am an imperfect coach.

I don’t know everything and I don’t pretend to.

One of the most admirable qualities I think any coach should possess is having a modicum of humbleness that acknowledges their “gaps.”

Copyright: convisum / 123RF Stock Photo


Some coaches are stellar at teaching the “big 3” but are unable to break down sprint mechanics.

Others are nutrition nerds and can break down the Kreb’s Cycle by heart, yet have limited experience coaching the nuances of the Turkish Get-Up.

And then there are those who feel the kipping pull-up is a good exercise:


I keed, I keed[footnote]It’s a joke obligatory CrossFit defender guy. Relax. Here, I made you some organic, grass-fed sweet potato pancakes. BFFs again?[/footnote]

As coaches we can’t be everything to everyone. However, that doesn’t mean we should avoid making our coaching gaps less “gappy” altogether.

Throwing myself into the fire I’ll be the first to admit I’m garbage when it comes to coaching the Olympic lifts. In fact I wrote an entire article on why I don’t use them in any of my programming.

A few weeks ago I had a client ask me if I could coach him up on the ballistic KB movements: I.e., kettlebell cleans and snatches.

[Cue crickets chirping]

I was honest.

I told him I could probably finagle my way through it and demonstrate a competent clean and snatch, however I knew he’d benefit from keener eyes on the matter. So I set my client up with a few sessions with Coach Justice Williams, a local StrongFirst certified coach here in Boston.

To that end, I wanted to narrow my own coaching gap and asked Justice if he’d be willing to film a few videos with me breaking down the clean and snatch.

He enthusiastically agreed.

Today is video #1….breaking down the swing/hip snap. Because, first and foremost: if you don’t own the swing/hip snap, you will not own the clean or snatch.

In this short tutorial we go through his coaching tips as well as common mistakes people may make along the way.

Enjoy.

Categoriescoaching Exercise Technique

2-KB Front Squat: A Simple Looking Exercise That’s Anything But

Being a “good” coach and writing effective training programs isn’t about inserting the most demanding or most obnoxious looking exercises for your athletes & clients.

Peruse social media and you’ll inevitably come across any number of fit pros vying for everyone’s attention with elaborate looking exercises ranging from Quasi-isometric deadlifts vs. chains (from a deficit on one leg) to flag-holds with band abduction (think about it).[footnote] Any day now someone’s going to post a video of juggling chain saws on a BOSU ball. Wait for it, wait for it……[/footnote]

I’m being facetious. But I’m not far off from being dead serious.

I’m lame, and could really care less about garnering “likes” by wooing people with circus acts.

Copyright: vadymvdrobot / 123RF Stock Photo


When I watch some of the things coaches put up on their IG feed or YouTube channel I have to wonder if they think about the following:

1.  What’s the likelihood that 3% of their audience can reproduce a modicum of what they’re viewing?

“Look at me, Weeeeeeeeeeeeeeee.”

2. How is said exercise going to help them?

I’m not trying to be a Johnny Raincloud here. I understand that, sometimes, people just want to do shit to do shit.

Great.

Do it.

There doesn’t always have to be a reason or rationale backed up by a Mel Siff quote.

However, too, I feel those who do have an audience and do pride themselves on sharing actionable content (and not just selfies) with the masses, share a responsibility to be practical – more often than not – with the content and information they’re relaying.

Just my two-cents.

Excuse me while I step off my soap-box.

On that note, lets talk about one of my favs.

2-KB Front Squat

I’m not the only coach who’s a fan of this squat variation. Others like Mike Robertson, Artemis Scantalides, Molly Galbraith, and pretty much every coach in the history of ever who’s been affiliated with StrongFirst or RKC certification are fans.

It’s one of my “go-to” squat variations that I use with athletes and general population clients alike for a variety of reasons:

1. It’s un-paralleled with how it helps people learn to appreciate FULL-body tension. The anterior placement of the load forces the core to fire like crazy and helps to promote ideal positioning of the torso:

  • Less rib flair and more of a “canister” position where the pelvis and rib-cage are stacked on top of one another, in addition to the pelvic floor and diaphragm. The abdominals are called into action to resist an excessive arch.

As a result…

  • A more upright torso comes to fruition which helps to offset excessive shearing of the spine. NOTE: this is NOT to insinuate a forward lean is wrong or “bad” when squatting, it’s not. In fact, it’s warranted and needs to happen. However, for a large chunk of people, especially in the beginning stages, it’s more “joint-friendly” to adopt an upright torso, accumulate reps there, and then progress to advanced variations where more forward lean enters the picture.

2. It’s a great way to load someone without crushing them.

To steal a train of thought from Artemis Scantalides:

The double kettlebell front squat allows you to train a decreased load for the same physiological effect. So even though you are not squatting as much weight, because of the asymmetrical shape of the kettlebell, and the placement of the kettlebells in the rack position, you are able to maintain squat strength by training the double kettlebell front squat regularly.

3. It humbles people. Even large humans who can seemingly squat Ohio will find this variation challenging. It doesn’t take much. Two, 24 kg bells will make many huddle in the corner sucking their thumb.

Below is a quick video I shot this AM which goes into slight detail on some of the components of the exercise, namely the set-up, how to transition the bells to the starting position, and basic cuing.

Hope it helps.

Quick-n-Dirty 2 KB Front Squat Tutorial

Categoriescoaching Exercise Technique

Two Cues to Clean Up Your Turkish Get-Up

Hope everyone’s New Years was fantastic and safe. Lisa and I celebrated our last Holiday as non-parents by being lame and going to bed at 9 PM New Year’s Eve. We figured we’d start a new hash-tag to highlight the fact: #sleepingwhilewecan.

2017 is here and with my first post of the year I wanted to discuss two common mistakes I see people make with their Turkish Get-Up.

Copyright: karmiic / 123RF Stock Photo


Lisa has been on vacation from work since before Christmas and I’ve taken advantage of tagging along in the mornings to train with her at her commercial gym. I don’t make it into commercial gyms all too often, but when I do you can bet two things will happen:

  1. I have to do everything I can to not want to gauge out my corneas.[footnote]Although, to this gym’s credit (the BSC in Allston), there are a lot of cool things happening. Out of all the BSC’s I’ve visited in Boston, this is the one I prefer the most. There are just as many squat racks as bench press stations, and there are always some pretty strong people getting after it there.[/footnote]
  2. I always pick up some good ideas for blog fodder.

During the past week I’ve noticed a lot of people performing Turkish get-ups, which is awesome. I think it’s rad to see more and more people venturing out of their comfort zones. Unfortunately, I’ve also noticed a few common themes with regards to questionable technique while observing the same people. Mistakes that are very subtle in nature, but can make a profound difference when it comes to reduced injury risk when corrected.

1) Rolled Shoulder vs. Packed Shoulder

This is the one snafu I see the most often. When someone transitions from the forearm to the “T” position (to the hand) they’ll allow the shoulder supporting their weight to roll forward. Kinda like this:

rolled-shoulder

Ouch.

With bodyweight or a lighter KB it won’t be that big of a deal. However, it’s a bad habit to fall into (even with light loads) and is going to place a lot of strain on the anterior shoulder, most notably the bicep tendon.

The better approach is to ensure a “packed” shoulder. Like this:

packed-shoulder

Bonus points for the sick Star Wars t-shirt. Demerit points for pitting out. My bad.

The simplest verbal cue I’ll use in this case is to tell the person to “place you shoulder blade in your back pocket” or maybe to say something to effect of “cork screw your hand into the ground.”

Both work equally well and place the shoulder in a far superior (and stable) position to transition forward.

2) Not Getting Under the Bell

Another common mistake I see often is people not getting underneath the bell when transitioning from the tripod/3-point stance to half-kneeling.

Most will perform more of “teapot” motion cranking through their lumbar spine (<– props to Artemis Scantalides for the teapot analogy) rather than hinging INTO their hips to get underneath the bell.

Here’s a quick 1:15 minute video explaining what I mean:


Learning to use the hips is crucial here and helps with getting a feel for what it means to “control” the bell. Not surprisingly some people struggle with this. Here’s simple way to groove things and get those hips nice a juicy:


Give the above suggestions a try and let me know if they make a difference. If not, I guess I’ll GFM…;o)

Categoriescoaching Exercise Technique

Turkish Get-Up Tip: Vertical Knee

The Turkish Get-Up.

Some people love them.

I mean, really love them.

https://www.youtube.com/watch?v=M_98w0cwqFQ


And others are indifferent maybe even skeptical.

I know some strength coaches who view them as a valued asset to their programs, providing insight on their athlete’s movement quality as well as highlighting any “weak links” that may exist.

And I know some strength coaches who could make a list of other things more valuable or worth their time:

  • Deadlifts
  • Squats
  • Arguing with a vegan
  • Running a 5K
  • A basket of dicks

I, for one, do find value in them.  Of course, whether or not I transplant them into someone’s program depends on several factors; namely, their goal(s).

Sorry, but if someone’s goal is hypertrophy I can think of roughly 412 other exercises more prudent to get the job done than the Turkish get-up.

I’m not saying it’s a waste of time to include them in a program designed to get someone jacked – maybe include them as part of an extended warm-up to get the joints primed for larger, compound movements, or, say, if someone has the movement quality of a pregnant pig (they’re a nice addition to GPP days) – however, I’d raise an eyebrow (or two) to any coach who places heavy precedence on including them in such a program.

That said, I find the get-up to be one of those universal movements I use with my athletes and general fitness clients alike. For athletes it’s a great way to control fatigue and reduce axial loading. Not to mention we’re accomplishing a lot with regards to scapular stability, hip mobility, glute activation, as well as working on primitive patterns such as rolling, half kneeling, to standing.

I pepper them into programs for general fitness clients because, well, it’s good for them (and I like to LOL when they call me an a-hole for making them do it).

There are a lot of moving parts to the get-up. Not surprisingly, this makes the learning curve a bit tricky for some with regards to honing technique

Much like how I prefer to layer the KB Swing, I think it’s wise to also break down the get-up to more bite-size portions.

Today I’d like share a tip I learned from StrongFirst Team Leader, Artemis Scantalides, on a subtle “technique trap” many seem to fall prey to.

Maintaining a vertical knee (which helps to keep the glute engaged during the initial roll to press).

Vertical Knee

CategoriesExercise Technique Exercises You Should Be Doing

Exercises You Should Be Doing: 1-Arm Bottoms-Up Anything

Drake said it best:

“Started from the bottom now we’re here.”

Based off last week’s article on Building the Squat From the Bottom and today’s apropos titled post, you may think I’m obsessed with bottoms.

Kim Kardashian and J-Lo jokes aside, you’re 100% correct.

When I was coaching at Cressey Sports Performance and working with numerous overhead athletes, utilizing bottoms-up exercises was a daily occurrence…many times serving as a starting point for guys traveling to Massachusetts to train after a tenuously long baseball season or maybe recovering from an injury.

Get it?

Started From the Bottom?

Bottoms-up? Starting point?[footnote]This wordplay doesn’t come easy folks.[/footnote]

In case you’re not picking up what I’m putting down: I like bottoms-up (kettlebell) exercises.

Like THIS one. And THIS one.

There are many reasons why, too.

1) Better Shoulder Health and Rotator Cuff Activation

With regards to shoulder health and rotator cuff activation, there aren’t many things more effective than holding a kettlebell upside down. Because grip becomes more of a “thing” here, a phenomenon called irradiation comes into play. Simply put: grip strength helps the shoulder to “pack” itself, providing more stability to the area.

Don’t believe me?

Hold your arm out in front of you making a fist. But don’t do anything, just hold it there.

Now, MAKE A FIST (as if you were going to thunder-punch a T-Rex). Notice how your shoulder kinda tensed up and “packed” itself. That’s irradiation.

Moreover, when we start talking about the rotator cuff muscles and what the anatomy books tells us their function is we get this:

  • Internal/external rotation of the humerus.
  • Abduction of the humerus
  • Humeral depression (counteract pull of delts)

All of this is correct. And, I defy anyone to put this bit of trivia in their Match.com profile and not be beating people off with a stick.

However, the RC’s true “function” is to keep the humeral head centered in the glenoid fossa.[footnote]This is why I’m not a huge fan of high(er) rep external rotation work. Exercises such as side lying external rotation and standing band external rotations are fantastic in terms of EMG activity. But it’s important to stay cognizant that high(er) repetition work will fatigue the rotator cuff, thus resulting in superior migration of the humeral head leading to increased risk of impingement.[/footnote]Bottoms-up KB carries are an excellent choice to train the rotator cuff in this fashion.

https://www.youtube.com/watch?v=PnpS41ag5ME


2) De-loading

I am a firm believer in lifting heavy things. The slogan of this site is “Because Heavy Things Won’t Lift Themselves” for crying out loud.

That said, it’s important to pump the brakes from time to time and understand (and respect) that lifting “heavy,” all the time, isn’t necessary to build a strong, durable, aesthetically pleasing body.

It’s the backbone, of course. But the “go heavy, or go home” mentality can be just as deleterious and stagnating as going too light.

What I also love about bottoms-up exercises is that they serve as a built-in “de-load” mechanism for many trainees, not to mention a tricky way to place a spotlight on any glaring side-to-side strength/muscular imbalances.

Have someone perform a 1-arm Bottoms-Up Bench Press or Overhead Press and watch as it becomes abundantly clear which arm is stronger than the other.


What’s more, because so many trainees like to “muscle” their exercises[footnote]That’s just a nice way of saying they’re compensating the shit out of everything.[/footnote], many of the smaller, stabilizing musculature gets the shaft. And thus, nagging injuries may occur.

Relax: I’m not going all Tracy Anderson and saying something asinine like “it’s important to use lighter weights so we can target our deep, less angry, stabilizing muscles. Also, dipping your left hand into a bucket of unicorn tears detoxes the body of sadness.”

What I am saying, however, is that it’s okay to use an exercise such as this as an accessory movement to help address a gross imbalance or weakness, or to even help build some muscle. The Bottoms-Up KB Overhead Press is actually one of my favorite shoulder exercises to build mass because it forces people to be strict with their technique.

  • Squeeze glutes, quads, and abs.
  • Lock rib cage down.
  • Press

3) Core Stability

I don’t feel I need to spend a lot of time on this one. Performing any unilateral movement (upper or lower body) has obvious core training benefits.

Here, not only are we getting all the benefits described above, but we’re also getting the benefit of challenging our core musculature to prevent any un-wanted motion (in this case: lateral flexion, rotation, extension, etc).

Bottoms-Up Split Squat


Bottoms-Up Bulgarian Split Squat


Bottoms-Up Reverse Lunge


With all these drills the objective is to stabilize the kettlebell so that it stays upright throughout, while at the same time maintaining a good thoraco-pelvic canister (minimizing rib flair and excessive anterior pelvic tilt).

[A good way to visualize this is to think about an invisible line being drawn from your nipple line to your belly button. You want to “connect” your rib cage to your pelvis and LOCK IT DOWN. The invisible line should stay the same throughout the duration of a set and not get longer].

You’ll notice on all the examples above I make a fist with my free hand to help increase bodily tension. This is important to help maintain that canister

4) And Lastly, Because I Said So

How’s that for a legit reason to give these exercises a try?

Categoriescoaching Exercise Technique Strength Training

3 Ways the Kettlebell Deadlift Can Improve Your Barbell Deadlift

Today’s guest post comes courtesy of Providence, RI based strength coach, Joe DeLeo. He discusses the kettlebell deadlift and why it can have a lot of influence on one’s performance with the barbell deadlift.

Enjoy!

3 Ways the Kettlebell Deadlift Can Improve Your Barbell Deadlift

The kettlebell deadlift can help you improve your barbell deadlift and the hip hinge.

I know what you are thinking…. “There can be only one!”

Hopefully by the end of this article I will have convinced you of the value of both and how you can improve your barbell deadlift with the kettlebell deadlift.

Key Benefits & Differences

Deadlifts can be performed two ways: conventional and sumo. A conventional deadlift has the feet placed inside the grip and a sumo deadlift has the feet placed outside the grip.

If this is confusing, I highly encourage you to go back and read Tony’s blog The Deadlift: Beginner Basics as well as his E-Book Pick Heavy Things Up which can you get for FREE by subscribing at the bottom of this article.

Note from TG: I agree. They’re both life changing. And come with a lifetime supply of hugs.

There are three main differences between the kettlebell and barbell deadlift: Grip, Stance, and The Path of the Handle.

1) Grip

In the barbell deadlift you maintain an overhand grip (palms down, knuckles up) for as long as you can maintain perfect technique or until you get to a heavy enough weight. At this point you will switch to an alternate grip. In the kettlebell deadlift you maintain an overhand grip the entire time.

One of the limiting factors in being able to deadlift heavier weight is your grip strength. Usually a person’s grip will fatigue before their posterior chain does. As Boston based coach, owner of Iron Body Studios, and Xena herself, Artemis Scantalides, notes in THIS article:

“As kettlebell sizes increases so does the thickness of the handle. A thicker handle requires more muscle activation!”

Another added benefit is that when performing the double kettlebell deadlift you will be training the grip of each hand independently while simultaneously learning to maintain equal tension through the left and right sides of your back and latissmus dorsi. You can easily monitor this, by noting if one of your shoulders becomes unpacked or you have greater difficulty maintaining control with one hand over the other.

This really helps to develop the mind/body connection or in scientific terms the neuromuscular connection.

2) Stance

In the conventional barbell deadlift your feet will be about 12 inches apart and toes pointed at about 30 degrees. The handle of the barbell should align over your midfoot as seen in the pictures below.

In the kettlebell deadlift your stance will fluctuate depending on whether you are deadlifting one or two kettlebells and the bell size. The kettlebell deadlift by nature is more similar to a sumo barbell deadlift as your hands are going between your legs and you’re in a wider stance (picture below).

One of the most difficult aspects in the barbell deadlift is finding the correct back position and making sure the chest is ‘up’ (I should be able to see the logo on your t-shirt!).

Mark Rippetoe makes a great point in Starting Strength: Basic Barbell Training:

“Everything else can be wrong with the deadlift and nothing really bad will happen but if your low back is round under a big load, safety will be compromised.”

It is very difficult to round your back with the kettlebell deadlift because the weight is behind you. If you round your back you will shift weight to the balls of your feet and tip over.

3) The Path of the Handle

This is probably where the greatest difference lies and the biggest benefit as well.

The path of a barbell deadlift should be vertical, always. It is the most efficient way to get the bar off the floor.

With the kettlebell deadlift that’s not possible due to the placement of the bells level or behind the malleolus.

The path of the kettlebell takes the shape of a “J” as it travels from the ground through full hip extension.

Now this actually works to one’s advantage because it elicits a stronger stretch reflex in the glutes and the hamstrings. This is because the weight is traveling behind our center of mass. This helps to really groove a solid hip hinge for the barbell deadlift and build some serious strength in the posterior chain, not to mention it makes for a lot of fun picking heavy things up!

Focus on really building control and coordination with the kettlebell deadlift and see your barbell deadlift improve as well.

References

  1. Jones, Brett. Cook, Gray. Kettlebells from the Center: Dynami. Functional Movement Systems. 2010. Print.
  1. Baechle, Thomas R; Earle, Roger W.Essentials of Strength Straining and Conditioning; Page 327. National Strength and Conditioning Association. Human Kinetics. 2008. Print.
  1. Rippetoe, Mark. Starting Strength: Basic Barbell Training 3rd Edition. Page 108. The Aasgaard Company. 2013. Print.
  2. “Scantalides, Artemis. Why I love the Single and Double Kettlebell Deadlift. 12/10/2015. Website.”

About Joe DeLeo

Joe DeLeo is a former collegiate rower turned strength coach. His practice focuses on working with endurance athletes to get stronger so they can perform their best. He also has tremendous experience rehabbing rowing-related injuries and stresses. He focuses on three modalities to train his athletes and clients: bodyweight, kettlebells, and indian clubs.

He is a Certified Strength and Conditioning Specialist through the National Strength and Conditioning Association. He holds certifications as a Functional Movement Specialist, Rocktape FMT II, and is a Level I Girya with StrongFirst.

He lives in Providence, RI, where he can be found both off and on the water helping his athletes get stronger and faster! You can read his blog posts HERE.

CategoriesExercise Technique Exercises You Should Be Doing Strength Training

The Most Underrated Exercise in Strength and Conditioning? It’s Not Deadlifts.

While I can’t say it’s always been the case (I’ve grown less dogmatic and immature as a coach the older I’ve gotten[footnote]Not counting the incessant poop jokes and affinity for pop culture references in all aspects of my life.[/footnote], I operate under the guise that every exercise has its time and place.

Except for maybe this one.

If she were juggling a pair of chainsaws while standing on the BOSU balls I could see myself giving a nod of approval.

I used to scoff at any coach or trainer who had the audacity to have his or her client leg press instead of squat.

Roll my eyes whenever I saw leg extensions or leg curls programmed.

And don’t even get me started on the gym coat rack Smith Machine.

I was a gym snob through and through. Borderline douchey. I still am to a small degree. But I’ve toned it down considerably as the years have passed.

I mean, for what it’s worth: I’ve actually been including more low intensity aerobic training in my own training (and that of my athletes), which is something I would have punched myself in the face for in the not so distant past.

I’d like to think of it as a form of evolvement on my end. More to the point, I’m not so singular in my train of thought on any given topic[footnote]Except for when it comes to movies. I’m still rip-shit that Shakespeare in Love won Best Picture over Saving Private Ryan during the 1998 Academy Awards.[/footnote] In short: I’m more open and less of a dick.

In fact, my thoughts on the topic mirror that of Bret Contreras (in THIS post):

“If there’s one movement that I absolutely loathe, it’s the “movement” that attempts to convince readers to avoid certain exercises altogether.”

Flipping the script, though, rather than waxing poetic on exercises not to do, today I wanted to instead discuss an exercise I feel is vastly underrated and underutilized.

Dare I say…most people reading should make it a point of doing it more often.

(Double) Anterior Loaded KB Front Squats


This is an exercise I’ve been using for years at Cressey Sports Performance and have always understood its benefits. I’ve used it with many beginner and intermediate lifters, and for those who feel they’re above this exercise and think they’re “too elite,” I’d defer to strength coach, Joe Kenn, who uses it exclusively with many of his NFL athletes too.

Side Note: I’d encourage you to listen to his interview on Mike Robertson’s Physical Preparation Podcast HERE.

Why I Heart This Exercise

1. I’m not an anti-back squat guy. We incorporate it – and it’s many iterations – at CSP often. I do feel there’s a cost-benefit to the exercise and that it has to be paired well to the athlete/person given their injury history, training experience, and overall goals.

Having said that, the Anterior Loaded KB Front Squat (from now on referred to as ALKBFS because I’m lazy and don’t want to type it out every time) lends itself to be a much more “back friendly” variation that most anyone can do on day #1.

The fact the load is more anterior (and not directly over the spine) seems an obvious advantage.

2. The ALKBFS elicits an almost unparalleled “core” challenge. Because the load is more anterior, one must fight like crazy not to tip over.

I.e., this is an excellent drill to help teach/coach people to maintain t-spine extension. You’ll still want to encourage a flexion moment, but because this variation encourages more extension it allows people to stay more upright.

It won’t take much to humble even the strongest back squatter. I’ve seen numerous trainees (both male and female) second guess their weight selection.

3. Moreover, for those with upper body imbalances or mobility issues – which may make back squatting difficult – the ALKBFS is great option. If someone doesn’t have the requisite shoulder abduction/external rotation ROM it doesn’t make much sense to slam a square peg into a round hole.

Of course we can utilize a Safety Squat bar, a giant cambered bar, or even have them perform a traditional barbell front squat, which makes the aforementioned imbalance moot. However, I encourage you not to disregard this movement just to be a contrarian.

4. Another reason why I like the ALKBFS so much is that it can transform or melt itself into more of a “hybrid” exercise if one so chooses.

Who’s to say we couldn’t transition from a KB clean to a squat? Or a KB clean to a squat to a press? Or a KB clean to a squat to a press to an overhead farmer carry? Or a KB clean to a squat to a press to an overhead farmer carry to sniper roll off a loading dock, Jason Bourne style?

The possibilities are endless.

You could even perform them offset style:


Give them a try today and let me know what you think.

CategoriesExercise Technique Female Training Strength Training

How the Kettlebell Can Improve Your Deadlift

I had an interesting conversation with my good friend and fellow strength coach, Ben Bruno, not too long ago.

He and I like to catch up every now and then to 1) discuss our mutual affinity for JP Licks ice-cream and 2) talk some training and fitness shop.

He’s originally from New England and worked as a coach at Mike Boyle Strength and Conditioning for a handful of years before moving out to LA last fall for a change of pace and to pursue some other opportunities.

His typical clientele now out in LA resembles a litany of Hollywood A-listers and a “who’s who” of gossip magazine covers, as well as those people who have a bit more of an aesthetic bias towards training.

While he loves LA and the people he works with, a small percentage of his heart is still back in Boston, working with athletes and helping people get strong.

In one of our last conversations he made the comment that there’s a stark contrast in training mentality between the west and east coast. But a little context comes into play.

Whereas at Cressey Sports Performance, someone nails a 400+ lbs deadlift and no one bats an eye, out in LA someone hits that same lift in a commercial gym and it’s assumed they’re on steroids.  And then given their own reality tv show!

Similarly, with regards to female training, and especially with regards to female celebrities and the “Hollywood” mentality as a whole (my apologies with the gross generalization here), barbell training is almost considered taboo.

Ben noted that whenever he’s tried to get some (not all) of his female clients to train with free-weights they were a tad skittish and reticent to place any appreciable load on the barbell.

Truth be told, while the tide is slowly turning for the better (more and more women are reaping the benefits of strength training. See: CrossFit), there’s still a “barbells are scary” vibe that pervades the female psyche.  It’s slight, but it’s still there.

Ben noticed a funny thing, however.  He noted that whenever he had his female clients use kettlebells they were more than eager to “get after it.” It was almost as if they didn’t think kettlebells counted as strength training.

Whether he had them squat, deadlift, push, pull, swing, carry, or anything else you can think of to do with a KB, seemingly, they’d be more than willing to do whatever Ben told them to do. And then some.

Plus, they’d do it with some heavy ass weight.

I too have noticed this same phenomenon with some of my past and current female clients. Ask them to perform a barbell deadlift and you’d think I asked them to shoot Bambi. Of course, this notion doesn’t surprise me when you have female professionals like THIS ONE telling everyone how dangerous deadlifts are.

Idiocy notwithstanding, switch to a KB deadlift and it’s on like Donkey Kong.

Lets be honest:  KBs are just a smidge less intimidating for some people (guys included), and they’re actually more useful and better than barbells in some cases.

I mean, not everyone has access to a state of the art gym and kettlebells don’t take up a lot of space, so they’re a fantastic option for quick and efficient home workouts.

In addition they’re great in terms of their versatility and “user friendliness” in general.

And get this……

The Kettlebell Can Actually Help Improve Your (Barbell) Deadlift

More to the point, the kettlebell swing can help improve your deadlift.

But before we get into the nitty gritty, it would behoove us not to at least discuss proper technique with the swing.

To that point I have two go-to sources.

1.  Iron Body Studios’ own Artemis Scantalides and Eric Gahan

2.  Neghar Fonooni

If you watched both videos (and why wouldn’t you?), you can see that both camps mirror one another in terms of how they coach and cue the swing.

With that out of the way, lets discuss how the KB swing can help improve your deadlift.

1. It’s All About the Hip Hinge, Baby!

The biggest mistake I see most people make with the swing is thinking that it’s more of a squat swing as opposed to a hip snap swing.

The swing, when done correctly, helps groove a rock-solid hip hinge pattern. And as any competent strength coach or personal trainer will tell you, the deadlift requires a ROCK SOLID hip hinge pattern.

This is non-negotiable.

Learning to push the hips back and engaging the posterior chain (namely hamstrings and glutes) during a swing will undoubtedly carry over well to the deadlift

 2.  Staying “Tight”

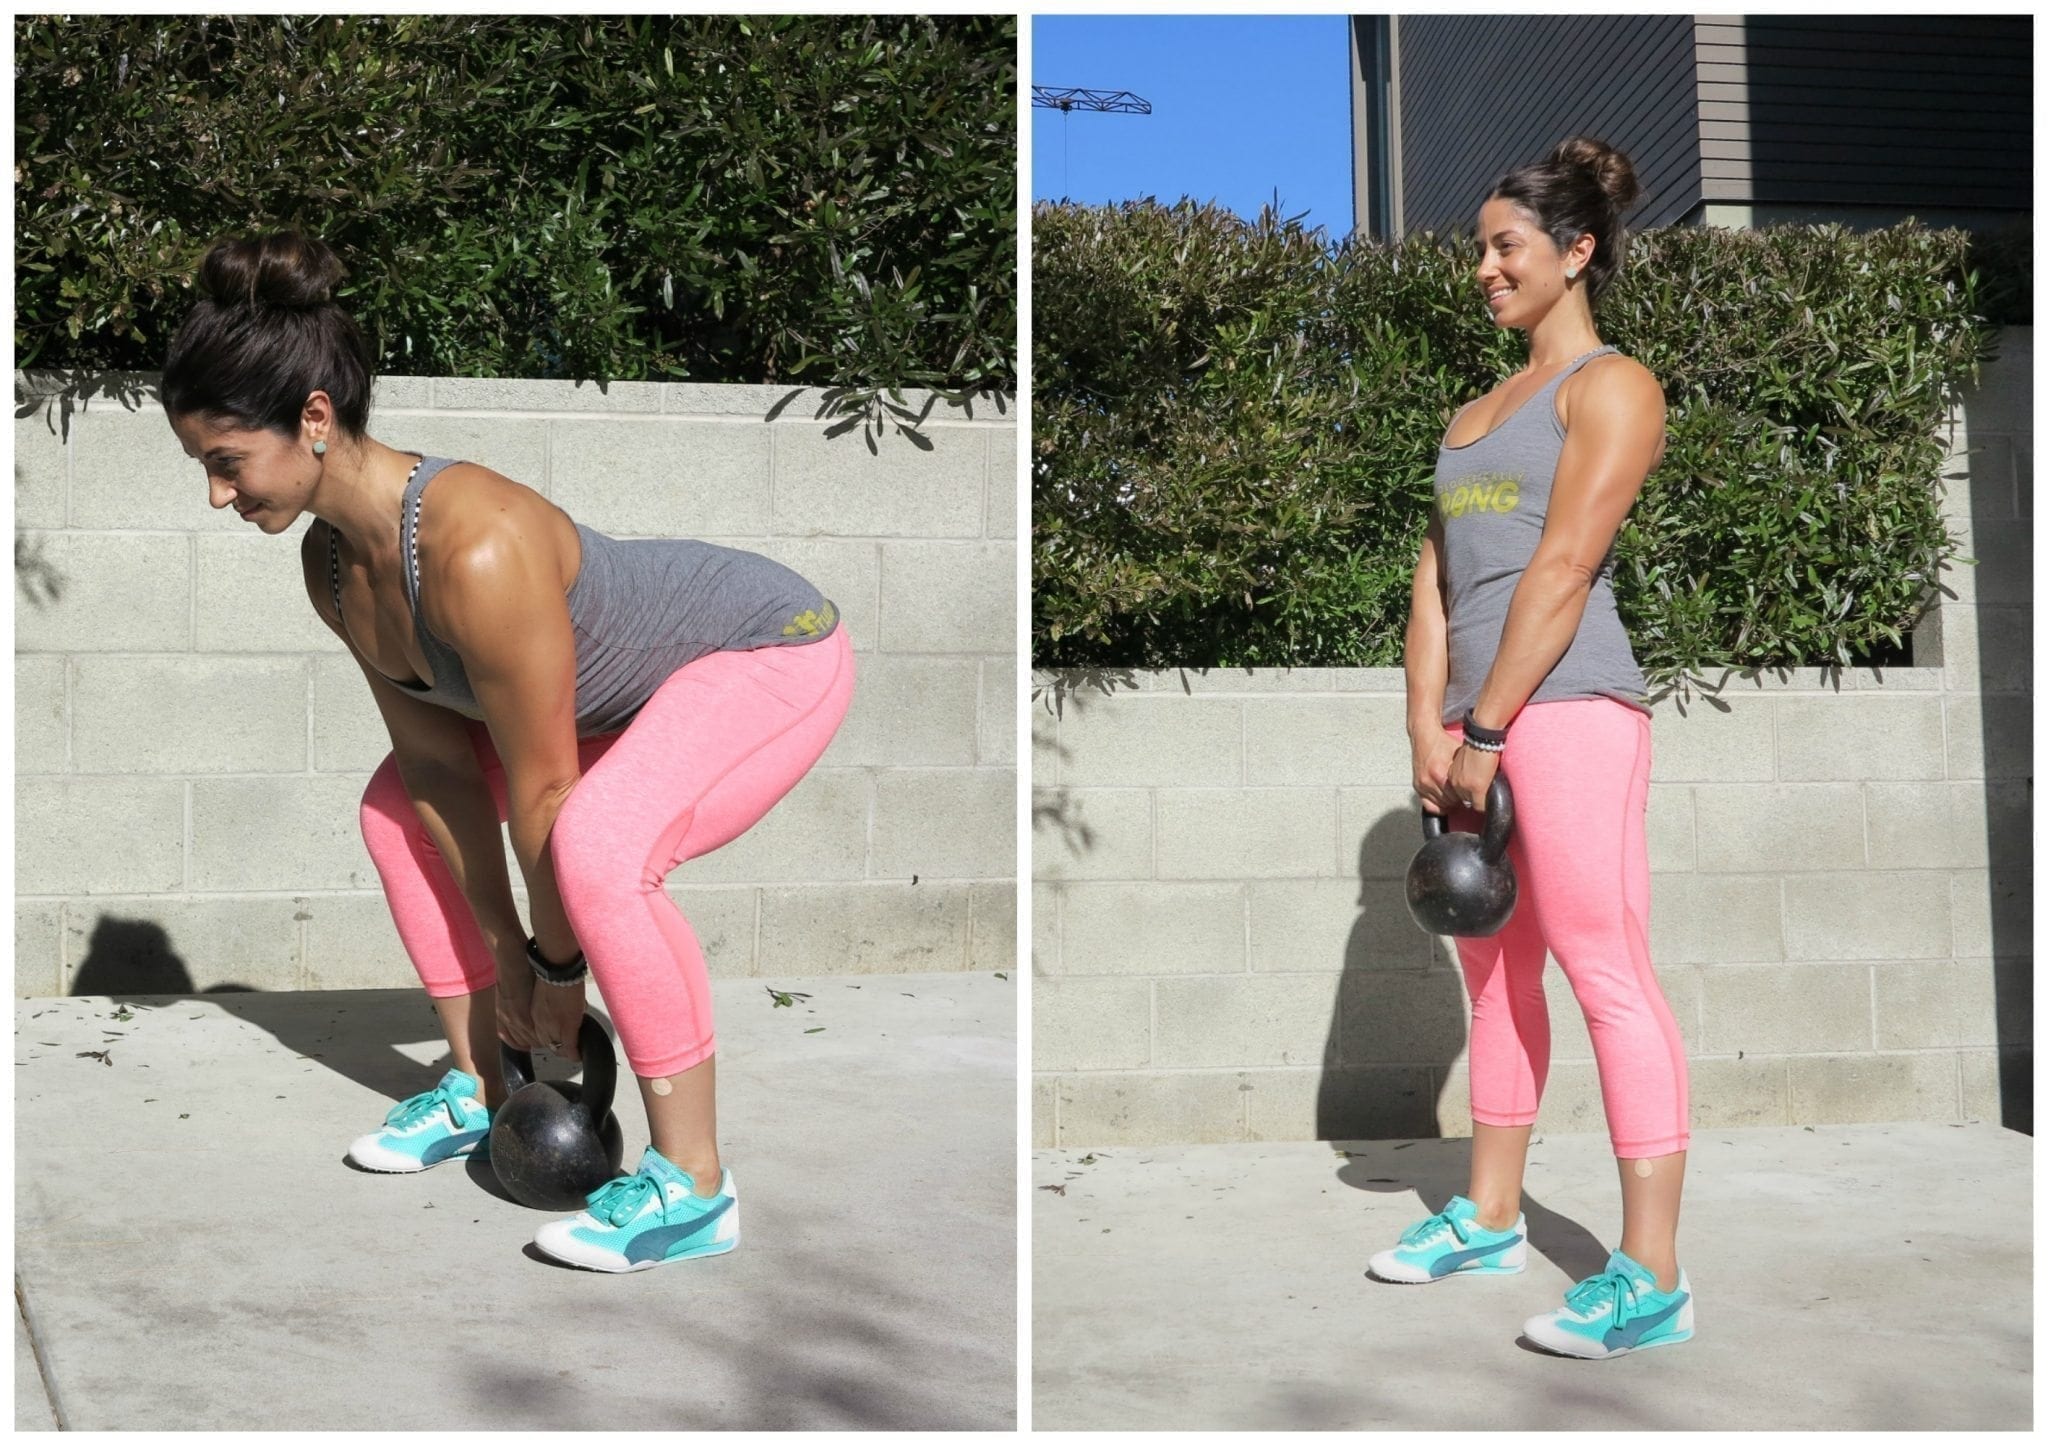
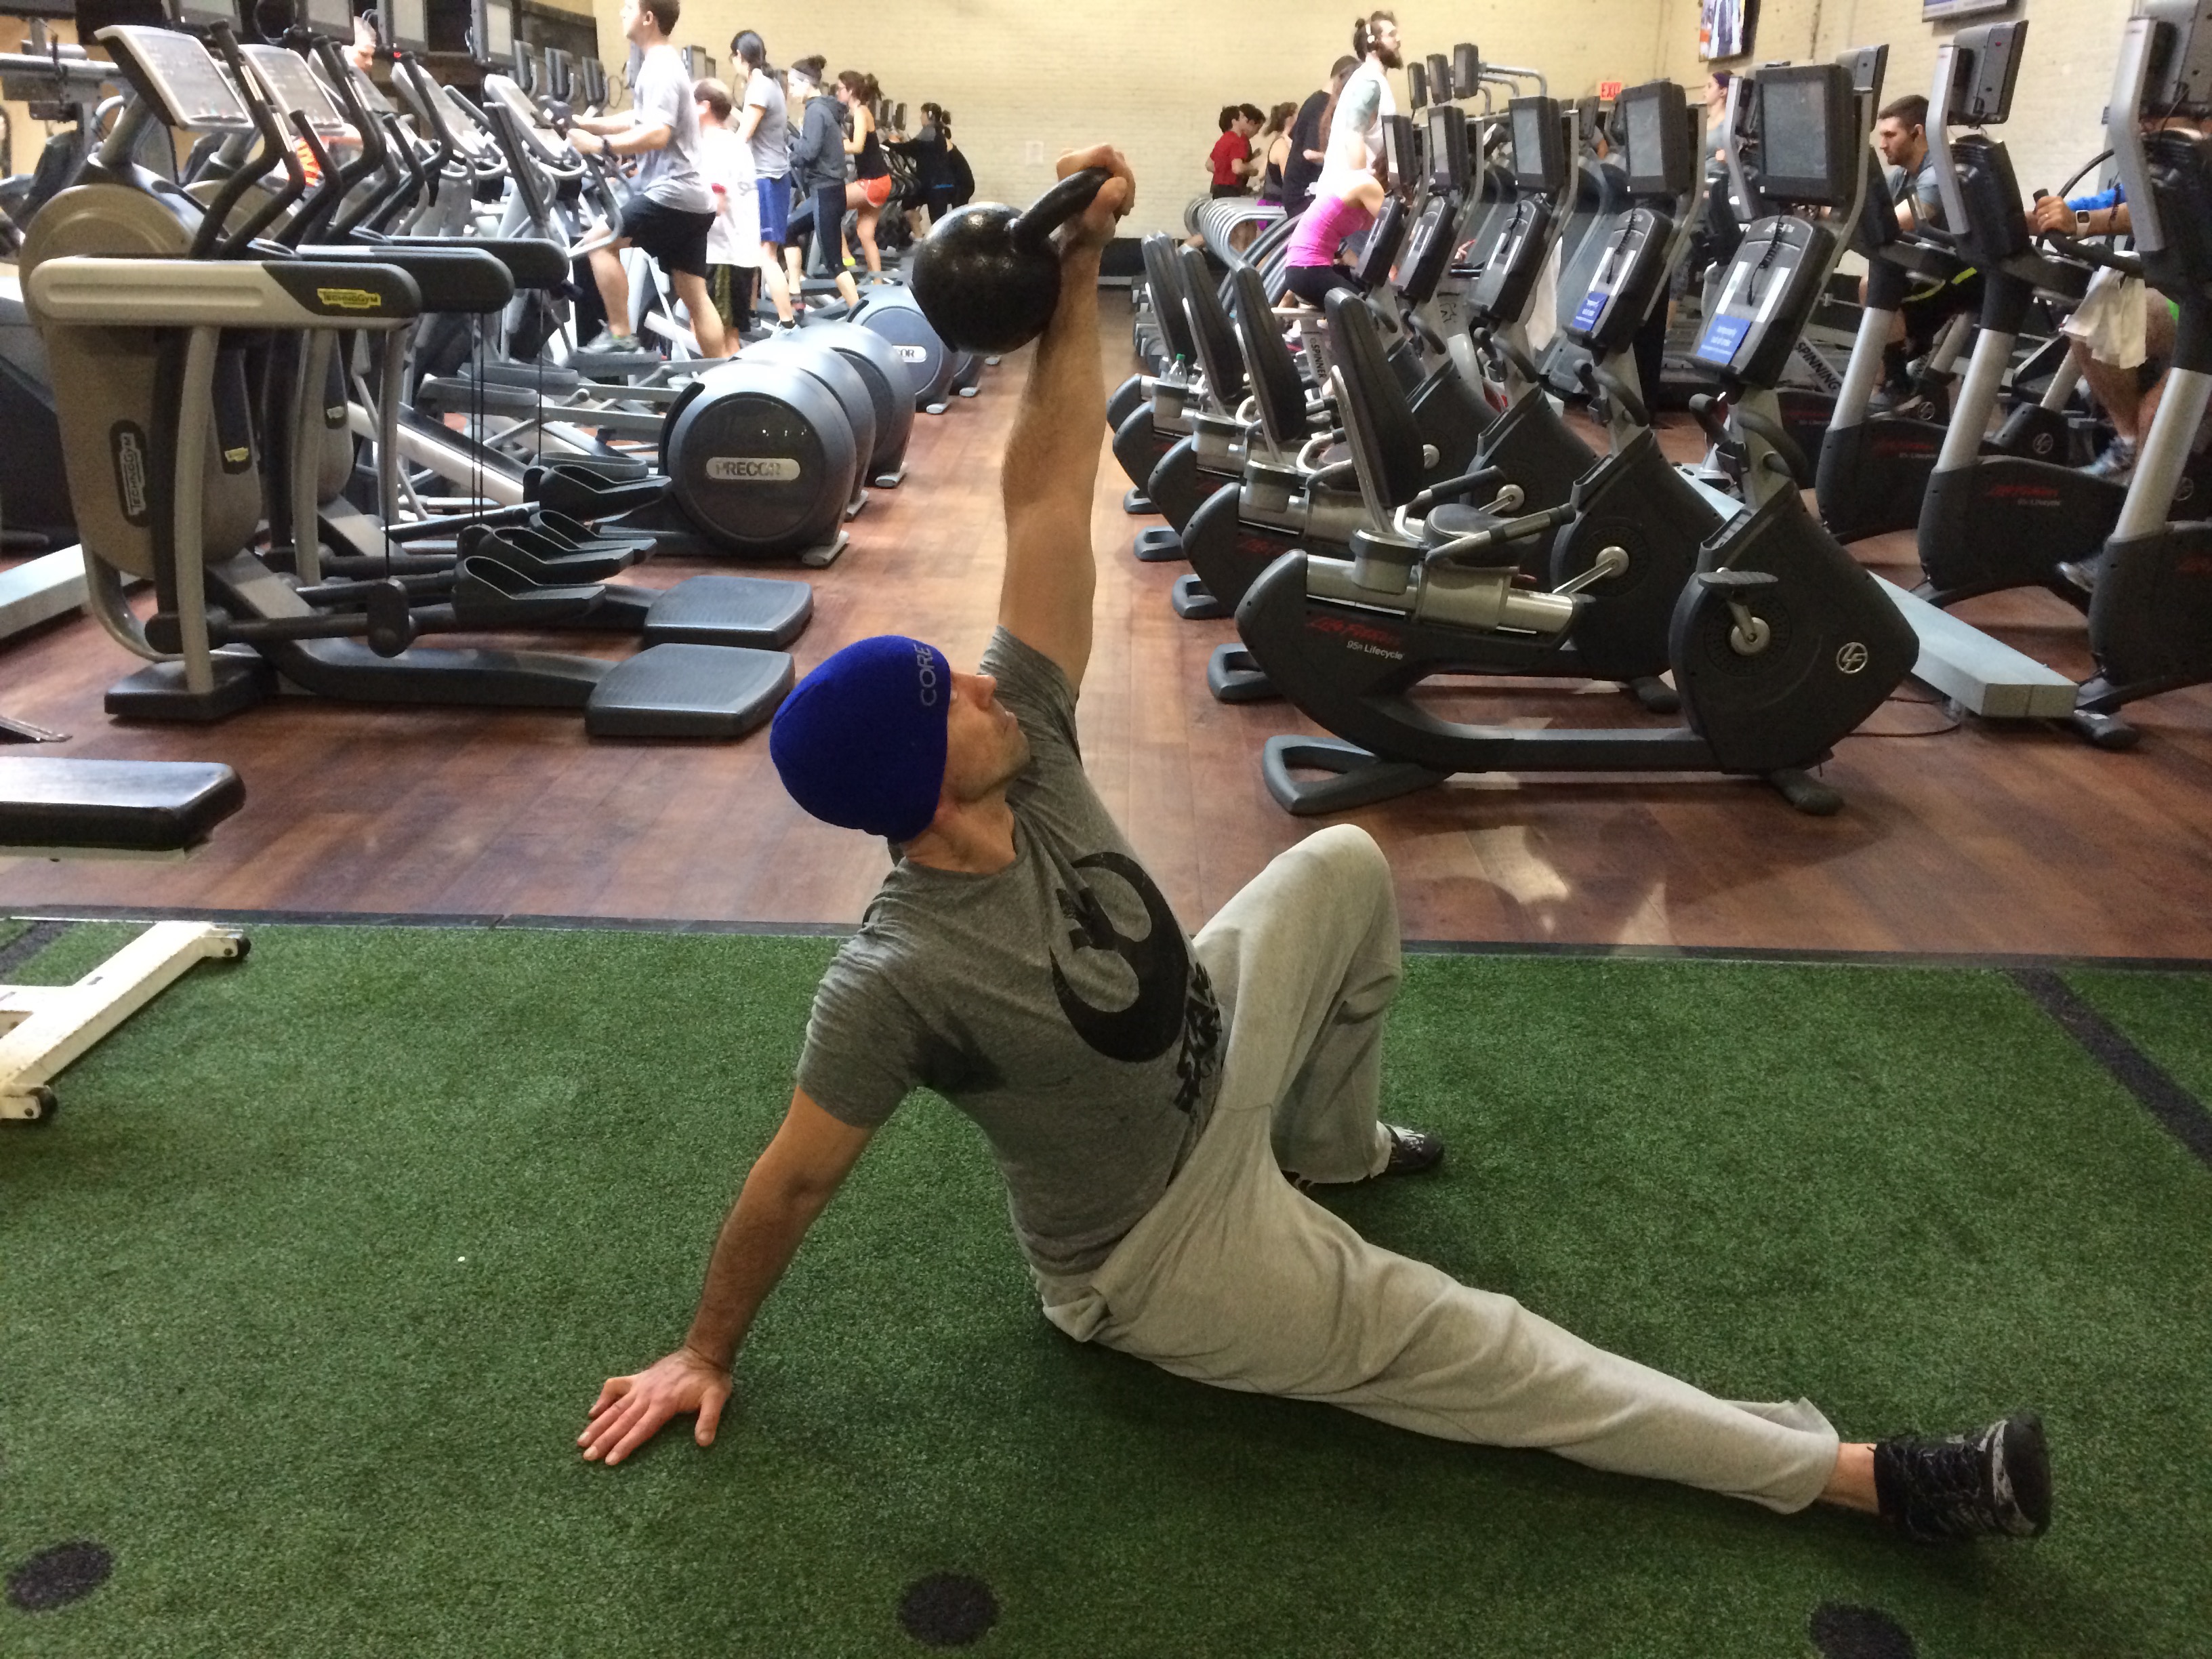
Look at this picture below of what the setup looks like for a KB swing.

Yeah, yeah the model is dashing. But other than that does anything look vaguely familiar?

It should, because it’s pretty much a dead-on image of what the set-up for a deadlift looks like (with the exception that with a barbell deadlift, the bar itself will be closer to the body and directly over the mid-foot, if not right up against the shins).

With the swing I like to cue one of two things to ensure tightness in the upper back:

1. Pretend like you’re squeezing an orange in your armpit and you’re trying to make orange juice.

2. Put your shoulder blades in your back pocket. This is a non-nerdy way of telling someone to posteriorly tilt their scapulae and to activate their lats (as well as the thoraco-lumbar fascia).

In short: promote more spinal stability.

Maintaining this “tightness” is key to the KB swing as well as a deadlift.

3.  Maximal Force Production

Remember above where I said the KB swing should resemble more of a hip SNAP.  That point cannot be overstated. 

The swing is an excellent way to help develop maximal force production. Think I’m full of it? Here’s what Strong First instructor and recent “I-made-the-Iron-Maiden-Challenge-My -Bitch” graduate, Artemis Scantalides, had to say on the matter.

“The purpose of the kettlebell swing is maximal force production.  Therefore, if the correct force is applied to an 8kg (~18lbs) kettlebell, that 8kg kettlebell can weigh up to 80lbs. 

If an 8kg kettlebell can weigh up to 80lbs with the correct force applied, imagine how much a 24kg (~53lbs) kettlebell can weigh if the correct force is applied??  

Subsequently, the kettlebell swing helps to improve deadlift strength because it allows you to use the lowest system load for maximal results. You are getting the most bang for your buck, by using less weight. 

As such, if you do not have a heavy weight available to you for deadlifts, then just do a few sets of perfect kettlebell swings and apply maximal force, and you just worked towards a stronger deadlift.”

Artemis: 1

Internet Gurus: 0

Final Thoughts

Kettlebells have a ton of merits, as I think we’ve covered. While they’ll never replace barbells for the big lifts, I like them because of all the ways they assist everything else. Obviously, they can help increase the deadlift, which I love.

I mean, being able to work on your deadlift when you’re not working on your deadlift? Doesn’t get much better than that.

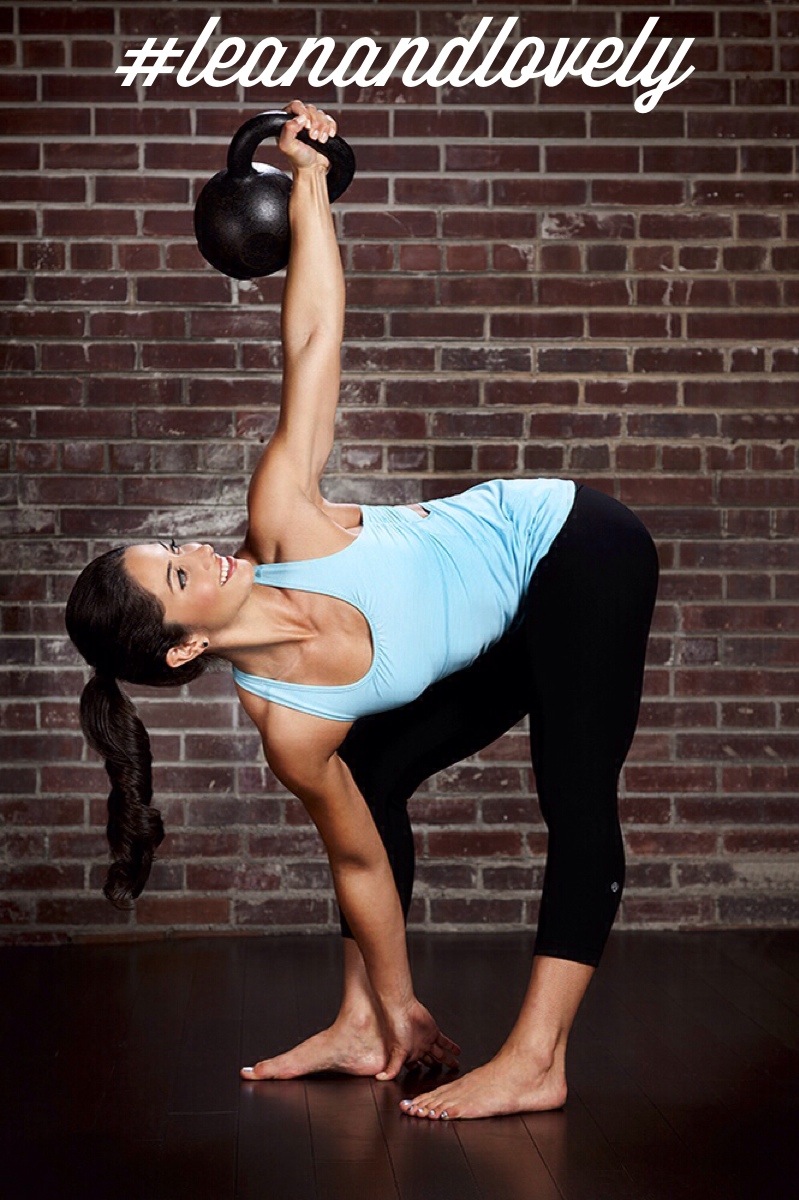
But kettlebells are also an amazing tool for active recovery, conditioning, or just as the mainstay in any great home-based program. If you’re looking for an awesome program featuring kettlebells, there’s really no reason to look any further than Lean & Lovely, the new program from the aforementioned Neghar Fonooni.

It’s obviously geared towards women, but let me tell you, if you use a 28kg bell and do any one of the workouts, you’ll very quickly see how guys can benefit from every single page of the book.

It’s 12 weeks of dedicated program, 25 extra bonus conditioning type workouts, and a ton of other stuff.

Most importantly: something like 40% of my readers are actually other trainers. People look to this blog to find ways to get better for themselves and their clients; to become better at their jobs.

I take that responsibility very seriously–so when I say that I think Lean & Lovely is a resource that ANY trainer can use, I mean it. If you pick up just one coaching cue to teach the swing, it’s worth it. If you pick up just one new way to communicate more effectively with your female clients, it’s worth it. And if you read through the book and it gives you ideas you can use to design workouts, it’s more than worth it, 10X over. 

That’s the best part about continuing education. Small investments pay huge dividends. So, again, Lean & Lovely is pretty much a no brainer.

One final note, about “marketing.”

I caught some flak on Facebook the other day for recommending L&L. Which is crazy. It’s a good product, and one I think will help people. Does my article help move some units? I sure hope so. But consider this.

In the back end of my blog, my metrics indicate that, including this one, I have now published 1373 posts. Of those, if I had to take an educated guess, less than 30 have mentioned or “promoted” some type of program or product. Less than 30. That comes out to about 2.25%. And that isn’t counting any of my articles published elsewhere, which, like my blog, are a FREE resource.

So, really: it’s mathematically unarguable that I only “promote” stuff I believe in. Programs and products that I really and truly think will add value to my readers or the fitness community and industry over all. Lean & Lovely is absolutely one of those programs, so I absolutely feel comfortable telling your to order it. It’s as simple as that.

If that’s not cool with you…well, my bad.

CategoriesExercise Technique

How to “Handle” the Kettlebell

There was a time when I hated kettlebells.  Okay maybe hate’s a strong word. Hate is something that’s reserved for things like Hitler, terrorists, sub-prime mortgage loans, and poodles.

Disliked may be a more appropriate term in this context.

Regardless there was a time when I felt kettlebells were nothing more than a fad  – look Ma, a cannonball with handles!! – that the fitness industry latched on to because it was something new (to us Westerners, anyways), and that it would run its course before you could say “stone washed jeans” or “Gangnam Style.”  For real.

LOL – shows how much I know.  I also remember back in the late 90s when this white rapper from Detroit with a funny name burst onto the scene.  I thought he was some joke or gimmick, a one-hit wonder at best. There was no way he was going to last!

Eminem seems to have done alright for himself.

Fast forward to today and my feelings towards kettlebells have changed. Now, I’m not someone who’s a “kettlebell guy” per se.  I don’t solely use kettlebells or claim that they’re somehow superior to anything else.

I always find it comical whenever a coach or trainer claims kettlebells trump anything else out there, as if barbells and dumbbells are now obsolete.

Last time I checked weight is weight, and the body can’t differentiate between a DB Goblet Squat or a KB Goblet Squat, or a DB row compared to a KB row.

Of course there are variables and advantages that a KB offers that other pieces of equipment can’t touch with a ten-foot pole, which is why I feel they’re a valuable TOOL in the toolbox.  They, along with everything else in our arsenal – barbells, dumbbells, TRX, bands, chains, Prowlers, selectorized machines, lightsabers, and yes, even BOSU balls – have their place.

However, it all comes at a price.

You see, kettlebells are a blessing and a curse.

A blessing in that they’re one of the most versatile pieces of equipment you can ask for.

They’re a wonderful teaching tool to groove a proper squat and hip hinge pattern, not to mention you can push, pull, carry, and swing the son-of-a-bitch to your hearts content.

All while taking up minimal gym space, as is the case with my stash of KBs in my office:

Conversely, KBs are a curse in that they’re one of the more innocuous looking pieces of equipment out there – seriously Ma, look. A cannonball!  With a handle!  Weeeeeeeee – and many, many, MANY people (trainers and coaches included) have no clue how to properly use them, let alone coach others to use them correctly.

To help save face, below are some blogs and articles you may find helpful.

HERE is a post (including a killer video by Artemis Scantalides and Eric Gahan of Iron Body Studios) on how to coach a proper swing pattern.

HERE is a post on a few (overlooked) tips on how to clean up KB swing technique.

And HERE’s a post on “stuff” you can do with a kettlebell to kick your own ass.

All of those would be fantastic starting points, but I’d also encourage those looking to take their KB skills to Jedi level to seek out further assistance from the likes of StrongFirst or DragonDoor.

Today, though, I wanted to tackle a few common mistakes people make with how they handle the kettlebell (<— no pun intended).

More specifically with how they pick it up and put it down.  I know it sounds silly, but it’s a mistake that a lot of people make (trainers and coaches included) which could lead to injury of you’re not careful.

Point blank:  there IS a right and wrong way to pick up a kettlebell to start a swing, or get-up, or any exercise for that matter, and one simple litmus test you can use to gauge one’s KB knowledge is to see whether or not he or she follows this protocol:

How to “Handle” the Kettlebell

CategoriesExercise Technique Fat Loss

Nailed It: Ass-Kicking With Nothing But a Kettlebell

Note from TG:  Still on vacation.  Lisa dragged me zip-lining yesterday.  I almost destroyed the back of my pants.  But it ended up being so much fun!

That is all.  

Enjoy this awesome guest post by current Cressey Performance intern, James Cerbie (who happened to write THIS very popular article on push-ups a few weeks ago).

Enjoy!

Conditioning can be boring.  Like really boring.

Just think back to high school sports, or really any level for that matter, and reflect on how many times people had you run for the sake of running.

Ugghhh….

Unless you’re a long distance runner (I currently live with two and don’t know how they do it) this was probably about as much fun as repetitively banging your head against a wall.

This isn’t to say that running doesn’t have its place (because it does), but more to bring light to the fact that there are many ways to burn fat, get in shape and all that jazz.

Furthermore, we know from experience that high intensity work (think sprints, circuits, finishers etc) is more effective than slow, steady state cardio when it comes to burning fat, building muscle, increasing VO2 max, and improving GPP.

Enter the kettlebell:  one of the greatest and most versatile pieces of equipment of all time.  It, by itself, has the ability to take your conditioning and fitness to the next level, so let’s get started.

The Movements

For the sake of today’s discussion, these are the movements you will need to be familiar with:

1.  Russian Kettlebell Swing

There are primarily two types of kettlebell swings:  Russian and American.  In the Russian swing the bell will only reach eye level, while in the American swing the bell will go all the way overhead.

We will be concerning ourselves with the former because I think it’s more user friendly, teaches the hip hinge better, and gets more out of your glutes and hamstrings:

2.  Kettlebell Goblet Squat

3.  Kettlebell Squat Jump

4.  KB Goblet Walking Lunge

5.  1-Arm Kettlebell Push Press

6.  KB Snatch

Note from TG:  as simple cue I like to use on these is to pretend as if you’re performing a KB high-pull and then the bottom of the KB should face straight a head once it hits about nipple height.  From there just think about “punching” the ceiling with a quick, explosive jab.

Look at you!  It’s like you’r Thor!

7.  1-Arm KB Reverse Lunge

The Workouts

As I mentioned above, all you need for a kickass “cardio” session is a kettlebell and your imagination.  With both of those things you can burn fat, build lean mass and take over the world.

Here are 4 variations to get you started:

1.  100-300 swings

This is about as straight forward as you could ever ask for:  pick how many swings you want to do, grab a kettlebell, and start swinging until you finish all the reps.

Side note: I’d recommend checking out THIS piece by Dan John on the 10,000-swing challenge.  It just goes to show how effective high volume swings can be.

2.  Swing and Squat/Jump Ladder

Perform the following in descending order until you hit 1.

10  kettlebell swings

10  kettlebell goblet squats or kettlebell squat jumps

9  kettlebell swings

9  kettlebell goblet squats or kettlebell squat jumps

8  kettlebell swings

8  kettlebell goblet squats or kettlebell squat jumps

.

.

.

.

1 kettlebell swing

1 kettlebell goblet squat or kettlebell squat jump

I’d recommend sticking to the swing and squat combo if you only have access to one kettlebell because you’re realistically not going to be able to jump with a heavy kettlebell (unless you wanted to do bodyweight squat jumps).

If you have access to a lighter kettlebell, and enjoy having jello legs, then give the swing and jump combo a try.  You’ll swing a heavy bell and jump with a lighter one.

3.  Squat, Press, Lunge Circuit

Complete as many rounds as you can in 8-10 minutes of the following:

15 kettlebell goblet squats

10 1-arm kettlebell push press with right arm

10 1-arm kettlebell push press with left arm

16 (8/side) kettlebell goblet walking lunge

4.  Overhead Nightmare

This variation is only for more advanced personnel that can go overhead safely.  Give THIS article by Tony a read over if you have questions concerning whether or not you should go overhead.

Perform as many rounds as possible in 6 minutes of the following:

10 kettlebell snatch on right

10 1-arm kettlebell reverse lunge on right

10 kettlebell snatch on left

10 1-arm kettlebell reverse lunge on left

Rest 1.5 min

And then go for another 3 minutes.

Closing Thoughts

Hopefully this has given you some new exercises to play with and ideas on how to put together a conditioning session with nothing but a kettlebell.  There’s honestly an infinite number of possibilities you could throw together just using the 7 exercises I gave you.

In addition, I hope it helps those of you who have really tight schedules.

Just because you can’t go to the gym for an hour, or just because you have access to limited equipment doesn’t mean you can’t get in an awesome workout.

Anyways, thanks for your time and post any questions or comments you have below.

Note from TG:  On an aside, my good friend Jen Sinkler just released an awesome new product – Lift Weights Faster – that mirrors many of the same thoughts in this article.  Ie:  Traditional cardio is about as exciting as watching NASCAR.

In it you’ll find 130+ grab-n-go workouts that will not only improve your conditioning, but also help you burn fat, possibly build a little muscle,  move better, and possibly help you look better naked…….with the lights on…..;o)

Go HERE to check it out.

About the Author

James Cerbie, CSCS, Pn1, USAW, Crossfit Level 1

James Cerbie is a certified strength and conditioning specialist, Precision Nutrition level 1 certified, USA weighlifting sports performance coach, and Crossfit Level 1 certified.  He has been blessed to work with athletes from the middle school to professional level, powerlifters, olympic lifters, and Crossfit athletes alike.  At the end of the day, James gets no greater enjoyment than seeing people improve, succeed, and achieve their goals.  He’s the owner of Rebel Performance and currently works as a strength and conditioning intern at Cressey Performance.

Come hang out with James on Facebook, Twitter, or drop him a line at Rebel Performance.