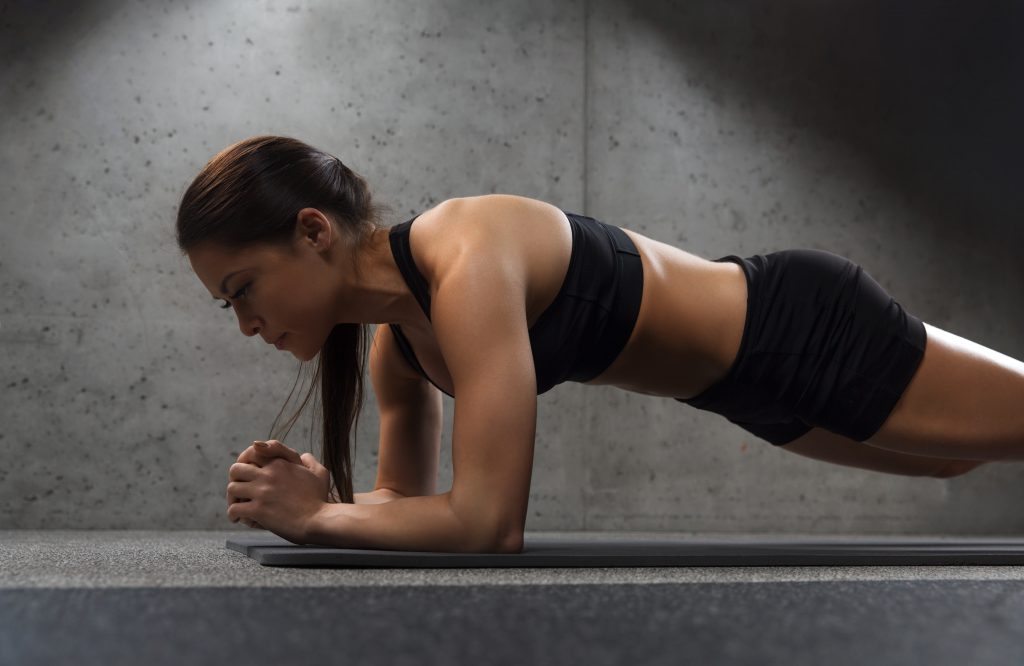
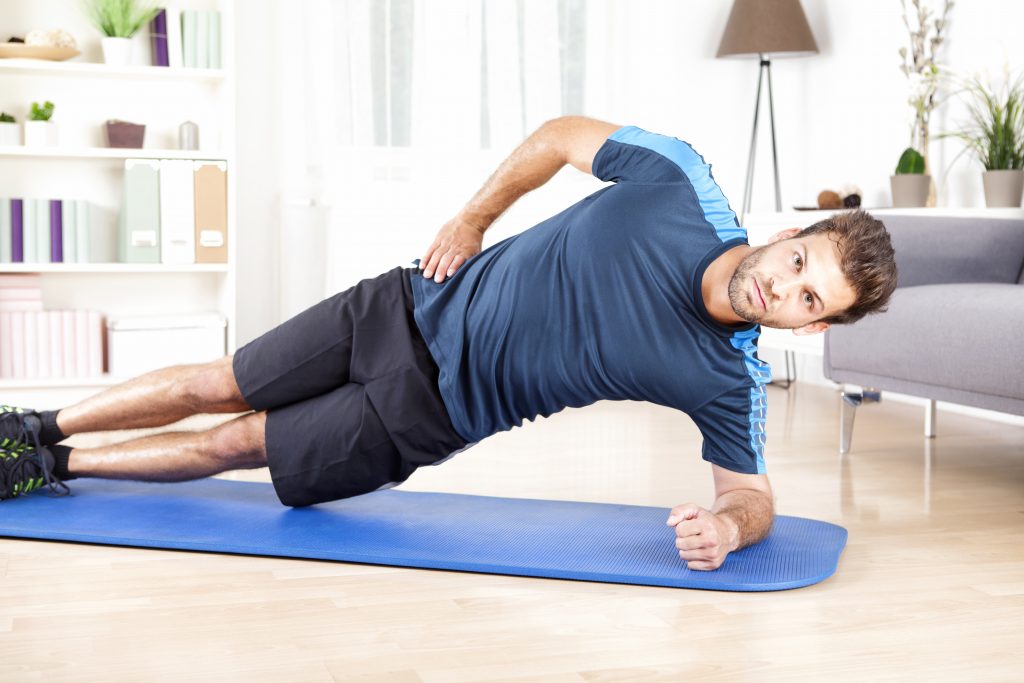
Truth be told: It’s a rare occurrence that I start working with someone and (s)he can perform it well. It’s a staple exercise with myriad benefits in both rehab and traditional strength training to target the core musculature – particularly the obliques.
Too, it’s also no coincidence, thanks to Dr. Stuart McGill, it’s considered one of the “Big 3” with regards to spinal health and working around and managing low-back pain.
When done correctly, the side plank can be a very challenging and worthwhile exercise to include in most programs.
Check out THIS article for particulars on common mistakes and how to progress the side plank.
Check out THIS article for other plank variations you should consider.
I find the side plank to be the exercise of choice for lazy trainers. It’s the sort of exercise a shitty trainer will prescribe for their client when there’s 5-10 minutes left in a session and the trainer just wants to run out the clock.
“Okay Hank, we’re going to finish with Side Planks today. Three minute holds per side. Blindfolded. While reciting the Elvish alphabet backwards. Go!”
And then, of course, Hank loses all the perceived benefits of the exercise because his technique has been compromised after 15 seconds.
“Come on Hank, 2 more minutes, keep reciting, Ampa, Anto, Hwesta…”
To be clear: I think everyone should take the time to master the side plank. It’s an important drill. It’s just that after a certain point there’s a rate of diminishing returns.
Personally, if someone can perform it perfectly for a minute per side I’d rather go a head and make the exercise more challenging than force someone to go for longer periods of time.
More to the point, can I just go a head and say it?
The Side Plank is just a boring exercise.
I’d rather spend the same amount of time scooping up my cat’s fur vomit.
To that end, here are two exercises that mirror all the benefits of the Side Plank but don’t make you want to commit seppuku when you actually do them.
1. Chaos March
Take a kettebell and wrap a band around one end. Grab onto the other end and hold it to your side as if you were holding a suitcase.
While maintaining a completely upright posture (no leaning!) march in place and try to keep the kettlebell “quiet.”
Also: In case it wasn’t obvious by lurking at my bookcase in the background: My kid loves puzzles.
I figured we could all use a reprieve from the barrage of “at home” exercises and workouts everyone is posting of late.
#COVID19sucksdonkeyballs
My good friend and London based personal trainer, Luke Worthington, released his Core Training Guidebook recently and in light of that wrote up this guest post that takes a bit of a different “take” on the topic.
Luke’s one of the smartest coaches I know and I think you should check it out (not an affiliate link).
Actually, now that I think about it: the timing of this pans out.
You’re all stuck at home and can’t go to the gym.
Everyone wants a core you can cut diamonds with.
Training the core doesn’t require a lot of equipment.
We have known for some time that core training and core control was about so much more than a six pack. But did you know it also plays a role in your mood, how you sleep, and even how you laugh or cry?
It’s generally accepted that movement is good for us on both a mental and a physical level. However, do we know just how closely the two are linked?
Our nervous system has two parts – parasympathetic (rest & digest) that takes care of all our subconscious actions. And sympathetic (fight or flight) that is our reaction to situations around us.
Generally in life we want to spend as much time as we can in a parasympathetic state – because quite simply, its easier!
However, moving from one to the other has just as much to do with how we move, as how we think.
Our neural anatomy isn’t just enclosed in our skull – the sympathetic ganglion (the part of or neurological system that activates sympathetic activity), are actually situated in the thoracic spine. So extending that part of your skeleton (arching your back) actively stimulates them, and therefore creates a sympathetic state. (one of the reasons why we stretch in the morning to wake ourselves up).
Note from TG: Also another “advantage” to powerlifters accentuating the low back arch during their bench press setup?
Moving ourselves into an extension position (also known as ‘scissor’ position) stimulates us, which makes us more alert, more able to exert force, run faster, jump higher, and generally be more ‘alpha’.2 Excellent for when we’re playing sports or fighting for our lives.
However, it also means that recovery, sleep, decision making and empathy are significantly reduced…
Not so good for maintaining relationships and resting – which we also need to do at times!
How Position Feeds This
One of the primary activities we must do in order to stay alive is breathe.
In order to perform this apparently simple activity we have quite a complex array of musculature supporting it. Our primary respiratory muscles are the diaphragm and the intercostal, which drive air in and out of the lungs with the purpose of exchanging gas and essentially stopping us from dying.
Whereas we may assume that inhaling oxygen is the primary cue for breathing – its actually blowing off carbon dioxide.
“A failure to do this results in our system becoming more acidic leading to a state of anxiety, increased sympathetic activity (fight of flight), impaired nerve conduction, restricted blood flow in cerebral cortex (poor decision making), increased phobic dysfunction panic attacks, and fatigue.”
LaghiF, Tobin F. Disorders of respiratory muscles. American Journal of Respiratory and Critical Care Medicine. Vol 168: 10-48 2003
The majority of the ‘good stuff’ in respiration happens in the lower 1/3 of the lungs.
Where the majority of blood vessels are situated.
However, in order for gas exchange to happen adequately here the ribcage and the pelvis have to be in the correct positions.
In simple terms they have to oppose each other – the pelvis in neutral, and the ribcage oriented over the top of it – almost like a cereal bowl with another one upside down on top of it! In coaching parlance we often call this the ‘cannister’ position.
If this doesn’t happen – then gas exchange cannot happen at this part of the chest cavity. But as a pre cursor to life it has to happen somewhere! If its not happening at the bottom, then it will happen at the top, however, in order for this to occur we have to engage additional musculature to help out (think upper back, trapezius, neck) as we need to elevate the upper chest to create space for airflow.
As well as the more direct consequences of creating unwelcome hypertonicity (over activity) in those areas (trapezius trigger points anyone).
This drive to create space in the upper chest requires thoracic extension, which as we know stimulates the sympathetic nervous system, creating a heightened state of anxiety, which in turn causes an increased desire to breathe…. but… we’re in the wrong position to!
This means we drive further into thoracic extension (scissor position), so we further stimulate the sympathetic nervous system and so we go around in a constant feedback loop…
To propagate the situation even further, the chest /neck breather is far less efficient at blowing off excess CO2 than the diaphragmatic breather (simply due to the fewer blood vessels available for gas exchange in the upper parts of the chest).
Not blowing off enough CO2 makes us more acidic, therefore more anxious, therefore having a greater desire to breathe, therefore driving further into thoracic extension
Poor position = poor breathing mechanics = greater level of anxiety.
However it also places us at a greater risk of further mechanical issues.
“In situations where respiratory drive is increased such as stress, disease or physical exercise, the ability of the respiratory muscles to perform their postural tasks is reduced. The presence of respiratory disease is a stronger predictor for lower back pain than other established risk factors”
International Journal of Osteopathic Medicine 12 (2009)
This constant feedback loop is what is occurring on a physiological level when a person suffers from a panic attack or hyperventilation. What they actually need to do is exhale fully, allow their torso to flex, and reducing the mechanical stress on the sympathetic ganglion, blowing off some CO2, restoring PH, and eventually settling back to homeostasis (balance).
When we’re over stimulated, hyperinflated, and unable to moderate our nervous systems – we push the emergency button.
When we cry, we exhale fully, and flex out of scissor position and into cannister.
Not sure if you’ve noticed but you don’t see people cry in an upright, extended position – they restore canister – get themselves neutral, and exhale. This is why we feel better after we do it, and why we often feel tired afterwards, and also why it makes our abs hurt!
Note from TG: All you have to do is watch me watching the ending of Notting Hill and you’ll see what Luke is referring to.
Training our core to resist movement through all three movement planes, whilst in incrementally more challenging positions will help us lift more and do more cool stuff – but it can also just make us better at life.
I thoroughly enjoyed her previous resource, The Ultimate Pull-Up Program, and used it with several of my own clients with great success.
I envy Meghan’s brain. She thinks of stuff I never would have thought of, and this latest program of her’s exploits that to the umpteenth degree.
Check it out HERE (it’s on SALE this week only), and also check out her article below showcasing some not-so-common core exercises utilizing the Landmine.
3 Landmine Core Exercises You May Have Not Seen Before
Landmine training and the countless exercises you can perform are badass, empowering, and extremely beneficial, and can be a key component in your training program. I am a huge fan of landmine training, and have been for a long time.
To be clear, while using a landmine attachment is great, it is not mandatory.
You can rest the barbell against a secure surface like a wall, box/other object, or on a no-slip surface. So really, all that is required to perform landmine exercises is a barbell and perhaps several weight plates.
Here are three landmine core exercises you might not have seen or tried before.
While these landmine exercises absolutely involve the upper body as well, and provide many benefits, these unique variations especially work wonders for improving lumbo-pelvic stability.
#1) Landmine Tall Kneeling Presses + Band Resistance
This exercise strengthens the chest, shoulders, and triceps, improves shoulder and scapular controlled mobility, and lumbo-pelvic stability. This exercise (and many other landmine pressing exercises) can be a great option if you struggle to perform overhead pressing movements.
Coaching Tips:
Set up a barbell so it is lengthwise, and is in line with the center of your body. You may anchor the barbell against a stable surface like a wall, weight plate, or box, or on a no slip surface. You may also use a Landmine attachment.
Loop a resistance band over the top of the barbell, and rest the band underneath your knees. There should be tension in the band for 100% of the movement.
Grab onto the top portion of the barbell. As for your grip, I like to interlock my fingers and place my hands on top of each other as this makes the body more symmetrical.
Get into a tall kneeling stance. Place your knees so they are approximately hip to shoulder width apart, and have a very slight forward lean in your torso. Your head, torso and hips should be in a stacked position.
Before each rep, take a deep breath in (360 degrees of air around your spine), brace your core (360 degree brace around your spine), tuck your ribs towards your hips (close the space in your midsection), and squeeze your glutes.
Now extend your elbows and press the barbell to a range where you are able to maintain proper form, then “row” the barbell back in to your body. In fact, your ability to control the movement of your shoulder blades plays a big role in your ability to perform this exercise. Do not keep your shoulder blades pinned. They are meant to move.
As you bring the barbell back in towards your body, stop just before your elbows touch your sides.
For the duration of the exercise, your head, torso and hips should remain in a stacked position. Do not allow your lower back to hyperextend, ribcage to flare, or your torso, spine or hips to rotate.
Exhale after you have initiated the press and as the barbell is traveling away from your body. Inhale and reset as the barbell is returning towards your body, or pause in the starting position, and inhale/reset there before the next rep. Do what works and feels best for you.
Regression:
Make this exercise easier by using less weight, or by using a band with less resistance.
Progression:
Make this exercise more challenging by using more weight, by using a band with more resistance, or by performing negative reps and taking 3-5 seconds to “row” the barbell back down to the starting position.
#2) Contralateral Bird Dog Hold + Landmine Single Arm Rows
This deceptively challenging exercise strengthens the mid and upper back, improves grip strength, shoulder and scapular controlled mobility (and stability on the planted side), and lumbo-pelvic stability.
This exercise requires a significant amount of lumbo-pelvic stability and is arguably more of a core exercise than an upper body movement. Be conservative when you are selecting your weight, and opt for 25-50% of what you’d use to perform single arm rows.
If you are performing this exercise correctly, aside from the arm that is performing the rowing movement, the rest of your body should remain in a fixed position.
Coaching Tips:
Set up a barbell so it is lengthwise, and is behind your body. You may anchor the barbell against a stable surface like a wall, weight plate, or box, or on a no slip surface. You may also use a Landmine attachment.
Kneel with one leg on a bench, and place the hand that is on the opposite side of your body on the bench. Make sure that your shoulder is directly above your hand. Spread your fingers, and pretend you are suctioning your hand to the bench.
Extend your leg that is on the opposite side of your body as the rowing arm, and so it is parallel to the ground.
Set your body so it is in a straight line from your head to heel, and maintain this position for the duration of the exercise. Make sure that your torso and hips are square to the bench. Also, do not allow your leg to drop, or conversely, lift too high (avoid hyperextending your lower back).
Before each rep, take a deep breath in (360 degrees of air around your spine), brace your core (360 degree brace around your spine), tuck your ribs towards your hips (close the space in your midsection), and squeeze your glutes.
Initiate the movement by using the muscles in your mid and upper back and draw your shoulder blade in towards the spine (retract). Do not initiate the movement with your arm, and do not use excessive momentum.
In the top position, do not allow your elbow to flare out; instead keep it close to your side.
Lower the barbell with control, and make sure you keep your shoulder from collapsing. During the lowering/eccentric component, do not keep your shoulder blade pinned. It is meant to move, and should perform the reverse movement (protraction) as it did during the rowing/concentric component.
Pay attention to your non-working/supporting side. Push away from the bench and protract your shoulder blade (move it away from the spine). Do not mindlessly hang out.
For the duration of the exercise, your head, torso and hips should remain in a stacked position. Do not allow your lower back to hyperextend or round, ribcage to flare, or your torso, spine or hips to rotate. Your torso and hips should remain square to the bench.
Exhale right after you have initiated the rowing movement; you may inhale/”reset” as the barbell is returning to the starting position, or hold your breath for the duration of the rep, exhaling, inhaling, and re-setting between reps. Do what works and feels best for you.
Regression:
Make this exercise easier by using less weight.
Progression:
Make this exercise more challenging by using more weight.
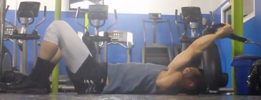
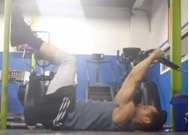
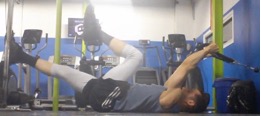
#3) Dead Bug + Single Arm Landmine Presses (Weight Behind)
I am a huge fan of dead bugs, and use many different variations in my training, and in the programs of the many people I work with. This innovative dead bug variation improves lumbo-pelvic stability, and shoulder and scapular controlled mobility.
Coaching Tips:
Set up a barbell so it is lengthwise and behind you, and is in line with your armpit. You may anchor the barbell against a stable surface like a wall, weight plate, or box, or on a no slip surface. You may also use a Landmine attachment.
Lie on the floor. Lift up your legs so they are in a vertical position, straighten your knees, and point your feet towards you (dorsiflex). If you cannot fully extend your knees, or if you are unable to maintain proper form, you can keep your knees bent at a 90 degree angle. Make sure they remain at a 90 degree angle for the duration of the exercise.
Keep your chin tucked and neck in a neutral position, extend your arms so they are above your chest, and tuck your ribs towards your hips (close the space in your midsection).
Pay attention that you are not “cheating” by using the muscles in your neck and/or upper body in place of the muscles of the anterior core.
Before each rep, take a deep breath in (360 degrees of air around your spine). Now steadily exhale through your mouth, contract your anterior core muscles as hard as you can, slowly “row” the barbell down towards the floor and simultaneously lower the leg that is on the same side of the body, and to a range where you are able to maintain proper form. Once you reach your full range, simultaneously press the barbell up and return your leg to the starting position.
You have the option of keeping the non-working arm in a vertical line over the armpit, or you can reach back with your arm as you lower the weight and your leg.
As for the shoulder blade of the side that is performing the pressing movement, do not keep it pinned. It is supposed to move.
For the duration of the exercise, do not allow your lower back to hyperextend, ribcage to flare, torso, spine or hips to rotate, or your hips to leave the floor.
Keep your legs relaxed so they do not dominate.
Make sure that your knee remains in a fixed position and that the movement occurs from your hip.
Regression:
Make this exercise easier by using less weight, by decreasing the range of the leg lowering, or by bending your knees to 90 degrees.
Progression:
Make this exercise more challenging by using more weight, by increasing the range of the leg lowering, or by adding in band or kettlebell resistance (on the hand that is not holding the barbell).
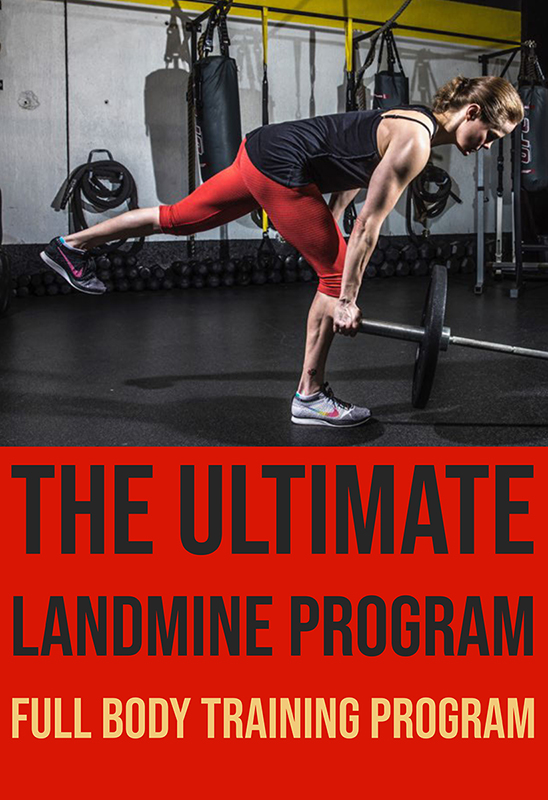
Ultimate Landmine Program
The Landmine has grown to be one of the most versatile pieces of equipment on the gym floor. You can train the entire body and if you’re someone pressed for time, prefers a more minimalist approach to training, or just likes trying new stuff, this resource will be a great fit.
It’s on sale TODAY (6/25) for $67 through Friday, June 29th so you only have a few days to take advantage. If you’re already familiar with Meghan’s work you know this is a no-brainer. If you’re unfamiliar with her work, trust me: you won’t be disappointed.
Today’s guest post comes courtesy of TG.com regular contributor, Travis Hansen.
He shares his approach to core training as well as numerous exercises he uses with his own athlete/clients. I’m willing to bet there’s a number you’ve never seen or tried before.
In the world of core training, there is a vast array of option to choose from and it can be overwhelming perhaps at times to decipher which options are more appropriate for you and your specific training goals.
What’s more, is that there are six sub-categories that absolutely need to be incorporated into your training regime so that you satisfy complete development of your core and all of its specific parts.
Here are the six categories for you:
#1- Prehab/Rehab based drills
#2- Anterior core drills
#3- Lateral/rotational core drills
#4- Posterior chains drills
#5- Explosive core work
#6- Core endurance work
1. Prehab/Rehab
Anytime there is a major weakness in the core there will be both a reduction in the recruitment of specific muscles in the core on outward to the rest of the body.
For example, it has been found that the TVA (Transverse Abdominis) muscle is suppose to be one of the first muscles to fire in the human body upon any movement initiated. This function is concrete enough to warrant a very valuable term/training principle that has been coined its honor.
The term “proximal to distal sequencing” has been adopted by many practitioners in the field on a regular basis, and helps explain how muscles activate inside at our core and then outward to the limbs sequentially. It’s also pretty well understood at this point that individuals with lower back pain tend to present with a timing delay of the TVA muscle which can prose several subsequent problems for you.
As a result, it becomes important that these individuals and even you partake in regular core training to either help remedy a current back issue, or prevent one from emerging in the future. And with 80% plus American who report back pain this issue becomes very urgent.
So in the context of prehab/rehab drills, here is a short list of drills you can include in your program if you aren’t already:
#1- Deadbugs
#2- Plank Progressions<— click to check out some plank progressions that don’t make my corneas bleed.
#3- Quadruped Progressions
2. Anterior Core
The next category on the list involves the development of the anterior core region or everything attached proximally from the lower sternum down all the way to the pubic symphysis. The TVA, Rectus Abdominis, and the external obliques are notable muscles within this sub-system of our anatomy.
This is system is your power pump per se as well, when it comes to core development.
Of course all systems are relevant in locomotion and none should be discounted, however, your individual power potential truly lies in this region along with the posterior chain, since they “co-contract” against one another in the sagittal plane.
If you don’t’ believe this then just witness performances across multiples exercises that are directionally linear dominant in nature versus those that are classified as lateral or rotational based: Squat, Deadlifts, Bench Presses, Jumps, and sprints are going to absolutely trump any shuffle, carioca, hip turn/crossover step, or lateral raise so on and so forth.
There are a few exceptions just like with everything, but overall our species was designed to express more strength and power in an up and down, front to back manner.
Here is a short list of anterior core drills for you:
#1- Reverse Crunches
#2- Stick Crunches
#3- Hanging leg raise progressions
#4- V-ups
#5- Rollouts
3. Lateral/Rotational Drills
The next category carries distinctions, but due to a natural lack of available variation with lateral based core drills, it’s much easier to just merge the two types together into one category.
If you play any sport, whether it be recreationally or what have you, you will need to incorporate lateral/rotational based core exercises into your program. Movements such as throwing, swinging, change of direction, etc. heavily rely on this region of our core anatomy.
Moreover, some of the fibers in the anterior core muscles will possess specific lines of pull that are geared towards rotation, such as the Rectus Abdominis muscle.
That means that by doubling up training to this muscle group and others, you are effectively covering all portions of the fibers within that muscle group and making them more sensitive to contracting in the process.
Some of examples of lateral/rotational based drills are as follow:
#1- Side plank variations
#2- Pallof presses
#3- Russian Twists
#4- Chops and Lifts
#5- Renegade Rows
4. Posterior Chain
The posterior chain has been discussed ad nauseum before just about everywhere on the internet, and it was alluded too briefly earlier, so we wont spend too much time on this one.
The “Deep Longitudinal Sub-System” is the more geeky and technical term for your posterior chain and if you analyze all of the target muscles you will see that it composes a vast majority of gross muscles or more than any other system which implies its extreme value in human movement and the core specifically.
The system begins at the heel then moves up through the shins, continuing up through the hamstrings and glutes, then across the thoracolumbar fascia and then the lumbar erectors, respectively. And if you haven’t heard it enough already, then its worth repeating, that if you aren’t absolutely crushing your posterior chain in the gym your are leaving a lot of strength and power skill in reserve.
Here are some common drills for this type of core training:
#1- Bent Knee Hip Extension Work (glute bridge, slideboard leg curls, stability ball leg curls, GHR’s)
https://www.youtube.com/watch?v=AE3BygMmgzo
#2- Straight Knee Hip Extension Work (Swings, Deadlift variations, pull-through variations, sled sprints)
#3- Lateral/Rotational Hip Work (Jane Fonda’s/hip abductions, clamshells, and bandwalks)
5. Core Power
Core power is next on the list.
As an industry, there would to be more of a focus on promoting power in the lower and upper body regions, with less focus on the middle of the body. Then again, the core is implicated in many of the popular power training methods, like medicine ball throws, jump squats, and swings to name a few.
Truth is it doesn’t matter if you are an athlete who has to change directions frequently, or you’re a lifter or gym junkie whose trying to maximize your strength and power potential or raise your RFD (Rate of Fore Development) to the next level, you have to build high levels of reactivity in your core to initiate, anchor, and even match upper and lower body efforts. Once again you are only as strong as your weakest link.
Here are some core power training exercises:
#1-Standing medicine ball throws
#2- Medicine pullover throws
#3- V-up throws
#4- Rope plank swings
6. Core Endurance
And the final category of exercises is the more slow and higher volume-based approach.
Before we continue though, please understand that considerable research has shown that every possible motion of the lumbar spine is linked to some type of injury.
And if this were the case then we should all act like rigid hot dogs right?
Not a chance.
So what gives?
Well, like most things related to training: injury history, structural variances, program design, age, genetics, nutrition, work capacity, and much more will dictate future outcomes.
Dr. Stuart McGill is one of the best in the world when it comes to spine biomechanics, and he postulated at one time that the spine has an eventual limit to how many times it can bend and extend in a lifetime. Everyone took this information and ran with it. He also understands and appreciates that the rigorous daily demands of an athlete require us to potentially exceed or really challenge thresholds of the spine, so we need to prepare the highly delicate and vulnerable region as best we can.
And it’s inevitable that less than ideal postures and patterns will be produced in training, but managing these potentially threatening scenario’s is the end goal. Also consider that even if someone were to stress the core and spine heavily in their youth, intense activity will eventually decline since this type of activity is inversely related to aging.
As such, it will probably all balance itself out in the end and we shouldn’t worry too much if your training is in order.
With that being said, it’s imperative that you build the work capacity/endurance of your core just like all other muscle groups.
In one study, a timed superman or back extension test that was performed isometrically was useful in treating patients with non-specific lower back pain.
This would make obvious sense since discs have been shown to slightly slip as fatigue emerges in the core.
Endurance training of the local core musculature satisfies this TUT (Time Under Tension) specificity and when progressed properly, may help center the disc more and surrounding structures right where we want them.
Moreover, the core is comprised of a lot of slow twitch muscle fiber which have a tendency to respond better more with longer sets and TUT according to Henneman’s Size Principle.
Last but not least, witness all of the athletes throughout history who regularly performed thousands of crunches over the course of a training cycle with no back issues and stellar performances. How do you explain that one? Maybe there would be a slight link to back health or a lack there of in these instances, but more than likely it’s probably satisfying a psychological compulsion which drives other forces and is important.
Now that you have a compete infrastructure of core training you can effectively design your core training program so that it suits your individual needs and preferences. Just make sure to include all elements of the program. The core is synergistic in nature just like the rest of the body, where one part will fail to match the strength of all the components combined.
Programming Suggestions
I wanted you to go away with some rough parameters on how to program for the various options of core training.
Some methods can be performed in higher quantities and frequencies than others. Again, this is just a general scheme that applies to a majority of clients:
Frequency/Sets/Reps/Rest/Int/Tempo (E-I-C)
#1-Prehab/Rehab based drills 3-5x 4-5 12-24 0-30 sec Mod. 3-1-1
For starters I’m involved with a pretty cool product – The Trainers Toolbox – that’s set to be released next week that’s going to set the fitness industry on fire. I won’t give away too much here, but suffice it to say it’s going to help a lot of fitness professionals.3
Second, we’ve had a cranky toddler on our hands all week this week (wake-up call of 4:30 this morning as a matter of fact), so, basically, FML.
Hence I haven’t had much time to write for my own site this week. Thankfully I have some awesome contributors – like Dr. Nicholas Licameli – who are more than willing to send me articles out of the blue and make me want to buy them a steak dinner.
There are some things that you just don’t hear everyday”
-“Who keeps eating all of the kale!?!?”
-“Of course I understand why my cable bill is $37.97 more this month than it has been in the past 15 months.”
-“I hope I get placed in Ravenclaw or Hufflepuff…please, Ravenclaw or Hufflepuff…”
-“Let’s talk about Fight Club.”
-“A strong core? No thanks, not interested.”
There seems to be a slight stigma surrounding training the abs and core while lying down because, as some say, there are “better” and more “functional” ways to train.
While this may have some truth to it, I don’t mind training the abs and core on the ground. Whether or not something is “functional” really depends on the individual and his/her goals (is a standard plank really “functional?”).
In order to have functional carryover to the task at hand, the training must be specific to the activity (more on this below).
This means that “functional” will be different for everyone.
If you’re a weight lifter or powerlifter, “functional” core strengthening may include tempo reps, pause reps with postural bracing, breathing drills under sub-maximal loads, etc.
If you’re a baseball player (check outMike Reinold and Eric Cressey, if you haven’t done so already), “functional” core strengthening may include plyometric twists, anti-rotation movements, quick accelerations and directional changes, etc. The point here is that “functional” is different for everyone and if the goal is simply to progressively load and train the abdominals, don’t fear the floor.
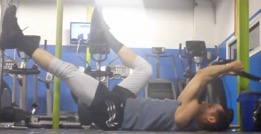
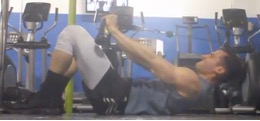
Today I’d like to share with you an exercise that I call the lying overhead pullover (LOP) (see the video link at the end of this article). I think I invented this exercise, however Chuck Norris and Total Gym do have a variation of it in their manual and let’s be honest, I do not want to get on the bad side of a man who once challenged Lance Armstrong to a “Who has more testicles” contest and won by five.
Other than the Total Gym variation, I have not seen it anywhere else.
How To Do It
Before we dive into how to perform the LOP, let’s have a quick review on what it means to “brace the core:”
“From the top down, we have the diaphragm, from the bottom up we have the pelvic floor, and around the sides we have the deep abdominals that surround the midsection like a corset. To engage the diaphragm, take a breath in through the nose and brace. To engage the pelvic floor, pull up as if holding in gas or urine. To engage the deep abdominals, tighten up the midsection as if putting on a tight belt after Thanksgiving dinner or walking into a cold pool as the water drifts up to your navel.”
It is imperative that you understand how to perform a pelvic tilt and properly brace the core…the entire exercise depends on it.
For more on this, check out my videos right here and here (these are from the archives, so bear with me…but the content is still relevant!).
To perform the LOP, lie on your back in front of a low cable station or a low anchored resistance band. Bend the knees and perform a posterior pelvic tilt by pressing the small of your back down into the floor. Reach overhead and grab the rope or band. Maintaining the pelvic tilt, bracing the core, and keeping the arms straight, pull the rope down toward your knees.
Squeeze the abs for a count, and slowly return to the start position.
Progressions and Regressions
As with any exercise worth writing about, it must have the ability to be modified to better meet individual needs such as level of experience, pain, personal preference, etc. It may seem intuitive that decreasing or increasing the resistance would make this exercise easier or harder to perform, however how changing the range of motion affects the difficulty of the exercise may be less intuitive.
The LOP is an anti-extension exercise, which means it challenges primarily the anterior abdominals to resist spinal extension.
During this exercise, the spine and pelvis collectively become a fulcrum and our arms and legs become levers. The lever arm and extension moment increase simply by stretching out a leg or stretching the arms overhead. As the lever arm increases, it becomes more challenging to prevent the spine from arching off the ground into extension.
By maintaining that pelvic tilt, we are resisting extension.
Looking for a nasty little extended set to take past failure?
Start with the most difficult position and regress in a stepwise fashion to easier versions as muscle failure is reached, again and again.
Another simple way to alter the range of motion would be to add a small crunch to the mix.
This would allow us to not only resist extension, but also overcome it with slight flexion. Be sure to crunch up almost into a 45-degree diagonal as opposed to down toward the feet or straight up toward the ceiling. This will ensure proper tension and alignment with the line of pull and resistance curve of the exercise.
Why I Like the LOP
There is one very important function of the abs that is often overlooked, and that is resisting movement. Sure, everyone knows that the abs flex, side bend, and rotate/twist the spine, but besides causing movement, the abs collectively function to resist movement and stabilize the spinal column.
The LOP challenges that function nicely.
Another reason why I like it is that the LOP trains lumbo-pelvic stability during upper and lower extremity movement.
Why is that important?
In order to perform pretty much any sport, exercise, or functional task, the spine has to provide a stable base for the extremities to move about, otherwise it would be like vertical jumping on sand or firing a bazooka off of a kayak (why you’d have a bazooka on a kayak is beyond me…).
I am not saying that performing the LOP will directly increase power output and safety during running, cutting, kicking, punching, squatting, overhead pressing, etc.
Nope. Sorry, but the principle of specificity still reigns supreme.
If you want to improve your 40 time, better get sprinting! If you want to improve power output when kicking a soccer ball, better get out on that field and kick! If you want to improve your squat, better read this article and of course…squat!
What I am saying is that the LOP is a great way to feel, get accustomed to, and train spinal stability with extremity movement, which is foundational to all of those previously mentioned tasks.
And That’s That (LOP in Action)
So be sure to give the lying overhead pullover a shot. Depending on how it is done, the LOP can be used as a top down ab movement, a bottom up ab movement, or a core stability movement. Feel free to experiment and find what works best for you and your goals.
Enjoy!
About the Author
Nicholas M. Licameli, PT, DPT
Doctor of Physical Therapy / Pro Natural Bodybuilder
Nick believes in giving himself to others in an attempt to make the world a happier, healthier, and more loving place. He wants to give people the power to change their lives in hopes to leave this place better because he was here. Bodybuilding and physical therapy just act as mediums for carrying out that cause. Love. Passion. Respect. Humility. Never an expert. Always a student. Love your journey.
First off: Yeah, that’s right I just put the slang version of “Gucci” into the title of a blog post about deadbugs.
Second: I promise I won’t ever do that again
Third: I’ve been swamped with travel the past few weeks (and the subsequent catching up on emails, programs, projects, and life shit-show) and I apologize for my lack of writing prowess. Thankfully I’ve had a handful of regular contributors to the site help to pick up the slack in my absence.
Thanks to Boston based coach, Lana Sova, for today’s contribution.
Fourth: Maybe I should have used “lit?” No? Okay, I’ll GFM.
When it comes to core training, people often fight over which exercises are the best, but that’s kind of like arguing whether Cardi B or Nicki Minaj is a better rapper.
In my opinion (which no one really asked for, but Imma say it anyways because #internet) there is space for both, much like there is a time and a place for different core strengthening exercises.
When people ask me which is the best core strengthener, I give the most boring answer — it depends.
There are many things I take into consideration when I include core strengthening exercises in a client’s program.
Things like goals, training levels, level of lumbo-pelvic control, and mind-body awareness all matter.
Much like the aging process, things are never the same with core training — what could be the best core exercises for a client today will not be the same a year or two from now because they’ve gotten stronger and advanced their skills.
Which leads me to today’s article.
For some reason, when it comes to core training, we go from zero to a hundred in no time. And by “we,” I mean personal trainers. I get it, often we’re tempted to impress clients and show them what we’ve got under our sleeves.
And, often, our clients swear by the fact that they are so advanced they can hold a plank for ten minutes while multitasking and doing 20 other things.
Cue *major eye roll*.
While it’s a good thing to keep your clients happy and help them fall in love with training and working out, there is also a thing called common sense, not to mention the art of giving a client not only what she wants, but also what she needs.
Enter Deadbugs
The deadbug exercise is my all time favorite core strengthening exercise.
When done correctly, it’s one of those exercises that looks easy, but isn’t when you do it yourself.
Progressions to this exercise are diverse and can be lots of fun. And while progressions are great and we do need them to help a client succeed, we also need not forget about regressions.
Deadbugs are one of the exercises where attention to the details matter. It’s easy to spot bad form on a deadbug when you see a client arch her back from the get go. But it’s much more challenging to notice incorrect form when things are not so obvious.
For example, ideally we want a client show us that she can maintain a canister position while performing a deadbug. What’s a canister position? If you live under a rock and never heard Tony speak about this concept, here’s a video for you.
But often, clients will cheat.
Like when I see clients bring their knees closer to their chest to help them with a posterior pelvic tilt.
Or maybe the second they begin to extend their leg out, they lose any core tension; to help them reach the floor, they’ll shift into an anterior pelvic tilt.
It’s our job as coaches to help a client succeed with this exercise without cheating, because the key to their success is doing exercises with correct form.
Happy client AND successful client = Happy coach.
Here are FIVE of my favorite deadbug regressions.
1) Deadbug ISO Hold with a Dowel
Deadbugs are a core stability exercise. This is where I often introduce the concept of an open or closed canister in relationship to the hips and rib cage.
Pssst: (Watch the video earlier in the post.)
Before we start moving the legs and arms and begin to resist any movement in the hip region, it would be a good idea to learn to own the closed canister.
The reason I love this exercise is it helps the client learn how to keep tension in the whole body while also feeling the abdominals working. Adding a dowel to the equation, with the client holding it above her chest while keeping her legs up in a tabletop position, helps her to learn what it means to activate her lats, which can translate to more advanced exercises like bench pressing or deadlifting later on.
I often use the cue ‘’Try to bend the dowel with your pinkies.” Go ahead and give it a try. This should fire up your lats like crazy.
2) Core-Engaged Deadbug ISO Hold with Band
Much like the previous exercise, this variation teaches the client to keep the closed canister position while keeping the tension in the entire body. However, she’ll hold a resistance band above her chest, which acts as a multiplier in creating the tension in the upper body.
3) Core-Engaged Deadbug March
This is an exercises I stole from Florida-based coach William Richards in one of his guest post for Tony on this site.
This is the exercises where, once your client learns how to control the canister position and knows how to create tension in the whole body, she can start moving her legs and making the exercise so much more advanced.
4) Deadbug w/ KB Overhead Hold
This exercise can teach your client how to maintain the canister position with her hands above her head. I like to use this exercise to build up the context for future exercises such as overhead presses.
5) Deadbug with a Pallof Press
This is probably more advanced than the previous exercises; nonetheless it’s still a great regression before you dive head first into all the glorious deadbug variations and completely destroy your client’s core.
It’s great to show your clients advanced movements and spice things up here and there. But before you do so, make sure your client is competent with the exercises and can perform them well. This will help your client show up at the gym more willingly and ultimately reach her goals.
About the Author
Lana Sova is a powerlifter and an in-person and online strength coach in Boston, MA. She helps women to change the way they look by making them strong.
I may as well post something on photosynthesis trends of oak trees in the Northeast, gas prices, or, I don’t know, what my kid had for breakfast this morning.
Everybody performs planks. And 90% of those people perform them incorrectly.
Today’s guest post by TG.com regular, Dr. Nicholas Licameli, sheds light on how to make your planks more effective.
HINT: It has zero to do with performing them for longer durations.
It’s Not What You Do, It’s How You Do It: A Better Plank
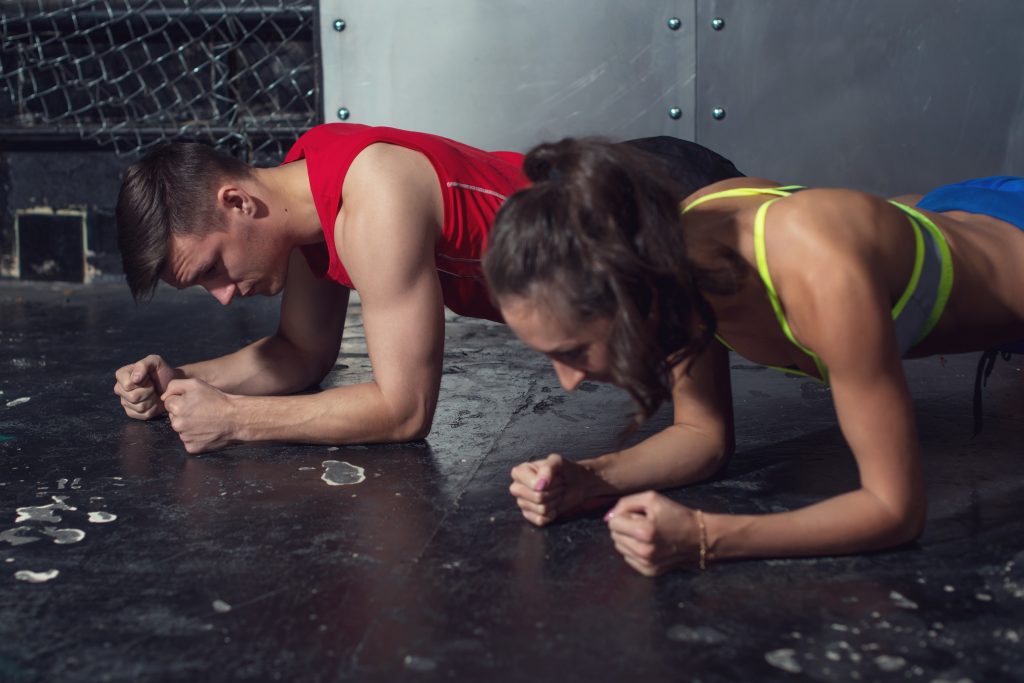
The plank.
We know it, we love it, and we know the benefits. However there is a simple way to make it more effective that you can implement immediately. It doesn’t involve any additional equipment and takes less than a second to do.
This simple modification will help not only those who are new to the exercise, but also those seasoned planking veterans.
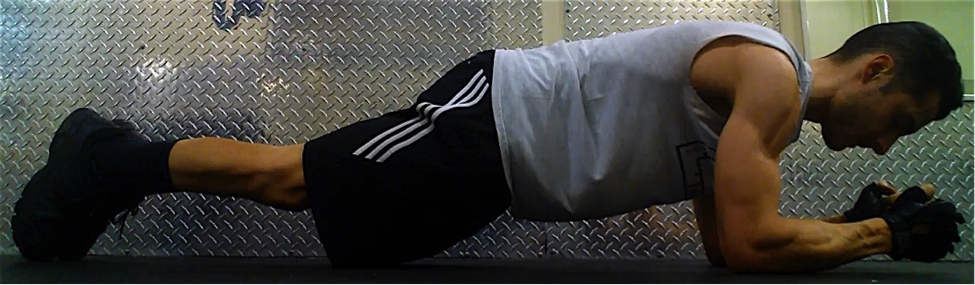
Take a look at the following two pictures.
Can you spot the difference?
It’s subtle, almost undetectable.
Here’s some more information: The plank on the top can be held for 3 minutes or more, while the plank on the bottom can only be held for 15-20 seconds max.
The plank on the top is engaging only a fraction of the core and abdominal musculature, whereas the plank on the bottom is recruiting nearly every muscle in the body, including the core and abdominals.
Form looks good in both: No sagging or lifting of the lower back and pelvis, serratus anterior is engaged for scapular stability, and the head, neck, and entire spine are in neutral. So what makes the bottom plank more effective than the top?
Let’s find out.
No, Wait, Don’t Go…the Plank IS a Big Deal
The plank is one of the best exercises for improving total body strength as well as the health of your spine. In order to perform the plank correctly and effectively, pay close attention to the position of the lower back and pelvis as well as the direction of the force being applied through the floor.
When in the plank position, imagine what would happen if all friction on the floor disappeared, almost as if doing a plank on ice. Which direction would your elbows and feet slide? Most likely, they would slide out from under you: your arms would shoot forward, your feet would shoot backward, and your face would be imprinted on the dirty gym mat that you sprayed with a dirty plastic bottle filled with an ambiguous pale blue liquid.
Note From TG:No reason for this GIF other than to 1) I couldn’t find a video of someone falling during a plank and 2) it’s freakin hilarious. Sorry for the brief hijack Nicholas.
That is precisely the problem with the top picture.
You’ll notice that my toes are digging into the floor and isometrically pushing away, while my arms are isometrically pressing forward toward my head.
Biomechanically, I am isometrically pressing into shoulder flexion, ankle plantar flexion, hip extension, and spinal extension. While this may be a good way to hit the deltoids and calves (not really), it is not doing much for the core and abdominals.
Why?
Because the core, and more specifically the anterior core (the muscles on the front side), is responsible for spinal flexion and anti-extension. In order to maximally engage those muscles, you must train those movements.
This can be achieved by forcefully, and isometrically, pulling your arms and feet together. Now imagine doing it on ice. What would happen? Our arms and feet would slide toward each other and we’d assume a pike-like position with spinal flexion and anti-extension, which is just what we want.
And Bingo was his name-o…
Why Is This So Common?
Our bodies do not want to be wasteful, so they will do their best to use the least amount of energy necessary to complete a task, unless we tell it otherwise.
With the plank, sometimes due to our body’s natural compensations and other times due to conscious effort, we tend to get into the “position of least resistance,” usually for the sake of increasing the amount of time we can spend in the plank position.
In other words, we make the plank as passive as possible to increase its duration.
Some even wear their plank time like a badge of honor!
Hearing, “How long can you hold a plank?” is slowly becoming almost as common in gyms and health clubs as, “How much do ya bench, bro?”
That’s why it is important to remember the goal.
Unless you are a competitive planker and are scored by how long you can hold a plank, the goal of the exercise is not to increase its duration, but rather to train the core!
Doing planks is kind of like making a homemade dinner, cleaning the dishes, or having sex.
Just doing the activity doesn’t mean it will be good.
The effectiveness of the plank, as well as a homemade meal, the dishes, and sex, depends on the execution.
Don’t treat the plank like a marathon…treat it like a sprint.
Instead of thinking, “How long can I hold a plank for?” think, “How short can I hold a plank for?”
The idea being: The harder the contraction, the shorter the duration. The harder you contract and brace your core, the shorter the plank will be.
Tired of long sets of planks? Start squeezing!
Tips For A Better Plank
1. Squeeze your glutes and contract your abs (rectus abdominis AND transverse abdominis), which will pull your pelvis into a slight posterior pelvic tilt (think slightly rounding your back).
2. In order to contract your abs, you want to engage both your rectus abdominis (six-pack muscle) and transverse abdominis (deep stabilizer muscle, much like a corset). To contract the rectus abdominis, imagine bringing the ribs and front of the pelvis together. To contract the transverse abdominis, imagine the feeling when cold water reaches your navel when walking into a pool.
3. Keep your head and neck in a straight line. DO NOT LOOK UP. Your tailbone, mid back, and head should all be in line with each other (see picture below).
4. Isometrically pull your elbows and feet together. This is the key. Imagine doing a plank on ice or on a slippery hardwood floor with socks and a towel under your arms, as seen below.
5. Once you assume the proper position, maximally contract every muscle from your toes to your fingers, but DO NOT HOLD YOUR BREATH.
6. Imagine giving a big hug with your shoulder blades. Keep the shoulder blades protracted (pressed forward) and be sure they stay snug around the ribcage. This will help engage serratus anterior, which is an extremely important muscle for the health of your shoulders. It is also quite aesthetically pleasing when well developed.
7. When coming off of a plank, slowly lower your knees to the floor. DO NOT let your hips/pelvis drop to the floor.
Don’t rely on the traction of the floor to maintain the plank position, rely on your core.
Would you rather get to muscle fatigue after planking for 10 seconds or 3 minutes? Clearly, ain’t nobody got time for no 3-minute, ineffective planks. Try this modification out and I guarantee your planks will become instantly more effective and you will look at the plank in a new light and learn to love it.
For a video demonstration and explanation of everything I just wrote, be sure to check out my video right here:
About the Author
Nicholas M. Licameli, PT, DPT
Doctor of Physical Therapy / Pro Natural Bodybuilder
Every single thing he does, Nick believes in giving himself to others in an attempt to make the world a happier, healthier, and more loving place. He wants to give people the power to change their lives. Bodybuilding and physical therapy just act as mediums for carrying out that cause. Love. Passion. Respect. Humility. Never an expert. Always a student. Love your journey.
The traditional front plank is one of the most well known and least useful exercises we have available to us.
There are various figures but the world record for a plank hovers between eight and ten hours. There are exactly zero useful strength exercises that you can do for eight hours.
The plank makes sense in theory: In that position you’re forcing your anterior core musculature to support your spine in a way it isn’t used to and will result in strength and stability increases.
Truthfully, it can be useful for this purpose, but it gets out of hand really quickly.
People always think that adding time to their plank is the right thing to do, but end up with some horrific Gollum-esque posture; neck cranked forward, low back sagging, butt up in the air just grimacing their way to an extra 5 seconds on their personal record.
I’m here to tell you that there are much better ways to train core stability (anti flexion / extension) than just hanging out watching the timer on your phone. In fact, I’ve got eight better planks you can try instead of the normal plank. I’ll even be a sweetheart and list them in what I believe is the easiest to hardest.
1. Foot March Plank
I like this as one of my first progressions from a static plank because it’s a very familiar position to most people.
Marching your feet just an inch or so off of the floor adds a substantial anti-rotation component to the exercise, and your client will recognize it very quickly.
2. Elbow Tap Plank
Like the foot march plank, this increases difficulty by taking away a point of contact but feels much more difficult than moving your feet.
I like to make my clients move through this very slowly and deliberately to help reduce the amount of hip swinging they get. I find it helps to keep your hands centered on your chest and adjust the width of your feet to increase or decrease difficulty.
3. Bent Knee Side plank with Clamshell
I actually think I dislike static side planks more than static front planks because people end up in really dog-shit positions really quickly.
A good “hack” to fix this is utilizing the bent knee side plank, which makes it easier to stay in a good position by shortening the length of the lever (your body).
To get even more out of this exercise, throw a band around your knees and hit a clamshell. You’ll be training anti-lateral flexion as well as a few aspects of your hips while you’re at it. I utilize these as both a core exercise and as a filler/activation exercise paired with squats or deadlifts.
4. Plate Drag Plank
This is very much a progression of the elbow touch plank and allows you to load it externally.
There are lots of other videos of people using kettlebells, sandbags and even heavy ropes to do these.
5. Side Plank with Wall Slide
The first time I did these was during Eric Cressey’s “Show and Go” program.
I saw them on the program for that day and watched his video and thought it would be no big deal.
Got set up for my first rep and as soon as I lifted my leg I folded like a chair.
My athletes have given this exercise various names like “The Devils Exercise” and “if I see this again next month I’m gonna punch you in the junk”.
But give them a shot, I swear you’ll like it…
6. Bench Plank with Row
This gets really brutal really fast.
I personally don’t really chase the weight of the row portion of the exercise as I prefer the plank to be the emphasis and to be controlled perfectly. It’s nice to get a little extra rowing in with this exercise, but always be in control of the dumbbell.
7. 8 Point Plank
I thought I’d throw a curveball at you by making the two most difficult variations here static planks!
I just learned this variation recently and it’s really pretty amazing.
I underestimated it at first and then found myself shaking like a leaf in a windstorm within five seconds of starting it.
Putting your knees on the ground and posteriorly tilting your pelvis will help to remove your quads and hip flexors from the equation and then moving your elbows out under your eyes lengthens the “bridge” a little more.
If it feels not so hard to you, then you really need to focus on that pelvic tilt!
8. RKC Plank
This is a static plank, but barely.
The technique described in the video is called the “Zip Up” technique and I like to go through those steps before every rep of this plank.
I typically ask my clients to do three, 10-second holds with a quick break in between each rep.
You end up with a 30 second plank, but the most intense 30 seconds possible. If you don’t say “holy shit” as soon as you finished, then you did it wrong.
Final Word
If you’re going to train your core, you might as well be doing something that’s legitimately effective and won’t take up 7 minutes per set.
Try these out and let me know how they go for you.
About the Author
Mike is a personal trainer and strength coach living in Cleveland with his fiance and adorable pit bull.
He is the owner of Anderson Strength and Fitness, the strength coach for Healthy Green Athlete and is an all around badass dude. You can follow him on Instagram HERE or shoot him an email at [email protected].
I’d like to preface this by saying I’m not a fan of the term “core training.” Some coaches like to play the uppity card and say such and such exercise “trains your core,” but in my view, everything, to some capacity, trains or hits the core.
When you deadlift you train your core.
When you perform a set of push-ups you train your core.
When you Sparta kick someone in the kidney for talking during a movie you train your core.
Your core is namely made up of everything that’s not your appendages (arms, legs) and it’s responsible, mostly, for transferring force from your lower extremity to your upper extremity (and vice versa), and also for helping you look hella good in a bathing suit.
Another way to think about things is that your core is this interconnected “web” of muscles and connective tissue that’s designed to resist force or prevent “unwanted” motion.
There’s a bit more to it than that, but all in all…….there you go.
There are a million and one different ways to train your core. Personally, I am not someone who says “well, if you deadlift and squat that’s all the core training you need.”
I think that’s a very narrow-minded and reductionistic way of viewing things. Most people are very good compensators and I’ve seen some very strong individuals struggle mightily when asked to perform a deadbug
Conversely, I do feel we should include “core-specific” exercises into our training arsenal; but exercises that take all of the above into account.
Give these a try.
Hollow Position Landmines
Who Did I Steal It From: Strength coach and my ice-cream eating BFF, Ben Bruno.
What Does It Do: I LOVE hollow position holds to help people learn and appreciate what it REALLY means to get (and maintain) full-body tension.4
Adding in the landmine adds a stability and anti-rotatory component that kicks things up a notch.
Key Coaching Cues: Watch THIS video if you’re unfamiliar on how to perform a basic hollow hold.
Also, and this should go without saying, if you’re unable to perform a hollow body hold, master that before attempting this exercise.
Set up the landmine so that you’re holding the barbell just above sternum level and assume the hollow body position. From there rotate the barbell side to side trying to limit movement in your torso and hips as much as possible; a little is okay (and will likely be the case for most people).
This is a self-limiting exercise in that you should only use whatever ROM you have available and that you can control. As you become more accustomed to the exercise and the novelty wears off, you should be able to access more range of motion.
I like to perform anywhere from 5-10 repetitions/side.
Foam Roller Rollouts
Who Did I Steal This From: My bald brother in arms, Dr. John Rusin.
What Does It Do: Much like other rollout variations this is a superb exercise that trains the anterior core musculature, albeit, specifically, trains anti-extension.
As an added bonus, we could also make a case this is a great exercise to hit the Serratus Anterior. So, anyone who needs to work on their scapular upward rotation….you’re welcome.
Key Coaching Cues: Assume a strict plank position with forearms on top of a foam roller:
Abs and glutes engaged.
I like to start people with their hips a liiiiitle higher (so as they fatigue they end up in a “neutral” spine position).
Begin with a slight retraction in the shoulder blades and then protract/abduct away from the foam roller. From there “push” the foam roller forward/backward in a manner that allows you to maintain proper spinal position (there shouldn’t be any excessive over-arching or rounding of the back).
Be sure to MAINTAIN scapular protraction throughout the duration of the set.
You can perform this exercise for time (start at 10 seconds and work up to 30. I see no reason to go above that number) or for repetitions (10-20).
My wife gave birth to our son on January 31st, which was a Tuesday. She was back in the gym that Friday. Although, admittedly, all she did was a few easy bodyweight exercises and listened to my advice on hammering drills like deadbugs, birddogs, and anything else that would help to build back her core strength and integrity.
Postpartum training is a very tricky topic, and a serious one. Many women make the mistake of jumping back into (aggressive) exercise before their body is ready and sometimes suffer the consequences.
In today’s guest post, Dr. Sarah Ellis Duvall, helps shed some light on a delicate topic.
Recently, I saw an awesome Instagram post by Tony of his wife, Lisa. She was maxing out on bench press when she was only a few weeks postpartum. Go Lisa!
She is kicking butt and taking names and I was totally impressed.
Note From TG:THIS is the post Sarah is referring to. It was an awesome lift. What was not so awesome was how another trainer came in to highjack the thread and grandstand about how “dangerous” it was that Lisa was lifting so heavy so soon after giving birth, despite, you know, Lisa having been training all through her pregnancy, taking her time after giving birth to get back up to that point, AND being cleared by her doctor.
Since she has an awesome coach, her programming is perfect, but what if you are postpartum, headed back to the gym and not being trained by Tony?
Well, your life is probably a little less fun and devoid of Star Wars humor but here are 5 things to keep in mind before maxing out on your lifts postpartum.
#1. Do You Have Full Core Strength Back?
Start by checking for a diastasis. This is a thinning of the fascia (think shiny layer when you pull the skin off a chicken) that connects the front of your abs. It should feel like a trampoline when you lift your head and poke it. If your finger sinks in, that’s telling us your core is not connecting yet.
Lie on your back, knees bent
Place your fingers in the middle of your stomach
Lift your head just a little and push
Do they sink or do they spring?
Check halfway between your ribcage and your belly button, right above your belly button and halfway between your pubic bone and your belly button.
Anything that sinks in or is more than two-fingers wide is considered a diastasis. I consider the sinking part more important than the width.
Think about this as how well your core is transferring a load or pressure. It will not transfer well if there is a gap or hole in the system.
#2. Check for Doming.
When you do a crunch, sit up or plank your abs should flatten, they shouldn’t dome out in the front.
Doming tells us that your abs aren’t firing together correctly.
Along with not supporting the spine and pelvis enough, doming can also lead to hernias. Prevention is definitely the best medicine when it comes to hernias!
#3. Is Your Deep Breathing System in Place?
Does your inhale reach your pelvic floor or is it all upper shoulders or belly?
This is also part of building correct core strength.
Your diaphragm is the top of your core. Think about it as the top of a pressure cooker. We use pressure to help support our spine. If your diaphragm and core muscles are not firing correctly, it can either create too much or too little pressure. The pelvic floor really hates both those scenarios because that can lead to leaks and prolapse (months and months down the road).
I love the umbrella analogy. If you breathe up into your neck and shoulders, you will never open the umbrella. If you only belly breathe, that’s like opening a broken umbrella where only one side works. Aim for your back, sides and front around your ribcage to expand with every breath.
#4. Make Sure Your Pelvic Floor is Timed With Your Diaphragm
A long pushing phase or holding too much tension in the pelvic floor can disrupt the natural movement of the pelvic floor. Make sure you can feel your inhale pushing down on your pelvic floor – pelvic floor responds by relaxing down, then naturally recoils up on your exhale.
#5. Be Aware of What Happens Under Exertion
The more demand, the harder the exhale, the more your pelvic floor should contract. Sometimes this gets mixed up and instead of your pelvic floor contracting it bears down in response to pressure.
Bearing down is a great way to cause leaking and pelvic organ prolapse.
I’ve seen many women in person and received many, many more emails from women that have gotten pelvic organ prolapse 3, 8, and even 10 months after having a baby.
They thought things were going well.
They thought they were in the “clear.”
Then they tried some new crazy bootcamp class with lots of jumping or they maxed out on a lift or they simply lifted something heavy over their heads. Getting prolapse at anytime can be very heart wrenching and frustrating, but getting it months after you thought you were fine is the worst.
I’m not saying, don’t exercise hard.
I’m simply saying be aware of what’s going on and make sure you have the groundwork laid before pushing your body. If you don’t know what your pelvic floor does under pressure, that’s the same thing as not knowing your knee caves in during a squat. If any professional saw you, they would immediately fix the knee caving in issue and tell you how they just saved your knee from years of pain.
Pelvic floor prolapse is a real issue with real consequences, and it’s crucial to take the requisite steps a head of time to (hopefully) prevent it from happening.
About the Author
A wife, mom and adventure sports athlete, Dr. Sarah is a women’s health specialist that believes in teaching. Helping women understand how the body works is the basis for her results-driven online program. She focuses on issues from the pelvic floor and diastasis to building strength injury free. When she is not hanging off the side of a mountain, Sarah enjoys writing and presenting at Core Exercise Solutions and figuring out how her patients can continue to pursue their dreams and lead a strong, adventurous life.


 Nicholas M. Licameli, PT, DPT


 Nicholas M. Licameli, PT, DPT