I often speak on the importance of the test/re-test concept with regards to assessment.
It’s nothing fancy or elaborate.
You test something – whether it be range of motion or maybe a strength discrepancy – implement a “corrective” modality if something’s deemed out of whack, and then re-rest that shit to see if it worked.
If it did….you’re Gandalf.1
If not…#awwwwwkward.
The test/re-test approach helps set the tone for any future “corrective” strategies or programming considerations you’ll do as a coach or trainer.
In addition, and something I’d argue is equally as important, it also provides an added layer of value to the assessment.
If you’re able to demonstrate to someone a significant change or improvement in ROM or reduction in pain/discomfort by implementing a drill or two, and it’s something they’ve been struggling with despite countless interactions with other fitness professionals, what’s the likelihood they’ll bust out their checkbook or Bitcoin wallets (<—depending on their level of geekery)?

I suspect highly likely.
It demonstrates a perceived level of “mastery” and knowledge-base towards the assesser (you) and, in a roundabout, reverse psychology kind-of-way, delves into the “pain center” of the assessee (athlete/client).
In this example it can refer to literal pain such as a banged up shoulder, knee, or lower back. But it can also speak to pain in the figurative sense too. Someone who’s frustrated and “had it up to here!” that they can’t lose weight, or maybe an athlete who was cut from their high-school team would have a degree of “pain” that would incentivize them to take action.
Show someone success or a clear path of action, however little, and they’re putty in your hands.
Of course this assumes you’re not some shady shyster who tries to up-sell the benefits of some super-secret concurrent, 47-week, Eastern-Bloc training program you copied from Muscle & Fitness or, I don’t know, organic raspberry ketones laced with mermaid placenta.
People who promote and use smoke-and-mirror tactics are the worst.
But lets get back to the topic at hand.
Test/Re-Test
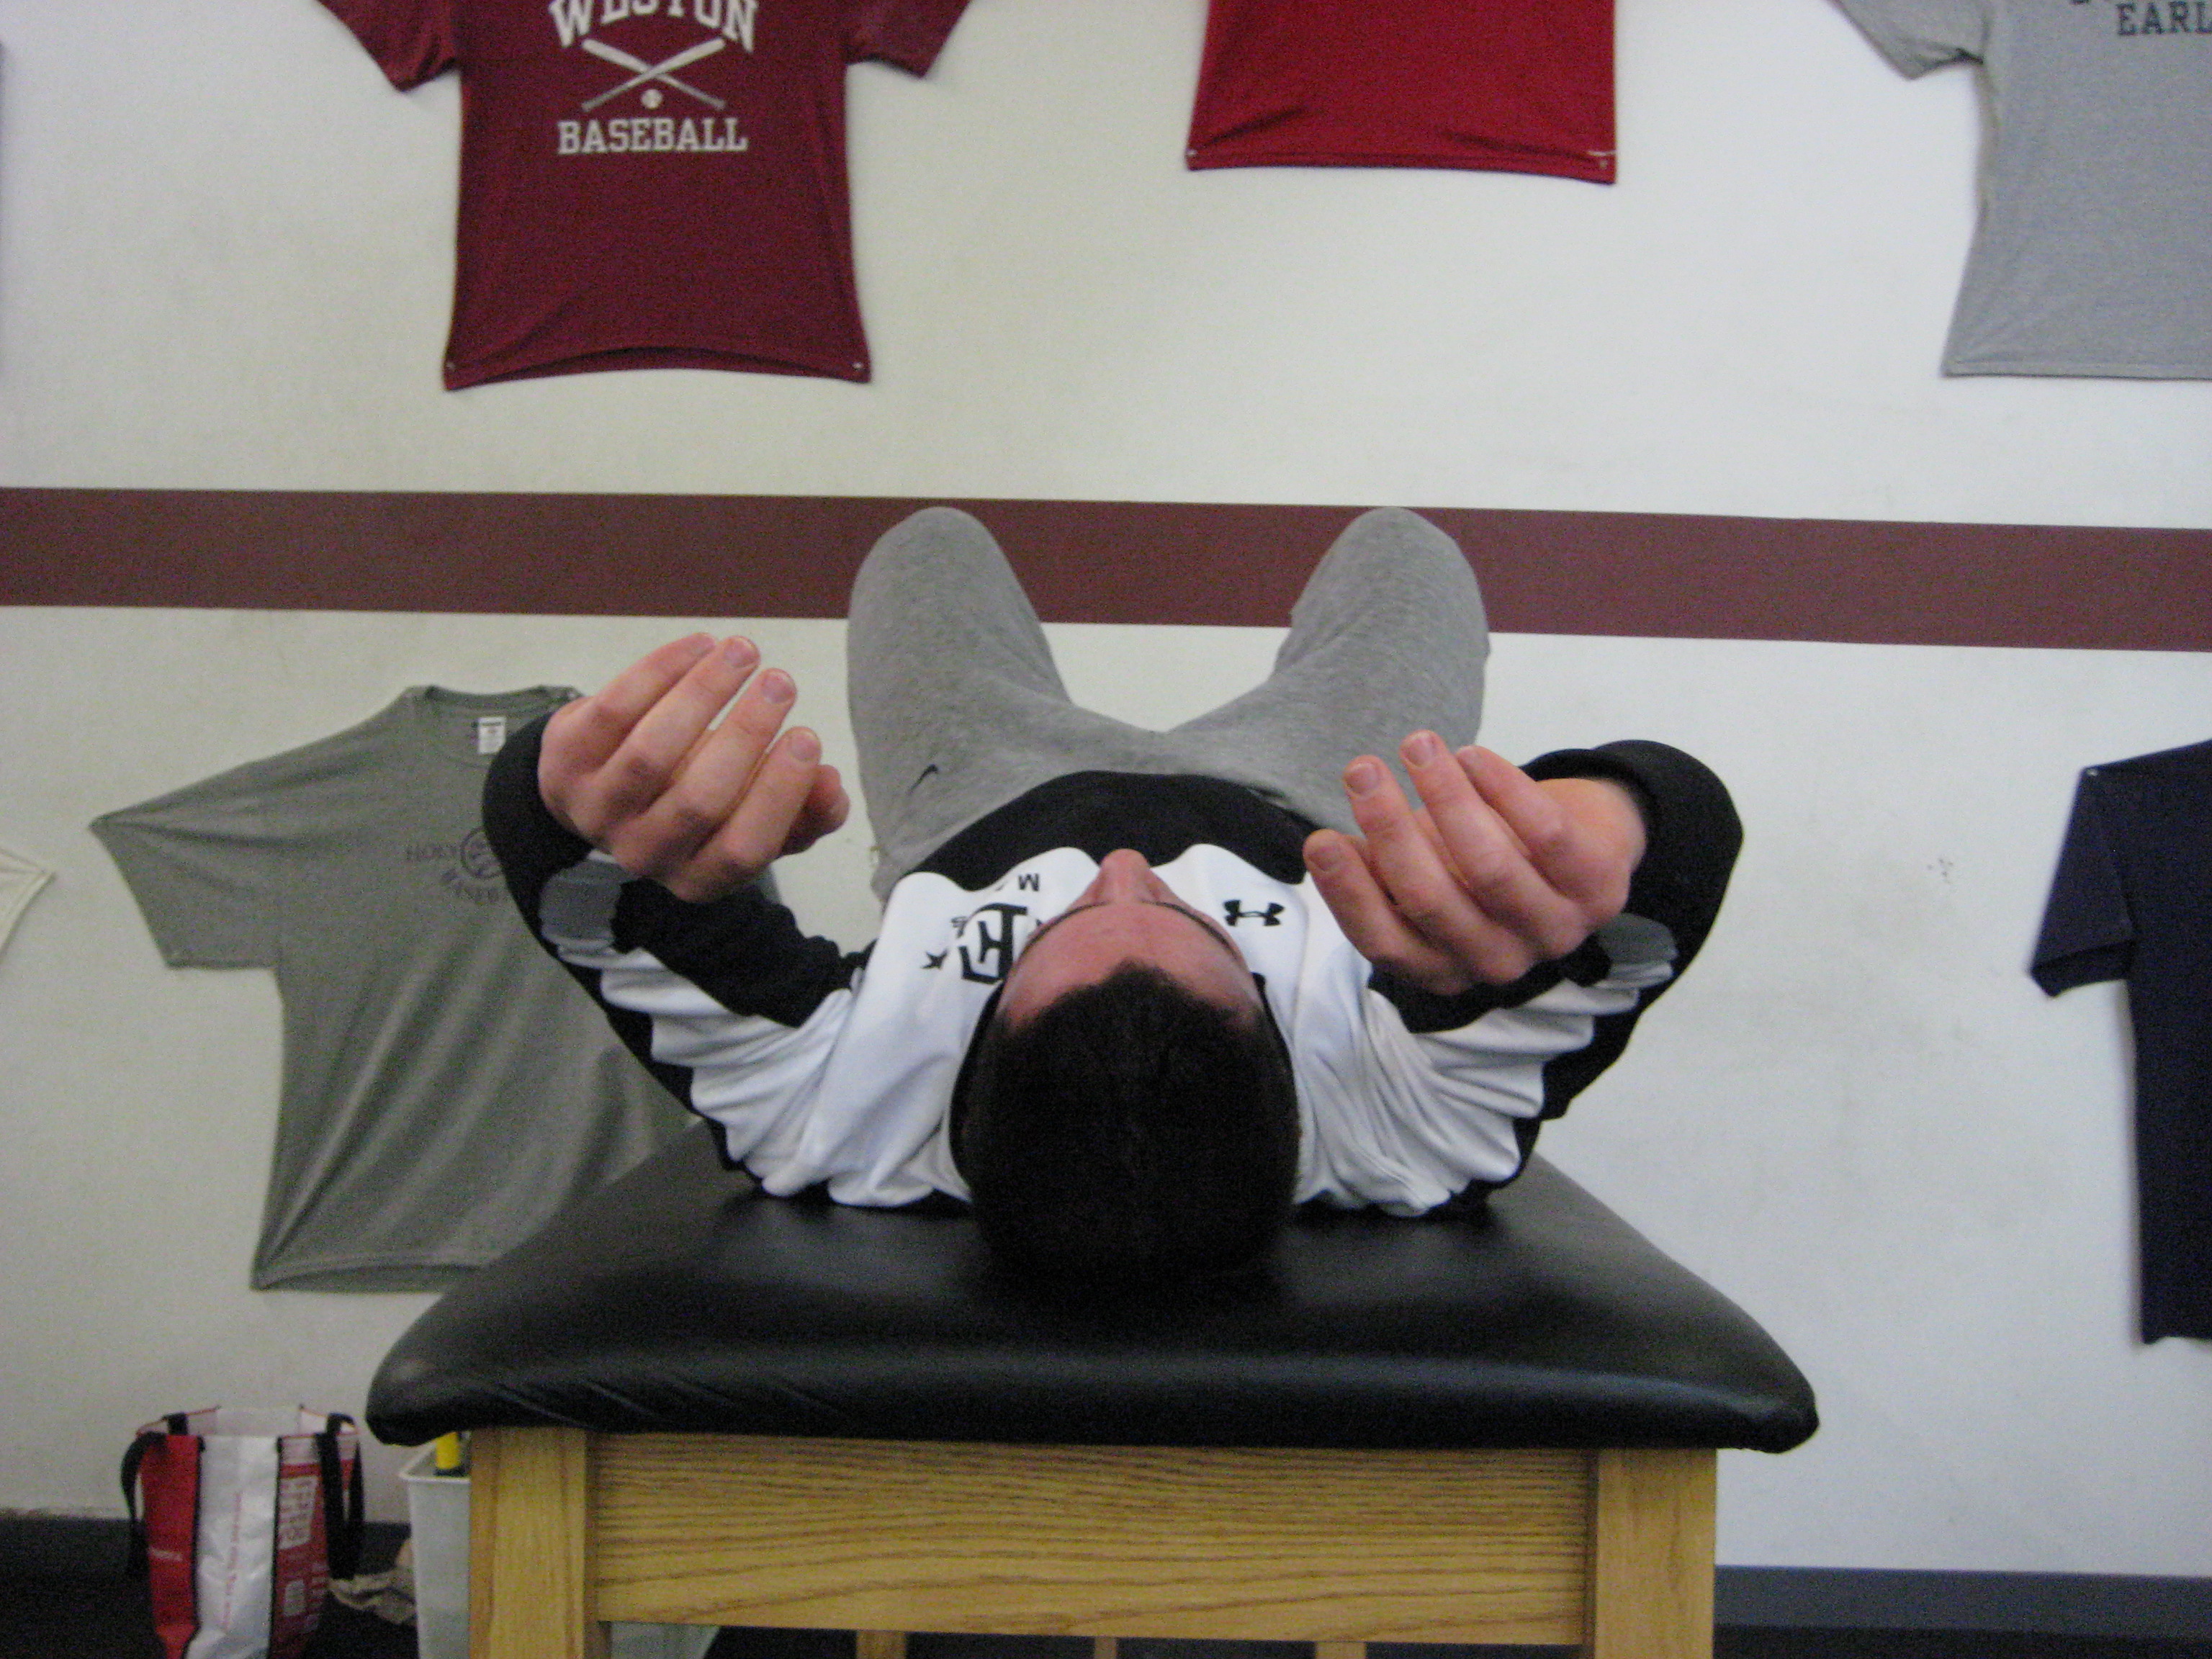
One of the main screens I use with my athletes and clients is their ability to lift or elevate their arms above their heads.
Shoulder flexion is important for everyone, not just overhead athletes and CrossFitters.
If someone lacks shoulder flexion, and they’re an athlete, it’s going to affect their performance. A baseball pitcher may be “stuck” in gross shoulder depression, which in turn will have ramifications on scapular positioning and kinematics, which in turn will result in faulty mechanics and compensatory issues up and down the kinetic chain.
Conversely, regular ol’ Hank from accounting, who likes to hit the gym hard after work, if he lacks shoulder flexion, he too could have numerous issues arise ranging from shoulder and elbow pain to lower back shenanigans.
Shoulder flexion – and the ability to do it – is a big deal in my opinion. And it’s a screen that should be a high-priority in any fitness professionals assessment protocol.
So lets say I’m working with someone who lacks shoulder flexion. I test it both actively (standing, picture above) and passively (on a training table).

I surmise that it’s limited and that it may be feeding into why a particular person’s shoulder has been bothering him or her.
I can use the test/re-test approach to see if I can nudge an improvement.
Now, as I’ve learned from many people much smarter than myself – Mike Reinold, Sue Falsone, Dr. Evan Osar, Dr. Stuart McGill, Papa Smurf, etc – you shouldn’t rely on any ONE screen/corrective.
Everyone is different, and what works for one person might not even scratch the surface for another.
With regards to addressing (lack of) shoulder flexion2, there are a handful of “go to” strategies I like to use.
And then it’s just a matter of seeing which one sticks.
1) Encouraging a Better Position
In order to elevate the humerus (arm) above your head, the scapulae (shoulder blade) needs to do three things:
- Upwardly rotate
- Posteriorly tilt
- Protract
The ability to do so is vastly correlated with the thorax. Those who are super kyphotic (ultra rounded upper back) will have a hard time elevating their arms overhead. Often, the simple “fix” here is to foam roll the upper back and work on more t-spine extension and you’ll almost always see an improvement.
Bench T-Spine Extension
Side Lying Windmill
But what about the opposite? Those who are stuck in more “gross” extension and downward rotation?
I.e., the bulk of athletes and meatheads.
Here the shoulder blades can be seemingly “glued” down.
In that case some positional breathing drills to “un-glue” the shoulder blades (and to encourage more 3D or 360 degree expansion of the ribcage/thorax) would be highly advantageous.
All 4s Belly-Breathing
It’s amazing what a few minutes of this drill can do with improving shoulder flexion ROM, without having to yank or pull or “smash” anything.
2) Allow the Shoulder Blades to Move
Some people simply don’t know how to allow their shoulder blades to move. A prime example is this past weekend.
An attendee who’s a personal trainer – but also competes in figure – mentioned how her shoulders (especially her left) had been bothering her for eons, and she couldn’t figure out why.
We had her perform this drill.
1-Arm Quadruped Protraction
In reality, both protraction and retraction are occurring, but many people have a hard time with the former.
The idea here is to learn to gain movement from the shoulder blade itself and not via the t-spine.
Here’s another angle (because, triceps):
https://www.youtube.com/watch?v=eyNFNxqFlSc
After a few “passes” with this drill, she saw an immediate improvement in her ROM. What’s more, the following day when she showed up for Day #2, the first thing out of her mouth was “my shoulder feels amazing today.”
That’s a win.
3) Pin and Go
Another route to take is to have the person foam roll their lats. Not many people do this, and there’s a reason why: It’s un-pleasant.
I’ll have the person spend a good 30 seconds or so on each side and then have them stand up and perform a simple SMR drill using a lacrosse ball against a wall.
They’ll “pin” the teres minor down (basically, find the tender spot behind their shoulder and hold it there) and then work into upward rotation.
https://www.youtube.com/watch?v=9OiGt_O1FvY
Another five or so passes here, and I’ll re-test.
Many times I’ll see a marked improvement in their shoulder flexion.
Caveat
NONE of this is to insinuate that anything mentioned above will work for everyone. The idea is to understand that it’s important to “test” a number of modalities and then re-test to see if you find an improvement.
If you do, you’re likely barking up the right tree which will make your corrective approach and subsequent strength training more successful.
If you don’t, well, my bad…..;o)


