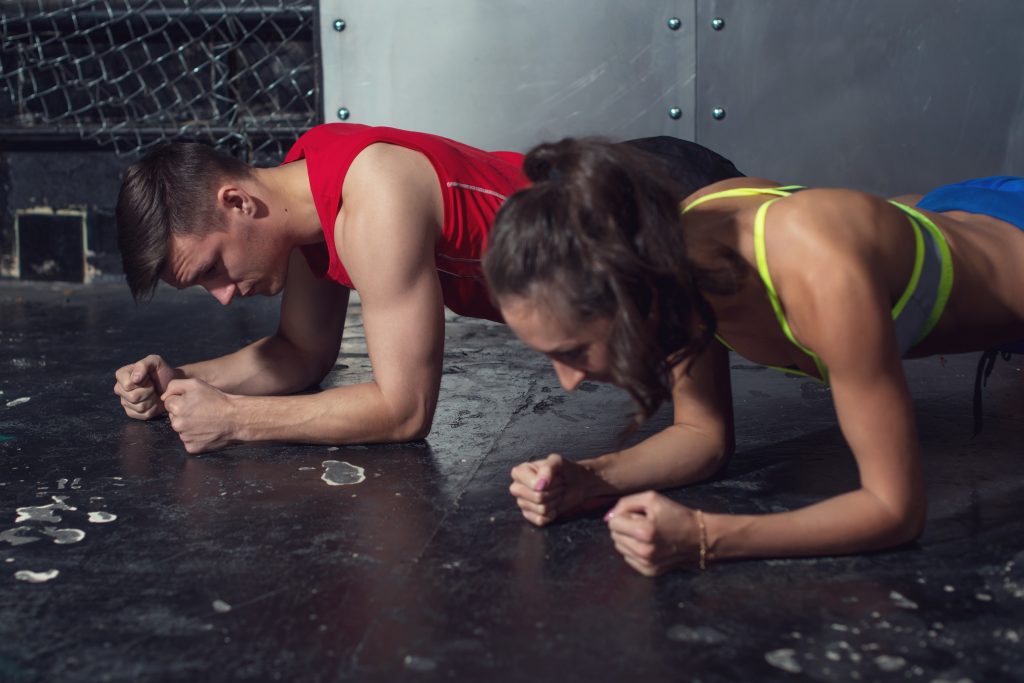
CategoriesExercise Technique

It’s Not What You Do, It’s How You Do It: A Better Plank

Copyright: undrey / 123RF Stock Photo


I know, I know.

Planks. Not the most exciting topic in the world.

I may as well post something on photosynthesis trends of oak trees in the Northeast, gas prices, or, I don’t know, what my kid had for breakfast this morning.

Everybody performs planks. And 90% of those people perform them incorrectly.

Today’s guest post by TG.com regular, Dr. Nicholas Licameli, sheds light on how to make your planks more effective.

HINT: It has zero to do with performing them for longer durations.

It’s Not What You Do, It’s How You Do It: A Better Plank

The plank.

We know it, we love it, and we know the benefits. However there is a simple way to make it more effective that you can implement immediately. It doesn’t involve any additional equipment and takes less than a second to do.

This simple modification will help not only those who are new to the exercise, but also those seasoned planking veterans.

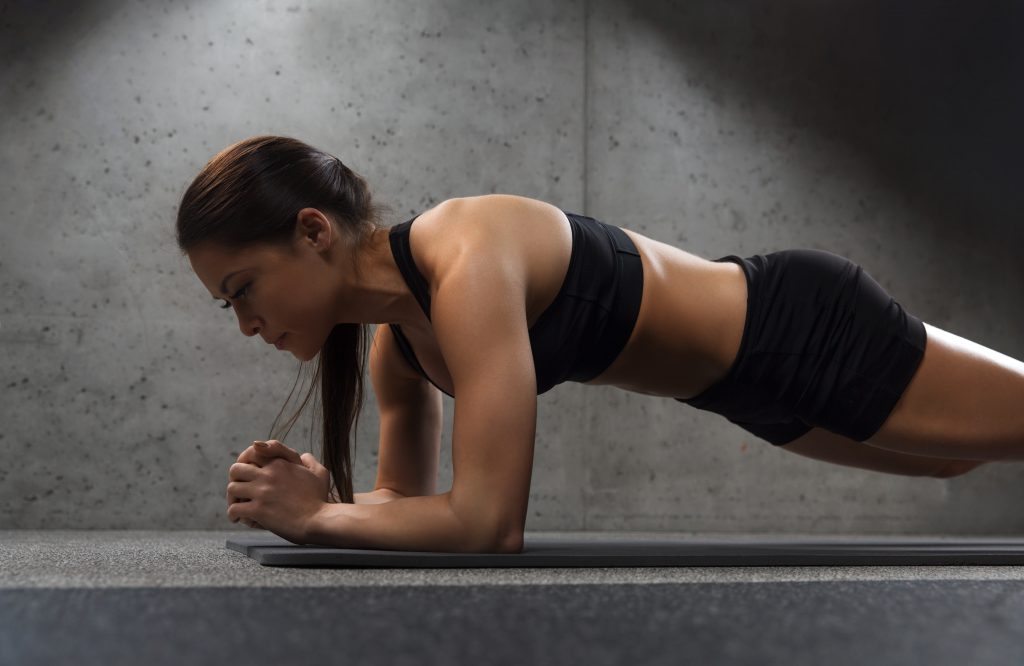
Take a look at the following two pictures.

Can you spot the difference?

It’s subtle, almost undetectable.

Here’s some more information: The plank on the top can be held for 3 minutes or more, while the plank on the bottom can only be held for 15-20 seconds max.

The plank on the top is engaging only a fraction of the core and abdominal musculature, whereas the plank on the bottom is recruiting nearly every muscle in the body, including the core and abdominals.

Form looks good in both: No sagging or lifting of the lower back and pelvis, serratus anterior is engaged for scapular stability, and the head, neck, and entire spine are in neutral. So what makes the bottom plank more effective than the top?

Let’s find out.

No, Wait, Don’t Go…the Plank IS a Big Deal

The plank is one of the best exercises for improving total body strength as well as the health of your spine. In order to perform the plank correctly and effectively, pay close attention to the position of the lower back and pelvis as well as the direction of the force being applied through the floor.

When in the plank position, imagine what would happen if all friction on the floor disappeared, almost as if doing a plank on ice. Which direction would your elbows and feet slide? Most likely, they would slide out from under you: your arms would shoot forward, your feet would shoot backward, and your face would be imprinted on the dirty gym mat that you sprayed with a dirty plastic bottle filled with an ambiguous pale blue liquid.

via GIPHY

Note From TG: No reason for this GIF other than to 1) I couldn’t find a video of someone falling during a plank and 2) it’s freakin hilarious. Sorry for the brief hijack Nicholas.

That is precisely the problem with the top picture.

You’ll notice that my toes are digging into the floor and isometrically pushing away, while my arms are isometrically pressing forward toward my head.

Biomechanically, I am isometrically pressing into shoulder flexion, ankle plantar flexion, hip extension, and spinal extension. While this may be a good way to hit the deltoids and calves (not really), it is not doing much for the core and abdominals.

Why?

Because the core, and more specifically the anterior core (the muscles on the front side), is responsible for spinal flexion and anti-extension. In order to maximally engage those muscles, you must train those movements.

This can be achieved by forcefully, and isometrically, pulling your arms and feet together. Now imagine doing it on ice. What would happen? Our arms and feet would slide toward each other and we’d assume a pike-like position with spinal flexion and anti-extension, which is just what we want.

And Bingo was his name-o…

Why Is This So Common?

Our bodies do not want to be wasteful, so they will do their best to use the least amount of energy necessary to complete a task, unless we tell it otherwise.

With the plank, sometimes due to our body’s natural compensations and other times due to conscious effort, we tend to get into the “position of least resistance,” usually for the sake of increasing the amount of time we can spend in the plank position.

In other words, we make the plank as passive as possible to increase its duration.

Some even wear their plank time like a badge of honor!

Hearing, “How long can you hold a plank?” is slowly becoming almost as common in gyms and health clubs as, “How much do ya bench, bro?”

That’s why it is important to remember the goal.

Unless you are a competitive planker and are scored by how long you can hold a plank, the goal of the exercise is not to increase its duration, but rather to train the core!

Doing planks is kind of like making a homemade dinner, cleaning the dishes, or having sex.

Just doing the activity doesn’t mean it will be good.

The effectiveness of the plank, as well as a homemade meal, the dishes, and sex, depends on the execution.

Don’t treat the plank like a marathon…treat it like a sprint.

Instead of thinking, “How long can I hold a plank for?” think, “How short can I hold a plank for?”

The idea being: The harder the contraction, the shorter the duration. The harder you contract and brace your core, the shorter the plank will be.

Tired of long sets of planks? Start squeezing!

Tips For A Better Plank

1. Squeeze your glutes and contract your abs (rectus abdominis AND transverse abdominis), which will pull your pelvis into a slight posterior pelvic tilt (think slightly rounding your back).

2. In order to contract your abs, you want to engage both your rectus abdominis (six-pack muscle) and transverse abdominis (deep stabilizer muscle, much like a corset). To contract the rectus abdominis, imagine bringing the ribs and front of the pelvis together. To contract the transverse abdominis, imagine the feeling when cold water reaches your navel when walking into a pool.

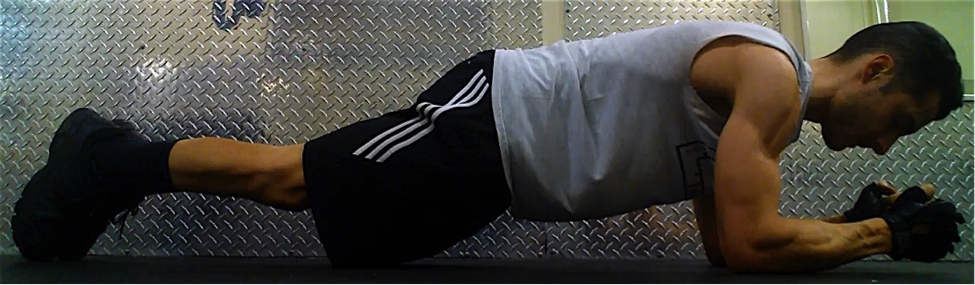
3. Keep your head and neck in a straight line. DO NOT LOOK UP. Your tailbone, mid back, and head should all be in line with each other (see picture below).

4. Isometrically pull your elbows and feet together. This is the key. Imagine doing a plank on ice or on a slippery hardwood floor with socks and a towel under your arms, as seen below.

5. Once you assume the proper position, maximally contract every muscle from your toes to your fingers, but DO NOT HOLD YOUR BREATH.

6. Imagine giving a big hug with your shoulder blades. Keep the shoulder blades protracted (pressed forward) and be sure they stay snug around the ribcage. This will help engage serratus anterior, which is an extremely important muscle for the health of your shoulders. It is also quite aesthetically pleasing when well developed.

7. When coming off of a plank, slowly lower your knees to the floor. DO NOT let your hips/pelvis drop to the floor.

Don’t rely on the traction of the floor to maintain the plank position, rely on your core.

Would you rather get to muscle fatigue after planking for 10 seconds or 3 minutes? Clearly, ain’t nobody got time for no 3-minute, ineffective planks. Try this modification out and I guarantee your planks will become instantly more effective and you will look at the plank in a new light and learn to love it.

For a video demonstration and explanation of everything I just wrote, be sure to check out my video right here:


About the Author

Nicholas M. Licameli, PT, DPT

Doctor of Physical Therapy / Pro Natural Bodybuilder

Every single thing he does, Nick believes in giving himself to others in an attempt to make the world a happier, healthier, and more loving place. He wants to give people the power to change their lives. Bodybuilding and physical therapy just act as mediums for carrying out that cause. Love. Passion. Respect. Humility.  Never an expert. Always a student. Love your journey.

YouTube: https://www.youtube.com/channel/UCAWFe5BmaJ_WFAh2aqsOg8g

Instagram: https://www.instagram.com/nicklicameli/

Facebook: https://www.facebook.com/nicholas.michael.58

CategoriesExercise Technique Program Design

8 Plank Variations That Don’t Suck

I know what you may be thinking.

“Really, Tony. An article covering planks? What’s next: Something on best exercises for a jacked Tibialis Anterior? Or, no, wait….NASCAR?”

I get it.

Planks aren’t the sexiest or most exciting topic on Earth. And they certainly aren’t an exercise that get people jazzed up to go to the gym and train.

Well, traditional planks aren’t anyway.

Today’s guest post by Cleveland based personal trainer, Michael Anderson, showcases some variations that may change your mind.

Copyright: dolgachov / 123RF Stock Photo

8 Plank Variations That Don’t Suck

The traditional front plank is one of the most well known and least useful exercises we have available to us.

There are various figures but the world record for a plank hovers between eight and ten hours. There are exactly zero useful strength exercises that you can do for eight hours.

The plank makes sense in theory: In that position you’re forcing your anterior core musculature to support your spine in a way it isn’t used to and will result in strength and stability increases.

Truthfully, it can be useful for this purpose, but it gets out of hand really quickly.

People always think that adding time to their plank is the right thing to do, but end up with some horrific Gollum-esque posture; neck cranked forward, low back sagging, butt up in the air just grimacing their way to an extra 5 seconds on their personal record.

I’m here to tell you that there are much better ways to train core stability (anti flexion / extension) than just hanging out watching the timer on your phone. In fact, I’ve got eight better planks you can try instead of the normal plank. I’ll even be a sweetheart and list them in what I believe is the easiest to hardest.

1. Foot March Plank


I like this as one of my first progressions from a static plank because it’s a very familiar position to most people.

Marching your feet just an inch or so off of the floor adds a substantial anti-rotation component to the exercise, and your client will recognize it very quickly.

2. Elbow Tap Plank


Like the foot march plank, this increases difficulty by taking away a point of contact but feels much more difficult than moving your feet.

I like to make my clients move through this very slowly and deliberately to help reduce the amount of hip swinging they get. I find it helps to keep your hands centered on your chest and adjust the width of your feet to increase or decrease difficulty.

3. Bent Knee Side plank with Clamshell


I actually think I dislike static side planks more than static front planks because people end up in really dog-shit positions really quickly.

A good “hack” to fix this is utilizing the bent knee side plank, which makes it easier to stay in a good position by shortening the length of the lever (your body).

To get even more out of this exercise, throw a band around your knees and hit a clamshell. You’ll be training anti-lateral flexion as well as a few aspects of your hips while you’re at it. I utilize these as both a core exercise and as a filler/activation exercise paired with squats or deadlifts.

4. Plate Drag Plank


This is very much a progression of the elbow touch plank and allows you to load it externally.

There are lots of other videos of people using kettlebells, sandbags and even heavy ropes to do these.

5. Side Plank with Wall Slide


The first time I did these was during Eric Cressey’s “Show and Go” program.

I saw them on the program for that day and watched his video and thought it would be no big deal.

Got set up for my first rep and as soon as I lifted my leg I folded like a chair.

My athletes have given this exercise various names like “The Devils Exercise” and “if I see this again next month I’m gonna punch you in the junk”.

But give them a shot, I swear you’ll like it…

6. Bench Plank with Row


This gets really brutal really fast.

I personally don’t really chase the weight of the row portion of the exercise as I prefer the plank to be the emphasis and to be controlled perfectly. It’s nice to get a little extra rowing in with this exercise, but always be in control of the dumbbell.

7. 8 Point Plank


I thought I’d throw a curveball at you by making the two most difficult variations here static planks!

I just learned this variation recently and it’s really pretty amazing.

I underestimated it at first and then found myself shaking like a leaf in a windstorm within five seconds of starting it.

Putting your knees on the ground and posteriorly tilting your pelvis will help to remove your quads and hip flexors from the equation and then moving your elbows out under your eyes lengthens the “bridge” a little more.

If it feels not so hard to you, then you really need to focus on that pelvic tilt!

8. RKC Plank


This is a static plank, but barely.

The technique described in the video is called the “Zip Up” technique and I like to go through those steps before every rep of this plank.

I typically ask my clients to do three, 10-second holds with a quick break in between each rep.

You end up with a 30 second plank, but the most intense 30 seconds possible. If you don’t say “holy shit” as soon as you finished, then you did it wrong.

Final Word

If you’re going to train your core, you might as well be doing something that’s legitimately effective and won’t take up 7 minutes per set.

Try these out and let me know how they go for you.

About the Author

Mike is a personal trainer and strength coach living in Cleveland with his fiance and adorable pit bull.

He is the owner of Anderson Strength and Fitness, the strength coach for Healthy Green Athlete and is an all around badass dude. You can follow him on Instagram HERE or shoot him an email at AndersonStrengthTraining@gmail.com.

CategoriesExercises You Should Be Doing

Exercises You Should Be Doing: Prone Plank Push-Pull

There’s no debating the fact that planks (and all their infinite variations) have a place at the “big boy” table in terms of exercises which 1. offer a horde of benefits, and 2. are wildly popular in the fitness community.

Personally I have a love/hate relationship with them.

I love them because, well, it’s hard not to appreciate/respect the long-standing work of guys like Dr. Stuart McGill, Dr. Craig, Liebenson, and a slew of others who are way smarter than me who have routinely shown that building and improving upon spinal endurance is a key factor in addressing low-back pain.

Having the ability to buttress shear loads and maintain a “neutral” spine both from an anterior/posterior perspective (prone planks) as well as laterally (side planks) goes a long ways in demonstrating one’s ability to control the lumbo-pelvic-hip area.

While I don’t have the exact numbers in front of me, Dr. McGill has noted that one should be able to hold a perfect prone plank position for roughly 90-120s, and a side plank for roughly 60s (on both sides).

If one is unable to do so, compensates in any way, or there is a major asymmetry between left and right sides on the side plank, it’s cause for a red flag and more than likely will result in a dolphin gets punched in the face.

In short, planks (or to be more precise:  the ability to perform them correctly) can be a valuable assessment tool.

Which brings me to why I also hate them.

Walk into any gym, anywhere, at any time, and you’ll undoubtedly see people planking away.  And, more often than not they look god awful.

There’s this….

And this….

And this, which is actually kinda cool….

Worse is that some people will brag – like it’s a badge of honor – that they can “plank” for five minutes.  Well la-de-freakin-do. Unless you’re training for some World Planking Championship, who cares????

And that’s not even the worse offense. I’ll give a free pass to the general fitness population because they don’t know any better.  But what really grinds my gears is when I see personal trainers having their clients perform planks for minutes on end, and it looks like the first two pictures from above.

What purpose does that serve?  And more to the point:  how is it you’re letting your client get away with such atrocious technique???????

AHHHHHHHHHHHH.

Okay, deep breaths Tony.  Everything will be okay.

Just so we’re on the same page:  I am NOT saying that planks are a waste of time.  Like I said there’s definitely a ton of efficacy for their inclusion in a well-designed training program.  But I’m also in the camp that believes there’s a rate of diminishing returns after a certain point.

If you’re working with a banged up client with a history of low back pain that’s one thing; but if you’re working with a “healthy” client with no contraindications or symptoms then I’d rather make planks more challenging rather than go for longer periods of time.

Which brings us to today’s exercise you should be doing.

Prone Plank Push-Pull

Who Did I Steal It From:  fellow strength coach and Cortland State alum, Justin Kompf.

What Does It Do:  it definitely brings a new flavor into the mix on two fronts.

1.  By taking one arm off the floor, you’re taking away a base of support which inherently makes the exercise more challenging.

2.  It also adds a dynamic component where the trainee has to RESIST me  with the push component, and then pull AGAINST my resistance with the pulling part.

All this while still maintaining a “neutral” spine and not allowing the torso to compensate in any way.

Key Coaching Cues:  All the same rules apply, and this means making sure your technique is spot on.  Meaning, there should be absolutely no compensating in the lumbar region (dipping or hiking), no forward head posture, and the glutes should be firing along with a significant abdominal brace throughout the duration of the set.

Additionally, I like to yell out the cues during the set:  Push!, Pull!, Push!, Pull!, your sister’s hot!, Push!, Pull!, Push!, Pull!,  so on and so forth.

Shoot for 6-8 reps on one side, switch, and repeat the same process on the other.

And that’s about it.  Give it a try today and let me know what you think!