The post seemed to resonate with people so I decided to expand the concept to include how I go about utilizing fillers with other common exercises.
Today: squatsssssss.
Filler’up
The beauty of fillers is that, much like tv shows based in the city of Chicago – Chicago Fire, Chicago Med, Chicago Justice, Chicago Sanitation, Chicago Teacher’s Union1 – there’s an endless array to pick and choose from.
What follows isn’t close to an exhaustive list.
What’s more, fillers can serve as a splendid opportunity to individualize someone’s program to hone in their unique injury history or their unique mobility/stability deficits.
QUICK ASIDE: When it comes to writing training programs for people, there are more similarities across the board than there are differences.
Far too often I find coaches/trainers making things more complicated than they have to be. Mike Boyle spoke to this not too long ago on social media:
People really want training to be complicated? Same group today 1 Euro BBall, 2 MLB pitchers, 2 position players, 2 national caliber female lacrosse players, 1 national level field hockey player, 1 NCAA female ice hockey player. 90% same. #sportspecific ?
Training programs, more often than not, revolve around these movement patterns, and the individualization generally comes down to what iteration of said movement pattern best fits the goal(s), injury history, and ability level of the athlete/client.
More to the point, instead of focusing on the facade of “sport specific training,” the better moniker should be centered on “people specific training.”
But that’s a hefty conversation for another time.
In the end, like I said, fillers are an ideal way to provide some semblance of customization into a program.
Fillers For Squats
Much like the deadlift, there are many moving parts to a squat which the body requires access to.
Starting from the bottom-up:
Ankle Dorsiflexion
Hip Flexion, in addition to Hip Internal Rotation
T-Spine Extension
Shoulder Mobility (specifically glenohumeral external rotation with regards to back squats)
Here are a handful of fillers for your consideration:
1) Hip Flexor Mobilization with IR/ER
The plain ol’ vanilla Wall Hip Flexor Mobilization is still one of my all-time favorite fillers, but this variation, which I stole from my boy Dean Somerset, adds another level to it.
Squatting requires hip flexion, and deep(er) hip flexion also requires hip internal rotation. Adding this in between sets of squats will make your hips feel nice-n-juicy.
The key, though, is to actually get motion from the HIP and not just crank through your lumbar spine. I like to put my hand on my ASIS and then “drive” that towards and away from my opposite (up) knee. In short, I think about opening and closing my pelvis.
There isn’t a ton of range of motion with this drill, but serves as a nice way to “unglue” the hips.
5 reps per direction/side is money.
2) Seated 90/90 Hip Switch (Progressions)
What I like most about this drill is that it hits both hip INTERNAL and EXTERNAL rotation simultaneously. The objective is to keep your chest up as best you can, along with your feet staying cemented to the floor.
1st Progression = Supported (hands)
2nd Progression = Unsupported (no hands)
3rd Progression = Adding in additional end-range Hip IR on the trail leg (be sure not to crank through your QL).
4th Progression = I don’t know, blindfolded? A new Bird Box challenge?
Shoot for 5-8 repetition per side (depending on which progression you’re doing). Hands Supported = high(er) reps. End Range Hip IR = you’ll hate life.
3) Side Lying Open Book
This one is pretty self-explanatory, and a great drill to help open up the chest and work on mid-back mobility.
Lie on the floor with a foam roller (or yoga block) underneath your top knee to prevent you from falling into excessive lumbar rotation. With your hips & shoulders starting stacked, “open” your top side by following your hand with your eyes.
BE SURE YOU’RE BELLY BUTTON DOESN’T GO ALONG FOR THE RIDE (it should stay put).
I had a gentleman come in for an assessment recently who, upon arriving, provided me with a laundry list of injuries and maladies that have hampered his ability to workout for quite some time.
The list he handed over would have prompted fist bumps from Tolstoy or Tolkien from its grandiosity in description and length.
Some were legitimate – an old athletic injury to his shoulder, along with some nagging low back pain.
Some were, shall we say, a bit of overkill – “my left Sternocleidomastoid gets a bit tweaky whenever I rotate my head more than 17.22 degrees. It’s even more profound when the Dew Point dips below a certain level. Or if I wear red on Thursday.”
The Power of Fillers
Okay, that last part did NOT happen. Rather, it was meant as an allegory of sorts, an attempt to showcase how some people can often fall into a trap of believing they’re broken and that the only way to “fix” themselves is to put under a microscope every tweak, niggle, and bump that rears its ugly head.
To be clear: It’s NOT my bag to discount people’s past or current injury history. I respect and take into account everything (injury history, goals, ability level, favorite Transformer3) and use that information to ascertain what will be the best, safest and most efficient path to dieselfication possible.
That said, I often have to play “bad cop” and help people come to an understanding.
That they’re not broken, that they can train, and that they don’t have to spend 30 minutes foam rolling and activating their Superficial Dorsal Fascial Line.
The drawn-out, overly complicated warm-up is my worst nightmare as a coach.
Actually, back up.
Kipping pull-ups are my worst nightmare. With a close second being anytime someone asks me about keto. Oh, and mushrooms.4
Sometimes when I start working with a new client – especially one coming in with an extensive injury history – they’re often riddled with fear and trepidation with regards to training. They’ve been stymied by an endless array of setbacks (and overly cautious physical therapists5) and are reluctant to push past the “corrective exercise” rabbit hole.
Their warm-up often takes longer than it takes to complete the Boston Marathon, to the point where every inch of their body is meticulously foam rolled and every muscle is painstakingly activated.
Yes, it’s important to activate “stuff.”
In fact, I’m often flummoxed some people still don’t understand the importance of taking themselves through a proper warm-up. Getting the body and nervous system primed for physical activity is kind of a big deal, and I won’t belabor the point here.
You should be doing it.
Don’t get me wrong: the warm-up is a splendid opportunity to individualize someone’s program and to have him or her dedicate some additional TLC to areas of the body that need it.
To that end, however, I do feel – at times – people baby themselves to the extent the warm-up becomes the workout.
This is where I find a lot of value in fillers and implementing them into my programs.
The idea is to address common “problem areas” by tossing in some low-grade activation/mobility drills during one’s rest intervals…as part of their training program.
The key point here is LOW-GRADE.
Filler exercises can be anything from glute activation and scapular upward rotation drills to, I don’t know, a particular stretch (hip flexors?) or naming all the members of Wu-Tang Clan. The premise is that they’re low-grade, low-demand, easy, and address something that won’t sacrifice performance on subsequent sets of iron work.
Performing 400m sprints or Tabata anything does not constitute as a filler, and defeats the point. We’re trying to turn stuff on and/or address common mobility/stability issues, not challenge Jason Bourne to a street fight.
All that said I wanted to share some insights on how I implement fillers into the programs I write, and in particular which ones I like to pair with certain exercises.
First up, deadlifts of course…;o)
Filler For Deadlifts
There are a lot of moving parts to the deadlift and to perform it in a safe manner requires “access” to a number of things:
Ample T-Spine extension
Ample hip flexion
Depending on the variation (I.e., sumo style) requisite adductor length
Scapular posterior tilt (hard to do if someone’s in excessive upper back kyphosis).
Lumbo-pelvic control/stability
The cheat code for unlimited lives in Contra (very important)6
If none of these things are in play or even minimally addressed many lifters are going to have a hard time staying healthy in the long run.
Alright, enough of my jibber-jabber. Lets get to the drills.
1) Split Stance Adductor Mobilization
Now, admittedly, if there was a Wikipedia page for “ordinary and unremarkable exercises,” this one would be right at the top. However, this has always been a staple filler exercise for me and one that I don’t forsee taking out of the rotation anytime soon.
What I like most about this exercise is that it targets the adductors in both hip flexion and extension. The key, though, is attention to detail with regards to anterior core engagement.
A common mistake I see people make is “falling” into their lower back when they walk their hands forward; it’s important to avoid this. Too, another common mistake is allowing the lower back to round as they sit back. The main objective should be to maintain as “neutral” of a spine as possible throughout the entirety of the set.
One other teeny-tiny thing to consider is scapular position. This drill can also be a nice opportunity to work on a bit of Serratus activation by actively “pushing” into the floor so that there’s a bit of protraction and the scapulae “set” or adhere to the ribcage.
Aim for 5-8 repetitions/leg during rest periods.
2) Monster Walks
All I can say about this exercise is that when it’s done properly it’s Glute O’clock.
In the video above I’m using Nick Tumminello’s NT Loop which I have found work really well for this drill.
FYI: I receive zero kickback from Nick – maybe a tickle fight? Fingers crossed – in recommending his band.
The idea here is to lock the ribs down and to keep the hips level so they’re not teeter-tottering back and forth during the set. Walk it back using the hips/glutes until the band is fully stretched and then control the return (again, making every effort not to let the hips teeter-totter).
I prefer to use anywhere from 5-8 repetitions here.
3) Bench T-Spine Mobilization
This is a money filler for those people stuck in flexion hell all day, in addition to those who have chronically tight/short lats.
Some key things to note:
Holding onto a stick (or anything similar) helps prevent the glenohumeral joint from going into internal rotation.
As you sit back towards your ankles, try to maintain a neutral back position throughout (keep those abs on, actively “pull” yourself back).
Perform a pseudo bicep curl at the bottom to help nudge you into a bit more thoracic extension.
Be careful not to induce excessive thoracic extension here. It’s easy to think the more ROM here the better, but that’s not necessarily the case.
4) Brettzel Mobilization w/ Exhale
Stolen straight from Gray Cook and Brett Jones this is easily one of my favorite fillers OVERALL, and not just for deadlifts. We’re locking down the lumbar spine by holding the bottom knee down (you can also place a foam roller here if you’re unable to get this low) in addition to adding a nice hip flexor stretch on the opposite side.
The goal, then, is to take in an inhale through nose and EXHALE (out the mouth) as you rotate and drive your top shoulder towards the floor.
Indeed, this is a fantastic drill to work on more thoracic extension, but again, be judicious with ROM here. More is not better. All I’ll say here is stay cognizant of your belly button (innie or outtie?) and where it’s pointing. As you extend back it should not point towards the ceiling. Instead, it should stay relatively motionless and pointing towards the wall your chest is facing.
As you exhale with each subsequent rep, you should notice you’re getting closer and closer to the floor.
3-5 repetitions per side should suffice.
And That’s That
There are a plethora of options here, but all I wanted to do was highlight a handful of my favorites. Choose ONE drill to perform during your rest periods. Also, depending on the total number of sets you have on the menu you could also alternate between 2-3 drills.
There’s no golden rule.
Hope this helped and gave you a few ideas to work with.
Few things are more annoying than a nagging (sports) injury.
Okay, I can think of some:
A piece of popcorn lodged between your teeth during a three hour long movie and no floss in sight.
Flat Earthers.
Poodles.
Talking about feelings.
Outside of those things, having (and trying to train around) a nagging injury is the worst. I live in Boston which has a thriving endurance training-centric community. As it happens I’ve seen my fair share of people walking through the doors of CORE suffering from shin splints.
Not in the sense that having shin splints is a shit show. Hey, they happen. Rather, it’s a shit show with regards to how most people (not all) tend to address the issue.
I’ve got some thoughts on the matter.
Shall we?
What Are Shin Splints?
Shin splints (or, for the more hoity-toity in the crowd, Medial Tibial Stress Syndrome) is a common injury found in endurance athletes (namely runners) as well as those who engage in a lot of jumping activities, and is often described as “my fucking shin hurts”“pain or discomfort along the inner edge of the shin bone (tibia).”
As far as the root cause?
It can be left up for debate, but the consensus tends to point towards increased activity that overworks the muscles and soft-tissue surrounding the area of the lower leg leading to swelling and pain.
In short (and more often than not): It comes down to someone doing too much, too soon.
OMG, I Have Shin Splints. Am I Going to Die?
No
Whew, Okay, How Do I Address It?
There are a number of obvious, if not overly simplified approaches that are worthwhile and can get the job done.
Commonly these range from rest (from the problematic activity, not just Netflix and Chilling) to stretching your calf muscles (Gastrocnemius & Soleus) and Achilles tendon to implementing some additional manual therapy in the form of massage, Graston, and/or self-“release” with The Stick or foam roller.
Like I said, these are all fine and dandy….albeit a bit reductionistic in nature; or a quick Band-Aid if you will.
Some other poignant options to consider:
1) Reduce Training Volume
Hey, here’s an idea: If shin splints are often the end-result of overtraining or surpassing one’s ability to recover, why don’t we, you know, latch onto the crazy idea of reduce training volume?
Weird, I know.
But something to consider and not to be trifled with.
2) Strengthen Anterior Musculature of Lower Leg
Namely, this means strengthening the Tibialis Anterior.
A popular exercise prescribed in this case is something like standing upright and “pulling” your toes towards your knees for “x” sets and reps.
Okay, cool.
I prefer something like ACTIVE ankle dorsiflexion vs. a band.
WARNING: Possibly the most boring video on the internet.
Here I’ll have the person pull his or her’s toes towards their chest against a band, but instead of mindlessly performing reps, I’ll have them actively pull against the band for 5-10 seconds for 5-8 repetitions.
It sucks.
3) Follow a Ketogenic Diet
Hahahahahaha. Just kidding.
Jumping into a shark’s mouth would be more worthwhile.
4) Emphasize Deceleration/Landing Tactics
Taking the time to coach people on how to LAND properly and to decelerate their bodyweight can have a huge impact on the reoccurrence of shin splints.
Meaning, when they master a good box jump (for example), and it doesn’t sound like an elephant being suplexed off the top rope of a wrestling mat when they land, the likelihood of shin splints rearing their ugly head is drastically reduced.
NOTE: This would also be an opportune time to address gait and running mechanics too. Not my area of expertise, but worthwhile to mention.8
But Wait, There’s More (The Really Important Stuff)
One of the major “drivers” of shin splints is thought to be over-pronation of the feet. It makes a lot of sense, but I’m often flummoxed as to how archaic the fitness industry can be in addressing this issue.
Orthotics are often seen as the end all-be all fix.
Full Disclosure: I am NOT a doctor and understand there are many people out there who benefit mightily from being prescribed orthotics.
However, for the bulk of people trying to conquer shin splits I do not feel what follows is the most germane approach. A few years ago I remember reading something physical therapist, Bill Hartman, wrote on the topic that really resonated with me and helped to shape my current thoughts on the topic.
Think about what happens when someone (over) pronates:
If we were to reverse engineer the anatomy/biomechanics it would look something like this:
Do More Anterior Core Work & Butt Stuff (Glute Work) —-> Nudge Posterior Pelvic Tilt —-> Femoral External Rotation —-> Tibial External Rotation —-> Supination of Foot.
I explain things a bit more in this quickie video.
To that end, below are a handful of exercises I feel should take more precedent when addressing shin splints.
Hammer anterior core/glute strength and hip stability.
Deadbugs
I think Deadbugs are a vastly underrated exercise, which is a shame because they’re an MVP when it comes to developing anterior core strength and pelvic control.
And while many people will scoff at how “easy” this exercise is, I’d argue that if it’s done RIGHT (as discussed in the video above), they’d have a newfound affinity for it.
Active Foot Squat w/ Band
Passive Foot = Deafaulting into a pronated (flat foot) position.
Active (Tripod) Foot = Maintaining three points of pressure in the heel, pinky toe & big toe.
Placing a band over the feet is an easy way to provide kinesthetic feedback to the trainee so (s)he can stay more cognizant of their foot position.
I.e., Resist pull of band, supinate, get an arch, and then maintain position throughout set.
Standing KB Swap
Popularized by Dr. Joel Seedman, this is a fantastic drill that provides a ton of value for our training buck. The idea is to GO SLOW and to “own” each transition. If you have to speed up in order to stay balanced that defeats the purpose.
It hammers home the concept of active foot.
It lights up the glutes and surrounding hip musculature.
It will humble the shit out of you.
I like to have trainees perform 3-4 sets of 6-8 reps/side with this drill.
1-Legged RDL KB Swap
This is more or less a progression to the KB Swap above. All the same benefits apply, except now you’re upping the ante in an RDL position (and really challenging hip stability).
Glute Bridge w/ Band Abduction
When it comes to the Glute Bridge I’d encourage everyone to experiment to see where they feel these these the most.
#1 you want to FEEL YOUR GLUTES WORKING.
You’d be amazed how many people come into my studio telling me “yeah, yeah, yeah, I do glute bridges, whatever,” only to find out, after watching them perform a few reps, they don’t even feel them in their glutes.
I’ll often play around with foot position – narrow stance vs. wid(er) stance, heels close to tush vs. heels further away from tush, pants on vs. pants off – to see when and where they feel their glutes the most.
Everyone is different.
But yeah, first and foremost, make sure they actually feel their glutes when they perform this exercise.
Once they master that, if you want to make their glutes feel even juicer, add a band and have them perform a few hip abductions at the top of each rep.
This is a double-whammy on glute activation.
Side Plank Hip Clam
This is one of my favorites, and admittedly a very advanced drill. I think Bret Contreras was the first to popularize this drill first and it’s definitely one that targets the glutes in a way not many exercises can.
I always like to say the progress you make in the gym are the direct result of how well you allow yourself to recover.
As counterintuitive as it sounds you break muscle down in the gym, and it’s the time away from deadlifts, squats, and daily WODs that your body recovers and bounces back stronger than before.
Today’s guest post from TG.com regular, Dr. Nicholas Licameli, expounds on some of the best (and simplest) ways you can get a little more recovery in your life.
It’s not as easy as telling someone to “go to bed.”
Enjoy.
My Top Recovery Tips
As soon as a training session ends, the goal should be to start the recovery process.
In order for us to consistently make improvements in our bodies and our training, we need exercise that overloads our current tolerance AND adequate recovery. In other words, we need to challenge, break down, and fatigue our muscles as well as recover from that challenge, break down, and fatigue.
There are many ways to look at fatigue. One common breakdown is peripheral fatigue and central fatigue. Peripheral fatigue is simply the physical stress, break down, and depletion of glycogen that muscles experience during training. This decreases strength, power, and performance and causes muscle soreness.
Central fatigue is a bit different.
Without going too in depth (that’s for another article), I introduce the autonomic nervous system, made up of the sympathetic (SNS) and parasympathetic (PNS) nervous systems. The SNS controls our stress response, or “fight or flight.”
SNS controls our bodies when we come face to face with a grizzly bear. We’re going to sweat and our heart rate, blood pressure, and respiratory rate will increase. During this state, we are essentially mentally and physically breaking down our bodies. The PNS controls the recovery response, or “rest, digest, and recover.” During this state, our blood pressure, heart rate, and respiratory rates all decrease.
It is in this state that we mentally and physically rebuild and recover.
Interestingly enough, the brain’s mechanism for learning works similarly to the mechanism by which muscles grow and become stronger.
Muscles do not grow in the gym.
Training causes muscles to be broken down. It is during recovery and sleep that muscles make adaptive changes.
Similarly, we do not learn while we attend a lecture.
The lecture is like a training session because we do not make adaptive and lasting breakthroughs while in class. Our brains make new connections and truly absorb new knowledge during the rest, digest, and recover phase, which occurs after the lecture and usually during sleep.
I Sleep Every Night, Isn’t That Enough?
Not quite.
Imagine this sample day:
Alarm goes off (for the 5th time…thanks a lot snooze button) and you jump out of bed feeling like you’re running late. You go into the bathroom, get washed, get dressed, sprint down the stairs, grab some coffee and a quick to-go bite to eat, and you get into your car.
Some traffic, nasty drivers, and frantic lane changes later, you make it to the office a few minutes late. With no time to prepare, you dive right into your daily work duties.
After a stressful day at work (and getting yelled at by your boss for being late) and four cups of coffee, you rush to get home to pick up the kids from school. The commute home is no better than the morning, but you manage to get there on time. You make it home, give the kids a snack[/efn_note]As if I know anything about childcare. Sorry parents, this article is written by a young man without children…yet.9 and head out to the gym.
After taking a pre workout with enough caffeine to give heart palpitations to a Clydesdale horse, you manage to get psyched up for your workout. After a great workout, you jump in the car newly energized and ready to make dinner for the family and help the kids with homework. After collapsing on your bed and staring blankly at your Instagram feed until you can’t keep your eyes open, you manage to somehow fall asleep.
What’s the point of this example?
This is an entire day spent in a sympathetic state!
Remember, the sympathetic system is the fight, flight, and physical breakdown system. There is no time allotted to the parasympathetic system: rest, digest, and recover.
Things like stress, caffeine, and training are all highly sympathetic.
Here’s the good news!
A day like this can be easily changed for the good. All it takes is a few minutes of actively disconnecting from the grind. My favorite (and in my opinion, the simplest) way to accomplish this is simply breathing.
That’s right. Good ol’ breathing.
Inhale deeply and exhaling slowly. Let your shoulders drop down on the exhale. Redirect your mind away from the day-to-day and focus on your breathing (more on this below).
In my office, we set an egg timer for one hour. When the timer goes off, everyone stops and takes a deep breath. It takes maybe 6 seconds and has had a significant impact on staff and patients alike. No egg timer? Every time you slip away for a bathroom break, try making it a point to take a deep breath. It may even be a good idea to bring along loved ones. What could be a better way to end the day than a couples breathing session in bed?
Actually, don’t answer that.
Note From TG: BOM, CHICKA BOM BOM
It seems logical that a proper recovery plan would target both types of fatigue. The following is a list of some recovery techniques that research has shown may be effective.
The techniques will target both types of fatigue and keep you on your way to achieving and surpassing your goals. Before we go on, it is important to note that no recovery technique, including the ones below, will be effective without proper sleep and nutrition. Getting your Z’s and eating properly to fuel and refuel our bodies are most important.
That being said, let’s get to it!
In an already packed schedule, it is not feasible to think you will be able to set aside time to do each technique, so I’ve numbered them from 1 (most important) to 4 (least important), in my opinion of course.
My opinion is based on the current research, effectiveness, convenience, and anecdotal experience both personally and professionally. It should be noted that although there is some research supporting the use of these techniques, many of the mechanisms and overall effectiveness still warrant further study.
For more information about specific parameters and references (and if you want to feel really insignificant about yourself and the quality of your own content), be sure to check out Chris Beardsley’s work at strengthandconditioningresearch.com right here.
1. Deep Breathing and Meditation
What Is It?
Using deep, controlled breathing and meditation to induce a state of physical and mental relaxation.
What Does It Do?
Deep breathing and meditation increases parasympathetic nervous system activity (rest, digest, recover) and decreases sympathetic nervous system activity (fight or flight).
How to Do It?
Choose a relaxing environment (an empty room, out in nature, etc.) and position yourself in a comfortable position (I prefer lying on my back with a pillow under my head and a pillow under my knees). Breathe in deeply through your nose and imagine the breath filling up and expanding your abdomen and lower back.
Hold for a few seconds and then exhale through your mouth in a controlled manner (don’t just blow the air out). With each exhale, imagine your body melting into the floor. Keep your mind focused on your breathing. “Is this an ‘in’ breath or an ‘out’ breath?” is the only thinking that should be happening.
If you hear a car horn and your attention goes to the car, redirect your mind back to your breathing. If your mind drifts to that report you have to write at work today, redirect your mind to your breathing. Some types of meditation actually involve allowing those intrusive thoughts in, and accepting their presence. If they are of significance, take moment to write them down.
If they are insignificant (be honest with yourself), push them away and redirect your mind to your breathing. Meditation takes practice, but as you train your brain to control intrusive thoughts and focus on the moment, you’ll see drastic changes in your recovery as well as your life.
2. Active Recovery
What Is It?
Active Recovery involves performing light resistance training or cardio either immediately following a workout or between workouts.
What Does It Do?
May reduce muscle soreness, limit strength losses, and even improve mood.
How to Do It?
Perform active recovery by using a light load (30% of 1 rep max) for about 20-50 reps for less than 60 minutes or using an active cool down such as a stationary bike for roughly 15 minutes.
Note From TG: Check out my Bloop, Bloop, Bloop Workout HERE which touches on the same idea a Nicholas describes and gives you some ideas on what to do.
3. Foam Rolling
(For an in depth look at foam rolling, be sure to check out my previous article here and my podcast here, which are much more comprehensive than what is described in this article.)
What Is It?
Foam rolling involves lying on a roller and using gravity to apply pressure to a muscle. The roller is pressed into the muscle belly and the user rolls up and down the length of the target muscle.
What Does It Do?
Like deep breathing and meditation, foam rolling can tap into the parasympathetic nervous system (rest, digest, recover) and reduce sympathetic nervous system activity (fight or flight) by inducing a global short-term decrease in muscle tone.
Muscle tone is the continuous passive contraction of a muscle controlled subconsciously by the brain. In other words, it’s a muscle’s resistance to passive stretch.
Tone is created by a constant subconscious message from the brain telling a muscle to contract. Many times the sensation of muscle “tightness” has more to do with tone and less to do with actual muscle length.
How to Do It?
1. View video above.
2. Or, if you learn better by reading:
Start off with a slow, steady roll covering the entire muscle group, scanning the area for tender spots. Think of scanning the area as a blind person would scan a new environment. Once you find a tender spot, pause and hold on that spot until a release is felt and the tenderness lessens. Add some deep breathing while holding on the tender spot to further assist in the release. Follow this up with another slow, steady roll over the entire muscle, just like how you started. It is true that foam rolling should be a bit painful, but too much pain will cause an increase in muscle tone, which, as previously mentioned, is exactly the opposite of what we want to do. More pain is not better.
Better quality is better.
4. Water Immersion
What Is It?
Water immersion is the use of ice baths or hot tubs.
What Does It Do?
May reduce muscle soreness and limit losses in performance.
How to Do It?
Use cold-water immersion (8-15°C/46°F-59°F) for 5-15 minutes or alternate 1-4 minute bouts of cold and hot water (38°C-42°C/100°F-108°F). Be sure to be submerged to shoulder height.
Where to Start?
A great place to start is with (1) deep breathing and meditation.
Start small.
Try devoting a few minutes each day to disconnecting and breathing. Work up to longer durations as you start to get the hang of it.
This will help in all aspects of life.
Once you’ve successfully made it a habit to disconnect and breathe for a few minutes each day, try adding in some (2) active recovery days.
After you have a solid daily breathing and meditation routine and you’ve managed to add in some active recovery to your week, consider using a foam roller combined with deep breathing for a few minutes after training and maybe even before bed. Once you have all these in place, feel free to give (4) water immersion a shot if you have the time and resources.
Use these techniques, along with proper sleep and nutrition, and you will soon reap the physical and mental benefits of proper recovery!
About the Author
Nicholas M. Licameli
Doctor of Physical Therapy / Pro Natural Bodybuilder
Every single thing he does, Nick believes in giving himself to others in an attempt to make the world a happier, healthier, and more loving place. He wants to give people the power to change their lives. Bodybuilding and physical therapy serve as ways to carry out that cause. Nick graduated summa cum laude from Ramapo College of New Jersey with his bachelor’s degree in biology, furthered his education by completing his doctoral degree in physical therapy from Rutgers School of Biomedical and Health Sciences (previously the University of Medicine and Dentistry of New Jersey) at the age of 24, and has earned professional status in natural bodybuilding. His knowledge of sport and exercise biomechanics, movement quality, and the practical application of research combined with personal experience in bodybuilding and nutrition allows him to help people in truly unique ways. Love. Passion. Respect. Humility. Never an expert. Always a student. Love your journey.
I’m still playing a little catch-up on my end from a weekend of Fitness Summit shenanigans in Kansas City.
I promise I’ll have some content ready to share tomorrow into the rest of the week (you miss me, right?), but in the meantime I’ve got an excellent guest post from Israeli Strength and Conditioning coach Menachem Brodie.
Enjoy.
How the Endurance Athlete Can Appease a Shoulder That Hates Them
As a Strength & Conditioning coach who works extensively with cyclists & triathletes most folk first reaction is “WTF Mate?” or “I didn’t even know that was a thing!”
When asked to describe it to people, the best I can come up with is that I know pretty much EXACTLY how Scott Evil feels:
Not “Strength coach” enough for that crowd, and not quite “Cycling enough” for that crowd…
But there is a ton that we can learn about posture and shoulder health from our two wheeled, pedal pushing friends, as they spend hours in positions just a bit more extreme than you or I sitting on the couch watching TV on the weekends.
The difference is that while we ingest 2,000 calories in Buffalo Wild Wings and that awesome ranch dressing, they burn those calories climbing mountains.
While posture and shoulder health have a huge impact on our overall well-being and can have significant and far-reaching effects, those effects are not always felt before it’s too late in the game.
This is especially true for Road Cyclists, runners, and triathletes, as their sport, by design, requires the body to work for long periods of time, preferably as energy efficiently as possible.
When I first started coaching cyclists for performance & strength, I focused on the glutes and their huge impact on the pelvis, spine, and rib cage as they supply the base of power on the bike and support for the upper body.
But it quickly became apparent that while I was on the right track, there was something even more basic that limits cyclists performance: Their posture….It is completely jacked due to hours on the bike in a closed position, supporting around 30% their weight with their hands and arms. (If you’re a cyclist and feel that you’re subjectively supporting more than 30% of your weight with your arms, go see a bike fitter, after you get started with the exercises we learn today.)
And so, the journey down the rabbit hole began, except unlike Alice, I could answer the Cheshire Cat with a definitive answer to “Where do you want to go?”
Improved performance
Improved quality of life
Avoiding looking like a Time trial cyclist/ the hunchback of Notre Dame….when you’re walking around at age 60
Let’s Get Down to Basics
There are two diaphragms in the torso that we want to have aligned in order to allow our body to function properly, including managing internal pressure, allow for proper/optimal muscle function, improved breathing, improved rib mobility, and much, much more:
Thoracic Diaphragm – controls pressure between chest and abdomen, the muscle responsible for respiration in the body, and what most people think of then you mention “Your diaphragm”.
Pelvic Floor – Controls pressure between pelvis and abdomen.
Interestingly enough, while in the general population we may see issues mostly at two of these diaphragms (Pelvic Floor and Thoracic diaphragms), in cyclists we tend to see a bit more issues, in large part due to the extreme position in which these athletes must perform for their sport.
Add into this mix that cycling is pretty much the only sport we have where the feet rotate about a fixed axis, variability in terrain, road surface, winds, and rider movements on the bike, and we have the right ingredients for some major movement issues.
Bear in mind that EVERY sport develops/requires its fair share of movement “deficiencies” or “imbalances at joints” due to repetitive tasks and movements, and while this is a part of sport, we need to keep our “average” cyclist in balance – after all, they are competitive in cycling, but a pro at something else…
Cycling puts you into an extremely vulnerable spot posture wise, not to mention with drivers (of note, PLEASE give us three feet when passing, it’s F***ing scary to have a car whiz past you within inches of knocking you off the road… when they could have waited 5 more seconds and given space… not to mention it’s pretty much law in nearly all countries and states).
Unfortunately, many in the cycling and triathlon communities have come to simply accept some forms of injuries as a right of passage for cyclists who are out there riding hard year in and year out.
From frozen shoulders and lower back pain, to constant upper neck pain and loss of hip extension….and a number of other issues, the communities have come to determine that “it just happens due to playing our sport”.
But it doesn’t have to be that way.
If we simply work on a few basic moves off the bike, we can have a significant positive impact on the riders performance and health, as well as YOUR performance and health from constantly flexing your spine to scroll through Instagram and Facebook throughout the day.
(Yeah, I saw you sit up a little straighter right there).
Opening the shoulder girdle, re-attaining proper scapular rhythm, and attaining better alignment of the Cervical, Thoracic, and Pelvic diaphragms are the goals we strive for and are not won in a few weeks, but rather over the course of a few months, and for more veteran riders, years.
It takes consistent work, done over a time period to see major gains and advances.
While it’s tough to argue which of these three diaphragms is “The most important to address” as it is based off of each individual athlete and what/if any issues they are having, we can say that due to our modern-day lifestyle, the shoulder girdle is a great place to start, as most cyclists will move to a compromised position at some point in longer/harder rides.
Not to mention that keeping the shoulder in good balance can relieve pressure on the brachial plexus, reduce the risk/ development of an overgrown coracoid process, as well as help alleviate some of the tension from the cervical extensors that are working so hard.
This allows accessory muscles of the thorax and neck to work as…. Accessory muscles, not stabilizers hanging on for dear life. As we get the shoulder joint sitting better, we can see the rib cage begin to gain proper movement, which leads to a better alignment of the Pelvic and Thoracic diaphragm, which allows the pelvic floor to relax and glutes and pelvic floor to activate in order to stabilize and move the body with more efficiency.
If we know that joint position dictates muscle function, then there are so many compensations happening in the sport of cycling, that many muscles wind up feeling like Tom Hanks in Castaway: They know what it’s like to be social and around others, but they begin to become detached from reality, and start doing other funny things.
Aside from helping to put you in the best position to maximize energy expenditure, keeping the shoulders healthy and moving well can help you be able to EAT while out on the bike as well!
The number of riders I’ve had the last ten years who had lost proper range of motion in their dominant shoulder, and were unable to eat on the bike due to loss of the range of motion thus not being able to reach into their back pockets, and “not trusting” their other hand to steer, is many.
While we often see hip issues in cyclists as well, we know that the hip and opposite shoulder work together in unison to allow us to move forward, and thus why starting at the shoulder along with breathing, can significantly improve a riders performance AND their quality of life.
Enough of the talk, let’s get into some solid action items that you can implement 3-5 days a week, in 15 minutes or less, to help you get back to great posture and able to express your true conditioning and strength, no matter what your sport.
Before jumping into the exercises, be sure to take 4-6 minutes to foam roll/ lax ball, especially:
Foam rolling the Lats
Foam rolling the chest
LAX ball/ ACUMobility the neck – all the cool kids are talking about the ACUMobility ball, and while I haven’t used it myself, it does look like a useful piece of equipment that will be regularly used, so yes, I’ll jump on the bandwagon.
Just don’t make the mistake that many endurance athletes do and spend too much time on the roller/lax ball. If you’re doing soft tissue mobility for longer than 10-12 minutes, you need to get a life/ take a hard look at your recovery/ lack of recovery between sessions.
It’s not how hard you can go in a session, it’s going hard enough that you can recover session to session, while keeping consistency in your trainings.
After the foam roller we’ll jump into breathing as shoulder joint position will also affect inhalation and exhalation, so we’re going to start here, with learning to breathe.
Learning to Breathe & Resetting the Diaphragm
All 4’s Quadruped Breathing – Resetting the Diaphragm
1 set of 5 deep breaths through the nose, out through the mouth. Hold each breath for 4 seconds
Crocodile Breathing – Filling the Cavity Evenly
1 set of 5 to 8 breaths
Next, we want to work on opening the shoulder, but in a way that allows us to tap into Thoracic Rotation. For some of you this may be a bit much, be sure to listen to your body, and breathe out and RELAX when you hit a tough spot.
Side Lying Windmill
Opening up lats, pecs, and T-spine to help the athlete function better.
One set of 8 each side
Finally, we work to fire up some muscles that may have been turned off, and/or “went on break.”
Wall Scap Slides
– Activating the Serratus anterior, Mid and lower Traps.
1 set of 8- make sure to keep your ribs from flaring, and your chin tucked.
Behind the Back Band Pull Aparts
– Activating the lower traps and rhomboids.
1 set of 8
Chin Nod, Progressing to Chin tuck Head lift
Helping activate the deep core, and fire up the muscles in your neck.
1 set of 8
Wrap Up
While these seem like a lot, you can and should be able to execute these exercises, in this order, 3-5 days a week, in 10-15 minutes. Remember, it’s not doing the exercises intensely or until fatigue that will help you see progress, it’s the CONSISTENCY that will.
About the Author
Menachem Brodie is a USA Cycling Certified Expert Level Coach, NSCA Certified Strength & Conditioning Specialist, Postpartum Corrective Exercise Specialist, and Serotta Certified Bike Fitter with over 20 years in the Health & Fitness Industry. “Brodie” as he is known, has done over 15 presentations for USA Cycling on Strength Training for Cycling, and is the author of Training Peaks Universities “Strength Training for Cycling Success”Online course.
When he’s not geeking out reading Ex-phys books, riding his bike, or trying to lift heavy things, he’s probably sleeping….errr, “recovering”. If you see Brodie without a coffee in his hand, something is probably amiss and you should call 911 immediately, as he may be signaling you for help.
Whenever a client or athlete grows frustrated from their lack of progress in the gym it can almost always be attributed to sleep…or lack thereof.
I often say the best “supplement” you can invest in isn’t protein powder, pre-work energy drinks, or something like Acai Boost,10 but rather…
…a solid night’s sleep.
Today’s guest post by Baltimore based personal trainer/coach, Tim Hendren, reverberates my sentiments on the topic.
Which is….go to freakin bed.
Sleep and Training: The Ultimate Balancing Act
At this point it’s common knowledge that the “experts” online have hijacked the attention of the public.
While conflicting and generally poor fitness advice has flooded the internet to confuse the public, one area that even sound coaches and trainers talk out of both sides of their mouths is the relationship between training and sleep.
On many occasions, I have heard live coaches (myself included) or coaches I follow online give the “wake up earlier to get the work done” speech and then five minutes later hit the same person with the “well you aren’t getting enough sleep” speech to explain lack of progress, chronic fatigue, or generally feeling like shit at the gym and beyond.
Most people can’t do both.
If a coach spews this advice at a parent of an infant or toddler or an accountant trying to meet a deadline during the peak of tax season, you can bet it’s going to fall on deaf ears.
Getting nine hours of uninterrupted sleep and getting up at 5am to get a workout in is about as likely as Tracy Anderson entering a powerlifting meet, it isn’t happening, and even if it does, that training session won’t be pretty.
Sleep is important, getting the work done is important. It takes balance. The best program ever written is a total waste of time if you can’t recover from it.
As usual, the answer is in the grey area. If you aren’t getting enough sleep, training needs to be scaled back in terms of volume, intensity, or frequency. If you are especially sleep deprived, dialing back two of those three variables may be necessary to optimize your results until you are able to get more shut-eye.
Even if you are getting the required nutrition to support your frequent and intense bouts of training, you WILL be stuck in neutral if you aren’t getting sufficient sleep.
The Importance of Sleep
We know that as Americans, we simply don’t sleep enough. In fact, according to a Gallup poll from a few years back, 40% of Americans are sleeping less than 7 hours per night.
While busy lifestyles, work schedules, and raising kids contribute to this lack of ZZZs, two underrated factors may be:
The brilliant Netflix feature that rolls the end of an episode directly into the next one in 5 seconds.
The graphics, sound, and online capabilities of the Call of Duty franchise has gotten totally insane.
Regardless of the root of the issue, this lack of sleep will wreak havoc on your production in the gym especially if your training sessions are frequent and intense.
Sleep deprivation will not only sap energy from your lifts, it will negatively impact you on a hormonal level by decreasing the release of testosterone (1) and increasing cortisol (2), an especially nasty combo when trying to gain strength, muscle mass, or lose body fat and even worse for males interested in having sex past the age of 35.
Furthermore, if you add quality sleep, you’ll have a much better chance at performing optimally in the gym (3). We know we need more sleep, but how?
How Do We Sleep for More Muscle?
A general rule of thumb is getting 7-9 hours of sleep per night to recover from training and support your effort in the weight room.
It’s important to note, however, that not everyone is going to be able to follow that advice 100% of the time.
Sometimes you are simply in a period of life (new baby, starting a new business, etc.) that doesn’t lend itself to a lot of sleep. While training is still encouraged under these circumstances, going balls to the wall with exercise is going to end up wasting time, effort, or causing injury.
Want a more restful night of sleep? Try implementing a couple of these tips to take advantage of all the benefits a great night of rest can provide.
1. Go to Bed Earlier
Common sense? Absolutely.
It’s also the easiest tip to implement and will yield the best results. I bet if there were some snazzy Instagram videos of shredded guys and girls going to bed at 9:30 on a Friday night, it would be a more popular thing to do.
2. Put Down the Screens an Hour or Two Before Bed Time (but after you finish this article).
This includes TVs, phones, laptops, iPads, and video games. The blue light from these popular devices is used to keep us alert and engaged. Helpful when writing a thesis, not so much when scrolling social media directly prior to bed. Blue light at night will completely disrupt the human body’s natural circadian rhythm hampering our ability to get a good night’s sleep. Put devices down a few hours before bed (out of arms reach), dim the lights, and read an actual paper book or magazine. Yeah, those still exist.
3. Stay Away From Caffeine in the Afternoon
Caffeine is glorious.
Its awakening effect has helped mankind move mountains, part seas, and beat deadlines. If it’s ingested too late however, it may affect sleep. Caffeine can stay in our system for up to 6 hours(4) so nix the 3pm cup of coffee used to finish strong at work.
Be careful of sneaky caffeinated items such as chocolate, soda (diet or regular), and even decaf coffee.
4. Avoid Alcohol
While this tip won’t win me a popularity contest, it simply must be stated. That glass or four of wine in the evening may help you cope with the shitty day you had and help you fall asleep faster (read: pass out), but it isn’t doing anything for your quality of sleep .(5)
With alcohol on board, it’s a good bet that the later stages of sleep most crucial for recovery from tough training will be disrupted. As usual, alcohol and progress in the gym simply don’t mix, use sparingly.
5. Your Bed is For Humans
Maybe it’s cold-hearted but the cats and dogs need to get kicked out of your bed.
How many times have you been woken up by your pet?
Think about it this way, every single time they move or nudge you, waking you up, you’re starting at square one of the sleep cycle. How are you going to reach the restorative stages of sleep if every 20 minutes Fido shoves his ass in your face?
If that doesn’t get you to train your pet to sleep in their own designated bed, ask yourself this question: would you let your spouse walk around outside all day on their bare feet and then climb into your clean bed with no bath or shower?
Doubtful!
About the Author
Tim is an exercise science graduate and CSCS who has been training in Baltimore MD for over 14 years. While his specialty is body composition, he has extensive experience working with clients from young athletes to cardiac rehabilitation patients. Tim has been published in a variety of fitness publications and writes for his blog when he isn’t helping clients in person.


Being a former fat boy, Tim developed a deep seeded passion for training and nutrition in his teenage years after a major body transformation. This passion is what drives him to seek the best results for his clients and readers. Tim combines a knowledge base earned from years of practice in the field, research, and time spent under the bar with practical advice to get his clients to the next level.
You can find Tim on Instagram (HERE) or his blog (HERE).
Whenever one of my clients or athletes walks in and starts to say something to the effect of “hey, my neck is really bothering me…..”
….I immediately put my fingers in my ears and start yelling “lalalalalala, I can’t hear you.”
Okay, kidding.
Neck stuff can be tricky if not terrifying, and I know my limitations as a strength coach. 90% of the time I refer out to clinicians more qualified in this department, but that doesn’t mean there aren’t some “first step” actions I can take to hopefully help and provide some relief.
In today’s guest post by Dr. Michael Infantino he provides some insights that are well within many strength coaches/personal trainer’s scope of practice.
Neck Pain and Headaches: The Link and How To Find Relief
Today I want to help you figure out if your neck is the source of your headache and how to treat it. Headaches, similar to many other diagnoses, can lead you down a rabbit hole of confusion.
So many subtypes of headaches exist that it becomes overwhelming to actually go about treating them. Luckily, the link between your neck and headaches is becoming more recognized.
I regularly see patients who are referred for suspected cervicogenic headache. Cervicogenic headaches imply that the neck is the cause of your headache.
This can be tricky because most headaches will actually result in some type of neck tension. This isn’t to say that treating the neck in these scenarios is a waste of time. It may resolve neck pain.
It just isn’t the answer to resolving your headaches.
Assuming that your headaches are cervicogenic in nature, what is the next step? Treating your neck pain is only one piece of the puzzle. We need to get to the route of the problem. Blaming your headaches solely on your neck is somewhat naïve. You need to consider how your lifestyle may have resulted in your neck pain and headaches.
Remember, everything affects everything. When our neck hurts we start wondering what ligament, muscle, nerve, disc or bone may be injured. Often times neglecting the actual cause of neck pain.
Injury and inflammatory processes local to the neck can occur for a multitude of reasons. It is not always secondary to trauma. Most of us start wondering if we slept in a bad position the night before or think back to a neck injury we sustained twenty years ago.
“That must be the problem! I used to play way to hard in pee-wee football [#glorydays].”
Instead, we need to consider the BIG 3. Sleep, nutrition and exercise. Ask yourself these questions.
How has my sleep been?
How about nutrition?
Have I been neglecting exercise or neglecting recovery?
Most problems start with sleep, nutrition and exercise. If you are missing the mark in any one area expect problems. Missing the mark in multiple areas? Now we have BIG problems.
How To Diagnose Cervicogenic Headaches?
Here’s your sign…
Headache triggered by sustainedpostures.
Neck pain that triggers a headache.
Neck pain and headaches that are located on one side.
Less than 30 degrees of upper cervical range of motion.
It is more common for cervicogenic headaches to be located on one side of the head, but not always. In some cases, people will sustain a whiplash injury or concussion. Headaches associated with these injuries are often multifactorial. However, we have often seen improvements by treating each suspected cause.
Treating your neck in these situations tends to do wonders.
Considerations For All
Posture… blah, blah, blah. I know we hear about it all the time.
You need to be cognizant of your posture.
This doesn’t mean that you need to sit at attention all day.
My biggest pet peeve is hearing that an “ergonomic specialist” told you that you needed to sit like a statue… all day. “Tall, chin tucked, flat back, shoulder blades pinched…” You’re kidding right?
As always, “poor posture” is not necessarily the culprit when it comes to pain.
Staying in one position for too long is the problem.
This doesn’t mean you have free reign to sit like the Hunch Back of Notre Dame. Studies have shown that a forward head position can increase the frequency of headaches (C Fernández-de-las-Peñas, 2006).
We often overlook the fact that our posture can have a huge impact on how we feel. Picture someone that is sad or depressed. What does their posture look like? Now think of someone confident and enthusiastic. What does their posture look like? How you position yourself can really play into how you feel physically and emotionally.
Tip: Change position every twenty minutes. Taking a walk can do wonders. Drinking a lot of water can force bathroom breaks. If you are stuck in a car shift positions often. Add some neck motions, some back arches, etc.
Be creative… and safe.
Flexibility
With a forward head posture normally comes tense muscles. Doing a quick scan to see which neck motions and shoulder motions feel more limited can make a huge difference.
Multiple studies have found a correlation between cervicogenic headaches and tightness of the sternocleidomastoid, upper trapezius, scalenes, levator scapulae, suboccipitals, and pectoral muscles (Page, 2011).
The picture below keeps things relatively simple.
Stretch the tight muscles and strengthen the weak ones. We will give more guidance on this in the next section.
Strength
Strengthening the neck has shown to improve neck pain and cervicogenic headaches.
Pain, poor posture and trigger points can alter the strength, endurance, timing and proprioception of the muscles around your neck.
Once you address trigger points and flexibility, restoring strength and endurance around the neck can happen relatively quickly.
The more research we have, the less specific it seems we need to be with these exercises (Ask, 2009; Jull, 2009; Gross, 2009; Van Ettekoven, 2006). Studies have shown that specific neck and upper body strengthening can be just as effective as general strengthening (Anderson, 2011).
Some medical providers will argue for the use of “deep cervical strengthening” using a biofeedback cuff.
A what!?
This is basically a rigged up blood pressure cuff. I love using this with patients because it teaches them how to realign their neck without using a lot of big muscles. If you do not have a blood pressure cuff have no fear. Gently performing chin tucks while attempting to avoid large muscle contractions will do.
[Watch the Neck Pain and Cervicogenic Headache Strength video below for more details on chin tucks].
Breathing
Telling someone they need to breath a specific way comes with some challenges.
We don’t always know why they have adopted an upper chest breathing strategy. It could be postural or even developmental. Some of us adopt certain postures because of work requirements or cultural norms. Other times it could be related to how we breathe; mouth vs. nose breathing.
Studies show that mouth breathers more commonly present with forward head posture.
It seems that a forward head position helps increase respiratory strength by using neck and chest musculature (Okuro, 2011; Int J Neiva PD, 2009).
So a forward head position is good?
No, this is a compensation that leads to increased tension and trigger points.
The emphasis placed on diaphragmatic breathing has been great over the past few years. We also need to make sure people are learning how to perform nose breathing. Besides helping improve oxygenation and preventing forward head posture, it has many other wonderful benefits. Since this is not the main topic of today I digress.
How To Test & Treat Yourself
The goal here is to keep things QUICK and DIRTY.
We will go through (1) motion and (2) strength testing.
Do you need to do all of these tests?
Absolutely not.
The benefit of testing and retesting is to see if you are actually making change. If your motion and strength improve after a couple weeks without resolution of headaches we need to go back to the drawing board. Consider seeing a skilled medical provider.
If you are short on time just go right to the “Ouch Test.” This is when you roll some inanimate object on your neck in an effort to identify trigger points. With a smile on your face of course.
Motion and Tissue Quality Testing:
1. Flexion/Rotation Test
The goal here is to see if your upper cervical rotation is limited in one direction. Cervicogenic headaches are usually attributed to dysfunction at the upper three cervical levels.
Flex your neck and rotate your head in an attempt to identify a “tighter side.” Keep in mind that what you feel isn’t always real. Give it a shot and consider using a friend to assist or a video camera to identify the direction you are limited in.
If you can’t get your chin to touch your chest we already know your neck needs some work.
2. Rotation/Flexion Test
If you had trouble getting your chin to your chest this test will help you identify if one side is tighter. This time you are rotating and then attempting to touch your chin to your collarbone.
This lets us know if upper cervical flexion is more limited on one side than the other. If you are limited, the assumption is that the opposite side cervical musculature is limiting you. To measure, see how many fingers can fit between your chin and collar bone.
Having objective measures will help you see if you made progress after treatment.
3. Follow The Map
Sometimes a roadmap is helpful for identifying the muscles that may be contributing to your pain and headaches. Being familiar with muscle referral patterns can help remove a little anxiety related to your pain. It helps prevent you from always thinking the worst when pain sets in. With a road map it is easier to get to your destination.
4. The “Ouch” Test
This is a more simple way of identifying which muscles may be triggering your headaches. Use your fingers, a roller stick, Thera-cane, lacrosse ball or whatever to identify tender regions around the upper neck and shoulders.
If a spot actually recreates your headache, you struck GOLD.
If you identify a tender region that does not recreate your headache, it would not hurt to treat it anyway.
5. Strength Testing
Chin Tuck and Lift Test
Lying flat on the ground or in bed, place on hand underneath your head.
First perform a small chin tuck and then remove your hand from behind your head without changing position.
Men should be able to maintain this position for at least 40 seconds with minimal shaking local to the head and neck.
Women should be able to maintain this position for at least 30 seconds with minimal shaking local to the head and neck (Domenech et. al, 2012).
Treatment. Let’s Get To Work.
1. Soft Tissue and Joint Treatment
Our goal here is to restore motion to the upper cervical region and resolve any trigger points.
2. Strength Treatment
We believe in being better than the average.
Your goal is to be able to hold the chin tuck and lift position for 1 minute, in a curl up position. We work on short duration holds with repetitions to help avoid excessive soreness.
Please do not be a hero and do long duration holds each time you exercise.
This recommendation is not for your general strength routine, only for this rehabilitation plan.
Goal: 1 minute hold in curl up position.
Retest: At the end of each week.
Protocol [See strength video above for demonstrations]:
Phase 1: Chin Tuck and Lift. 5 second holds for 10 repetitions. (5x/week)
When you can perform this with ease and no pain move on.
Phase 2: Chin Tuck and Lift. 10 second holds for 10 repetitions. (5x/week)
When you can perform this with ease and no pain move on.
Phase 3: Curl up + Chin Tuck and Lift. 5 second holds for 10 repetitions. (5x/week)
When you can perform this with ease and no pain move on.
Phase 4: Curl Up + Chin Tuck and Lift. 10 second holds for 10 repetitions. (5x/week)
Headache Diary: Become A Good Detective.
Using a headache diary is a great way to identify the source of your headache.
If you want to be a good detective you need to take some notes. Noting the time of day, triggers (specific activity, specific movement you made, foods you ate, your mood, etc.), symptoms that preceded your headache, medications used and how you found relief.
Achieving 1% gains in various regions of your life, on a daily basis, is a surefire way to resolve most health issues.
Overview
The link between cervical dysfunction and headaches is often overlooked.
Basic maintenance that includes soft tissue work, strength, awareness of posture and proper breathing could be the fix you need. The medical community as a whole has been getting better at addressing the cause of headaches rather than covering them up with medication. Putting a spot light on the fundamental components of health should always be the answer.
Getting sleep, nutrition and exercise right is often the answer to most disease and illness. This will make your life much simpler, not to mention how much better you will feel.
Interested in a FREE home exercise plan. Click here to get started today!
About the Author
Dr. Michael Infantino is a physical therapist. He works with active military members in the DMV region. You can find more articles by Michael at RehabRenegade.com.
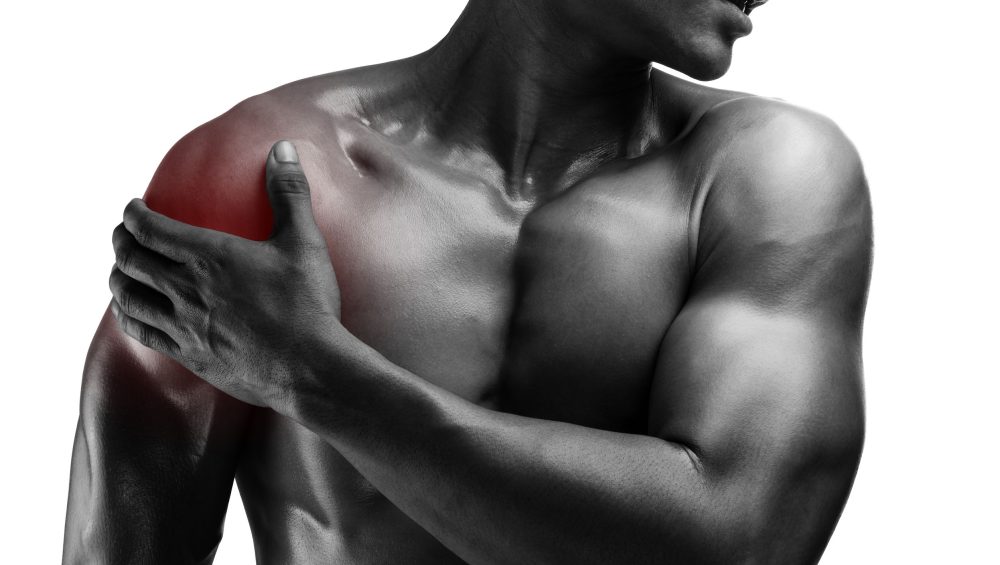
Today’s guest post by Dr. Michael Infantino of RehabRenegade.com covers an often glossed over culprit of shoulder pain….the bicep tendon.
It can be an annoying area to treat/work around and when not addressed can derail anyone’s training for a long time.
However, an injury with the bicep tendon isn’t always as tumultuous as it may seem, and sometimes can be tackled with some simple fixes.
Enjoy.
Bicep Tendonitis? When In Doubt Check These 5 Muscles Out
Knowledge and wisdom are not one in the same. A profound statement for an article that is going to discuss pain at the plain old bicep tendon. The reason I bring this up is because an endless amount of information is available to you through the internet.
When you search bicep tendon pain you will likely run into 100,000 articles that talk about pain local to the bicep tendon. I could make an argument that less than 1% will discuss techniques that you can implement to independently resolve your pain.
That is our plan for today.
Before we start drawing up a six week rehabilitation plan for your shoulder or sending you to the nearest orthopedic surgeon, lets attempt some quick fixes. Please, do not mistake a quick fix with a half-hearted attempt.
Refrain from replacing the whole roof when a few shingles will do.
Step one is making sure you are an appropriate candidate for this article. Let’s rule out a bicep tendon rupture!
Schedule an appointment immediately with an Orthopedic Physician if:
1. You heard a sudden “ pop” at the shoulder, along with swelling and bruising around the bicep.
This typically occurs when you are trying to “man up” and carry something that is a tad bit too heavy for you. Often a result of your best friend refusing to pay for a moving company.
2. You have a nice “Popeye” deformity at the bicep.
This doesn’t imply that you have impressive biceps. It means you tore the bicep tendon.
Other Reasons For Concern:
Weakness and pain local to the bicep when flexing the bicep or rotating your palm up to the sky with the elbow partially bent. This does not indicate a rupture, but a partial tear is still possible.
I don’t think I tore my bicep tendon. What else could cause irritation to the bicep tendon?
It is common for the bicep tendon to be a pain generator because of its location. The bicep tendon is often impinged between the humerus and surrounding structures in the shoulder (usually the acromion and the coracoid process).
Keep in mind that impingement is normal.
We have nice “cushions” named bursae that are built to tolerate this compression. It is when this compression becomes too frequent or too intense that we see injury occur at the bicep tendon. We tend to see this in people who perform a lot of overhead activities in athletics or with work requirements.
It hurts when I rub my fingers across the bicep tendon. Doesn’t this mean it is a bicep tendon problem?
Simply rubbing your finger across the bicep tendon is not an accurate way to diagnose a bicep tendon injury. This is the most common mistake I see by medical providers and those with a certification in WebMD browsing. This is not a specific or sensitive test for diagnosing a bicep tendon injury. (Gill, HS)
What is the best way to determine if the bicep tendon sustained an injury?
The gold standard would be an ultrasoundfrom a physician (Skendzel, JG). Isolating the bicep is the next best method. Resistance to the bicep, or lowering yourself in a reverse grip pull up is also useful information.
It is possible that you have developed some inflammation local to the bicep tendon. Most of the special tests specific to the bicep do not have great statistics. We can make a more accurate diagnosis by considering how you sustained your injury and the movements that provoke your pain.
Could pain at the front of my shoulder be related to something else besides the bicep tendon?
Absolutely. Muscles throughout the shoulder and neck can refer pain to the front of the shoulder. The same way that organs can refer pain to different regions of the body.
Let’s check out 5 muscles that commonly refer pain to the front of the shoulder.
Note From TG: A lacrosse or tennis ball work well for all the drills demonstrated in the video, but my preferred “tool” is the ACUMobility Ball by ACUMobility.com.
Use the coupon code GENTILCORE at checkout for an additional 10% off your purchase.
Deltoid
People often forget that the muscle fibers of the deltoid run over the bicep tendon. When you feel pain while pressing around the bicep tendon it may actually be an irritated deltoid.
Biceps
Another no brainer if you are having pain around the bicep tendon. Overuse of the biceps or a quick force applied to the biceps (eccentric force) can cause trigger points to develop in this muscle. If you notice increased discomfort around the bicep some soft tissue work and a few days off from the “gun show” should help.
Pectorals/Subclavius
The real problem here could be too many chest days and not enough leg days!
Poor resting posture during the day and poor technique with exercise are often the true culprits. Falling into a slumped position on a regular basis can put the pectorals in a shortened position.
This faulty posture can lead to excessive impingement, as well as increased tone and trigger points in the pectoral muscles.
The subclavius runs deep to the pecs. It attaches between the clavicle and the first rib, often referring pain to the front of the shoulder. You can usually address this spot while working on the upper fibers of the pecs.
Scalenes
These muscles run on the front, side and back portion of your neck.
The scalenes are one of the many muscles responsible for moving your neck. If you tend to adopt a forward head posture or a slight tilt of the head to the left or right these muscles may be engaged more often than necessary.
Having a forward head posture means that you are passively hanging on these muscles for support during the day. This can lead to increased tone and trigger points. We also tend to see issues in the scalenes show up following a whiplash injury.
The scalenes are also involved in breathing. If you tend to be an upper chest breather these muscles may be taking a beating. Keep in mind, adopting this breathing style can lead to increased tension in the neck and thorax, as well as feelings of anxiety. After you do some soft tissue work, be sure to be more aware of posture and work on accessing your diaphragm.
Infraspinatus
The infraspinatus in one of the four infamous rotator cuff muscles.
It runs right on top of your shoulder blade.
Dysfunction in this muscle tends to show up regularly with shoulder pain. Trigger points in the infraspinatus are a problem because they alter timing and strength of this muscle (or any muscle). This alters normal mechanics at the shoulder with overhead activities. Often leading to an unstable shoulder with excessive impingement taking place.
We wrote another article in the past that discussed how referred infraspinatus pain also resembles carpal tunnel syndrome. This is not the easiest muscle to treat on your own, but don’t skim over it.
Final Consideration:
In some instances, performing soft tissue work around the shoulder will do the job just fine. This does not mean we can overlook the pieces that may have contributed to this injury in the first place. Your goal is to control what you have the ability to control.
What can you control?
1. You can normalize the tissues surrounding the shoulder.
Treat local trigger points, normalize muscle flexibility and reduce stiffness. The goal is to restore normal shoulder mechanics to the best of your ability. Treating muscle stiffness and trigger points helps optimize the timing and strength of the muscles around the shoulder to enhance stability.
2. You can also modify your activity for the time being.
If a certain activity worsens your pain, back off. It is possible that your shoulder is inflamed and needs some time to recover. This is not a fast pass to weeks off from the gym with your best friend Netflix. This means more attention on soft tissue work and flexibility. You also want to gradually return to exercise. Experiencing some discomfort during exercise is ok.
“Poke the bear, but don’t take it to dinner.”(in reference to pain)
– Adriaan Louw
Interested in a FREE Mobility Program to treat pain at the front of the shoulder? Click here
About the Author
Dr. Michael Infantino is a physical therapist. He works with active military members in the DMV region. You can find more articles by Michael at RehabRenegade.com.

References
Gill HS, El Rassi G, Bahk MS, et al. Physical examination for partial tears of the biceps tendon. Am J Sports Med 2007; 35:1334.
Skendzel JG, Jacobson JA, Carpenter JE, Miller BS. Long head of biceps brachii tendon evaluation: accuracy of preoperative ultrasound. AJR Am J Roentgenol 2011; 197:942.
Stephen M Simons, MD, FACSM, J Bryan Dixon, MD Section, Biceps tendinopathy and tendon rupture
Uptodate.com
Taylor SA, O’Brien SJ. Clinically Relevant Anatomy and Biomechanics of the Proximal Biceps. Clin Sports Med 2016; 35:1.
If you missed Part I of Dr. Licameli’s guest post, you can check it out HERE. Now, you could read today’s post and get the gist of what was said yesterday, but you run the risk of missing out on some nitty-gritty details.
Kinda like watching Blade Runner 2049.
You could watch it without watching the original, but you’re missing out on some important context.
*** This is the part where’d you know what points 1-4 were all about.
5) Don’t Push Through Pain…Not All The Time, Anyway
There is good pizza and there is bad pizza. There is good pain and there is bad pain. Differentiating the difference is of utmost importance when training the shoulders.
We’re not talking about delayed onset muscle soreness (DOMS), which is felt 1-2 days after training.
We’re talking about pain during training.
What follows are some guidelines to help you navigate your way through pain.
KEEP IN MIND, THESE ARE GENERAL GUIDELINES. IF YOU HAVE PAIN, BE SURE TO SEE A QUALIFIED HEALTHCARE PRACTITIONER!
I stress finding a qualified healthcare practitioner. A qualified healthcare practitioner will explain all of this, in addition to providing several options to keep you training while recovering from injury.
Let’s face it…not all physical therapists have spent much time under a bar. Some have spent time at the bar or even at barre class, but many have no experience or expertise in weight lifting or bodybuilding. You deserve your goals to be taken seriously. You deserve more than things like, “stop squatting for 4 weeks” and standing internal and external rotation with a band to “strengthen” the rotator cuff…or is it rotator cup…no, it’s rotary cuff…rotary club!
That’s it.
Characteristics of good pain:
-How Does It Feel?: Muscle burn; usually symmetrical right to left.
-Onset: Gradually increases as the set progresses.
-When Does It Stop?: At the completion of a set.
Characteristics of bad pain:
-How Does It Feel?: Sharp, numb, tingling; intensity may be asymmetrical right to left.
-Onset: Quickly; may be felt after only the first few reps
-When Does It Stop?: Days, weeks, months…; stays well after the set is completed, however may also end at the completion of a set.
If you find yourself experiencing bad pain, it may not be the end of the world. Bruce Lee also said, “Be like water.”
Water has the flexibility to take the shape of whatever container it is placed in, while still maintaining its identity…water.
In a similar way, our training can be modified without losing its identity or effectiveness. Try to modify your training. Sharp pain when pressing overhead with a barbell? Try a landmine press. Unable to perform a reverse flye? Try a face pull. Keeping the same exercises and modifying training volume may also do the trick.
6) Don’t Overdo It With The Classic “Rehabilitation” And “Injury Prevention” Exercises. There Are Hidden Benefits In Some Classic Movements.
It is no one’s fault but our own that, as a profession, physical therapy has a certain reputation when it comes to injury and injury prevention. The misconception is that in order to reduce pain or prevent injury, a hefty dose of classic “rehabilitation” exercises need to be added into an already packed training regimen.
For me, and many out there like me, gone are the days of separating “therapeutic exercise” from “regular training.” Say goodbye to blocking off a half hour pre and post workout to foam roll and perform straight leg raises and clamshells. If you look closely, you can find what you need for healthy shoulders right there in your existing training routine. Here are some examples:
Face Pull: Trains scapular retraction and external rotation. Great for scapular stability, rotator cuff strengthening, and balancing out internal vs. external rotation.
Farmer Carry/Overhead Carry: Excellent way to train postural, scapular, and global rotator cuff stability, not to mention full body/core strength.
Plank on Ball with Protraction and/or the Ab Wheel: Great way to dynamically train serratus anterior, core stability, and scapular stability.
Plank with Band Around Wrists with Protraction: Great way to train external rotation as well as dynamically train serratus anterior, core stability, and scapular stability
Landmine Press: With proper scapular movement (more on this to come), this is an excellent exercise to dynamically strengthen serratus anterior and improve scapular neuromuscular control.
Pull-up/Pull-down: With proper scapular depression at the initiation of the pull, this is a fantastic exercise to target the lower traps, which play a key role in scapulohumeral mechanics. Full range of motion and a long eccentric will also help lengthen the lats, which can limit shoulder mobility.
Squats/Deadlifts: Train “shoulder packing” position. A proper warm-up prior to these lifts will also include thoracic mobility work.
Seek out experts like Tony Gentilcore (obviously), Andrew Millett, John Rusin, Jeff Cavaliere, Quinn Henoc, Mike Reinold, Mike Robertson, Eric Cressey, Dean Somerset, Zach Long, Joel Seedman, Ryan DeBell, Teddy Willsey, and many more.
But if you have pain, GO SEE A QUALIFIED HEALTHCARE PRACTITIONER FIRST!
7) Symmetry…Don’t Forget External Rotation and Thoracic Mobility
As previously mentioned, weightlifters tend to be very “internal rotation dominant,” and for good reason.
Let’s look at the muscles that internally rotate the shoulder.
Just to name a few: pec major, lats, subscapularis, teres major, front deltoid.
Let’s take a look at the muscles that externally rotate the shoulder: infraspinatus, rear deltoid, teres minor.
The muscles that internally rotate the shoulder are of greater number and greater size (the pecs and lats are two of the strongest muscles of the upper body). The external rotators are less in number and much smaller. Give those external rotators a fighting chance to create some balance! Don’t neglect them!
It’s important to note that just performing an equal amount of presses and rows/pull-downs will not improve shoulder rotation symmetry because, as previously mentioned, both the pecs and the lats internally rotate the shoulder. So even though pull-downs and rows are “back” exercises, they still train the lats and therefore still train internal rotation.
Some of my favorite exercises to train external rotation are face pulls, W raises/pulls, reverse flyes with external rotation bias, wall slides with a band, and planks with a band around the wrists.
Adequate thoracic mobility is crucial to optimal shoulder function. If the scapulae are the foundation of the shoulder, the thoracic spine is the ground on which the foundation is built.
Thoracic mobility should be included in almost every warm-up, regardless of the body part being trained. One of my favorite thoracic mobility exercises is a kneeling protraction sit-back into a lat stretch with deep breathing. Be sure to check out this video of a sample lower body warm-up routine that includes this exercise.
8) Don’t Pin Down The Scapulae
It happens all the time.
An idea comes out and soon gets morphed into an extreme.
“Dynamic stretching may be better than static stretching pre-workout” turns into, “Don’t ever do static stretching because it’s a waste of time.”
“Foam rolling may help improve short-term soft tissue restriction and range of motion” turns into “I have to foam roll for 30 min when I wake up as well as pre workout, post workout, and before bed in order to break up adhesions and prevent injury.”
The idea of “shoulders down and back” seems to have experienced a similar course. Yes, keeping the shoulders in a retracted and depressed position with a properly extended thoracic spine will place the muscles, nerves, and joints in a structurally advantageous position as well as open up the subacromial space by about 30%. It also allows for unrestricted overhead shoulder range of motion.
However, the scapulae must move, and they must move correctly. The scapula is the base and foundation of the shoulder and dysfunction can most certainly lead to injury.
Note From TG: Check out THIS article I wrote a while back touching on the same topic; in this case how it relates to performing a DB Row correctly.
Generally, the scapula remains relatively stationary during the first 30 degrees of shoulder abduction (lifting the arm out to the side as in a lateral raise), with the movement coming primarily from the glenohumeral joint. As abduction continues past 30 degrees, the scapula begins to move and the glenohumeral joint and scapulothoracic joints move in about a 2:1 ratio.
This means that at 120 degrees of abduction, the glenohumeral joint has contributed about 80 degrees and the scapula has contributed about 40 degrees. If the scapula remains pinned “down and back,” range of motion will be restricted and the glenohumeral joint will be forced to overcompensate. This dysfunction will likely limit performance and increase risk of injury.
In addition to upward rotation, the scapula also needs to protract (glide forward) during both overhead and pulling movements. Serratus anterior is one of the main muscles responsible for protraction as well as for adhering the concave surface of the scapula to the convex surface of the ribcage. Pinning the scapulae down and back is not what we need…we need controlled, scapular motion.
I’m Done
If at least one person benefits from these tips, I have done my job. My hope is that you will keep these tips in mind and reap the benefits of strong, healthy shoulders. You’re putting the work in, now let’s capitalize on it.
About the Author
Nicholas M. Licameli
Doctor of Physical Therapy / Pro Natural Bodybuilder
Every single thing he does, Nick believes in giving himself to others in an attempt to make the world a happier, healthier, and more loving place. He wants to give people the power to change their lives. Bodybuilding and physical therapy serve as ways to carry out that cause. Nick graduated summa cum laude from Ramapo College of New Jersey with his bachelor’s degree in biology, furthered his education by completing his doctoral degree in physical therapy from Rutgers School of Biomedical and Health Sciences (previously the University of Medicine and Dentistry of New Jersey) at the age of 24, and has earned professional status in natural bodybuilding. His knowledge of sport and exercise biomechanics, movement quality, and the practical application of research combined with personal experience in bodybuilding and nutrition allows him to help people in truly unique ways. Love. Passion. Respect. Humility. Never an expert. Always a student. Love your journey.
Today’s guest post comes courtesy of physical therapist Dr. Michael Infantino, and covers a topic every human in the history of ever has had to deal with.
It’s good. You should read it.
Enjoy.
What Your Doctor Never Told You About Arthritis
Physician: “Welcome. Thanks for coming in for your appointment this morning. It says here that you are having shoulder pain. Is that correct?”
You: “Yes it is. I didn’t think anyone actually read that intake form. I am glad that I took the 30 minutes to fill it out in the waiting room. Also, thank you for taking me back only 45 minutes later than my scheduled appointment time. That’s way better than my previous appointments.” [In a sarcastic tone.]
Physician: “Well there could be a host of reasons that you are having shoulder pain. Did you fall recently? And how old are you? Did you know that most 40 year olds have arthritis?”
You: Inner dialogue, “No, I didn’t fall. Fall? What am I 90 years old?” “I exercise regularly Doc. It hurts sometimes when I am bench pressing or doing shoulder press. Can’t think of any specific incident when it first started hurting.”
Physician: “Did you ever consider not lifting weights? It may be rewarding to have those big muscles, but it could increase your risk of injury. Look at me. I do 20 minutes of stationary biking each day, no pain… try that.”
You: [Scratching your head] Again, inner dialogue, “He is kidding, right? I would rather beat my head into a wall than stationary bike for 20 minutes.”
Physician: “Ok, lets do some testing on you. (Three minutes later) Well, luckily I didn’t find anything that resembled a rotator cuff tear or instability. You also don’t seem to be missing much motion so we can throw a frozen shoulder diagnosis out the window. Why don’t we have an X-ray done?”
You: “Ok Doc. You are the boss… this should tell me what the problem is, right?”
Physician: “For the most part, yes. We can see if you have any bone spurs or arthritis. Remember what I said about old people right? They get arthritis.”
You: “Old? I am 40 bro!”
THE FINDINGS:
Physician: “It seems here that you have some arthritis in your shoulder. This explains your pain. You could try taking some anti-inflammatories. Exercise might help to. Here is a list of rotator strengthening exercises that we use. Have at it! If this doesn’t work come back in a few weeks and I can inject it with cortisone.”
You: You think to yourself, “Shoulder exercises? I work out my shoulders all the time. Is the Doc saying I am weak? Am I going to be popping anti-inflammatories my whole life?”
As doom sets in you start to think about all the moments you have taken for granted.
The joy you get from bench pressing and the euphoria that bicep curls provide. The ease in which you were once able to perform the perfect landmine press, never having to worry about your shoulder.
You start questioning past decisions. If I only would have strengthened my rotator cuff muscles earlier or just road the stationary bike like the DOC.
As you are drowning in self-pity the pause button is pressed, and some random guy pops out to provide what might seem like a cheesy infomercial.
RandomGuy: “Hello! I am aware that your physician just made arthritis seem like the death sentence. Before you leave today demoralized, let me give you some facts about arthritis to ensure that you don’t sentence yourself to a lifetime of stationary biking. He tried that line on me once too.”
What is Arthritis and What Does This Mean For Me?
Osteoarthritis is the most commonly diagnosed form of arthritis. Referred to as the “wear and tear” arthritis.
This label holds some truth, but it does not tell the whole story. Living a life enriched by the joys of picking big things up and putting them down may lead to more arthritis than stationary biking.
Osteoarthritis is actually the result of increased inflammation surrounding the joint.
Remember that inflammation is your body’s attempt at healing tissue.
Unfortunately, your joints and cartilage do not always allow for optimal blood flow. Instead of providing healing it just leads to some degeneration. What you need to understand is that many other factors can contribute to arthritis.
This includes:
natural aging
obesity
diet
gender
previous injury
your god given anatomy
Arthritis. “The Get Out of Jail Free Card.”
Arthritis seems to be that “get out of jail free card” for most clinicians.
You show up complaining of pain without any recent trauma. You don’t recall dropping a barbell on your chest or hearing a pop after throwing a no-hitter… for your co-ed softball league.
It seems like your rotator cuff and labrum are safe and sound.
We strive to avoid wrinkles like we strive to avoid arthritis.
So what usually happens next?
Your medical doc whips out the “big guns” of course.
In this case that would be an X-ray, MRI or ultrasound.
Come to find out you have a little bit of arthritis at the shoulder.
Lets stop for one second.
For some reason we imagine this life where we defeat the natural aging process. We strive to avoid wrinkles like we strive to avoid arthritis. Wrinkles may be a source of pain just as much as arthritis is.
More importantly, having arthritis does not necessarily mean you are going to have pain.
It wasn’t until some brilliant people started putting people without pain under X-ray that we realized something extraordinary.
They have arthritis too, but nopain!
One study found that arthritis and degeneration of the spine progressively increased with age. However, that is generally NOT true with pain. People also complain of back pain more frequently in their 40’s to early 50’s (Louw, 2017). From there it steadily declines despite the fact that arthritis steadily increases.
More than 90% of 60 year olds (without complaints of pain) will present with some form of degeneration around the spine (Brinjikji W. et al).
As much as we hate to hear it, we need to remember that inflammation does not create pain. It just warns the brain that we may have a problem.
People who have had limb amputations because of rheumatoid arthritis (another form of arthritis triggered by an autoimmune disease) continued to feel stiffness in a limb that was no longer there (Haigh et al).
Basically, phantom limb pain.
This reinforces the idea that part of your discomfort is also because of a sensitized central nervous system. Your brain and nerves get all hyped up the longer your pain lasts. This is why pain management and physical therapy are focusing on finding ways to desensitize your central nervous system. This includes things like graded motor imagery and helping people understand how pain really works.
It is Time To Do Your Best Sherlock Holmes Impersonation.
With what you know now, how terrible would it be if arthritis were blamed for your pain without considering other causes?
We may go through the rest of life thinking that nothing that can be done.
On top of that we think, “if I have arthritis now how bad will in be in ten years from now?”
You may even consider canceling your gym membership and living in a bubble. Before it gets to this point try to enhance your self-awareness. Consider what activities may be contributing to your pain. Poor programming, bad technique and lack of focus on mobility.
These are all low hanging fruit.
Other considerations for reducing inflammation:
Diet
Sleep
Exercise
Physical and Emotional Stress
Failing at any of the categories listed above can elevate local joint inflammation. Potentially leading to pain. People neglect the importance of a diet that minimizes inflammation. We have a general idea of the foods that cause more trouble (breads, pastas, dairy, sugar, red meats, and so on).
Losing weight, minimizing alcohol intake, not smoking, exercising and cleaning up your diet is usually sufficient for getting on the right path.
Many recommendations for herbal supplements and vitamins exist. But don’t think that taking some turmeric and fish oil will override the bowl of ice cream you take down every night.
Or the occasional soda with lunch.
We also know that being deficient in certain vitamins can result in increased levels of inflammation. In a study that looked at the relationship between knee pain and arthritis, “people with knee osteoarthritis who were obese but had healthy vitamin D levels were less disabled than people who were obese individuals but had insufficient vitamin D levels.”
Make sure you consult with your doctor before implementing any vitamin supplementation.
More is not always better.
Consuming too much of one vitamin could cause toxicity or alter the effectiveness of other vitamins (Glover et al).
If You Are Already Making All the Right Lifestyle Choices and Still Having Pain What Can We Do?
Muscle can often be the source of a lot of the aches and pains we experience. Inflammation at a joint or trigger points in a muscle both increase those danger signals back to the brain.
Our goal is to decrease those danger signals in as many ways as possible.
That could be treating the muscle, reducing stress, getting more sleep, improving our diet and so on.
To start moving in the right direction we can benefit heavily from seeing a professional.
Who exactly?
It really depends on your preference.
A lot of overlap exists between massage, physical therapy, chiropractic, acupuncture and so on these days. Many of these disciplines are using similar services when it comes to hands on treatment.
For example, cupping, joint mobilization, manipulation, soft tissue manipulation, instrumented assisted treatment, active release techniques and more. Other disciplines besides physical therapy are also using exercise. Doing your research, and finding out which provider specializes in your injury is more important than ever.
Been There, Done That and Still No Success?
This is when I would look to a medical doctor, preferably someone that specializes in orthopedics or sports medicine. Knowing that you have been through conservative care already they will most likely recommend an X-ray, ultrasound and/or MRI.
Caution: Ignorance is sometimes bliss. This is when you are going to see what your joint really looks like. It is not always pretty, and “degeneration,” “tears,” “bone spurs” are not always synonymous with pain. Do not let these findings immediately make you think that surgery is necessary.
2/3 people over the age of 70 have pain-free rotator cuff tears (Milgrom, Schaffler et al., 1995)
50% of people with knee arthritis have no reported pain (Bedson and Croft, 2008)
35% of collegiate basketball players without reported knee pain have notable abnormalities on MRI (Major and Helms, 2002)
The doc offered a cortisone injection… should I do it?
Cortisone tends to be used more commonly with knee and shoulder pathology. It has been shown to be effective at reducing pain. The goal is to reduce inflammation local to the joint.
“Yea, but isn’t inflammation a good thing?”
Great question.
Yes, it can be, but excessive inflammation can cause increased stress on a tissue, enhancing those danger signals. Ultimately resulting in more pain.
Could cortisone cause more damage?
It is possible that excessive use of cortisone can weaken tissues leading to possible tissue injury. What is “excessive use” defined as? That part varies depending on who you ask. Learn a little more about cortisone injections from the Cleveland Clinic.
Should I take Aspirin (anti-inflammatories)?
Anti-inflammatories may be effective as reducing local inflammation.
Some studies have shown that cortisone may be more effective, but not in all cases. Anti-inflammatories like aspirin are not meant for long-term use secondary to its harmful effects on the gastrointestinal system.
“Possible risks of all NSAIDs include: stomach problems (such as bleeding, ulcer, and stomach upset), kidney problems, high blood pressure or heart problems, fluid retention (causing swelling, such as around the lower legs, feet, ankles, and hands), rashes, or other allergic reactions.” (Rheumatology.org).
As always, consult with your physician.
The doctor gave me a home exercise plan for my shoulder. Will this work?
It depends.
As we mentioned earlier, exercise that does not increase pain can be beneficial.
To keep it simple, “motion is lotion.”
Movement also increases local blood flow, which can help reduce inflammation.
Cardiovascular exercise can reduce pain through endorphin release (self made pain killers). Keep in mind that working through pain on your generic rotator cuff strengthening program will get you no where. Not to say that working through a little pain is a bad thing. The assumption that a weak rotator cuff is the culprit is often misguided.
Interested in a FREE Shoulder Mobility Program to help reduce pain? Click here.
Overview
Arthritis is not a death sentence.
It also does not mean that you need to resort to stationary biking and aquatic therapy.
Arthritis is as normal as developing wrinkles when it comes to aging. Before you blame your pain on arthritis consider the low hanging fruit that you are not addressing. If you need a little boost get a second pair of eyes on you at the gym. Also consider seeing a medical provider that can do some soft tissue and joint mobilization.
Low Hanging Fruit:
You weight
Diet
Sleep
Exercise Routine (programming and technique)
Self Care Practices (mobility work and rest)
Stress (physical and emotional)
About the Author
Dr. Michael Infantino is a physical therapist. He works with active military members in the DMV region. You can find more articles by Michael at RehabRenegade.com.

References
Arroll, B., & Goodyear-Smith, F. (2005). Corticosteroid injections for painful shoulder: a meta-analysis. The British Journal of General Practice, 55(512), 224–228.
Bedson, J., & Croft, P. R. (2008). The discordance between clinical and radiographic knee osteoarthritis: A systematic search and summary of the literature. BMC Musculoskeletal Disorders, 9, 116. http://doi.org/10.1186/1471-2474-9-116
Brinjikji W, Luetmer PH, Comstock B, et al. Systematic Literature Review of Imaging Features of Spinal Degeneration in Asymptomatic Populations. American Journal of Neuroradiology. 2015;36(4):811-816. doi:10.3174/ajnr.A4173.
Glover T, Goodin B, King C, Sibille K, Herbert M, Sotolongo A, Cruz-Almeida Y, Bartley E, Bulls H, Horgas A, Redden D, Riley J, Staud R, Fessler B, Bradley L, and Fillingim R. (2015). A cross-sectional examination of vitamin D, obesity, and measures of pain and function in middle-aged and older adults with knee osteoarthritis. Clin J Pain; 31 (12); 1060-67.
Haigh RC1, McCabe CS, Halligan PW, Blake DR. Joint stiffness in a phantom limb: evidence of central nervous system involvement in rheumatoid arthritis. Royal National Hospital for Rheumatic Diseases, and Department of Medical Sciences, University of Bath, UK.
Liu-Bryan R, Terkeltaub R. Emerging regulators of the inflammatory process in osteoarthritis. Nat Rev Rheumatol 2015; 11:35.
Louw, A., Zimney, K., Johnson, E.A. et al. Aging Clin Exp Res (2017) 29: 1261. https://doi.org/10.1007/s40520-017-0731-x
Loeser RF, Goldring SR, Scanzello CR, Goldring MB. Osteoarthritis: a disease of the joint as an organ. Arthritis Rheum 2012; 64:1697.
Major and Clyde A. Helms. MR Imaging of the Knee: Findings in Asymptomatic Collegiate Basketball Players. American Journal of Roentgenology 2002 179:3, 641-644
Milgrom, Charles & MB, Schaffler & Gilbert, S & van Holsbeeck, Marnix. (1995). Rotator-cuff changes in asymptomatic adults. The effect of age, hand dominance and gender. The Journal of bone and joint surgery. British volume. 77. 296-8.
Serdar Kesikburun, MD, Arif Kenan Tan, MD, Bilge Yilmaz MD, Evren Yasar, MD, Kamil Yazicioglu, MD. Platelet-Rich Plasma Injections in the Treatment of Chronic Rotator Cuff Tendinopathy: A Randomized Controlled Trial With 1-Year Follow-up