CategoriesAssessment coaching

A Peek Into My Assessment Process

I thought I’d do a solid and give my readers an inside peek into my assessment process today.

Copyright: sean824 / 123RF Stock Photo


To be blunt: I don’t feel what I do is all that special or altogether revolutionary. But it’s a topic that came up a lot earlier this week when I asked the Twitterverse for some ideas on what they’d like to see me write about in the future.

So, Here Goes

Much of the time the entire process starts with a swipe right an email. Someone reaches out and expresses an interest in coming to my studio in Brookline, MA so I can take a look at their bum shoulder or low back, or maybe to have me audit their deadlift or squatting technique.

They’ll be a few back and forths and I’ll try my best to articulate to them what my assessment will cover. I’ll ask for a little background information – training history, any current/past injuries I need to be aware of, or whether they’re Team Jacob or Team Edward?1 – and then I’ll break down the general flow of the assessment and what they can expect.

In short, I’ll inform them that I divide the session into two parts: The “poking and prodding part” and the “pseudo training session part.” The part where I incessantly blurt out movie quotes is just a given.

The goal, for the poking and prodding part, is to see if any red-flags pop up from a “is anything I’m doing causing any pain standpoint?” and a “do they have the mobility/flexibility of a rusty crowbar standpoint?”

Likewise, the goal of the pseudo training session part is to ascertain general movement quality and to not bore them to tears.

I explain this to them in a much more professional and succinct manner.

Once we’ve established a date/time to meet up I’ll send them the address of the studio (you would think this is obvious, but I can’t tell how many times I have forgotten to do so), pre-payment options if they so choose (PayPal Button), as well as my Health Questionnaire I’d like for them to fill out prior to coming in (to help save time).

Copyright: alexskopje / 123RF Stock Photo

An important point I’d like to note about my health questionnaire (I am not saying you have to do this) is that I consider this an opportune chance to start building a rapport with the client. Most people know what to expect from a standard health questionnaire. Questions regarding their family history, past/current injuries to note, allergies, and what (if any) medications they’re taking are all par for the course. Mine questionnaire is no different.

However, out of nowhere I’ll hit them with questions like:

  • What’s your favorite movie?
  • What’s your pet’s name?
  • Have you ever been bitten by zombie?

Such things help break the monotony and serve as conversation stimulators. Plus they demonstrate I don’t take myself too seriously and that I’m cool as balls.

The Face to Face

Now it’s go time. We finally meet face to face.

I’ve championed this sentiment in the past but it bears repeating:

“The main objective for me when starting with a new client is to not treat the assessment as an opportunity to showcase how much of a walking ball fail they are. It serves no purpose IMO to point out every…single…thing they suck at. Rather, my goal is to do anything and everything I can to demonstrate to them success.”

If they’re coming in with shoulder pain and they lack shoulder flexion, what can I do to 1) help them get out of pain? and 2) demonstrate movements that they can do (pain free)? Moreover, can I use the Test/Retest protocol to see an increase in ROM in shoulder flexion?

If I can accomplish one of those things within an hour, if not all three, it’s a safe bet I’ll likely achieve an easy “buy in” on their end. I’ll also kindly ask them to refer to me as Gandalf from that point on.

I’ll begin each assessment with a 5-10 minute window where we discuss our feelings. Normally I’d rather jump into a shark’s mouth than discuss my feelings with anyone, but it’s about them not me. The best thing I can do is shut up, ask questions, and listen and use the word “why?” a lot.

Example 1

Them: “I want to lose ten lbs?”

Me: That’s cool, why is that? What benefit do you think you’ll receive in attaining that goal?

Example 2

Them: “My goal is to compete in my first powerlifting meet.”

Me (after I high-five them): “Cool. why is that? What benefit do you think you’ll receive in attaining that goal?

Example 3

Them: “I’d like to get stronger.”

Me: “Yeah, that’s cool but it says here your favorite movie is The Matrix Revolutions, is that right? 

Them: “Yep, I love it.”

Me: “Get the fuck out of my gym.”

Sometimes people talk for a few seconds, while others go on for several minutes (and then some). Either way, by getting THEM to talk – and asking why? – I’ll get a better idea of where their mindset is at in addition to having a better appreciate of where they’re coming from.

Something else to note here is that, often, coaches will use the interview process to ask about coaches and trainers the person may have worked with in the past and their experiences with them. I think it’s a good idea to ask. However, what I find is all too common is some coaches take it as an opportunity to lambast the other coach.

“Your previous trainer did whaaaaat? That’s so stupid!”

Don’t do that.

Just nod your head, say something to the affect of “huh, that’s interesting,” and move on. You’re not doing yourself any favors by talking smack about other fitness professionals. In fact I think it comes across as very unprofessional.

It’s Time to Poke and Prod

NOTE: Just realized this comes across as slightly creepy. Rest assured things stay 100% PG.

At this point I’ll take out my training table and start the formal assessment. To be honest: while I do have a checklist I work off of, no two assessments are the same. Having the checklist helps, but everyone’s different. While there is some overlap, what I look at and how I assess a 22-year old college baseball player can be quite different compared to a 47-year old accountant with limited exercise experience.

To that end, every fitness pro approaches assessment differently. I’ve taken the FMS and use portions of it all the time. However I’m going to try my best to cater the assessment to match the person standing in front of me. That’s the beauty of having my own spot. I can do whatever the heck I want.

If that means going off the beaten track so be it.

I’d be remiss not to mention it’s inevitable there’s going to be a degree of bias. One’s training philosophy and values will come into play. For example I’m a “strength” guy. I like getting people strong (while also helping them feel a little more athletic). Despite my assessment I’m still going to have people deadlift, squat, press, row, carry, lunge, and perform first pumps x infinity to Annie Mac radio.

Some may be like, “WTF Tony. What’s the point in doing the assessment, then, if all your going to have them do is the same stuff you have everyone else doing?”

Fair question.

The assessment helps me figure out someone’s starting point. More to the point, the assessment helps me figure out what variation of those lifts will be the best fit given their goals, ability level, and movement quality.

As an example, I use the table assessment to perform a hip scour and gauge hip (IR/ER) ROM. If someone has 45-50 degrees of ER and 20-40 degrees of IR (and appropriate hip flexion ROM) it’s a safe bet they’re okay with squatting below 90 degrees (or with most anything else I’d have them perform on the gym floor). If not, well, I’ll adjust.

I can also perform further “screens” to see if the lack of ROM is due to actual “tightness” or if all I have to do is work on someone’s REACTIVE stability:


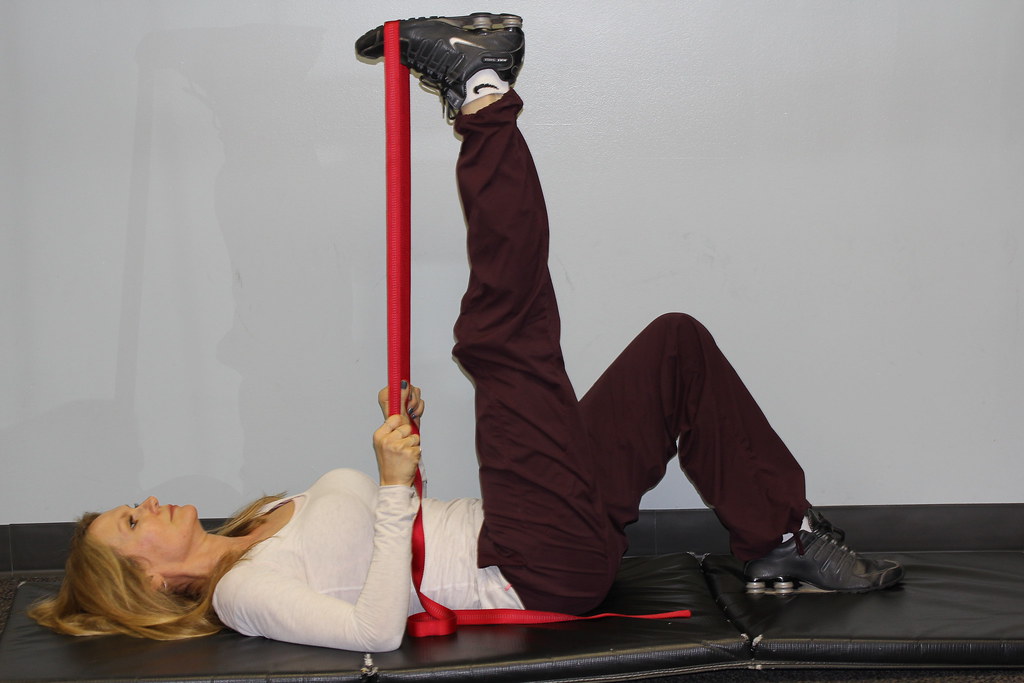
I can also use the Shoulder Flexion Screen to see whether or not overhead pressing is a good idea.

In the end, I’m not going to sit here and say you MUST do “x, y and z” because I don’t know what you should or shouldn’t be doing. All I know is that there’s no one right way, but that getting people OFF the table is more valuable to me.

The Pseudo Training Session

The poking and prodding part takes, maybe, 15 minutes to complete. 20 minutes tops. Sometimes less.

I don’t want people feeling like a patient and I’d much rather get them on the gym floor doing stuff. I get more information this way anyways.

Here’s where I’ll take a look at their hip hinge, squat, and single leg (front plane) stability. If need be, I’ll regress or progress accordingly. For some a hip hinge is showing them a cable pull-through.


For others it’s an actual deadlift.


Remember: SHOWING THEM SUCCESS is crucial.

Show people what they can do, and don’t perseverate on what they can’t.

At this juncture I’ll also begin to showcase some of the “correctives” I may want them to do. Some may need to prioritize their T-spine mobility or maybe we need to spend some time activating their glutes. Or, maybe we need to show them a good movie, like The Royal Tenenbaums.

I’ll also break down why (and how) I want them to foam roll and do their soft-tissue work, and then I’ll basically take them through a quick training circuit. This may come down to a short-n-sweet A1-A2 circuit for a few sets. Or, I don’t know, maybe we’ll take our shirts off and perform bicep curls for ten minutes.

Either way I’ve done all I can to have (hopefully) given them a positive experience and a better idea of my coaching style, what a typical training session would look like, and how I’m going to help them increase their general level of badassery.

Buy in = they give me their credit card number….;o)

PS: If you’re really interested into diving into my assessment process check out mine (and Dean Somerset’s) resource Complete Shoulder and Hip Blueprint.

hipandshoulderfb-banner

Categoriescoaching Exercise Technique personal training Program Design Strength Training

The Beginner’s Checklist for Deadlift Badassery

It’s the start of a new year and with it a proverbial reboot or rejuvenation towards one’s health and fitness. Well that, and a metric boat load2 of Facebook statuses of people complaining about all the “newbies” crowding the gym.

Copyright: langstrup / 123RF Stock Photo


I am not one to complain because 1) I don’t typically work out in a commercial gym 2) Nah nah nana naaaaah and 3) I think it’s a good thing when people decide to be more proactive, take an active role towards their health and well-being, and join a gym. I mean, really? Are you that inconvenienced? I can appreciate it’s slightly annoying when there’s a traffic jam at the power rack (made worse when people are using it to perform bicep curls) or that it’s more or less an obstacle course to walk around all the meandering patrons doing this thingamajiggy or that whateverthef***.

Relax. Deep breaths. It’ll all be over by the second week of February…;o)

Nevertheless, as pumped as I am that people take the initiative to begin an exercise regime, I’d be remiss not to cringe – just a little bit – at the overzealousness of some as they begin their fitness journey.

Last week was one of the rare weeks where I trained every day in a commercial gym (my wife was on vacation and I joined her at her gym) and while it was great to observe people getting after it, the coach in me couldn’t help but start to hyperventilate into a paper bag want to be a coach.

For example I saw a lot of people deadlifting. It was cool. I wanted to go over and high-five every single person. However, that would have been weird and possible justification for a restraining order I kept to myself, but past all of that was an insatiable desire to want to fix a lot of deadlifts.

I admired their intent, but I’d be lying if I said a small piece of my soul didn’t die watching a few people doing their thing.

You see, for a lot of beginners what I “think” ends up happening is that they watch a re-run of the CrossFit games on ESPN or watch videos like this:


…and are all like “that’s badass, I want to do that,” not recognizing that 1) a deadlift is much more than just bending over and lifting a barbell off the ground (regardless of whether it’s 1000+ lbs or 50 lbs) and 2) a straight bar deadlift (from the floor) is the most advanced variation of a deadlift there is. Not many people are ready or prepared enough on Day #1 to perform this safely and with proper technique.

So I figured I’d offer a sort of “check-list” for beginners to consider, and what I feel would be the appropriate progressions to follow to work up to a straight bar deadlift.

Note to Internet Hero Trainer Guy/Girl Who Will Inevitably Call Me Out On Why I Didn’t Address This Thing Or That: This is not a dissertation, it’s a blog post highlighting a few candid thoughts and processes. This is no where near an exhaustive breakdown of deadlift technique or programming.3

Checks and Balances

Everyone is different and there’s no ONE right way or variation or cue that applies across the board. People have different leverages, injury histories, and experience levels and it’s important to take all those things into heavy consideration when coaching anyone up on the deadlift.

I will say: I know what I DON’T want to see. This:

That’s pretty much THE golden rule.

Because it makes me do this:

There are any number of reasons someone’s deadlift may look like the above picture:

  • Lack of hip mobility to “access” the hip flexion required to get that low to floor.
  • Lack of t-spine mobility (specifically extension).
  • Lack of ankle dorsiflexion.
  • Lack of kinesthetic awareness.
  • The novelty of the exercise.
  • They were born on a Wednesday. I don’t know.

Obviously step #1 would be to address and musculoskeletal/mobility restrictions that may be present.

Lack of Hip Mobility

Wall Hip Flexor Mobilization


Dynamic Pigeon to Half Kneeling


Shin Box


Lack of T-Spine Mobility

Side Lying Windmill


T-Spine Extension (Done Right)


Lack of Ankle (and Big Toe) Dorsiflexion

This is a component that’s often overlooked. If someone can’t access dorsiflexion it’s going to compromise their ability to get into deep(er) hip flexion to get down to grab the barbell.

Active Ankle Dorsiflexion


Metatarsal Active Squat Drill


Lack of Kinesthetic Awareness

Oftentimes it’s lack of awareness of what the body/joints are doing in space that’s the limiting factor. I like to use the Cat-Camel drill to build context and to demonstrate what I don’t want to see (rounded back) and what I do want to see (neutral spine)


Addressing Novelty (<— This is HUGE)

Here we have the nuts and bolts. Much of time, even though the stuff discussed above is very important, it comes down to the novelty or “newness” of the exercise as to why some people fail. To be blunt, and as alluded to earlier, much of the reason why many fail at deadlifting from the get go (and end up hurt and using the lame excuse that deadlifts are dangerous for everyone) is because they’re too aggressive and end up gravitating towards variations (and loads) they’re not ready for.

They either don’t understand what it actually means to hinge through the hips (which is all a deadlift really is: it doesn’t always have to mean pulling a heavy barbell off the ground) and/or they fail to progress accordingly based off their experience and leverages.

Learning what it means to dissociate hip movement from lumbar movement step #1 in grooving a bonafide hip hinge. One of the most popular drills to do so is the Wall Hip Hinge. Unfortunately, as harmless and innocuous as it looks it’s easily butchered. Here’s how I like to coach it up:


Another drill I like is the Tall Kneeling Handcuff Hip Hinge. Here we can take some joints of the equation and place a KB behind the back, which, for some reason, works. I think Gandalf made it up.


If you’re’ interested in learning some more hip hinge drills you can check out in THIS article I wrote a few months ago.

Assuming I’m comfortable with someone’s hip hinge now it’s time to start adding some load.

Remember: You DO NOT have to use a straight bar, and I’d caution against it for more beginners. The only people who have to use a straight bar are competitive powerlifters and Olympic lifters. Generally the people who say otherwise are those who don’t coach people. So if some Joe Schmo internet warrior tells you otherwise tell him to f off.

While there are always exceptions to the rules my progression series is as follows:

1. Master Hip Hinge Drills.

2. Cable or Band Pull-Through.


3. Kettlebell Deadlift: Elevated if need be. And from there we can progress to pulling from the floor as well as ramping things up to 1-Arm KB Deadlift (which adds an additional rotary component), 2-KB Deadlift, and even Hover Deadlifts:


4. Trap Bar Deadlift: The trap bar (or hex bar) deadlift is an excellent choice for beginners or those with limited experience because of its user friendliness. This is often my “go to” variation for everyone I begin working with.

https://www.youtube.com/watch?v=p-sA3PG1kGY


  • For starters one’s center of gravity is inside the bar, which makes it easier to maintain an upright torso angle and a better neutral spinal position. All of which translates to less shear loading on the spine.
  • The elevated handles make it easier for those with mobility issues/restrictions – such as limited hip flexion and/or ankle dorsiflexion – to perform in a safe and successful manner.

5. Rack Pulls or Block Pulls: Here we can start adding anterior load. With the barbell now in front of the body the axis of rotation is further away which can result in more stress on the lower back. This is fine so long as neutral spine is maintained.

I’d note here that I much prefer Block Pulls. I find they have more carryover to the actual deadlift as you’re still able to get slack out of the bar (which you’re unable to do with a rack pull). Both are great options, though, when introducing straight bar variations.

Is your spine still attached? Can you still feel your legs? Good. Lets move on.

6. Sumo Deadlift/Conventional Deadlift: Look at you, son! Pulling from the floor now. Whatever variation allows for the most success, feels better, and guarantees proper spinal position is the one I’ll run with.

Sometimes people picked the wrong parents and their anatomy dictates what will be the best fit long-term. Generally speaking those with mobility restrictions, longer torsos, and short(er) arms will prefer sumo style over conventional. I prefer a middle-ground approach for many and often use a Modified Sumo Stance with my clients/athletes:

https://www.youtube.com/watch?v=q6Xjb72gGTE


None of this speaks to the other particulars I like to go over with trainees with regards to foot placement, hand placement, leg drive, common mistakes with lockout and the descent, not to mention appreciating, getting, and maintaining body tension. You can do a search on the site and find an abyss of other deadlift articles that go over all those things.

The goal today was to showcase my (general) approach to deadlifting with beginners. I hope it helped.

Addendum (Other Stuff I Wanted to Say)

1. Consider hiring a competent coach to show you the ropes. A good litmus test to figure out whether or not they know what they’re talking about:

  • Ask them if they know who Andy Bolton is.
  • Have him or her point to their posterior chain. If they point to their abs. Walk away.
  • They can differentiate between a deadlift and a squat.
  • They actually look like they lift weights.

2. Stop BOUNCING your repetitions. It’s a DEADlift, not a BOUNCElift. On each rep, when you return to the floor, you should come to a complete stop. “Reset” your air and spinal position, and repeat.

3. I HATE high-rep deadlifts, especially for beginners. Fatigue is going to compromise form. Try to stick to no more than 5-reps per set.

4. Home base – in terms of loading – should be in the 65-80% range of 1-rep max. Not that this means you should test your 1RM right away. The thing to consider is that you don’t NEED to train heavy to start. Beginners or un-trained individuals can train with as low as 40% of 1RM (Hint: that’s super light) and still reap all the benefits and gain a training effect. Honing technique should be the main goal at this point.

5. Anyone see La-La Land yet?

CategoriesAssessment personal training

What You Weren’t Taught About Assessments

As this post goes live I’m (hopefully) en route back to Boston after attending Mark Fisher’s wedding in NYC this past weekend. I decided it best to pre-schedule something on the off-chance some crazy shenanigans went down, like, I don’t know, an impromptu dance-off with a unicorn or a shot of Tequila somehow made it into my hands.

Nevertheless, better safe than sorry…I needed to plan a head.

Today’s guest post comes courtesy of Boston-based strength coach and massage therapist, Mike Sirani.

Enjoy!

Copyright: dolgachov / 123RF Stock Photo


Oh, the assessment.

The assessment is one of the most pivotal moments when working as a personal trainer or strength and conditioning coach. It’s often your first in-person interaction with a potential client.

Even though brand awareness, marketing, and your reputation can all help your chances of success before the assessment even starts, you still have 30 to 90 minutes to sell a client on why you or your gym is the best person/place to help them reach their goals.

This can be difficult, especially if:

  • You’re young and/or new to training people.
  • You feel like you’re not as busy as you should be.
  • You have thoughts like, “I’m so much smarter than this other trainer, but they’re making way more money than me.”
  • You often scratch your head thinking things like, “I’ve taken PRI, DNS, FMS, FRC, SFG, and eat KFC, and despite all of my continuing education, the number of clients I see still isn’t growing.

If any of the above rings a bell to you, I believe this article can help you.

All the knowledge in the world is as useless as the Cleveland Browns on a Sunday unless you understand a few key things.

1) Most People Are Seeking Your Services to Get Fit

Somewhere along the way, physical therapy blurred with strength and conditioning, and strength and conditioning blended with physical therapy. It’s great for the field, and both do work optimally together, along the same continuum, but it’s important to know your role.

Most clients looking to improve their fitness don’t give a shit about their pelvic inlet position or posterior mediastinum’s or the 10-degree difference in hip internal rotation from side to side. When you start throwing out those terms, you’re just a big weirdo. Here’s what I recommend instead:

Listen

  • Be an active listener.
  • Have good body language.
  • Ask the right questions. All of your questions should help you build rapport and lead towards making good clinical decisions in order to help the person in front of you.

Meet Them Where They’re At

  • Don’t put down or talk bad about someone’s previous exercise programs, especially if it’s something they enjoy doing.
  • Making them stop doing something they enjoy should be your last option and done only if you’re 100% sure it’s holding them back from reaching their goals.
  • People will have pre-conceived notions and it’s your job to educated them—but also respect their views and understand that not everyone will be a good fit to work with you.
  • I currently train clients who are yogis, cyclists, triathletes, Cross Fitters, Pilate’s enthusiasts, and runners. What do they all have in common? They see value in my service, enough to limit how much they’re doing of their other activities to make room for strength training because it will help them reach their goals and allow them to continue doing the activities they love

Actually Come Up with a Fitness Plan

  • Here’s an idea: Instead of throwing someone through the gamut of corrective exercises on Day 1, why don’t you bring them through a brief workout?
  • Show them what they’re good at, show them what they’re bad at, and actually coach them through different movements.
  • Then work with them to come up with the outline of a plan that you’ll use to guide them towards reaching their goals.

2) Context Matters!

It’s clear that above I poked fun at a few philosophies and anatomical terms. Please don’t get me wrong. I don’t condone being one of those trainers who is all about doing an exercise only because it looks cool and fun. The better you know your anatomy, physiology, biomechanics, and pain science, the more potential you’ll have to be a great coach.
But, as a coach, you must also take all of that knowledge and put it in CONTEXT for the client to UNDERSTAND, APPRECIATE, and VALUE what you are saying.

You see, we take these continuing education courses that are catered towards physical therapists, massage therapists, and chiropractors and think we can explain things the same way when bringing someone through a fitness evaluation. Often times in a course, you’re explaining that increasing this range of motion or decreasing tissue tension in this area will help alleviate pain.

What if your client isn’t in any pain and they just want to get fit? What do you do then?

Consider learning how to re-phrase things and put them into context that not only work for fitness and performance, but put value in what you can do to help them reach their goals. Here are a few examples:

  • A right-handed baseball player who lacks passive hip internal rotation – “When we increase your hip internal rotation, you’ll be able to load and explode much better with your lower body and generate a lot more power during your swing.”
  • A powerlifter who lacks ankle dorsiflexion – “When we increase your dorsiflexion, it’ll become much easier to hit depth on your squat and you won’t get red-lighted on weights you should be able to lift.”


  • A client who asks why you’re watching them perform certain movements during a FMS – “This will give us a better idea of what exercises will be best for you body at this time and tell us what you need to work on in order to progress the exercises you’ll be doing during your first program.”

With that being said, you also need to realize that you’ll run into situations where a client may have a Type A personality and want to know the details and the science. Now is the time when you can step up to the plate and impress the client with your knowledge of anatomy, physiology, and biomechanics.

3) Analogies

Science can get complicated. It can be overwhelming explaining tissue healing or specific training and rehab concepts to a client. This is where analogies can be huge for educating a client and getting them to buy in and be on the same page as you.

A good analogy is great for explaining an unfamiliar concept with a familiar one and can take complex explanations and make them simple.

Be creative with these and make sure you drive your point home with something your client really resonates with.

In Summary

If you’re good at your job and are able to get a client to train with you a couple times a week, you’ll likely have good adherence and get good results. But you have to first know how to put yourself in a situation where someone is willing to spend money on you or your gym each week. It’s easy to fail getting to this point when you get caught up in how much you think you know and are waiting for every opportunity to share what you learned over the weekend.

Instead of feeding into your own ego by showcasing your knowledge with a new client:

  • Be a good listener
  • Meet them where they’re at
  • Always come up with a plan
  • Know that context matters!
  • Use analogies.

I once heard Alwyn Cosgrove say, “If you can see John Smith through John Smith’s eyes, you can sell John Smith what John Smith buys.”

If you can remember to see John Smith through John Smith’s eyes and know that clients don’t care how much you know until they know how much you care, you’ll be a much better coach, and your busier schedule and increase in clients/members will surely reflect your improvements.

About the Author

mike-siraniMike Sirani is a strength and conditioning coach and massage therapist in Boston, MA. He works at Pure Performance Training where he helps client’s look, feel, move, and perform better.

Prior to building a successful personal training business in Boston, Mike graduated from one of the nation’s best exercise science programs at Springfield College and graduated from the Cortiva Institute in Boston for massage therapy shortly after.

He interned at Conca Sport and Fitness, one of Western Massachusetts’ top training facilities, and the nation’s best baseball strength and conditioning facility, Cressey Sports Performance. He is a certified strength and conditioning coach through the NSCA and has completed extensive continuing education in manual therapy, cardiovascular training, Functional Range Conditioning (FRC), Postural Restoration Institute (PRI), and Functional Movement Screen (FMS).

Mike played collegiate baseball at Springfield College and is an avid golfer. When not doing any of the above, Mike enjoys binging on good television shows and spending time with his fiancé. You can check out what Mike is up to on Facebook or check out some of his other articles at Rebel Performance.


CategoriesAssessment Corrective Exercise mobility

Stop Cranking on Your Shoulders for More Mobility

Seriously, stop it.

For many people the first choice when their shoulder begins to hurt or if they lack mobility is to start cranking and yanking on it. This is rarely the right approach, and as Andrew Millett (my good friend and Boston based physical therapist) points out in today’s post…there a far better and far more effective approaches.

Enjoy.

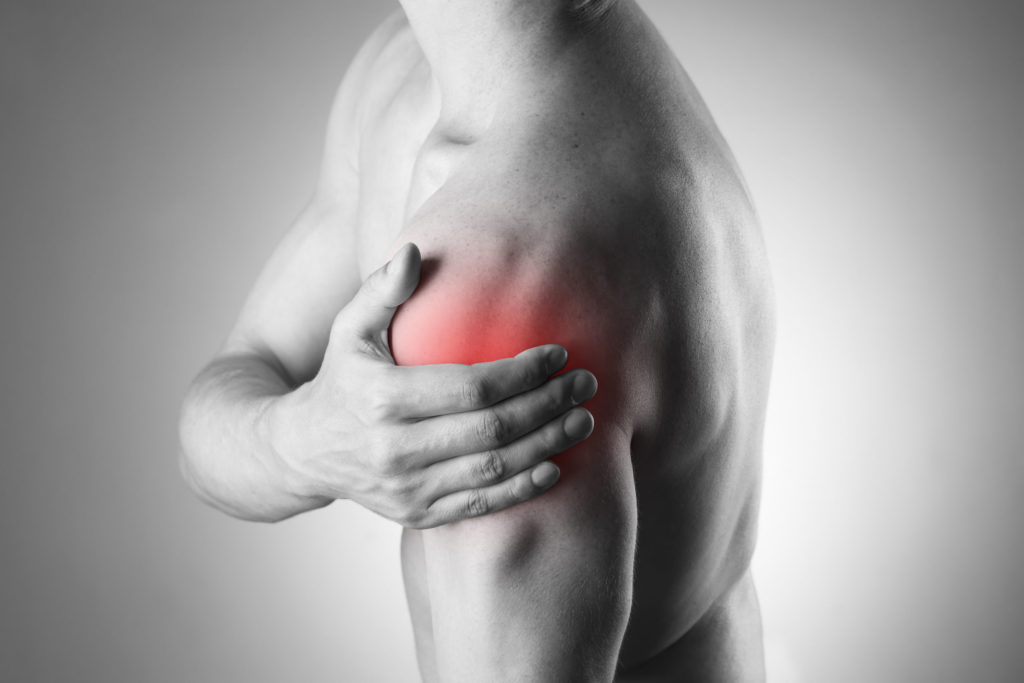
45885490 - man with pain in shoulder. pain in the human body. black and white photo with red dot

Copyright: staras / 123RF Stock Photo

The shoulders, specifically, the glenohumeral joints, are typically very mobile joints. They need to flex, extend, abduct, adduct, horizontally abduct and adduct and internally and externally rotate in multiple planes and positions in relation to the body. Even though the shoulders are a common area of mobility, many people will present with limitations in at least one aspect of glenohumeral motion.

There are various reasons why someone may have limited shoulder mobility.

Bony Limitations

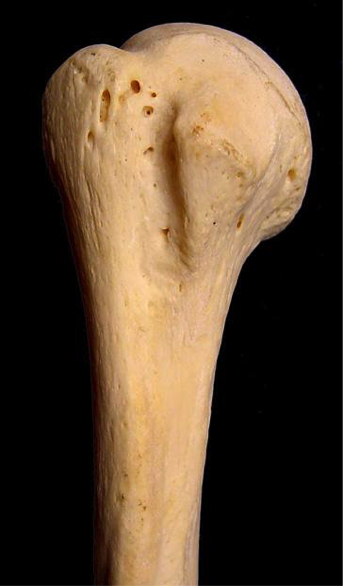
bone

photo credit: pediatric-orthopedics.com

People who engaged in various overhead sports such as baseball, softball, etc. have been shown on multiple studies to have changes to the glenoid and humeral head. In baseball players specifically, they can appear to have a loss of internal rotation range of motion as compared to their non-throwing shoulder and an increase in external rotation range of motion as compared to their non-throwing shoulder.

This change in range of motion is commonly due to humeral retroversion. Humeral retroversion is the alternation of the humerus and humeral head in relation to the glenoid fossa from years of repetitive overhead activity, specifically throwing.

gird

Photo credit: opensiuc.lib.siu.edu

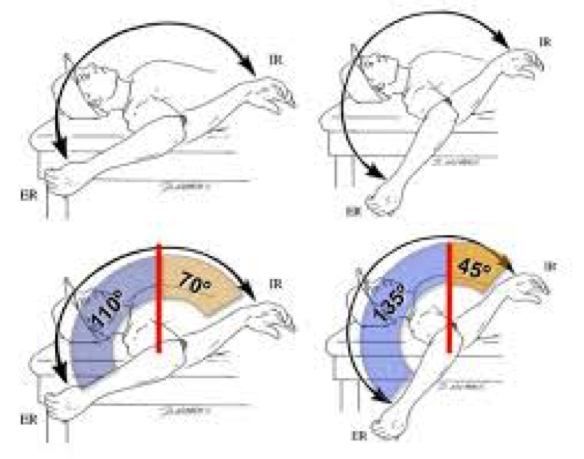
This is typically only seen in overhead athletes. This differentiation in range of motion side to side in external and internal rotation is considered “normal” for this population. As long as External + Internal Rotation aka Total Motion is within 5 degrees of the non-involved shoulder, then that is considered normal.

Note from TG: In other words, loss of IR in a throwing shoulder is an adaptive response and is normal! It doesn’t necessarily have to be fixed.

With that said, we do not want to crank on someone who has “normal” total motion, but may lack internal rotation on one side versus the other. Asking your patient or client if they engaged in overhead sports as a child is a good clue to this. Then measuring their motion will give more information.

We will get into more detail later on how to improve their motion if their is more than a 5 degree difference in total motion.

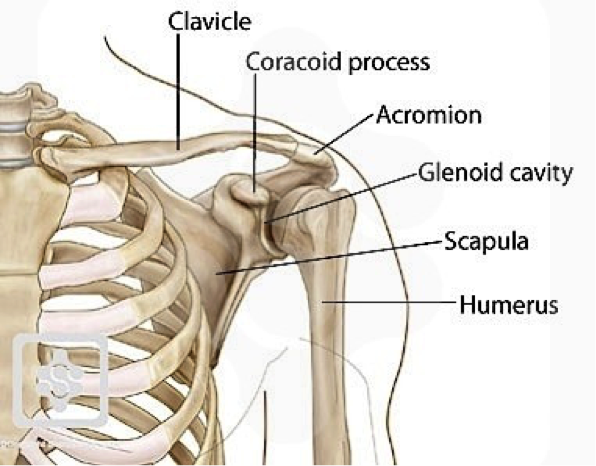
Another bony limitation at the shoulder can be acromion type. The acromion is a bony structure that is present in all people that is part of the scapula.

acromion

Photo credit: ipushweight.com

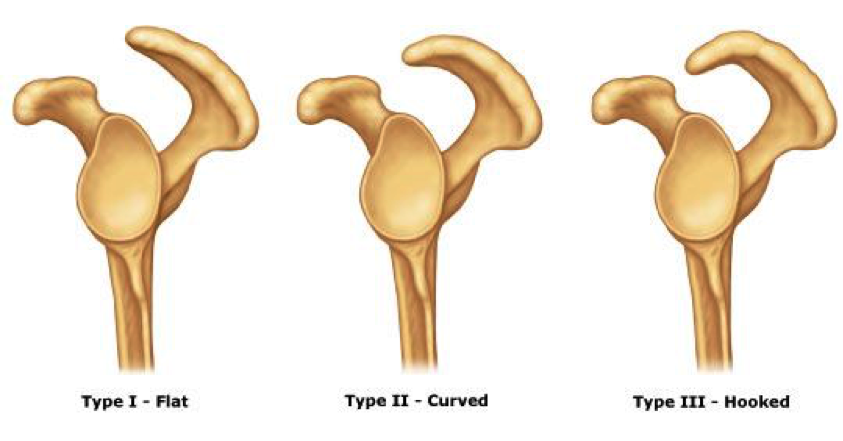
All acromions are not created equal though. There can be 3 varying types of acromions.

acromion-type

Photo credit: cursoenarm.net

As you can see in the picture above, a type I acromion is relatively normal in appearance. In type II and III, there is more of a curved/hooked appearance to it. This alteration in can cause pain and limited motion when reaching overhead.

The only way to definitively know if someone has a type II or III acromion is through radiographic imaging. Programming may need to be altered to more horizontal pulling/pushing variations instead of overhead work if someone doesn’t have full overhead mobility due to a type III acromion.

For most people with a type II acromion, physical therapy can help to improve range of motion and decrease the effect of the acromion on shoulder motion and pain. For most people with a type III acromion, more often than not, surgical intervention is what will help.

Capsular Limitations

In the majority of the joints in the body, there is something called a “capsule” surrounding the joint. A capsule is synonymous to a ziploc bag encompassing the joint.

In this capsule, there are “folds” in certain aspects depending on where the arm is positioned. Due to an old injury, surgery, etc., this capsule can become “tight or stiff.” Now, without getting into too much detail about why it is tight/stiff or why there are capsular limitations, the only way to determine if there is capsular limitations, is by a licensed healthcare practitioner, ie. PT, chiropractor, etc.

Typically, older populations may have more capsular limitations OR if someone has had a long standing injury or prior surgery to the shoulder, they may present with decreased ranges of motion because of the capsule.

The only other area that can be attributed to decreased ranges of motion due to the joint capsule itself that affects the shoulder, would be the thoracic spine. Lack of thoracic spine extension and/or rotation can limit shoulder flexion, external rotation, etc.

To test for limited thoracic spine mobility, try Quadruped Passive Thoracic Rotation:


Normally, passive rotation should be 50 degrees in the general population. If it is less than that, that can significantly limit shoulder range of motion.

Soft Tissue Restrictions

Now, this is the more common of all three of the factors that can limit shoulder mobility. Excluding clients who are hyper-mobile, the majority of clients and patients have some form of increased soft tissue tone in one if not more areas of their body.

At the glenohumeral joint, there are a few “big” than can contribute to limited shoulder mobility.

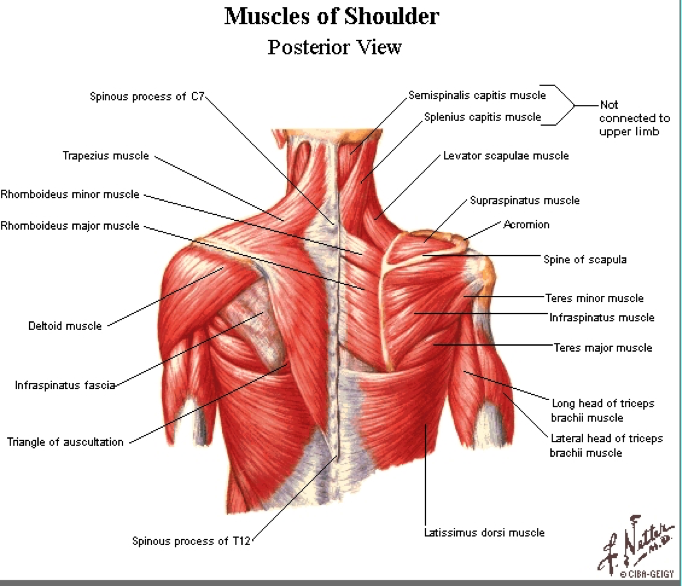
muscles-of-shoulder

Photo credit: www.smogshoulder.com

Muscles that can limit shoulder flexion are:

  • Pectoralis Major/Minor
  • Teres Major
  • Latissimus Dorsi
  • Subscapularis

Muscles that can limit shoulder abduction are:

  • Pec Major/Minor
  • Teres Major
  • Latissimus Dorsi
  • Subscapularis

Muscles that can limit shoulder external rotation are:

  • Pec Minor
  • Teres Major
  • Latissimus Dorsi
  • Subscapularis

Muscles that can limit shoulder internal rotation are:

  • Infraspinatus
  • Teres Minor

Now, you’re probably thinking that I just “copied and pasted” most of those muscles from one section to the other. The latissimus dorsi is a huge contributor to limited overhead shoulder mobility due to its attachment on the trunk into abduction and flexion. It can also limit external rotation as it is a shoulder internal rotator.

Pectoralis minor can limit overhead motion because of its attachment on the coracoid process of the scapula and the rib. Decreased pectoralis minor tissue extensibility can cause an anterior tilt of the scapula limiting humeral motion on the glenoid.

Subscapularis can limit overhead motion due to its attachment on anterior side of the scapula and on the humerus. Teres major attaches on the scapula as well as on the humerus and can limit overhead mobility as well.

Infraspinatus and Teres Minor limit internal rotation of the shoulder due to its attachment points on the humerus and scapula.

Typically, one if not more than one of the aforementioned muscles can limit overhead mobility. Instead of performing intense stretches and forcing the glenohumeral joint into motions it just does not have, we need to ASSESS and then ADDRESS any limitations that are present.

Assessment

Active Motion

To assess someone’s active ranges of motion, ask them to move.

Have them perform:

Shoulder Flexion

active-shoulde-flexion

Shoulder Abduction

active-shoulder-abduction

Shoulder Medial Rotation

active-shoulder-medial-rotation

Shoulder Lateral Rotation

active-shoulder-external-rotation

“Normal” ranges of motion for general population clients would be:

Shoulder Flexion: 180 degrees OR humerus in line with the client’s ear.

Shoulder Abduction: 180 degrees OR humerus in line with side of body

MRE: 3rd digit finger tip to contralateral inferior angle of scapula

 LRF: 3rd digit finger tip to superomedial border of contralateral scapula.

Now that you have assessed someone’s active motion, we need to assess it passively to fully determine if someone has a true mobility limitation.

Passive Motion

Perform the same motions passively into flexion, abduction, MRE, and LRF. Do not force these motions or push through tightness or pain. If you cannot passively bring the client’s arm to the aforementioned areas mentioned in the Active Motion section, then we know the client has a true mobility limitation.

Addressing the Issue

If someone presents with limitations in passive shoulder flexion, abduction, MRE, or LRF, performing some form of Self-Myofascial Release (SMR) can be beneficial.


Then, re-test passive motion to see if there has been an improvement in mobility. If there has, then you know you have worked on the appropriate areas.

If there has NOT been an improvement in mobility, refer out to a manual therapist (PT, sports chiropractor, massage therapist, etc.)

If the mobility has improved, then we want to use appropriate mobility drills to help groove the patterns that were just improved.

Horizontal Adduction/Posterior Rotator Cuff Stretch


Key Points:

  • Make sure to keep scapulae retracted by using wall or door jam.
  • Once scapulae is fixed, gently bring arm across body.
  • Hold 5-8 seconds pre-training or 30 seconds post-training.
  • By fixating scapulae, it will provide a more focused stretch to the posterior aspect of the shoulder.

Latissimus Dorsi Stretch


Key Points:

  • Use opposite side hand to fix scapulae to rib cage.
  • Once scapulae is fixed, hold onto a stationary object and sit back.
  • Gentle stretch should be felt in the lat.
  • By fixating the scapulae to the rib cage using the opposite hand, it provides a truer stretch to the lat vs tractioning the glenohumeral joint.

 Motor Control

Once there has been an improvement in mobility, we want to make sure that the brain and the body knows how to access that “new” mobility. We need to make sure to re-pattern the proper movement patterns to avoid falling back into an poor compensations.

For shoulder re-patterning, various movements that help to promote proper movement patterns such as:

Forearm Wall Slides


Back to Wall Shoulder Flexion


Quadruped Assisted Reach, Roll, and Lift


Now that we have improved the mobility by addressing increased soft tissue tone, re-patterned those movement patterns, now we want to incorporate them all together.

Movements such as:

Turkish Get-Up


Kettlebell Bottoms Up Baby Get-Up


There you have it! Instead of mindlessly stretching your shoulder, address any potential limitations and get back to training effectively!

About the Author

Andrew Millett is a Metro-West (Boston) based physical therapist

Facebook: From The Ground Up

Twitter: @andrewmillettpt

Instagram: andrewmillettpt
CategoriesAssessment Corrective Exercise

The Power of Test, Re-Test: How to Supercharge and Add Value to Your Assessment

During the Complete Hip & Shoulder Workshop in Seattle last weekend I spoke on the importance of the test/re-test concept with regards to assessment.

It’s nothing fancy or elaborate.

You test something – whether it be range of motion or maybe a strength discrepancy – implement a “corrective” modality if something’s deemed out of whack, and then re-rest that shit to see if it worked.

If it did….you’re Gandalf.4

If not…#awwwwwkward.

The test/re-test approach helps set the tone for any future “corrective” strategies or programming considerations you’ll do as a coach or trainer.

In addition, and something I’d argue is equally as important, it also provides an added layer of value to the assessment.

If you’re able to demonstrate to someone a significant change or improvement in ROM or reduction in pain/discomfort by implementing a drill or two, and it’s something they’ve been struggling with despite countless interactions with other fitness professionals, what’s the likelihood they’ll bust out their checkbook or Bitcoin wallets (<—depending on their level of geekery)?

I suspect highly likely.

It demonstrates a perceived level of “mastery” and knowledge-base towards the assesser (you) and, in a roundabout, reverse psychology kind-of-way, delves into the “pain center” of the assessee (athlete/client).

In this example it can refer to literal pain such as a banged up shoulder, knee, or lower back. But it can also speak to pain in the figurative sense too. Someone who’s frustrated and “had it up to here!” that they can’t lose weight, or maybe an athlete who was cut from their high-school team would have a degree of “pain” that would incentivize them to take action.

Show someone success or a clear path of action, however little, and they’re putty in your hands.

Of course this assumes you’re not some shady shyster who tries to up-sell the benefits of some super-secret concurrent, 47-week, Easter-Bloc training program you copied from Muscle & Fitness or, I don’t know, organic raspberry ketones laced with mermaid placenta.

People who promote and use smoke-and-mirror tactics are the worst.

But lets get back to the topic at hand.

Test/Re-Test

One of the main screens I use with my athletes and clients is their ability to lift or elevate their arms above their heads.

Shoulder flexion is important for everyone, not just overhead athletes and CrossFitters.

If someone lacks shoulder flexion, and they’re an athlete, it’s going to affect their performance. A baseball pitcher may be “stuck” in gross shoulder depression, which in turn will have ramifications on scapular positioning and kinematics, which in turn will result in faulty mechanics and compensatory issues up and down the kinetic chain.

Conversely, regular ol’ Hank from accounting, who likes to hit the gym hard after work, if he lacks shoulder flexion, he too could have numerous issues arise ranging from shoulder and elbow pain to lower back shenanigans.

Shoulder flexion – and the ability to do it – is a big deal in my opinion. And it’s a screen that should be a high-priority in any fitness professionals assessment protocol.

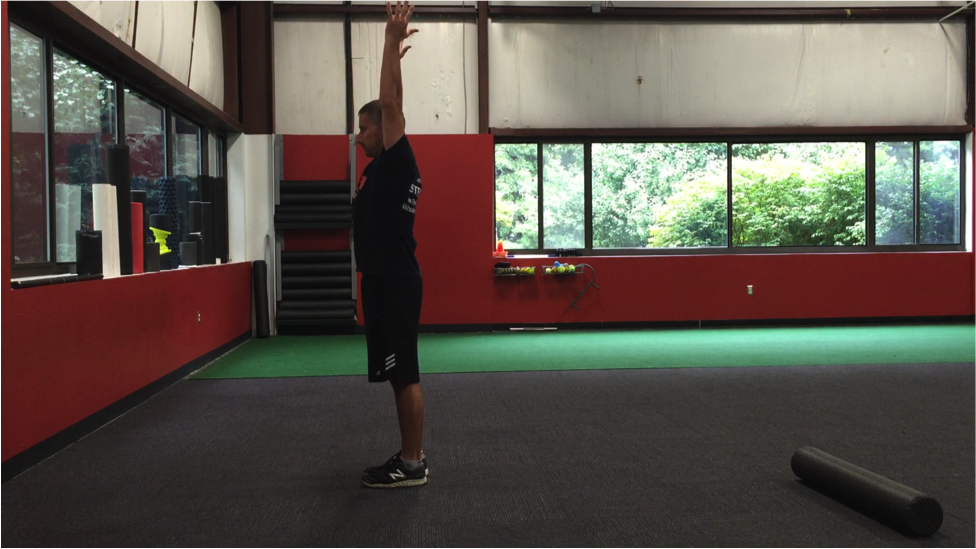
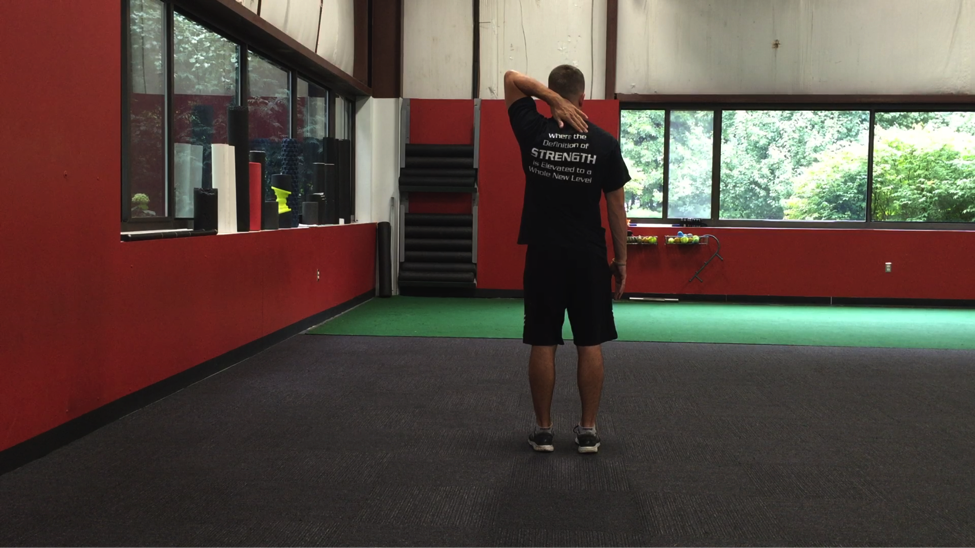
So lets say I’m working with someone who lacks shoulder flexion. I test it both actively (standing, picture above) and passively (on a training table).

I surmise that it’s limited and that it may be feeding into why a particular person’s shoulder has been bothering him or her.

I can use the test/re-test approach to see if I can nudge an improvement.

Now, as I’ve learned from many people much smarter than myself – Mike Reinold, Sue Falsone, Dr. Evan Osar, Dr. Stuart McGill, Papa Smurf, etc – you shouldn’t rely on any ONE screen/corrective.

Everyone is different, and what works for one person might not even scratch the surface for another.

With regards to addressing (lack of) shoulder flexion5, there are a handful of “go to” strategies I like to use.

And then it’s just a matter of seeing which one sticks.

1) Encouraging a Better Position

In order to elevate the humerus (arm) above your head, the scapulae (shoulder blade) needs to do three things:

  • Upwardly rotate
  • Posteriorly tilt
  • Protract

The ability to do so is vastly correlated with the thorax. Those who are super kyphotic (ultra rounded upper back) will have a hard time elevating their arms overhead. Often, the simple “fix” here is to foam roll the upper back and work on more t-spine extension and you’ll almost always see an improvement.

Bench T-Spine Extension


Side Lying Windmill


But what about the opposite? Those who are stuck in more “gross” extension and downward rotation?

I.e., the bulk of athletes and meatheads.

Here the shoulder blades can be seemingly “glued” down.

In that case some positional breathing drills to “un-glue” the shoulder blades (and to encourage more 3D or 360 degree expansion of the ribcage/thorax) would be highly advantageous.

All 4s Belly-Breathing


It’s amazing what a few minutes of this drill can do with improving shoulder flexion ROM, without having to yank or pull or “smash” anything.

2) Allow the Shoulder Blades to Move

Some people simply don’t know how to allow their shoulder blades to move. A prime example is this past weekend.

An attendee who’s a personal trainer – but also competes in figure – mentioned how her shoulders (especially her left) had been bothering her for eons, and she couldn’t figure out why.

We had her perform this drill.

1-Arm Quadruped Protraction


In reality, both protraction and retraction are occurring, but many people have a hard time with the former.

The idea here is to learn to gain movement from the shoulder blade itself and not via the t-spine.

Here’s another angle (because, triceps):

https://www.youtube.com/watch?v=eyNFNxqFlSc


After a few “passes” with this drill, she saw an immediate improvement in her ROM. What’s more, the following day when she showed up for Day #2, the first thing out of her mouth was “my shoulder feels amazing today.”

That’s a win.

3) Pin and Go

Another route to take is to have the person foam roll their lats. Not many people do this, and there’s a reason why: It’s un-pleasant.

I’ll have the person spend a good 30 seconds or so on each side and then have them stand up and perform a simple SMR drill using a lacrosse ball against a wall.

They’ll “pin” the teres minor down (basically, find the tender spot behind their shoulder and hold it there) and then work into upward rotation.

https://www.youtube.com/watch?v=9OiGt_O1FvY


Another five or so passes here, and I’ll re-test.

Many times I’ll see a marked improvement in their shoulder flexion.

Caveat

NONE of this is to insinuate that anything mentioned above will work for everyone. The idea is to understand that it’s important to “test” a number of modalities and then re-test to see if you find an improvement.

If you do, you’re likely barking up the right tree which will make your corrective approach and subsequent strength training more successful.

If you don’t, well, my bad…..;o)

CategoriesAssessment coaching Exercise Technique Strength Training

Building the Squat From the Bottom

We all know that squats are a staple movement that span the gauntlet when it comes to helping people get stronger, leaner, and faster.

Blah, blah, blabbidy, blah.

That’s all well and good. But lets be honest.

Squats also help build bodacious bottoms.

There’s a reason why no one has ever written a song titled “Flat Bottomed Girls” or “I Like Average-Sized Butts.”

We like our derrieres fat and big, baby!

Alas, this article isn’t about the human form, appreciating the backside, and how squats help build bottoms.

No, this article is about something else entirely.

How to Build the Squat FROM THE BOTTOM

Dean Somerset and I spent this past weekend up in Kitchener, Ontario (<– that’s in Canada) just outside Toronto co-teaching our Complete Hip and Shoulder Workshop.

Note: you can check out to see if we’re coming to your neck of the woods HERE.

One of the main bullet points Dean and I hit on was squat patterning and how coaches and personal trainers can go about cleaning up their athlete’s or client’s squat technique.

Or, better yet: demonstrate to them some semblance of success.

Just so we’re clear: I think the squat is a basic movement pattern that everyone should be able to perform. I’m not insinuating that everyone should be able to walk into a gym on day #1 and drop it like it’s hot into a clean, deep squat and/or be able to load it to a significant degree.

Not everyone can (or should) squat deep. I’ve written on the topic several times, and for those interested you can go HERE and HERE.

That said, it is a movement pattern that’s important and one that can help offset many postural weaknesses, imbalances, not to mention more colloquial goals like athletic performance and aesthetics.

Assessment

Squat assessment is a crucial component to figuring out what’s the right “fit” or approach for each individual.

I can’t stress this enough: Not everyone is meant to squat to ass-to-grass on day one. Not everyone has the anatomy or hip structure to do it!

But it’s also important to figure WHY someone can’t squat to depth? Is it a mobility issue (which many are quick to gravitate towards) or a stability issue?

Digging deeper on the mobility-stability conundrum, Dean hit on a few important points this past weekend in trying to differentiate what mechanism(s) prevent someone from A) squatting deeper than that think they can squat and B) squatting with a better, more efficient pattern.

It’s a concept I’ve used myself with my own athletes and clients, but Dean did a really great job at peeling back the onion and helping the attendees better understand where they should focus their efforts.

Is it a Structural Issue?

Say someone makes the Tin Man look hyper-mobile when they squat. No matter what they do or how they position themselves, they just can’t seem to squat to an appreciable depth.

Most trainers and coaches would chalk it up to something lame like “tight hip flexors” or lack of hip mobility (which certainly could be the case), and revert to any litany of drills to improve either of the two.

This could very well be the correct anecdote, but I do feel it’s an often simplified and overused approach. I can’t tell you how many coaches have taken this route only to end up barking up the wrong tree.

It’s imperative to dig a little deeper.

Structural issue(s) = bony growth (FAI?), bone spur, and/or geometry of the hip joint itself.

As a trainer or coach you’re not diagnosing anything, and unless you’re Superman6 and have X-ray vision you’re more or less speculating anyways.

Assuming you have the knowledge base and are comfortable doing so, you can ascertain of what each person’s (general) anatomy is telling you by using a hip scour.


Supine (Passive): Have an individual lay on his or her’s back and bring knee into hip flexion. Is it uncomfortable or do they feel any pinching at or near the hip joint? If so, abduct the hip. Does the pinching go away? Do they gain more hip flexion?

This can speak to what their ideal squat-stance width should be.

You can also check hip internal/external rotation. Do they have more or less ROM in either direction? This could speak to more retroversion/anteversion of the acetabulum itself.

In general: those with an anteverted acetabulum (more than enough IR) are going to have crazy amounts of hip flexion. These are people are the ones who can squat ass-to-grass without blinking an eye. Of course, whether or not they can control that ROM is another story.

Conversely, those with a retroverted acetabulum (more ER) may struggle with hip flexion (bone hits bone earlier) and will likely never live up the all the internet trolls’ expectations regarding squat depth.

They’ll likely dominate hip extension ROM, however.7


Supine (Active): You can also have someone test their hip flexion ROM actively (meaning, they’re the ones doing the work). The key here, however, is making sure they use their hip flexors to actively “pull” their knees towards their chest.

Can they do it? Any restrictions?

https://www.youtube.com/watch?v=k3TI-GJNl9w


Prone/Quadruped: Another “screen” to add is in the quadruped position where, again, the person is more stable.

Here you’re checking to see at what point do they lose control of lumbar positioning?

Some people, due to their anatomy, and despite 698 coaching cues being tossed their way, will lose positioning before they hit 90 degrees of hip flexion. You can be the most well-intentioned coach in the world, but unless you’re Professor Dumbledore you’re never going to be able to fit a square peg into a round hole.

So, you work with what’s presented to you. This person will need to squat at or above parallel.

I’m fairly certain the Earth will still continue to spin.

However, what you’ll often find is that they’re able to get into what would be equivalent to a “deep squat” position. Further, if you have them dip down and extend their arms above their head it’s akin to the same position as an overhead squat.

If they’re able to assume this position, it’s a safe bet (although not entirely exclusive) they it’s not a structural issue that’s preventing them from assuming a deep(er) and “clean” squat pattern.


All of it’s information – which may or may not stick – but it’s information nonetheless. And it’ll all help guide you as a coach to figure out what’s most suitable approach for your athletes and clients.

When assessing someone’s active squat pattern they may present as a walking ball of fail and demonstrate a whole host of compensation patterns. This is where some fitness professionals are quick to jump on the “it’s a mobility issue” bandwagon.

Taking the time to perform a more thorough screen (like the ones suggested above), though, is an excellent way to glean whether or not that is indeed accurate.

Squat From the Bottom

Lets assume you figured out it’s NOT a structural issue. You assess/screen someone in the supine/prone/quadruped positions and find they’re able to exhibit a passable squat pattern.

Yet, when they stand up and attempt to squat they resemble a stack of crashing Jenga pieces.

One of the best strategies I’ve found to help address this is to teach/re-groove the squat pattern FROM THE BOTTOM. Basically, start in the end position.

It helps to build context and confidence. In addition, it engrains the CNS to inform the brain “dude/dudette, relax, we got this!”

Assisted Squat Patterning

If I’m working with someone in person, I’ll hold my hands out in front of me (palms up), ask them to place their hands on top of mine (palms down), assume a squat stance, and “groove” their squat pattern (sit back with the hips, push the knees out), and “pull” themselves down into the bottom position of the squat.

I’ll then have them let go, hold that position for a good 3-5 second count, and then stand back up. We start them where we want them to finish. As a result this BOTTOMS-UP approach helps groove technique, but more importantly helps improve people’s confidence at sitting in the hole.

Some other variations you can use:

Squat Walk Down


Suspension Trainer Assist


Have someone grab the side of a squat or power rack (or use a suspension trainer – TRX, Jungle Gym) and use as much assistance as they need in order to get into the bottom position.

Note: Make sure they maintain a good back position.

Once they get into a position they feel they can control and “own,” have him or her let go and hold that position for a 3-5s count.

Then, stand up.

Have them repeat for several repetitions.

You’ll often find that after a few reps things start to click.

Boom

When it comes to squatting, not everyone should be held to the same standard.

  • Perform the screens mentioned above. Do your job.
  • Figure out what the best “fit” is for each person – depth, stance width, foot placement, etc.
  • Use pattern assistance if necessary. Start from the bottom. Build success into people’s training.

Either approach you use – whether it’s partner assisted or with external assistance (rack, TRX) – the main advantage is that it forces anterior core engagement, which in turn helps improve stability, which in turn improves motor control, which in turn makes people into rock stars.

Except without the fame, money, and glory. And amphetamines.

CategoriesAssessment

Assessment Protocols: There’s No One Right Way

We had a new crop of interns start up this week at the facility, and last night I had the opportunity to spend a little time with them to go over some “big rock” coaching cues and assessment protocols on the squat.

I only had 30 minutes with them and there’s obviously a lot to discuss with regards to the squat. I mean, people pay good money to spend entire weekends geeking out over squat mechanics, lever arms, and arguing over whether it’s better to squat with a low-bar position or high-bar.

So I did my best with the time given. I huddled them up in the corner of the facility, in front of a squat rack, and told them to KNEEL BEFORE ZOD!


Okay, that didn’t happen. But it may very well in the future…;o)

However, the whole 30-minute squat tutorial did happen, and one of the very first things that came out of my mouth was:

“There’s no such thing as one right way to squat.”

Some people do better with a high(er) bar placement on their back, some people will squat with a wider stance compared to others, and yes, contrary to what some blowhard coaches on the internet subscribe to…some people, due to their anatomy/hip structure, will not be able to squat past 90 degrees of hip flexion (or ass-to-grass in brospeak).

To hold everyone to such a standard is unrealistic at best, entirely ignorant at worst. That’s like me saying, “everyone should deadlift Sumo style” or “everyone should bench press with their heels down” or I don’t know, “everyone should be right handed.”

It’s dumb.

The conversation got me thinking about the topic of assessment and how, oftentimes, some coaches and trainers will marry themselves to one protocol or “one way” to assess their athletes and clients.

Now, don’t get me wrong: I wholeheartedly understand (and appreciate) that some demographics require specific assessment strategies to best ascertain what they’re unique needs are as it relates to the demands of their sport or profession.

I work with a lot of overhead athletes (baseball players) so it makes sense that, within the realm of their assessment and what’s important for them to be successful in their sport, I place a lot more scrutiny on their ability to upwardly rotate their shoulder blades, how much shoulder flexion they have, and whether or not they have ample segmental rotation.

However, how you go about assessing and what you look for in a gymnast will differ (in some regards) with how you assess a football player. And how you assess your everyday office worker/computer guy will most likely, in some ways, differ with how you assess a bomb sniffing dolphin trainer. It’s science.

In addition, there’s more of an onion to peel back and factors to consider once we start talking injury history (flexion based back pain vs. extension based back pain), training history, and goals.

In all, we could make the argument that no one assessment is the same given the plethora of sports, activities, hobbies, injuries, aberrant movement patterns, and training goals which exist amongst different populations.

Head, Shoulders, Knees Over Toes

I for one use and implement several assessment methodologies. You can plug in just about anything – FMS, PRI, SFMA, NASM – and I’ve likely used snidbits of each with the over thousands of assessments I’ve done throughout my career.

I think all are important, and all have their advantages and disadvantages. And, honestly, one of the advantages of working in the private sector is that I’m able to implement more of a smorgasbord approach to assessment if I so choose.

My assessments are more of a two-part show anyways:

1. The Poking and Prodding Part (which, not coincidentally, and unfortunately, is where many fitness professionals stop).

This is more or less the non-exercise static & dynamic assessment – testing things like shoulder flexion, scapulohumeral rhythm, hip IR/ER, glenohumeral ROM, toe touch, push-up, bodyweight squat, and, if need be, given a unique injury, performing more provocative tests to see what exacerbates their pain/symptoms.

The poking and prodding part (don’t be creepy about it) is an important part. It provides a lot of valuable information. I can implement screens that test passive ROM which essentially gives me feedback on their total ROM; but then it’s equally as important to include screens which test one’s active ROM which gives feedback on their available/usable ROM.

Lack of ROM isn’t always a mobility issue.


And while it’s not the case for everyone, many fitness professionals stop their assessment there – at the poking and prodding part.

Giving credit where it’s due: it’s amazing if they actually do this part. Many don’t even bother. It’s unfortunate, though, that this is the point where some stop. It makes me sad.

It’s only half the equation. It’s important to include the second part, too.

2. The “Lets Go Move Around and Lift Stuff” Part.

At CSP we’ll do the poking and prodding part and then go out on the gym floor and see what shakes free. I’ll often stay a fly in the wall and just see what people do without giving them much coaching. I want to see what their default movement patterns are when I say “deadlift that weight,” or “go pick that up.” It’s often uncanny how, what was perceived as wonky movement on the table, clears right up once someone is under load.

Too, the “pick stuff up” part serves as a way to give someone a little flavor for what to expect moving forward and get them excited to train.

How excited would you be walking into a new facility where, on day #1, all you did was stand there while a complete stranger “hmmm and ahhhh’d” for 60 minutes over your Thomas Test, told you how your left big toe doesn’t dorsiflex enough, your Zone of Apposition is all off, and that you’re going to perform a bunch of breathing drills?

Spending all that time telling someone how much of a walking ball of fail they are isn’t going to impress.

So yeah, get them moving!

Assuming they’re in the clear why not take a look at their deadlift (ability to hip hinge)? Or maybe take a look at their squat pattern with a barbell? You don’t need to go heavy, of course. But it stands to reason loading people up will offer a bevy of additional information.

Or maybe take a page out of Dan John’s latest book, Can You Go?, and implement some subtle performance based assessments/markers:

1. Plank – can they perform it (correctly) for two minutes? If not, well, they’ve got some work to do.

2. To the Floor and Back Up (I like this one a lot).

It’s just as it sounds. Tell someone to get down on the floor and back up. What do they do?

From Dan’s book:

Claudio Gil Araujo, who performed a study at the Clinimex Exercise Medicine Clinic in Rio de Janeiro, said being ablt to stand up from a seated position on the ground was “remarkably predictive” of physical strength, flexibility and coordination at a range of ages.

Araujo said, “If a middle-aged or older man or woman can sit and rise from the floor using one hand – or even better without the help of a hand – they are not only in the higher quartile of musculo-skeletal fitness, but their survival prognosis is probably better than that of those unable to do so.”


3. Farmer Carry

Have someone perform a loaded farmer carry for max time. Mark it down. When you re-assess a few weeks (or months) down the road and they’re able to carry a further distance, you know what you’re doing is working.

Dan’s Standards (from his Mass Made Simple book)

Bodyweight on left, load on the right:

– Under 135 pounds: 135 pounds.

– 136-185 pounds: 185 pounds.

– 186-205 pounds: 205 pounds

– Over 206 pounds: 225 pounds

For your “non-athlete” general fitness population clients the above suggestions are fantastic markers to get (and improve upon), and they probably won’t even realize you’re “assessing” them in the first place. Plus it adds more variety and fun to the overall process.

So in the end, there’s no ONE right way to assess. In addition there’s more to an assessment than having someone lie on a table and telling them how much their posture sucks.

Get people moving, people.

Want More?

Dean Somerset and I have already kick-started our Complete Shoulder & Hip Workshop tour in Edmonton two weekends ago. The feedback we received was amazing, and we’re excited to be hitting up various spots on North America soon:
ST. LOUIS: September 26-27th.
CHICAGO: October 17th-18th.
LOS ANGELES: November 14th-15th
I’ll also be doing a super special SOLO (1-Day) workshop in NYC at Legacy Strength located in Floral Park, NY. The workshop is titled Shoulder Assessment 101: Deconstructing Everything From Computer Guy to the Elite Athlete.
Date: Sunday, October 25th
Location: Legacy Strength, Floral Park, NY.
For more information contact Joey Olivo at: [email protected]
CategoriesAssessment Corrective Exercise Program Design

Is Corrective Exercise Overrated?

We got a doctor in the house!

Today’s guest post comes courtesy of Dr. Evan Osar, a Chicago based chiropractic physician and coach, and someone I’ve been a huge fan of since reading his first two books Form and Function and Corrective Exercise Approach to Common Hip and Shoulder Dysfunction.

His latest resource (a course, really), The Integrative Corrective Exercise Approach, is available starting today and is something I believe will add a ton of value to any fitness professional looking to take his or her’s assessment and programming skills to a higher, dare I say, Jedi’esque level.8

Is Corrective Exercise Overrated?

These days it’s hard to read an article or view a video about exercise without the mention of corrective exercise. Like many things in our industry, corrective exercise has its fair share of proponents as well as detractors. And there are plenty of facts and fictions about how to define corrective exercise and actually what it is.

FYI: Despite what Google says, this isn’t corrective exercise

In this article I am going to explain our concept of corrective exercise and dispel one of the biggest myths surrounding it.

I will also share with you how to integrate corrective exercise to improve the success you are already having with your general population clients. Because when you understand what corrective exercise is – as well as what it isn’t – you can create dramatic changes in your client results by implementing some very simple principles and key concepts into your programs.

Lets Do This

The first thing we need to discuss prior to covering the most common myth is to define the term corrective exercise. While it may seem like an issue of semantics, similar to other industry terms like ‘functional training’ and ‘core training’, corrective exercise takes on a variety of different meanings depending upon whom you speak with.

It’s important to recognize that our clients have developed their own unique and individual strategy for posture and movement. This strategy has been influenced and driven by many factors including but not limited to:

  • Things they have learned throughout their life such as adopting posture and exercise cues from their parents, therapists, and/or fitness professionals.
  • Compensations they have developed as a result of previous injuries, traumas, and surgeries.
  • Their lifestyle – sitting at a desk, the types of exercises they do and/or have done, how active they are or aren’t.
  • How they have been taught to exercise (for example many individuals have been taught to over-brace or grip as their primary stabilization strategy).
  • Their emotions or how they generally feel about themselves or their situation in life

These factors directly contribute to your client’s habits, which then dictate their current postural and movement strategy.

These habits are how your clients will perform most things in their life.

They will generally use this habitual postural and movement strategy when they sit, stand, walk, do their job, and exercise. It is these habits – actually their non-optimal habits – that lead so many individuals to develop chronic tightness, muscle imbalances that inhibit optimal performance in many of their activities, and which eventually lead to pain syndromes.

Because they become so engrained into their nervous system, most individuals are not even aware of these habits. This is why it is becomes so challenging to alter chronic posture and movement habits – they have been imprinted into their nervous system.

This is where we believe corrective exercise can play a vital role as part of an overall training system.

In our paradigm, we view corrective exercise as a strategy that consists of a thorough assessment so that you can:

  1. Identify the key factors contributing to an individual’s current postural and movement strategy.
  2. Utilize specific release and/or activation techniques to address the individual’s primary issues that are driving their chronic problems or loss of performance.
  3. Incorporate the principles of the Integrative Movement System™ – alignment, breathing, and control – into the fundamental movement patterns of squatting, lunging, bending, rotating, pushing, pulling, and gait so the individual can accomplish their health and fitness goals.

In other words, we view corrective exercise as a strategy – rather than a series of exercises – to help individuals develop and maintain a more optimal postural and movement strategy so that they can accomplish their health and fitness goal whether they be to exercise at a more intense level, develop a strategy for dealing with their chronic muscle tightness, or simply to live life with greater ease and less discomfort.

With an understanding of what corrective exercise is, it is also important to understand what corrective exercise is not.

Corrective Exercise Is Not:

  • A ‘fix’ for your client’s postural dysfunction, muscle imbalances, and/or pain.

  • A method for making individuals do their exercises in a ‘perfect’ way.

  • A group of remedial exercises that a client performs to undo the effects of performing inappropriate exercise (allowing clients to perform exercises in which they can’t maintain their alignment, breathing, and control).

  • A diagnosis or substitute for a thorough evaluation by a qualified health care professional.

  • A substitute for a well-designed integrative strength training program.

Note From TG: I really like that last point.

https://www.youtube.com/watch?v=oTY8bE6C1bs


Now that I have defined what it is and what it is not, here is the most common myth I hear surrounding the concept of corrective exercise:

Corrective Exercise ‘Fixes’ Postural Dysfunction and Muscle Imbalances

This is by far the biggest myth surrounding corrective exercise and the statement that its detractors most often bring up. This myth commonly stems from within the health and fitness industry because we like to make BOLD claims and then promise equally BOLD results.

We often claim things like:

1. ‘Everyone has a tight, short psoas’ from sitting too much so do this stretch and strengthening exercise (insert the novel stretch and strengthening exercise here) and you’ll fix everyone’s back pain.

2. ‘Everyone has forward shoulders from working on the computer so have your clients stretch out their pecs and strengthen their rhomboids and lower trapezius with some Y’s, T’s, and W’s and you’ll solve all your client’s shoulder problems’.

3. ‘Here’s the ‘best’ movement screen so you’ll know exactly what’s causing your client’s problems’ and here’s the corrective exercises to ‘fix’ those problems.

Making BOLD statements and promising BOLD results gets people to open the most recent blog or video post.

Making BOLD statements and promising BOLD results gets people excited that they have discovered ‘the answer’ to their clients issues.

However making BOLD statements and promising BOLD results also makes people lazy about performing their own assessments and determining the best exercises for the individual that they are working with.

Because the Truth Is:

  • Yes, some people have a tight psoas and weak glutes… and many do not. And for those individuals in the latter group, stretching their psoas and strengthening their glutes actually perpetuates the very problem causing their low back pain.
  • And yes, many individuals have forward shoulders and inhibited rhomboids and lower trapezius…and many do not. Doing Y’s, T’s, and W’s for example however do not even address the most common cause of the forward shoulder so again, these exercises will perpetuate and/or create an entirely new issue in your clients.


  • Finally, there is no magic screen or assessment that will tell you all you need to know about your client. You need to perform a series of assessments, combine them with your client’s intake and functional goals, and then determine where you would start with them. Then you must find the exercises that work best for your clients that help them address their biggest issues and how to incorporate these components into a well-designed program.

Conclusion

Corrective exercise is not a series of exercises designed to diagnose or identify the ‘fix’ for your client’s issues.

It is a strategy for implementing a thorough assessment, implementing the appropriate releases and/or activation sequences so that your client can achieve optimal alignment, breathing, and control, and then integrate these principles into the fundamental movement patterns and/or your client’s functional goals.

Used judiciously, corrective exercise is a part of an overall training strategy designed to look at your client as an individual and provide them with a viable option for successfully addressing their issues while working towards their functional goals.

Corrective exercise should enhance and not deter from developing greater strength, mobility, endurance, or other objective outcome. When you understand and integrate a successful corrective exercise strategy, you will help so many clients who have been struggling with chronic issues, safely and effectively accomplish their individual health and fitness goals.

About the Author

Audiences around the world have seen Dr. Evan Osar’s dynamic and original presentations.  His passion for improving human movement and helping fitness professionals think bigger about their role can be witnessed in his writing and experienced in every course he teaches.

His 20-year background in the fitness industry and experience as a chiropractic physician provide a unique perspective on corrective exercise and fundamental training principles for the health and fitness professional that works with the pre and post-rehabilitation, pre and post-natal, baby boomer and senior populations.

Dr. Osar has become known for taking challenging information and putting it into useable information the health and fitness professional can apply immediately with their clientele. He is the creator of over a dozen resources including the highly acclaimed Corrective Exercise Approach to Common Hip and Shoulder Dysfunction and the Integrative Corrective Exercise Approach.

CategoriesAssessment

Assessing Our Assessments: Shoulder Flexion

Assessment.

It’s a powerful word. A daunting word. A ten letter word. A word that means different things to different people.

But the word itself implies you’re assessing something.

So, what is it?

Well, given this is a fitness website it stands to reason that when I say the word “assessment” I’m not referring to one’s ability to color between the lines, write sick computer codes, or, I don’t know, how to say “excuse me, but can you tell me where the library is?” in Spanish9

No, in this context, when referring to the word assessment…I’m alluding to one’s ability to do “stuff.”

Particularly with their body. Most often in the weight room and/or within the confines of their respective sport(s).

But also their ability to perform every day life tasks – bending over to pick something up off the floor, reaching for something, carrying things, fighting crime, walking down a flight of stairs without snapping their hip in half – pain free.

The other day I said something halfway smart on Twitter:

I approach assessment with every person with a blank slate. While I’d be remiss not to mention we do have a “protocol” we prefer to follow at Cressey Sports Performance – namely because of the unique population we overwhelming work with on a daily basis, overhead athletes – it’s not uncommon for me to go off the beaten track when it’s called for.

Put another way…..

No two assessments are the same.

It’s outside the scope of this article to discuss the entire assessment process. Rest assured I’m asking all the pertinent questions: training history, injury history, goals, favorite Mighty Morphin Power Ranger, you know, the important stuff.

While every assessment is different, there is a go to “algorithm” that exists which helps guide the process and keeps this succinct and organized.

We generally start static to dynamic; proximal to distal; and seated/lying/ground-based to moving.

All that said, under the umbrella of assessment, there are certain protocols or screens I use with just about every client or athlete I work with – no matter what sport he or she plays or what their background is. There are some screens too valuable to omit.

Not only that, we have to be able to look at what the assessment is looking at, whether it’s looking at what we think it’s looking at, and whether or not it’s telling us as much information as we think we’re getting from it.

I don’t even know if that makes any sense, but I’m going with it.

Basically all I’m saying is that, while assessment is cool and all, a lot of fitness professionals really suck at it and have no clue what they’re looking for.

Lets take a look at the standing shoulder flexion screen.

To the casual fitness professional this screen tests one’s ability to get their arms over their head.

It goes like this:

Trainer to Client: “So, like, stand there and lift your arms over your head.”

Client to Trainer: “Like this?” [Cue picture pictured below, the one on the left].

Trainer to Client: “Yes! You did it! Well done. Lets go kip.”

Client to Trainer: “Right on. Weeeeeeeeeeee”

To the untrained eye (again, looking at the picture to the left), and to someone who doesn’t know what to look for, things look a-okay.

Arms + Overhead = Able to train.

But to me it looks like a nightmare. There’s significant forward head posture in conjunction with a massive rib flair and hyperextension through the lumbar spine.

[Not coincidentally, lack of shoulder flexion could easily explain why someone has chronic lower back issues. Look at what happens every time they do anything overhead. They crank through their lumbar spine. Just sayin…..]

When corrected – picture to the right – total ROM (shoulder flexion) is reduced because compensation patterns are corrected (no head protraction, rib flair, and pelvis is more posteriorly tilted). And this isn’t even half bad. I’ve seen way worse. Some people I’ve worked with couldn’t get their shoulders past 75 degrees of shoulder flexion when I made sure they weren’t allowed to compensate!

Candidly: if someone can’t pass this simple screen they really have no business doing anything over their head in the weight room, kipping pull-ups included.

So this begs the question: What prevents someone from getting full shoulder flexion in the first place?

It could be any number of things:

1. Shoulder Capsule, osseous changes (which, admittedly, aren’t very common).

2. Soft tissue restrictions – subscapularis, lats, teres minor, traps, etc. (much more common).

3 Lack of scapular upward rotation (instead of upwardly rotating scapulae, they shrug).

4. Thoracic spine mobility.

5. And lastly, and something Mike Reinold speaks to quite often, lack of lumbo-pelvic hip control.

I’m not going to hit on every point above today. I’d encourage you to check out Mike Reinold’s site and/or look into his and Eric Cressey’s Functional Stability Training series (which goes into the geeky stuff in MUCH more detail).
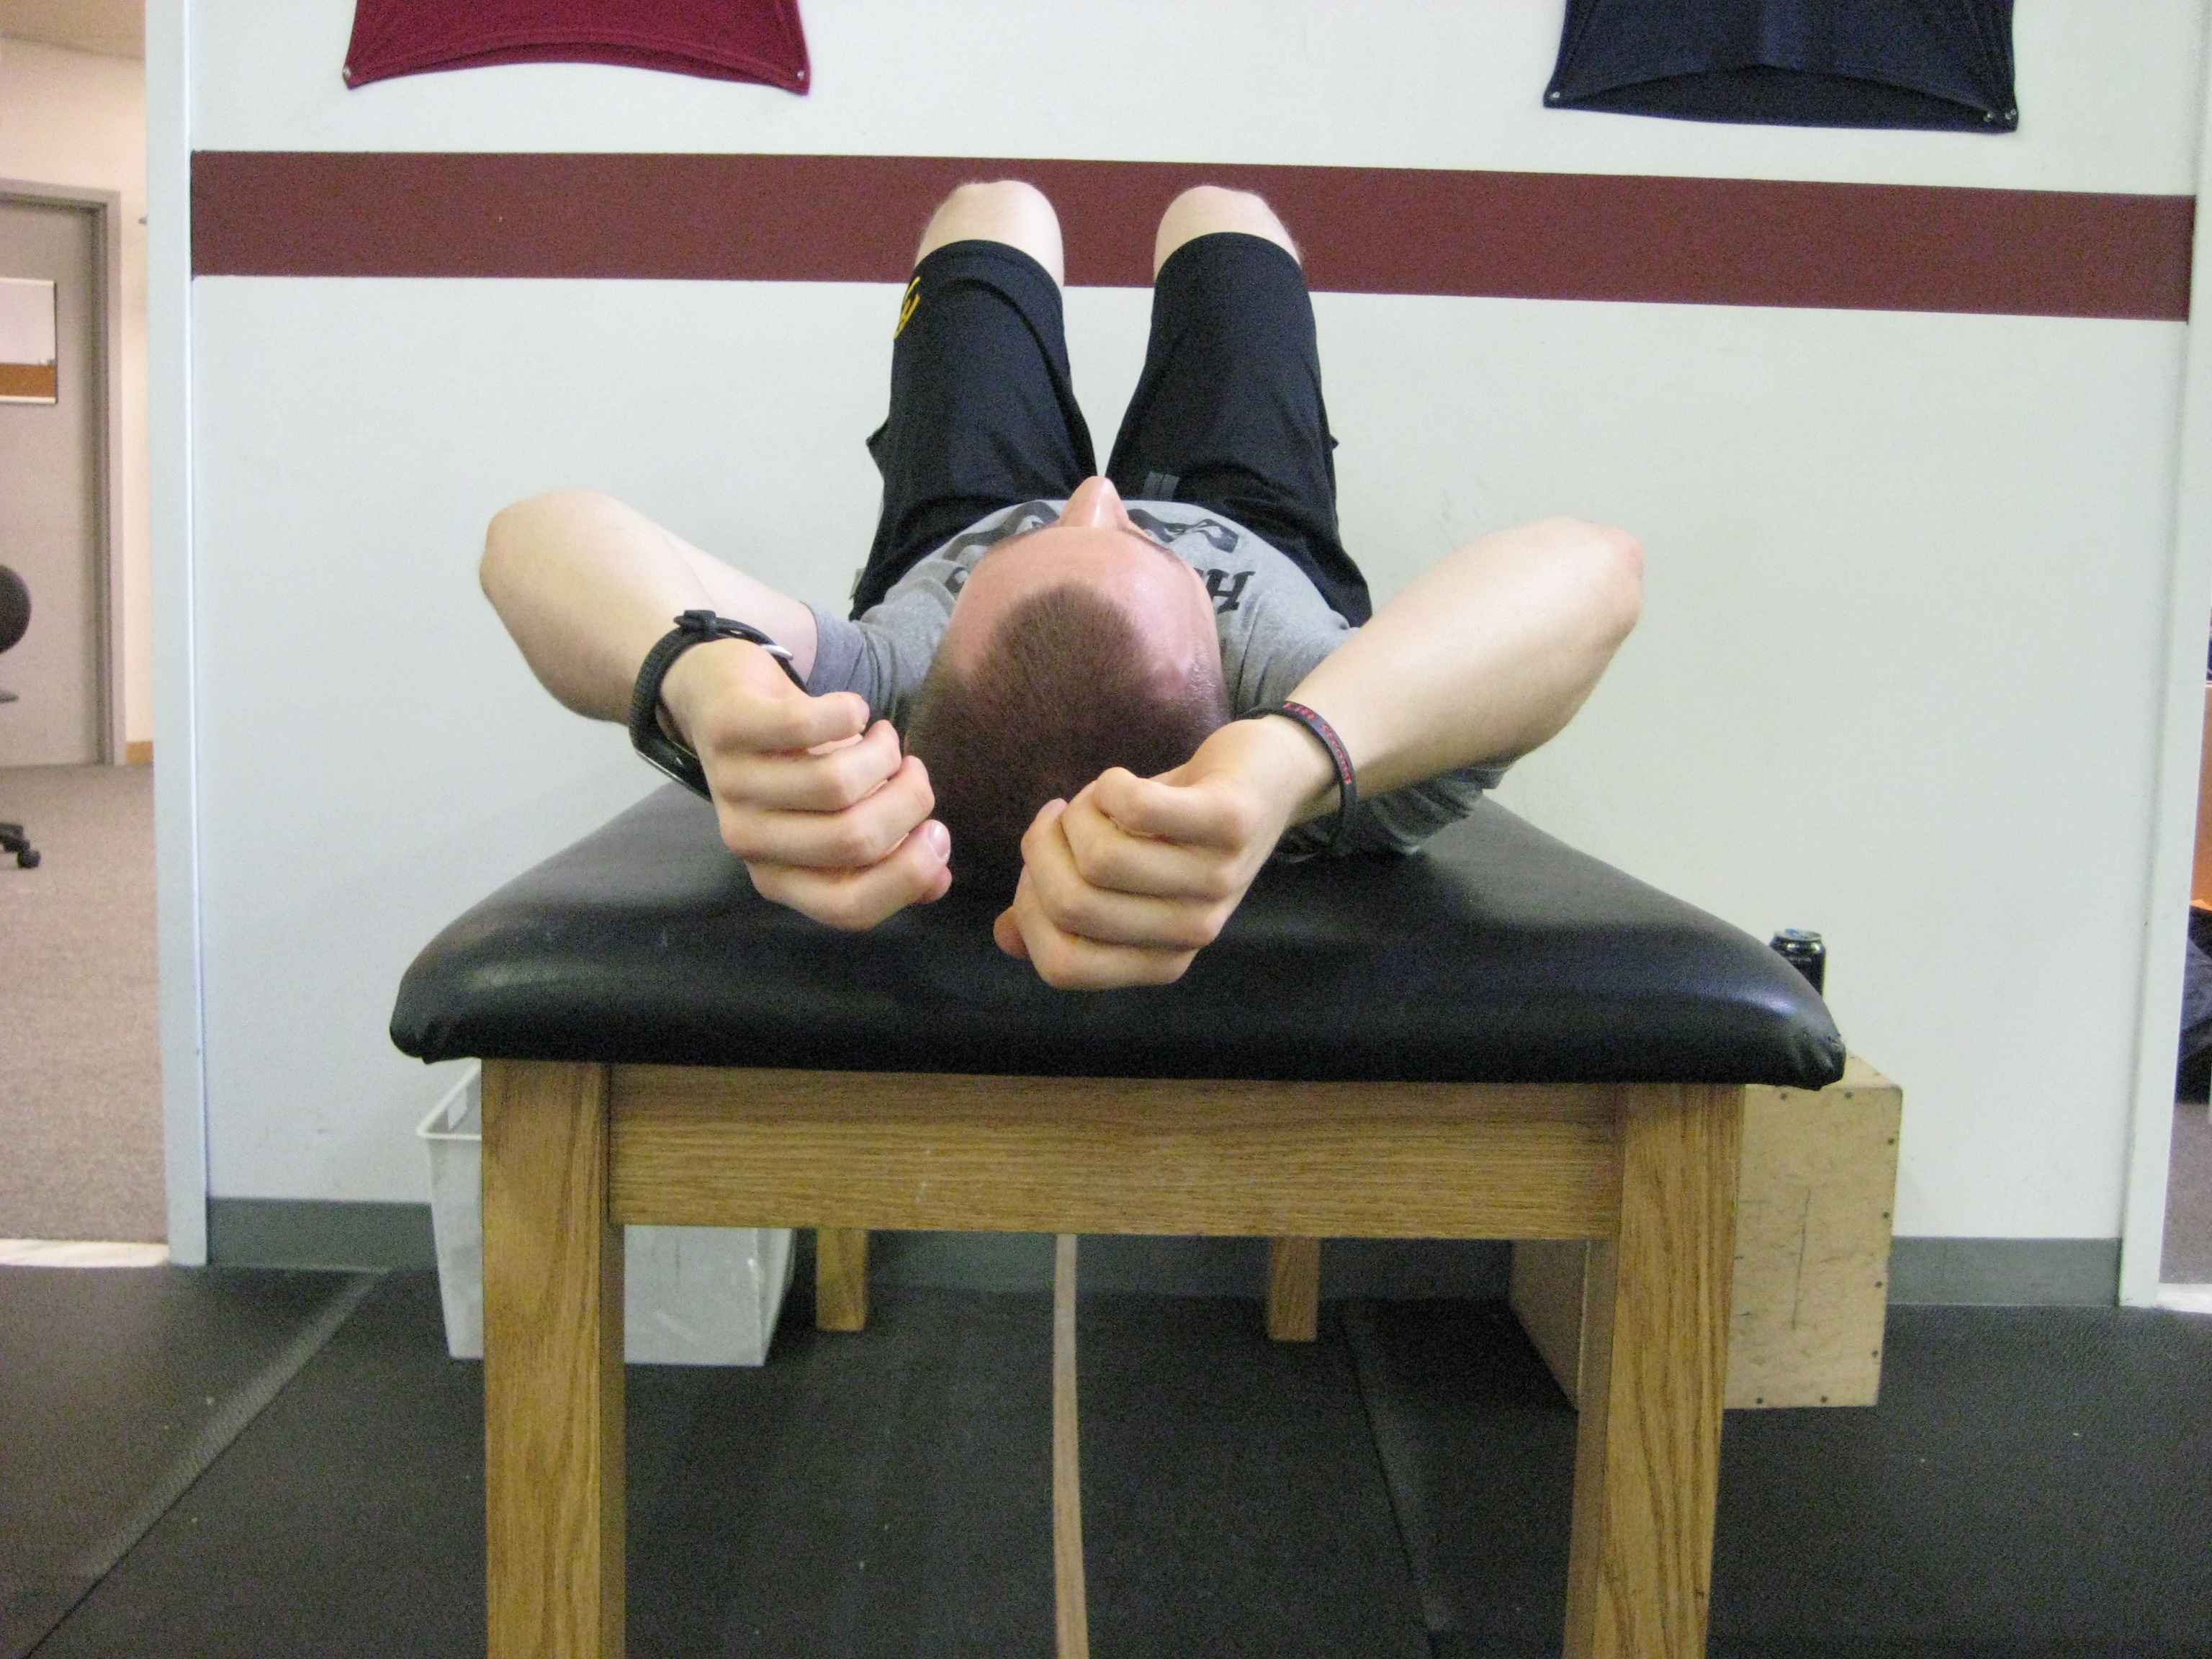
What I will delve into is how, when someone does present with a lack of shoulder flexion, you can differentiate between whether you’re dealing with a lat length/soft tissue restriction or if it’s a anterior core/pelvic control issue.

Easy – test their PASSIVE range of motion.

Like this.

Have them lie on their back (making sure to bend their knees to flatten out the lumbar spine and to account for any excessive rib flair). If their upper arms don’t touch the table….you’re most likely dealing with a soft-tissue restriction (lats, teres minor, traps, rhomboids, etc).

Hammer the lats with some t-spine mobility drills like this one:


And you can hit the rhomboids and traps using this drill:


And you can get the teres minor using this drill (thank you Mike Reinold).


If you test someone on their back and they pass with flying colors (I.e., their arms touch the table), then it stands to reason you’re probably dealing with a lumbo-pelvic control issue and a weak anterior core.

In that case my go to is coaching someone through deadbug variations.

Standard Deadbug – with emphasis on exhale


Note: these can be regressed to include arms only or legs only (or even legs bent so ROM is decreased).

Stability Ball Deadbug


Note: placing the stability ball between contralateral elbow and knee forces the trainee to squeeze the ball, thus activating the anterior core to a more effective degree.

Core Activated Deadbug w/ KB


People will often roll their eyes at deadbugs – deeming them too easy. That is until they do them correctly.

As well we can’t discount other exercises and drills that challenge the anterior core and pelvic control. Push-ups (and their infinite variations), birddogs, bear crawls, chops, lifts, Farmer carries, Pallof Presses, asymmetrical loaded lifts….all are fair game in my book.

The bigger picture, however, is to pay closer attention to what you’re actually assessing. Does the assessment itself assess what you think it’s assessing? Moreover, are you able to interpret what it’s telling you correctly?

If yes, awesome. You win the internet today.

If no, WTF are you doing???

CategoriesAssessment personal training

What I Learned Taking the FMS

This is what I looked like last Sunday after spending three days and 20 course hours taking the Functional Movement Screen (FMS) I & II modules.

That’s my face melting.

It sounds (and looks) like a bad thing, but I assure you it’s the exact opposite.

Sitting through 20 hours of anything can be daunting.10

Sitting through 20 hours of non-stop talk on anatomy, assessment, corrective exercise, and how much I suck at the Active Straight Leg Raise can be downright overwhelming. And to be honest there were times I was overwhelmed.

But this was easily one of the best 20 hours I’ve spent doing anything not involving a book, baseball, Star Wars, or chocolate covered strawberries. BOM CHICKA BOM BOM.

Trying to overview the entire experience in one simple blog post isn’t doing it any justice. But I figured I’d try to highlight some “big rock” concepts and tidbits of information I learned while everything was still fresh in my head.

Lets Do This

I’d be remiss not to first give a shout out to both Functional Movement Systems and Perform Better for putting on and running a class-act event. The two together are like peanut butter and jelly or Jordan and Pippen or Batman and Robin (<— without the weird sexual tension).

I’d also be remiss not to lend a huge kudos to the bandleader, Brett Jones, who was the epitome of class and professionalism the entire weekend. He’s like Justin Timberlake, only with kettlebells. And a 500+ lb deadlift.

He along with Mike Perry and Diane Vives did an amazing job coaching all the attendees up and offering their expertise. A slow clap goes out to all of them.

NOTE: From here on out I’m using bullet point format because what follows is going to be a massive brain dump that may or may not make any sense. Good luck.

– The “S” is the most important letter in “FMS.” It’s a (S)creen. Nothing more, nothing less. It’s NOT an end-all-be-all assessment. I’ve always used components of the FMS when assessing my athletes and clients, but always viewed it as the outer layer of an onion. If I need to peel back more layers and dig deeper with other protocols I will.

What does the FMS accomplish? In a nutshell: it ascertains whether or not someone can “access” a pattern.

– Simplifying things even more: the FMS helps to figure out if “you move well enough to do stuff.”

– The FMS can also be seen as a litmus test to see if someone is at risk for injury. Of course a previous injury is going to be the greatest risk factor, but the FMS looks at other things such as asymmetries, mobility, stability, and neuromuscular control.

A great analogy that Brett used to describe the process was to ask the audience whether or not smoking increases the risk of cancer? Yes. Does not smoking protect you from cancer? [Interesting question, right?]

Just because you do or do not do something doesn’t mean anything. The primary goal(s) of the FMS is to set a movement baseline, identify the pain or dysfunction, and set up proper progressions and conditioning to address it.

– Fitness professionals are the worst at testing. We overthink things. There’s no such thing as a “soft” or “hard” 2. There’s no such thing as a 1+ or 1-. The screen is the screen, and it’s important (nay, crucial) to hold yourself to the standards and criteria set forth by the manual.

I’m paraphrasing here, but either shit looks good – and meets the criteria for testing – or it doesn’t.

You can’t overthink things or start doing stuff like, “well, his heel only came up a teeny tiny bit, and only rotated 8.3 degrees. I guess that’s a 3.”

– We can’t feel bad for giving people the score they present with and deserve. It’s doing them a disservice in the long run. It’s just like Brett said and made us pledge as a group before we started testing one another: “I’m still a good person and am not a failure if I score a 1.”

It’s not the end of the world and you won’t be considered the spawn of Satan if scored a “1” on your Deep Squat screen.

Life…will…go…on.

https://www.youtube.com/watch?v=Ois60CobLZM


– If pain is present…ALWAYS REFER OUT. If pain is present and persists, don’t just blame the hip flexors. Again, as Brett noted, there’s 32 muscles that act as hip flexors, why is the psoas always the culprit for back pain? If you do the screen, apply the correctives, and pain persists, it’s (probably) something deeper and outside your scope of practice.

Seriously, refer out.

But that doesn’t mean we still can’t train the athlete or client. As coaches we can usually train around any injury; we don’t need to keep everyone in a safe bubble where we just tell them to “rest.” To me that’s unacceptable and not an option.

– Take a gander at the Functional Performance Pyramid. Don’t worry I’ll wait.

If you decrease one’s movement capacity and increase their performance (make the movement block less wide compared to the performance block), that’s bad.

If you increase one’s movement capacity (think: yoga) and decrease their performance, that’s also bad.

We’re really good as coaches and personal trainers at building better engines (improving performance), but neglect to address the brakes and suspension (movement). Hence, people often break down sooner.

This is also another fantastic reason why the FMS is valuable. It’s helps you figure out where people need the most work/attention.

– Raise your hand if you feel the Active Straight Leg Raise is a great screen to test for hamstring length.

It’s not.

If anything it’s more of a screen for the “core,” and how well you’re able to control your pelvis. I.e., can you maintain extension on the down leg as you bring the other into hip flexion (and vice versa).

– The Deep Squat Screen (<—- bolded on purpose) takes place with the toes pointing straight a head. It’s not how we coach the squat in the long run.

1. Toes forward provides some semblance of standardization. It doesn’t make sense to allow people to externally rotate their feet (even a little bit) because that defeats the purpose. You allow someone to rotate 5 degrees, and the next person rotates 15. Like, WTF?

2. Toes forward also makes it easier to see faults and compensations in the pattern.

I literally had a “tense” exchange with a female attendee who gave me push back on making her perform the screen with her toes pointing forward.

Her: “Well I can’t squat if they’re forward!”

Me: “Then you won’t get a 3.”

Her: “Last time I went to this (she attended module I at a previous time), I was told we could point our toes out.11

[Relax, deep breaths]

Me: “Sorry but we were told otherwise yesterday. Toes forward.”

Based off her reaction you would have thought I insulted her yoga pants. With a little bit of a huffy attitude she reluctantly conceded and ended up with a 2.

I guess I’m an asshole.

– Corrective exercise is like boxing. It’s generally accepted that there are four different kinds of punches in boxing: the jab, cross, hook, and uppercut. The Five-Point-Palm-Exploding-Heart-Technique from Kill Bill didn’t make the cut.


You don’t need 500 different correctives to “fix” something. You only need a few and to OWN each one. Don’t overwhelm your clients with 17 different variations of glute bridges to perform before they go to bed. They’re not going to do them. Ever.

– Breathing is all the rage in fitness today. And for good reason: it’s something that needs to be addressed.

I’ve seen magical things happen when you help someone address a faulty breathing pattern. But pigging back off the previous comment about corrective exercise, you don’t need to get all fancy pants on people.

Showing your athletes and clients how to properly perform “crocodile breathing,” where they learn to get 360 degree expansion (and to not rely on their accessory muscles like the upper traps, scalenes, etc) can go a long ways in helping to set the tone on fixing stuff….even a straight leg raise or shoulder mobility.

Dumbledore can’t even do that.


How’s that for a super scientific explanation.

– You need to be RELAXED when you foam roll. We’re not deadifting max effort weight here. Chill out.

– Don’t underestimate the power of grip work (squeezing the handle of a dumbbell or kettlebell) to help improve rotator cuff function as well as shoulder mobility.

– You need a minimum of 30 degrees of ankle dorsiflexion to run well. Just sayin…..

– Here’s one of the best analogies I’ve ever heard with regards to overhead pressing courtesy of Brett Jones. When explaining the path of the DB or KB during an overhead press tell your client to pretend as if there’s a booster rocket underneath the elbow and that it takes the weight to space.

The path should be straight up, not to the side or in a zig-zag fashion. Straight up.

I Could Easily Keep Going

But I think that’s enough.

Needless to say I HIGHLY encourage any and all fitness professionals to attend one (or both!) of these courses if you have the opportunity to do so. I learned a ton and there’s no reason to suspect you wouldn’t either.