CategoriesConditioning Program Design

Conditioning That Won’t Make You Hate Life *That Much*

Lets get right to the point.

Conditioning – how much to do?, how “hard” should it be?, what modalities are best? – can be a conundrum for many.

As with any question the appropriate answer is “it depends.”1

That said, the questions above are no different but are predicated on a number of things: one’s goal(s), injury history, current ability/fitness level, and whether or not they’re Bo Jackson.

Okay, that’s the epitome of “it depends.”

Even still, there’s no way a simple blog post can appropriately articulate the expansiveness of this topic and all the components at play.

However, I will say this:

  1. Conditioning as a means to AID RECOVERY is crucial.
  2. Conditioning is not more effective the harder you make it. I.e., it shouldn’t make you shit your spleen. If it does, you may want to head to the nearest hospital.

Conditioning That Won’t Make You Hate Life (That Much)

At the expense of making things a bit too over-simplistic, in my opinion, conditioning is more about helping to increase one’s work capacity (or ability to do more work in a given time).

Watering it down further and directing my train of thought to most of you reading: low(ish) intensity conditioning can help in the weight room and improve recovery and performance.

But if you prefer a more smarty-pants explanation, I like Alex Viada‘s say on the matter:

“If the goal is to improve work capacity (ability to do more work in a given time) it’s crucial to employ modalities that aid and promote general recovery which also create positive adaptations in durability, energy stores, cardiac output and cardiac perfusion, and other general components of overall endurance that essentially provide the foundation for an athlete to train and compete for longer while recovering better.”

The key, though, is not to be an asshat and turn something that’s supposed to, you know, help you recover…and turn it into loaded Prowler sprints paired with 400m handstand walks over broken glass for AMRAP.

Again, I can’t say this enough…

AIDING RECOVERY IS THE GOAL.

Here are a handful of my favorite go to protocols.

1. You Haven’t Been An Athlete For 20+ Years So Lets Stop Pretending You Are One Movement Circuit

Sprinting, more often than not, will not be my first choice for most trainees.

It’s too aggressive and most people just aren’t prepared for it. Repeatedly stabbing themselves in the neck with a cactus would likely be more beneficial.

I keed, I keed.

At some point I may venture into opening things up and introducing some sprint work into the mix.  But in the meantime, for most people, a more down to Earth approach to movement training/conditioning would be to implement more basic calisthenics like skipping, side shuffling, and the like into the mix.

  • 20 yd Forward Skip
  • Walk/jog 20 yd
  • 20 yd Reverse Skip
  • Walk/jog 20 yd
  • 20 yd Lateral Skipping/direction
  • Walk/jog 20 yd
  • 20 yd Side Shuffle/direction
  • Walk/jog 20 yd
  • 20 yd Carioca/direction
  • Walk/jog 20 yd
  • Rest 1-2 Minutes
  • Repeat for 3-5 Total Rounds

2. Tempo “Sprints”

My expectation isn’t that everyone has to look like Tom Cruise sprinting from an alien in order to perform sprints:


However, there should be a “base” level of competence involved which is where coaching comes into fruition. That said, sprinting doesn’t always have to be an-all-out-holy-fucking-shit-that-skyscraper-is-going-to-collapse-on-my- head-if-I-don’t-high-tail-it-out-of-here endeavor.

Strength coach Mike Boyle has always championed “tempo runs/sprints” as a conditioning method for his athletes AND regular Joe’s and I agree wholeheartedly.

I think they’re fantastic.

Basically all you do is perform sprints at 60-75% effort with walking recovery.

A basic template would look like this:

  • Tempo Sprint 50 yd
  • 50 yd walk back
  • Repeat for “x” number of rounds

A good rule to follow is no more than a 10% increase in volume (distance or time) each week.

3. Add a Prowler

There are a thousand and one different ways to implement conditioning with Prowler Sled.

One that I like is this:

  • 20 yd (loaded) Prowler Sprint (or whatever is best suited for the person: loaded, un-loaded, sprint, walk, pants on, pants off, you’re the coach, figure it out)
  • 40 yd Jog
  • 80 yd Walk (recover)
  • Repeat 8-10 Rounds

4. Something I Stole From Chad Wesley Smith

Strength coach Chad Wesley Smith defines tempo as the following:

“Tempo activity is done at 60-75% of max intensity and while the duration will vary based upon the nature of the activity you’re performing and your requisite fitness levels, 15-45 seconds of work is a good guideline. These work intervals are interspersed with low intensity calisthenics like push-ups, ring rows, abs, or can just be rest periods.”

One of Chad’s favorite protocols (and one I stole from him) is as follows using a stationary bike:

  • 1st Rep: 30 seconds of riding (~110 rpm) followed by 10 push-ups, rest until heart rate returns to bottom aerobic development zone OR you can speak normally.
  • 2nd Rep: 3o seconds of riding (~110 rpm) followed by abs, rest until heart rate returns to bottom aerobic development zone OR you can speak normally.
  • 3rd Rep: 30 seconds of riding (~110 rpm) followed by 10 push-ups, rest until heart rate returns to bottom aerobic development zone OR you can speak normally.
  • 4th Rep: 3o seconds of riding (~110 rpm) followed by abs, rest until heart rate returns to bottom aerobic development zone OR you can speak normally.
  • 5th Rep: 30 seconds of riding (~110 rpm) followed by 10 push-ups, rest until heart rate returns to bottom aerobic development zone OR you can speak normally.
  • 6th Rep: 3o seconds of riding (~110 rpm) followed by abs, rest until heart rate returns to bottom aerobic development zone OR you can speak normally.

Rest 3-5 Minutes and begin Set 2.

Two sets of SIX is a good starting point and over a number of weeks build up to TWO sets of TEN and maintain there.

5. Juarez Push-Up Inverted Circuit

This is a doozy I stole from another strength coach, Josh Bryant, of Jailhouse Strong (which should give away where the name of this circuit came from).

  • Perform 10 Push-Ups
  • Get up, walk/jog 20 yds
  • Perform 1 Push-Up
  • Get up, walk/jog back 20 yds
  • Perform 9 Push-Ups
  • Get up, walk/jog 20 yds
  • Perform 2 Push-Ups
  • Get up, walk/jog back 20 yds
  • So on and so forth

Perform any of these conditioning workouts on “off” days between your regularly scheduled workouts and I am willing to bet you’re going to see some drastic improvements in your ability to recover and work harder in the gym.

Categoriescoaching Conditioning

Finishers That Will Finish You

Anyone familiar with the video game Mortal Kombat will appreciate the slight reference to it in the title of today’s post.

Finish him.”2

Today’s guest post from Cressey Sports Performance coach and Strength Camp Coordinator, George Kalantzis, showcases some “killer” finishers that you can use at the end of your workout to add some extra conditioning or make you hate life.  Whatever floats your boat.

Enjoy.

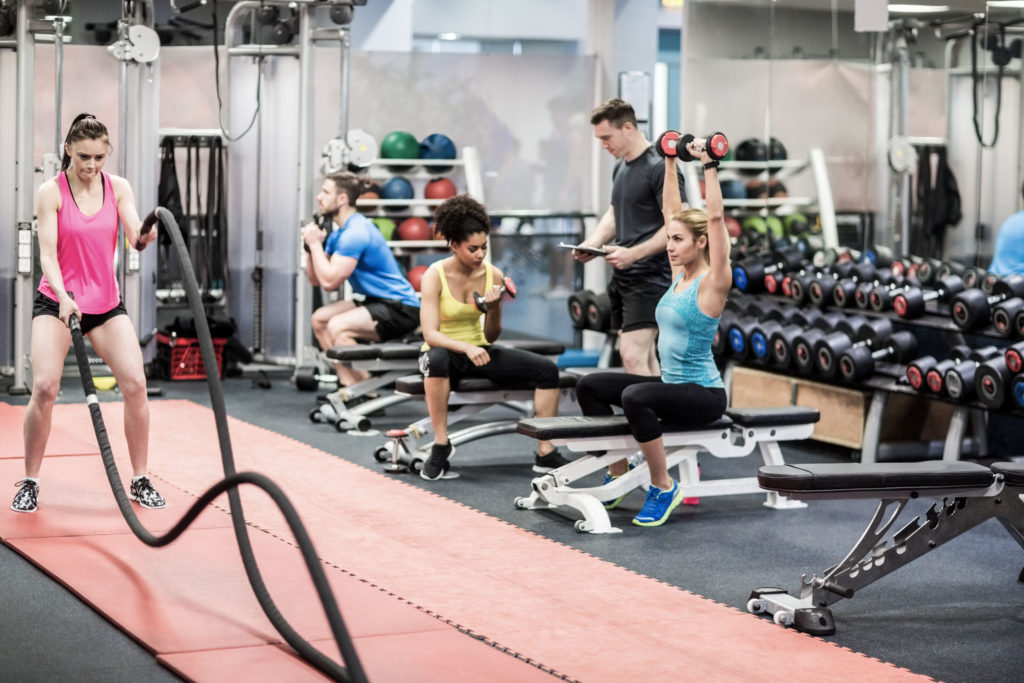
46688753 - fit people working out in weights room at the gym

Copyright: wavebreakmediamicro / 123RF Stock Photo

You want to be shredded and understand that you need to train hard to get results. For many a great way to help expedite the process is to add high intensity short duration workouts to your training regimen.

What is A Finisher And How Do You Use Them?

A finisher is simply a short burst of high intensity training performed at the end of a workout that will drastically improve your conditioning levels and bring out that six pack. The cool thing about finishers is that you can use pretty much anything from your own bodyweight, to ropes, sleds, and barbells.

The sky is the limit when it comes to finishers.

When Do I Use Finishers?

For someone who is training 3x per week, full body routines, you could add those at the end of your workout for maximum fat burning effects. For those that prefer the traditional upper/lower split 4-5x’s a week, the type of finisher you would add depends on the amount of volume during your session.

For example, if you are lifting heavier earlier in the week, it would be wise to challenge your body in the same way so that your workout does not interfere with recovery. And on days that you have decided to take it lighter, maybe you could add in that extra finisher.

Lets say I squatted heavy on Monday, I would follow the workout with some 400 meter repeats for best results, and maybe towards the end of the week I would choose to do something less hellish like a slow intensity cardio based session.

Copyright: nndemidchick / 123RF Stock Photo

Everyone is going to be different and ultimately it is going to depend on your fitness level, the amount of time you have available, any other external stressors that you may have going on within your life.

The following workouts are designed to be finishers at the end of a workout and should last 5-10 minutes depending on your conditioning level.

You could also use them as an extra conditioning day during the week or when strapped for time. These circuits will be sure to jack up your heart rate and send your metabolism into overdrive.

Finisher City

1) Dumbbell Shoulder Carry/Renegade Rows

Grab a pair of dumbbells and choose wisely. This is a great circuit that can be used as pre-work to fire up the core and shoulders or as a finisher.


2) Kettlebell Complex Finisher

The KB finisher is probably one of my favorites to use in my own workouts and with clients. It really challenges your endurance and strength in one and is fun because you switch between three different exercises to prevent boredom.


3) Battle Rope Core Crusher

When you think about getting shredded, there is no better tool than the battle ropes. The cool thing about ropes is that you can pretty much take them anywhere from outside to inside, and they are so versatile that anything can go. Check out this core crusher . Be warned, it is not as easy as it looks, and 20-30 seconds of work can typically get the job done.


4) Sprints

What good would finisher be without sprinting? Sprint intervals have been shown to increase testosterone levels and prevent decline it’s decline so what are you waiting for?

Here is some of my sprint favorite to use:

  • 400 meter sprints for best time at least 90 second rest in between

Sprint for 15 seconds light job for 45 seconds Repeat 4-5x’s, increasing the number of rounds every week as you progress. This number is not set in stone, and any shorter interval bursts with a minimum a 2:1 rest to work ratio will do the trick.

Very tough : Want to really challenge your endurance and jack up your heart rate? Try 800 meter sprints, but you have been warned, these are not easy!

Conclusion

If you want to get shredded, will most likely help. They require a tremendous amount of effort but will be sure to boost your testosterone levels while elevating your fat loss levels. Use them at the end of the workout or during your off days for maximum results.

About the Author

George began his time at Cressey Sports Performance as an intern in the fall of 2013, and returned in 2014 as CSP’s Group Fitness Coordinator, overseeing all Strength Camp coaching and programming responsibilities.

George is a veteran of the United States Marine Corps and was awarded an honorary discharge after eight years of service. He possesses an MBA from Southern New Hampshire University and is currently attending massage school to become a licensed massage therapist.

Outside of CSP, George maintains a fitness-related blog that can be found at www.sgtkfitness.com.

He and his wife Shawna reside in Manchester, NH.

CategoriesConditioning Fat Loss

Cardio For Meatheads

I hope everyone had a lovely Christmas or start to their respective Holiday Season. Lisa and I are currently in the Dallas/Fort Worth area visiting family so I’ll be taking a brief hiatus from the website this week. Thankfully a few friends and colleagues were kind enough to pinch hit for me and provide some stellar content in my absence.

First up is Shane “The Balance Guy” McLean who’s written several excellent articles for this site in the past. Today he discusses “cardio” for meatheads.

Cardio For Meatheads

I despise traditional cardio.

I’d rather pour gasoline over myself and jump into a fire than run on a treadmill.

However, give me a barbell and a few weight plates and I’m happier than a pig in mud. Happier pigs make yummier bacon, and the World Health Organization should be dammed, just saying.

For the most part, I’ve been a guy who never really found it difficult to get lean.

However, this has been harder as I’ve gotten older. This creates a conundrum as strength training is no longer enough for me to drop fat, but joining those cardio bunnies on the dreadmill is never an option.

Since the health benefits of cardiovascular exercise are undisputed, and the theory that cardio eats muscle like termites through wood has been smashed to pieces (Alex Viada is a prime example), I should suck it up and join the masses, right?

With most gyms having battle ropes, kettlebells, and medicine balls, that’s never going to happen. After all, there are more interesting ways to get your sweat on instead of being held captive by the treadmill or elliptical.


The beauty of using these tools is it saves your joints from taking an unwanted pounding on the treadmill, and with little or no eccentric stress involved with the exercises below, you’re not likely to get sore afterwards which allows you to have your bacon and eat it, too.

The routines below are my go to cardio when training for strength or hypertrophy.

Insert these at the end of your training as a finisher or between strength training sessions in place of traditional cardio. Smile and wave at the cardio bunnies while you’re sweating because they’re probably wondering what the heck you’re doing.

1) Battle Ropes/Side Plank Combo

I borrowed these from the Sons of Strength, Eric and Ryan Johnson. This combination is brutally effective and a great way add some extra core work in.

Instructions – Do any variation (see video below for ideas) for 30 seconds and then immediately get into side plank. Make sure to breathe down into your belly and engage your glutes. Hold this for 30 seconds. Go back to the battle ropes for other 30 second interval and do the side plank on the opposite side. Repeat this sequence for 10 minutes.

https://www.youtube.com/watch?v=QStcSUGBJ1I


2) Kettlebell Swings/RKC Front Plank

This is another combo I stole from the Sons of Strength. Holding a full tension plank after heavy kettlebell swings is a challenge you’re sure to enjoy.

Instructions – Do 20 Russian Style kettlebell swings and then immediately get into an RKC Front plank. Once you have hit full tension take 10 deep inhales (and exhales) while maintaining full tension. Repeat the kettlebell-plank sequence for 5- 10 rounds.


3) Kettlebell Swings/Medicine Ball Slam

This duo will get your heart racing because the heart is working double time pushing blood from the lower to the upper body and back again. As an added bonus your lungs will burn, which is a sure sign of a good time. It will help to channel your inner Hulk smash on the slams.

Instructions – Do this as a countdown superset. Do 20 reps each of the swings and the slams and go down by two each time you perform a round until you reach two reps for each exercise (for example 20-18-16-14….2). If you don’t have access to medicine balls, substitute in battle rope slams.


Note – You can mix and match these combinations to keep things interesting. For example

  • Swings- Side plank
  • Battle ropes- RKC front plank

4) 10 Minute Farmers Carry  

Dan John is a believer that inefficient exercise (exercises you suck at) is essential for fat loss and the farmers carry definitely fits the bill.

The following 10 minute carry combination is straight out of Dan’s play book which I unashamedly stole for your benefit.

At first glance this appears easy, but this carry combination will light you up.

Instructions – Depending on your strength level, start with one 20, 25 or 30 pound kettlebell. Hold the bell overhead (bottoms up) and walk, keeping your biceps by or behind your ear. After you lose your grip, stop and reset. When you lose your grip for the second time, bring the bell into the rack position and keep walking.

Once you lose neutral wrist position or your upper back is screaming at you, hold the bell suitcase style by your side and keep walking. Do this for a total of 5 minutes on each side.

Wrapping Up

Conditioning shouldn’t always be a grind and neither should it stand between you and your gains. This is a time to keep it short, sweet, intense and most of all fun.

After all, life is too short to be bored out.

Author’s Bio

Shane “The Balance Guy” McLean, is an A.C.E Certified Personal Trainer working deep in the heart of Dallas, Texas.

No, Shane doesn’t wear a cowboy hat or boots.  After being told that his posture blows by Eric Cressey, he has made it his mission to rid the world of desk jockeys, one person at a time, and have fun while doing so.

CategoriesProduct Review Program Design

Lets Talk (Over) Conditioning

Today I have a guest post from the one and only (and lovely), Jen Sinkler. It’s a timely post because 1) I’m in Australia and Lisa would kill me if I spent all my free time working and 2) Jen’s just released her updated Lifts Weights Faster 2.0.

I loved the first version when it came out last year; and to be speak candidly, outside of the athletes I train who need more specificity with their conditioning, when it comes to writing conditioning based programming (whether for myself or for my general fitness clientele) I tend to flip through LWF 1.0, find something the fits (10-30 minute workout), and sucktitude follows. But in a good way.

LWF 2.0 is 10x better and Jen has gone out of her way to provide an epic product that I feel is one of the best of its kind.

But that doesn’t come without a brief caution: OVER-conditioning. It’s a topic that Jen discusses below.

Lets Talk (Over) Conditioning

If you’re feeling pressure to make all your workouts the hardest, biggest, and most intense ever or else you’ll end up like this guy, you’re not alone. The go-hard-or-go-home mentality is pervasive, making many people fret worry that if they don’t do a body-crushing session every time they work out, they’ve failed.

In reality, the truth is nearly exactly the opposite. You can still make progress without destroying yourself. In fact, you can make bigger strides, more consistently and for the long term, when you don’t leave it all on the gym floor.

That doesn’t mean take it easy — it just means don’t run your body (and along with it your mind and spirit) into the ground by forcibly pushing past your limits every workout (maybe even any workout). You’ll find that this bod-friendly approach will net you even more positive results in the long run.

CHILL, HONEY BUNNY!

As a culture, we are obsessed with extremes. And maybe we don’t need to be. One of my fellow trainers at The Movement Minneapolis, “Cardigan Mark” Schneider, puts fitness on a spectrum — from ill to athlete.

From a marketing standpoint, the “athlete” end of the spectrum is sexy, but it can come at a high cost, in the form of overuse or acute injuries, chronic wear-and-tear on the body, and amount of time invested.

So let’s flip the script: What can you gain by easing off the gas slightly? Fewer injuries, less stress on the body, and a more sustainable fitness regimen — which is clutch, considering consistency is one of the keys to long-term success. Consider it a huge deposit in the bank for your future self; the you 10 years from now will be eternally grateful that you didn’t empty your account and push your body to the point of injury today.

Not always turning the dial up to 11 will also net you more time, money, and energy. If every workout has a cost, overdrawing our accounts means our bodies simply won’t function well — not ideal if your fitness goals include feeling better, moving better, and living better. A consistent, positive balance will better support your fitness goals.

KEEP IT SHORT AND SWEET

When we talk about conditioning, short, intense-enough sessions are the answer to keeping your account in the black and your fitness on track

A well-structured conditioning circuit will often move you out of the sagittal plane that many of the big movements (such as squats and deadlifts) in by asking you to rotate (or resist rotation), perform more unilateral movements, and crawl, roll, or jump.

You’ll involve different energy systems when you incorporate different levels of intensity by performing a variety of different movements with a spectrum of different tools and weight used. All of it adds up to more adaptation (i.e., progress), and more adaptation equals a stronger, fitter you.

CHECK YOURSELF BEFORE YOU WRECK YOURSELF

So…how do you keep your intensity in check? Easy — monitor how you’re feeling during the circuit.

When a conditioning circuit calls for five rounds, you don’t want to flame out after round three. Don’t push to failure on the repetitions and, if need be, take a longer rest than what is assigned in the workout. In the end, you’ll likely up the number of quality reps performed — and reap the gains from your hard (hard-enough) work — without having to deplete your account to do so.

One last thing! When deciding how hard to workout, consider the sum total of your stress.

Your body can’t differentiate between workout stress and other stress. So if you’re experiencing a lot of heart-rate-raising, cortisol-spiking events in your daily life, take the opportunity to chill and scale back your workouts for a while.

When life quiets down, your workouts can ramp up again. You do the math on who makes more progress: The person who goes hard for 52 minutes or the person who works within their limits for 52 weeks?

READY FOR BETTER RESULTS…FASTER?

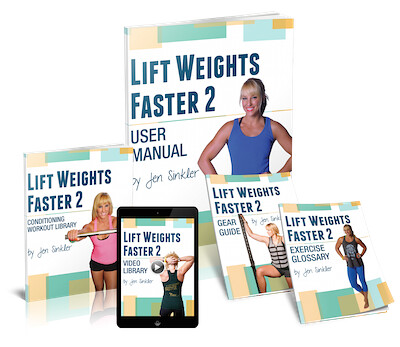
If you’re looking to amp up your conditioning in creative and productive ways, I’ve put together a mammoth 181-workout pick-and-choose library called Lift Weights Faster 2.

Complete with a full exercise glossary that includes written descriptions and photographic demonstrations of nearly 270 exercises (from classic moves to more unusual ones — the Jefferson deadlift, anyone?), a video library that includes coaching on 30 of the more technical lifts, 10 challenge-workout videos, plus a dynamic warm-up routine, I’ve combined my training and athletic experience with my long background in magazine publishing to create a clear-cut, easy-to-use resource that you’ll want to turn to all the time.

Every workout is organized by the equipment you have available and how much time you’ve got, with options that last anywhere from five up to 30 minutes.

Lastly, I’d be remiss if I didn’t mention I teamed up with my husband, David Dellanave, to create a strength program companion resource called Get Stronger Faster 2 to help you take your strength level to the next level. This completes the total workout package and helps you get results, faster.

Click below for more information.

Lift Weights Faster 2.0 

Jen Sinkler is a longtime fitness writer for national magazines such as Women’s Health and Men’s Health. A former member of the U.S. national women’s rugby team, she currently trains clients at The Movement Minneapolis. Jen talks fitness, food, happy life and general health topics at her website, www.jensinkler.com.

CategoriesExercise Technique Fat Loss

Nailed It: Ass-Kicking With Nothing But a Kettlebell

Note from TG:  Still on vacation.  Lisa dragged me zip-lining yesterday.  I almost destroyed the back of my pants.  But it ended up being so much fun!

That is all.  

Enjoy this awesome guest post by current Cressey Performance intern, James Cerbie (who happened to write THIS very popular article on push-ups a few weeks ago).

Enjoy!

Conditioning can be boring.  Like really boring.

Just think back to high school sports, or really any level for that matter, and reflect on how many times people had you run for the sake of running.

Ugghhh….

Unless you’re a long distance runner (I currently live with two and don’t know how they do it) this was probably about as much fun as repetitively banging your head against a wall.

This isn’t to say that running doesn’t have its place (because it does), but more to bring light to the fact that there are many ways to burn fat, get in shape and all that jazz.

Furthermore, we know from experience that high intensity work (think sprints, circuits, finishers etc) is more effective than slow, steady state cardio when it comes to burning fat, building muscle, increasing VO2 max, and improving GPP.

Enter the kettlebell:  one of the greatest and most versatile pieces of equipment of all time.  It, by itself, has the ability to take your conditioning and fitness to the next level, so let’s get started.

The Movements

For the sake of today’s discussion, these are the movements you will need to be familiar with:

1.  Russian Kettlebell Swing

There are primarily two types of kettlebell swings:  Russian and American.  In the Russian swing the bell will only reach eye level, while in the American swing the bell will go all the way overhead.

We will be concerning ourselves with the former because I think it’s more user friendly, teaches the hip hinge better, and gets more out of your glutes and hamstrings:

2.  Kettlebell Goblet Squat

3.  Kettlebell Squat Jump

4.  KB Goblet Walking Lunge

5.  1-Arm Kettlebell Push Press

6.  KB Snatch

Note from TG:  as simple cue I like to use on these is to pretend as if you’re performing a KB high-pull and then the bottom of the KB should face straight a head once it hits about nipple height.  From there just think about “punching” the ceiling with a quick, explosive jab.

Look at you!  It’s like you’r Thor!

7.  1-Arm KB Reverse Lunge

The Workouts

As I mentioned above, all you need for a kickass “cardio” session is a kettlebell and your imagination.  With both of those things you can burn fat, build lean mass and take over the world.

Here are 4 variations to get you started:

1.  100-300 swings

This is about as straight forward as you could ever ask for:  pick how many swings you want to do, grab a kettlebell, and start swinging until you finish all the reps.

Side note: I’d recommend checking out THIS piece by Dan John on the 10,000-swing challenge.  It just goes to show how effective high volume swings can be.

2.  Swing and Squat/Jump Ladder

Perform the following in descending order until you hit 1.

10  kettlebell swings

10  kettlebell goblet squats or kettlebell squat jumps

9  kettlebell swings

9  kettlebell goblet squats or kettlebell squat jumps

8  kettlebell swings

8  kettlebell goblet squats or kettlebell squat jumps

.

.

.

.

1 kettlebell swing

1 kettlebell goblet squat or kettlebell squat jump

I’d recommend sticking to the swing and squat combo if you only have access to one kettlebell because you’re realistically not going to be able to jump with a heavy kettlebell (unless you wanted to do bodyweight squat jumps).

If you have access to a lighter kettlebell, and enjoy having jello legs, then give the swing and jump combo a try.  You’ll swing a heavy bell and jump with a lighter one.

3.  Squat, Press, Lunge Circuit

Complete as many rounds as you can in 8-10 minutes of the following:

15 kettlebell goblet squats

10 1-arm kettlebell push press with right arm

10 1-arm kettlebell push press with left arm

16 (8/side) kettlebell goblet walking lunge

4.  Overhead Nightmare

This variation is only for more advanced personnel that can go overhead safely.  Give THIS article by Tony a read over if you have questions concerning whether or not you should go overhead.

Perform as many rounds as possible in 6 minutes of the following:

10 kettlebell snatch on right

10 1-arm kettlebell reverse lunge on right

10 kettlebell snatch on left

10 1-arm kettlebell reverse lunge on left

Rest 1.5 min

And then go for another 3 minutes.

Closing Thoughts

Hopefully this has given you some new exercises to play with and ideas on how to put together a conditioning session with nothing but a kettlebell.  There’s honestly an infinite number of possibilities you could throw together just using the 7 exercises I gave you.

In addition, I hope it helps those of you who have really tight schedules.

Just because you can’t go to the gym for an hour, or just because you have access to limited equipment doesn’t mean you can’t get in an awesome workout.

Anyways, thanks for your time and post any questions or comments you have below.

Note from TG:  On an aside, my good friend Jen Sinkler just released an awesome new product – Lift Weights Faster – that mirrors many of the same thoughts in this article.  Ie:  Traditional cardio is about as exciting as watching NASCAR.

In it you’ll find 130+ grab-n-go workouts that will not only improve your conditioning, but also help you burn fat, possibly build a little muscle,  move better, and possibly help you look better naked…….with the lights on…..;o)

Go HERE to check it out.

About the Author

James Cerbie, CSCS, Pn1, USAW, Crossfit Level 1

James Cerbie is a certified strength and conditioning specialist, Precision Nutrition level 1 certified, USA weighlifting sports performance coach, and Crossfit Level 1 certified.  He has been blessed to work with athletes from the middle school to professional level, powerlifters, olympic lifters, and Crossfit athletes alike.  At the end of the day, James gets no greater enjoyment than seeing people improve, succeed, and achieve their goals.  He’s the owner of Rebel Performance and currently works as a strength and conditioning intern at Cressey Performance.

Come hang out with James on Facebook, Twitter, or drop him a line at Rebel Performance.

CategoriesFat Loss Female Training

The Conditioning Conundrum: 4 Common Mistakes

Setting the scene:  Jen Sinkler, former USA Rugby player, former fitness editor of Experience Life Magazine, current “free-agent/entrepreneur” fitness junkie, and 100% fashionista was asked a follow-up question when being interviewed by a reporter. When explaining how she prefers to train and not ONCE uttering the words treadmill, elliptical, or Thigh Master, the reporter incredulously asked……“but what do you do for cardio???”

Jen’s now viral answer:  “I lift weights faster!”

I’ve known Jen for coming up on six years now, and outside of being one helluva editor and awesome human being, I don’t think I’ve ever met anyone who’s more immersed in “fitness” than her.  You name it, she’s done it.

Powerlifting, Strongman, CrossFit, kettlebells, Tough Mudders, taming Dragons…..she’s done it all.  While never being more than five feet away from some lip gloss.

Told ya:  100% fashionista.

Knowing I was going to be away on vacation this week (it’s 75 degrees at 7:30 AM as I type this. What, what!), and knowing that Jen’s first solo product – Lift Weights Faster – was launching while I was going t be away,  Jen was gracious enough to write a superb guest post for me on common conditioning mistakes that people make.

For those who like short and to the point here are the Cliff Notes:

Forgetting time is money – quick run down on intensity, volume and density…and how people neglect taking into the importance of density and their conditioning.

Not taking a systems approach – the importance of a $2 notebook for training, people throw it to the side during the conditioning, and leave progress on the table.

Workouts Can Be Like Having a Birthday Near Christmas – putting too much stress on an already stressed out body, whether it be from work, relationship, and other chronic stressors.

Variety the Smart Way – last but not lest, forgetting to add variety in different structures, time versus rep-based, and letting mental creep set in and loath the workout.

The Conditioning Conundrum:  4 Common Mistakes

Thanks to a rash of new research, the viral spread of info over the internet (“lift weights faster,” anyone?) and your own common sense stemming from the fact that you can get just as winded doing sets of heavy kettlebell swings as going for a run, the idea that cardio and strength work can be blended is generally more accepted than it used to be.

Thank god, because that elliptical shit is for the birds. (Unless you like it, then yadda yadda yadda, carry on.)

If you are here on this particular website, however, chances are you’ve already bought into the idea that resistance-training circuits are a viable alternative to traditional cardio pursuits (and that when it comes to both performance and body composition changes, they’re superior).

But as the pendulum inevitably swings toward favoritism of metabolic resistance training and everything that falls under that umbrella, some people will naturally either redline the extremes, or simply misinterpret what smart circuit training really is.

Here are four ways you may not be doing it quite right.

Mistake 1: Not Being Dense Enough

Regardless of the type of conditioning you’re doing, there are three variables always at play:

Intensity: This is the how many pounds you’re lifting, or how much resistance you’re using. In the context of exercise, for the sake of precision, it is not how hard you try. It’s just cold, hard weight on the bar (or otherwise in your hands).

Volume: This is the total number of repetitions you complete of a particular movement. Whether you’re talking about one set or your entire workout, volume is the number of repetitions you complete. (To calculate total volume, multiply reps by resistance used, or intensity.)

Density: This is the time it takes to complete a bout of work — essentially, how quickly you get the job done, whether “the job” refers to a set or your entire workout.  (You can calculate it by dividing volume by time.)

If you’ve been strength training for a while, you’re probably inherently familiar with the three and how they play out in your strength program and progress, whether you’re conscious of it or not. You know that if you do much of X (high-volume deadlifts?), you’re wiped out when you try to do Y (Yvette), for example, and by the same token, what leads you to better performance. If you can lift heavier than you did a few weeks ago, you have a working knowledge of these concepts.

As a fitness community, we share a lot of notes about volume and intensity, but the variable that doesn’t get enough love is density.

Outside of CrossFit, people don’t really talk about how quickly they finished their workouts or work sets, but I think, perhaps, that we should — especially when your goal is better conditioning.

Teach your body to crush a circuit, recover quickly and ask for more, and you’ll crack open a new metric by which to measure your progress, both in how you feel and also how you look, if you want to lean out.

Mistake 2: Not Tracking Your Workouts

McDonald’s is one of the most profitable businesses on the planet, not so much because their food is delicious and high quality, but because they’ve taken a systems approach to make everything easier. Easier to produce, easier to measure, easier to manage.

Every piece of that business has a process and system in place, and if you approach your strength and conditioning from the same angle, you, too will be able to more easily measure and produce progress.

Bar none the best piece of strength training equipment in the weight room is the two-dollar training journal you bring in with you. The amount of feedback you can provide yourself, along with the ability to troubleshoot stalled progress, is big. Big. Huge. (Why yes, I am quoting Pretty Woman!)

But time and again, I see people toss their journals by the wayside when it’s time to finish up with a quick circuit. And yet, there is much valuable info to be gleaned, even here.

Track your volume, density and intensity, here, too, and you can figure out new ways to PR. In fact, even in your circuits, try setting your mind to moving the needle on one of those factors every time you train.

Mistake 3: Going Overboard

My rule of thumb: Regardless of your fitness level, if it feels like too much, it probably is.

What may not look difficult on paper will play out very differently while you’re in the gym. A whole lot of plyometric exercise, heavy lifting and hard circuit training can take a toll after some time.

Stress hormones such as cortisol are by no means always the bad guy — in fact, they’re quite useful for saving the day, in whatever form that takes for you. Chronically elevated cortisol levels, however, are a different story, and we would do well to note that our bodies don’t differentiate between types of stress. Piling training stress on top of work stress, relationship stress and money stress on a long-term basis can lead to a pretty major crash and burn.

Research points to lifting weights at maximal velocity spiking cortisol levels when compared to lifting at a lower rep speed, so if you’re piling on elsewhere, it’s probably better to cool it on conditioning. One to two sessions a week is plenty, for many people.

Mistake 4: Joining the Circus

Humans are hardwired to seek novelty — we have a deep-seated tendency to constantly seek out new, different, shiny. It can be good thing, this neophilia, in that it helps us assess risks, to learn new skills, to become more capable.

But new is everywhere now, including the gym. In her book New: Understanding Our Need for Novelty and Change, Winifred Gallagher writes: “We already crunch four times more data — e-mail, tweets, searches, music, video, and traditional media — than we did just thirty years ago, and this deluge shows no signs of slackening. To thrive amid unprecedented amounts of novelty, we must shift from being mere seekers of the new to being connoisseurs of it.”

You know what that means? It means being selective about what is worth your time and what is not, not embracing variety simply for variety’s sake.

If your training time is limited, seek productivity in your conditioning sessions, exploring variations of skills you’re proficient in and finding ways to manipulate volume and work-to-rest ratios.

Changing a circuit of “three sets of 10 repetitions” to “three rounds of 30 seconds of work and 30 seconds of rest” will evoke a different psychological response. New structure, new progress. Win-win.

The Total Package and Then Some A Lot

I get it — it’s easy to feel stagnant or overwhelmed by the prospect of putting together productive conditioning circuits. With that in mind, I compiled 130 grab-and-go workouts in my Lift Weights Faster product (including two guest workouts from Tony G.!).

Complete with a full exercise glossary that includes written descriptions and photographic demonstrations of approximately 225 exercises, from classic moves to more creative ones, I leveraged my background in magazine publishing to create a clear-cut, easy-to-use resource.

Every workout is organized by the equipment you have available and how much time you’ve got, including plenty of effective, hot-n-heavy options that last less than 10 minutes and also over 35 different workouts that require minimal equipment for when you’re traveling or outside the gym.

—–> Lift Weights Faster <—–

About the Author

Jen Sinkler (www.jensinkler.com), RKC, PCC, PM, USAW, is a longtime fitness journalist who writes for national magazines such as Women’s Health and Men’s Health. A former member of the U.S. national women’s rugby team, she currently trains clients at The Movement Minneapolis.

CategoriesUncategorized

My Top Three Metabolic Protocols For People With Knee Pain

Before I get into my three favorite metabolic protocols for people with bum knees, I have a very important announcement to make.  No, it has nothing to do with a cannonball (ALA:  Will Ferrell, in the movie Anchorman).

No, it has nothing to do with hitting a 600 lb deadlift (trust me, when that happens, you’ll know).  And no, it has nothing to do with me divulging any plans to release a product anytime soon (although, that will definitely be in the cards at some point this decade year.  I promise).

Actually, the truth is, my girlfriend and I signed a lease earlier this week, which makes it official:  we’re moving in together.  Yay for co-habitation!!!

Note to Lisa:  Just a heads up babe – I pee in the shower.

Anyways, it’s a big step for sure, but it’s something that we’ve been discussing for a while now.  We found a ginormous apartment in an area that we love in the city, and we’re really excited to make it ours.

The move in date is in less than a month, which means, among other things, I need to go through my t-shirt drawer and decide which ones I want to take with me.  You could say that collecting vintage t-shirts is a hobby of mine, and while some (Cobra Commander) I’m going to keep forever, others are so old and crusty that I could probably walk over to the local nursing home and donate them as penicillin.  HA!  Get it?

So, that said, if any of you have any words of wisdom (or encouragement), please, feel free to chime in below.  I mean, now that we’re moving in together, Lisa is pretty much obligated to make me ham sandwiches everyday, right?  Right?

Okay, enough with beating around the bush – lets get down to business.  Now, if you’ve been reading this blog for any length of time, it’s no secret that even though I’m 34 years old, I have knees that are seemingly older than Gandalf.  Zing!  Count it!  Man, I’m on fire today!

As such, while I’m still able to hit my lower body pretty hard, I still have to be careful when it comes to things like squatting (consistently), sprinting, and any other modality that puts a lot of stress on the knees.

Now, before I go on, let me be perfectly clear: despite what a lot of people say – you can ALWAYS train around an injury.  I won’t belabor the point – especially since I wrote on the topic already, HERE – but suffice it to say, while I definitely have to tweak my programming accordingly (not to mention stay on point with things like foam rolling and other soft tissue modalities), I still feel I’m able to get a great training effect and maintain (if not improve) my overall strength and conditioning levels following a few basic tweaks – seen below.

As the title above suggested, today, I want to focus more on the metabolic or conditioning side of things – because, lets me honest, when you have cranky knees, doing anything more than a light jog (or even walking) can oftentimes be problematic.

Here are my top three metabolic protocols in no particular order.  And, as it so happens – there’s no smoke and mirrors involved.

1.  Airdyne Bike Intervals

I’d argue that no one piece of equipment (other than the Prowler) is despised more in our facility than the airdyne bike.

When it comes to interval or metabolic training, not many pieces of equipment can trump the full body effect that the airdyne bike has on the body; which is why I like to follow what’s called the 180 Rule.  Which is this:  whatever you see the vast majority of people using in the gym (elliptical trainers, for example), do the exact opposite.  In layman’s terms, the equipment that no one ever uses tends to be the ones that are the most useful.

See that airdyne that’s tucked over there in the corner of the gym that you thought was part of an antique exhibit?  Yeah, you should use it.

People don’t use them because they’re hard, and they’re not fun (and coincidentally, they don’t have a flat screen television attached to them either).

While you can certainly keep things easy and just follow a simple 1:2 or 1:3 (work: rest) ratio – something like 15s of work, followed by 45s rest for a certain amount of time (say 10 minutes) – I like to kick things up a notch and follow a protocol popularized by Christian Thibaudeau:

1a: 30s, easy
1b: 20s, hard (and by “hard,” what I really mean is pretend that a lion is chasing you while you have a steak tied to your back.  GET MOVING!!!!!)

2a: 60s, easy
2b: 30s, hard

3a: 90s, easy
3b: 40s, hard

4a: 120s, easy
4b: 50s, hard

5a: 150s, easy
5b: 60s, hard

6a. 180s, easy
6b: 70s, hard

Cool down for 5 minutes, and allot some time to catch your breath.

And yes, if you don’t have access to an airdyne bike, you can still use a regular bike here.  The only thing you need to be cognizant of is that you must make sure to increase the resistance on the sprints, and lower the resistance during rest intervals.  And clean up your pool of sweat, you jerk!

2.  Slideboard

I’ll be honest here and say that there was a time where I felt the slideboard was a foo-foo piece of equipment that I would NEVER use.  Then, I actually took my head out of my ass, started listening to people like Mike Boyle (who expounds on their efficacy religiously), and finally started seeing just how valuable and versatile they can be.

The slideboard may be the best, most cost effective conditioning mode available for athletes exclusive of actually running (which for those with bum knees, ain’t gonna happen).

Taking a page from Boyle, the slideboard offers the following:

  • Places the athlete n a sport-specific position, almost regardless of sport.
  • Positively stresses the abductors AND adductors muscles.
  • Allows athletes to work in groups of three to four on one piece of equipment
  • Provides work capacity training in an interval format with no adjustments, all for under $600.

What’s more, it’s a VERY joint friendly modality to use when someone suffers from knee pain.  Moreover, think about how we generally train as a society:  we tend to be VERY linear with our movements, doing things in a straight line all……….the………freakin………time.  With the slideboard, however, we can now train lateral (side-to-side) movement, which undoubtedly is an important component of any well-rounded program.

Keeping things simple, I prefer to use standard work: rest ratios here.  Meaning, one would basically slide for 20-30 seconds, rest of 60-90 (or longer) seconds, and repeat for a required amount of time.

3.  Stadium or Hill Sprints

My friend Nia Shanks is going to love this, since she’s ALWAYS telling people how running hill sprints is the bees knees.

I have to say, I kinda agree.

Now that the weather is nicer here in Boston, every Sunday my girlfriend and I head over to Harvard University and run sprints up the football stadium.  Here’s me doing my last sprint last weekend:

 It’s fairly standard:

Sprint Up (or walk briskly, depending on current fitness level)
Walk Down
Repeat
Hate Life

Because there’s very little (or less) stress on the knees running up stairs (or a hill), this is a fantastic modality for those with knee issues.  But, in reality, it’s a phenomenal workout regardless, and I defy anyone to argue otherwise.

So, there you have it – my top three metabolic protocols for people with knee pain.  While it’s definitely not an exhaustive list by any stretch of the imagination, I feel that these are the three that can most easily be implemented by most people given equipment availability.  Have one to share?  Let er rip below!