CategoriesExercise Technique personal training Program Design

2 Side Plank Drills to Perform That Don’t Have the Words Side Plank In Them

I’m not here to hate on the side plank.

Truth be told: It’s a rare occurrence that I start working with someone and (s)he can perform it well. It’s a staple exercise with myriad benefits in both rehab and traditional strength training to target the core musculature – particularly the obliques.

Too, it’s also no coincidence, thanks to Dr. Stuart McGill, it’s considered one of the “Big 3” with regards to spinal health and working around and managing low-back pain.

When done correctly, the side plank can be a very challenging and worthwhile exercise to include in most programs.

  • Check out THIS article for particulars on common mistakes and how to progress the side plank.
  • Check out THIS article for other plank variations you should consider.
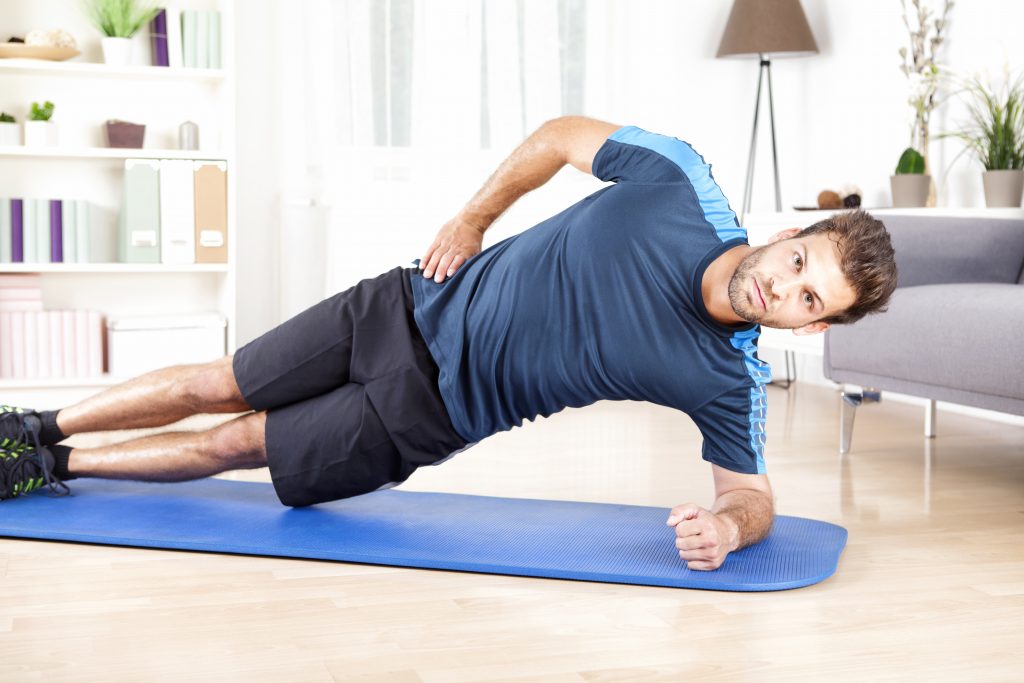
Copyright: Sebastian Gauert

But Seriously, Do These Instead of Side Planks

I find the side plank to be the exercise of choice for lazy trainers. It’s the sort of exercise a shitty trainer will prescribe for their client when there’s 5-10 minutes left in a session and the trainer just wants to run out the clock.

“Okay Hank, we’re going to finish with Side Planks today. Three minute holds per side. Blindfolded. While reciting the Elvish alphabet backwards. Go!”

And then, of course, Hank loses all the perceived benefits of the exercise because his technique has been compromised after 15 seconds.

“Come on Hank, 2 more minutes, keep reciting, Ampa, Anto, Hwesta…”

To be clear: I think everyone should take the time to master the side plank. It’s an important drill. It’s just that after a certain point there’s a rate of diminishing returns.

Personally, if someone can perform it perfectly for a minute per side I’d rather go a head and make the exercise more challenging than force someone to go for longer periods of time.

More to the point, can I just go a head and say it?

The Side Plank is just a boring exercise.

I’d rather spend the same amount of time scooping up my cat’s fur vomit.

To that end, here are two exercises that mirror all the benefits of the Side Plank but don’t make you want to commit seppuku when you actually do them.

1. Chaos March


Take a kettebell and wrap a band around one end. Grab onto the other end and hold it to your side as if you were holding a suitcase.

While maintaining a completely upright posture (no leaning!) march in place and try to keep the kettlebell “quiet.”

Also: In case it wasn’t obvious by lurking at my bookcase in the background: My kid loves puzzles.

Also (Part II): That’s Molly Galbraith’s book, Strong Women Lift Each Other Up, that’s upright and facing the screen.

That wasn’t done on purpose. But it IS a great read and you should check it out.

2. Offset Farmer Hold


1. Grab a Trap (Hex) Bar, or even a standard straight bar, and load one end with a plate.

2. Stand upright.

3. Don’t tip over.[footnote]If you do a baby seal dies. Jerk.[/footnote]

Even though nothing is moving, I find this drill much more palatable for the bulk of my clients because it simply looks badass.

WU-TANG!

CategoriesExercises You Should Be Doing Uncategorized

Exercises You Should Be Doing: Copenhagen Side Plank Shenanigans

Just to get the obvious question out of the way: I have ZERO idea why the Copenhagen Side Plank is called what it is. My educated guess is it’s not because it was popularized in Detroit.

In THIS article, though, via Carl Valle, he notes the origin of the exercise is a bit of a mystery, but that the Danes have most of the acclaim directed toward them because they’re the ones responsible for much of the most recent research on groin injuries in sport.

Fair enough.

Copyright: swisshippo / 123RF Stock Photo

Side Planks Are “Okay”

Regular plain ol’ side planks – you know, the ones you see Karen or Jim perform at your local gym – are fine. There’s indeed a myriad of efficacious uses for the exercise; especially for those dealing with chronic low back pain.

The world’s most renowned low back researcher, Dr. Stuart McGill, has belabored this point for the better part of the past two decades, most notably in his seminal books Low Back Disorders, Ultimate Back Fitness & Performance, and, for the TL;DR crowd, Back Mechanic.

In Short: The side plank provides a splendid opportunity to target the lateral obliques and quadratus lumborum in an ISOMETRIC fashion. Much of McGill’s research backs up the idea that isometric exercises to enhance muscular endurance are in favor over dynamic, more traditional strength & conditioning exercises in improving spinal stiffness and stability.

Too, because there are two sides of the body – left and right (SPOILER ALERT) – using the standard side plank to compare discrepancies between both sides is a powerful assessment tool.

If someone can smoke their left side, yet can barely perform ten seconds on their right without breaking form…

…it may provide some important information and a pertinent starting point in terms of rehab.

That said.

I’m not a fan of plank variations that go on and on and on and on.

I don’t have enough eye rolls to give for people who “brag” about their insane five-minute planks holds.

First off: No one gives two flying fucks about a five-minute plank hold. You may as well brag about your ability to perform a cartwheel, or, I don’t know, your proficiency in long division.

Seriously, no one cares.

Secondly, most people’s form turns into utter garbage after the 60 second mark and with it…

…all benefits of the exercise.

I much prefer to make plank variations more challenging than just tacking on time for the sake of more time.

Oh, Hello Copenhagen Side Plank(s)


NOTE
: In addition to the link provided above, I’d also encourage you to check out THIS article from Nick Tumminello if you want to partake in a deeper dive in just how badass Copenhagen Side Planks are.

Just as a heads up, not only are they great for people with low back pain but they’re also fantastic for:

  • Adductor strengthening (if you work with athletes, especially hockey & soccer players, this is key).
  • Knee strengthening (I actually use Copenhagens a lot with clients attempting to work around knee pain. Much of this ties in with strengthening the adductors)

There’s a bevy of variations to consider here, but two of my go to’s are highlighted in the video above.

1. Copenhagen  Side Plank w/ Leg Lift

There’s really nothing fancy here. As is the case with any plank variation, think: Abs on, glutes on. From there don’t just think about haphazardly lifting the bottom leg towards the top.

Do that.

But ALSO think about driving or pushing the knee of the top leg INTO the bench or table.

At the top SQUEEZE your knees together, hard.

And then CONTROL the lowering portion.

2. Copenhagen Side Plank w/ Low Leg Driver

Take all the cues from above and now bend the knee of the bottom leg 90 degrees and then move the same leg into hip flexion/extension; without allowing your pelvis to lower or dip.

Tip: if you want to keep yourself honest, place something like a glass of water or yoga block underneath the bottom leg. If at any point your leg knocks over “the thing,” you suck at life and should be ashamed of yourself.

Basically you’ve besmirched your family name.

150 points from Gryfindor.

Tip #2: Many articles advocate for trainees to place the ankle (of the top leg) on the table or bench, so that the legs are completely straight. I’m not a fan of this because it places a lot of unnecessary strain on the medial component of the knee out of the gate.

Notice in the video how my knee is supported by the table?

Start there.

You can progress to less “support” as you gain more proficiency with the exercise.