Categoriescoaching continuing education Corrective Exercise

5 Ways I Include Single Leg Training In My Programs

Single leg training isn’t sexy to talk, much less write about. In terms of excitement factor I’d rank it somewhere between a watching a NASCAR race and picking lint out of your belly button.

I can understand the cacophony of subsequent eye rolls and yawns that are being directed my way.

“An article on single leg training?! Come on, Tony. What’s next keto recipes?”

I get it.

However, hear me out.

Copyright: vadymvdrobot / 123RF Stock Photo

5 Ways I Include Single Leg Training In My Programs

Single leg training is important shit.

Now, more often than not whenever there’s an article written on single leg training it’s under the guise or in congruence with taking a massive dump on bilateral training (think: squats and/or deadlifts).

The implication being one should avoid bilateral or two-legged training in lieu of performing only unilateral or one-legged training.

I think it’s a stupid argument to have on par with which is better: Low-bar vs. high-bar squats? Or mint chocolate chip vs. mint Oreo ice-cream?

With deference, almost always, the appropriate answer to the single leg vs. bilateral debate (and, really, any question in the history of ever) is “it depends.”

  • Some people are more concerned with being brutally strong with the “Big 3”  and are only worried about optimal force production. If that’s the case bilateral movements should make up the bulk of training.
  • Conversely, some people, especially athletes, need to marinate in a diverse pool of movement. In that case single leg training is going to take precedence and play more of an integral part in their training and programming.
  • Are there people out there who debate ice-cream? Don’t be cray-cray.

Suffice it to say, here’s my take on the debate: BOTH are important, BOTH play a significant role in a well-balanced program, and BOTH should be used simultaneously.

If we’re being honest, though, we generally don’t have to pull any arms behind backs in order to convince people to perform bilateral movements like squats and deadlifts.

It’s pretty much bro-code.

Single leg work on the other hand?

Well, that can be a bit of a harder sell.

It’s unfortunate because even if someone’s goal is to be a brick shit house (or a house of shit bricks, I’m not here to judge) single leg training has many benefits, mmmkay.

Including but not limited to:

  • Joint health and integrity (I have yet to find an individual with a history of knee, hip and/or back issues who doesn’t benefit from a healthy dose of single leg training).
  • Improved balance.
  • Improved foot/ankle/hip stability. Or, stability in general.[footnote]Google “Mike Boyle & Lateral Sub-System” for more insight on this front.[/footnote]
  • A fantastic way to train rotary stability (<— a fancy schmancy way of saying something will work your core).
  • Greater specificity to sport (and real life).
  • Improved strength & hypertrophy (depending on how it’s implemented).
  • Helps address weaknesses and imbalances from limb to limb.
  • Reduced wear and tear via less axial loading.
  • More exercise variety.

And the list can go on.[footnote]I’m certain I’m omitting some obvious benefits, but my kid woke me up early this morning and my brain is running on fumes as I write this. So, fuck off.[/footnote]

Below are (some) ways I like to include single leg training in my programs.

1) Treat Single Leg Training Like Eating Broccoli

It’s just, you know, something that has to be done.

It’s hard for me to peruse the list I made above of all the benefits and not include some semblance of single leg training in a program (regardless of someone’s goal).

There aren’t many scenarios I can think of off-hand where it won’t help.

  • Be a better athlete? Check
  • Be a better lifter? Check
  • Beat Jason Bourne in a knife fight? Check.

All the bases are covered.

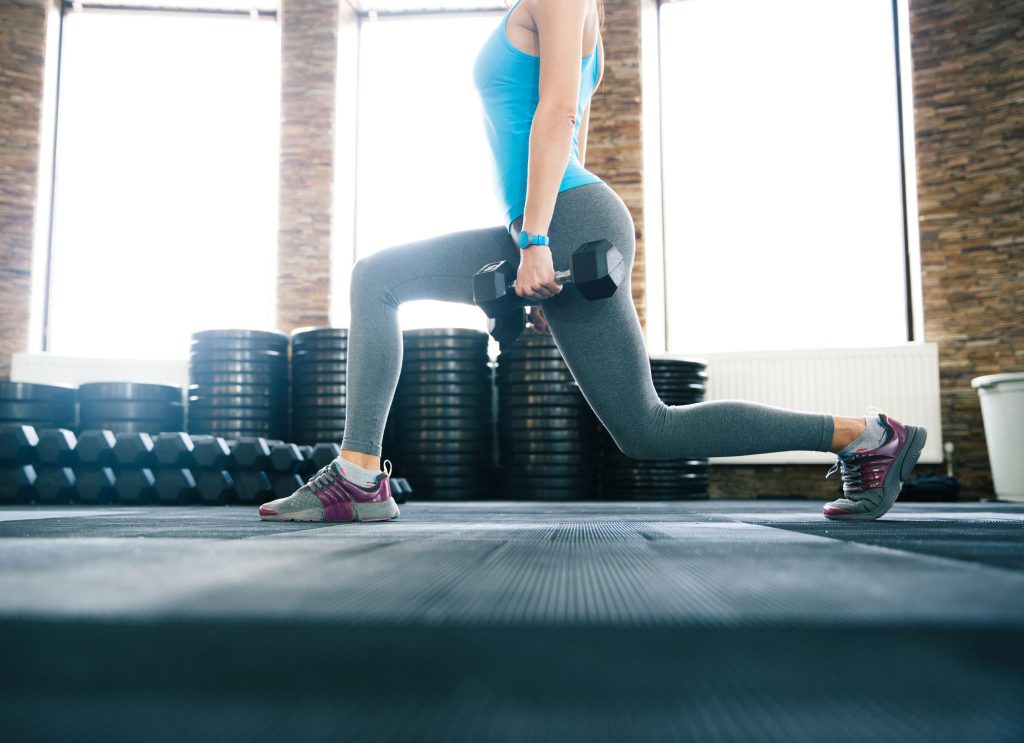
That said, one pet-peeve of mine and something I notice all….the…..time as a coach is that people tend to go way too heavy.

I’ll watch some guys grab the 80+ lb dumbbells and perform walking lunges and think to myself “why?”

But this is after both my corneas jump out of their eye sockets and then proceed to jump into a bucket of battery acid.

Their knees are caving in every which way and it’s evident most are unable to control the load. This kinda defeats the purpose of doing it in the first place.

Stop training your ego and lower the load.

I’d rather people use a load they can control and perform it for high(er) reps than to grab the heaviest weight possible and make perhaps do more harm than good.

ALSO…..

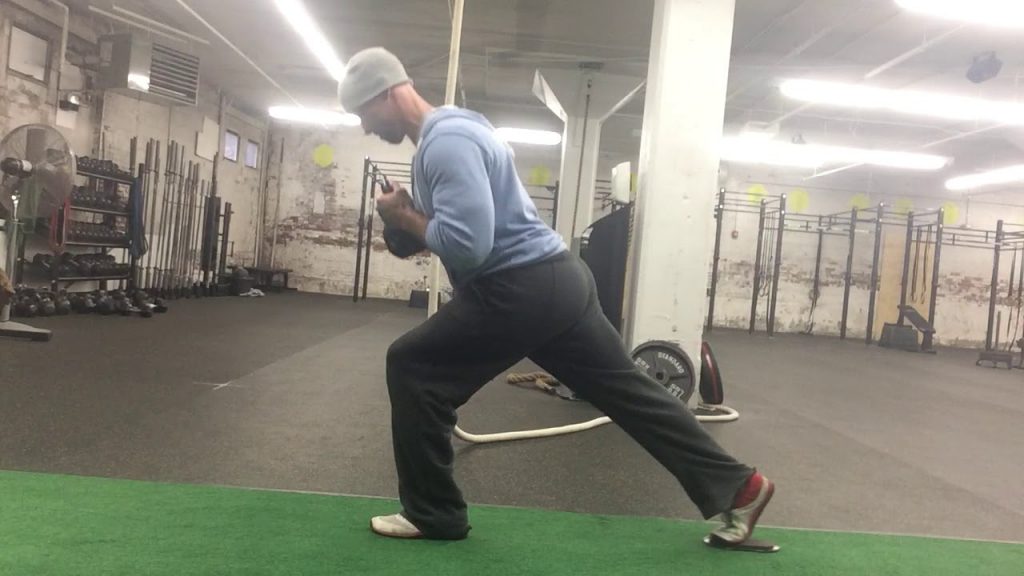
It’s my own preference as a coach, but I much prefer people to adopt more of a forward lean when performing lunge variations.


When you assume a more upright posture during lunges it makes it easier to crank through the lower back which can also result in excessive rib flair; I.e., a more unstable position.

The inner dialogue should be more “shoulders over knees” than “shoulders over hips.”

2) Potentiation (Or, Turning “Stuff” On)

I often have my clients perform a single leg movement before squatting or deadlifting.

https://www.youtube.com/watch?v=a1Y73sPHKxw


I find it’s a nice way to turn “stuff” on and to prime the body for the extracurricular shenanigans going down shortly thereafter.

Goblet variations are my go to here (less grip intensive): Goblet Reverse Lunge, Goblet Forward Lunge, Goblet Reverse TO Forward Lunge, Goblet Split Squat, Goblet Bulgarian Split Squat, Goblet Whateverthefuck.


The idea is to go LIGHT and to OWN the movement.

I like to use 2-3 sets of 6-8 reps per side.

Pants optional.

3) Adding Isometric Holds

If you really want to humble someone (and to make their glutes scream for blood mercy) try adding in some isometric holds.


I LOVE using these with my clients/athletes as it forces them to use sloooooow down, to stay more cognizant of body position, and it also aids in more time under tension.

4. Combo Movements

Another way I like to include single leg training into my programs is to combine two movements into one.

This is a fantastic way to make the movements a bit more challenging and also serves as an opportunity to stroke my evil strength coach beard (despite the fact I don’t have one).

You want sore, I’ll give you sore.

Goblet Step-Through

Rear Foot Elevated Kang Squat

5) Fake Single Leg Training

Least we forget single leg training can be too advanced of an option for some people. Whether it’s due to novelty or “just because” we can incorporate “fake” single leg options to help ramp people to the real thing.

I’m more concerned with setting people up for as much success as possible rather than making them feel frustrated.

In that light here are two excellent options I use all the time:

Wall Press RDL

Here, we can still groove a single leg hinge pattern, but in a supported fashion.

For those who have balance issues this is an excellent choice.

B-Stance Squat


With the offset (or B) stance, we place more load on the front leg. Again, this is a great option for those with stability/balance issues and who aren’t quite ready for actual 1-legged squats (you sadistic bastard).

CategoriesExercise Technique Program Design Strength Training

Top 3 Single Leg Exercises For Yoked Ass Legs

Coincidentally enough I choose the picture for today’s guest post before actually reading it. 

Oops, a minor editorial mistake.

You see, as you’ll learn below, placing a barbell on your back during single leg exercises – while not a wrong strategy to partake – does have a distinct disadvantage.

HINT: More load isn’t always the “x-factor” with regards to making exercises more challenging.

Suffice to say, lesson learned (but I’m too lazy to go back and find a different picture).

I hope you enjoy this excellent piece by two colleagues of mine – Dr. Michelle Boland (a phenomenal local coach here in Boston) and Tim Richardt (a former coach at CORE who’s now located in the Denver area) – that gave me a few Ah-HA moments.

Copyright: serhiibobyk / 123RF Stock Photo

Top 3 Single Leg Exercises For Yoked A$$ Legs

Quarantine have your legs and butt looking skinnier than Gollum’s?

An excellent example of commitment to a singular goal, but not of muscular development. 

Get your quads, glutes, and hamstrings looking more bountiful than a post-Mordor-crumbling Shire feast with these single leg exercises!

We’re done with the Lord of the Rings references now, we promise.

We’ll explore loading options, body positioning, front versus rear foot elevation, and direction of center-of-mass (COM) movement to help you taste those sweet, sweet single-leg gains.

Let’s get right to it…

#1 Front Foot Elevated Zercher Split Squat

Load Position Advantage 

Holding the weight in the crook of your elbows allows for more relaxation of muscles on the backside of your trunk, enabling increased depth WHILE circumventing grip strength as a potential rate-limiter for loading.

A barbell placed in the traditional “back rack” may rob you of comfortable hip range-of-motion (ROM) due to compression of muscles on the backside of your trunk.

Loading in the Zercher position lets you maintain more VERTICAL displacement throughout the movement, and more pure-up-and-down displacement means more stimulation of muscles that DO vertical displacement (i.e. glutes and quads), leading to more gains and more eventual jealousy from your high school ex after they see your jacked wheels on Facebook.

No barbell? We can accomplish a similar effect with 2 DBs

https://www.youtube.com/watch?v=WlVELvq-ijg&list=PL2C3q7iaQQIVqmCkqxRFaIpiHffq-YcrQ&index=1


Vertical displacement whilst keeping a STACKED position during a split squat, vital to loading muscle tissue (yay!) and minimizing joint strain (boo!), is reviewed,
HERE

Why Front Foot Elevation?

Elevating the front foot shifts your COM backwards, meaning the muscles of the front leg can relax to a greater degree to allow for more depth during the lowering (eccentric) portion of the movement. Additionally, raising the front foot shifts the trained range of motion into deeper degrees of hip flexion, leading to greater mechanical stress placed on the musculature that extends the hip (dat booty). 

Bonus; Heel Up?


Try
elevating your front heel to enable increased loading of the knee and hip whilst maintaining the “vertical stack” during this drill.

Be sure to maintain heel contact and allow your knee to drift forward over the mid-foot to allow for more hip and knee flexion.

#2 Staggered Stance Retro RDL

Why Backwards is Better…

The Staggered Stance Retro RDL allows you to use the front leg to push your COM backwards towards the leg that’ll be doing all the work. This exercise HAMMERS glutes and hammies, and is a great stepping stone towards an eventual unassisted SLRDL.

The KEY distinction between the conventional RDL (or Heels on Wall Variation) and the staggered stance retro RDL is the direction of your COM travels. In the rear foot single leg deadlift, your COM translates forward, whereas in the staggered stance retro RDL, your COM migrates backwards. 

Going front foot supported allows for more of a sit “back” scenario encouraging a more advantageous orienting of the hips to access ROM (remember: more ROM, more loading, more gainz) as well as reducing the challenge of NOT falling forward onto your (pretty) face.

Why Single Arm Loading?

We love a single KB held in the opposite hand (in reference to the back leg), as this encourages rotation of the ribcage TOWARDS that rear leg. Rotation towards the side we’re loading means we’re able to load muscles of that hip to a greater degree, and the combination of an opposite hand reach AND a front foot support ensure we’re loading the back leg’s hamstrings and glutes as much as we possibly can.

Technique 

Some pointers with the Front Foot Supported Single Leg Deadlift:

  1. Position the non-working leg in front of the working leg and use the front (non-working) leg to push the back (working) leg backwards. This results in a hip “shift” TOWARDS that back leg.
  2. The arm opposite the working leg holds the KB and maintains a path over the big toe of the back foot. That reach further supports the shift you obtained in step 1.
  3. Sit your hips back in space, feeling loading on the heel, base of the big toe, and base of the little toe. Reverse this motion by pushing through this “tripod foot” back to the starting position.

#3 Rear Foot Elevated Split Squat

Jack Up That Back Foot

The Rear Foot Elevated (RFE) Split Squat is a variation that places greater emphasis on the front leg. This exercise is also a good progression towards a strict single leg activity, such as a single leg squat

While performing a boring ‘ol split squat, the load is fairly evenly distributed between the front and back legs. However, elevating the rear foot shifts your center of mass forward, dramatically increasing the loading of the front leg. Train this sucker and that leg’s getting more yoked than a Marriott Courtyard omelette bar. 

The RFESS is #3 on this list because it trains a little like a cross of exercises #1 and #2.

It’s a vertical movement (like our FFESS), but the forward lean created by the elevation of the rear foot enables some degree of forward/backwards COM displacement (like our deadlift variation). The result is an unholy cross of glute and leg destruction.

Placement of Load

To optimize loading with this drill, we recommend dumbbells in each hand- like THIS. As we mentioned previously, a barbell placed in the traditional “back rack” position tends to compress muscles on the backside of the body, robbing the body of hip flexion availability and trainable range of motion. 

The distance between your front and back legs- your “stride length” during a split squat- also matters.

A short stride length (front foot closer to back foot) will bias hip musculature (glutes). If you elongate the stride length you’ll shift the loading to more quads, leading to more yoked legs with which to better fill out those new early-Christmas jeggings. 

And Now, This…

You can check out these three extra loading variations that target different planes of motion in the RFE split squat: RFE Split Squat Planes of Motion Variations

Bonus Yoked-Worthy Exercise: Walking Toe Touch Lunges

Muscle Recruitment 

Walking Lunges with an opposite arm reach facilitate more high hamstring recruitment by biasing a posterior tilt of the pelvis. High hamstrings fix the position of the pelvis, enabling greater loading of the hip extensors (butt), making this drill an excellent choice for a “finisher” after your main exercises. To quote our good friend, the wise and powerful Tony, after performing a set of these, “I FELT it in my soul”!

DISCLAIMER; Michelle and Tim are NOT responsible for any Soul-Delayed-Onset-Muscule-Soreness (SDOMS) experienced after performing this drill.

Technique

Big pointers with the Walking Toe Touch Lunges

  1. Maintain up/down motion by keeping your head stacked over your chest and stacked over your hips… put simply “mostly elevator, a little escalator”
  2. Reach your opposite arm to your front big toe keeping your breastbone pointed straight ahead and letting your shoulder blade reach around your ribcage
  3. “A little” hinge at the hips is necessary to stay moving FORWARDS, but “a little” is all you get
  4. Be nice to your back knee, a soft surface is ideal with this drill
  5. Focus on turning into your abs on the same side as the front leg 
  6. Stand up by pushing the ground away with the front foot (that same tripod foot as we discussed previously)
  7. You get no bonus points for lunging LONG- keep your stride length short and controlled

Summary

  • Choosing single leg exercises that will allow you to achieve the greatest ROM while moving heavy loads are key to targeting more muscle mass. Gettin’ more yoked than a 12th century plow animal is all about moving load over ROM. 
  • Intelligent holding positions, such as DBs at sides and zercher, beget more motion availability. 
  • The positioning or elevation of your feet relative to one another is VITALLY important in ensuring we’re loading the target tissue through as large of an available range as we can muster.

Now go get those legs so HUGE that grandma’s gonna have to buy you new Christmas stockings.

About the Authors

Michelle Boland

Tim Richardt

Categoriescoaching Corrective Exercise Exercise Technique Program Design Strength Training

How Unilateral Strength Training Can Improve Your Squat, Bench, and Deadlift

Another fantastic guest post today from Shane McLean. This time he tackles the importance of unilateral strength training and offers some neat ideas as to the best accessory movements to compliment the “big 3.”

Copyright: vadymvdrobot / 123RF Stock Photo


Don’t you love “that” guy who always stands between you and the dumbbells while doing single arm curls and making faces only his mother could love? What if I told you that he’s actually on to something, minus the faces and grunting?

Bilateral exercises (not biceps curls) should form the foundation of your strength program because this is where you’ll get most of your gains. However, unilateral training often gets neglected in the quest to get bigger and stronger because it’s just not as sexy (or cool) as a big squat, deadlift or overhead press.

However, unilateral training will help you get stronger, improve the big lifts (by shoring up weakness) and provide the following benefits.

Reduce Muscle Imbalances

Due to activities of daily living almost everybody has a dominant and non-dominant side. For instance, carrying more groceries on one side over the other over time may get one arm stronger.

During bilateral exercises such as a press or squat variation, your dominant side can pick up the slack for the weaker side.

Have you ever seen a lifter struggle to lock out one side over the other during a barbell bench press? I rest my case. Improving your “weaker” side will reduce your injury risk and help increase overall lifting numbers.

Improved Muscle Recruitment

Unilateral training makes you work harder and recruit more muscle fibers to perform the exact same movement, such as a split squat.

Taking one leg out of the equation forces your abductors and core to stabilize your pelvis while the working leg performs a split squat. Working more muscle with less weight will help correct strength imbalances between sides, also.

Core Work Without Crunches

When training unilaterally, you automatically throw your body off balance, forcing your core muscles to engage in order to keep yourself upright.

Trust me when I say that’s a good thing.

And we can double-down on the core training ante by utilizing offset loading:


Programming Guidelines

Unilateral exercises are best performed as an accessory movement after your big lift for the day.

Choose one or two single limb movements per session and perform three to four sets on both sides. The repetitions performed will depend on your goal.

For example:

  • Strength: 4 – 6 reps
  • Hypertrophy/Fat Loss: 8 – 15 reps

If you have a strength or muscle size imbalance always start with the weaker/smaller side first and let the weaker side determine the weight/reps you do on the stronger side.

Without further ado, here are my top two accessory exercises you should be doing to improve your squat, dead lift and press numbers. Sorry, this is a biceps curl free zone.

1) Deadlift

 Suitcase Carries


Not only will carries change your life in three weeks, according to Dan ‘the man’ John, they can strengthen grip imbalances between hands which can be a limiting factor when pulling heavy from the floor or opening the pickle jar.

When you’re doing carries (you do, right?), pair them with a movement that doesn’t demand a lot of grip strength, so you can get more out of it. For example:

1A. Goblet squat/press variation.

1B. Suitcase carry- (25-50% of your bodyweight) 30 steps one hand then 30 steps with the opposite hand.

Form considerations – cues “shoulders down and back” or “chest up” work well here. Checking your form in a mirror will help if you having trouble knowing if you’re overcompensating or not.

Front Racked Kettlebell Bulgarian Split Squat

These were first introduced to me by Anthony Dexmier to improve my pulling ability from the floor. Let’s just say after doing them, we weren’t the best of friends.

Hardcore dead lifters knows that hip mobility, upper back strength and leg drive are essential elements for pulling heavy, and this exercise covers all those bases, if somewhat brutally.


Pairing this exercise with a single arm row variation is a real upper back whammy that you’re sure to enjoy. For example

1A. Front racked kettle bell elevated split squat – 12 reps on each leg

1B. 3 point dumbbell row – 12 reps on each arm


Form considerations – Perform a bodyweight elevated split squat and notice where your big toe is, and then place weight plate in front of it. This will give you a reference point and shorten your set up time between sets. This is courtesy of the one and only Jordan Syatt.

Keep a nice tall chest and your wrists in neutral during this entire movement and smile through the pain.

2) Bench Press

Landmine Press

The single arm landmine press is a mix between a vertical and horizontal movement which makes this great for individuals who lack the shoulder mobility for overhead pressing and for those looking to improve their press numbers.

Note From TG (to Shane): How could you not include a link to THIS article I wrote discussing how to assess overhead mobility and drills to help improve it?

Why Shane…….WHY?!?!?

The beginning of this exercise (initial push of the shoulders) is the hardest part of the movement. This will assist you with pushing the bar off your chest during the bench press or pushing the barbell overhead from a dead stop. The extra core work doesn’t go astray either.

This press can be done from a variety of positions. For example, it can be done standing, tall kneeling and this half kneeling variation courtesy of Eric Cressey:


Pairing this landmine variation with a hip flexor stretch works well and provides an active rest between sides and sets. For example

1A. Half kneeling landmine press (right hand)

1B. Half kneeling hip flexor stretch (right knee down) – 30 seconds

1C. Half kneeling landmine press (left hand)

1D. Half kneeling hip flexor stretch (left knee down) – 30 seconds

Form considerations- Make sure the barbell is close to the front of your shoulder and actively squeeze the barbell. This provides Irradiation, allowing you to produce more force and lift more weight. This also turns on the rotator cuff, which helps with shoulder stability.

Single Arm Dumbbell Floor Press

The reduced range of motion of the floor press makes this a great triceps builder (when the elbows are close to your side) and will assist you in getting stronger with the lockout part of any press variation.

The single arm variation will turn on your core and shoulder stabilizers due to the offset load that can get neglected during bench/overhead pressing. It’s a shoulder saver because it eliminates the lower half of the press where the shoulder is externally rotated and nasty things like shoulder impingements can happen.


Pairing this with a side plank or a suitcase carry gives your shoulders and core the extra work they deserve. For example

1A. Floor press

1B. Side plank variation 30 sec/ Suitcase carry – (25-50% of your bodyweight) 30 steps one hand then 30 steps in the opposite hand.

Form considerations- Grip the dumbbell tight or strangle the handle and keep the elbow close to your side but not touching. Touch the entire upper arm to the ground at the start of each rep.

3) Squat

Single Leg Negative Calf Raise

It’s a common issue to lack ankle mobility as we wear shoes that inhibit the movement of the ankles, like wearing high heels, for example. The ability to dorsiflex the ankle (how far the knees can go over the toes without raising the heel) can get compromised and this can show up in the squat.

As the squat movement has to come from somewhere, lacking dorsiflexion can negatively affect the joints further up the kinetic chain especially the knee, and who hasn’t had sore knees (and everything else) at the end of an intense squat session?

If hammering away at ankle mobility isn’t working for you, try this single leg negative calf raise drill from Dr. Ryan DeBell before your squat session. This will help with ankle dorsiflexion under load.


Form considerations- Having something solid to hold on to is a must. If you have pain bending the knee during this drill, please use a pain free range of motion. Do 5-10 reps on each leg before you squat. Your knees will thank you.

Barbell Reverse Lunge- Front Squat Grip

Most lunge variations are interchangeable because they work on knee stability (knees that go out instead of in) and core (reduced base of support) hip mobility (active stretch of the hip flexors) and help build your quad strength and size. Sounds like everything a good squat needs, right?

This variation does this and more. The front squat grip works on your anterior core upper back strength and thoracic mobility which are also needed for a strong squat.


Pairing this with an upper back or anterior core exercise in a superset works well. For example

1A. Barbell Reverse Lunge – Front Squat Grip – 8-12 reps on both legs

1B. Chin up

Or

1A. Barbell reverse lunge- Front squat grip 8-12 reps on both legs

1B. RKC Front Plank

Form considerations- Start on the light side until you nail the technique and feel confident that you’re not going to bite the floor. Keep the ears away from the shoulders and maintain an upright torso during this exercise.

Wrapping Up

Don’t forget about unilateral training when it comes to getting bigger, stronger and more awesome. Including these exercises into your routine will improve your lifting numbers and overall balance and will help keep you off the lifting DL.

You can throw in some single arm curls (for the girls) to keep Ron happy, if you must. J

Author’s Bio

 Shane “The Balance Guy” McLean, is an A.C.E Certified Personal Trainer working deep in the heart of Dallas, Texas.

No, Shane doesn’t wear a cowboy hat or boots.  After being told that his posture blows by Eric Cressey, he has made it his mission to rid the world of desk jockeys and have fun while doing so.

After all exercise is fun and never a “work” out.

You can follow Shane on Twitter HERE, and Facebook HERE.

CategoriesExercises You Should Be Doing

Exercises You Should Be Doing: 1-Arm Landmine Reverse Lunge

It’s Patriot’s Day today in Boston.

What’s Patriot’s Day you ask?

Multiple choice:

1) A civic holiday commemorating the anniversary of the Battles of Lexington and Concord, the first battles of the American Revolutionary War on April 19, 1775?

2) Tom Brady’s birthday?

HINT: It’s the former.

Patriot’s Day is also the day the Boston Marathon is held, and the city more or less shuts down to cheer on the thousands upon thousands of participants. As a matter of fact, my apartment is located around mile 24 of the course and the elite runners will be passing by shortly.

I need to make this post quick so I can go watch.

1-Arm Landmine Reverse Lunge

**Technically this exercise could be labeled “1-Arm Landmine Reverse Lunge – Perpendicular Grip” since you’re not facing the barbell itself. But that’s too long of a name. So, whatever.


Who Did I Steal It From: Megatron.[footnote]The Transformer, not Calvin Johnson (the ex-football player).[/footnote]

But for real, I can’t recall who I stole this one from. Clifton Harski perhaps? I saw him perform a more advanced variation of this exercise with the barbell itself resting in the “crook” of his elbow – Zercher Landmine Reverse Lunge.

What Does It Do: Reverse lunges in general are a more “joint friendly” single-leg option since the tibia can stay more vertical, and because there’s less deceleration involved (as opposed to a forward lunge where one has to “decelerate” their entire bodyweight).

They’re an excellent choice for people struggling with chronic knee discomfort or pain.

Too, the landmine reverse lunge provides an added core challenge due to the “offset loading” involved. There’s a massive rotary stability component, which makes it a nice fit for those looking to get a little more bang for their training buck.

Key Coaching Cues: I always err on the side of being conservative when it comes to single leg training. Far too often I find trainees playing “hero” on their single leg work, going too heavy, and missing out on all the benefits (hip stability/strength, knee stability, foot strength, grip strength, training multiple planes w/o compensating (knee valgus), core strength, hamstring/quad strength, overall level of sexiness, to name a few).

QUALITY of movement is important here.

Load barbell up with plates (those with longer arms may need to use smaller plates; not bumper plates as shown in the video), “cup” the barbell with your hand, and step back making sure to gently tap the knee to the floor.

Be sure to finish each repetition at the top by squeezing the glute of the working leg (the one that’s not moving).

Fist pumps optional.[footnote]But not really.[/footnote]

ADDENDUM

From Mr. Landmine himself, Ben Bruno:

“I LOVE this exercise a lot with the women I train and get them to go heavy.”

This makes a ton of sense…especially for those who may feel a bit intimidated at first at the notion of deadlifts and squats.

CategoriesExercises You Should Be Doing

Exercises You Should Be Doing: KB Lateral Lunge with Pulse

Some of you may recall an exercise I featured a year or two ago that I stole from Dan John called the Goblet Squat with Pulse.  For those who may need a gentle reminder you can click HERE to get the gist.

Similarly, today’s exercise takes the same “pulse” concept yet adds a slight modification in the form of a lateral lunge (and some pretty sweet techno in the background).

KB Lateral Lunge with Pulse

Who Did I Steal it From:  Well I guess by extension Dan John, but given I haven’t yet seen this tweak anywhere else on the interwebz, Cressey Performance is calling dibs on this one.

Bitches!

What Does It Do:  I love this exercise for people with short or stiff adductors for obvious reasons, but really this is a fantastic exercise for just about anyone as it gets them out of their comfort zone in the sagittal plane. Moreover, the pulse component adds a significant anti-flexion flavor into the mix that Ben & Jerry can’t touch, not to mention, by association, helps encourage people to maintain more t-spine extension which is never a bad thing.

Key Coaching Cues: First of all don’t be a hero and automatically reach for the 24 kg kettlebell, because that ain’t gonna happen. As far as weight selection goes, I’d start on the conservative side – the lighter the better.

One major point to dive into is how to perform a lateral lunge.  Many people make the mistake of stepping to the left or right and allowing their knee to translate too far forward over their toes.  Now I’m not one of those alarmist who feels that the knees should never go past the toes (try walking up a flight of stairs without that happening, or play a sport), but in this scenario I coach people to make their step/lunge to either side and to SIT BACK into the hip.

The knee is obviously going to come forward slightly, but the heel should stay DOWN and glued to the floor at all times. If anything, the tibia (lower leg) should stay a bit more vertical, but if you’re making an effort to sit back into the hip this shouldn’t be an issue.

Once in the bottom position, press the KB out in front of you until your arms are fully extended (elbows locked out), and pause for 1-2 second count.

Bring the KB back towards your torso, return back to the starting position and repeat for the desired amount of repetitions.

I generally shoot for anywhere from 6-8 reps per side.

For those who don’t have access to kettlebells, you should still be able to perform this exercise with a standard dumbbell.  Except in this case you’ll have to hold the DB with both hands wrapped around the handle.  It’s a bit more cumbersome, but doable.

And there you have it.  Try it today and let me know what you think!

CategoriesExercises You Should Be Doing Program Design

Exercises You Should Be Doing: 1-Legged RDL to Squat

I haven’t done one of these in a while, so I figured I’d throw a bone everyone’s way and introduce you to a brand spankin new exercise that I’ve been throwing into my own programs as well those of my athletes and clients.

I know (some) people are under the assumption that since I’ve omitted the bulk of single training from my programs, that this also means I’m avoiding them like the plague and that I’ve written them off entirely, or that what applies to ME also applies to my clients.

This is false, and couldn’t be further from the truth.

In fact, I heart single leg training and think it behooves pretty much anyone with a girl down there part or guy down there part* to include them (to some capacity) in their strength training programs.

The advantages in doing so are numerous, and something I’ve beaten to death numerous times on this blog so I won’t belabor the point now.  If you’re that curious, though (or if you’re new to the site – thanks for stopping by!) just do a search for “single leg training” or “listen to Tony because he’s the smartest man alive, even smarter than Yoda, and is also uncannily witty and awesome” in the search function in the bottom righthand corner.

Or you can visit my buddy Ben Bruno’s site and watch in awe as he demonstrates feats of strength on ONE leg that most people would give up their first born to be able to do on two.

Anyways, without getting too off-track, and since I can’t really think of a smooth segue ,I think single leg training is kind of a big deal and something that should be utilized by most trainees.  Here’s a new one you can try out.

1-Legged RDL to Squat

Who Did I Steal If From:  one of my former distance coaching clients, Laura, sent me an email a while back telling me that she had a nomination for an Exercise You Should Be Doing, and that it was one that her current trainer, the one and only Bill Hartman, had her performing on a regular basis.

What Does It Do: There’s really no other way to describe it other than how Laura explained it to me:

It’s a Frankenstein of a contralateral SLDL (Single-Leg Deadlift) and a RFE (Rear Foot Elevated) squat.

The first half of the exercise is a hip dominant RDL that places heavy emphasis on the hamstrings and glutes, while the second half is more of a quad dominant squat pattern.

It’s a marriage of both worlds, and takes the SLDL to a whole new level and really hammers hip stability, rotary stability (especially with the offset loading), as well as generally increases people’s level of awesome.

Key Coaching Cues:  Trust me, it’s a lot more difficult than it looks, so for those of you who may be scoffing at the “wussiness” of the exercise, just give it a try. It’s a much more humbling exercise than you think, as evident by the fact that I’m clearly struggling a bit with performing it correctly myself.

A few comments:

– Grab a kettlebell and crush the handle!  Literally try to make the handle “melt” in your hand.  Doing so will help the rotator cuff fire through a process called irradiation, and help make everything more “compact.”

– I find that this exercise is much easier to perform with a kettlebell, but if you don’t have access to any, a dumbbell would be a suitable substitute.

– Initiate the movement by hip hinging and forcing the brunt of your weight into your heel.  I like to tell people to try to drive their rear heel towards the ceiling, but also to pretend like they’re trying to push the wall away from them. More to the point, try to think to yourself “make the spine long.”  The entire backside – from head to toe – should make a straight line.

– Once the weight is just below your knee, bend at the knee and single-leg squat the weight to the ground.  This is the main reason why using a KB would be better here, as you don’t have to quite as low to reach the ground.

– Once there, single-leg squat the weight back up to knee level, and then SLDL hinge back to the initial standing position (making sure to finish the movement with your glute!).

– I’d say that anywhere from 5-8 reps per leg would be the goal here.

Try today and let me know what you think!

* In other words: the Who-Ha and Jiggly Bits.  Okay, we’re all grown ups here.  I’m referring to vaginas and penises, okay!  There I said it.

CategoriesExercises You Should Be Doing

Exercises You Should Be Doing: Barbell Reverse Lunge – Front Squat Grip

Today we’re starting the CP expansion, and the staff – along with the interns and other helpers – are going to be moving equipment, rubber matting, and god knows what else, over to the new facility for the next 12-16 hours

I didn’t want to leave all of you hanging, so here’s a quick post on one of my favorite exercises I hate.

Enjoy (wish us luck)!

Quick, off the top of your head pick a handful of exercises you absolutely hate.  Exercises that, if you had to choose between doing one of them or throwing an ax into your face, you’d seriously consider the ax.

I know “hate” is a strong word. Speaking from a personal standpoint there are plenty of exercises that I hate doing, but LOVE how they make me feel and the results they elicit on my body.

– Bulgarian split squats and bench pressing come to mind (the latter making the list because I’m an absolutely abysmal bencher).

– Turkish get-ups really come to mind.

– And yes, sometimes I even dread my beloved deadlifts – particularly when I have to pull from a deficit.

If we were to pool everyone’s answers, though, I’m sure we’d get a hodge podge of exercises and movements ranging from the OLY lifts to rotator cuff drills. Still, if I were a betting man I’d be willing to wager that two exercises could easily make it into the Top 5 Exercises We Hate But Love Them Anyways:

Single leg work (in any form) and front squats.

NOTE: Just so we’re clear, in this context “hate” doesn’t mean people don’t do them.  It just means there’s a teeny tiny part of them – a molecule! – that would rather swallow a live grenade than head to the gym that day and perform what’s on the paper.

So it only makes sense to combine the two!

Barbell Reverse Lunge – Front Squat Grip

What Does It Do: As with any single leg variation, we’re getting a crock-pot of benefits:  increased single leg strength, improved hip stability, increased core  strength and stability, ankle mobility, glute activation, blabbidy blah, blibiddy boo, you’ve heard it all before.

By that same token, what I really like about this variation – reverse lunge – is that it tends to be a little more “knee friendly,” as there’s very little deceleration involved compared to things like forward lunges or walking lunges. In other words, compared to the latter, reverse lunges don’t entail you having to step forward and slowing down your entire bodyweight.

As such, this variations bodes well for those who have cranky knees.

Something else to consider is the bar placement.  With the barbell loaded anteriorly (in front of the body) there’s a fairly aggressive anti-flexion component of the torso, which will encourage a bit more thoracic extension.

Key Coaching Cues:  I prefer the cross body grip as shown in the video, but if someone has ample wrist flexibility to do it, I’m not opposed to using the clean grip.  I just find that those people are few and far between, and generally opt for the cross grip.

The bar should rest on the “meaty” part of the shoulders – I like to tell people to find their shelf – right up against the neck.  Yes, it’s uncomfortable.  Yes, you’re just going to have to suck it up.

Elbows should point straight a head, and NOT towards the floor.  I like to tell people, “chest up, elbows up” throughout.

With your eyes also looking straight a head, un-rack the bar and take two steps back to set up.  From there, extend one leg back to perform a reverse lunge.  The back knee should GENTLY tap the floor, and then, pulling through the front heel of the front leg, you’re going to return back to the starting position making sure to “finish” with that same side glute. Squeeze that bad boy!

God you’re sexy.

Try this one out and let me know what you think.