…most of you reading don’t have enough eye-rolls to give.
I mean, I get it: a blog post on warming-up is about as exciting as me writing about breathing drills, how to make kale chips, or, I don’t know, NASCAR.
But two things:
1. This post will be short and sweet.
2. The video shown below will help you not only feel better, but also help you crush your next (and subsequent) lower body lifts.
There’s no need for me to belabor the point: a proper warm-up prior to lifting heavy things is imperative. It helps increase core temperature, potentiate the central nervous system, “lubricate” the joints, and as a whole is just a smart habit to follow to better prepare the body for the workout to follow.
Thing is…
…the warm-up is also the one thing most trainees skip, treat as the evil step-child, or otherwise ignore altogether.
I can’t fault some people for doing so.
Some warm-ups are just absurd. I’ve had some people show me warm-ups that take 20-30 minutes to complete. Now, this isn’t to say that, sometimes, this isn’t warranted. Depending on one’s injury history (or even other factors, such as age) we can sometimes justify a warm-up of that length.
But too – and more to the point – if I were given a warm-up that takes that long to complete I’d be tossing it some shade too.
On the flip side, I also think one reason many people skip their warm-up is because there’s no rhyme or reason to what they’re doing:
“I’ll do some arm circles here, some hip thingamajiggies there, weeeeeeeeeeeeeeeeeeeee.”
An ideal warm-up will not only prepare you for the stuff you’ll be doing on the weight-room floor, but also address any mobility/range of motion/activation deficits that may exist.
And, lately, my train of thought is that an ideal warm-up is short and to the point and kinda-sorta makes you hate life.
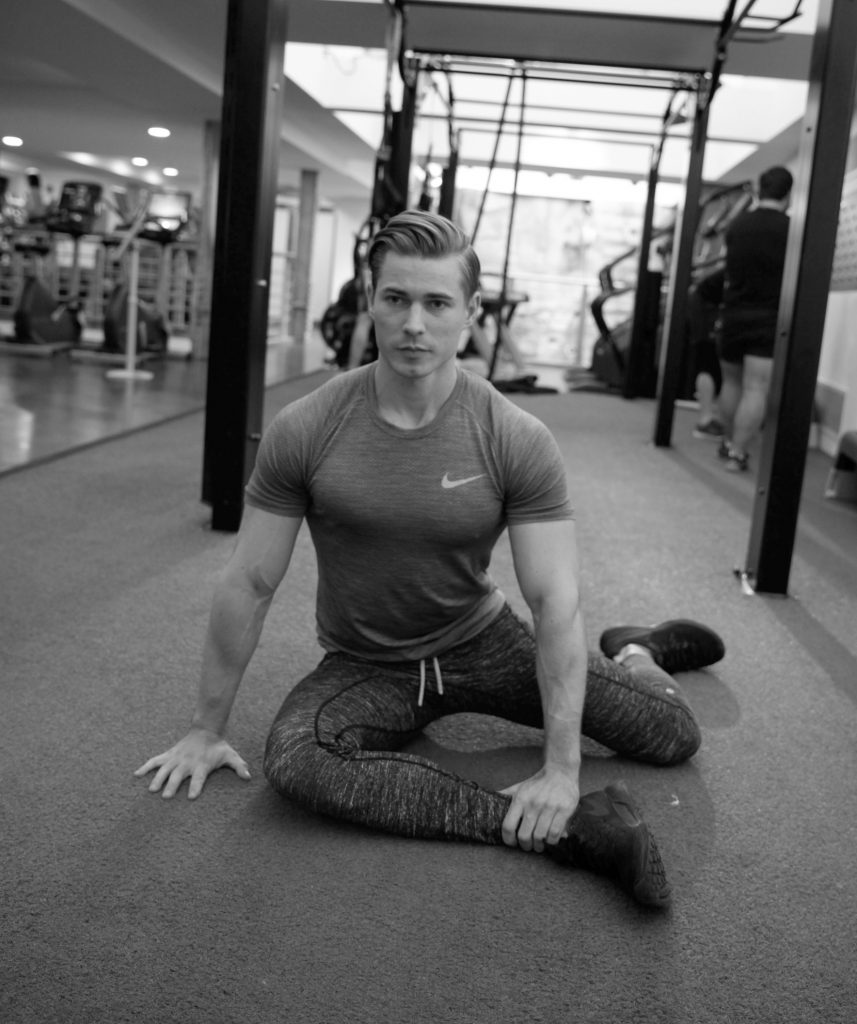
A perfect example is this hip series1. I’ve been using myself of late and is something covered in the (Even More) Complete Shoulder & Hip Blueprint – a brand new product with entirely new content Dean Somerset and I just released this week.
This series hits all the heavy hitters to keep your hips nice-n-juicy for some squats or deadlifts:
✅Hip IR
✅Hip ER
✅Hip Flexion
✅Dissociating hip movement from Lower Back movement.
Start with your hands on the floor for support and try to stay as upright as possible (contingent on your ability to do so).
It’s not a deal breaker if you have to lean to the side a bit.
You also have the option to “ramp” up the intensity while performing this series too. You can go through the motions and make it relatively easy or you can come close to shitting a kettlebell by increasing the amount of tension you put into it.
I encourage clients to dabble in both (because both scenarios have their advantages and disadvantages).
Have fun (<– said with a hint of sarcasm).
(Even More) Complete Shoulder & Hip Blueprint is currently on sale this week till this Sunday for $70 off the regular price, and digs into preparation concepts like this, plus so much more to help you get the best possible plan of action for your clients in order to get them results in the fastest, easiest and safest manner possible.
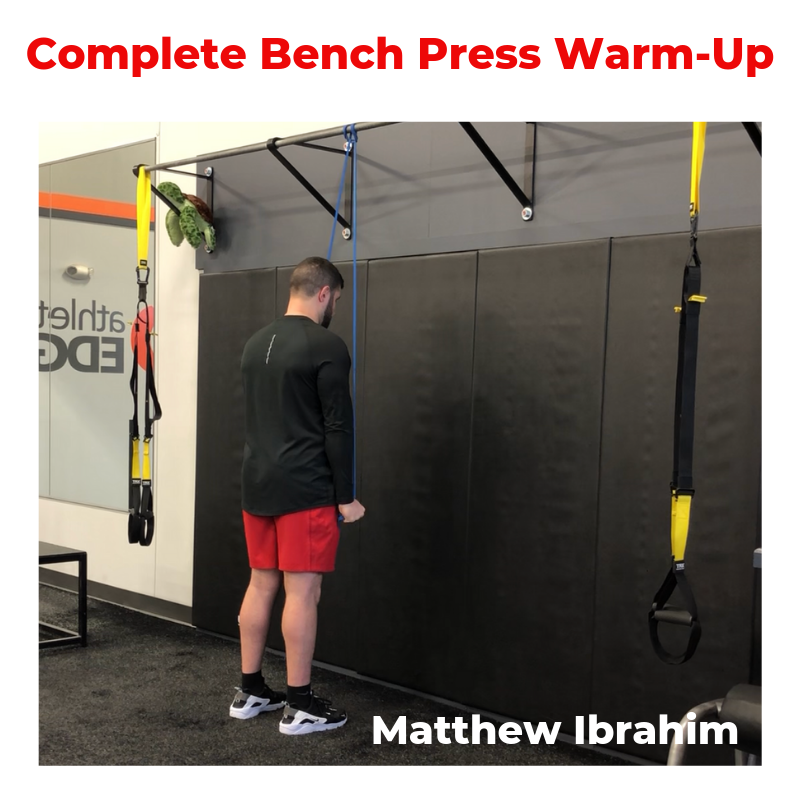
My good friend and fellow Massachusetts based strength & conditioning coach, Matthew Ibrahim, comes through today with the final installment is in “Complete Warm-Up” series.
The shoulder is a complex area that deserves the finest attention to detail when it comes down to a proper warm-up, especially when discussing the overhead shoulder press. The goal here is to prepare the shoulders to perform well in the overhead press pattern for long-term health, function and durability.
One of the key areas to focus on first will be to spend quality time training trunk stability, which acts as a STRONG base of support from which to press upon. Consider the trunk and associated core musculature as your anchor. You need a STRONG anchor for a STRONG overhead press.
Next up will be to work on shoulder mobility and overhead range of motion. The way to achieve this will be through tackling shoulder joint mobility, thoracic (t-spine) extension and flexibility in your lat muscles.
Once all of that is taken care of, be sure to then focus on rotator cuff activation for general shoulder health and robustness, in addition to stability and motor control in your shoulders during the overhead press pattern.
Check out the list of eight overhead shoulder press warm-up exercises below, which have been delicately organized in a progressive manner to help your shoulders feel healthy and strong.
1) Mini-Band Tall Plank w/ Alternating Lateral Tap – x8 each side
2) Yoga Pike w/ Alternating Toe Tap – x3
3) PVC Bench Tall Kneel Rockback – x8
4) Mini-Band Standing Long Pull-Apart – x8
5) Mini-Band Standing Front Lift – x8
6) Mini-Band Standing Overhead Press – x8
7) KB Half Kneel Bottoms-Up 1-Arm Press – x5 each side
8) DB Z-Press – x8
About the Author
Matthew Ibrahim is the Co-Owner & Lead Performance Coach of TD Athletes Edge in Salem, MA.
He has been an invited guest speaker nationally in over 10 U.S. states, which was highlighted by his presentations at Google Headquarters and Stanford University, in addition to guest speaking internationally in Milan, Italy.
His work has been featured in Men’s Fitness, STACK Media and The PTDC.
Currently, he is completing his masters degree at Rocky Mountain University with a direct track into their PhD program. He is a big fan of interacting on Instagram and regularly posts about training, performance and recovery.
If you missed the previous installments of this series from Massachusetts based strength & conditioning coach, Matthew Ibrahim, you can check them out in the links below:
One of the top priorities to focus on when warming up prior to performing your deadlift in training is to spend time in the ACTUAL hip hinge (deadlift) position itself.
Most folks tend to skip out on this and lose out on the benefits. It becomes super important to groove the hip hinge pattern with repetition in the warm-up if you plan to load it in training with your deadlift.
In addition to grooving the hip hinge pattern, here are some other key areas to target in your warm-up when preparing to deadlift: trunk stability, lat activation, hamstring tissue flexibility and hip joint mobility.
All eight exercises below provide your body with the opportunity to warm-up everything labeled above in an efficient and cohesive format:
1) Yoga Pike – x5
2) Walking Inchworm – x5
3) Alternating Bird Dog – x5 each side
4) KB Dead Bug – x8 each side
5) Band 1-Leg Hamstring Pull-Down – x10
6) Band Standing Straight Arm Pull-Down – x10
7) MB Hug Good Morning – x10
8) Cable Pull Through – x10
About the Author
Matthew Ibrahim is the Co-Owner & Lead Performance Coach of TD Athletes Edge in Salem, MA. He has been an invited guest speaker nationally in over 10 U.S. states, which was highlighted by his presentations at Google Headquarters and Stanford University, in addition to guest speaking internationally in Milan, Italy.
His work has been featured in Men’s Fitness, STACK Media and The PTDC. Currently, he is completing his masters degree at Rocky Mountain University with a direct track into their PhD program.
He is a big fan of interacting on Instagram and regularly posts about training, performance and recovery.
One of the top priorities to focus on when warming up prior to performing your squat in training is to spend time in the ACTUAL squat position itself.
Most people miss the boat here.
Why?
Well, it’s important to actually groove the pattern with repetition in the warm-up that you plan to load in your training.
Crazy talk, I know.
A handful of other components to address in your warm-up when preparing to squat will be to work on trunk stability, hip mobility, groin flexibility, ankle mobility and upper back (thoracic) extension.
The cool thing about this is that you can work on ALL of those things in the ACTUAL squat position itself in your warm-up, too!
All 8 exercises below provide your body with the opportunity.
1) All Fours Rockback – x10
2) Catcher Rockback w/ Toe Turn – x8 each side
3) Alternating Spiderman – x5 each side
4) Windowpane Squat – x8
5) Squat-to-Stand – x5
6) Alternating Cossack Squat – x8 each side
7) KB Horns-Grip Prying Squat – x30 seconds
8) KB Horns-Grip Squat w/ Press – x8
About the Author
Matthew Ibrahim is the Co-Owner & Lead Performance Coach of TD Athletes Edge in Salem, MA.
He has been an invited guest speaker nationally in over 10 U.S. states, which was highlighted by his presentations at Google Headquarters and Stanford University, in addition to guest speaking internationally in Milan, Italy.
His work has been featured in Men’s Fitness, STACK Media and The PTDC. Currently, he is completing his masters degree at Rocky Mountain University with a direct track into their PhD program. He is a big fan of interacting on Instagram and regularly posts about training, performance and recovery.
I think one main reason most (not all2) people skip their warm-up is because there’s no rhyme or reason to what they do.
They’ll perform some arm circles here, some thingamabobbers there, do the hokey pokey, turn themselves around, and they’re miraculously “warmed up.”
While something is better than nothing, I do feel the more specific your warm-up is to the task at and you’re about to do – bench press, squat, deadlift, overhead press a centaur – the more “palatable” (not to mention efficient) it’s going to be.
To that end, my good friend and fellow Boston-based coach, Matthew Ibrahim, submitted the first of what will be a 4-part series on how to dial in your warm-up based on the main lift of the day.
Today, it’s the bench press.
Enjoy!
Your bench press warm-up should be short and to the point.
It’s important to spend time priming these main areas: chest, shoulders, rotator cuff, triceps, lats and hips. Remember: the bench press is much MORE than just an upper body exercise.
Most people miss the boat when it comes to working on hip extension (think: bridges, hip thrusts, etc.) in their warm-up prior to bench pressing. Why is this important? Well, it’s important to use stability and tension in both the legs and trunk to your advantage.
You achieve this through maintaining hip extension in your bench press.
Furthermore, if you can successfully anchor the feet down into the ground, use some strong leg drive and stabilize the trunk, you will be able to bench press from a much STRONGER base of support.
Big leg drive = big bench press.
The next step is to target all of those key upper body muscles for a healthy and strong bench press: rotator cuff, triceps and lats. We want to make sure the rotator cuff muscles are ready for overall shoulder health and that the triceps are prepared to assist in arm drive. The lats are crucial in terms of being able to successfully anchor and pin down the upper back area, which forms another STRONG base to drive up from.
Lastly, let’s discuss thoracic extension.
Pure biomechanics folks – please take a DEEP breath and realize that there are ZERO shearing forces going down vertically through the spine here, since the body is positioned in a horizontal set-up on the bench.
Is the upper back “arch” slightly uncomfortable for some folks?
Maybe.
However, I would suggest that only a visibly excessive arch is typically one that might not feel great. A strategic arch that helps the lifter gain leverage is always welcomed for a bigger and healthier bench press, especially from a pure physics and biomechanics standpoint.
All eight exercises below provide your body with the opportunity to warm-up everything labeled above in an efficient and cohesive format.
1) Bridge w/ Alternating Reach – x5 each side
2) Yoga Push-Up – x5
3) Mini-Band Standing Short Pull-Apart – x8
4) Mini-Band Standing Chest Press – x8
5) Band Standing Pull-Apart – x10
6) Band Standing Tricep Extension – x10
7) Band Standing Straight Arm Pull-Down – x10
8) Hands Supported Tall Kneel Rockback – x8
About the Author
Matthew Ibrahim is the Co-Owner & Lead Performance Coach of TD Athletes Edge in Salem, MA. He has been an invited guest speaker nationally in over 10 U.S. states, which was highlighted by his presentations at Google Headquarters and Stanford University, in addition to guest speaking internationally in Milan, Italy. His work has been featured in Men’s Fitness, STACK Media and The PTDC. Currently, he is completing his masters degree at Rocky Mountain University with a direct track into their PhD program. He is a big fan of interacting on Instagram and regularly posts about training, performance and recovery.
We live on a busy street here in Boston so it’s more of less toddler catnip for him. It’s impossible to go for a walk and he not be transfixed with every Hyundai and Honda that whizzes by. Likewise, every book we read together he points out every car,
The concept of Controlled Articular Rotations is nothing new to the industry. Coaches like Pavel Tsatsouline have been singing their praises for decades.
However, there’s been a bit of a renaissance and cacophony of interest within the industry of late due in no small part to Andreo Spina and his Functional Range Conditioning (FRC) courses.
Full Disclosure: I have not taken any of the courses myself, and my only immersion with the concepts are through various colleagues of mine – Dean Somerset, Frank Duffy, Matt Crush, to name a few – who have taken the courses or who have been certified.
FRC is a system of joint health and mobility, and CARs are just one branch underneath the FRC umbrella. Or maybe I should use tree in this analogy?
Anyway, whatever, you get the idea.
CARs are active, rotational movements that explore the outer limits of articular (joint) motion. To steal a frame of thought from Long Island based strength coach Chris Cooper:
“Stretching and other mobility drills are great, but if you can’t control your body in that new range, then what’s the point.
Explore how your body moves, and then push its limits.”
Too, another component of CARs that’s important to respect is the idea of irradiation, which is just a fancy schmancy way of saying “tension.”
When CARs are done well they incorporate an immense amount of tension in the body so nothing else moves (spine, pelvis, etc) so you can capture as much range of motion possible in that one particular joint.
To borrow another scientific word, they fucking suck donkey balls when done correctly.
Here two of my current “go to’s” when it comes to how I’ve implemented CARs into my programs:
Scapular CAR
This is a fantastic option on upper body days before any heavy bench pressing. Moreover, in terms of overall shoulder health these are stellar. Many trainees have gotten into the unfortunate habit of “locking” their shoulder blades in place (most germane to the conversation: scapular downward rotation syndrome) and this drill is a great way to “unglue” everything.
Key Points to Consider
This is NOT a passive position. Glutes on, abs on, make a fist with non-working side.
Place side you’re working in scapular plane
Pretend as if there’s a glass of water on your arm you don’t want to spill.
Protract, shrug (elevate), retract, depress shoulder blade in a deliberate manner.
My cat is such a diva.
Seated 90/90 Hip Switches
I like this drill a lot because it trains both hip internal and external rotation simultaneously.
NOTE: After I posted this my boy Frank Duffy chimed in to say this:
“From a hardo FRC standpoint 90/90 transitions aren’t CARs because they’re focusing just on the IR/ER component of the hips in flexion whereas CARs address all the joint motions. What’s demonstrated is technically considered an Isometric Movement Path (IsoMP).”
Note to Frank: Don’t ever embarrass me on my blog again.4
This is also a good choice to get the hips nice a juicy before a squat or deadlift session. I prefer to start people ground-based (sitting) with hip CARs before I implement quadruped and then standing variations.
Key Points to Consider
My bad for the blatant crotch shot.
Make a fist with both hands – squeeze coal into diamonds.
Both feet must stay in contact with the floor at all times.
Try your best to stay as upright as possible.
If you need to regress, place hands on floor behind you.
The Warm-Up Blueprint For Lifting
Looking for some more ideas to spruce up your warm-up?
Listen, we all go through the motions when it comes to warming-up. I find most people fall into two camps:
Team “nope, I’d rather walk over broken glass.”
Team “the workout is the warm-up.”
You’re either someone who doesn’t do a warm-up (and likely always has achy joints and sub-par lifts), or someone who does warm-up, but then takes 45 minutes to go through a laundry list of “correctives” (and likely has achy joints and sub-par lifts).
It shows you how to design your own customized warm-up using the concepts I discussed above and then some. It takes you through soft tissue release, dynamic stretching, CARs, and targeted muscle activation techniques to better prepare you for squatting, deadlifting, bench pressing, and overhead pressing.
What’s more it’s all done with a British accent.
Jack could read The Silmarillion or, I don’t know, the Wikipedia page for the Kreb’s Cycle and I’d pay to listen to it.
The best part is that this is a home study course. So you can go at your own pace.
I had an amazing time in the DC area this past weekend presenting and catching up with friends and colleagues.
Today is all about playing catch up: emails, writing programs, and of course spending some quality time with family. I’ve got some good blog posts percolating in my head and hope to do a massive writing dump later this week. In the interim, however, I’ve got strength coach George Kalantzis filling in for me today with a stellar article.
Like anything worth having in life, all good things have a starting point.
If you’re like me, you’ve probably been guilty of skipping the warm-up. Don’t bother lying to me – I know you’ve done it. And I get it. You’re crunched for time and the last thing you want to do is roll around and warm-up.
But, what if I could explain the warm-up for you in terms you might appreciate a bit more…
I.e.,……sex.
BOM CHICKA BOM BOM
Do I have your attention now? Great, then keep reading to un-fuck your warm-up.
I got this idea from my mentor and friend John Romaniello a few years back, and it has to be the best explanation of warm-ups I have ever heard and something I find myself using quite often.
“ Workouts are like sex, and the warm-ups are foreplay.”
Sure, you can skip foreplay and have great sex, but if you skip foreplay all the time, chances are things will get stale and your sex life will suffer.
The same thing can be said about your body. Continuing to ignore the warm-up will cause your body to break down, hinder your results, and you’ll become more prone to injuries.
Maybe warming up does not sound that bad after all.
While I’m not here to tell you that you can’t just walk into the gym grab an empty bar and start lifting or to tell you that you “must” foam roll and do a “dynamic” warm-up prior to your lift.
I’m here to say that warm-ups do matter and with the right time and concentration you can get tremendous benefits without wasting useless time.
The Only Warm-up You’ll Ever Need
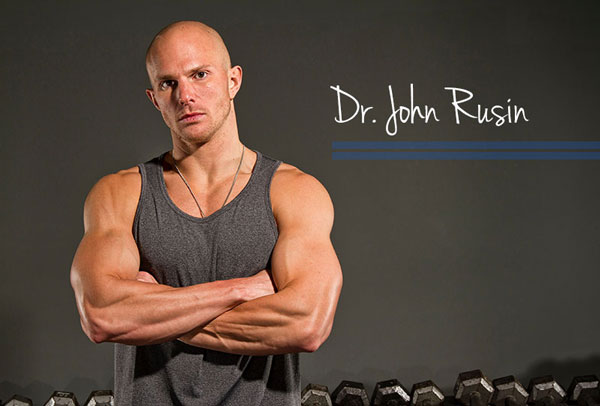
Recently I attended The High-Performance Pain Seminar by Dr. John Rusin at The Onnit Academy in Austin, TX. It was a 2-Day seminar packed with a ton of great information.
There were so many things presented, but what I liked most about his presentation was his ability to make things a lot simpler for my clients and myself. One of those concepts was the warm-up.
A quick and effective warm-up looks like something like this:
Release tight muscles (SMR, Bi-Phasic stretching)
Activate weak or inactive muscles (corrective exercises, stability based activation)
Get Moving (pattern development, central nervous system stimulation)
For the context of this article and not writing an entire book, I will be covering a few of my favorite SMR techniques and drills that everyone can benefit from.
Release Tight Muscles
As a massage therapist, I’m a huge fan of foam rolling. But too often I see people making love to their rollers or just perhaps haphazardly rolling because they’ve seen coaches do it.
Replace Eric’s (Cressey) voice with a little flute and guitar and things could get interesting.
While there are many ways you can “foam roll,” the goal should be to choose an area that will have the biggest carry over to your movement that day.
In general, most people have trouble with the following areas.
Lower Body – Quadriceps, Adductors, Glutes, and Lateral Hip
The mid-back release is one of my favorites mobility drills to use as everyone can benefit from some upper back mobility. Tony wrote an amazing article on it HERE.
Lateral Hip Trigger Point Release
The glutes take a beating daily, and trigger points are a common source of hip and low back pain. Performing daily release on the glutes can make a huge impact on everyday health and performance.
Bi-Phasic Stretching
One of the common myths associated with stretching is that if a muscle feels tight, it should be stretched to improve range of motion and restore flexibility. But, just because your muscle feels stretched doesn’t mean that exercise will yield a positive result.
Take for example the hip flexor and hamstring stretch. A lot of people stretch through pain because they believe it is helping, or do they end up in the wrong position. Not only is this a waste of time, it can actually be one of the prime reasons tightness never goes away.
So what can you do to help with tight muscles?
Instead of haphazardly stretching, learn how to achieve proximal stability through the shoulders, hips, and core. Not only will this save your joints and you’ll feel better, you’ll begin to notice a difference when you hit the gym floor.
Most people will benefit from biphasic stretching in the following areas:
Lower Body– Hip Flexors, Adductors, Posterior-Lateral Hip
Deep Squat Belly Breathing With Lat Stretch x 5 Breaths
Grab a TRX and sit deep into a squat with your feet together and palms up. This will turn off the lats and facilitate a good stretch throughout the upper body. Let your head relax and take deep breaths.
Split Stance Adductor Mobilization With T-Spine Rotation x 6-8/side
I see a lot of people mess this drill up.
Set up on all fours, kick your leg out to the side, and screw your palms into the ground to create tension throughout the body. Rock back slightly until you feel a slight stretch in your adductor (inside leg). Make sure not to round your lower back.
True Hip Flexor Stretch x 30-45 seconds/side
The key here is to sit tall, squeeze the glutes forward and make sure that your spine stays neutral rather than achieving a range of motion through the lower back.
Supine Hamstring Stretch x 6-8/leg
Take your time with this drill. Don’t worry if you cant get your leg straight, just work in a range of motion and a nice controlled manner.
Activate Weak Muscles
After you’ve addressed the areas of mobility, its time to activate and enhance movement.The goal here should be to find the big-ticket items that will enhance movement for the workout, not become a corrective guru.
Movement needs to be good enough, not perfect. Choose big areas that will yield optimal ranges of motion and force production.
Most people will need work in the core, glutes/hips, shoulders, and lats.
Banded Glute Bridge 8-10 Reps
Shoulder Activation x 10 Reps ( Facepulls, Band Pull Aparts, Lat Pulldowns)
Get Moving With CNS Development
After you’ve released tight muscles and activated everything, it’s now time to select a few exercises that will match the primary movement of the workout and wake everything up.
For example, if the workout is based on a heavier deadlift day and you are a bit more advanced, choose something like this:
Explosive drill – Swings, jumps, throws etc
Mobility Drill
If you were more of a beginner, it would look something like this:
Half Kneeing MB Chest Pass
Mobility Drill
In Summary
If you want to maximize your performance and keep your body healthy in the long term, warming up is a must-have component of your workouts. Instead of spending useless time rolling around for countless minutes and just performing exercises haphazardly, spend about 5-7 minutes on exercises that will have the biggest carry over for that day and you’ll begin to not only see a huge improvement in your strength, but also your health.
Author’s Bio
George is a Marine Corps Veteran of 9 years and was awarded an honorable discharge after deployments to Iraq and Afghanistan. He is currently a Master Instructor and Personal Trainer at Equinox in Boston and a licensed massage therapist.
Outside of Equinox, George maintains a fitness related blog that can be found at www.sgtkfitness.com.
He and his wife Shawna reside in Manchester, NH with their daughter Melina and fur baby Lola the dog.
I arrived back to Boston late last night from London and I’d like to say I woke up today well-rested and ready to wow everyone with some witty fitness prose.
I’d like to say that.
Not gonna happen today. I’ve got a ton of emails and programs to catch up on, but that doesn’t mean I don’t have any content prepared for you today. Andrew Millett, good friend and Boston based physical therapist/strength coach was kind enough to send along this baller post today.
I got the idea for this post after recently attending the Advanced Warm-Up and Recovery Workshop put on by Matt Ibrahim and Dr. John Rusin. I didn’t know what new things I may learn at the workshop, but after taking pages of notes and getting new ideas for my clients and patients, it was definitely worth it.
You walk into any gym or fitness facility and you will see people warming-up on the bike, treadmill, elliptical, or maybe even rolling around on the foam roller. It is great to see people putting in the time and effort to consciously warm-up their musculoskeletal, nervous, and circulatory systems prior to engaging in their exercise routine.
The key word in that last statement is:
Consciously
Too many times, people warm-up without any direct goals or agenda in mind. They hop on one of the aforementioned cardio machines and watch TV or read a magazine and aimlessly pedal or step until they think they are ready to exercise. If they are on the foam roller, they probably roll around on it like they are rolling out pizza dough or look like a boy scout trying to start a fire with 2 sticks.
When you are working with a client or are performing a warm-up in your own gym routine, there needs to be a specific goal in mind while warming-up prior to your exercise session.
First off, we need to assess our clients to see what areas they may be lagging in. Here are a few quick and easy tests to see if there are any areas that need to be targeted for some type of self-myofascial release.
Ankle
In the sagittal plane, the ankle needs to be mobile. It needs to be able to plantar-flex and dorsiflex for the demands of life as well as demands in the gym.
In order to perform a squat without compensations, the ankle must be able to dorsiflex and allow the tibia to translate anteriorly as the person descends down in the bottom position. To determine if someone has adequate ankle dorsiflexion, try the Knee to Wall Test.
Knee to Wall Test
You instruct the client to place their foot on the tape strip. On the tape strip, there are 4 lines, each 1-4 inches away from the wall.
Start with the client’s foot on the “4” line. Four inches is required for adequate dorsiflexion in order to perform the squat.
Tell the client to try and touch their knee to the wall without letting their heel come up. Also, make sure they are going into valgus or varus movements at the knee to potentially compensate for lack of dorsiflexion.
If someone cannot reach from the “4” line, then have them move up and determine where they can reach from. Then test the opposite side.
If they cannot reach, ask them where they “feel it.” If they feel they can’t go any farther due to tightness in the back of their ankle, then we know that some of the soft tissue structures on the posterior aspect of their lower leg could be to blame.
For that, some type of self-myofascial release (SMR) to the soleus, posterior tibialis, flexor hallucis longus/flexor digitorum groups could help to improve range of motion at the ankle.
If they feel a pinch on the anterior aspect of the ankle, that could potentially be a joint mobility dysfunction.
Try a Banded Ankle Mobilization.
Start by placing a thick superband around a post or squat rack; something that can’t move. Then place the band at the ankle joint, just inferior to the medial and lateral malleoli. Place a good amount of tension on the band. While maintaining this tension, recreate the same movement as if you were performing the knee to wall test. Go as far as you can comfortably go. Hold for 2-3 seconds when you can’t go any farther. Return to the starting point and repeat for 6-10 reps.
Then retest the Knee to Wall Test.
If it improves, then we know the Banded Ankle Mobilization worked. Whether it improved or not, it might be wise to refer out to a licensed healthcare practitioner to further assess the ankle to determine what may be limiting that motion.
If there has been an improvement in ankle mobility, we want to be able to control that “new found” mobility.
Try the Heel Raises with Single Leg Eccentric. I first saw this from Dr. Ryan DeBell of The Movement Fix.
Key Points:
– Perform the movement slow and controlled.
-When your foot is are parallel to the ground, slightly flex the knee and go slow and controlled towards the ground.
-Imagine like you are slowly pulling your heel to the ground.
Hip
At the hip, we need to determine a few different areas of mobility. Starting in the sagittal plane, we need to determine if the client has adequate hip extension. If the client doesn’t have adequate hip extension mobility, they will have a more difficult type using their gluteal musculature to perform some of the movements we ask them to.
In addition to not being able to effectively activate and use certain muscles, lack of hip extension mobility can place increased stress on the lumbar spine and the knees, as well as some other more distal joints. By ensuring the client has adequate hip extension mobility, then we know some of the other joints of the body will be able to function properly.
To determine if someone has adequate hip extension mobility, we have two different options. First off, you can perform the ½ Kneeling Hip Extension Test.
VID ½ KNEELING HIP EXT TEST
Have the client place one knee down on a padded surface and the other knee up. Instruct them to contract their gluteus maximus on the down leg side, brace their abs, and slowly bring the hips forward.
We ideally would like to see 30 degrees of hip extension on the trail leg. You can use the Inclinometer App on the Iphone to measure the angle.
You can also perform a Thomas Test. This is a test that is typically taught in physical therapy schools to determine hip extension mobility.
*Disclaimer*: First off, you need to ask your client if they are okay with you placing your hands on them to assess their hip mobility.
Thomas Test
Self Thomas Test (and Sick Beats)
You are going to have the client lie supine on the side of a table or bench. Have them hold their knee at 90 degrees of hip flexion, or at hip height. Place your thumb on their Anterior Superior Iliac Spine (ASIS).
Using your other hand, slowly lower the leg the client is not holding with their hands.
If you can lower their leg to the level of the table and their ASIS does not translate anteriorly, then we know they have adequate hip extension mobility.
If you lower the client’s leg and their ASIS DOES translate anteriorly prior to the leg reaching the level of the table, then we know there is some muscle group limiting hip extension.
To determine, which muscle group, then we need to change the position of the lower leg.
If we extend the knee and perform the same test, this will place tension on the Psoas and Iliacus muscle groups. If you lower the leg with the knee extended and the ASIS translates anteriorly, then we can determine Psoas and Iliacus are to blame for decreased hip extension mobility.
If we lower the leg and the ASIS doesn’t translate anteriorly, then the only other muscular group to blame would be Tensor Fascia Latae (TFL).
To test for this, we slightly abduct the hip and perform the same test. If the ASIS translates anteriorly, then we know TFL is to blame.
If we run through all of these tests and each test with the knee extended doesn’t cause anterior translation of the ASIS, but when the knee is flexed it does, then we can determine that Rectus Femoris is to blame.
To improve hip extension mobility, try SMR to whichever area you determine to be problematic.
SMR w/ Lax Ball to Iliacus/Psoas & TFL
SMR to Rectus Femoris
SMR to Vastus Lateralis & TFL
Then re-test to see if any of these SMR variations improved the client’s hip extension mobility.
Once someone’s hip mobility has improved or is normal, we want to make sure they can stabilize in that mobility.
The Cook Hip Lift is a great movement for accessing and stabilizing hip extension mobility.
Key Points:
-Place a ball in your hip crease.
-Use non-stance leg to keep ball in hip crease.
-Lift hips up off ground. Do not let ball fall out
-Perform for 8 repetitions per side.
Thoracic Spine
The thoracic spine is another area of the body that needs adequate mobility. If it doesn’t present with adequate mobility, areas of the lumbar and cervical spines and the shoulder can be affected. It is one of the most influential areas of the body because of the impact it can have on so many different areas.
To determine if your client has adequate thoracic spine mobility, it is best assessed in quadruped using the Quadruped Thoracic Rotation Test.
Normal thoracic rotation in the general population should be 50 degrees. To measure this, use the Inclinometer app and place it ½ way between both shoulders on the thoracic spine.
When you are passively bringing them through the movement, make sure there is no lumbar movement such as sidebending occurring as this will skew your measurements. Also, gently rotate the client. Don’t try to force rotation on someone that may not have it.
If the client does not have 50 degrees of thoracic rotation, there are various thoracic spine mobility drills that can be performed such as:
A-Frame T-Spine Mobilization
Side Lying Thoracic Rotation
Side Lying Rib Roll
If the client has 50 degrees or more of passive rotation, but less than 50 degrees of active rotation, a thoracic spine motor control drill can be performed.
Drills such as:
Quadruped Assisted Thoracic Rotation
Key Points:
-Perform slow and controlled.
-Make sure not to side-bend through your spine. Make sure to rotate through mid-back.
Seated Assisted Thoracic Extension
Key Points:
-Squeeze ball between your knees.
-Slightly turn away from where band is attached.
-Slow and controlled, allow band to rotate body.
Shoulder
The last pertinent area of the body to address in a warm-up is the shoulder. Limited shoulder mobility in shoulder flexion, abduction, or internal/external rotation can affect function at the shoulder, cervical spine, thoracic spine, and even the lumbar spine.
To assess the shoulder, movements such as:
Supine Shoulder Flexion Test
Supine Shoulder ER Test
If there are limitations in mobility, performing self-myofascia release as shown below can help:
Once mobility has been improved, now we want to make sure we can use that mobility. Performing movements such as:
Back to Wall Shoulder Flexion
Key Points:
-Maintain low back flat to the wall.
-Raise arms up and when the reach shoulder height, gently reach 1 inch in front of your finger tips.
-Continue this gentle reaching as you continue to raise your arms overhead.
Forearm Wall Slides
Key Points:
-Slide arms up the wall.
-When your elbows get to shoulder height, gently press into the wall/push your trunk away from the wall.
-Maintain the pressure on the pinkie side of your hand as you slide up the wall.
Quadruped Assisted Reach Roll and Lift
Key Points:
-Perform slow and controlled.
-Slowly reach out. Rotate palm up to the sky. Slowly raise arm up.<
Yoga Push-Ups Sans Pushups
Key Points:
-Think of pushing the ground away from you with your hands.
-Should be felt in your upper back and out and around your rib cage.
If you have no mobility limitations in any of the aforementioned areas, feel free to use the motor control or stability drills to help primer your nervous system to prep you for your lift.
There you have it! Create a plan for your warm-up, do said plan, and then go and get after your training!
About the Author
Andrew Millett is a Metro-West (Boston) based physical therapist
Lets be honest: most of you reading either skip it altogether or discreetly brush it to the side as something you know you should be doing, but, you know, don’t.
I’m not here to judge. I do it too.
I don’t feel I need to sit here like an overbearing parent and type out all the reasons why you should be doing a thorough warm-up prior to training. But I will anyways.
A warm-up:
Improves alignment and posture.
Allows for additional and opportune times to address and tackle “problematic areas” such as the thoracic spine (lack of rotation and/or extension), hips (it takes a crowbar to squat past 90 degrees), glutes (you don’t have any), and ankles (the cement blocks we wear for shoes – not to mention high-heels – place us in a constant state of plantar-flexion, thus compromising our ability to dorsiflex).
Helps to increase core temperature and promotes blood flow…which helps improve flexibility/extensibility of muscles.
All that said – and despite many, many, MANY– smart people telling us how important it is…people still tend to skimp on their warm-up.
NOTE: HERE is an article I wrote a few years ago on “The Perfect Warm-Up?” As well as THIS one I wrote for STACK.
This video was part of the article linked to above. I only post it NOW for Eric Cressey’s EPIC video-bomb. Wait for it…..
Long story short: including a warm-up prior to training is a smart use of training time, will help to offset many of the poor sitting (and standing) positions we tend to be stuck in on a daily basis, and it only takes maybe 10 minutes.
DO IT!
The Over-Warm-Up
So now that we’ve established that you’re not going to warm-up, lets discuss the concept of the over warm-up, a term popularized by strength coach and powerlifter Paul Carter.
You’re TOTALLY going to be down for this…so keep reading!
For any uppity strength and conditioning snobs reading this can also, technically, be referred to as Post-Activation Potentiation.
Rather than attempt to define what Post-Activation Potentiation (PAP) is, I’ll defer to Bret Contreras:
“PAP is a phenomena by which muscular performance characteristics are acutely enhanced as a result of their contractile history. The underlying principle surrounding PAP is that heavy loading prior to explosive activity induces a high degree of CNS stimulation which results in greater motor unit recruitment lasting anywhere from five to thirty minutes.”
Traditionally, PAP is performed by utilizing a close to max-effort lift (think: bench press, squat, deadlift, arm wrestling a Terminator) followed suit with an explosive activity with the same “pattern” (think: medicine ball throw, vertical jump, 10-40 yd sprint, high-tailing it to local florist when you forget it’s your anniversary).
To take advantage of the phenomena most strength coaches agree that PAP is best utilized using the “lift something heavy then perform a similar explosive movement after” approach.
NOTE: I’d encourage you to read Bret Contreras’s full article HERE on PAP if you really want to dive into the nitty-gritty stuff.
However, for strength purposes I’ve found using a similar approach useful. Essentially you’ll take your “main” movement of the day – squat, bench press, deadlift – and extend your warm-up/build-up sets so that you work above your intended, scheduled work load.
So, for example, lets say you’re performing squats today and your program calls for 4×4 @ 75% of your 1RM. For the sake of argument lets say your 1RM is 350 lbs.
1) 75% of 350 = 262 lbs (rounded up to 265).
2) A traditional warm-up may look like this:
1×8 @ 40% (140 lb)
1×6 @ 50% (175 lb)
1×5 @ 60% (210 lb)
1×2 @ 70% (245 lb)
4×4@ 75% (265 lb)
3) The OVER warm-up will look like this:
1×8 @ 40% (140 lb)
1×6 @ 50% (175 lb)
1×5 @ 60% (210 lb)
1×2 @ 70% (245 lb)
1-3×1 @ 80-85% (280-300 lb)
4×4@ 75% (265 lb)
So in this case the objective is to hit a weight above or past the intended work sets to “potentiate” the nervous system, and thus (hopefully) making them feel easier/lighter.
The idea is to ENSURE your “over warm-up weight” is one you KNOW you can crush. Meaning, it’s not close to a 1RM and bar speed should still be, well, speedy.
Something else to consider is that this should only be utilized when you’re using sub-maximal weight with your work sets (60-80% of 1RM). DO NOT attempt this when you know you’re working at percentages higher than that.
I mean, you could…it just (probably) won’t end well.
Also, this isn’t something you’re going to want to perform long-term. Maybe use it for a block (3-6 weeks) and then revert to something else.
Once a week I head over to Boston University to fiddle around in the strength and conditioning center. I’ve been going there for well over two years now, and as much as I love training in a state-of-the-art facility – if for nothing else for a little change of scenery – I think the greater benefit is the opportunity it allows for me to hobnob with some other really smart, forward thinking coaches.
Yesterday was a classic example.
I had just finished my bench workout (I know! Benching on a Tuesday! Blasphemy!) when coach Jill Zeller asked if I’d take a few moments to look at her hip. Her left side had been bothering her as of late, and she was curious to get another set of eyes to take a peek and to see if I picked up on something she hadn’t.
In the process fellow BU coach, Will Turner, joined the festivities and before you could say Minas Tirith three times really fast, the three of us were geeking it up talking about acetabulum anatomy, Left Anterior-Interior Chain (<– Postural Restoration Institute shenanigans), and pelvic alignment.
Oh my god, get this….at one point Jill was like, “dude, if it’s a Left AIC, why would my left hip hurt?” And Will was like, “anterior humeral glide syndrome?” And I was like, “and that’s why the honey badger can’t have gluten!!!”
It was hilarious.
Whatever. You had to be there.
Anyways, it was a good brain dump and after the fact Jill and Will started chatting about some new fancy schmancy warm-up drill Jill had picked up the previous weekend while out in Denver working with University of Denver strength coach, Matt Shaw.
Split Stance 3D Hamstring Mobilization w/ Reach
What Does It Do: This actually hits a number of cool things:
1. The “3D” part refers to the multi-planar aspect of the mobilization. I.e., by reaching in a variety of directions (forward, left, and right) we then hit the hamstrings in all planes of motion – not just sagittal.
2. As such we also get a fantastic glute stretch/mobilization because we’re grooving a hip hinge pattern.
3. In addition, with the bent leg, there’s a significant ankle dorsiflexion component.
Key Coaching Cues: I feel this one looks fairly self-explanatory, but there are a few points to hammer home.
– It’s important to maintain a neutral spine and to try to avoid going into excessive lumber extension on these. A lot of people are going to want to crank through their lower back on these rather than through the hips.
– Too, you need to own your rib position (something I explain in more detail HERE).
– To prevent any HYPERextension of the knee, rather than locking the knees out I’d advocate for “soft knees” instead (just short of locking out).
– Be sure to “push” your hips back while performing the reach in the opposite direction.
– Shoot for 3-5 reps per direction.
– Use these as part of an extended warm-up, or as a nice “filler” in between exercises.


 Matthew Ibrahim is the Co-Owner & Lead Performance Coach of TD Athletes Edge in Salem, MA.
 Matthew Ibrahim is the Co-Owner & Lead Performance Coach of TD Athletes Edge in Salem, MA. He has been an invited guest speaker nationally in over 10 U.S. states, which was highlighted by his presentations at Google Headquarters and Stanford University, in addition to guest speaking internationally in Milan, Italy.

 Matthew Ibrahim is the Co-Owner & Lead Performance Coach of TD Athletes Edge in Salem, MA.
 Matthew Ibrahim is the Co-Owner & Lead Performance Coach of TD Athletes Edge in Salem, MA. He has been an invited guest speaker nationally in over 10 U.S. states, which was highlighted by his presentations at Google Headquarters and Stanford University, in addition to guest speaking internationally in Milan, Italy. His work has been featured in Men’s Fitness, STACK Media and The PTDC. Currently, he is completing his masters degree at Rocky Mountain University with a direct track into their PhD program. He is a big fan of interacting on Instagram and regularly posts about training, performance and recovery.