CategoriesAssessment

Assessment: Can Your Clients Actually Do What You Want Them to Do?

There’s a lot that needs to be taken into consideration when assessing a new client.

Their unique injury history (past and present), goal(s), training experience, time constraints, equipment availability, even their favorite 90’s tv teen drama (if it’s not Party of Five we can’t be friends)…

…all are taken into account and cross-pollinated with my educational background and experience to ascertain, to the best of my ability, what will be the best course of action to get said individual from Point A1to Point B2 this means becoming  in the most time efficient and and safe manner possible.

Copyright: viacheslavmaksimov / 123RF Stock Photo


For all intents and purposes the assessment, at least from my perspective, is an amalgamation of muscle testing, movement screens, table work, and good ol’ fashioned investigative work to see whether or not something shakes free or if any “red flags” exist.

But more importantly, the assessment is a splendid opportunity to set the tone, prove to someone that they’re not “broken,” and to help them find their TRAINABLE MENU.

In short, I often joke that my assessment can be described as follows:

“Can the person standing in front of me do stuff?”

There’s only so much muscle testing, table work, looking at range of motion, and “hmmm’ing” and “ahhhh’ing” any one individual can tolerate before (s)he wants to jump through a pane glass window.

To that end, I prefer to make my assessments more palatable by getting the person standing/sitting in front of me more involved in the process and providing the “facade” (for lack of a better term) that they’re being taken through a pseudo training session.

By having him or her MOVE during their assessment I accomplish a few things:

1) I don’t come across as a creepoid by just staring at them for 60 minutes.

2) I get waaaaaaay more information in terms of movement ability, compensation patterns (if any) that exist, and whether or not certain positions (or loads) exacerbate their symptoms.

Active vs. Passive Assessment

One simple way to do all the above is to differentiate between one’s ability to actively perform a specific movement pattern and to passively do it.

My colleague, Luke Worthington, summarized this point beautifully and succinctly in his presentation for The Complete Trainers’ Toolbox:

“What can THEY do?” = Active Assessment

“What can I do FOR them?” = Passive assessment.

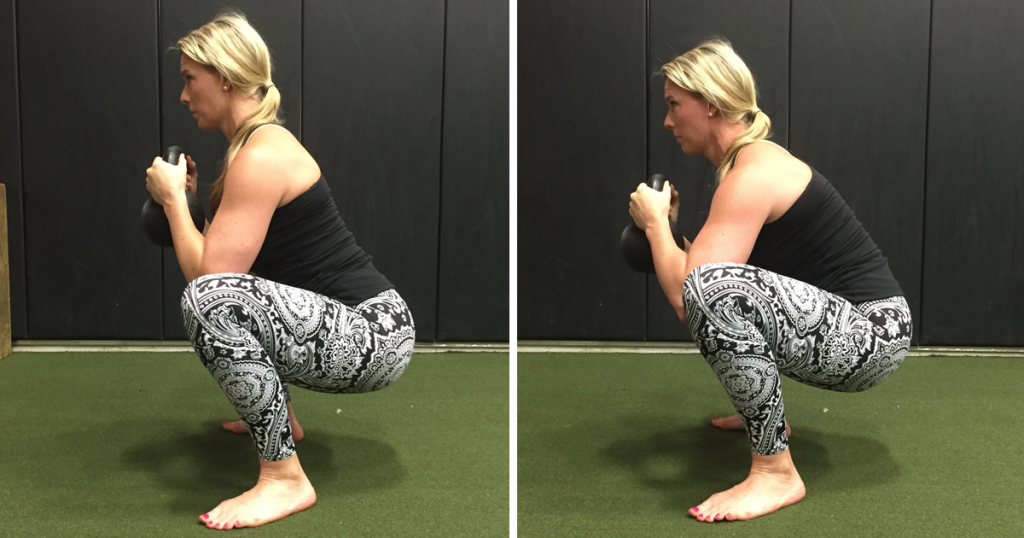
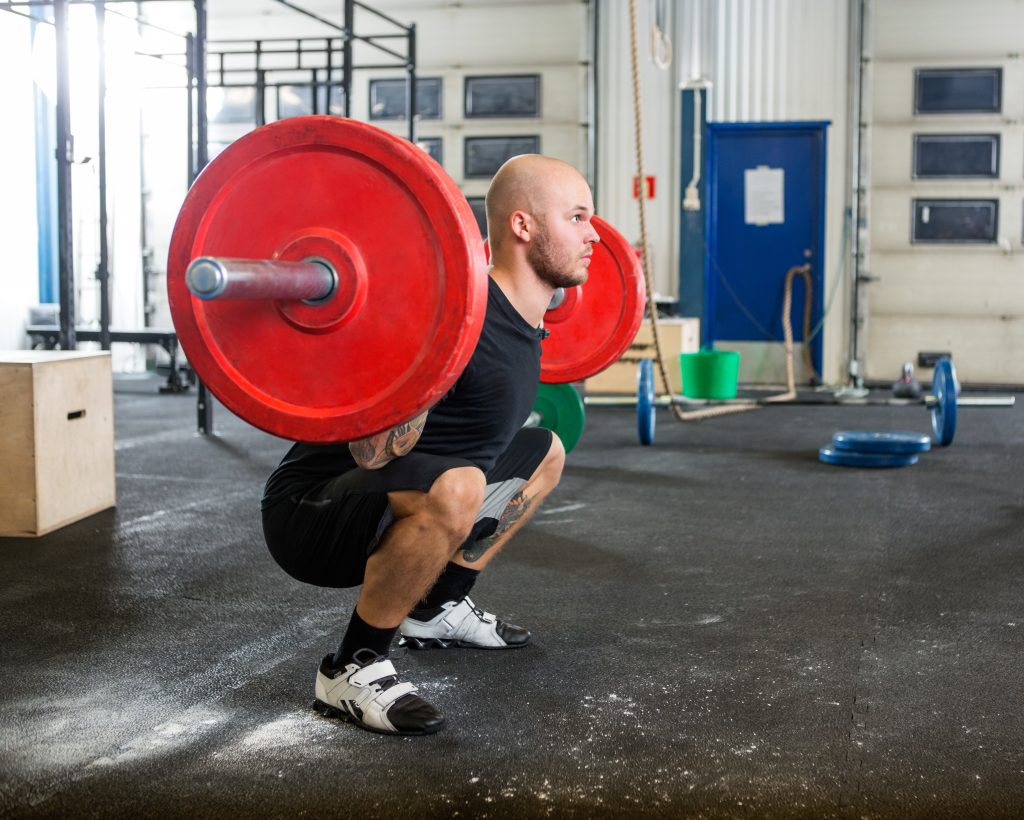
Lets us the squat as an example.

When you watch someone perform a standard bodyweight squat – or loaded – you’re bound to see a bevy of things go awry.

Don’t get me wrong, it’s not always a shit show.

Every so often I’ll work with someone for the first time, they’ll demonstrate a well executed squat, and I’ll break down crying like the first time I watched Lady Gaga and Bradley Cooper perform Shallow in the movie A Star is Born.

However, if I’m being honest, this doesn’t happen often.3

Generally speaking there’s always something weird or wonky or twingy whenever I watch someone squat

No one is perfect.

But to that point, I think it’s imperative to differentiate between someone’s ACTIVE ability to do something and their PASSIVE ability to do it.

Watch someone squat and it’s likely you’ll see any one of the following (if not a combination):

  • Knee valgus
  • Excessive rounding of the spine
  • Excessive pronation of the feet
  • Loss of balance
  • A perceived lack of depth (<— which is arbitrary, but if there’s a lot of “effort” to get to a certain depth or it’s just really, really shallow, then that is important to note).

And when we do see any of the above we have a nasty habit of assuming that said individual is dysfunctional, and subsequently end up over corrective exercising them to death.

Fast forward three months (and a cornucopia of hip mobility and ankle dorsiflexion drills) and there’s been little, if any, improvement.

To repeat: Watch someone squat (actively).

That will give you a ton of information.

But don’t stop there; especially if you find they’re having trouble with it.

You should also test them PASSIVELY.


Oftentimes, when you add this extra layer of assessment, in a way that’s less aggressive and provides a bit more stability to the system – FYI: HERE‘s another way to do it in a quadruped position – you’ll find that they CAN do what you’re asking them to do.

Why Is This Important?

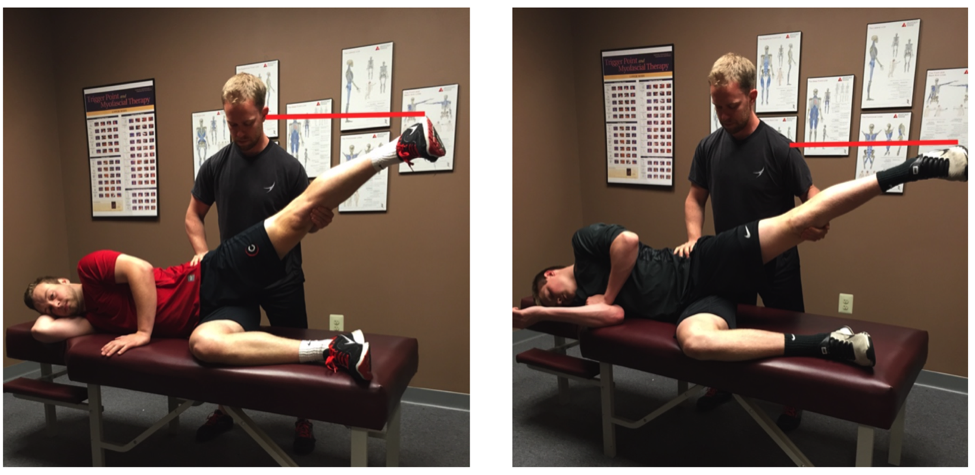
In the video above I’m taking my training partner, Justin, through a basic (passive) hip scour/hip flexion screen. If he were a client this would follow an active squat assessment.

I’d want to see if his ACTIVE  movement (he’s doing the work) matched his PASSIVE (I’m doing the work). From there I’d want to compare the gap that exists between the two.

I want that gap to be as narrow as possible.

If his active squat was poor yet I re-assessed passively and saw an improvement – I.e., that he could, indeed, access more ROM – then I can surmise with a high degree of certainty that he doesn’t have a micro-penis he is likely not dealing with something more nefarious, like a bony block or musculature issue.

In this scenario I can do my job as a coach.

I can implement the appropriate “correctives” and/or exercise progressions/regressions to help him learn to squat.

His body showed me he can do it passively, so I need to show it how to do it actively.

If, however, there was no improvement when testing him passively, then:

It’s not my job.

1) I’d still work within my scope and train him within the ROM that’s pain free and that he can control.

2) However, I’d also refer out for more diagnostic testing or manual therapy to compliment his iron work.

Take Home Points

  • The assessment shouldn’t be used as a tool to point out every…single…dysfunction someone has.
  • Besides, what presents as “dysfunctional” actively may just be the body turning on the emergency brakes.
  • Also look at PASSIVE movement.
  • Try to narrow the gap between active ROM and passive.
  • If more ROM is present passively, then do what you do best…coach!
  • If ROM is poor (or pain exists) actively AND passively, you may want to consider referring out.
  • Groutfits make my butt look amazing.
CategoriesAssessment Corrective Exercise Program Design

Part II: Correcting the Lower Back and Hips

A few weeks ago my good friend and author of Day by Day: The Personal Trainer’s Blueprint to Achieving Ultimate Success, Kevin Mullins, wrote an introduction of sorts to the state of “corrective exercise” in the fitness industry.

To summate: Stop it. Just stop. People still need to train in order to get better.

He followed that up with a treatise on the shoulders. Today, he’s back to cover the lumbar spine and hips.

Grab a cup of coffee.

This is good.

Copyright: kudoh / 123RF Stock Photo

Part II: Correcting the Lower Back and Hips

In the last article – HERE – we looked at how we would address the issues that occur at the shoulders and thoracic spine. We discovered that optimal shoulder function comes from a healthy scapulohumeral rhythm, a mobile thoracic spine and humerus, and strong scapula and core muscles. In the end we identified common problems and proposed unique exercise solutions that can not only correct issues when they arise, but also strengthen the capacity of the joint altogether.

That followed my opening article in which I discussed my stance on the current state of our industry and how we’ve gone overkill in regard to corrective exercises. You can read that HERE.

Which brings us here to the next installment of the series – a similar dive into the lower back and hip joint, an anatomically different, but physiologically similar region of the body.


You’ll discover how lower back pain isn’t simply the lower back, how hip dysfunction or immobility requires more than flexibility and blood flow, and that integrated three-dimensional movements are the key to unlocking the hips and core.

As Shakira sings, “hips don’t lie”.

We are going to dive into the anatomy of the region, the physiology of the segments, and biomechanical implications that must be considered by any professional worth their salt.

We are going to unlock our, and our client’s, potential by adding another five great exercises to the equation too. But first, I want to take a moment to clear the air and amend a point I made in my previous post.

An Amendment on the FMS

In my last article I made a bit of a blunder when I described an issue that I have with the Functional Movement Screen. In my efforts to write a short, and interesting, piece of literature that covers a complex topic I did not effectively communicate my viewpoint on the matter. My claim that “the FMS puts the fear of God into trainers” isn’t quite accurate.

Brett Jones of FMS and I had a call on the matter and enjoyed an outstanding conversation on the FMS, how trainers are using it, and my specific area of concern.

Brett Jones (Note From TG: NEVER make Brett angry. Ever. Just kidding. Brett’s as professional as they come and one of THE best presenters I have ever had the pleasure of learning from. But seriously, don’t feed him past midnight.

He drew to my attention that the FMS, when taught properly and used properly, especially after the level 2 certification, provides trainers a lot of tools to correct and address issues that are present in the screens.

And he is spot on.

In my experience with the Functional Movement Screen, and the literature it publishes, I’ve found tremendous success in identifying, addressing, and correcting flawed patterns. The tools are present for a trainer to succeed.

So, to that end – the FMS itself is not an issue, and in fact, the certifications and resources that Gray (Cook) and Lee (Burton) provide are high on my list of recommended education for trainers. Simply put, much of the responsibility lays on the trainer performing the assessment to ensure they understand what they are screen, why they are doing it, and what it all means regarding the client’s exercise program.

And so, my point is really this:

“The FMS can put the fear of God in trainers who haven’t invested enough time to understand its purpose and nuance. This can be avoided by investing in your education and diving head first into new information.”

Basic Hip and Lower Back Anatomy – Skeletal

When looking at the skeletal anatomy of the spine and hip we find that it is quite simple. There are four major considerations:

  • The thoracic spine – capable of flexion, extension, and rotation. In an ideal world the thoracic spine handles the bulk or rotation and extension of the spine.
  • The lumbar spine – capable of flexion, extension, and rotation. In an ideal world the lumbar spine serves more as a stable base for movement that allows the pelvis to move underneath, and the thoracic spine to move above.
  • The pelvis – capable of anterior tilting (pouring water out of our belly button), posterior tilting (pouring water out of our back) and lateral tilts to either side (pouring water out of our sides).
  • The femurs – capable of internal and external rotation, flexion and extension, as well as abduction and adduction. Each of these movements are necessary to generate the variety of locomotion patterns we execute daily and for the specific movements we perform in training.

The ankle and foot are also capable of impacting health of the hips too, especially in the running community. Issues in these lower joints can cause negative effects to move upwards in the kinetic chain and begin causing negative adaptations in the hip joint or lumbar spine. We will address these correctives in the final part of this series, Hip-Knee-Ankle-Foot, so stay tuned.

For now, simply acknowledging their role in the process is enough.

Under the same principles, the shoulders can also impact the function of the hips. A dysfunction in the shoulders, such as upper cross syndrome, impacts the T-spine, which disrupts the lumbar spine and pelvis. Improving the health of the shoulder joint can help alleviate the poor postures that stress the lumbar spine and allow for a better functioning pelvis that experiences the ranges of tilt patterns because the lack of tightness in the lower spine. The scapula specifically should be considered (and will be in our correctives).

Basic Anatomy of Spine and Hips – Muscular

There are muscles that could be mentioned in this section that run very deep in the body and have very specific function.

The multifidus for example is a muscle that runs along the spine and has an important function; yet, our training practices aren’t exactly targeting it.

It is always good to know these types of muscles, such as the quadratus lumborum, obterus group, gemelli4 , and the aforementioned multifidus. Still though, this article is meant for our day-to-day efforts and most trainers simply don’t need to consider these things

There are some major players that you need to know though:

  • The abdominal wall, specifically the transverse abdominus, rectus abdominus, internal and external obliques, and psoas muscles. These muscles flex, extend, and rotate the spine and some act on the hip as flexors.
  • The gluteus maximum, minimus, and medius. These muscles act on the hip as external rotators and hip extensors.
  • The four muscles of the quadriceps, three muscles of the hamstrings, the tensor fascia latae as well as your abductors and adductors all act on the hip and knee joint. These muscles drive motion of the femur in the hip socket in a variety of ways that are unique to each pattern. In the next section we’ll isolate the specific motions and what muscles are involved for bookkeeping purposes.

The erector spinae, the quadratus lumborum, lattisimus dorsi, and lower trapezius muscles function on the thoracic and lumbar spine from the posterior of the body. These muscles are critical for putting the T-spine in the right place and stabilizing the L-spine during movement.

Basic Movement Physiology

Knowing what is in play is only half of the battle.

Note From TG: Goddamit Kevin. Rule #239 of being a nerd is that whenever the phrase “only half the battle” is used it must always be followed with GOOOO, Joe

In fact, knowing the structures and muscles involved is irrelevant if we don’t understand how they create movement in the body. To avoid blowing this article out into a thirty-thousand-word book on physiology we are going to have a down and dirty list of functions and the muscles that do the work.

I implore you to read and learn more about the muscular physiology that drives these movements from other resources. Play with things at the gym and try to “feel” what you can. I felt obligated to include this information in an honest effort to create the best free guide to hip correctives you’ll find. What you do with your education from there now rests in your hands.

  • Spinal Flexion – rectus abdominus, psoas major
  • Spinal Extension – quadratus lumborum, erector spinae, latissimus dorsi,
  • Spinal Rotation or Lateral Flexion – Any of the core muscles mentioned above when functioning unilaterally. If one side of the rectus abdominus fires, then you’ll see lateral flexion and some rotation. Other rotators include the internal and external obliques and serratus anterior.
  • Spinal Stability – transverse abdominus, multifidi, all muscles above fired isometrically
  • Hip Flexion – psoas major, iliacus, rectus femoris, sartorius, tensor fasciae latae, adductor longus and brevis, gracilis, pectineus. Some fibers of the glute minimus and medius engage here.
  • Hip Extension – glute maximus, biceps femoris, semitendinosus, semimembranosus. Some fibers of the glute medius engage too.
  • Hip Abduction – the glute maximus, minimus, and medius as well as the tensor fasciae latae. The piriformis functions when the hip is at 90 degrees.
  • Hip Adduction – adductor longus, brevis, magnus, pectinius and gracilis
  • Hip Internal Rotation – tensor fasciae latae, adductor longus, brevis, and magnus, pectineus, sections of glute medius and minimus
  • Hip External Rotation – piriformis, gemellus superior and inferior, obturator internus and externus, glute maximus, minimus, medius, psoas major, sartorius, quadratus femori

Now, I realize that this list reads like the appendix of a textbook, but don’t get lost in the noise. Notice the tremendous amount of overlap. You’ll see that the glutes have multiple functions as do the adductors and the TFL.

This sort of information at least shows us what the major players are going to be.

The Fascial Integration

We must also give attention to the intricate layers of fascia that are found in the core, hip, and thigh. Whether we address it through myofascial release or integrated non-linear movements, we must give it attention.

As noted in the previous edition, fascia is a highly communicative tissue that can arrange our body and its structures at a speed that is closer to the speed of light or sound than it is the speed of our cognition.

Fascia adapts, positively or negatively, to the stress placed upon it. Sit in a chair all day? Well, your fascia is likely bound up and dehydrated. Exist in a world where yoga, integrated movements, and sports are a major focus? Chances are you have healthy fascia.

The utilization of non-linear movements is one of the best ways of to improve fascia.

The Major Issues

The issues that occur at the spine and hips are almost always interconnected. A client could deal with just one or all of them.

Chances are that you’ll deal with all of these issues in some point in your career.

It is important to read and learn each of these as their own issue while also understanding that a client could show up to you with a Royal Flush of dysfunction. Luckily, the correctives we’ll discuss at the end are Swiss army knives – they are great for everyone.

1) Desk Posture

Once again, our lovely desk posture makes an appearance on the list. It is important to acknowledge the impact that upper cross syndrome (UCS) can have on core function, and thus hip function. If someone is slouched over with internally rotated shoulders, a kyphotic thoracic spine, and weak abdominal muscles, then we can very likely ascertain that their hips aren’t going to function optimally.

The lack of thoracic extension, poor function of the core muscles, and the overextension of the erector spinae and trapezius muscles dramatically impact the way someone can function up and down the length of their spine.

Ironically, many of these same flaws are also present in lower cross syndrome (LCS), which involves the muscles of the lumbar spine, abdominal wall, and the hips. Dysfunction caused from sitting all day can make the muscles involved weak (glutes and abdominals) or tight (muscles of the lower back and the hip flexors).

When a client presents these issues, especially together, it can be hard to prescribe any challenging exercises because their entire torso is locked from neck to butt. It is important to spot these issues early and begin implementing a corrective strategy that gets that client on the right path.

Thankfully, we’ll have some exercises below that will be great for both UCS and LCS issues.

2) Excess Anterior Tilt

When the pelvis is stuck in its “tipped forward” position for too long there are issues that can present themselves at rest and during exercise. In fact, continuing to exercise, especially with exercises that promote even more tilt, can cause damage to the vertebral discs.

In this position the erector spinae and QL are pulled tight while the anterior core is left in a lengthened and overstretched state. This sort of weakness in the abdominal wall makes optimal hip function harder to achieve and can lead to injuries at the spine.

Another unfortunate consequence is the overextension of the spine, or flaring of the rib cage, which can create the appearance of a midsection that is holding excess bodyfat. This bulge is simply a result of poor posture and would disappear once the pelvis is set back to neutral.

It should be noted that though that the pelvis should be able to anterior tilt through a full range of motion – it just shouldn’t be stuck that way.

3) Excess Posterior Tilt

The exact opposite of anterior tilt is the posterior version, which is when the pelvis is tilted back too far. This “belt-buckle to nose” condition is often found in individuals with lower cross issues since their abdominal walls are weak and their hip flexors overactive.

This position pulls the glutes completely in line with the body and flattens out the lumbar spine by ridding of the natural curvature of that region. This is not only “less attractive” due to the appearance of having no ass, but it also dangerous to load someone who can not achieve even low levels of hip extension and hip flexion. When someone is stuck here – they effectively have no idea of how to move their hips.

The corrective strategy here requires specific interventions that improve the awareness of the client as well as the strength of the glutes, hamstrings, abdominal wall, and even latissimus dorsi muscles. Additional efforts can be spent to improve external rotation of the femur and abduction too.

Once again, the hip should be able to posterior tilt during some movements and to help create stability.

4) Sticky Femurs (no, this isn’t technical)

One of my favorite terms for someone lacking the ability to rotate their femurs in their hip sockets (internally or externally) is “sticky femurs.” What I mean by this statement is nothing more than the image of having gum stuck in the joint that prevents optimal movement.

This is a combination of a lack of mobility in the joint due to not experiencing enough movement variation. Very active people could have “sticky” hips if they don’t cross train or experience movements in all three planes. Many “big” lifters struggle with external and internal rotation at the hip.

The other side of the coin is weak external or internal rotators that are incapable of owning the position that we put the femur in with excellent mobility. This is very common in dancers, those who practice yoga, or others who don’t actively strengthen these muscles. Detrained individuals fall into this category too. The mobility is there, but strength at end ranges is not.

5) Poor Coordination

Sometimes the issue is simply getting people to start exercising more and feeling their body move in a variety of ways. Frequent exercise, especially when done with coordination as the end goal, can improve a lot of functions of the hips on its own. It is amazing just how bad things can get when someone is rusty or de-conditioned.

Of course, you’ll need to spend time mobilizing and strengthening the various elements of the hip joint, but you’ll likely see increased output by simply exposing clients to new forms of movement and exercise. Any training program that features unilateral, contralateral, ipsilateral, and bilateral movements in all three planes is ideal.

6) Weak Core

Lastly, poor strength in the core itself can cause serious issues. It can derail any segment of the body since the primary function of the core itself is force transduction – AKA – translate forces from the limbs to each other and to the external environment.

A strong core is capable of remaining stable as the limbs create and accepts force. We must ensure our clients can move through all three planes of motion, with optimal function at the joints, with a variety of loads and challenges, because they possess a strong core. For this reason, most of our programming for the core should emphasize creating, and maintaining, tension.

The Corrective Exercises

Once we dive into the corrective strategies it is important to acknowledge that all these movements can be used to help with each issue. All these movements in some way will impact the ability of the client to succeed in overcoming hip dysfunction.

Each are also excellent in isolation as warmups, isolated correctives, and “fillers” between primary movements (as Tony often discusses). The Sumo deadlift, obviously, is a primary movement that should occur early in a program, especially if we are loading it up.

1. Glute Bridge Pullovers

https://www.youtube.com/watch?v=744uVr_qbqM


This simple variation of the traditional glute bridge accomplishes two major things:

  1. Drives all the major benefits of the traditional glute bridge
  2. Incorporates lat tension into the glute bridge – a key point for deadlifts and squats

You can strengthen the lats, glutes and abdominals while also addressing coordination issues. This exercise can help with every problem listed above except for “sticky femurs.”

2. Foot Elevated Glute Bridges

https://www.youtube.com/watch?v=uB_OanZw_Js


Another glute bridge variation that can dramatically improve the strength of the hip muscles (both flexors and extensors). By elevating the feet, you can increase the range of motion you’ll experience and improve your ability to drive into the bridge.

The key is to manage the lumbar spine and avoid overextension. The sort of exercise is great for strengthening the core, improving pelvic tilt issues, addressing coordination, and improving posture.

3. Cossack Squats

https://www.youtube.com/watch?v=XC0InYzYb00


A highly advanced variation of a lateral squat – the Cossack squat asks for an incredible amount of external rotation from the femurs. It targets the muscles that drive abduction and hip flexion and extension while moving through the frontal plane.

You can use your arms to help counterweight your body as you go down and find depth. Ease into the motion and look to improve your depth and mobility over time. This is an advanced exercise that can be regressed to holding onto something like a squat rack to help with weight transfer.

4. Copenhagen Side Planks


For some reason we love naming exercises after places – this side plank variation being no different. However, this is one of the most incredible ways of working the adductor grouping without needing to add external load. You’ll also integrate your internal rotators and the muscles of the rotary core. This sort of combo lends itself to improving strength and coordination.

Your goal should be to squeeze the bottom leg towards the bottom of the bench without rolling over and dumping the tension in the side plank.

Drive yourself to maintain an ideal side plank posture the entire time.

5. Loaded Marching Carries

https://www.youtube.com/watch?v=JuHCDH1T43E


Loaded carries are a movement pattern all their own. Few things can rival the simple effectiveness of grabbing heavy weights and walking around with great posture. This variation though, greatly improves the function of the hips by incorporation intentional hip flexion through the march.

Focus on driving the knees perfectly vertical, play with your speeds, and always emphasize a tight upper back, strong core, and depression of the scapula.

This exercise addresses every single problem mentioned above.

6. Sumo Stance Deadlifts

https://www.youtube.com/watch?v=XhxviMQEWOM


The validity of a medicine is always in its dose. Sumo stance deadlifts are one of the best corrective exercises you could program assuming:

  • You or your client are ready for the stress of loaded hinges
  • You choose the appropriate version for where you are in your training routine
  • You have earned the right to be here by exercising pain free with less aggressive modalities.

The reason that the sumo stance is so great is that you are literally working all of the muscles of the thigh, hip, core, and upper back at the same time. The external rotation and abduction of the femurs improves the strength of the muscles involved while also helping clients discover new mobility and neuromuscular coordination. This pattern is especially useful for those who spend most of their days sitting.

7. Loaded Beast to World’s Greatest Hip Opener

https://www.youtube.com/watch?v=spt_l-XhZRE


An interesting cross between a traditional mobility exercise and one of the loading phases in Animal Flow – this is one of my go to exercises for increasing the dynamic ability of my clients.

This version allows you to go fast or slow depending upon skill set while also loading the hips through a full flexion and extension cycle, improving coordination, and integrating the upper body and lower body together in a mobility movement.

You can use this as a “energy system” filler if you so choose (and your client is ready).

BONUS:

8. Hinge Position Face Pull

https://www.youtube.com/watch?v=JibVKRxbgAs

A lot of clients need help discovering how to hinge. Those same clients also struggle with maintaining tension in their cores and lats too. This exercise combines an active movement of the shoulders (great for shoulder health) with a passive hip hinge to improve core and hip strength.

Add this into any of your programs as a variation of the face pull that challenges your clients do more than just yank on the cable.

Wrapping it Up

Your ability to improve your client’s function around their hips depends on your ability to address the mobility and stability needs of the segment while also ensuring they are getting enough of a training stimulus to cause change. Understanding the nuances of the anatomy and physiology is a critical step in developing progressive programs that correct issues and cause a training effect.

The final part of the series will discuss the relationship of the hip-knee-and ankle.

CategoriesAssessment Exercise Technique

Individualizing Your Squat Stance

I’ve often championed the notion that there’s “no such thing as textbook technique.”

How we’re taught to execute certain exercises in a textbook often won’t translate to the real world because, well, we don’t live in textbooks.

This is a theme that’s hit on several times in The Complete Trainers’ Toolbox. Sam Spinelli, one of the contributors, was kind enough to share a bit of an amuse bouche from his presentation “All Things Squats, Knees, and Hips” with everyone today.

To check out the full presentation, as well as contributions from eight other renowned industry leaders, go HERE for more information.

Copyright: leaf / 123RF Stock Photo

Individualizing Your Squat Stance

Humans are these incredibly awesome, adaptable, and diverse creatures.

Within our awesomeness, over time we have adapted to have a diverse set of unique features in our anatomy that provides for a wide range of movement from person to person. This is something that we did not readily acknowledge for a long time and tried to fit people into square holes.

The squat is a perfect example of this topic.

For such a long time it has been advocated to squat with your toes forward and perfectly hip width apart. The unfortunate thing is that this limits a significant majority of people from being able to squat comfortably – or to an appreciable depth.

While some people may be able to do so with practice and working on range of motion, for a vast majority it is just not realistic due to their bony anatomy.

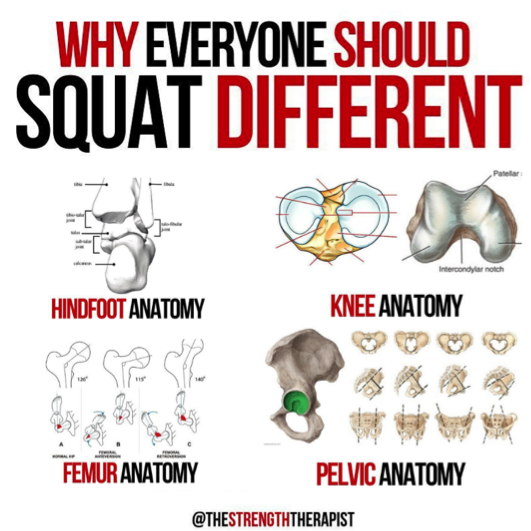
 As we examine the ankle, knee, and hip, we can see that there is significant variation within the bones forming them and the resulting joints.

For example, at the hip we have an acetabulum that can vary in depth of which will impact how much motion a set sized femoral head can have. This will impact the capacity of motion for hip range between individuals, leading to diverse squat stances already. When we begin to layer on the other ways our anatomy differs, it compounds and leads to a breadth of variations in how people may squat.

How Should I Squat Then?

There isn’t a set stance that will accommodate everyone – some people will do well with a hip width stance and slight toe out, others may do better with a narrower stance and feet directly forward. Finding what works best for you can be a challenge at first and require some experimentation.

To help expedite the process, try out these four methods:

1) Find Your Squat Stance – Standing


2) Find Your Squat Stance – Supported


3) Find Your Squat Stance – Seated


4) Find Your Squat Stance – Kneeling


The goal with each is to start with feet together and progress foot/knee width. You will find that one width generally feels better than the others, that’s the one to stick with for now. Then you can start playing around with foot/knee angle and continue experimenting.

This will get you a great head start on your squat stance and making it unique to you.

Two additional details – you may find your stance more comfortable with your feet not symmetrical and you may find that your stance changes with time. These things are normal for many people.

Did I Just Blow Your Mind?

This is just the tip of the iceberg in terms of stuff I cover in my presentation “All Things Squats, Knees, and Hips” in the Complete Trainers’ Toolbox, an online resource that became available this week that also features presentations from eight other industry professionals – including Tony Gentilcore, Dean Somerset, Dr. Lisa Lewis, Alex Kraszewski, Kellie Davis, Meghan Callaway, Dr. Sarah Duvall, and Luke Worthington..

It includes 17 total hours of content covering a wide range of topics every health/fitness professional is bound to relate with. It’s on sale this week at a significant discount, but only until Sunday, February 17th at midnight.

Go HERE for more information.

CategoriesAssessment Corrective Exercise Program Design

Part I: Correcting the Shoulders

Last week my good friend and author of Day by Day: The Personal Trainer’s Blueprint to Achieving Ultimate Success, Kevin Mullins, wrote an introduction of sorts to the state of “corrective exercise” in the fitness industry.

To summate: Stop it. Just stop. People still need to train in order to get better.5

Today, in Part I, Kevin peels back the onion on the shoulder.

Grab a cup of coffee.

This is good.

Copyright: remains / 123RF Stock Photo

Shoulders, Yo

Excellent strength coach, and outstanding Canadian, Dean Somerset once stated in an internet post, or maybe it was a blog, “there is always a cost of doing business.” He meant it as a point of emphasis when talking about the various effects of training programs and specific exercises. But he also could have extrapolated it outwards to reflect the stresses of our daily lives.

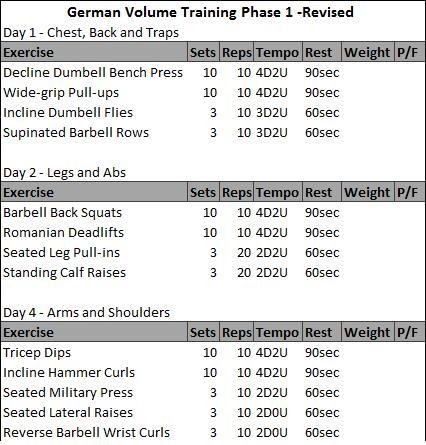
Poor posture while seated for twelve hours is going to have a cost associated with it just as German volume training.

Note From TG: OMG, German Volume Training brings back the worst memories. I don’t know which was worse: getting kicked on the balls or GVT?

For this reason, the fitness industry has made a major shift towards corrective exercises. Once seen as the tools of progressive physical therapists – these mobility, stability, and integrated exercises have become critical elements in training programs for elite athletes, nimble geriatrics, and the average Joe and Jane alike.

The growth of corrective modalities in conventional personal training is a good thing overall. However, as I pointed out in the introduction to this article series – HERE – there exists a very big downside to the obsession with movement perfection and body correction.

There needs to be a better way of correcting people’s movement flaws, overcoming their specific weaknesses, and getting them to a place where they can safely train hard. Far too many coaches are “under-training” their clients because they are investing too much time “correcting” things. At some point we need to get people training hard towards their actual goals.

Using Your Head For Their Shoulders

There may be no part of the body more susceptible to under-training than the shoulders. With multiple skeletal structures, a bunch of muscle attachments, and a relationship with the spine – there are a lot of reasons that someone wouldn’t be “allowed” to train hard with their shoulders.

Training them includes more than the traditional bodybuilding approach too.

The glenohumeral joint is involved in all upper body pushing and pulling motions as well as the specific isolation exercises that are popular in bodybuilding programs (such as lateral raises or chest flyes). The scapula and clavicle are too, but their positioning on the body also impacts movement such as the deadlift and squat.

Because of their high level of integration with every exercise we do, the shoulders are often the most banged up part of a client’s body. Our poor postures and ill-advised training programs aren’t helping us. Often the two compound each other and only worsen any dysfunction that exists.

Hence the need for correctives.

Really though, the shoulder itself is a bit of a miracle joint – with all the muscles that cross it, the fascia, the nerves, blood vessels, and obvious skeletal structures – it is amazing that it functions as well as it does.

But there can be a whole host of issues going on, or there can be just one. And that is what is most challenging about assessing and correcting shoulder dysfunctions.

  • It could be as simple as improving someone’s ability to retract and depress their scapula, such as when someone’s posture isn’t where we’d like it.
  • Or as complex as improving external rotation of the humerus while also stealing more extension from the thoracic spine and stability from the scapula during upward rotation and elevation, such as when a client wants to get better at pull-ups.

No matter how intense the problem is it is important that we as coaches keep our processes simple.

Removing the Restrictions

Yet, simple is not how most coaches approach shoulder health.

In fact, if you were to follow many of the conventional prescriptions that are floated through the industry, then you’d avoid many of the things that produce big results for your clients in favor of small correctives that make small changes. While some clients do need more intervention with these corrective methods – most simply need enough to create an opportunity for more intense training.

If you were to follow many of the guidelines that accompany something as notable as the Functional Movement Screen (the FMS), then many of your clients would not be allowed to press, or pull vertically, or load up abduction or adduction in the frontal or transverse planes until they were able to get a “2” on the shoulder mobility assessment.

While Gray Cook and Lee Burton did an incredible job creating a screening tool that helps coaches discover dysfunction and lack of movement prowess – they also created a system that is preventing a lot of clients from actually getting better.

Note From TG: For anyone interested (I.e., everyone) I wrote about my experience taking the FMS and what I took from it HERE.

The protective measures and governing principles of systems put the fear of God in personal trainers who use them. Many are afraid of loading anything until they see a two on the scoreboard. It is a steady dose of low intensity or no intensity correctives until that day.

Which is where the problem with corrective exercises starts:

Low to no intensity corrective exercises aren’t why clients improve over time. Instead, it is the strengthening exercises that come after these correctives that matter most.

If we are to improve how we utilize corrective exercises in our programs, then we must be willing to accept that what we now know isn’t perfect. We must be willing to entertain the idea that there is a better way of doing business. It is this exact mentality that drives innovation in technology.

It will drive innovation in fitness if we let it.

—-

(It is important to pause here and make a statement – this article is not meant to treat, diagnose, or prescribe methods or modalities for someone who is dealing with diagnosed injury or dysfunction in their shoulders. Traumatic injuries, conditions such as frozen shoulder, cervical kyphosis, and others require a finer touch from qualified medical professionals.)

If Not This, Then What?

Corrective exercises are like the bore that drills tunnels in the side of a mountain. They create the space for the construction to take place, but they aren’t the construction. You wouldn’t want to drive through a tunnel that hasn’t been reinforced with steel supports and millions of pounds of concrete, so why do you think that corrective exercises are enough to create a finished product in fitness?

The mobility and stability exercises that we define as “correctives” simply create the space for more optimal change to take place. They create the opportunity for well-selected strength exercises to change the tissues for the better.

For shoulder health we find that the classic approach of wall-angels, thoracic roll-overs, and cat-cows are simply creating the opening for which exercises like loaded carries, supinated pulldowns, and banded retractions fill with strength and stability. Our goal needs to be to do enough to get to the exercises that stimulate adaptation and create positive change; in the shoulders and in the rest of the client’s body.

Our responsibility as trainers is to help our clients overcome dysfunctions and improve their movement quality – sure. But our job also implies that we help our clients burn calories, build muscle, and come just short of conquering the universe.

Before diving into the actual corrective exercises that will open the gates for us to train with the intensity our client’s want and need, let’s ensure that everyone reading is on the same page on the anatomy and physiology of the shoulder joint.

The Basic Anatomy and Physiology – Skeletal

When looking at the shoulder joint you are presented with three major bones: the clavicle, the scapula, and the humerus.

  • The clavicle (or collarbone) is the most stationary of all of these structures, but its lateral aspect does elevate and depress in reaction to movements of the other bones. The humerus, the upper arm bone, is designed for external and internal rotation within the socket – known as the glenohumeral joint.
  • The humerus can move through flexion, extension, abduction and adduction, and horizontal abduction and adduction by rotating around the glenohumeral joint in each of the three planes (sagittal, frontal, transverse). These movements are aided by the function of the scapula.
  • The scapula (or shoulder blade) is the large bone in the back of the body. It is capable of six motions: elevation, depression, upward rotation, downward rotation, protraction, and retraction. These movements are also correlated to the three planes of motion too – sagittal, frontal, and transverse respectively.

The spine is also involved in shoulder mobility and stability is often left out when looking at function. We will explore this relationship in the next section when we begin looking at how core function can impact shoulder mobility as well as how thoracic extension is necessary for optimal function of the shoulder joint.

The Basic Anatomy and Physiology – Muscular

The human shoulder functions as incredibly as it does because of the incredible number of muscles that are involved. Some control the humerus, others control the scapula, and others control the spine.

Most of these muscles are found in the back.

When looking at the muscles that contract at the shoulder, we must separate the muscles that control the external rotation and internal rotation of the humerus from the muscles that create the six motions of the scapula. While some muscles share functions – it is important to identify its primary action and what it acts upon in order to better understand how the shoulder wants to function.

The four muscles of the rotator cuff are most responsible for the external and internal rotation capacity of the humerus.

  • There is evidence to support that the triceps are involved in external rotation, especially under load (just turn your arm around as far as you can right now, and you’ll feel the lateral head of the triceps contract). Therefore, the triceps join the supraspinatus, infraspinatus, and teres minor as external rotators of the humerus.
  • With that claim we can also ascertain that the biceps and pectoralis group are involved to some degree in internal rotation (although there is significantly less IR available at the shoulder joint). The subscapularis is the internal rotator of the cuff.

When examining the muscles that move the scapula, we are simply looking at the muscles of the upper back; the lats, teres major, rhomboids, trapezius, levator scapulae, the serratus and the three external rotators of the cuff. Each of these muscles have specific functions on pieces of paper, but it is imperative as coaches that we realize that most exercises performed in a gym setting involve more than just one of these muscles doing one of these functions.

It is easy to point at the traps and say “oh, they are elevators and contribute to upward rotation.” It is less easy being able to look at a flawed motion and know exactly what is wrong:

For example, many coaches will point at someone having issues with retraction and think “ah, the upper traps are overactive and the teres major/minor need strengthening.” They could be right and probably are in a population of people who sit with rounded thoracic spines and internally rotated shoulders.

Add in forward neck and shrugged shoulders and this “diagnosis” seems spot on.

However, getting just the teres group to fire without activating the infraspinatus or supraspinatus is nearly impossible in a traditional training setting. Getting someone to stay out of their upper traps sounds like a great coaching cue, but that requires getting them to fire the muscles that contribute to scapular depression; the lower traps, pectoralis minor, and latissimus dorsi at the same time – something most clients (or you) can’t do consciously.

In fact, a lot of scapular depression comes from the ability to put the thoracic spine into extension. Doing so involves activation the lowest fibers of the traps, the lats, the upper abdominals, and a whole host of muscles that are so deep and connected to the individual vertebrae that considering them in training is pointless.

When these muscles contract and thoracic extension takes place, you find that the scapula better slide into the depressed position.

The Core Connection

Yet, thoracic control isn’t completely isolated either.

It is very hard to contract the thoracic muscles without some level of core control. In this instance, the core includes the anterior muscles of the core that we know (rectus and transverse abdominals, internal and external obliques, and Psoas Major.

It also includes the muscles of the posterior core: the quadratus lumborum and the erector spinae.

Conscious contraction of these muscles allows for the core to hold tension, which better stabilizes the lumbar spine, which better allows the thoracic spine to go into extension, which better allows the scapula to depress, which better allows the humerus to externally rotate. As you can see, everything is connected, which is why we can’t use such generic correctives to solve complex problems.

A Less Important Factor?

You’ll notice that we haven’t yet mentioned the deltoid – the most known shoulder muscle. For all the attention it gets in bodybuilding circles its function is not as critical to shoulder function as you’d believe. The anterior fibers assist in internal rotation and drive flexion of the arm while the posterior fibers aid in external rotation and initiate horizontal abduction. The lateral fibers function to create abduction of the arm in the frontal plane.

From a corrective standpoint, it is very rarely an issue with the deltoid that proves to be the problem. In fact, it is often the overdevelopment of the deltoids and upper traps and underdevelopment of the rotator cuff muscles that create impingement issues in dedicated lifters. Great corrective exercises keep the deltoids involved and avoid shutting them out.

The Hidden Gem

In recent years we’ve come to learn that the fascia in our bodies is more than just a covering and more than just extra tissue that gets cut through in surgery. It is a living tissue that is involved in our function on a day by day and minute by minute basis.

In fact, research from Michol Dalcourt and the team at the Institute of Motion have proven that the fascia can communicate information across the body faster than any muscle tissue. Its ability to compress and expand is crucial for athletic development.

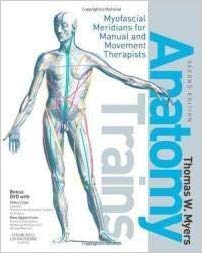
Unfortunately, many fitness professionals see it as tissue that is addressed with foam rollers, lacrosse balls, and other release methods. This isn’t wrong of course as these implements can do well to increase blood flow, increase hydration of the fascia, and improve mobility of the joint in question. However, we can also train our fascia just as we train our muscles. We must look to incorporate the variety of slings that Thomas Meyer’s discusses in his text Anatomy Trains.

In our solutions section we’ll explore a few ways to do that to improve the function of the shoulders and truly correct any issues that exist.

But first, we must identify a few of the most common problems.

Common Problems

1) Desk Posture (UCS)

The most common problem that a client will present in regard to their shoulder health is the classic “desk posture”. The scapula sits in protraction and elevation while the humerus’ are internally rotated. This posture is held for eight, ten, and twelve hours a day. Over time the pectoralis muscles get tighter, the trapezius muscles lengthen, the muscles of the scapula and glenohumeral joint get weaker, and the client continues to worsen.

The most advanced form of this condition is known as Upper Cross Syndrome (UCS) – a severe condition of immobility that usually involves additional intervention with physical therapists, and sometimes, orthopedic surgeons. This posture often presents forward neck as a well – a dangerous condition of the cervical spine.

The treatment for individuals in this position is to correct their posture and work to move them in better retraction, depression, and external rotation. However, many of the common methods do not provide enough intensity to stimulate muscle growth or strength adaptations in the muscles of the upper back. It is crucial for trainers to invest time in building their clients upper backs and coaching optimal patterns if the corrective interventions are ever going to stick.

2) Poor Scapulohumeral rhythm

For many people the pain they experience in their pressing and pulling motions is a result of a poor pattern being present. Of course, there are others who have legitimate issues such as shoulder impingements, strained muscles of the rotator cuff, or overactive trapezius muscles that make doing certain movements nearly impossible. The rest though, simply need help reworking their patterns and an emphasis on strengthening the muscles that control those patterns.


The scapulohumeral rhythm refers to the quality of movement that occurs when we consider the scapula and glenohumeral joints interaction. People with great rhythms typically an exercise pain-free while people who lack control and patterning struggle to accomplish even the most basic tasks.

This topic is quite deep, but in short realize there is a relationship between the position of the humerus and where the scapula “should” be.

For example, in a traditional dumbbell overhead press the scapula should be upwardly rotating and elevating as the humerus adducts towards the midline at the top of the press. Many people will execute their press and have little to no movement out of their scapula, thus causing increased stress on tissues that shouldn’t need to encounter them.

3) Lack of External Rotation

One of the issues many clients face is the inability to rotate their humerus back. This is more than just the presence of too much internal rotation (such as with U.C.S.). The muscles responsible for external rotation of the shoulder are powerful muscles that also engage in the motions of the scapula. Lacking strength in these tissues can cause someone to become more internally rotated, but also makes it incredibly hard to achieve external rotation at the glenohumeral joint.

This matters for more than just mobility.

Popular exercises such as pull-ups require a person to own a certain amount of external rotation in order to execute the motion. So too does the overhead press. Lacking the ability to achieve optimal end range of E.R. makes both movements, and so many others, hard to accomplish.

It is important to understand that the exercises we use to improve external rotation put the humerus in a greater rotation than we would normally encounter in traditional lifting. But, this sort of work is necessary to strengthen and stimulate the muscles that create E.R. and maintain it in an isometric contraction (such as during a overhead press).

4) Weak Core and Poor Thoracic Extension

As stated earlier, the core and spine play a major role in whether the shoulders function optimally. A lot of lifters never develop optimal shoulder health because they create mobility by overextending their lumbar and thoracic spine to compensate. This is especially prevalent in ego lifters performing an overhead press with a massive amount of “layback”.

Lacking the ability to contract the anterior core and stabilize the lumbar spine makes it significantly harder for someone to master true thoracic extension. The ability to lift the ribs and extend the thoracic spine allows for better depression, retraction, and downward rotation of the scapula. These motions are direct opposites of the posture that many fall into as a result of upper cross syndrome or “desk posture”.

Strengthen the abdominal wall and muscles of the T-spine is imperative to optimizing shoulder function. Much like the foundation of a skyscraper must be firm and set underneath the construction, so too does our core and spine for our shoulders.

5) Weak Upper Back and Lack of Awareness

In a lot of cases, especially in individuals who do not regularly engage in an exercise plan, there is simply a lack of proprioception and strength in the muscles that control the scapula and glenohumeral joint. Often, there is nothing “wrong” with this population other than their lack of sensory awareness and force production capabilities.

Clients like this require more exposure to well-coached patterns and a progressively overloaded strength program that allows their muscles to adapt over time. It may be beneficial to use low intensity correctives to prime a specific pattern and create mobility in the joint prior to loading the muscles with traditional methods.

It is critical that we stop seeing all clients as wrecked when they are unable to perform a specific task. For many people, especially with something as obscure as the FMS, it is simply an unfamiliarity with their body and the demand you are placing upon them. Increase their exposure to well-coached exercise instead of trying to fix something that isn’t broken.

New Solutions

As we dive into the specific movements it is important for us to realize that these are just a few examples of great movements that can be used to strengthen and stabilize the shoulder joint. Some of these movements are common and others are painfully boring (in a sense that we aren’t shaking the Earth).

However, simplicity is often the fasted route to success.

A few of these movements are going to be outside the realm of normality for some coaches. Many traditional strength coaches would look at Animal Flow as a weird form of yoga and dancing, but it is that arena that brings the fascia into the fold. Other movements are simply manipulations of variables in the training arena, such as the angled press, that most people aren’t considering.

1) Dual Kneeling Band Pull Apart

https://www.youtube.com/watch?v=3rrHNDcVa9s


The band pull apart is nothing new.

However, adding in the kneeling position asks us to contract our core and our glutes – two major parts of our foundation. In doing so we can better extend our thoracic spine, which in turn allows for better retraction of the scapula.

2.1) The Full-House (2 Cables/3 Motions)

https://www.youtube.com/watch?v=COSRT7nPTPc

This multi-pattern movement asks for retraction of the scapula, then retraction into downward rotation and depression (with external rotation of the humerus). Lastly, the overhead press asks for elevation, upward rotation, and forces the external rotators to fire hard to prevent the arms from collapsing forward of the line of gravity.

This sort of movement is incredible for grooving the scapulohumeral rhythm, improving upper back strength, and increasing external rotation of the humerus. It is quite the challenge and needs to be done extra light. Five pounds was the resistance in the videos.

2.2) Second View

https://www.youtube.com/watch?v=Qt8ex9TL8GQ


3) External Rotated T, Y

https://www.youtube.com/watch?v=3Juj1iYiJFE


A simple variation of traditional T and Y – this a movement that can be used to improve retraction of the scapula while strengthening the external rotators. It forces the trainee to own their humeral position and originate movement from the glenohumeral joint while remaining set onto stable scapula.

This exercise also promotes additional thoracic extension.

4) Angled Press

https://www.youtube.com/watch?v=FVPsVXWXds0


Far too many people contraindicate the overhead push pattern when someone is dealing with shoulder dysfunction. If we were to listen to the FMS, no one who can’t get a two on the shoulder mobility exam should ever press overhead. Yet, tons of people can press pain-free without getting a two.

This exercise helps bridge the gap between overhead pressing and not. The slight angle (about 15 degrees) allows you to load up the deltoids a bit without creating a perfect opposition to gravity. The neutral grip, forward elbow, and emphasis on tempo allows us to focus on scapulohumeral rhythm. Use this as a primary exercise after preparing clients for their workouts. This will correct a lot of flaws so long as the movement remains pain free.

5) Supinated Pulldowns

https://www.youtube.com/watch?v=TbIy3pH0nlo


At first glance this looks like a standard, boring pulldown.

Yet, it is the dramatic emphasis on depression and elevation of the scapula that makes this one stand out. Far too many folks get on the pulldown and just start yanking on the bar to get their set done. The motion becomes about completion instead of optimization.

The supinated hand grip helps keep the humerus in a slightly more externally rotated position while also prevented much of the internal rotation that happens with heavy pronated pulldowns. The focus here is to emphasize absolute end ranges. Feel the scapula elevate while maintaining control and then drive them downwards into full depression at the bottom.

6) Simple Animal Flow (Beast Hold to Scorpion to Alternating Crab Reaches)

https://www.youtube.com/watch?v=x27wT-nxUkg


A lot of you will look at this and wonder – why in the heck am I going to do all that flailing? Yet, animal flow is an incredible discipline that emphasizes loading of a lot of our passive structures – the fascia, the connective tissue, the skeletal system. Strengthening these things is imperative to the absolute realization of healthy shoulders. Specifically, the external rotation of the humerus in set crab position is a great tool to have in your arsenal.

7) BONUS: New Way to do Chest Flyes

https://www.youtube.com/watch?v=hcRTVz4aWOE


Lastly, I want to share the new best way for you to execute chest flyes.

See, the chest flye is one of the most favorite exercises in bodybuilding culture. It causes a tremendous stretch of the pec fibers and can help the person doing them build the muscle they crave. Yet, there is a ridiculous amount of sheering force placed upon the shoulder joint when the dumbbells reach the bottom of a traditional flye.

So, instead of using dumbbells and pissing off your shoulders – integrate this band only variation. The key is to press out into the band for the entirety of the movement, thus keeping a high level of tension on the working muscles without stressing the shoulder joint against gravity. As you fatigue shorten the range and focus on the squeeze.

Putting It All Together

You can correct someone’s shoulders and move their fitness forward at the same time. Your job as a fitness professional is to drive your clients towards the results they want and the results they didn’t know they need. You can still use low intensity correctives in your programs, of course, but it is imperative to go forward understanding that they are simply a very small piece of a much larger puzzle. Your client, if they are to improve, must begin strengthening the muscles by training the appropriate patterns that address shoulder health.

Next: The Lower Back and Pelvis

In the next article we’ll explore the lumbar spine, pelvis, and anterior core and how we can better correct chronic low-level back pain, coach better hinge patterns, and improve our client’s ability to move with confidence.

CategoriesAssessment Corrective Exercise Exercise Technique

The Big Toe and the Squat

Two things with regards to the title of today’s post:

  1. I’m thinking it could pass for the title of the next big children’s book.6
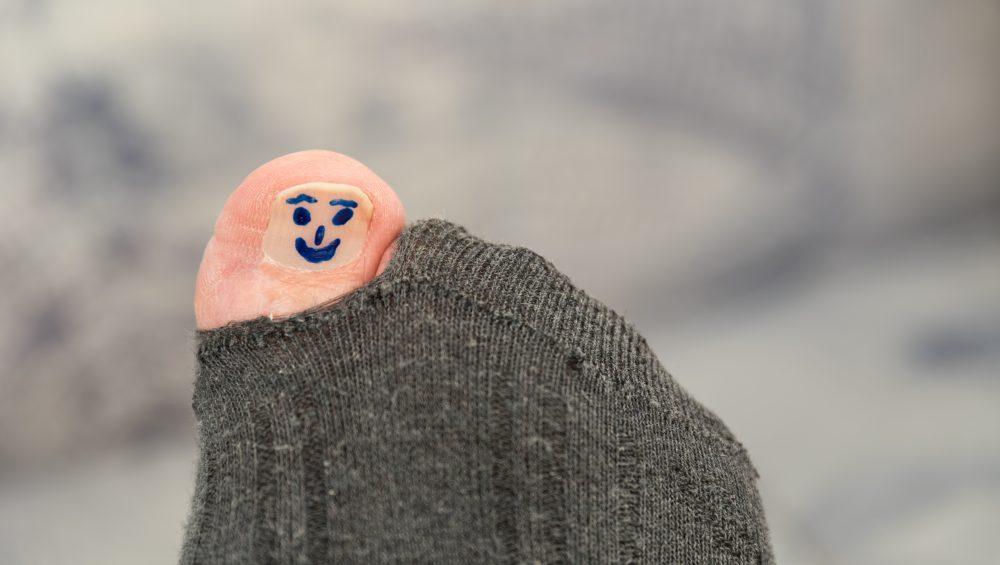
  2. Searching stock images for “big toe” pretty much made me want to throw up a little in my mouth. I’d place it  somewhere between kipping pull-ups and gonorrhea in terms of stuff I’d rather not see with my eyes ever again.

There’s a lot to consider and that can go awry when discussing the squat. To say there’s a plethora of moving parts – not to mention positional considerations (hand position, stance, bar position, etc) – would be an understatement.

One of the last things you’d probably ever consider when it comes to your squat performance is your big toe. Well, I’m here to tell you that it’s a pretty damn important and something you should consider considering.

Also, this is about as non-pukey of a picture as I could find of a toe.

Copyright: alfredhofer / 123RF Stock Photo

The Big Toe & the Squat

What inspired this post was an interaction I had with a new client recently. During his initial evaluation I had him show me his squat because he had mentioned the movement has always bothered his lower back.

He’d worked with previous trainers in the past who had attempted to “fix” things, more often than not resulting in him stretching this, smashing that, performing a cornucopia of positional breathing drills while repeating the Elvish alphabet backwards, and otherwise being over corrective exercised to death

The next step was to bring in an exorcist.

I didn’t do any of those things.7

Instead I did something revelatory.

In fact, I’d be surprised if I’m not nominated for a Nobel Prize for how revelatory what I did was.

Are you ready?

Wait for it…

Wait for it…

I watched him squat.

https://www.youtube.com/watch?v=a1Y73sPHKxw


I’m flummoxed as to why this seemingly obvious “intervention” is often overlooked. I think a lot of it has to do with something John Rusin spoke about during his keynote talk at the SWIS 2018 Symposium:

“We’re in an industry that gets too distracted by bright, shiny objects.”

Watching someone squat is boring.

Having someone stand in a zero gravity chamber while a bunch of lasers attempt to release their psoas isn’t.

We’ve become infatuated with gadgets and gizmos so much so that it’s become much harder to galvanize the masses into trusting what it is they do best……

………..COACH.

To that point, I’m old school and I just wanted to watch my man squat.

I had him take off his shoes and pants, and it’s here where I noticed something.

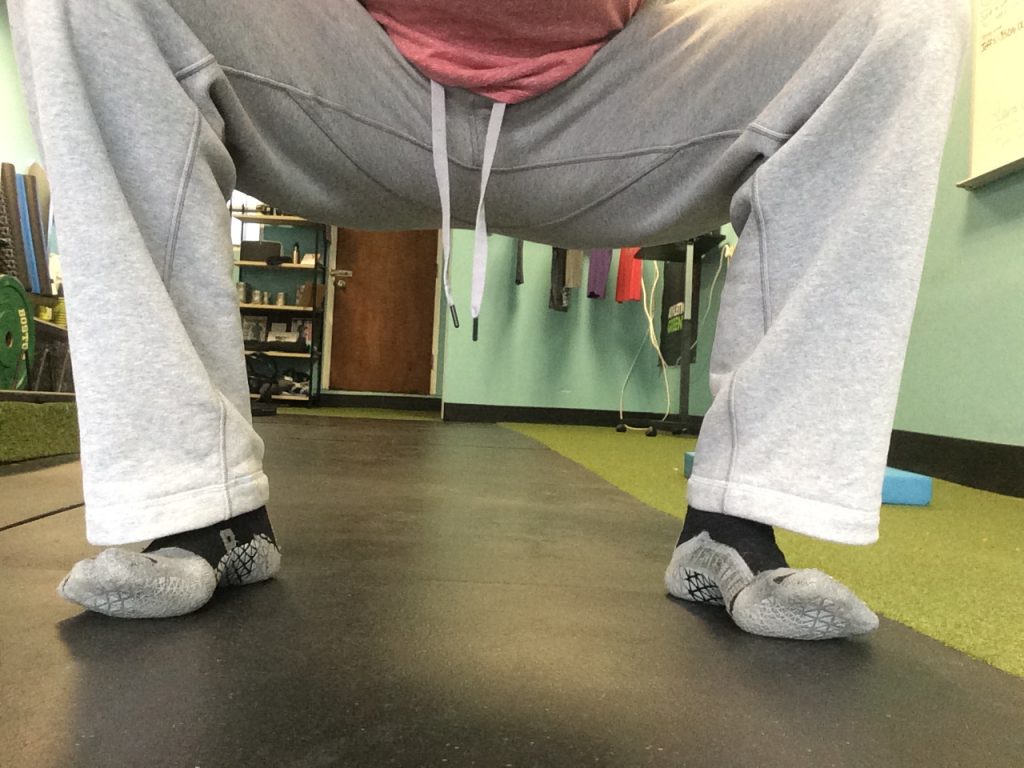
I watched his feet and saw that with every repetition his toes would come up off the ground, like so:

FYI: this is a picture of me doing a reenactment. See you in a few weeks at the Oscars.

Now, for the sake of brevity, it is a conversation to have as to whether or not he was cued into lifting his toes off the ground or not? I’ll nip this in the bud and say for the record that he wasn’t.

He was just never coached on how to squat properly.

As such, it became glaringly clear why his back had always been flipping him the middle finger whenever he attempted to squat (Goblet, front, back, all of them).

When your toes – most often the big toe – comes off the ground you lose your core.


Bullet Points (for those of you too lazy to watch):

  • When toes come up, you lose canister position (ribs stacked on pelvis) and thus lose your core and stability.
  • When toes comes up, you crank into lower back.
  • Think more about foot pressure (pushing into floor and even weight distribution on big toe/metatarsal, small toe, AND heel).
  • Cement toes to the floor.
  • Take your clients’ shoes off when they squat. It will tell you a lot.
  • My biceps looks amazing in salmon colored t-shirts.

But Wait Tony, Some Coaches Cue People to Squat With Big Toe Up on the Way Down, and Then to Push It Into the Ground on the Way Up. Are You Saying They’re Assholes?

No.

Coaches such as Mark Cheng and Cal Dietz  – who are both the shit – often advocate the big toe stays up on the way down during a squat (but the ball/metatarsal still stays glued to the floor) and then press the toe down on way up.

I find this to be okay – and far be it from me to say they’re wrong. They’re both developing outstanding athletes and making people better.

I just find that with all the other mental gymnastics that come along with the squat – big air, ribs down, sit down, not back, spread the floor, drive your chest into the bar, hips through, don’t poop your pants – that it gets a little crowded when you add in the “toes up on the descent, toes down on the ascent” cue.

As I note in the video above I like to cue the idea of foot pressure – with three points of contact – and to cement the toes down during the squat.

Moreover, the objective is not to grip or dig into the floor with your toes.

As Lexington, KY based coach, Drew Watts, notes:

I don’t like “digging” because you don’t want to press the tip of the toe to the ground, more the pad of the toe. Big toe, ball of the foot, 5th metatarsal, heel. Pressing big toe helps the windlass mechanism as well.

Here’s a nice demonstration of everything in action by Essex, Vermont based strength coach, Jess Voyer (who was kind enough to refer to me as a genius in her IG post. 4,000,000 points to Gryffindor):

https://www.instagram.com/p/Bs-xYyEHdmy/

All of This to Say

Don’t be shy to take people’s shoes off.8

Having a keener eye on what their toes are doing during their squat can give you a lot of information and insight.

Toes down = core on = sexier squat.

CategoriesAssessment Program Design

The Inundation of Corrective Exercise In Strength and Conditioning Makes Me Want to Throw My Face Into a Brick Wall

Just to help calm the waters: I am not anti “corrective exercise.”

And I am not really going to throw my face into a brick wall.

I respect and can appreciate that, sometimes, our jobs as fitness professionals require us to pump the brakes and to venture down the corrective exercise rabbit hole.

Some people require a bit more TLC with regards to improved movement, motor control, and/or, and I’m paraphrasing here…”just learning to turn shit on.”

Some people will require a laundry list of additional mobility work, stretching, or positional breathing drills to point them in the right direction and to help them feel better.

What I am against, though, and what drives me bonkers, is when coaches and personal trainers go out of their way to:

1) Overstep their scope of practice and end up performing really shitty physical therapy with their clients and athletes.9

OR

2) Highlight every minor “dysfunction” with a client/athlete – excessive anterior pelvic tilt, kyphotic posture, left eye is lower than the right (you freak) – making him or her feel as if they’re walking ball of fail.

Copyright: alexytrener / 123RF Stock Photo

Training Is Corrective

Here’s another gleaming example of how TRAINING is corrective and how, if we do our jobs as coaches, we can often accomplish a lot sans the brick wall.

My client, Emily, who’s a trainer herself, has been dealing with some left shoulder issues. I had her come in the other night to see if I could offer some insights and to listen to some sick EDM beats.

The latter has nothing to do with anything, but whatever….give THIS a listen.

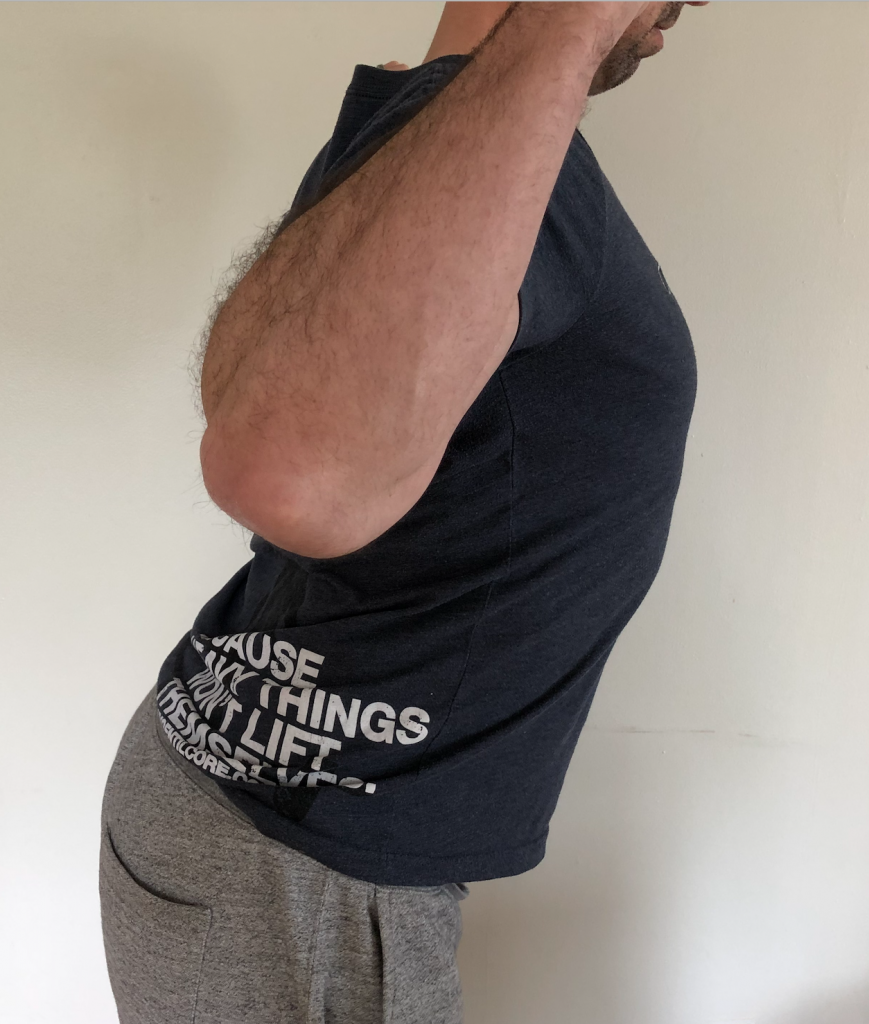
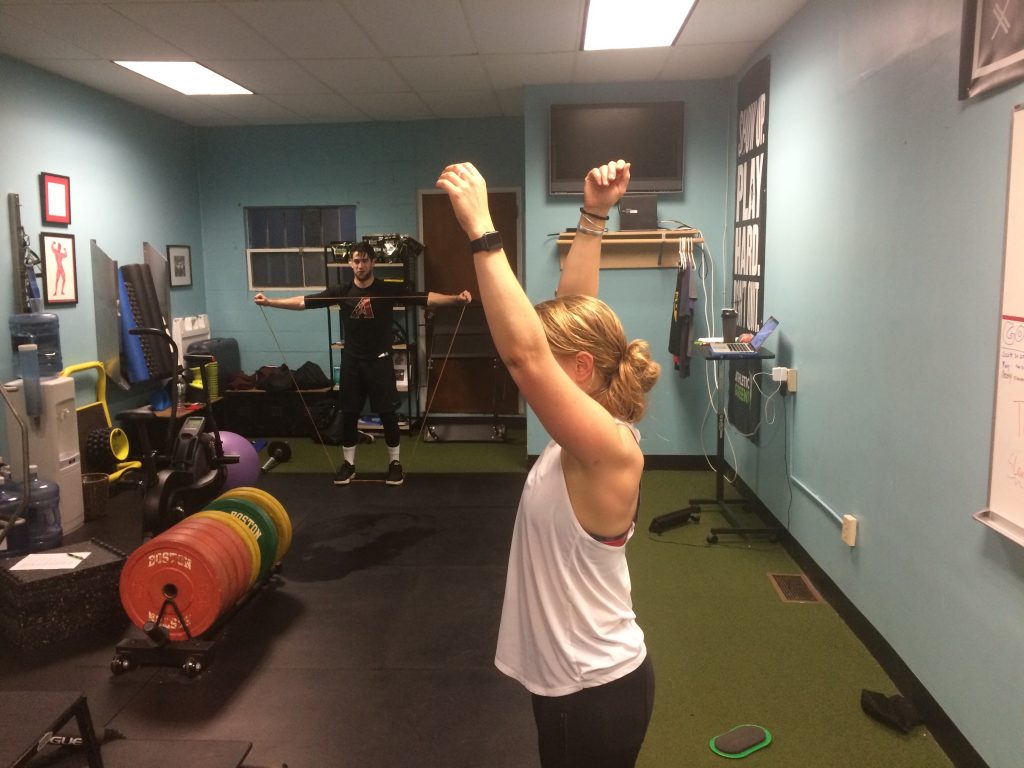
Emily showed up and I took the picture below. It shows something clearly awry and that some sort of shoulder clusterfuckey was at play; namely lack of shoulder flexion on the left side.

What was the culprit?


It could have been a few things:

  • Capsular issue
  • Lack of scapular rotation (namely upward rotation).
  • Soft tissue restriction.
  • Lack of lumbo-pelvic control.
  • It was a Wednesday.
  • I don’t know.

What I do know is that I had to respect my lane and understand it wasn’t my job as a strength & conditioning coach to diagnose anything.

I could, however, assess her general movement capacity, use my knowledge of anatomy, and perform a little trial and error to see if I could improve things.

What follows is more or less a brain dump and an attempt to explain my thought process as I worked with Emily for the next hour.

I’m not gonna say that what ended up happening was on par with some Matrix level shit, but I will say I basically know Kung-Fu.

via GIPHY

I Know Kung-Fu

To start I thought to myself:

“What actions have to happen at the scapulae in order to get the arms overhead?”

– Upward rotation
– Protraction
– Posterior tilt

Emily wasn’t getting much upward rotation on that left side. When I asked her to bring her arms overhead it was as if her left arm hit a massive speed bump and came to an abrupt stop. She could push through it, but not without pain.

So I had to think about what muscles help with that action (upward rotation)?

– Upper and lower traps
– Serratus


Too, I noticed she also had a more depressed shoulder girdle as a whole; her clavicular angle was more horizontal rather than having a slight upward grade.

HERE‘s Eric Cressey discussing this in a little more detail.

I surmised her UPPER traps needed some attention.

The upper traps often get a bad rap and are avoided like a Coldplay concert. In certain populations (think: desk workers) and instances, the upper traps are OVERactive and can play a role in increased shoulder elevation as well as superior migration of the humeral head, and hence an increased risk for shoulder impingement.

In this scenario, it behooves us to not go out of our way to increase upper trap activation.

However, we often forget the upper traps are a major player in UPWARD ROTATION, not to mention help with scapular elevation…both of which, in my eyes, Emily could have used some more of.I didn’t get over corrective with Emily and start having her perform some voodoo like tapping her pinky finger three times while flossing her teeth with a strain of hair from a Hippogriff.

I didn’t have her perform a laundry list of “correctives” that, for all intents and purposes, would have likely made her feel like a patient and bore her to tears.

Nope, I had her TRAIN and just modified a few things.

We did:

1. Landmine Presses with a Shrug/Reach


2. Face Pulls in an upwardly rotated position (so the upper traps were more engaged)


3. And, instead of performing movements that would pull her into more shoulder depression and downward rotation (deadlifts, farmer carries, etc) we opted for Landmine Squats, Zercher RDLs, and Hip Thrusts.


In short: We turned shit on (upper traps) and trained movements that (likely) wouldn’t feed into the root causes of her symptoms.

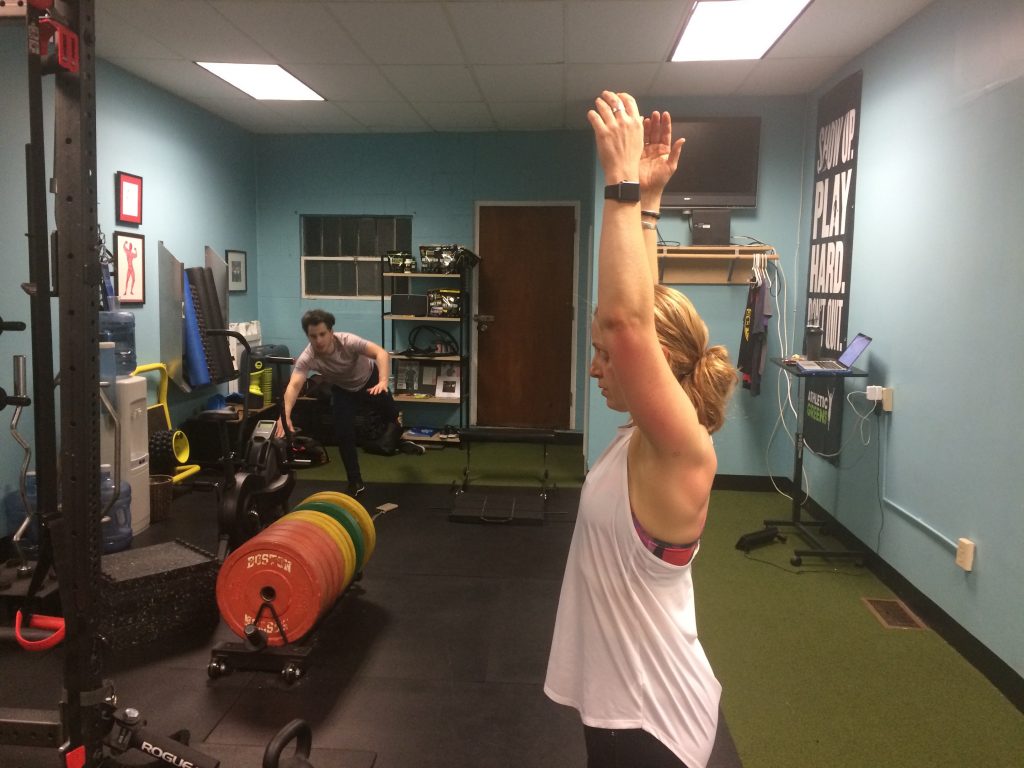
Here’s the picture I took at the end of her session:

I’m Gandalf.

CategoriesAssessment Corrective Exercise Program Design

Which Is More Fictional: Unicorns or Tight Hamstrings?

Two weekends ago I was in London teaching a workshop with my friend Luke Worthington.

We had a group of 35 trainers from across the UK (and Europe) eager to learn more about assessment, program design, coaching up common strength movements, and how I rank the Bourne movies.10

One of the main umbrella themes we kept hammering home was that, contrary to popular belief, “tight” hamstrings isn’t really a thing.

Labelling the hamstrings as “tight” is often the default scapegoat and blamed for everything from butt wink to low back pain to male pattern baldness. So it wasn’t surprising to see the flabbergasted reactions from the majority of attendees when Luke and I kept repeating our message.

You would have thought Gandalf rode in on a Unicorn yelling “You shall not stretch the hamstrings!” based on people’s facial expressions.

Copyright: luckyraccoon / 123RF Stock Photo

Did Tony Just Say Tight Hamstrings Don’t Exist?

What’s next: Water isn’t wet? Grass isn’t green? Ryan Gosling’s gaze doesn’t penetrate my soul?

Listen, I’m as skeptical as they come whenever anyone in the health/fitness industry uses the words “everyone,” “always,” or “never.”

Those are three words, when used ad nauseam, immediately scream “shady motherfucker with an agenda,” whenever I hear them.

  • It’s never the hamstrings. OR You should never eat past 7 pm.
  • Always avoid gluten. OR If you’re serious about fat loss, always avoid carbs.
  • Everyone must deadlift from the floor. OR Everyone who reads this site is clearly off the charts intelligent and attractive. (<— 100% true).

There are nevertheless exceptions to every rule and circumstance. I’d be remiss not to tip my hat at the notion there are, indeed, people out there who have legitimately tight (or, more to the point, anatomically short) hamstrings.

https://www.youtube.com/watch?v=a1Y73sPHKxw


That being said, I doubt you’re one of them.

I’m not going to sit here and say it’s never the case, but it’s such a rare occurrence that you’re more likely to win an arm wrestling match vs. a grizzly bear than actually having tight/short hamstrings.

Take butt wink for example.

The common culprit is tight hamstrings (photo on the right).

But if we were to discuss (and respect) basic anatomy we’d note the following:

  • The hamstrings are a bi-articular muscle group that cross both the hip and knee joints.
  • My pecs can cut diamonds.
  • As we descend into deep(er) hip flexion – I.e., squat – the hamstrings lengthen on one end (hips) and shorten on the other (knee), for a net change of nada.

#itsnotthehamstrings.

But How Can We Tell?

It’s uncanny how many people I’ve interacted with in my career who describe having tight hamstrings, and after telling me they’ve been stretching them for 43 years (<— only a slight exaggeration), are still looking for that one magical stretch to cure them.

My first step is to plop him or her on an assessment table and ask them to perform a simple screen to ascertain whether or not they do, in fact, have tight hamstrings.

It’s called the Active Straight Leg Raise.

You lie the individual supine and ask them to slowly, while keeping one leg cemented to the table or floor, elevate the other off the table while keeping it as straight as possible. They keep going until they feel the first smidgeon of resistance (or you start to see compensations like the pelvis rotating, the foot rotating, and/or either knee start to flex).

An acceptable ROM is anywhere from 70-90 degrees of hip flexion.

A funny thing almost always happens.

Most people pass the screen with flying colors.

Me: “You don’t have tight hamstrings.”

Them: “The fuck outta here! You mean, there aren’t any other stretches I should be doing?”

Me: “Zero.”

Them: “Zero?”

Me: “Yep, zero.”

[Cue crickets chirping]

This finding doesn’t, however, dismiss the fact said person’s hamstrings still FEEL tight.

So, W……..T……….F?

Something is awry.

To peel back the onion a bit more I’ll then implement a brilliant trick I was reminded of by Ottawa based personal trainer, Elsbeth Vaino.

The Bridge Test


I’ll have the same individual perform a standard glute or hip bridge. They’ll get into position and then I’ll ask “where do you feel that?”

Many will immediately say “hamstrings.”

I’ll then have them perform a 1-Leg Glute Bridge and ask them to hold that position for 10-15 seconds.

Most don’t last five.

“YOWSA…..my hamstrings cramped up.”

Why?

The body’s #1 hip extensor is the glute max, and if it’s not doing it’s job well the body’s #2 hip extensor, the hamstrings, will pick up the slack.

In all likelihood, for most people most of the time, the hamstrings feel tight because 1) they’re overactive and doing double the work and/or 2) pelvic alignment needs to be addressed (more glutes and anterior core = more posterior pelvic tilt = hamstrings are put on slack).

NOTE: the latter point – hamstrings lengthened due to (excessive) anterior pelvic tilt – is why stretching them only feeds the issue. The tightness many feel is neural in nature, not because of true shortness. Stretching an already lengthened muscle only exacerbates things.

Something Else to Consider: Active End-Range Hip Flexion

To add another nail into the “it’s not the hamstrings” coffin I’ll also take a gander at one’s ability to move their hip into (active) end-range flexion.

This “trick” digs into some of Dr. Andreo Spina‘s work on Functional Range Conditioning (FRC) and is another splendid way to gently tell someone to stop stretching their hamstrings.


No diggidy, no doubt.

Final Word

The sensation of tight hamstrings is less about an anatomically short muscle which requires endless hours of static stretching, and more about improving:

  1. Position/alignment of the pelvis via nudging people into a little more posterior pelvic tilt by hammering glutes and anterior core.
  2. Active end-range hip flexion. Allow people to experience this position more often and good things will happen.

Stop…..stretching…..the…..hamstrings.

CategoriesAssessment coaching Corrective Exercise

Low Back Pain: Habitual Movement Can Have Greater Influence Over Intentional Exercise

We’ve all seen the statistic: 80% of the population will experience low back pain in their lifetime.11

Back pain is the single leading cause of disability worldwide. Americans spend upwards of $50 billion per year on back pain. Back pain is the nemesis of all ninjas.

The struggle is real folks.

Given how pandemic the issue is and the sheer number of resources there are on the topic, why is LBP still such a nuisance and the Bane of many people’s existence?12

Copyright: kudoh / 123RF Stock Photo


When it comes to low back pain there is no one clear cut answer or way to explain things. As my good friend David Dellanave would say “different shit is different.”

It’s impossible to definitively point the finger at one or two things and say “there, that’s it. THAT’s why everyone’s back feels like a bag of dicks.”

Certainly we can proselytize, but at the end of the day we’re mostly just guessing at what may be causing someone’s low back pain. We’re using an amalgamation of relevant anecdotes, experiences, expertise, and evidence based research to make those educated guesses.

But it’s guessing nonetheless.

[BEFORE WE MOVE ON: Another good friend, physical therapist Zak Gabor, sent me THIS rather thorough paper on management of low back pain. To quote Zak…”Movement is key, but EDUCATION on false beliefs about the body is arguably most important.”]

A week or so ago as I was watching an episode of VICE News on HBO and one of the main stories that night was on opioid addiction and of a former drug representative who, sadly, because of debilitating low back pain, had become addicted to the very pain killers that had made him so successful years prior.

In the story he described a seemingly endless barrage of treatments ranging from massage therapy and acupuncture to ultrasound treatments, physical therapy, and traction.

It was a hefty list and I can’t remember all of it.

In the end he ended up having back surgery, yet unfortunately was still reliant on pain killers to help with his chronic low back pain.

As the story unfolded they panned to the same individual miniature golfing with his family and I ended up taking a screenshot of him bending over to pick up the ball after sinking a shot.

If I could add sound it would be accompanied with a cacophony of painful grunting akin to a rhinoceros passing a kidney stone.

Now, what follows is not an attempt at me diminishing his experiences, and I’m fully cognizant my only source of info regarding his “treatment” was/is the five minute snap shot I was given from the story.

That said, I wonder how much agony and frustration might have been prevented in his lifetime if someone took the time to show him some basic “spinal hygiene” (to steal a phrase from Dr. Stuart McGill and his book Back Mechanic) tactics to clean up his daily movement?

What might have happened (what can happen?) if, instead of acupuncture, he was shown how to hip hinge well or given a healthy dose of Deadbugs, Birddogs, and Breathing Side Planks?


Repetitive (aberrant) flexion, as shown in the still shot I took, certainly isn’t doing his back any favors. And, I have to assume this type of thing is happening dozens (if not hundreds) of times per day, whether he’s picking up a golf ball or getting out of a chair.

It glaringly demonstrates how we often neglect to address the obvious and simple everyday “hammers” in our lives that can (not always <— this is important) lead to back pain.

Nope, not those hammers.13

I’m talking about the kind of hammers – repetitive movement (repeated spinal flexion, and extension for that matter) – that start off as innocuous nothings (the twist there, the bending over there), yet manifest into something far more nefarious once one’s tissue tolerance is surpassed.14

As my friend and strength coach, Joy Victoria, notes:

Habitual daily postures and movement strategies have a greater influence, than intentional exercise.”

Massage, ultrasound, etc, while likely part of the puzzle (and can provide immediate, albeit temporary relief), are just band-aids.

I think exercise, and to be more specific, strength, can play an integral role in the grand scheme of things.

However, as fitness professionals it’s imperative we keep a keener eye. Deadlifts don’t cure everything. Recognizing run-of-the-mill wonky movement and attacking that, as trivial as it may seem, can make all the difference in the world for those who suffer with low back pain.

CategoriesAssessment Rehab/Prehab

Neck Pain and Headaches: The Link and How To Find Relief

Whenever one of my clients or athletes walks in and starts to say something to the effect of “hey, my neck is really bothering me…..”

….I immediately put my fingers in my ears and start yelling “lalalalalala, I can’t hear you.”

Okay, kidding.

Neck stuff can be tricky if not terrifying, and I know my limitations as a strength coach. 90% of the time I refer out to clinicians more qualified in this department, but that doesn’t mean there aren’t some “first step” actions I can take to hopefully help and provide some relief.

In today’s guest post by Dr. Michael Infantino he provides some insights that are well within many strength coaches/personal trainer’s scope of practice.

Copyright: remains / 123RF Stock Photo

Neck Pain and Headaches: The Link and How To Find Relief

Today I want to help you figure out if your neck is the source of your headache and how to treat it. Headaches, similar to many other diagnoses, can lead you down a rabbit hole of confusion.

So many subtypes of headaches exist that it becomes overwhelming to actually go about treating them. Luckily, the link between your neck and headaches is becoming more recognized.

I regularly see patients who are referred for suspected cervicogenic headache. Cervicogenic headaches imply that the neck is the cause of your headache.

This can be tricky because most headaches will actually result in some type of neck tension. This isn’t to say that treating the neck in these scenarios is a waste of time. It may resolve neck pain.

It just isn’t the answer to resolving your headaches.

Assuming that your headaches are cervicogenic in nature, what is the next step? Treating your neck pain is only one piece of the puzzle. We need to get to the route of the problem. Blaming your headaches solely on your neck is somewhat naïve. You need to consider how your lifestyle may have resulted in your neck pain and headaches.

Remember, everything affects everything. When our neck hurts we start wondering what ligament, muscle, nerve, disc or bone may be injured. Often times neglecting the actual cause of neck pain.

Injury and inflammatory processes local to the neck can occur for a multitude of reasons. It is not always secondary to trauma. Most of us start wondering if we slept in a bad position the night before or think back to a neck injury we sustained twenty years ago.

“That must be the problem! I used to play way to hard in pee-wee football [#glorydays].”

Instead, we need to consider the BIG 3. Sleep, nutrition and exercise. Ask yourself these questions.

How has my sleep been?

How about nutrition?

Have I been neglecting exercise or neglecting recovery?

Most problems start with sleep, nutrition and exercise. If you are missing the mark in any one area expect problems. Missing the mark in multiple areas? Now we have BIG problems.

How To Diagnose Cervicogenic Headaches?

Here’s your sign…

  1. Headache triggered by sustained postures.
  2. Neck pain that triggers a headache.
  3. Neck pain and headaches that are located on one side.
  4. Less than 30 degrees of upper cervical range of motion.

It is more common for cervicogenic headaches to be located on one side of the head, but not always. In some cases, people will sustain a whiplash injury or concussion. Headaches associated with these injuries are often multifactorial. However, we have often seen improvements by treating each suspected cause.

Treating your neck in these situations tends to do wonders.

Considerations For All

Posture… blah, blah, blah. I know we hear about it all the time.

You need to be cognizant of your posture.

This doesn’t mean that you need to sit at attention all day.

My biggest pet peeve is hearing that an “ergonomic specialist” told you that you needed to sit like a statue… all day. “Tall, chin tucked, flat back, shoulder blades pinched…” You’re kidding right?

As always, “poor posture” is not necessarily the culprit when it comes to pain.

Staying in one position for too long is the problem.

This doesn’t mean you have free reign to sit like the Hunch Back of Notre Dame. Studies have shown that a forward head position can increase the frequency of headaches (C Fernández-de-las-Peñas, 2006).

We often overlook the fact that our posture can have a huge impact on how we feel. Picture someone that is sad or depressed. What does their posture look like? Now think of someone confident and enthusiastic. What does their posture look like? How you position yourself can really play into how you feel physically and emotionally.

Tip: Change position every twenty minutes. Taking a walk can do wonders. Drinking a lot of water can force bathroom breaks. If you are stuck in a car shift positions often. Add some neck motions, some back arches, etc.

Be creative… and safe.

Flexibility

With a forward head posture normally comes tense muscles. Doing a quick scan to see which neck motions and shoulder motions feel more limited can make a huge difference.

Multiple studies have found a correlation between cervicogenic headaches and tightness of the sternocleidomastoid, upper trapezius, scalenes, levator scapulae, suboccipitals, and pectoral muscles (Page, 2011).

The picture below keeps things relatively simple.

Stretch the tight muscles and strengthen the weak ones. We will give more guidance on this in the next section.

Strength

Strengthening the neck has shown to improve neck pain and cervicogenic headaches.

Pain, poor posture and trigger points can alter the strength, endurance, timing and proprioception of the muscles around your neck.

Once you address trigger points and flexibility, restoring strength and endurance around the neck can happen relatively quickly.

The more research we have, the less specific it seems we need to be with these exercises (Ask, 2009; Jull, 2009; Gross, 2009; Van Ettekoven, 2006). Studies have shown that specific neck and upper body strengthening can be just as effective as general strengthening (Anderson, 2011).

Some medical providers will argue for the use of “deep cervical strengthening” using a biofeedback cuff.

A what!?

This is basically a rigged up blood pressure cuff. I love using this with patients because it teaches them how to realign their neck without using a lot of big muscles. If you do not have a blood pressure cuff have no fear. Gently performing chin tucks while attempting to avoid large muscle contractions will do.

[Watch the Neck Pain and Cervicogenic Headache Strength video below for more details on chin tucks].

Breathing

Telling someone they need to breath a specific way comes with some challenges.

We don’t always know why they have adopted an upper chest breathing strategy. It could be postural or even developmental. Some of us adopt certain postures because of work requirements or cultural norms. Other times it could be related to how we breathe; mouth vs. nose breathing.

Studies show that mouth breathers more commonly present with forward head posture.

It seems that a forward head position helps increase respiratory strength by using neck and chest musculature (Okuro, 2011; Int J Neiva PD, 2009).

So a forward head position is good?

No, this is a compensation that leads to increased tension and trigger points.

The emphasis placed on diaphragmatic breathing has been great over the past few years. We also need to make sure people are learning how to perform nose breathing. Besides helping improve oxygenation and preventing forward head posture, it has many other wonderful benefits. Since this is not the main topic of today I digress.


How To Test & Treat Yourself

The goal here is to keep things QUICK and DIRTY.

We will go through (1) motion and (2) strength testing.

Do you need to do all of these tests?

Absolutely not.

The benefit of testing and retesting is to see if you are actually making change. If your motion and strength improve after a couple weeks without resolution of headaches we need to go back to the drawing board. Consider seeing a skilled medical provider.

If you are short on time just go right to the “Ouch Test.” This is when you roll some inanimate object on your neck in an effort to identify trigger points. With a smile on your face of course.

Motion and Tissue Quality Testing:


1. Flexion/Rotation Test

The goal here is to see if your upper cervical rotation is limited in one direction. Cervicogenic headaches are usually attributed to dysfunction at the upper three cervical levels.

Flex your neck and rotate your head in an attempt to identify a “tighter side.” Keep in mind that what you feel isn’t always real. Give it a shot and consider using a friend to assist or a video camera to identify the direction you are limited in.

If you can’t get your chin to touch your chest we already know your neck needs some work.

2. Rotation/Flexion Test

If you had trouble getting your chin to your chest this test will help you identify if one side is tighter. This time you are rotating and then attempting to touch your chin to your collarbone.

This lets us know if upper cervical flexion is more limited on one side than the other. If you are limited, the assumption is that the opposite side cervical musculature is limiting you. To measure, see how many fingers can fit between your chin and collar bone.

Having objective measures will help you see if you made progress after treatment.

3. Follow The Map

Sometimes a roadmap is helpful for identifying the muscles that may be contributing to your pain and headaches. Being familiar with muscle referral patterns can help remove a little anxiety related to your pain. It helps prevent you from always thinking the worst when pain sets in. With a road map it is easier to get to your destination.

4. The “Ouch” Test

This is a more simple way of identifying which muscles may be triggering your headaches. Use your fingers, a roller stick, Thera-cane, lacrosse ball or whatever to identify tender regions around the upper neck and shoulders.

If a spot actually recreates your headache, you struck GOLD.

If you identify a tender region that does not recreate your headache, it would not hurt to treat it anyway.

5. Strength Testing


Chin Tuck and Lift Test

  1. Lying flat on the ground or in bed, place on hand underneath your head.
  2. First perform a small chin tuck and then remove your hand from behind your head without changing position.
  3. Men should be able to maintain this position for at least 40 seconds with minimal shaking local to the head and neck.
  4. Women should be able to maintain this position for at least 30 seconds with minimal shaking local to the head and neck (Domenech et. al, 2012).

Treatment. Let’s Get To Work.

1. Soft Tissue and Joint Treatment

Our goal here is to restore motion to the upper cervical region and resolve any trigger points.


2. Strength Treatment

We believe in being better than the average.

Your goal is to be able to hold the chin tuck and lift position for 1 minute, in a curl up position. We work on short duration holds with repetitions to help avoid excessive soreness.

Please do not be a hero and do long duration holds each time you exercise.

This recommendation is not for your general strength routine, only for this rehabilitation plan.

Goal: 1 minute hold in curl up position.

Retest: At the end of each week.

Protocol [See strength video above for demonstrations]:

Phase 1: Chin Tuck and Lift. 5 second holds for 10 repetitions. (5x/week)

When you can perform this with ease and no pain move on.

Phase 2: Chin Tuck and Lift. 10 second holds for 10 repetitions. (5x/week)

When you can perform this with ease and no pain move on.

Phase 3: Curl up + Chin Tuck and Lift. 5 second holds for 10 repetitions. (5x/week)

When you can perform this with ease and no pain move on.

Phase 4: Curl Up + Chin Tuck and Lift. 10 second holds for 10 repetitions. (5x/week)

Headache Diary: Become A Good Detective.         

Using a headache diary is a great way to identify the source of your headache.

If you want to be a good detective you need to take some notes. Noting the time of day, triggers (specific activity, specific movement you made, foods you ate, your mood, etc.), symptoms that preceded your headache, medications used and how you found relief.

Achieving 1% gains in various regions of your life, on a daily basis, is a surefire way to resolve most health issues.

Overview

The link between cervical dysfunction and headaches is often overlooked.

Basic maintenance that includes soft tissue work, strength, awareness of posture and proper breathing could be the fix you need. The medical community as a whole has been getting better at addressing the cause of headaches rather than covering them up with medication. Putting a spot light on the fundamental components of health should always be the answer.

Getting sleep, nutrition and exercise right is often the answer to most disease and illness. This will make your life much simpler, not to mention how much better you will feel.

Interested in a FREE home exercise plan. Click here to get started today!

About the Author

Dr. Michael Infantino is a physical therapist. He works with active military members in the DMV region. You can find more articles by Michael at RehabRenegade.com.


CategoriesAssessment coaching Program Design speed training

Bottoms-Up Squat Patterning Is the Jam

I was livid.

Not long ago I had a female client come in for an initial assessment and she divulged to me the previous coach she had worked with, in not so many words, inferred she was “dysfunctional” and that she’d likely never be able to perform a decent squat.15

What kind of BS is that? Within ten minutes of the first session you tell someone how much of a walking ball of fail they are? Awesome business model, dude.

I took it as my mission to use that initial session with her and demonstrate to her success; to prove to her she could squat. Maybe not with a barbell on her back, ass to grass, but I wanted to show her that 1) not many people are able to do that in the first place and 2) there are many different iterations of the squat and it was my job to showcase what her best options were given her ability level, injury history, and goal(s).

Screw that coach.16

Copyright: fxquadro / 123RF Stock Photo


The interaction above took place several months ago.

And, not to be too braggadocious, I was able to successfully get her to “squat” within that first session after taking her through a thorough screen and using more of a bottoms-up approach to pattern her squat.17

It all came down to getting her nervous system comfortable in the bottom position and to own it.

Cliff Notes Version:

  • Perform a hip scour to ascertain general anatomy limitations
  • Assess both passive AND active squat pattern(s).
  • See if active “matches” passive ROM (Range of Motion).
    • If so, do they demonstrate enough motor control to, well, control that ROM?
    • If not, is it a mobility or stability issue? I find it’s rarely the former. However mobility tends to be everyone’s “go to” scapegoat.
  • Implement appropriate patterning drills that match the trainee’s ability level and don’t bore them to tears with too many corrective drills that don’t accomplish much of anything.

Non-Cliff Notes Version:

Read THIS —-> Building the Squat From the Bottom

Bottoms-Up Is the Jam

Using the BOTTOMS-UP approach to introduce specific movements – in this case, the squat – is a foolproof way help build your client’s confidence in the movement and to start to nudge a training effect.

NOTE: a baby dolphin dies every time you default to 30 minutes of “ankle mobilization” drills.

This past weekend I was fortunate enough to attend the Clinical Athlete Workshop in Springfield, MA with Dr. Quinn Henoch, Dr. Zak Gabor, and Matthew Ibrahim.

Quinn brought to light two more drills I’m immediately going to add to my arsenal and I wanted to share them with you here.

Check these bad boys out.

Quadruped Rockback Squat Patterning


Tall Kneeling Squat Patterning


Pretty cool, right?

Play around with them yourself. Use them with your clients. Demonstrate to your clients that they can do stuff, and that oftentimes it’s just a matter of breaking down movements into more digestible parts to show them success.

Go to work my Padwans.