ufabizphoto@123rf.comCategoriesExercise Technique Program Design Strength Training

An Ode to the Meadow’s Row

As odes are concerned, you can relax: this post is not a poem.

However if I were to give my poem writing skills a test-drive it may look a little something like this:

Meadow’s Row, Meadow’s Row.

Thou shall build superior backs.

Lats, lats.

More lats.

I like bacon.

Seems how I won’t be giving Langston Hughes a run for his money anytime soon, lets get into the meat and potatoes of the Meadow’s Row and why I like it so much.

First off, John Meadows, the guy who popularized the movement, was a brick shit house. Sadly, John passed away in 2021.
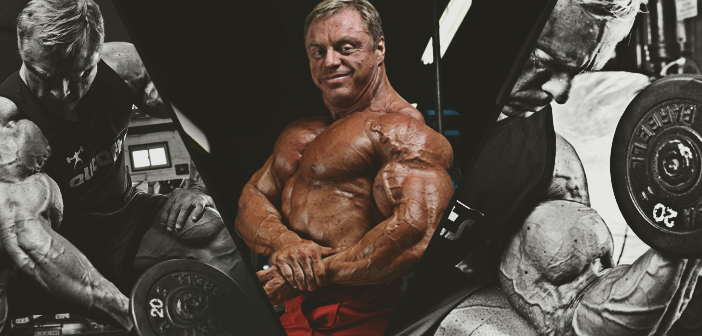
It was a long-time staple exercise in his routines, and, if you want a back the size of Nebraska, like John had, you’d be remiss not to start peppering it into your exercise routines as well.

I’ve been a big fan of the Meadows’ Row for awhile, ever since I first saw John mention it in THIS article over on T-Nation a few years ago. It wasn’t until earlier this week, however, when I posted the picture below on Instagram that I felt compelled to write about it.

Julian getting an early introduction to one of my favorite back exercises: the Meadow’s Row.

A post shared by Tony Gentilcore (@tonygentilcore) on

Basically, someone saw the picture and asked if I’d discuss coaching cues and provide a few videos?

Given I’ve been in a little “coming up with new content funk” I was more than happy to oblige. So, here you go.

The Meadow’s Row

What Does It Do? –  I’d like to preface everything by saying I do feel it’s important for most trainees – especially beginners and intermediates – to pump the brakes a little and learn to perform a strict 1-Arm DB Row first.

You can start HERE.

But also, check out THIS article from Lee Boyce.

The 1-Arm DB Row should not be performed in a straight up and down motion. This often leads to faulty mechanics and people “rolling” their shoulder(s) too far forward due to excessive humeral extension.

The resultant abducted and anteriorly tilted scapular position makes it cumbersome to target the upper back muscles, which is kinda the point of the exercise in the first place. So, there’s that.

Rather, the more kosher way to perform them is to have the DB move in an “arc” fashion; forward and back. This does two things:

  1. When conjoined with the cue “bring your elbow to your hip or back pocket” it prevents the elbow from going past the midline of the body, avoiding that “rolling” of the shoulder mentioned above.
  2. It matches the fiber orientation of the lats, which is what we’re really trying to target.

Side Note: I also agree with Lee that you can only be so strict with the DB Row for so long before it loses its moxy.

Meaning: I think it is important to be strict – at first – so that you can target the scapular retractors (namely, rhomboids). However, it won’t take long before the limiting factor of how much weight you can use is, you know…being strict.

As Nick Tumminello notes in THIS excellent article, two things to consider are the Resistance Curve and Strength Curve of any exercise.

The Resistance Curve: This refers to how the load changes throughout the range of motion based on changes in lever-arm (or moment-arm) length.

The Strength Curve: This refers to how your strength changes throughout the range of motion of a given exercise, which is due to a principle of physiology known as the length-tension relationship or the length-tension curve.

Photo Credit: T-Nation.com

Muscles have the lowest potential to produce force when they’re either fully elongated or fully contracted – somewhere in the middle is when they produce the highest amount of tension.

Moreover, when performing a horizontal row (like a 1-Arm DB R0w) the lever arm gets LONGER at the end range of the concentric motion (when your humerus is perpendicular to the ground).

As Nick notes:

This is why you often see lifters pull the weight halfway with good form, then jolt it the rest of the way when doing exercises like barbell bent-over rows and one-arm dumbbell rows. It’s also why you see so many people turning their torso towards their rowing arm as they pull the dumbbell in on dumbbell rows, along with seeing people staying too upright on bent-over barbell rows and one-arm dumbbell rows, or leaning back to far when performing seated rows or machine rows.”

Anyways, I’m a firm advocate for coaching strict technique in the beginning. But we also need to recognize said strictness can be a limiting factor if muscle growth is a goal.

And, it is…..always……….;o)

By all means, be strict!

Just know you (likely) won’t be turning any heads or building an impressive upper back with your “strict” 45 lb rows.

So What is it About the Meadow’s Row That I Like So Much?

  • It builds ginormous backs.
  • Specifically, it hammers the lats (which is your largest back muscle).
  • It makes you feel like a badass diesel motherfucker.
  • It’s fun to do, and nice change of pace from plain ol’ vanilla DB Rows.
  • A great option to go heavy if your gym is lame and doesn’t have heavy DBs.

Key Coaching Cues: 

1. Use straps.

Don’t listen to internet trolls who will tell you you’re “cheating” if you use straps. They brag about 225 lb deadlifts and their parents still pay their phone bills.

Use straps. You don’t want your grip to be the limiting factor on these.

2. John himself advocates you open up your hip closest to the bar. As in: the hip closest to the bar should be higher than the outside hip. I believe he prefers this method as it puts the lats on stretch a bit more.

Either way, play around with hip position and see what feels best for you.

3. I like to support my torso with my “free” hand by resting it on my opposite knee. I feel this takes the burden off my lower back.

4. I still use the same cue: “elbow to back hip or back pocket.”

5. Try to feel a slight “stretch” in the bottom position, when arm is straight.

6. Holy shit, lats for days.

Another option would be to perform the Meadow’s Row with a Meadows Attachment.

The thinner handle helps with grip issues, and won’t result in demerit points if you’re adamant on not using straps.

In addition, you can also play around with different handle positions to see which one you prefer or feel most. There’s no right or wrong here.

NOTE: You can purchase the attachment HERE on Elitefts.com.

And That’s That

If you haven’t already, give the Meadow’s Row a try today. It’s one of my favorites and I’m sure you’ll learn to appreciate them as well.
Categoriescoaching Exercise Technique Strength Training

Stuff I Used to Say, When I Was An Idiot: Squat Edition

I remember the first time I saw Eminem perform. I was at my apartment in between classes watching a little TRL on MTV. It was spring break, 1999. I was in my living room. Many of my friends were somewhere else, not in my living room, galavanting around on some beach in Cancun soaking up some rays and debauchery.

Customary during Spring Break week MTV was also in Cancun, and hoping to catch a glimpse of my friends – and Britney – I tuned in.

Hi, my name is, what? My name is, who? My name is, chka-chka Slim Shady.

Mouth agape with a spoon full of Fruity Pebbles I was like, “what in the what is this?”

Eminem something er other now? Trying to impregnate Spice Girls?

“Pfffft, whatever,” I thought. “He won’t last.”

Ten #1 albums, 45+ million records sold, and one not so sucky movie – 8 Mile – to his credit, I guess you could say I was an idiot.

Eminem didn’t do so shabby for himself.

And while I could sit here and reminisce over you1other past pop-culture snafus I made….

  • Chicks will always dig stone washed jeans.
  • Robert Downey Jr will never make it as Iron Man.
  • ABC’s What About Brian? (2006) will become the next Grey’s Anatomy or Lost. It’ll be a sure fire hit.2

…lets not bask too much in my ineptitude.

I mean, Adele?

She’s okay. I guess.

Speaking candidly, my “misses” can extend to the coaching side of the spectrum as well. I can think of a few things I used to think or say back in the day that, upon reflection, were pretty idiotic.

What are some examples you ask?

Good question.

1. Telling People to Arch…HARD.

Like many people interested in lifting heavy things I used to read – and still do – anything and everything by the likes of Dave Tate, Jim Wendler, and Louie Simmons.

All three are strong mofos and have, arguably, put out some of the best training advice on getting strong within the past few decades.

I mean, are you going to argue with this guy?

Or this guy?

Or him?

Uhhhh, no.

They’ve all contributed to the greater good of the industry and many of us owe our PRs to any number of articles or resources they’ve produced throughout the years.

That being said, I had to audit myself a few years ago when it came to coaching the squat. After being introduced to the concepts of PRI (Postural Restoration Institute) and listening to other strong dudes like Chad Wesley Smith speak on the topic, I wondered if cueing people to “arch, hard!,” and to” sit back” were the right things to be saying to the bulk of my athletes/clients when they were getting under the bar?

Copyright: Kurhan / 123RF Stock Photo

Very few were competitive powerlifters and even fewer were geared lifers. I.e., none wore squat suits when training (which require an aggressive arch and sitting back to reap the benefits).

To be clear: There are still many very strong dudes (and coaches) who advocate squatting with a hard arch, and that’s their prerogative. The thing to appreciate, however, is that what works and is ideal for a geared lifter won’t necessarily (read: rarely) ever translate well to a non-geared lifter.

If I were to balance the “I want to be brutally strong AND not shit my spine on this next set” teeter-totter, I’d opt for not arching (aggressively).

The ribs & diaphragm are pointing in one direction (up) and the hips & pelvic floor are pointing in another (down).

Put simply, this is all sorts of fuckeduppery not a stable position.

We’re placing a ton of shear load on the spine.

What’s more, this will invariably force the lifter to initiate the movement by sitting back (rather than down. You know, a squat). As a result, often, the chest will fall forward, and the cue we default to is “arch, arch, arch, chest up, chest up, chest up.

This only feeds instability.

A better, I believe, approach (again, for non-geared lifters) is to tone down the arch and adopt what’s been referred to as the “canister” position.

Giving credit where it’s due, the first person I ever heard use this phrase was Dr. Evan Osar. A simple analogy he used was to think of your pelvis as one ring and your rib cage as a bunch of other rings.

We want all those rings to be stacked.

This will nudge us into a more stable, joint-friendly environment

Now, a minor glitch in this way of thinking is that some people think this infers going into posterior pelvic tilt, where we flatten out the lumbar spine.

This is not what’s happening. As you can see in the picture above, my hips are still behind the bar (still very important) but there’s less of an aggressive arch. Telling people to posteriorly tilt their pelvis towards spine neutral is different than telling them to flatten out their spine.

From there it’s a matter of owning the canister position and to squat down rather than back.

2. Knees Forward Instead of Knees Out

The “push your knees out” cue is something I’ve slide-stepped away from within the past year.

To defend my position I’ll need to piggy back off my comment above – the squat, for most trainees, is more about “sitting down” than it is “sitting back.”

I want the squat to look like a squat.

This means there will be forward translation of the tibia over the toes (but not so far that the heels come off the ground) and that there is equal parts knees coming forward and hips going back.

The net result = down.

My good friend, smart-as-balls physical therapist, and owner of Resilient Performance Physical Therapy (in NYC), Dr. Doug Kechijian, stated it best in a Tweet recently:

That’s right: it’s okay, nay, better?, for the knees to travel forward.

Cueing someone to break with their knees almost always negates the need to remind them to push their knees out.

They’ll do it automatically:


I’m all for using less coaching to clean up someone’s technique. The last thing most of your clients need is you barking a plethora of cues at them: “chest up, knees out, eyes forward, chin tucked, what’s the square root of 47?”

Play around with knees breaking first and then sitting down. My suspicions are that things will feel cleaner, more powerful, and the squat will feel like a squat.

Huh, weird.

ADDENDUM: NONE of this is to say I’m right. These are nothing more than cues and approaches that have worked for me in recents months/years with my clients and athletes. You may think I’m batshit crazy, and that’s cool.

I mean, to reiterate, I’ve been wrong on many things prior.

Amazon.com? Such a stupid idea.

I hope you’ll consider these suggestions however, and play around with them yourself. I think you’ll be surprised.

Categoriescoaching Exercise Technique

2-KB Front Squat: A Simple Looking Exercise That’s Anything But

Being a “good” coach and writing effective training programs isn’t about inserting the most demanding or most obnoxious looking exercises for your athletes & clients.

Peruse social media and you’ll inevitably come across any number of fit pros vying for everyone’s attention with elaborate looking exercises ranging from Quasi-isometric deadlifts vs. chains (from a deficit on one leg) to flag-holds with band abduction (think about it).3

I’m being facetious. But I’m not far off from being dead serious.

I’m lame, and could really care less about garnering “likes” by wooing people with circus acts.

Copyright: vadymvdrobot / 123RF Stock Photo


When I watch some of the things coaches put up on their IG feed or YouTube channel I have to wonder if they think about the following:

1.  What’s the likelihood that 3% of their audience can reproduce a modicum of what they’re viewing?

“Look at me, Weeeeeeeeeeeeeeee.”

2. How is said exercise going to help them?

I’m not trying to be a Johnny Raincloud here. I understand that, sometimes, people just want to do shit to do shit.

Great.

Do it.

There doesn’t always have to be a reason or rationale backed up by a Mel Siff quote.

However, too, I feel those who do have an audience and do pride themselves on sharing actionable content (and not just selfies) with the masses, share a responsibility to be practical – more often than not – with the content and information they’re relaying.

Just my two-cents.

Excuse me while I step off my soap-box.

On that note, lets talk about one of my favs.

2-KB Front Squat

I’m not the only coach who’s a fan of this squat variation. Others like Mike Robertson, Artemis Scantalides, Molly Galbraith, and pretty much every coach in the history of ever who’s been affiliated with StrongFirst or RKC certification are fans.

It’s one of my “go-to” squat variations that I use with athletes and general population clients alike for a variety of reasons:

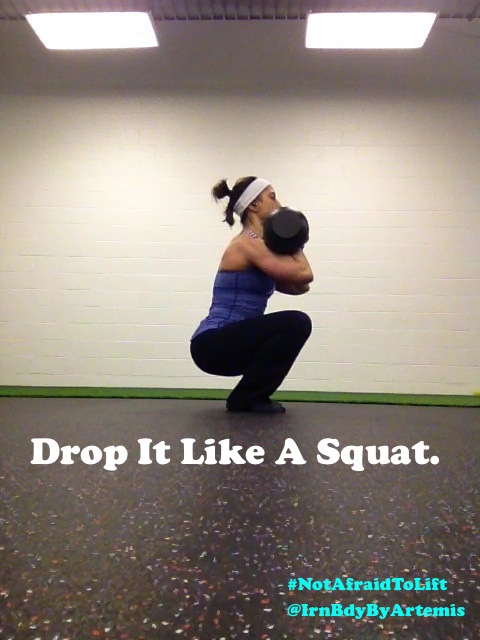
1. It’s un-paralleled with how it helps people learn to appreciate FULL-body tension. The anterior placement of the load forces the core to fire like crazy and helps to promote ideal positioning of the torso:

  • Less rib flair and more of a “canister” position where the pelvis and rib-cage are stacked on top of one another, in addition to the pelvic floor and diaphragm. The abdominals are called into action to resist an excessive arch.

As a result…

  • A more upright torso comes to fruition which helps to offset excessive shearing of the spine. NOTE: this is NOT to insinuate a forward lean is wrong or “bad” when squatting, it’s not. In fact, it’s warranted and needs to happen. However, for a large chunk of people, especially in the beginning stages, it’s more “joint-friendly” to adopt an upright torso, accumulate reps there, and then progress to advanced variations where more forward lean enters the picture.

2. It’s a great way to load someone without crushing them.

To steal a train of thought from Artemis Scantalides:

The double kettlebell front squat allows you to train a decreased load for the same physiological effect. So even though you are not squatting as much weight, because of the asymmetrical shape of the kettlebell, and the placement of the kettlebells in the rack position, you are able to maintain squat strength by training the double kettlebell front squat regularly.

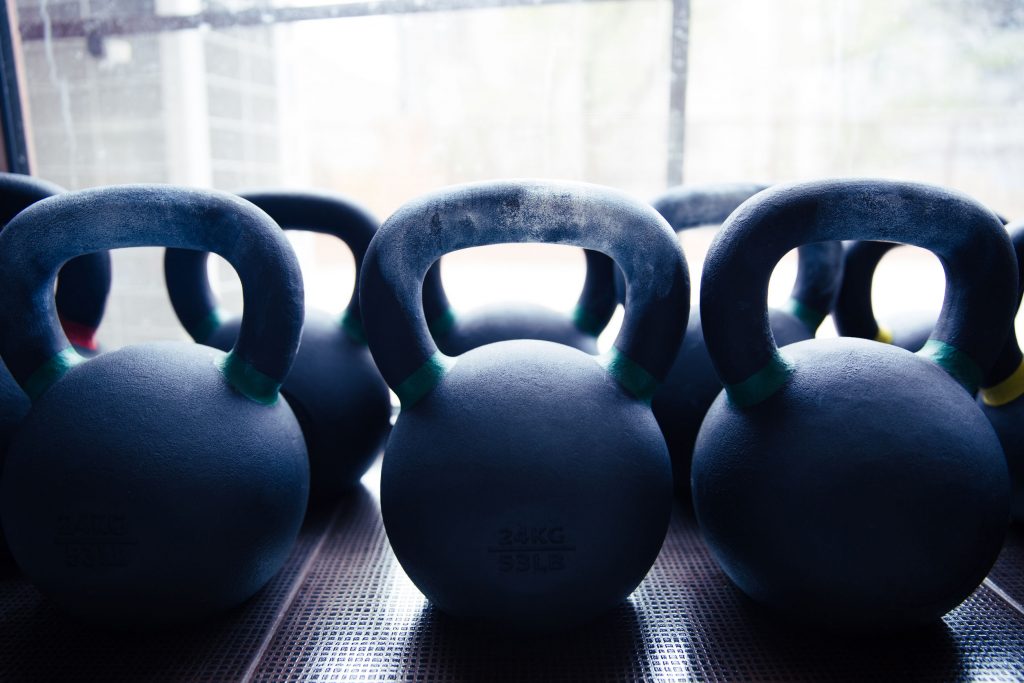
3. It humbles people. Even large humans who can seemingly squat Ohio will find this variation challenging. It doesn’t take much. Two, 24 kg bells will make many huddle in the corner sucking their thumb.

Below is a quick video I shot this AM which goes into slight detail on some of the components of the exercise, namely the set-up, how to transition the bells to the starting position, and basic cuing.

Hope it helps.

Quick-n-Dirty 2 KB Front Squat Tutorial

CategoriesExercise Technique muscle growth Strength Training

Dumbbells Are Better Than Barbells For Pec Development: There, I Said It

This post is about training the pecs.

Sha-ZAM.

Copyright: pjphotography / 123RF Stock Photo


Full disclosure, I was going to use this picture as the main image for today’s article:

Copyright: wrangel / 123RF Stock Photo

However:

1. This guy’s pecs weren’t “pecy” enough.

2. Yellow peppers are gross.4

Every dude who lifts weights wants an impressive, well-defined chest.5

For men I think it’s pretty much engrained in our genetic code to A) miss the toilet seat when peeing and B) to want to train our chest whenever possible. In the most primal sense possible, we could make the case that a muscular looking chest is our version of a peacock spreading his feathers.

It’s a sign of masculinity, bravado, (perceived) sexual prowess, and encourages the ability to do this in public whenever the occasion arises…which, is all the time:

via GIPHY

I am no different.

Throughout my lifting career I’ve always placed a premium on training my chest and it should also come as no surprise that 97% of the guys I’ve coached throughout the years have prioritized the same.

We’ve been programmed to think that barbell variations are the best way to build an impressive chest. And although I’d be remiss not to note that many guys with big bench press numbers do, in fact, have enviable pecs, I’d note there are far more guys with average (if not laughable, by powerlifting standards) bench press numbers who would make He-Man swoon with their chest development.

Having a 300 lb bench press – while baller and worthy of a fist-bump – isn’t a requirement for building respectable pecs.

Again, to reiterate, this is not to downplay the bench press.

Hoisting some heavy-ass weight off your chest, repeatedly, is never a bad approach. But if we take a look at the actual anatomy of the Pectoralis major muscle and it’s function(s) we can note why, from a developmental standpoint, dumbbells are almost always a better option.

Pectoralis major

Actions:

1. Flexion of humerus.

2. Adduction of humerus.

3. Medial rotation of humerus.

4. Cutting of diamonds (when maximal pecification is achieved).

NOTE: We could, also, divide the Pectoralis major into two separate “areas.” The sternal head, mostly responsible for humeral extension, as well as adduction, and the clavicular head which is mostly responsible for humeral flexion.

Barbell variations limit things because they don’t allow for any humeral adduction. This is why, if pec development is the goal, dumbbell variations are a better play because THEY ALLOW MORE ADDUCTION, GOSH! How many times do I have to tell you.

Regular, plain ol’ DB Bench Presses are fine and will get the job done. However, what kind of post would this be if all I did was say “go do some DB Bench Presses.”

Lame. That’s what.

So, here are some of my (other) favorite dumbbell variations that are (hopefully) new to most of you reading.

1. DB Press – Accentuated Eccentric


Nothing too revolutionary here. All I’m doing in this video is accentuating the lowering (eccentric) portion to help attenuate more muscle fiber damage and subsequent muscle growth.6

I like to keep people in the 3-5s range as far as the lowering portion is concerned and aim for 8-12 repetitions. A sneaky trick I’ll often implement is a MAX set on the last set. So it may look something like this:

Set #1 = 10 reps

Set #2 = 8 reps

Set #3 = MAX reps

But you can always use straight weight or a pyramid scheme or whatever. It’s all good.

2. DB 1-Arm (Offset) Press


This is a nice way to address any strength imbalances between one side and the other. Too, it adds an intense core-stability (rotary stability) component as well, as you have to fire all you have as to not fall off the bench.

3. DB Alternating Press


This is a classic variation I always revert back to. I like this one as it kinda-sorta emulates a 1-arm press. Plus, it requires a fair amount of scapular stability on the straight-arm side as you perform the set.

4. DB Elevator Press


This is a play on something Ben Bruno discussed with Goblet Squats not too long ago. Here, the idea is to lower the DB 1/4 of the way, then back up, then lower 1/2 down, then back up, then lower all the way down, then back up again.

That’s one rep.

It sucks, but in a “holy shit, my pecs are so juicy right now kind of way.”

I’ll often shoot for 6-10 repetitions.

5. DB “Reverse Batwing” Press


This variation is the counterpoint to Dan John’s Batwing Row exercise. Here, you’ll hold one DB a few inches above the chest as you perform all your repetitions on the other side.

Switch, and repeat on the opposite side.

Ouch.

6. DB Squeeze Press


This is probably my favorite DB exercise to hammer the pecs. Here you promote both actions of the pecs into one hybrid exercise.

The idea here is to squeeze the DBs together as you press up and down.

7. DB Press w/ Intraset Iso Holds


Hot off the presses – at least for me – I stole this one from Jim Smith of Diesel Strength & Conditioning.

The idea here is to, again, increase time under tension (TUT) in an effort to increase metabolic demand and muscular damage.

Start with a 10s isometric hold at top. Another 5s hold half-way down. And then another 5s hold a few inches above the chest. Then perform 8-10 repetitions.

If you really want to hate life, after you perform your reps, repeat the three separate iso-holds again on your last set.

8. DB Floor Flye – Hollow Position


This isn’t a press, but it’s still a very effective exercise to build the pectorals since it’s 100% adduction. I got this idea from strength coach Joel Seedman as it’s also a nice variation that hammers the core too.

Moreover, since it’s performed on the floor it can be considered a more “shoulder friendly” flye variation since it limits the ROM and keeps trainees out of the “danger zone.”

And there you go.

Now go pecify those pecs people.

Categoriescoaching Corrective Exercise Exercise Technique

Exercises You Should Be Doing: Off-Bench DB Press

It’s been a few weeks since I’ve graced the internet with a new (to you) exercise, so lets jump in:

Copyright: maximkostenko / 123RF Stock Photo


Any bench-pressing variation can be a double-edged sword. On one hand the advantages are numerous:

  • Builds upper body strength.
  • Pecification of pecs.
  • And that’s pretty much it.

So maybe not as numerous as I thought. But there’s no denying the importance of horizontal pressing movements (barbells, dumbbells, people, etc) with regards to building and developing a well-rounded physique and/or athlete.

To their detriment, however, some people take the “well-rounded physique” idea to the extreme and often perform waaaaaaaaaay more pressing movements compared to anything else. Just walk into any commercial gym (literally, any one, just pick), and try sit there for more than five minutes and not see someone start to bench press.

It’s impossible.7

As a result we often see an uptick in shoulder ouchies due to muscular imbalances (over-developed pecs compared to under-developed upper back muscles) and wonky scapular mechanics.

The latter is not an absolute: You’ll often find shoulder blades that are “glued” together or stuck in downward rotation in people who bench a lot. This is good thing in that you WANT the shoulders to be retracted and depressed in order to move a lot of weight.

It can be bad in that you still should be able to “access” upward rotation, protraction, and all the other motions the scapulae are designed to perform in order to keep the shoulders healthy.

Unfortunately, this isn’t the case for many people.

Off-Bench DB Press


Who Did I Steal It From: Vin Diesel.8

What Does It Do: Pressing variations involving a bench are open chain and don’t allow the shoulder blades to move. As noted above: this is fine. In order to heave a significant weight off your chest you need to set a stable base. And in order to do so it’s crucial to retract and depress the shoulder blades.

The thing is, over time, this can produce less than stellar scapular mechanics and result in shoulder pain or discomfort.

The scapulae (shoulder blades) need to be able to move.

This variation allows such a thing to happen.

Not only is the shoulder blade now able to move through a more diverse ROM, but this exercise, too, is a great rotary stability exercise (you have to fire your core musculature to maintain a straight torso as to not fall off the bench) in addition to nudging a bit more glute activation.

Key Coaching Cues: There’s not much to it. Lie on bench and scoot over to one side or the other so that the shoulder blade of the pressing arm is off the bench.

And then, you press.

Try to avoid lowering the DB so low that your shoulder “rolls” forward. Also, I like to cue a bit of a PLUS or protraction movement at the top.

Bonus Tip: Make a fist with your free hand to aid in developing even more full-body tension.

Perform 8-12 repetitions and then switch.

Wrap Up

Will this movement help you press 300 lbs? No.

But it will help keep your shoulders healthy in the long-run, and I see no harm in peppering it into programs sporadically just to remind trainees/athletes that it’s okay to let their shoulder blades move and breath a little bit.

Moreover, you know and I know that when someone’s shoulder hurts and you tell someone to stop pressing, that they’re likely going to be an a-hole an press anyways. At least with this variation you can help keep them sane and still press while addressing all the other things they may need to be working on to solve the issue(s).

CategoriesExercise Technique Exercises You Should Be Doing

Exercises You Should Be Doing: HBT Front Squat March

In my career as a strength coach I’ve worked with numerous athletes and non-athletes alike dealing with back pain. And while much of the time my initial “go to” exercises are things like the McGill curl-up, birddogs, deadbugs, and various planks I also recognize that, after awhile, some people would rather wash their face with broken glass than perform another rep of any of those exercises.

Copyright: stylephotographs / 123RF Stock Photo


Curl-ups, birddogs, and planks work. There’s no denying that. Coaching people up on those three movements alone and having them perform them on a consistent basis will clean up a lot of aberrant movement reduce pain in a symptomatic back.

However, it’s just, you know, they get boring after a while. As much as I’m a fan of those movements (and could care less how bored someone gets if it’s what they need to be doing to get better), part of my job as a coach is to help people not feel like a patient and to find other means to elicit a training effect.

I mean, raise your hand if this sounds familiar:

Athlete/Client: “Ready to train coach. What are we doing today?”

Coach: “You’re in for a treat. We’re getting after it with birddogs today. Holla!”

Athlete/Client:

via GIPHY

Like I said, it’s not to bemoan the birddog – it’s lovely exercise – but it’s not to say we can’t toss in alternative exercises that are just as conducive to working through low back pain AND more palatable for those looking to actually train.

HBT Front Squat March


Who Did I Steal It From? – a combination of Dr. Joel Seedman and MA based strength coach, Ryan Wood.

What Does It Do? – I’ve discussed the concept of HBT before in THIS article, but to reiterate:

“HBT = Hanging Band Training.

It’s exactly what is sounds like. You take some bands, hang some stuff off them, and do stuff. Because, science.

While at first glance it comes across as a bit gimmicky, HBT training does have a fair amount of efficacy. As Dr. Seedman explains in the article linked to above, the oscillatory characteristics of this brand of training provides a unique training stimulus that challenges stabilization, increases core demand, helps “excite” the CNS, and also has a bit of carryover to muscle gain due to the increase in time under tension.”

Germane to this exercise, the oscillatory effect of the kettlebells (or plates if you don’t have access to KBs) works wonders with regards to challenging the core musculature to stabilize and in helping to build a more resilient back.

The exercise itself can work in one of two ways:

1) If you have the space to do so, you can have someone unload a barbell from a rack and have him of her walk a specific distance.

2) Or, if you’re like me, and have a smaller studio, you can just as effectively have someone stand in place and march it out, like my client Dima is doing in the video above. Like a boss.

Key Coaching Cues: This is a fairly intuitive exercise. The KBs hanging from the bands is going to jostle the individual every which way if they’re too lazy and not CONTROLLING the barbell. The objective is to resist the movement of the KBs.

I like to tell my clients to “keep the KBs quiet.”

Some other things you want to be on the lookout for is too much leaning back and/or any excessive lateral flexion (side bending). The idea is to “stay tall” as one alternates back and forth from foot to foot.

You can either shoot for a specific time (say, 30-40seconds) or a specific number of steps. Give it a try and let me know what you think.

Categoriescoaching Exercise Technique Program Design

The Abdominal Rollout: Common Mistakes and Progressions

Having a newborn at home = I’ve been waking up on the wrong side of the bed lately. A lot. I’m cranky AF and my brain waves aren’t firing on all cylinders this morning so you can blame this lame introduction on that.

Cool?

Awesome. Lets discuss abs. Specifically, lets discuss one of the more common ab exercises out there: the abdominal rollout.

Copyright: georgerudy / 123RF Stock Photo

The Abdominal Rollout: A Complete History (But Not Really)

I’d like to sit here and pizzaz you with some interesting factoids and trivia about the abdominal rollout, like, say, I don’t know, its roots can go all the way back to Mesopotamia and that every male had to perform strict repetitions for 17 hours straight before he was allowed to mate. Maybe the History Channel can back me up on that one?

Who knows, for all I know some guy named Phil was the first to perform the exercise while training in his basement in 1968 while jamming to Hendrix. Phil was cool as shit.

Either way, all I can really tell you is that it’s a staple exercise that trains the anterior core musculature – upper and lower rectus regions in addition to the internal and external obliques – and has long been a “go to” exercise for anyone looking to shred their mid-section.

Copyright: max5799 / 123RF Stock Photo

Specifically the abdominal rollout is an excellent variation that trains ANTI-EXTENSION, and, well, many people tend to miss the boat in this regard.

I see a lot of common mistakes when I watch trainees perform this exercise. In fact, most would be better off pumping the brakes a little bit and mastering something like an RKC plank first.

RKC Plank = a plank (albeit learning appreciate tension).

The set-up is more or less the same a regular ol’ plank, except here you’ll want to flex everything – your abs, glutes, quads, eyelids, everything.

An important cue I use when teaching the RKC plank is to tell the person doing it to pretend as if they’re trying to drag their elbows towards their toes. When done right, it increases the “holy cow, this is really hard” factor by a large margin.

Also, when done right, 10 seconds will feel like torture.

But I’m getting a little off-track. What are those common mistakes of the rollout I was referring to above? The two most common are:

  • People falling into excessive lumbar extension (<– remember: the rollout is an exercise that helps train anti-extension; it defeats the purpose of the drill if you allow your lumbar region to “fall” into extension). The idea should be to maintain posterior pelvic tilt of the pelvis throughout.
  • Not allowing the hips to follow the shoulders.


In Case You’re Too Important to Watch the 2-Minute Video Above

1. I like to cue people to start the exercise in a bit more of a lumbar flexed posture (PPT). Relax, it’s unloaded flexion, you’ll survive. By doing so, most will end up in spinal neutral as they draw closer to the floor.

2. My triceps look jacked in that video.

3. Oftentimes as people break toward the floor their shoulders will lead and the hips will tend to lag behind. A cue that often works for me is to tell the person to pretend there’s a rope or chain connecting their hips and shoulders and that the shoulder are “towing” the hips behind them. They should move simultaneously.

Address those two things and technique will clean up nicely.

How About Progressions?

Assuming you’re already pretty good at the standard rollout, what are some ways we can progress the exercise?

Some less sexy alternatives would be:

  • Add a pause at the bottom.
  • Use a slower tempo on the way down and up. Think: three seconds down, pause, three seconds up.

We all know you’re going to skip those however, so maybe consider these options?

Level 1: This Is Kinda Cool, I Guess – Elevator Ab Wheel Rollout


Here, the idea is to include some pitstops or “speed bumps” along the way to make the movement more challenging and to increase time under tension.

With the Elevator Rollout I’ll tell people to rollout to three different lengths:

  • 1/2 way out, then back.
  • 3/4 way out, then back.
  • Full ROM, then back
  • THAT’s one rep.

Aim for 5-6 repetitions (which is really 15-18 repetitions when you count all the additional stops).

Level 2: Alright, Now We’re Talking – 2-Way Ab Wheel Rollout


All we need to do to make something a little more challenging is to add a change of direction. With the 2-Way Ab Wheel Rollout the idea is to alternate between veering off to the left and to the right. But, really, you can add as many directions as you want. And, if you’re really feeling frisky you can combine this with the elevator variation above.

I like to shoot for 6-8 repetitions per direction with this one.

Level 3: Ohhhhhhhhhhhh, Snap – Band Resisted Ab Wheel Rollout


To up the ante even more we can add resistance in the form of a band. With this variation I wrapped two bands around the corner of a squat rack and wrapped the other ends around each handle of the abdominal wheel.

The band will “assist” with the yielding/eccentric component, but you will need to fight and overcome the concentric portion. It’s a pretty nasty progression, so don’t take it lightly.

Aim for 8-12 repetitions.

Level 4: “Whoa, I Know Kung-Fu” – Standing Band Resisted Barbell Rollout

^^ Bonus points for The Matrix reference.


Admittedly, this isn’t that baller…but it’s a nice variation for those who aren’t quite able to perform a strict standing rollout (which is next level Jedi shit). With this variation you have to overcome the band as you roll out, however on the way back the band will accommodate or assist you back up to the starting position. Pretty nifty.

Aim for 5-8 repetitions.

And that’s that. I hope those tips to clean up technique help and made sense, and I also hope you now have a few new exercises to try.


Categoriescoaching Exercise Technique Program Design

Sport Restrictive vs. Sport Specific Exercise: How to Avoid Damaging Our Athletes

Speed ladders, parachutes, BOSU balls…it’s all nauseating at times. There’s a time and place for all those things – I guess – but when they’re added to an athlete’s (especially young athlete’s) training repertoire I have to wonder if they’re in there because the coach feels it’ll make him or her better, or if it’s the novelty they’re after? Today’s guest post by strength coach, David Otey, tackles the idea of sport RESTRICTIVE exercise and sport ASSISTIVE.

Good stuff.

Copyright: gloffs / 123RF Stock Photo

Sport Restrictive vs. Sport Specific Exercise

In fitness, finding your niche is a major part of making an impact on an individual. Over the last few years, Instagram celebrities and fitness magazines are guiding people on the best “sport specific” exercises for athletes.

If you want to be great at throwing, do this!

If you want to play cornerback in football, do that!

The whole process is very demanding of precise movements. The only issue is, details enhance, they don’t create. Just like a nice tie doesn’t make a cheap suit look better, detail work without a foundational set of athleticism, doesn’t change the athlete.

We can all remember our first intro to lifting weights, like a first date. The first interaction is the most impactful so a shit program can really compromise your results for years to come if you don’t find the right direction.

Ever meet that 50 year old guy that is still doing his HS football team’s lifting routine?? I meet that guy all the time. The issue with this idea is young athletes usually get thrown into a specific rotation of exercises that may be helping tiny details but neglecting overall development.

The fact is, the first 6 months to a year of working out is the most crucial from a muscle mass, neuromuscular awareness, and overall gym knowledge standpoint. Those initial days and exercises really set the table for your future accomplishments in the gym.

Sport specific exercises have been used for years with the intent of developing a particular athlete in their respective competition. Ever hear of the SAID principle? If so, makes sense right?

Sport restrictive exercises is a term I use for any exercise that could hinder the natural athleticism of an athlete.

If we are using sport specific exercises, they should be a compliment to some natural big lifts that are the foundation of our program. Thousands of athletes, right now, are practicing how to make one hand catches like Odell Beckham Jr. While focusing on that, they are neglecting speed, power, route running, catching fundamentals, and more

Athlete programming has two overall objectives: Maximize potential and minimize injury/restriction.

If you are not getting better, you are competing less.

If you are hurt, you are competing less.

We want athletes to compete more, work more efficiently, and stay in the game longer. The idea of sport restrictive exercises is to change the thought process from what things can I do for specific movements to what things should I REALLY not be doing to hinder my development in that sport.

I would argue that the majority of exercises are good for all athletes with a strong foundational level of athleticism (assuming no major injuries). There are a subset of exercises for each sport which should be avoided if you are looking to max out your potential. Here are four of the more common situations we may run into which are holding back our athletes.

Restricted Hip Drive

Restricted Shoulder Mobility

Loss of Rotational Power Generation

Loss of Multidirectional Movement

These four basic areas are really what encompass the attributes that set an athlete apart from the field.

Lacking in one or multiple of these either place you behind the curve or place you on the injury reserve. These for characteristics are also seen in every sport just in varying quantities. Let’s dive into how we can distinguish and avoid sport restrictive exercises going forward. As sport specific exercises are truly movements seen in game situations, I will refer to the exercises below as “sport assistive.”

Hip Drive

Hip drive is one of the most powerful and common strengths of any athlete. Whether you are throwing, blocking, sprinting, hips dominate the motion. Hip drive can be used in many ways but explosion and stability are the key responsibilities of the Glutes. To get the most of your hip drive, it’s important to work in areas that are similar to your sport. The weight room opens us up to a long list of activities that can work on a more powerful looking lower body. Key word is LOOKING. How can we adjust to just flat our powerful.

Sumo Deadlift – Sport Restrictive Movement

Note from TG: Noooooooooooooooo (sad face). I’m still posting a video of myself.


Traditional Deadlifts are becoming more common in weight rooms everywhere which is a great thing. The movement is based on full body strength and developing power. With regard to the Sumo Squat, it’s inherently unique set up is unfamiliar to almost any sport we see on a regular basis. Now I know, some people are going to say, “But what about the extra muscles used in the Sumo Deadlift?”

I certainly can understand that, my argument is this is more suited for the athlete geared towards weight-room competitions and less towards indoor/outdoor traditional sports. Building a foundation should be based on movements that are going to directly impact performance, not just look sweet in your Instagram post.

Broad Jump – Sport Assistive Movement

Without hip mobility, you are leaving yourself with a quick road to injury. Restricted hip mobility leaves you in a position to rely on areas to gain mobility that aren’t meant to have mobility. This extra strain, either placed on your knees or lower back, can quickly turn into chronic issues.


To avoid this, don’t work on exercises with unique demands that are uncommon to your everyday activity. The broad jump for any athlete is a way to specifically focus on hip and lower body explosion with the outcome of “project myself as far as humanly possible”. All out power is what we strive for. The hip extension utilize in the broad jump mimics almost all lower body locomotive movements we will see more commonly.

Shoulder Strength

Shoulders are the second most impactful joint in the body. Where the hip is mainly responsible for power generation from the lower limbs, the shoulders have the main juncture of the upper limbs. In all throwing sports, the chain reaction between medial foot all the way through the throw, is either amplified or diminished because of shoulder (scapular and glenohumeral) strength and mobility.

Barbell Military Press – Sport Restrictive Movement


The traditional Military press is no argument a solid movement for building muscle mass, but not ideal for working with the general athlete. The fundamental difference between athletics and barbells is the level of predictability.

Barbell movements confine the body to accommodate muscle growth and patterning to a restricted path due to the bar. In sports, all movements are unique and the body is better prepared when trained to be strong through its own control of its path (Example: Dumbell Press).

With respect to athletes with large wingspan, shoulder movement independent from one another is also safer than fixated movement. Increased muscle mass restricts in some sports and helps in others, but overall, the barbell is counterproductive for the athlete.

Landmine Shoulder Press – Sport Assistive Movement

The Landmine Shoulder Press is a great method to strengthen the muscle while focusing on glenohumeral rhythm.


To build in the body’s capabilities to work at its highest demand, we need to reinforce the body’s desire to work in collaboration with coexisting parts of the system. The Landmine’s free pivoting base allows you to control the weight independently. Along with this, the path of the bar promotes scapular upward rotation along with force angle more appropriate for one of our most unstable joints.

Rotational Power

Power is only as good as it can be transferred. Its tough to turn on a light with a frayed power cord (don’t try that at home). The anterior and posterior core’s primary functions are to maintain spinal stability and transfer power. The inherently awesome part of rotational power is the body’s ability to work together and coordinate multiple segments to maximize output. This doesn’t happen without the core, and doesn’t happen without training the body in its full capacity rather than in isolated segments.

Power Cable Twist – Sport Restrictive Movement


Cable twists are commonly seen in gyms around the country as a method to great sick abs. Unfortunately, they aren’t great at that and are more detrimental to spinal integrity. Just as I wouldn’t swing a baseball bat without pivoting my feet, rotation without lower body rotation creates increased stress on the discs, vertebral columns, lumbar spine, hips, damn near everything. Creating rotational power generally starts at the medial foot and transfers up, so training in that manner is most appropriate.

Med Ball Throws – Sport Assistive Movement


The Med Ball Throw is one of the most similar movements to translation of rotational power. One key factor of power is the ability to go full throttle. Just like doing sprints on a treadmill is definitely not the same as doing full sprints outside, there is no restriction of full potential. Proper Med Ball throws can teach an athlete full power output, safely!

Multidirectional Movement

Side Shuffles – Sport Restrictive Movement


One of the hardest things for me to watch is a coach teaching an athlete to side shuffle. Usually, with the side shuffle, the athlete is instructed to keep their back foot in contact with the ground. This concept is generally contradictory to natural lateral movement. Try running while keeping one foot on the ground at all times. Chances are you are going to lose your race.

Lateral Skiers – Sport Assistive Movement

https://www.youtube.com/watch?v=aOI1exR6pSk


The medial foot is one of the primary points of the body where power starts. Stealing a base, juking a tackle, initial drive in the baseball swing, all start from medial foot. Lateral work is a great translator to rotational power and lower body reactive capability. Lateral Skiers allow you to focus on single leg accommodation and the ability to propel from that loaded position. This is a movement that every athlete should build do and practice.

Summary

Every program is going to be unique because of the athlete and specific coach writing the program. The purpose of this article isn’t to blast certain exercises but to bring up arguments to why other movements may be more appropriate for your athletes.

You don’t need a speed ladder to be sport specific.

The best sport specific movements are those done in practice. Unfortunately, as coaches, we may only work with certain athletes in a weight room setting. It is important to identify which exercises can translate, and which in the long term, could be holding back our athletes. Bottom line: don’t restrict your athletes by refusing to adjust from the status quo.

Author’s Bio

David Otey is a Strength and Conditioning specialist based out of New York City. David is the 2016 Fitness Manager of the Year for Equinox and has been featured in several major fitness publications on the topics of strength and Conditioning.

CategoriesAssessment coaching Exercise Technique

“Squat Like a Girl”

I hate the term “girl push-up.” I hate the connotation it breeds; that girls are weak and that they should do these kind of push-ups instead (performed from the knees). Coaches who use it are 1) lazy and 2) are definitely worthy of the stink eye.

But what about squats? Is there such a thing as “squatting like a girl?” Does the term equally make me want to toss an ax into my face? Well, not exactly. In today’s excellent guest post, NY based coach, Meg Julian, provides some insight on why, sometimes, there is such a thing as squatting like a girl.

Copyright: Kurhan / 123RF Stock Photo

“Squat Like a Girl”

I’d like to start off by saying that I’m truly honored Tony named his firstborn child, Julian, after me. I hope to inspire the masses as much as I’ve affected Tony. But I’m not here to talk about Baby Julian; I am here because of Baby Julian (yay!).

We are here to talk about why “squatting like a girl” can be different than squatting like a boy.

After working in a female-only gym for five years and training many females clients during the past seven years (not to mention being a woman myself), I’ve found that we often don’t hear about how tips for men might not work perfectly for women, because our bodies (shocker!) are different.

This is one major reason why when I ask new clients to squat, they often struggle to squat, or even look back blankly (really!) Why? Because squats can be complicated, and most exercise science was developed for men by men.

Photo Credit: T-Nation.com

And that’s no way to live, as a great squat can help women with overall strength and weight-loss, which are frequently among the goals I hear from clients.

So, whether you want to put an Olympic barbell on your back or just get in and out of a chair, you’ll want learn how to properly squat. Here are four important ways that women can improve their squat:

#1: Use Your Butt

Squatting is widely considered a phenomenal exercise for building your butt, but many women don’t effectively engage their glutes when they squat. Counter-intuitive, right?

That’s partly because most people sit for much of the day and thus over-stretch their posterior chain, which is the butt and hamstrings; we also tend to over-work the front of our bodies, rather than the posterior.

It’s no surprise, then, that the little elves in your muscles don’t stand a chance.

This condition is called “glute amnesia,” and it’s a term coined by back specialist Stuart McGill — I’m not kidding! If you don’t engage your glutes when you squat, the connection between your muscles and brain will fade, which will make it even harder to use your bum when you want to. In other words, if you don’t use it, you lose it.

To remedy this, the cue we often hear when squatting  is to “sit back.”

But this often turns into a balancing act of:

  • Gripping the ground with your toes and hanging on for dear life;
  • Sticking your butt back;
  • Leaning forward and hoping to not fall over; AND
  • Doing nothing positive for your body.

Instead, I tell clients to pick their toes up off the ground.

Picking your toes off the ground, and putting the weight in your heels, makes the connection between the brain and posterior chain stronger. This is often what is meant by “sit back,” but our bodies tend to take the path of least resistance, so instead of truly using your glutes, it’s common to become a bit of a surfing expert.  

Note from TG: Nice cue to get people to “feel” their glutes work and to understand their role in squatting. While I don’t want to speak for Meg, it’s not one I’d use long-term, especially if the goal is to lift more weight.

If this seems weird and awful, or you topple over, you’re probably not doing it incorrectly; you just haven’t built the strength yet. Keep trying. And you might want to practice over a bench until you get the hang of it.

#2:  Redefine the Relationship Between Your Knees and Your Toes.

The misinformed cue we often hear is “Don’t let your knees come past your toes.”

The idea, again, is that your weight should be in your heels and mid-foot instead of being perched up on your toes. The cue has it’s heart in the right place, but it’s just misdirected, much like this meme:

But I love home; that’s where I keep my bed, food and dog.

The problem? Again, everyone is built differently. For example, if you have long femurs (thigh bones), it’s going to be better for your squat to let your knees come past your toes.  

The focus, instead, should be on having your shoulders go straight up and down as you squat.

So instead of focusing on your knee placement, double-down on your efforts to keep your weight back, barbell over mid-foot, and your back upright.

#3 And One More Thing About Your Feet.

It’s common to be toldSquat with your toes facing forward,” but most women will feel more comfortable turning their toes out a bit when they squat. The female hips and the way the leg bones fit into them are built to be a little wider; you know, “birthing hips” and all.

So instead of focusing on your feet facing forward, focus on aligning your knees above your toes, and for women, this likely means turning your feet slightly outward — and your knees along with it.

Trying to force a more narrow stance or twist the toes in a direction they don’t naturally want to go will cause a lot of tension in the knees. It’s like trying to jam a drawer shut that’s off its runners — not pleasant.

This may be perfectly fine for some and even how most assessments are done, but it’s possible that this is not the ideal form during every workout. Just look at the way a little kid naturally sits in a sandbox (do they still have those?): knees are wide and toes are turned out.

Not sure how wide to point your toes? I recommend standing barefoot with your heels together on a smooth surface like wood, and squeeze your glutes. Then, separate your feet until your heels are under your shoulders. This is likely the most comfortable position for a squat for your body. Play around and see what feels best.

#4: Show Your Ankles Some Love.

Tight calves can lead to a lack of dorsiflexion, which is the ability to flex the toes up toward the shins. It’s a problem I often see in women who wear high heels or flip flops and never stretch.

Lacking range of motion in your ankles is terrible for nailing a squat. By limiting the bend, your body will find a way to compensate by flattening arches, caving knees in toward each other or leaning too far forward.

Here’s a simple test of ankle mobility: Place your toes four inches from a wall. Without lifting your heel, can you bend your knee until it taps the wall. If yes, you’re good! If no, keep practicing twice a day until you can. Keep it up until you can consistently hit a wall. In a good way.


Wrapping It Up

Most women have goals of losing weight, improving their backsides and getting stronger. While these goals are a bit vague, I do have a specific answer: Squat as much as you can handle —  after you master squatting like a girl.

Author’s Bio

If you enjoyed what you read, want to learn more or just need to know where to send the hate mail, visit me HERE, where you can subscribe to my weekly email dedicated to tips like these and improving technique and strength for obstacle course racing. You can also follow me on Instagram HERE.

Megan Julian is a New York-based NASM Certified Personal Trainer, with additional certifications such as, FMS L2, NASM-CES and CFSC. She specializes in preparing brides for the big day, helping obstacle course racers improve their times and working with clients of all ages overcome injuries. In her free time, she enjoys running through the woods, jumping over walls and crawling under barbed wire — sometimes at events such as the World Championship Obstacle Course Race in Canada.

Categoriescoaching Exercise Technique Program Design Uncategorized

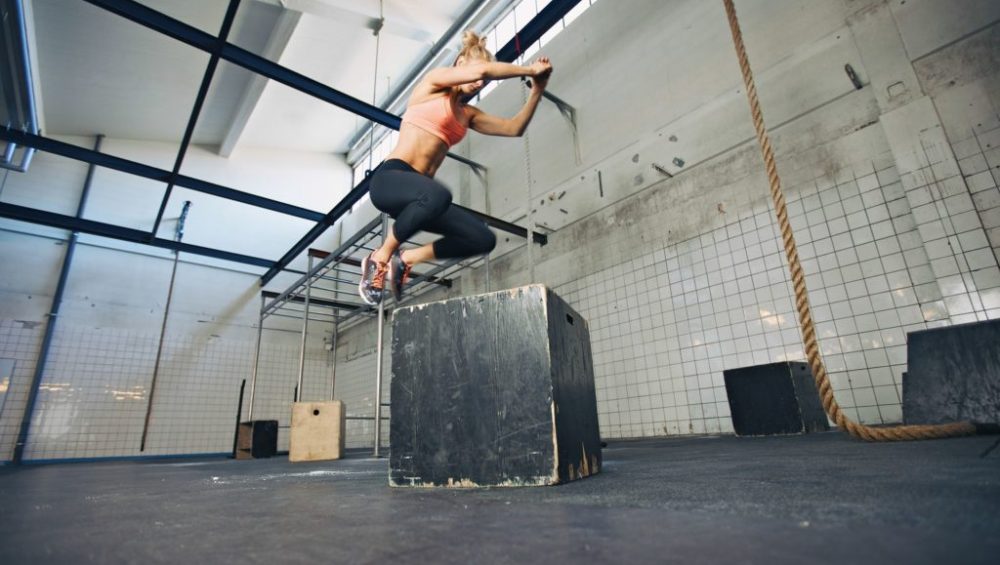
Box Jumps: You’re Not Jumping as High as You Think You Are. And, You’re Doing Them Wrong

Thump, thud, thump, thud.

“What’s that noise?” I thought to myself. “Thor whacking people’s faces with Mjolnir or a T-Rex break dancing to It Takes Two.”

I turn the corner….”please let it be a T-Rex. PLEASE!

Nope, just some asshat performing box jumps.

Copyright: ammentorp / 123RF Stock Photo


Now, before anyone gets their panties in a tissy….I am not against box jumps. I implement them into my training as well as into the programs I write for other people and think believe they have a time and place (as does most any other exercise in existence9).

I mean, any strength coach or trainer worth his or her weight in paleo brownies understands their role in helping to train explosiveness and athleticism. And, if we were to peel back the onion a bit further, we’d note the REAL benefit(s) of box jumps are:

  1. Force summation, Rate of Force Development, or learning to put force into the ground.
  2. Landing mechanics: or, learning to absorb force.

It’s not to try to jump onto a box at the highest height possible or to perform them for endless repetitions.

Dumb


Really Dumb


Dumber


Commentary on Video #1

Before the record button was pressed you know those two guys were thinking to themselves “Dude, if you hit this jump it’s going viral and you’re totally going to get laid tonight.”

He’s lucky he didn’t break his back or neck.

Commentary on Video #2

Considering the number of banged up knees and scraped shins I’ve come across I really wish CrossFit would begin to understand that box jumps aren’t a great conditioning tool, and that there’s an abyss of better options.10

Hell, running over your right arm with a Honda Civic would be better than high-rep box jumps.

Commentary on Video #3

Yeah, yeah, I get it: It’s JJ Watt, it’s an old video, he’s an elite professional athlete, he nailed it, quit belly aching Tony.

Admittedly that was a baller jump and I too would have full confidence in JJ’s ability to jump over Mordor and then some. However, from a cost-benefit standpoint…..as a coach who’s worked with plenty of high-level athletes myself, I wouldn’t touch that with a ten-foot pole.

I have to wonder, though, did the coaches in that video prescribe or allow this to happen because they felt it would make their athlete better, or because they were chasing YouTube views and likes?

Not worth the risk. Refer to video #1.

My Real Beef: Not Box Jumps, But HIGH Box Jumps

A few months ago I watched a stellar video by Nick Tumminello where he went into detail on why he didn’t like HIGH box jumps, and he made a brilliant point I had never thought of before.

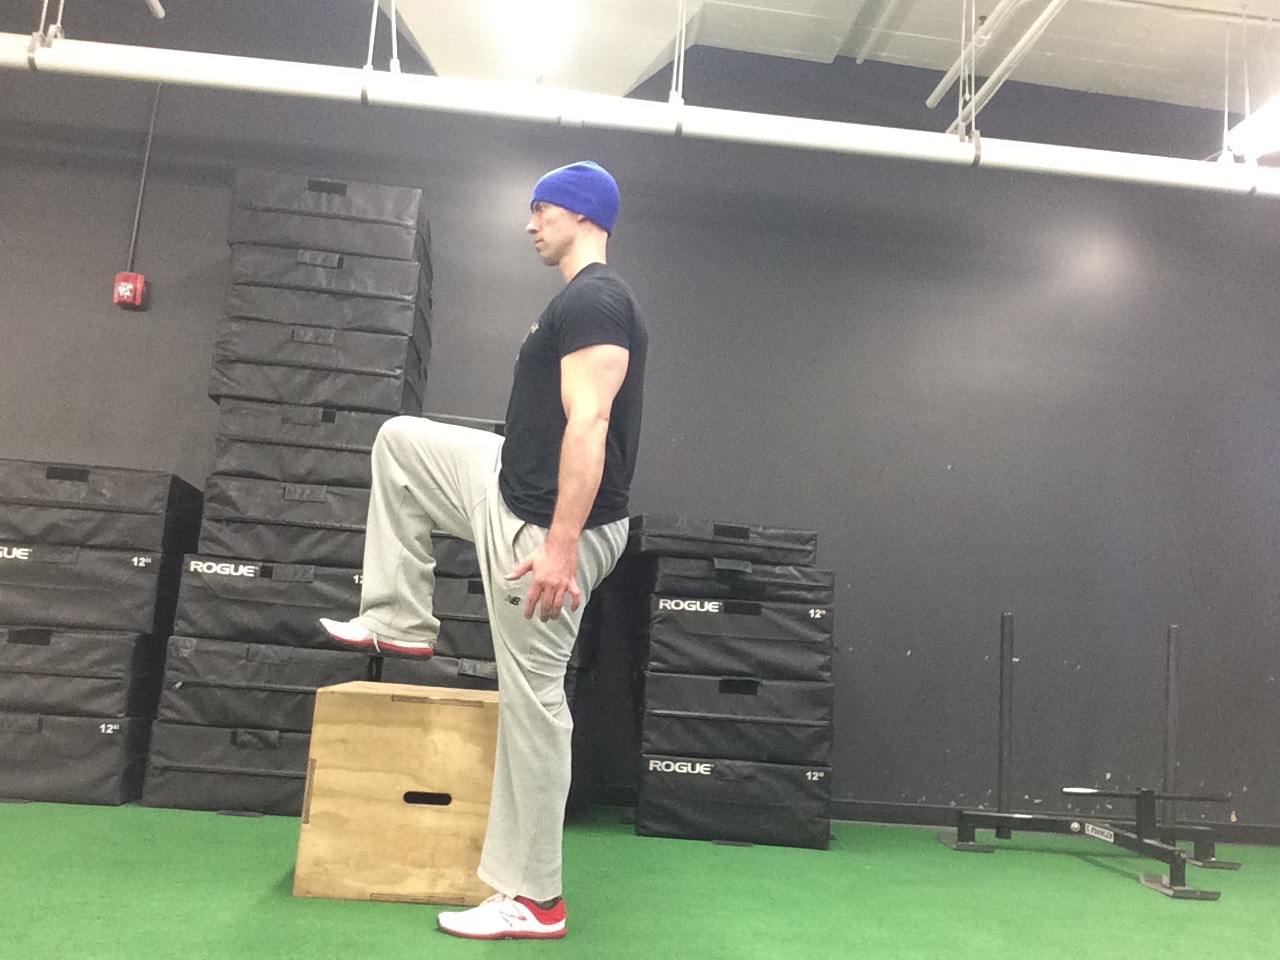
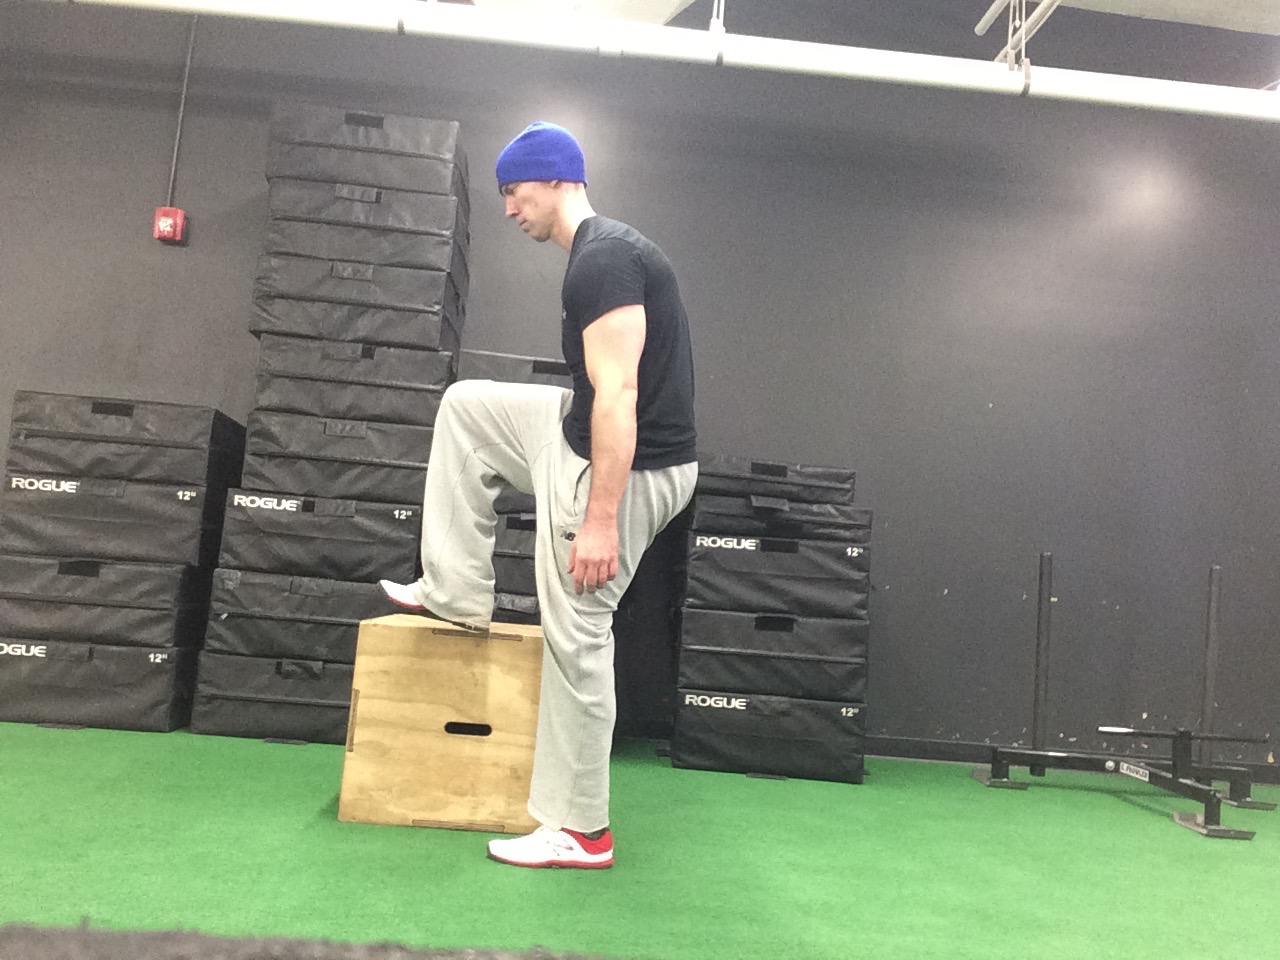
High box jumps reward those people with excellent hip mobility, particularly those with great hip flexion. Here’s an example:

The distance from the bottom of your foot to top of box is the “real” distance you’re jumping. Not so impressive now, huh?

And this is what the same jump looks like when someone doesn’t have the ability to clear ample hip motion:

They start cranking through their lumbar spine, over and over and over and…..”awwwww, goddamit I blew out my back again.”

“Ma, meatloaf! We want it.”

And speaking of the lumbar spine, how many times do you watch someone perform their box jumps and it ends up looking something like this:

Box Jump: Poor Landing


Happens all the time right?

Yuck.

If your box jumps look like this you’re using too high of a box and are reaping ZERO benefit from doing them.

How you start (chest up, knees slightly bent and not caving in, athletic position) is how you should end. Like this:

Box Jump – Good Landing


Another not so great thing thing many people end up doing is landing too loud on the box. Remember: one of the main benefits of the box jump is absorbing force.

Box Jump – Loud Landing


If someone can hear your box jumps in Idaho you’re doing them wrong.

Instead, you want to make sure you land softly, or what I like to tell my clients “like a ninja.”

Box Jump – Who’s the Ninja? You Are That’s Who


A Few Other Random Thoughts

  • Even with a (seemingly) low box height, the idea is to cue your clients to jump as high as they can (and then to land soft). External cueing works wonders here:
    • Try to hit your head on the ceiling.
    • Jump away from the ground.
    • OMG, there’s a snake!
  • I like to program box jumps for low reps. Sets of 1-3 are ideal.
  • Moreover I LOVE performing box jumps on lower body days prior to squatting or deadlifting as it serves as a nice way to potentiate or wake up the nervous system.
    • Perform 3-4 sets of 1-3 reps and you’re good to go.
    • Quality over quantity.