CategoriesProgram Design Strength Training

Safety Squat Yoke Bar: Training Application

This is a Tony Gentilcore & Matthew Ibrahim collaborative post.

Or, as I like to call it: A Gentilhim (or Ibracore?) production.

The Safety Squat Yoke Bar (also referred to as “SSB”) is a popular speciality bar that’s most often affiliated with collegiate strength & conditioning facilities, powerlifting gyms, or gyms that are a bit more “serious.”1

However, the Safety Squat bar has grown in popularity in recent years and it’s popping up in more commercial and boutique style gyms as well.

This is great because Matt and I both feel the Yoke Bar is a valuable piece of equipment, one that should be in every gym, with a variety of training applications.

Read on to see what they are.

Copyright: 60dudek / 123RF Stock Photo

Safety Squat Yoke Bar in Your Face, Son

Before I proceed it would make sense to show you a picture of the bar so you know what we’re talking about.

Advantages

1. The SSB is a more “shoulder friendly” way of squatting. Because you grab the bar by the handles which, when the bar is on your back, are located below your shoulders and a smidge in front of the body, it doesn’t require as aggressive of a set-up as a traditional back squat.

Traditional Back Squat (Straight Bar) = Shoulders maximally abducted and external rotated. Many lifters don’t have access to this range of motion and as a result their shoulders are like…


SSB/Yoke Squat = Not the above.

2. The SSB is more of a “hybrid” squat. As Matt notes:

“Since the SSB has a longer bar camber from side to side (as opposed to a traditional barbell) plus a unique loading position for weight plates, it offers the lifter a fine balance between what they would expect from a barbell back squat and from a barbell front squat.“

3. The SSB “fixes” your squat. Mirroring what Matt mentioned above, because of how the bar is designed, you have to fight like hell to stay upright (which, not coincidentally, makes it a great option to strengthen the upper back AND help work on thoracic extension; two things most people need more of).

As you get stronger with the SSB/Yoke Bar it’ll make things infinitely easier to stay upright if or when you revert back  to a straight bar.

4. The SSB = 110 Power Boost in World of Warcraft (but only with a +1 Shield and Infinity Cloak).

Nerd.

5. The SSB helps with depth. Because the bar is situated higher up on the back it promotes more of a “squat down” pattern rather that “squat back.”

This, in turn, will often help a lot of people squat deeper (if that’s something they’re interested in).

Here’s an SSB Squat in action.


The SSB Squat exercise is quite common and frequently used.

We wanted to delve a bit deeper to provide several other lower body training exercises you could perform with the SSB that you may not be using already in your overall strength and conditioning program.

1. SSB Hatfield RFE Split Squat (Matt)

Description: This exercise targets lower body strength and power, primarily in the quadriceps, hamstrings and glutes.

The trunk stability challenge here is the real deal as well, since you’re holding on to each side of the squat rack with your hands while the SSB rests on your shoulders. Be sure to press the entire surface of the working foot down through the ground as you power up from the bottom position to the top during each rep.

I’m a monster fan of this exercise due to the strength and power development components.


2. SSB Reverse Lunge (Tony)

Description: This was a staple exercise we utilized when I was coaching at Cressey Sports Performance due to it’s shoulder friendliness in addition to the fact we could be more aggressive with loading compared to dumbbells (grip becomes  less of a limiting factor).

As with any single leg exercise there’s also a hefty balance and coordination component as well. I prefer a bit of a forward lean when executing this exercise as it places less stress on the lower back and also allows for more emphasis to be placed on the hips.


3. SSB 1-Leg RDL (Matt)

Description: This exercise targets lower body strength, primarily in the posterior chain muscle group (hamstrings and glutes). As the SSB rests on your shoulders, be sure to hold the handle grips tight with each hand to ensure trunk stability.

It’s important to also mention the relevance of keeping a neutral-ish spine as you descend down into the bottom position due to the orientation of the load on your shoulders. I like this exercise due to the single leg strength and stability demand it poses to the athlete.


4. SSB Front Squat (Tony)

Description: This is a variation I first witnessed my man Jim Smith – of Diesel Strength – recommend a few years. ago.  I won’t go into the weeds on the benefits of a front squat

– you can read more HERE – but what I will say is that this variation is a wonderful way to counterpoint any client/athlete who insists that barbell front squats are too uncomfortable for him or her to perform,

I get it.

They suck.

They’re uncomfortable.

I don’t care, do this instead.


5. SSB Good Morning (Matt)

Description: Talking about posterior chain development without mentioning the Good Morning exercise is like eating eggs without the bacon; you just don’t do it.

The Barbell Good Morning has been a staple training tool for years when attempting to develop the glutes and hamstrings of the posterior chain muscle group. The SSB offers a slightly anterior loaded position when compared to the traditional barbell loaded version, which forces you to hinge your hips back even more than usual. I enjoy using this exercise as a way to really “feel” the hamstrings under load.


6. SSB Pin Squat (Tony)

Description: I loooooooooove2 this variation as an accessory movement to the deadlift.

The key is to try to approximate the pin height to one’s hips height so that it “matches” their deadlift setup. In other words: the starting position of the Pin Squat should mirror their deadlift setup.

Factor in the increased demand to maintain an upright torso (t-spine extension) and your entire posterior chain is going to be challenged with this exercise.

⠀

CategoriesAssessment personal training Program Design

30 Days of Shoulders: Days 21-30

Copyright: pjphotography / 123RF Stock Photo

30 Days of Shoulders: Days 21-30

The third and final installment of my “30 Days of Shoulders” series went live today over at T-Nation.com. All three parts cover everything from shoulder assessment and tips on shoulder friendly pressing t0 how to improve shoulder health and performance.

Collectively it’ll make all your hopes and dreams come true.

Check it out —-> HERE

Categoriespersonal training Program Design

Does Stretching Improve Performance?

I’m still overseas in the U.K.3

I’ve got some of my own content lined up for later this week, but today TG.com regular, Travis Hansen, was kind enough to pinch write for me today.

It’s on static stretching and whether or not there’s any efficacy towards it helping to improve athletic performance.

Enjoy.

Copyright: ammentorp / 123RF Stock Photo

Does Stretching Improve Performance?

Does the science on traditional stretching actually benefit measures of athlete performance? I’m not sure that the notion has ever been questioned and we have all, including myself, just accepted the fact that by stretching our muscles we were actually taking positive steps towards running faster, jumping higher, and becoming an overall better athlete.

Before we dive into a lot of the research lets first look at some theories for and against stretching. We will start with the pros of stretching.

Pros of Stretching

First, it’s a common belief that stretching can effectively alter the tissue length resulting in more potential energy to be stored and an effective reset to the muscle allowing it to stay healthy and perform better. The effects of stretching on injury prevention is another article topic in itself, so we will just focus on the benefits of performance for now.

Unfortunately, it’s by no means fair to sit here and say that stretching will help you perform better although it sounds great on paper.

However, stretching does affect the viscous properties of muscle fibers and creates less resistance temporarily allowing for more potential ROM; although it doesn’t seem to be a permanent adaptation. Stretching can also improve fascicle length which may have implications on muscle recruitment rates, so there is another plus for stretching.

Moving on, stretching also deals with the aftermath of training.

Stretching has been shown to improve Parasympathetic Nervous System Activation.

This is the rest and digest part of our nervous system that you probably already know about and stretching can impact this branch of the nervous system, hasten recovery, and increase the potential to train harder in subsequent sessions if the stretching is timed right.

Lastly, stretching can make sure that there are no limitations in movement.

There is a bevy of research showing that its biggest influence is through creating more range of motion and degrees of movement freedom.

There are several scenarios you could think of which would require more ROM as an athlete (i.e. deep squat prior to vertical jump takeoff, loading phase of throwing or swinging, etc.) and you wouldn’t want a limitation in flexibility to prevent any success in your skill execution.

But what if stretching doesn’t really work as well as we thought and had hoped for…………?

Maybe Stretching Isn’t the Magic Pill (Important, but Not a Panacea)

1.  Angle of Peak Torque

I read about this theory awhile back when Chris Beardsley brought the idea to light in the Journal of Strength and Conditioning Research.

Basically, there are specific angles and ranges of motions where we will be most successful with different styles of training.

For example, with low velocity movements like bench press, squatting, and deadlifting the larger the range of motion and joint angle…the greater amount of force can be generated.

Conversely, with high velocity movements the ranges of motion and angles need to be much smaller in order to be successful.

All else being equal, stretching isn’t really going to offer a whole lot if you’re an athlete who relies upon high velocity performance on a regular basis.

Another thing to consider is that if you analyze the nature of most power and speed based activities, often times, athletes and clients already possess the capacity to load sufficiently and unload and propel their bodies in the intended direction.

So why then would they need to stretch more if muscles are naturally elastic and they’re already capable of the desired response?

via GIPHY

Kelly Baggett referred to this idea of movement specificity as limits of flexibility.

Most movement in sport doesn’t even come close to what a person is already capable (stretching wise) and the tasks don’t require a tremendous amount of stretching in order to perform well.

Lastly, is the old Length-Tension Relationship.

A muscle has a sweet spot in terms of optimal contraction that we should all aim for.

If there is too little or too much stretch then there will be resultant decreases in force production and performance.

Stretching then becomes questionable with this in mind since it aims to drive more motion into the tissue and surrounding joints which could cause our efforts to dissipate when the time comes.

Note From TG: I wanted to take a quick time-out to expound a bit on this topic. Please don’t take this post as an all-out attack on static stretching. My thoughts (and I think Travis’s are as well) mirror that of Mike Boyle, where, years ago there was a study that showed stretching before a vertical jump affected performance.

The knee-jerk reaction by the fitness industry was to avoid stretching with a ten-foot pole. However, if I recall, the study had it’s participants do a metric shit-ton of stretching (like 10-15 minutes worth, give or take? maybe more?), which of course isn’t ideal for performance. There’s a stark different between that and having an athlete engage in a few quick stretches.

Basically, it’s likely best not to take a yoga class right before a timed 60. Outside of that, a smidge of static stretching prior to competition isn’t going to alter the space-time continuum.

Okay, I’ll shut-up now.

This All Sounds Nice on Paper But What Does the Research Actually Say Stretching Does for Performance?

“To determine whether SS produced similar performance changes in different performance activities, the findings of the studies were separated into power–speed- or strength-based tasks. Fifty-two studies reported 82 power–speed-based measures (i.e., jumping, sprint running, throwing), with 56 nonsignificant changes, 21 significant reductions, and 5 significant improvements; collectively, there was a small 1.3% reduction in performance. Seventy-six studies reported 188 strength-based measures (i.e., 1-RM, MVC), with 79 nonsignificant changes, 108 significant reductions, and only 1 significant improvement. There was a moderate reduction in performance (–4.8%), which indicates a more substantial effect of SS on strength based activities. The stretch durations imposed between activity types were considerably longer for strength-based activities (5.1 ± 4.6 min) than for power–speed-based activities (1.5 ± 1.6 min), which may explain the greater mean performance reductions after SS.” (1)

And here is some more…

“Twenty-six studies incorporating 38 power–speed-based measures used <60 s of SS, with 29 nonsignificant changes, 4 significant reductions, and 5 significant improvements in performance; collectively, there was a trivial change in performance (–0.15%) (Supplementary Table S41). It is interesting to note that although most of the findings were not statistically significant after short-duration stretching, a greater number of significant improvements than reductions were found in jumping (Murphy et al. 2010b), sprint running (Little and Williams 2006), and cycling (O’Connor et al. 2006) performances. Thus, there is no clear effect of short-duration SS on power–speed-based activities, although changes may be observed on a study-by-study (and hence, subject-by-subject) basis. Nonetheless, when 28 power–speed-based studies (44 measures) using ≥60 s of stretching were examined, 27 nonsignificant changes and 17 significant reductions were found, with no study reporting a significant performance improvement. Compared with shorter-duration stretching, the mean reductions were marginally greater (–2.6%) (Supplementary Table S41).” (1)

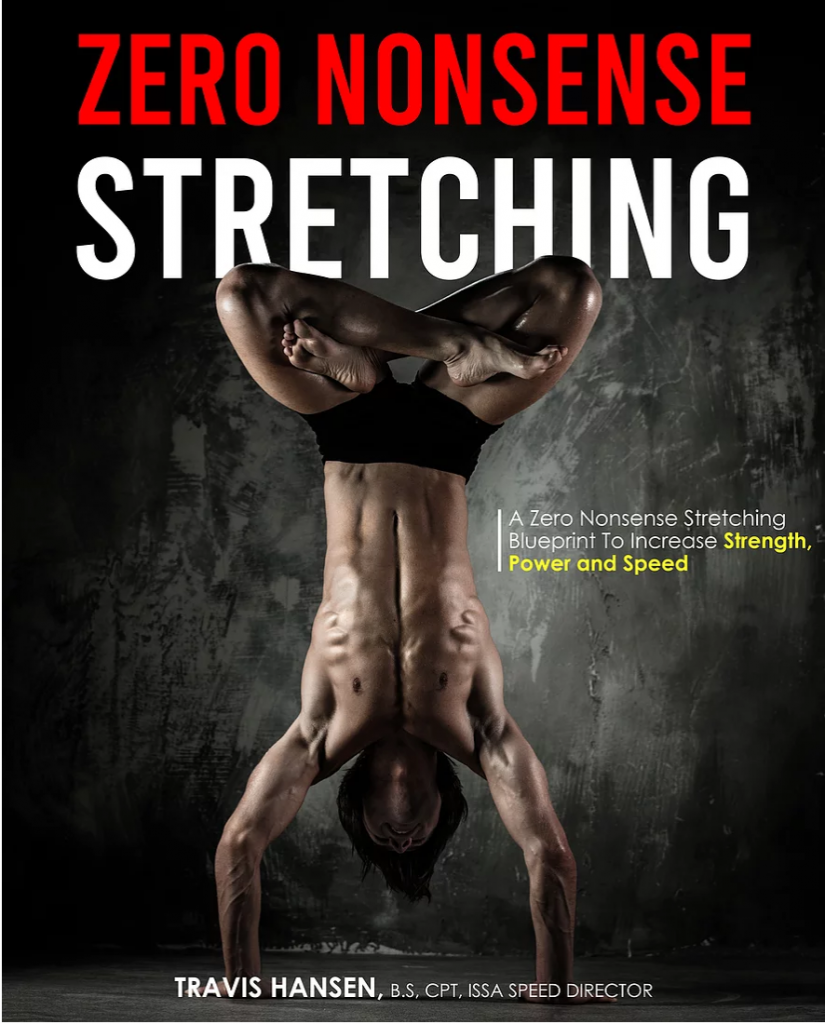
Zero Non-Sense Stretching

If you’d like to hear a little more on what Travis has to say on the topic check out his resource Zero Nonsense Stretching HERE. (<– affiliate free link).

You can also check out his website HERE.

CategoriesAssessment Program Design

30 Days of Shoulders: Days 11-20

I’m writing this from my most favorite place in the world…

…a room full of cute and cuddly kittens.

Just kidding, I’m in London.

I’m here because I have a few speaking engagements lined up –  a half-day Shoulder workshop for a crew of Equinox trainers in Kensington on Saturday, my Coaching Competency Workshop in Dublin on Sunday, and then mine and Luke Worthington’s Strategic Strength Workshop back here in London next week.

Spots are still available for both the Dublin and London events (wink, wink, nudge, nudge).4

I just checked into my hotel after an overnight flight from Boston and I feel like a zombie.

Needless to say I am not in the writing mood, but I do\ have a little sumthin, sumthin to share today.

Copyright: luislouro / 123RF Stock Photo

30 Days of Shoulders: Days 11-20

This is Part II of my latest series over at T-Nation.com dealing with anything and everything shoulders: How to make them bigger, how to make them feel less like a bag of dicks, you know, the usual.

You can check it out —> HERE (also includes link to Part I in case you missed it).

Enjoy and keep your eyes peeled for Part III coming next week!

Categoriescoaching personal training Program Design

90s Hip Hop, Complete Coach, and Mike Robertson

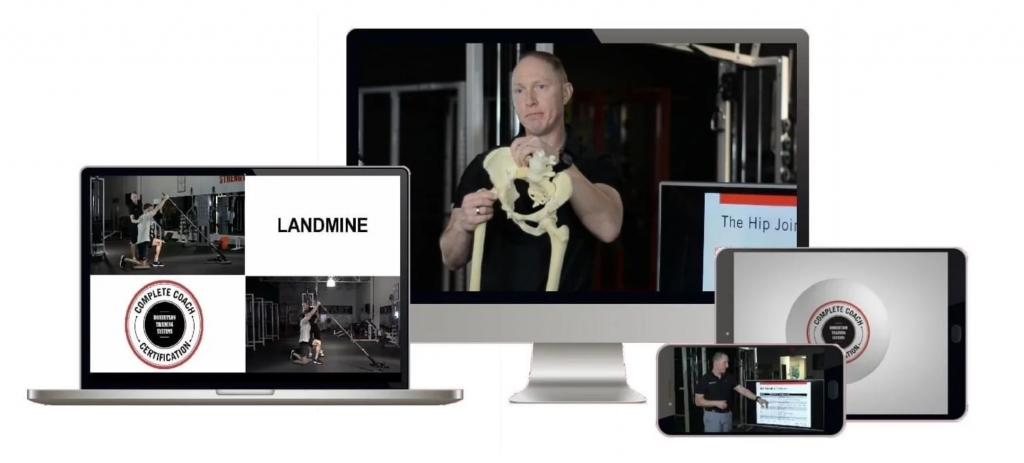
My good friend, Mike Robertson, released is latest resource this week…the Complete Coach Certification.

Check it out here —> http://bit.ly/2lWGhpJ

It’s on sale this week only (until Friday,  9/6) at a hefty discount.

If you’re a strength coach, personal trainer, you work with athletes, non-athletes, Doug from accounting, or ninjas, this resource will make you a more well-rounded health/fitness professional.

I had some questions for Mike about the product, but more specifically about his coaching philosophy and what he feels we (as an industry) need to do better.

Copyright: jtrillol / 123RF Stock Photo

Mike and Tony Talk Shop

TG: Mike, first things first: When I came onto your podcast a few weeks ago I introduced you to muy new favorite obsession: the Take It Personal Radio Podcast. How much do you love me it? Which has been your favorite episode (I know it’s hard to choose)?

I have only two words:

Life changing.

Seriously, I love that show so much. I mean, it’s all of the artists I grew up listening to, chopped and mixed to perfection.

My favorite so far is the Wu-Tang episode, but anyone that really knows me knows that I’m a pretty massive fan of the WU!

Note from TG: It’s hard to pick my favorite, but if I had to choose I’d go with the DJ Premier Tribute. Eight freakin hours or Premier beats. My head just about exploded when I listened to it for the first time. And then there’s the Native Tongues (Tribe Called Quest, De La Soul, Jungle Brothers, Queen Latifah, Money Love, etc) tribute that’s something like 12-13 hours long.

I can’t handle it.

TG: Okay, let’s get on track: What was your vision/goal in creating the Complete Coach Certification?

MR: Simple: To push our industry forward, and over time, positively influence 10,000 trainers and coaches across the globe.

Unfortunately what I’m seeing nowadays is a dearth of trainers/coaches who have gone the traditional route – school and a certification – and then struggle to be of any value whatsoever on the gym floor.

They can’t interact with other humans.

They can’t progress or regress clients.

And forgot about asking them to write a program! Their brains are so scattered and influenced by random Instagram trainers you can’t get a cohesive, streamlined program out of them to save their lives.

And while I may sound a little harsh, the fact of the matter is, it’s not really their fault.

This is the culture we’ve created for training and coaching.

So my goal is to fix that.

To show trainers and coaches how systems and procedures can make their lives easier, and help them get better results.

To show them it’s not about knowing 1,879 exercise variations, but knowing 10-15 really good exercises, being able to progress/regress as necessary, and then coach the hell out of them.

And to show them that if you act like a professional and get really good at what you do, this can be an amazing career.

One where you can make real money and have a life outside of the gym as well.

At the risk of sounding bold or narcissistic, here’s where I’m at:

I’m only 41 but I don’t think it’s too soon to start thinking about my legacy.

  • What did I bring to the table?
  • Did I really make an impact?
  • Or did I live a life where I could’ve done more, and instead settled to play small ball?

If I go out tomorrow, I want people to be like “That Mike Robertson wasn’t perfect, but damn he did his part and made a massive push to  drive this industry forward.”

TG: I, uh, taught my toddler to go pee-pee in the potty last week. That’s my legacy…haha. I know this is about as lame of a question as I can ask (but I’m going to ask it anyway). What are some common mistakes you find coaches make with regards to program design?

MR: I don’t think it’s a lame question – it’s actually one we need to be asking more often.

Here’s a brain dump:

  • Having no clear goal.
  • Having too many goals and “program jumping.”
  • Not knowing the basics of program design (sets/reps/time under tension, how they all work together, etc.)
  • Poor (if not awful) exercise selection.
  • A lack of cohesiveness across all elements of the program (resistance training, conditioning, etc.)
  • Failing to meet a client/athlete where they’re at.
  • Failing to give a client/athlete some of what THEY WANT in the program.
  • Letting their beliefs/training focus influence that of their clients/athletes.
  • Being too boring with their programming.
  • Being too random with their programming.

I mean I could go on and on here, but hopefully you catch my drift.

As an industry, we have a looooooooong way to go to get our program design skills up to snuff.

TG: What do you feel has been the biggest change or maturation in your own programming since you first started coaching? As an example, for me, it was the under-appreciation of sub-maximal training; I’m a firm believer (now) that easy training is good training.

MR: Man this is a really tough one, so I’m going to give you two:

1 – I do a better job of planning and programming all elements of a program nowadays. For instance in the past, I was a powerlifter so I skewed everyone towards a strength focus.

Because if it was good enough for me, it was good enough for them. Right???

It’s taken me a long time to break that habit, but now I can write a really smooth and well-rounded program for virtually any client or athlete.

TG: Oh man, good one!

2 – The second piece is I’m better at streamlining and transitioning clients between two programs.

Let me explain that in a bit more depth…

Imagine taking a client who is doing an accumulation phase and they’re using like 60-70% of their 1 rep max.

Then the next week, you decide they need to move to max strength and so you start crushing them with 90% loads.

Can you imagine how jarring that is to the body?

So it’s been a big goal of mine to smooth out all of the elements I have to program for my athletes – from speed/power, to strength, to conditioning – and trying to make those transitions from block to block smoother and easier on the athlete.

It’s never perfect, but I’m light years of where I was even a few years back.

TG: Complete off-topic, but is Bill (Hartman) a cyborg?

He is, but here’s the strangest part – he’s not alone.

There are actually a few hiding in plain sight in our industry.

I’m sure there are others, but these three I can confirm from first-hand experience.

TG: I lived with Eric for two years and was a business partner for eight, I can confirm he’s not a T-1000 (but close).

One of my biggest pet peeves in this industry (other than kipping pull-ups) is how some coaches take this bravado approach and more or less “bully” people into thinking that THEIR way is the only way to coach “x” exercise.

I feel this is a narrow-minded take and fails to appreciate (much less consider) each person’s individual anatomy and how that will dictate set-up and which variation of certain lifts will be best suited for them.

Your take? Agree? Disagree? 

MR: Couldn’t agree more.

TG: Okay, whew, good. Cause if you didn’t shit was gonna get awkward.

MR – and that’s where I think progressions/regressions come into play.

I have a model for what I want a squat/deadlift/push-up/whatever to look like, but I also realize that everyone is going to move different.

  • They have different lever lengths.
  • Their body (thorax, pelvis, hips, etc.) are positioned differently.
  • They have different joint structures on top of that.

So while I might have my model, I also have to realize that every/client athlete is going to find the strategy that works most effectively for them, based on their goals.

Part of the evolution of coaching is realizing that how you think/feel/move is great, but it shouldn’t necessarily impact how you train other people.

Once you get there, training and coaching become a lot more fun.

TG: One missing component of program design, I feel, is centered around the soft skills of coaching. It’s one thing to write a solid program, but then how it’s executed and coached is whole different matter.

I know you touch on this in the certification, but can you maybe elaborate on this here?

MR: Look man, I got by for my first 3-5 years on the floor because of soft skills, so I’d like to think I’m better to speak on this than most!

A big part of my success early-on was due to my ability to relate to people, to empathize, and to build rapport – NOT due to my coaching or program design skills.

I know John Kiely has talked about this in the past, but there’s actual research out there that shows if a client likes you and has positive emotions about you, that they could potentially get better results than someone who might have a “superior” program!

TG: The fuck outta here Mike Robertson! What’s next? Telling me bacon isn’t delicious? That Bachelor in Paradise isn’t where one find true love?

Isn’t that crazy?

When they like you, they have the right biochemical make-up when they enter the gym, and they end up getting better results.

But this is why I’m such a stickler for finding that blend between the hard and soft skills.

Relationships, rapport, and trust are critical – if you don’t have them, you won’t have success in this industry.

Period.

But the results are fast tracked when you have streamlined programming and coaching on top of that.

I’m sure you would agree, it’s not an either-or proposition – but finding the balance that works best for you as a trainer or coach.

Complete Coach Certification

I know I say this all…the…time, but it needs repeating:

Those who invest in themselves will last longer in this industry, are less likely to burn out, and, frankly, will often make more money and be more successful.

There aren’t many coaches whom I direct other coaches to more than Mike.

I’ve learned a ton from him throughout the years, I still do, and he’s really outdone himself with the Complete Coach Certification.

It’s on sale this week only and includes the option to pay with installments rather than one-lump sum. Everything from basic anatomy, breathing mechanics (<– SO important), keys to coaching, program design, and Mike’s “R7” protocol is covered.

There’s also a bevy of additional bonuses, including training templates, exercise regression/progression charts, and access to Mike’s fitness business webinar.

Check it out —> http://bit.ly/2lWGhpJ

CategoriesAssessment Corrective Exercise Program Design

30 Days of Shoulders: Days 1-10

I’m willing to bet that if you’re reading this if you have two shoulders.5

I’m also willing to bet that, given the two shoulder scenario, and given this is a blog dedicated towards strength & conditioning, you’re interested in:

  • Keeping your shoulders healthy.
  • Making your shoulders stronger.
  • Building shoulders that resemble boulders.
  • Argon. You know just because it’s a cool element.6
Copyright: restyler / 123RF Stock Photo

30 Days of Shoulders: Days 1-10

My latest article (which is a three-part series) just went live T-Nation.com today, and it covers anything & everything as it relates to shoulders.

Check it out…HERE.

CategoriesCorrective Exercise Program Design

Let’s Not Make Things More Complicated Than They Have to Be: The Hip Hinge

Some things, no doubt, are complicated:

  • Long division
  • The Kreb’s cycle
  • Nuclear fission
  • Brexit
  • Figuring out the plot of West World
  • Vaginas

There’s a bevy of examples in the universe.7

I’m sure collectively we can think of several hundred (if not thousands) of them.

The hip hinge isn’t one of them.

Or, at least it shouldn’t be.

Copyright: blanarum / 123RF Stock Photo

Trust Me, You Can Do It

The most cogent place to start is to (briefly) explain what a hip hinge is. And to that end I often like to steal a train of thought from renowned strength coach and writer, Dan John:

“The Hip Hinge = Maximal hip flexion with minimal knee flexion.”

Well, that was easy.

Now that we know what it is, why do we care?

In my neck of the woods – strength & conditioning – the hip hinge is the precursor (or base) for a lot of what we do to help make people stronger, faster, and more athletic.

Deadlifting = hip hinge.

Jumping = hip hinge.

But in everyday life, too, the hip hinge pops in to make a cameo appearance:

  • Bending over to pick up your child.
  • Picking up anything off the ground, really.
  • Sitting down.
  • Assuming an athletic position in your recreational basketball league. You know, the same league a bunch of your friends asked you to join because it was going to be fun, but then you went a head and missed those two foul shots to lose the championship game, and now everyone hates you. That league.

Photo Credit: STACK.com

Whether you realize it or not, and whether or not it involves lifting heavy things (or your recycling bin), you likely hip hinge many, many, many times per day.

And you’re likely more than proficient at it.

Some (not all) fitness professionals like to make things more complicated than they have to be. When it comes to the hip hinge, really what we’re after is the ability to dissociate hip movement from lumbar movement.

We want to be able to move from the hips with little (if any) movement from the spine; especially when we’re under significant load.

Some fit pros will assess the hip hinge and if it seems wonky or awry they’ll automatically transform into “corrective exercise” mode where said individual will be put through a hefty 17-week program complete with dowel rods, bands, breathing drills, and maybe a Shaolin monk (in worst case scenarios) to set them straight and to fix things.

Now, I am not here to bemoan corrective exercise or to belittle those who take the time to coach up their clients with hip hinge drills.

I mean, I’ve written several blog posts on the topic HERE and HERE, so I’d be a major asshole if I did that.

But, what I would like today’s post to do is to provide a bit of context and to remind coaches that sometimes all people need is a slight nudge or reminder that “x” is what you want them to do.

Again, with a hip hinge, all I’m after is dissociation of hip movement from lumbar movement. If I can get an individual to create tension – or a “flexion moment” – in the anterior core so that they can’t move through their lower back, then my job is done.

This drill is about as simple as I can make it:

The Bear Hug Hip Hinge

CategoriesProgram Design Strength Training

3 Landmine Core Exercises You May Have Not Seen Before

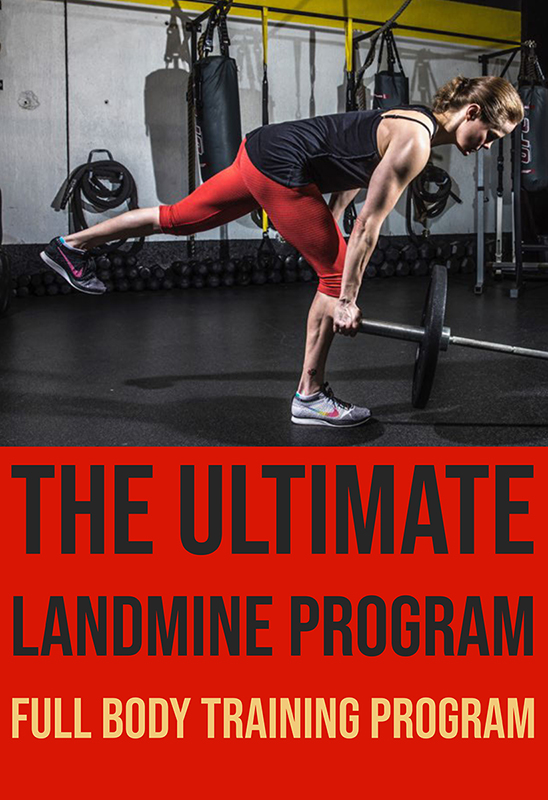
Today marks the release of Meghan Callaway’s latest resource, The Ultimate Landmine Program,

I thoroughly enjoyed her previous resource, The Ultimate Pull-Up Program, and used it with several of my own clients with great success.

I envy Meghan’s brain. She thinks of stuff I never would have thought of, and this latest program of her’s exploits that to the umpteenth degree.

Check it out HERE (it’s on SALE this week only), and also check out her article below showcasing some not-so-common core exercises utilizing the Landmine.

Copyright: langstrup / 123RF Stock Photo

3 Landmine Core Exercises You May Have Not Seen Before

Landmine training and the countless exercises you can perform are badass, empowering, and extremely beneficial, and can be a key component in your training program. I am a huge fan of landmine training, and have been for a long time.

To be clear, while using a landmine attachment is great, it is not mandatory.

You can rest the barbell against a secure surface like a wall, box/other object, or on a no-slip surface. So really, all that is required to perform landmine exercises is a barbell and perhaps several weight plates.

Here are three landmine core exercises you might not have seen or tried before.

While these landmine exercises absolutely involve the upper body as well, and provide many benefits, these unique variations especially work wonders for improving lumbo-pelvic stability.

#1) Landmine Tall Kneeling Presses + Band Resistance

This exercise strengthens the chest, shoulders, and triceps, improves shoulder and scapular controlled mobility, and lumbo-pelvic stability. This exercise (and many other landmine pressing exercises) can be a great option if you struggle to perform overhead pressing movements.

Coaching Tips:

  • Set up a barbell so it is lengthwise, and is in line with the center of your body. You may anchor the barbell against a stable surface like a wall, weight plate, or box, or on a no slip surface. You may also use a Landmine attachment.


  • Loop a resistance band over the top of the barbell, and rest the band underneath your knees. There should be tension in the band for 100% of the movement.


  • Grab onto the top portion of the barbell. As for your grip, I like to interlock my fingers and place my hands on top of each other as this makes the body more symmetrical.


  • Get into a tall kneeling stance. Place your knees so they are approximately hip to shoulder width apart, and have a very slight forward lean in your torso. Your head, torso and hips should be in a stacked position.


  • Before each rep, take a deep breath in (360 degrees of air around your spine), brace your core (360 degree brace around your spine), tuck your ribs towards your hips (close the space in your midsection), and squeeze your glutes.


  • Now extend your elbows and press the barbell to a range where you are able to maintain proper form, then “row” the barbell back in to your body. In fact, your ability to control the movement of your shoulder blades plays a big role in your ability to perform this exercise. Do not keep your shoulder blades pinned. They are meant to move.


  • As you bring the barbell back in towards your body, stop just before your elbows touch your sides.


  • For the duration of the exercise, your head, torso and hips should remain in a stacked position. Do not allow your lower back to hyperextend, ribcage to flare, or your torso, spine or hips to rotate.


  • Exhale after you have initiated the press and as the barbell is traveling away from your body. Inhale and reset as the barbell is returning towards your body, or pause in the starting position, and inhale/reset there before the next rep. Do what works and feels best for you.

Regression:

Make this exercise easier by using less weight, or by using a band with less resistance.

Progression:

Make this exercise more challenging by using more weight, by using a band with more resistance, or by performing negative reps and taking 3-5 seconds to “row” the barbell back down to the starting position.

#2) Contralateral Bird Dog Hold + Landmine Single Arm Rows

This deceptively challenging exercise strengthens the mid and upper back, improves grip strength, shoulder and scapular controlled mobility (and stability on the planted side), and lumbo-pelvic stability.

This exercise requires a significant amount of lumbo-pelvic stability and is arguably more of a core exercise than an upper body movement. Be conservative when you are selecting your weight, and opt for 25-50% of what you’d use to perform single arm rows.

If you are performing this exercise correctly, aside from the arm that is performing the rowing movement, the rest of your body should remain in a fixed position.


Coaching Tips:

  • Set up a barbell so it is lengthwise, and is behind your body. You may anchor the barbell against a stable surface like a wall, weight plate, or box, or on a no slip surface. You may also use a Landmine attachment.


  • Kneel with one leg on a bench, and place the hand that is on the opposite side of your body on the bench. Make sure that your shoulder is directly above your hand. Spread your fingers, and pretend you are suctioning your hand to the bench.


  • Extend your leg that is on the opposite side of your body as the rowing arm, and so it is parallel to the ground.


  • Set your body so it is in a straight line from your head to heel, and maintain this position for the duration of the exercise. Make sure that your torso and hips are square to the bench. Also, do not allow your leg to drop, or conversely, lift too high (avoid hyperextending your lower back).


  • Before each rep, take a deep breath in (360 degrees of air around your spine), brace your core (360 degree brace around your spine), tuck your ribs towards your hips (close the space in your midsection), and squeeze your glutes.


  • Initiate the movement by using the muscles in your mid and upper back and draw your shoulder blade in towards the spine (retract). Do not initiate the movement with your arm, and do not use excessive momentum.


  • In the top position, do not allow your elbow to flare out; instead keep it close to your side.


  • Lower the barbell with control, and make sure you keep your shoulder from collapsing. During the lowering/eccentric component, do not keep your shoulder blade pinned. It is meant to move, and should perform the reverse movement (protraction) as it did during the rowing/concentric component.


  • Pay attention to your non-working/supporting side. Push away from the bench and protract your shoulder blade (move it away from the spine). Do not mindlessly hang out.


  • For the duration of the exercise, your head, torso and hips should remain in a stacked position. Do not allow your lower back to hyperextend or round, ribcage to flare, or your torso, spine or hips to rotate. Your torso and hips should remain square to the bench.


  • Exhale right after you have initiated the rowing movement; you may inhale/”reset” as the barbell is returning to the starting position, or hold your breath for the duration of the rep, exhaling, inhaling, and re-setting between reps. Do what works and feels best for you.

Regression:

Make this exercise easier by using less weight.

Progression:

Make this exercise more challenging by using more weight.

#3) Dead Bug + Single Arm Landmine Presses (Weight Behind)

I am a huge fan of dead bugs, and use many different variations in my training, and in the programs of the many people I work with. This innovative dead bug variation improves lumbo-pelvic stability, and shoulder and scapular controlled mobility.


Coaching Tips:

  • Set up a barbell so it is lengthwise and behind you, and is in line with your armpit. You may anchor the barbell against a stable surface like a wall, weight plate, or box, or on a no slip surface. You may also use a Landmine attachment.


  • Lie on the floor. Lift up your legs so they are in a vertical position, straighten your knees, and point your feet towards you (dorsiflex). If you cannot fully extend your knees, or if you are unable to maintain proper form, you can keep your knees bent at a 90 degree angle. Make sure they remain at a 90 degree angle for the duration of the exercise.


  • Keep your chin tucked and neck in a neutral position, extend your arms so they are above your chest, and tuck your ribs towards your hips (close the space in your midsection).


  • Pay attention that you are not “cheating” by using the muscles in your neck and/or upper body in place of the muscles of the anterior core.


  • Before each rep, take a deep breath in (360 degrees of air around your spine). Now steadily exhale through your mouth, contract your anterior core muscles as hard as you can, slowly “row” the barbell down towards the floor and simultaneously lower the leg that is on the same side of the body, and to a range where you are able to maintain proper form. Once you reach your full range, simultaneously press the barbell up and return your leg to the starting position.


  • You have the option of keeping the non-working arm in a vertical line over the armpit, or you can reach back with your arm as you lower the weight and your leg.


  • As for the shoulder blade of the side that is performing the pressing movement, do not keep it pinned. It is supposed to move.


  • For the duration of the exercise, do not allow your lower back to hyperextend, ribcage to flare, torso, spine or hips to rotate, or your hips to leave the floor.


  • Keep your legs relaxed so they do not dominate.


  • Make sure that your knee remains in a fixed position and that the movement occurs from your hip.

Regression:

Make this exercise easier by using less weight, by decreasing the range of the leg lowering, or by bending your knees to 90 degrees.

Progression:

Make this exercise more challenging by using more weight, by increasing the range of the leg lowering, or by adding in band or kettlebell resistance (on the hand that is not holding the barbell).

Ultimate Landmine Program

The Landmine has grown to be one of the most versatile pieces of equipment on the gym floor. You can train the entire body and if you’re someone pressed for time, prefers a more minimalist approach to training, or just likes trying new stuff, this resource will be a great fit.

It’s on sale TODAY (6/25) for $67 through Friday, June 29th so you only have a few days to take advantage. If you’re already familiar with Meghan’s work you know this is a no-brainer. If you’re unfamiliar with her work, trust me: you won’t be disappointed.

—> Ultimate Landmine Program <—

CategoriesAssessment personal training Program Design

Static Posture: It’s Just Information

Posture.

This is not an exhaustive blog on the topic.

It’s more like an amuse bouche or bite-sized commentary on a pet peeve of mine: Fitness professionals who place waaaaay too much emphasis on it (often times to the detriment of the client/athlete).

As well as a scenario where we might pay a little closer attention to it.

I like cheese.

Copyright: lculig / 123RF Stock Photo

Posture: It’s Just Information

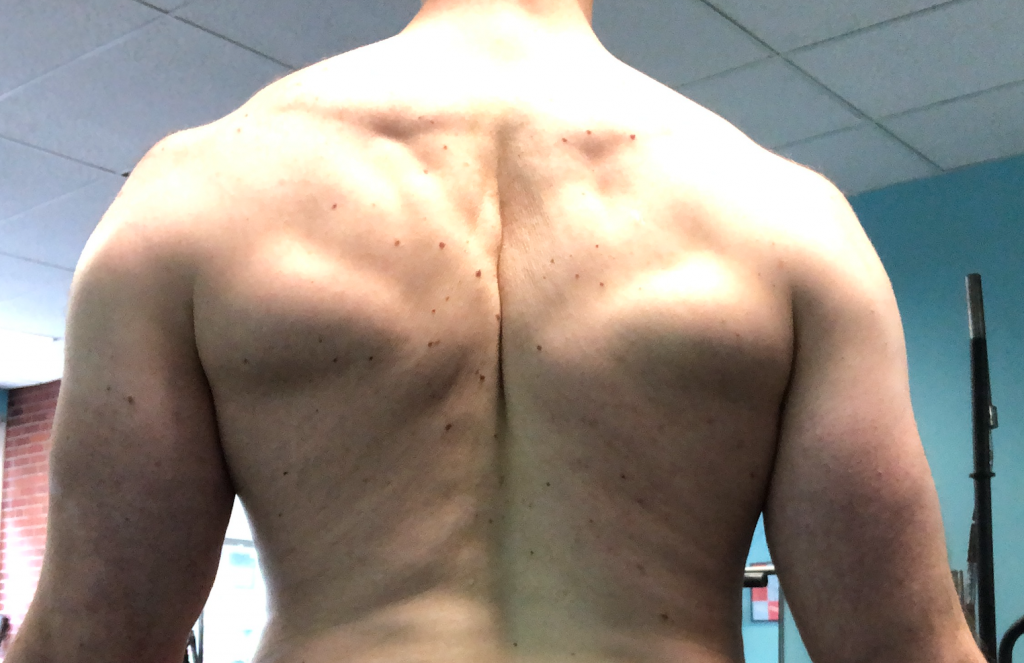
Take a look at this picture.

What do you see?

I see two shoulder blades that are making out.

C’mon you two, get a room. Goddammit, I can’t take you anywhere.

The therapist or coach (or someone more mature) with a keen(er) eye may likely say something to the effect of:

  • Overactive rhomboids (excessive scapular adduction/retraction).
  • A more downwardly rotated scapular position (depression).
  • An “interesting” shade of blue on the walls.

Now, to be clear: I am NOT someone who places a ton of credence on one’s static posture. While we’re getting better of late, I think the industry as a whole has gotten into a bad habit of placing all if its eggs into the posture basket…

…labeling people as dysfunctional the second we see forward head posture or a hair that’s out of place.

I’ve witnessed some coaches reaching for their “corrective exercise” bag of tricks before they’ve even seen the person they’re assessing do anything:

“Okay Mr. Smith, I notice you exhibit a slight kyphosis in your upper back, your right shoulder is a bit internally rotated, and it looks as if your left eyeball is lower than the right.

Weird.

But here’s the deal: You should purchase a 424 pack of training, and maybe, just maybe, after 62 weeks of dedicated corrective training where we dive deep into some transverse fascial line reactive neuromuscular breathing techniques we’ll be able to progress towards looking at a barbell.

I’m pumped. How about you?!”

via GIPHY

This is not to short-change the importance of someone’s static posture and the information you can glean from it. Of course, if someone walks in with a lengthy injury history and it hurts to blink, then, yeah, it’ll have a bit more weight.

However, we can’t assume that just because a particular person presents with “y” – posturally speaking – that that automatically means “x.” I’ve seen some individuals walk in for their initial assessment with questionable (textbook) posture only to reveal the cleanest health history you’ve ever seen.

Zero injuries. Zero discomfort. Zero fucks to give.

Static posture is nothing more than information.

No one is a walking ball of fail because he or she presents a certain way.

Besides, we also need to respect that “good” or “bad” posture is relative to the load in addition to the task at hand. The latter point is especially cogent to the conversation because as my good friend Alex Kraszewski notes in presentation for The Trainers’ Toolbox:

“Posture/position will govern where motion is available from, as well as who much and where load is distributed. The task will dictate the appropriate range of posture available.”

How I want someone to “look” when attempting a challenging set of deadlifts is quite different compared to someone who’s just sitting there in front of me, sitting.

What’s more,

Anyway, back to the original picture above.

You forgot didn’t you?

Here, this one:

This is a very common theme or resting “presentation” amongst athletes – especially overhead athletes – as well as fitness professionals who 1) stand a lot during the day and 2) lift heavy things for a living.

Again, nothing is cemented as an absolute here, but if an individual walks in complaining of shoulder pain, and you ask him/her to take off their shirt (don’t be creepy about it) and their shoulder blades rest in a more retracted and downwardly rotated position, we can deduce that said individual (may, not always) need to work on more protraction  to nudge them back to a more neutral position.

Neutral Scapular Position = Superior/inferior border of the scapulae rests between 2nd-7th thoracic vertebral levels, medial border is ~1-3″ from midline.

Photo Credit: MikeReinold.com

Someone “locked” in a more downwardly rotated position will almost always have a hard time achieving ample scapular UPWARD rotation (protraction is part of this equation), which is kind of a big deal for overall shoulder health & performance.

But don’t assume, you should check.

This is why it’s crucial to include both load AND movement in the initial assessment; sometimes scapular position will clean up on its own with minimal intervention.8

But let’s assume it doesn’t, and the person has been complaining of shoulder ouchies.

What then?

Here are a few drills I like to use and I offer for your consideration:

NOTE: I will say the bigger umbrella theme here is addressing ribcage/thorax position. The position of the shoulder blades are at the mercy of the T-spine.

1. Deadbug w/ Reach


I have a crush on deadbugs and their infinitesimal variations.

They’re a bonafide rockstar when it comes to improving anterior core strength and lumbo-pelvic control (which comes in mighty handedly when you’re working with someone who’s stuck in a more extended position).

Simply “reach” towards the ceiling as you extend your legs towards the floor and perform a FULL exhale with each repetition.

2. Deadbug w/ Loaded Reach


Same as the above, but now we add a smidge of load in the form of a med ball, kettlebell, dumbbell, a basket of He-Man figures, anything.

Sometimes adding a very slight load here can help clients/athletes “feel” the protraction more.

3. Quadruped Band Protraction – off Foam Roller


This is a drill I stole from my good friend and business partner, Dean Somerset.

He’s Canadian.

4. Forearm Wall Slides – off Foam Roller


1. You can blame my buddy Justin Kompf for the verticalness of this video.

Amateur hour.

2. This was/is a staple exercise from my days at Cressey Sports Performance. Start with a foam roller against the wall with your forearms against the foam roller. Protract (push away) from the foam roller and then slide up the wall making sure not to crank into your lower back and flair your rib cage.

Reset at the bottom.

Repeat.

It won’t take long for it to be Serratus O’clock.

CategoriesAssessment Program Design

Embrace Asymmetries For Improved Performance

Today’s guest post comes courtesy of TG.com regular, Travis Hansen.

It mirrors a sentiment I’ve been championing for a few years now: That we don’t have to start hyperventilating into a paper bag the second we notice asymmetry in our clients/athletes.

It behooves us to maybe lean into it a bit more.

Not always, of course. But certainly more often than we think.

Copyright: gearstd / 123RF Stock Photo

Embrace Asymmetries For Improved Performance

I’m sure there are many who read this article title and immediately wanted to grab their pitchfork.

Hear me out.

There are many times when you actually need to embrace the notion that our body’s natural anatomical design consists of several structural asymmetries perfectly balanced to allow us to perform at a higher level.

Cue dramatic chipmunk here.

https://www.youtube.com/watch?v=a1Y73sPHKxw


Moreover, there are even times when you can implement an imbalanced approach both through a direct exercise, but also through how much volume you incorporate, to help neutralize a dysfunction that currently exists.

And lastly, even in the presence of elastic/power, strength, and even limb length disadvantages, the body routinely seeks a way to remain healthy and perform at a higher level.

Note From TG: If you’re interested, HERE‘s my take on why leaning into asymmetry is likely the right branch to bark up.

You know, because I’M ALWAYS RIGHT.9

First Layer of Asymmetry

Lets take a look at the first element of asymmetry that exists in the human body beginning at the foot.

I don’t think anyone would argue at this point that the various plantar flexors of the foot responsible primarily for propulsion in human movement vastly out-weight and out-perform the smaller and less powerful dorsiflexors of the foot.

Why would this be the case though?

If one group, which primarily lies on the backside of the lower leg, dominates the front side of the foot, wouldn’t there be tearing that would occur on the front eventually regardless of how much of an attempt to balance the leg is achieved?

The shin muscles do indeed tear from (mainly) eccentric overload and weakness but this can be solved.

Regardless, a balance exists at the lower leg just like many other areas, and there is just enough size and strength present in the leg in healthy individuals to allow this imbalance to occur without any problems.

Another example, can be seen at the shoulder.

Consider that your Latissimus Dorsi, teres major, biceps, anterior deltoid, and pecs all have the capacity to drive the shoulder into horizontal adduction and accelerate the arm explosively, while everything on the backside, which isn’t much, is stuck with the job of having to slow this arm action done.

Of course, the posterior muscles will fail to match the strength output of the powerful anterior shoulder group.

However, we’re designed pretty miraculously.

Our shoulder, specifically the posterior cuff, can slow “things” down just enough to bridge the large gap between front and backside and allow us to remain healthy and continue to increase throwing velocity without much issue.

Note From TG: Another way to think of it is that if the body WAS designed symmetrically or if we went out of our way to seek it, that would likely inhibit an athlete’s ability to throw a baseball in the first place. As a thrower throws, particularly at a young age, there’s a bony adaptation that occurs (retroversion) which then allows for an aggressive layback position to throw a baseball faster and faster. 

If we tried to “fix” that or if the body was designed to be “equal” we’d have a lot of 72 MPH fastballs out there.

Of course, this isn’t to say there aren’t certain training modalities and manual therapy approaches we can implement to help “offset” this imbalance; there are many.

That being said, from an athletic development standpoint, the late Charles Poliquin even pointed out that elite sprinters carried a much more powerful posterior chain than anterior chain in attempts to sprint faster.

Charles declared a 100% ratio, but whether or not that figure is valid remains unseen.

To support his statement and raw figures aside, the body cannot run faster after initial phases of sprinting since vertical forces stagnate and any further increase in running speed stems from increased hamstring, glute, and horizontal force production.

The Second Layer of Asymmetry

The next example where we can begin to appreciate imbalances deals with a particular approach to program design in those people with “severe” asymmetries.

Take an anterior pelvic tilt for example.

If this message hasn’t been driven into your brain enough already, it’s worth repeating one more time since its still so prevalent:

…and that is utilizing a pre-dominant training ratio hip to quad exercises.

There is naturally a slight lordosis and anterior pelvic tilt that does and should exist in athletic and power-based postures, but excessive imbalance is what becomes problematic. The same scenario can be seen at the shoulder like was previously mentioned, anterior versus posterior core, and in other planes of motion as well.

Along these same lines, you will see training tactics such as RNT, PAILs, and RAILs all seeking to address imbalances by subtly or substantially inducing imbalances.

Alwyn Cosgrove first coined the idea of creating an imbalance to cure an existing one.

For example, if you present with a common lateral weight shift during a squat you can actually add increased poundage towards the side of the shift or set up a resistance band to pull you in that same direction to built an instinctive reflex to get you back towards center.

Note From TG: You can see that in action HERE.

More importantly, it will create a tactile awareness of the issue that you will have memory of in the future in case that same issue decides to manifest again and you will know precisely how to correct it.

Third Layer of Asymmetry

Lastly, is the issue of seeking to reduce or even eliminate according to some, the effect of having one limb stronger or more powerful than the other.

In the most extreme cases, you can witness the damaging effects of strength discrepancies with common orthopedic evaluations such as the 90 degree isometric lateral raise test.

It’s been stated that if there is a strength imbalance or pain response that results in one arm being over +50 percent stronger than the weaker arm that could be indicative of a full thickness tear to the supraspinatus muscle.

So yes, there does need to be at least some balance or an attempt to balance out joints for an athletic performance standpoint to prevent scenario’s such as this one.

But is it fair to ever think that we could actually fully restore joint strength so that we are equally strong everywhere?

No.

1) For the reasons that were mentioned earlier based on our anatomical design, and 2) you just won’t see it happen.

If you truly test single leg strength with optimal testing selections such as pistol/single leg squats, or Bulgarian drills for strength capacity, or advanced bounding plyometric variations for power, you will witness differences in volume, endurance, and intensity more times than not.

And That’s That

On a final note, consider that Usain Bolt has one leg that is inches longer than the other but contributes to key characteristics of sprinting speed, and this notion of imbalance is further perpetuated.

Maybe it’s time we start to look at imbalance differently when necessary and start embracing the notion rather than trying to erroneously fight it, and see what happens.

About the Author

Travis Hansen has been involved in the field of Human Performance Enhancement for nearly a decade. He graduated with a Bachelor’s degree in Fitness and Wellness, and holds 3 different training certifications from the ISSA, NASM, and NCSF.

He was the Head Strength and Conditioning Coach for the Reno Bighorns of the NBADL for their 2010 season, and he is currently the Director of The Reno Speed School inside the South Reno Athletic Club.

He has worked with hundreds of athletes from almost all sports, ranging from the youth to professional ranks. He is the author of the hot selling “Speed Encyclopedia,” and he is also the leading authority on speed development for the International Sports Sciences Association.