Categoriespersonal training Program Design Strength Training Uncategorized

10 Steps To Dominate Your Deadlift Technique

The better title of this post should be: “10 Steps To Ensure You Won’t Destroy the Back Of Your Pants (With Your Spine) When You Deadlift.”

The deadlift, as with any compound movement, requires precision and attention to detail in order to 1) Perform it well 2) Not get hurt and 3) To have any shot at lifting appreciable weight. There are many moving parts to the lift, however, to speak candidly, of the “Big 3,” the case could be made it’s the least technical.1

This is not to insinuate it’s altogether easy or simple. Simple in concept? Yes. I mean, picking a barbell up off the ground and locking it out isn’t rocket science. Simple in execution? Well, that’s where things get a bit more complicated.

Below are some overarching (<—Ha, pun intended) “themes” with regards to setup and execution of the deadlift I feel are important across the board.

Copyright: spotpoint74 / 123RF Stock Photo


1) First, Lets Clear the Air

The internet likes to argue. It’ll argue whether or not the dress was gold or blue (remember that stupid debacle from a few years ago?), DC vs. Marvel, high-bar vs. low bar squats, and/or who’s the most bad-ass He-Man character not named He-Man.

Cyclone anyone?

More cogent to the topic at hand, people will also argue on the internet that anyone who SUMO deadlifts is cheating.

The prevailing, uppity, train of thought is that, because one is closer to the ground when performing a SUMO deadlift (compared to a conventional stance) it’s easier and thus it’s cheating…and somehow less relevant of a lift.

To which I say: bull to the shit.

Unless your name is Professor Dumbledore and can somehow make someone’s femur change length when they switch from a conventional stance to SUMO stance…the whole “it’s less ROM, it’s easier” argument is a moot one.

The moment arm (femur) doesn’t miraculously change from conventional to SUMO stance.

It’s just…..different.

What you lose in the sagittal plane during conventional, you gain in frontal plane when performing SUMO style deadlifts.

Generally speaking (due to the moment arms and levers at play):

Conventional Pulls: easier/faster off the ground, harder at lockout.

SUMO Pulls: harder/slower off the ground, all out sexification at lockout.

Stephanie Cohen hit a 525 lbs deadlift at a bodyweight of 123 lbs recently. It was done SUMO.


True to form, (some of) the internet projectile vomited all over itself calling her out, saying it didn’t count, and that it’s not real powerlifting (I guess because she was using straps?).

1. Hahahahaha. I have to assume most commenters calling her out couldn’t sniff her warm-up weight.

2. Um, the lift didn’t take place at a powerlifting meet. So thanks for making the stupidest argument you could possibly make.

[For the record: most powerlifters I know are some of the most respectful, courteous, and supportive people I know. They would never turn their nose to such an impressive lift.]

Step one to successful deadlift technique is to figure out what style feels best FOR YOU.

What feels better? What feels more powerful and stable? Which one places you in the best position possible?

Some people will do well with conventional style, while others may prefer SUMO. Both are fine.

Relax internet.

2) Get Your Air, Set Your Ribcage

Gone are the days of cuing people to excessively arch their backs. Gross, repetitive extension can have just as many negative ramifications on spine health as gross, repetitive flexion.

Ideally we want to shoot for more of a canister (or pillar) position where the pelvis and ribcage are “stacked” on top of one another. Most specifically, the pelvic floor and diaphragm are stacked on top of each other.

I like to cue people to get a big gulp of air and aim for 3D expansion (breathing into their stomach, sides, and back) before bending over to grab the bar.

Admittedly it takes a bit of practice but makes a profound difference in how the lift feels.

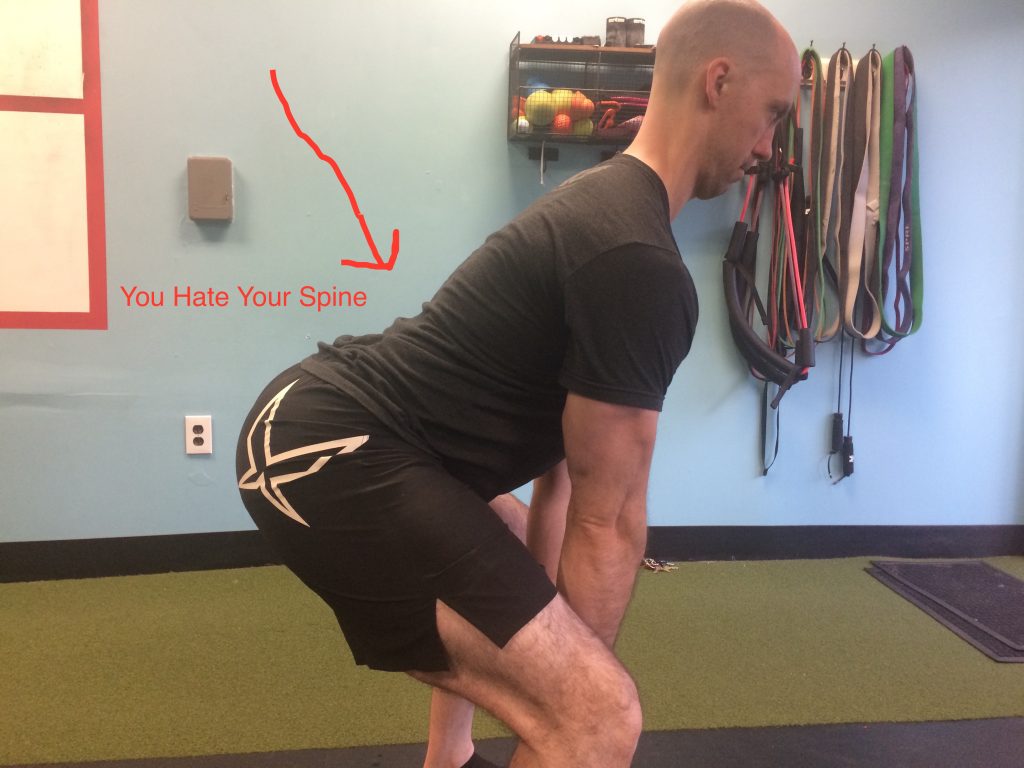
3) Chest Up, Show Me Your Logo

This is a cue I stole from Eric Cressey and a staple at Cressey Sports Performance. Generally speaking I like to see the following on the deadlift setup:

  • Shoulders above chest
  • Chest above hips
  • Hips above knees.

This isn’t the case for everyone, mind you, but a good rule of thumb to follow. This will ensure most people stay in a “neutral” position and offset the bulk of shear forces on the spine.

I’ll often stand in front of an individual and just say “show me your logo the entire time” as he or she descends down to the bar.

The end result should look like the picture above.

If not, this happens:

4) Armpits Over Barbell, Max Hamstring Tension

Regardless of style of pull, the goal with one’s set up should be armpits over the bar with maximal hamstring tension.

This will help ensure 1) hips are as close to the bar as possible (without making it too squatting. In that case the hips are actually further away….laterally) and 2) people will be less likely to pull via the lower back.


5) Turn Lats On

The lats are a big player with regards to deadlift technique. You want to make sure they’re “set” to help with upper back stiffness during the lift itself.

The best cue I’ve used to help with this is to tell someone to “squeeze the oranges in your armpits.”

Works like charm.

6) Pull Slack Out of the Bar or Bend the Bar

7) Push Away

The deadlift is just as much of a PUSHING exercise as it is pulling. You want to generate force into the ground and drive AWAY, thrusting your hips forward as you stand up.

People who solely focus on pulling the weight up – via their back – are often the ones that complain about it low back pain the most.

8) Finish at Top or Stand Tall

A common mistake I see some trainees make is either not getting their hip through at the top (AKA: the sexy stripper butt) or going too far.

“Hump the bar” at the top. Finish. Stand tall. All are cues I’ve used that work and get people to finish with their glutes.

9) Don’t Let Go

On the descent, don’t let go.

Stay engaged.

It’s here where I’ll often see people round their shoulders or lose their upper back position. And it makes me sad.

Keep your abdominals engaged (and keep squeezing that orange), even on the way down.

NOTE: Disregard for max effort pulls….;o)

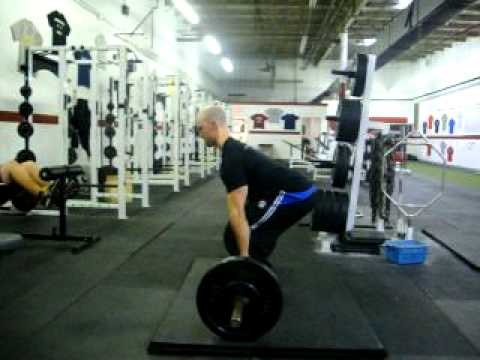
10) Reset or Peel the Shoulders

There’s a time and place for tap-n-go deadlifts, but I have to admit I rarely use them. Instead I’ll tell people to “reset” between each rep – albeit it’s brief – to gulp their air, “peel their shoulders back,” and to make sure they’re in a good position for the next rep.

The video below is of me demonstrating this with a dumbbell, but you should still get the gist:


These Aren’t Set in Stone

None of what I said above is concrete.2 There will always be some slight deviations based off someone’s anatomy, ability level, and goal(s).

However, I have found that for most people, most of the time, they all work really well to get people’s technique in check.

Happy Thanksgiving everyone!

CategoriesUncategorized

Deadlifts and Foot Placement

The deadlift is arguably one of the more technical strength movements to master, and it’s no wonder that it oftentimes takes trainees months, years (maybe even more) to really hone in on the technique side of things.

So many variables and factors come into play, and if we were to make an impromptu checklist it may look something like this:

  • Can you demonstrate proper spinal position, or what we like to call “neutral spine”. This also includes packing the neck and not destroying the back of your pants.
  • Do your hips come up too quickly on the initial pull?
  • What about on the descent:  do you tend to sit back and engage more of the hips and glutes, or do you use more of a squat pattern?
  • How about bracing and intra abdominal pressure: can you get and maintain ample (360 degree) expansion?
  • Do you have sufficient ankle, hip, and t-spine mobility to maintain proper position throughout?
  • Are you “finishing” with your hips/glutes at the top?
  • Do your socks match your shirt?  Oh, god….they don’t!  Shit, now everyone’s going to think you’re an idiot and are going to laugh at you!  Hahahahahahahaha.

No one is the same, obviously. What works for one person, may be a recipe for disaster for the next. But one common mistake I see many trainees making when setting up to deadlift – especially with regards to conventional or trap bar style – is placing their foot stance too wide.

Hopefully this video demonstration – done on ONE TAKE, thank you very much – helps shed some light on the topic.

Enjoy.  Have an awesome weekend!

Note: My apologies for the picture quality.

CategoriesUncategorized

5 Coaching Cues: Deadlift

It’s no secret that I love deadlifts.  They rank right up there with Star Wars, my mom, oatmeal, and old GI Joe re-runs  And while I feel the deadlift is one of the more beneficial movements out there in terms of improving performance, muscle growth, and even posture….it’s still something that a lot of trainees have a hard time perfecting.

I give people all the credit in the world for doing them………

….it’s just many don’t do them properly.

Moreover, it can be a very intricate and complex movement to master, and as much as I try, attempting to cover every nook and cranny into one 1200 word blog post is about as easy as quantum physics.

That said, below are some of the more common coaching cues I gravitate towards when attempting to teach it to others. While it’s not an all encompassing list by any means, I do feel the ones highlighted serve as a solid foundation and work wonders in terms of “cleaning up ” technique.

Maybe even yours!

Push the Hips Back

Developing a proper hip hinge pattern can be a cumbersome endeavor for a lot of trainees, as many want to “squat” everything.  The conundrum, it seems, is that there are a lot of trainees and personal trainers (sadly), that feel deadlifts are the same thing as squats.

Einhorn is Finkle and Finkle is Einhorn!!!!!!

While I could sit here and write a five-page dissertation on why this is the most absurd thing I’ve ever heard, lets just agree on a few things:

1.  Squats are generally considered more “quad dominant,” while deadlifts on the other hand, are considered more “hip dominant.”  I’m not a huge fan of this distinction because you can easily make a squat more hip dominant in nature (think box squats), but for the sake of brevity, it’s a relevant talking point.

2. Squats generally start with an eccentric loading phase, while deadifts are almost purely concentric.

3.  And, most important of all, regarding trunk, hip, and knee angles, significant differences between the lifts are readily apparent.  In a nice summary titled Differences in the Squat and Deadlift in the Journal of Pure Power (V.5, Number 2, April 2010), the scientists noted that squats produced a more linear relationship between the hip and knee angles, “illustrating a more synergistic and simultaneous movement.”

The deadlift, however, showed three distinct phases defined by dominant joint action at the knees during lift off, the hips with the barbell at knee height, and both knees and hips during lockout.

So, in summary:  a deadlift IS NOT A SQUAT!!!!!!!

Capiche?  Good!

Back to the topic at hand:  the hip hinge.  This cue comes into play throughout the entire movement, from the set-up to the descent.

In terms of the set-up, I like to tell people to stand up right against the bar and to then push their hips back (as if there were a rope around their waist and someone was standing behind them pulling the rope back).  Essentially, one would be performing a romanian deadlift – feeling significant tension in the hamstrings – until their hands are able to grab the bar.

Many trainees make the mistake of breaking with their knees and “squatting” down to the bar. This is wrong.  Instead, think about pushing the hips back.

“Pull” the Chest Tall

Pulling the chest tall encourages the trainee to get into t-spine extension, which in turn demonstrates that he or she can resist shear loading of the spine.

Once someone’s hands get to the bar, I usually like to say “use the bar to pull your chest tall.”  Meaning, they’ll literally use the bar to set themselves into proper position.

Taking it a step further, if I’m standing directly in front of them and their shirt happens to have a logo of some sort – a team logo, a New Balance emblem, a picture of the Jonas Brothers (don’t worry, I won’t judge) – I want to see that logo when they set up.

The chest shouldn’t be parallel to the floor, but rather more upright.  An adjunct to this would be to think “chest tall, hips down.”  So, as one pulls their chest tall, the hips will come down simultaneously. From there, they’ll be in a solid position to pull.

“Stiffen” the Upper Back

This could arguably be the most crucial of the bunch.  As I noted above, resisting shear load is kind of important when deadlifting.

Pulling a bar off the ground with a rounded upper back is a recipe for disaster, but unfortunately, it’s par for the course whenever you walk into a commercial gym.

Using the cue “pull the chest tall” is often helpful, but sometimes trainees don’t have the kinesthetic awareness to “feel” what their back is doing.  You can tell someone to arch their back, and they’ll think they’re doing it, but it will still look similar to the picture to the right.

To “stiffen” the upper back, I may just tell them to place their shoulder blades in their back pocket and to “set” their shoulders in place.  Truth be told, this cue often works in unison with pulling the chest tall.

As a pair, those two cues should place an individual in a solid starting position to pull (see pic above in the previous section).

Tuck the Chin

Too, as much as we’re concerned with keeping the entire backside in a neutral (arched) position, we also need to be cognizant of neck position.

If you watch a vast majority of people set up to deadlift, you’ll invariably see them end up looking up or straight ahead, cranking their neck into hyper-extension, kinda like this:

Please, stop doing this.

I like to tell people to find a spot that’s roughly 10-15 feet in front of them, and to keep their eyes fixated on that point throughout the entire set.

Another cue I like to use in this instance is “your head should follow the hinge.”  In other words, during the set-up, your entire back side – from head to sacrum – should make a straight line.  Oftentimes, during the lockout, people will still think I want them to look straight down, which isn’t the case at all.

During lockout your head should be upright and your entire backside should still make a straight line (you’re looking 10-15 feet a head of you).  Then, on the descent, your head will follow the hinge.  As you push your hips back, your head/neck will still stay in line with the actual hinge.

I think that makes sense. If it doesn’t, too bad……;o)

Hump the Bar (Hips Through)

Another common mistake that many trainees make is not “finishing” the movement.  At lockout, you’ll often see one of two scenarios:

1.  No hip extension what-so-ever, and they don’t squeeze their glutes at the top.

2.  HYPER extension – because they’re not using their glutes, they substitute lumbar extension for hip extension……….and their spine cries.

It’s a double edged sword in both scenarios, because in each instance the glutes don’t come into play at all.

Luckily there’s an easy fix. As one comes to lockout, simply tell them to squeeze their glutes and “hump the bar.”

For those in the former (no hip extension), this will serve as a vital cue to use.  Squeezing the glutes at the top will provide more posterior pelvic tilt and help to finish in a more optimal position.

For those in the latter, however (hyper extension), because their glutes don’t fire properly and they’re compensating with excessive lumbar extension, you may need to take a more of hands-on approach and show them where to stop.

Either way, in both cases, squeezing the glutes (humping the bar) will bode in their favor.

And Now You’re (Hopefully) Less Sucky

There are numerous cues I like to use when teaching the deadlift, but these five tend to be the ones that stick out the most.  Sure, we can talk about taking slack out of the bar, foot placement, not destroying the back of your pants, and other more pertinent cues…..but like I noted above, the five above serve as a fantastic foundation and will set a lot trainees up for success.

Have your own cues you find useful?  Share them below in the comments section!

CategoriesUncategorized

How to Set-Up to Deadlift Properly

I’m throwing you a curve ball today, and starting what I hope will be an on-going series of video blogs here on tonygentilcore.com.

My hope is that:

1.  I’m able to better convey the information I’m trying to relay to the masses. Writing is one thing, and I feel I do a decent job of not sucking at that. For many, though, they’re more visual learners, and this is the perfect medium for those types of people.

2. 2012 is looking to be the year where I put on my big boy pants and start doing more speaking engagements. The way I see it, video blogs will help me hone my skillz and hopefully teach myself to not swear like a sailor, stop saying “um” every other sentence, and to stop USING MY HANDS WHEN I TALK FOR THE LOVE OF GOD!!!!!

3. And, more importantly, save my fingers from all of this damn typing!

Anyways, the catalyst for today’s video blog stemmed from my incessant (maybe un-healthy?) obsession with deadlifts. But more to the point, it stemmed from various questions and comments I’ve received on articles and blog posts I’ve written in the past concerning how to set-up for the deadlift properly.

Sometimes, things are just lost in translation, and I figured a video would help elucidate my thoughts more clearly and showcase some simple coaching cues I feel will benefit a lot of people.

The tipping point, however, came when an online client sent me a video of his deadlift set-up and I had to do everything in my power not to face plant into my keyboard.

It was bad. Like, “how is his spine still in one piece?” bad. And with that, I knew I had to do something other than write back “Um yeah, you need to stop doing that.”

The result?

How to Set-Up to Deadlift Properly

A few things to note:

  • I feel the set-up is something that many trainees take far too casually.  Let me be blunt:  deadlifting success and performance starts and ends with the set-up.  Foot placement, bar placement, learning to activate the lats, as well as hip placement all come into play. With the latter point for instance, people tend to set their hips either too high, where their lower back takes a beating, or they set up too low, and it turns more into this weird, squat/deadlift, hybrid thingamajig.

Hopefully this video clears some of the murky water.

  • Thanks to Kyle for being my model (and for the sweet Presidential-like wave in the background when being introduced).  Also, thanks for Marco for being Spielberg’esq with the camera work.
  • My goal was to do this sucker in one take. I succeeded. In re-watching it, though, there were definitely some “did I just sat that?” moments (did I just say “finger Kyle?” Dammit Tony!). Trust me, I’ll get better. Promise.
  • I’d love to get your feedback, so please feel free to comment below.  In addition, I’d also be interested in ideas for future installments. Is there anything you’d like to see covered?

Okay, I’ll shut up now.  Here’s the video: