Today’s guest post comes courtesy of Dr. Michael Mash.
I have a legit man-crush on him ever since I’ve started diving into his online resource Barbell Rehab. As the name implies: Its mission is to help barbell athletes (and aficionados) overcome pain and improve performance WITHOUT being forced into “corrective exercise” purgatory.
In a sense, it’s designed to use barbells (and lifting stuff) to help fix shit. What’s more Tony G than that? Okay, maybe Jason Bourne fight scenes.
Or dragons.
Or an endless cheese plate.
Regardless, Barbell Rehab speaks to my strength coach love language, and as it happens Michael is offering his course to all my readers at $50 off the regular price for this week only.
All you have to do is click THIS link and enter the coupon code TONYG50 to receive your $50 credit.
And even if you’re not keen to saving money (weirdo) you should still give his blog post below a read because it’s riddled with common sense and practical applications you can use TODAY to improve your squat screen or assessment.
Do You Really Need to “Screen” the Squat?
When it comes to effectively screening the squat, many personal trainers and strength coaches have different approaches. From not utilizing a screen at all, to performing dozens of assessments prior to implementing a bodyweight squat, what is the best way to screen the squat?
Before we answer this question, let’s first talk about the function of a “screen” in general.
What is a Screen and Should We Use it?
According to John Hopkins…
“…a screening test is done to detect potential health disorders or diseases in people who do not have any symptoms of disease.”
If we apply this definition to the squat, one could say that a squat “screen” is a test performed to detect potential joint, muscle, or movement impairments in those who don’t have any pain.
In order for a screen to be effective, a “failed” test must be highly predictive of future injury or pain. If it’s not, this could create a lot of false positives results (a.k.a telling someone they’re doomed for injury if they really aren’t). So on one side, you want to make sure your client is “safe” to squat before loading them up, but you also don’t want to prevent them from squatting if they don’t really need to.
Oh the dilemma!

It’s Tough to Really “Predict” Pain and Injury
As mentioned, in order to analyze the efficacy of a screen, we need to know if it can indeed accurately predict injury. As it turns out, the research isn’t so sure about this.
In fact, it has been shown that one of the most common movement screens, the FMS, is only slightly better than a 50/50 coin flip at predicting injuries. This doesn’t mean, however, that you need to throw the baby out with the bathwater. While both myself and the authors of this paper note that the FMS can be used to see HOW a person moves, it shouldn’t be used as a way to predict injury.
If the FMS can’t reliably predict injury or pain….what can?
Because pain is a multidimensional experience driven by biological, psychological, and sociological factors, it is really a reductionist mindset to blame pain solely on “tight hamstrings” or “poor form” in general.
In fact, factors such as stress, anxiety, depression, lack of social support, job dissatisfaction, and poor sleep and nutrition can ALL affect a person’s pain experience. This is why we need to zone OUT when it comes to “predicting” injury and really take a comprehensive approach. The WAY someone moves is certainly important, but it’s just one tiny piece of a much larger puzzle.
What is an Effective Movement Screen?
So how should you effectively screen the squat? In order for a screen to be effective, it needs to be SPECIFIC, and there’s no better way to be specific than to actually perform the movement itself. Yep, that’s right. The best way to “screen” the squat, is to actually have the client perform a squat.
This process will give you ALL of the information you need in order to make a decision on whether or not they are “safe” to proceed forward with loading the squat.
And guess what?
It doesn’t involve any kind of joint-by-joint assessment, specific muscle flexibility testing, or any other long drawn out processes either.
While the aforementioned approaches can be beneficial to “dig deeper” if someone already has pain, they’re rather unnecessary as part of a screening process in asymptomatic individuals.
For those without pain, here’s a simple process I recommend in order to determine if they are safe to squat.
Step 1: Show Me Your Squat
The first step of our world’s simplest squat screen is to simply ask the client to “show me a squat.” I like to do this for a few reasons. First, it will give you an idea of what they “think” a squat is and how they move in general. Two, it will also give you an idea of how hesitant they are to move.
Some will just drop it low into a perfect squat and others will hesitate to start and move really slowly. You may see the latter example if someone has a history of pain or has fear with movement in general.
This is all useful data to collect on this important first step. If the squat looks good, congratulations!
Your job is easy today, and it’s time to load them up!
If it needs some work, it’s on to the next step.
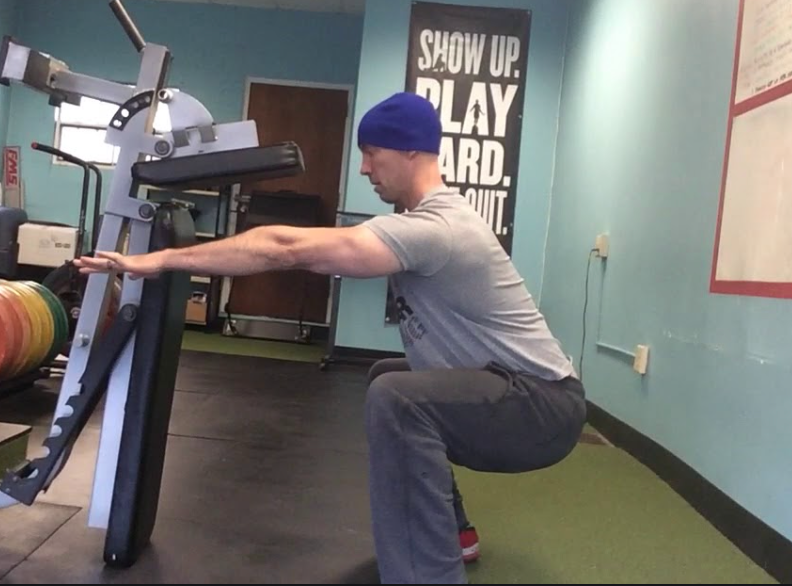
Step 2: Coach the Squat
After asking the client to show you their squat, it’s time to coach it. While everyone is going to squat with a different stance width, degree of toe out, and torso angle, it helps to at least have a frame of reference to start from.
I recommend cueing them into a heels shoulder-width stance with a moderate 20-30° toe out, and then asking them to squat as far down as they comfortably can. While this foot placement won’t work for everyone, it’ll work for the majority of people. In this initial bodyweight squat coaching phase, some people may have discomfort or won’t be able to quite get to parallel…and that’s ok.
That’s why we have Step 3.
Step 3: Modify Stance and Depth if Needed
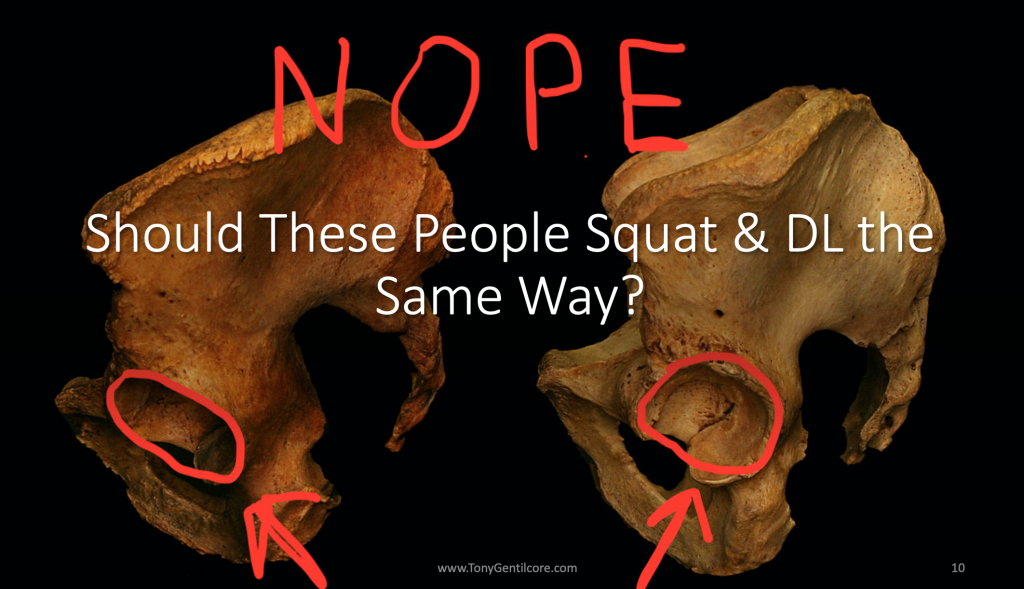
If you coach the client into a shoulder-width slightly toed out stance, and they have pain with this, or they can’t squat very deep, all is not lost yet. Two of the most common pains you’ll see with a bodyweight squat are hip and knee pain. And just because they have pain, doesn’t mean they are injured or need to be referred out to a rehab professional. It may simply just be the way they are built.
For example, if you take someone with highly retroverted hips, and have them try to squat with a narrow stance with minimal toe out, they may get a “pinch” in the front of their hips at the bottom. This can usually be remedied by widening the stance a bit and turning the toes out more. This doesn’t mean anything is wrong with them…it’s simply the way they are built!
Tying it all together, if someone has pain when you coach them into a bodyweight squat, see if it’s relieved with a simple stance adjustment. This is 100% within your scope to do as a personal trainer or strength coach, as you’re not diagnosing, assessing, or putting your hands on the client at all.
Step 4: Change the Exercise and/or Refer Out
Sometimes the squat pattern itself is so sensitized, that a stance or form adjustment isn’t enough to eradicate pain. If this is the case, I’d recommend NOT proceeding forward with having the client squat, and instead, finding a similar exercise like a rear foot elevated split squat or a lunge variation that they can tolerate.
If the client’s goal is to squat, it would also be best at this point to refer out to a qualified rehab professional as well. This is why interdisciplinary care is so important in the health and fitness world. At this point, as the personal trainer or strength coach, you can continue to train your client with what they can tolerate (full upper body workouts and modified lower body exercises) while the rehab professional addresses the pain itself.
A Quick Note on Squat Depth
Sometimes no matter how much you modify stance, degree of toe out, or hip position, your client won’t be able to squat to “depth.” Depth is defined as when the greater trochanter of the hip goes below the top of the patella from a side view.
In this case, you need to find out if it’s simply because they feel “tight” or if it’s limited by pain.
If it’s limited by pain (even after stance adjustments) then you may want to refer out. If they just feel “tight,” then you can proceed forward with loading them up to tolerance….even if it’s not quite to depth. That’s right. There is no evidence to suggest that squatting above parallel is inherently dangerous.
Rather than spending six months working solely on mobility to increase squat depth, you can work on BOTH simultaneously. Train the squat to the depth the client is comfortable with and tease in mobility drills at the same time.
This one-two punch of increasing mobility and loading through it, will help your clients squat deeper (if that’s their goal) much quicker than not squatting at all.
Tying it All Together
The squat is one of the most beneficial lower body movement patterns to coach your clients through. While everyone will squat with a different stance, degree of toe out, and variation, there’s no need to take clients through an extensive “screening” process prior to loading them up.
Instead:
1️⃣ Ask them to “show me a squat” to get an idea of how they move to begin with
2️⃣ Coach the squat. Cue them into a moderate stance with slight toe out and ask them to squat as deep as they can
3️⃣ If they have pain, see if you can find a stance width, degree of toe out, and depth that is tolerable for them. If so…it’s time to load them up!
4️⃣ If they still have pain after a stance adjustment, it’s probably best to hold on squatting for now and to refer out to a rehab professional for further assessment.
About the Author
Dr. Michael Mash is the owner and founder of Barbell Rehab, a continuing education company dedicated to helping fitness and rehab professionals improve the management of barbell athletes. Check out his CEU approved online course, The Barbell Rehab Workshop at this link and use coupon code TONYG50 for $50 off.