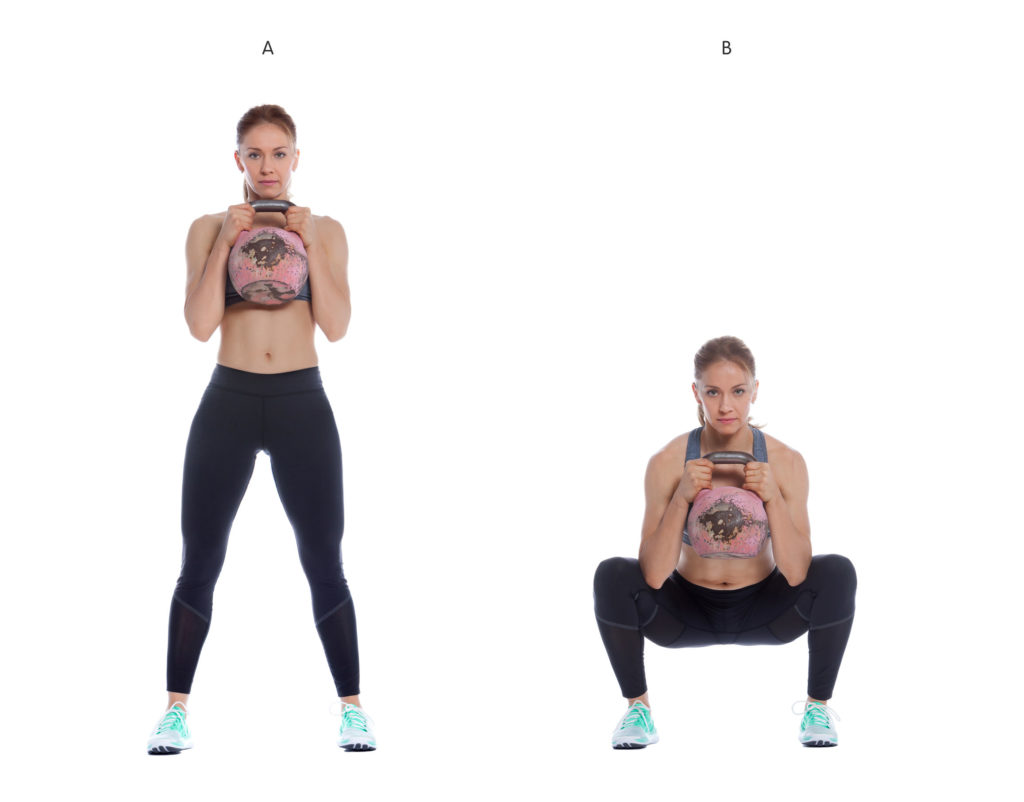
Categoriescoaching Exercise Technique Program Design

The Abdominal Rollout: Common Mistakes and Progressions

Having a newborn at home = I’ve been waking up on the wrong side of the bed lately. A lot. I’m cranky AF and my brain waves aren’t firing on all cylinders this morning so you can blame this lame introduction on that.

Cool?

Awesome. Lets discuss abs. Specifically, lets discuss one of the more common ab exercises out there: the abdominal rollout.

Copyright: georgerudy / 123RF Stock Photo

The Abdominal Rollout: A Complete History (But Not Really)

I’d like to sit here and pizzaz you with some interesting factoids and trivia about the abdominal rollout, like, say, I don’t know, its roots can go all the way back to Mesopotamia and that every male had to perform strict repetitions for 17 hours straight before he was allowed to mate. Maybe the History Channel can back me up on that one?

Who knows, for all I know some guy named Phil was the first to perform the exercise while training in his basement in 1968 while jamming to Hendrix. Phil was cool as shit.

Either way, all I can really tell you is that it’s a staple exercise that trains the anterior core musculature – upper and lower rectus regions in addition to the internal and external obliques – and has long been a “go to” exercise for anyone looking to shred their mid-section.

Copyright: max5799 / 123RF Stock Photo

Specifically the abdominal rollout is an excellent variation that trains ANTI-EXTENSION, and, well, many people tend to miss the boat in this regard.

I see a lot of common mistakes when I watch trainees perform this exercise. In fact, most would be better off pumping the brakes a little bit and mastering something like an RKC plank first.

RKC Plank = a plank (albeit learning appreciate tension).

The set-up is more or less the same a regular ol’ plank, except here you’ll want to flex everything – your abs, glutes, quads, eyelids, everything.

An important cue I use when teaching the RKC plank is to tell the person doing it to pretend as if they’re trying to drag their elbows towards their toes. When done right, it increases the “holy cow, this is really hard” factor by a large margin.

Also, when done right, 10 seconds will feel like torture.

But I’m getting a little off-track. What are those common mistakes of the rollout I was referring to above? The two most common are:

  • People falling into excessive lumbar extension (<– remember: the rollout is an exercise that helps train anti-extension; it defeats the purpose of the drill if you allow your lumbar region to “fall” into extension). The idea should be to maintain posterior pelvic tilt of the pelvis throughout.
  • Not allowing the hips to follow the shoulders.


In Case You’re Too Important to Watch the 2-Minute Video Above

1. I like to cue people to start the exercise in a bit more of a lumbar flexed posture (PPT). Relax, it’s unloaded flexion, you’ll survive. By doing so, most will end up in spinal neutral as they draw closer to the floor.

2. My triceps look jacked in that video.

3. Oftentimes as people break toward the floor their shoulders will lead and the hips will tend to lag behind. A cue that often works for me is to tell the person to pretend there’s a rope or chain connecting their hips and shoulders and that the shoulder are “towing” the hips behind them. They should move simultaneously.

Address those two things and technique will clean up nicely.

How About Progressions?

Assuming you’re already pretty good at the standard rollout, what are some ways we can progress the exercise?

Some less sexy alternatives would be:

  • Add a pause at the bottom.
  • Use a slower tempo on the way down and up. Think: three seconds down, pause, three seconds up.

We all know you’re going to skip those however, so maybe consider these options?

Level 1: This Is Kinda Cool, I Guess – Elevator Ab Wheel Rollout


Here, the idea is to include some pitstops or “speed bumps” along the way to make the movement more challenging and to increase time under tension.

With the Elevator Rollout I’ll tell people to rollout to three different lengths:

  • 1/2 way out, then back.
  • 3/4 way out, then back.
  • Full ROM, then back
  • THAT’s one rep.

Aim for 5-6 repetitions (which is really 15-18 repetitions when you count all the additional stops).

Level 2: Alright, Now We’re Talking – 2-Way Ab Wheel Rollout


All we need to do to make something a little more challenging is to add a change of direction. With the 2-Way Ab Wheel Rollout the idea is to alternate between veering off to the left and to the right. But, really, you can add as many directions as you want. And, if you’re really feeling frisky you can combine this with the elevator variation above.

I like to shoot for 6-8 repetitions per direction with this one.

Level 3: Ohhhhhhhhhhhh, Snap – Band Resisted Ab Wheel Rollout


To up the ante even more we can add resistance in the form of a band. With this variation I wrapped two bands around the corner of a squat rack and wrapped the other ends around each handle of the abdominal wheel.

The band will “assist” with the yielding/eccentric component, but you will need to fight and overcome the concentric portion. It’s a pretty nasty progression, so don’t take it lightly.

Aim for 8-12 repetitions.

Level 4: “Whoa, I Know Kung-Fu” – Standing Band Resisted Barbell Rollout

^^ Bonus points for The Matrix reference.


Admittedly, this isn’t that baller…but it’s a nice variation for those who aren’t quite able to perform a strict standing rollout (which is next level Jedi shit). With this variation you have to overcome the band as you roll out, however on the way back the band will accommodate or assist you back up to the starting position. Pretty nifty.

Aim for 5-8 repetitions.

And that’s that. I hope those tips to clean up technique help and made sense, and I also hope you now have a few new exercises to try.


Categoriescoaching Exercise Technique Program Design

Sport Restrictive vs. Sport Specific Exercise: How to Avoid Damaging Our Athletes

Speed ladders, parachutes, BOSU balls…it’s all nauseating at times. There’s a time and place for all those things – I guess – but when they’re added to an athlete’s (especially young athlete’s) training repertoire I have to wonder if they’re in there because the coach feels it’ll make him or her better, or if it’s the novelty they’re after? Today’s guest post by strength coach, David Otey, tackles the idea of sport RESTRICTIVE exercise and sport ASSISTIVE.

Good stuff.

Copyright: gloffs / 123RF Stock Photo

Sport Restrictive vs. Sport Specific Exercise

In fitness, finding your niche is a major part of making an impact on an individual. Over the last few years, Instagram celebrities and fitness magazines are guiding people on the best “sport specific” exercises for athletes.

If you want to be great at throwing, do this!

If you want to play cornerback in football, do that!

The whole process is very demanding of precise movements. The only issue is, details enhance, they don’t create. Just like a nice tie doesn’t make a cheap suit look better, detail work without a foundational set of athleticism, doesn’t change the athlete.

We can all remember our first intro to lifting weights, like a first date. The first interaction is the most impactful so a shit program can really compromise your results for years to come if you don’t find the right direction.

Ever meet that 50 year old guy that is still doing his HS football team’s lifting routine?? I meet that guy all the time. The issue with this idea is young athletes usually get thrown into a specific rotation of exercises that may be helping tiny details but neglecting overall development.

The fact is, the first 6 months to a year of working out is the most crucial from a muscle mass, neuromuscular awareness, and overall gym knowledge standpoint. Those initial days and exercises really set the table for your future accomplishments in the gym.

Sport specific exercises have been used for years with the intent of developing a particular athlete in their respective competition. Ever hear of the SAID principle? If so, makes sense right?

Sport restrictive exercises is a term I use for any exercise that could hinder the natural athleticism of an athlete.

If we are using sport specific exercises, they should be a compliment to some natural big lifts that are the foundation of our program. Thousands of athletes, right now, are practicing how to make one hand catches like Odell Beckham Jr. While focusing on that, they are neglecting speed, power, route running, catching fundamentals, and more

Athlete programming has two overall objectives: Maximize potential and minimize injury/restriction.

If you are not getting better, you are competing less.

If you are hurt, you are competing less.

We want athletes to compete more, work more efficiently, and stay in the game longer. The idea of sport restrictive exercises is to change the thought process from what things can I do for specific movements to what things should I REALLY not be doing to hinder my development in that sport.

I would argue that the majority of exercises are good for all athletes with a strong foundational level of athleticism (assuming no major injuries). There are a subset of exercises for each sport which should be avoided if you are looking to max out your potential. Here are four of the more common situations we may run into which are holding back our athletes.

Restricted Hip Drive

Restricted Shoulder Mobility

Loss of Rotational Power Generation

Loss of Multidirectional Movement

These four basic areas are really what encompass the attributes that set an athlete apart from the field.

Lacking in one or multiple of these either place you behind the curve or place you on the injury reserve. These for characteristics are also seen in every sport just in varying quantities. Let’s dive into how we can distinguish and avoid sport restrictive exercises going forward. As sport specific exercises are truly movements seen in game situations, I will refer to the exercises below as “sport assistive.”

Hip Drive

Hip drive is one of the most powerful and common strengths of any athlete. Whether you are throwing, blocking, sprinting, hips dominate the motion. Hip drive can be used in many ways but explosion and stability are the key responsibilities of the Glutes. To get the most of your hip drive, it’s important to work in areas that are similar to your sport. The weight room opens us up to a long list of activities that can work on a more powerful looking lower body. Key word is LOOKING. How can we adjust to just flat our powerful.

Sumo Deadlift – Sport Restrictive Movement

Note from TG: Noooooooooooooooo (sad face). I’m still posting a video of myself.


Traditional Deadlifts are becoming more common in weight rooms everywhere which is a great thing. The movement is based on full body strength and developing power. With regard to the Sumo Squat, it’s inherently unique set up is unfamiliar to almost any sport we see on a regular basis. Now I know, some people are going to say, “But what about the extra muscles used in the Sumo Deadlift?”

I certainly can understand that, my argument is this is more suited for the athlete geared towards weight-room competitions and less towards indoor/outdoor traditional sports. Building a foundation should be based on movements that are going to directly impact performance, not just look sweet in your Instagram post.

Broad Jump – Sport Assistive Movement

Without hip mobility, you are leaving yourself with a quick road to injury. Restricted hip mobility leaves you in a position to rely on areas to gain mobility that aren’t meant to have mobility. This extra strain, either placed on your knees or lower back, can quickly turn into chronic issues.


To avoid this, don’t work on exercises with unique demands that are uncommon to your everyday activity. The broad jump for any athlete is a way to specifically focus on hip and lower body explosion with the outcome of “project myself as far as humanly possible”. All out power is what we strive for. The hip extension utilize in the broad jump mimics almost all lower body locomotive movements we will see more commonly.

Shoulder Strength

Shoulders are the second most impactful joint in the body. Where the hip is mainly responsible for power generation from the lower limbs, the shoulders have the main juncture of the upper limbs. In all throwing sports, the chain reaction between medial foot all the way through the throw, is either amplified or diminished because of shoulder (scapular and glenohumeral) strength and mobility.

Barbell Military Press – Sport Restrictive Movement


The traditional Military press is no argument a solid movement for building muscle mass, but not ideal for working with the general athlete. The fundamental difference between athletics and barbells is the level of predictability.

Barbell movements confine the body to accommodate muscle growth and patterning to a restricted path due to the bar. In sports, all movements are unique and the body is better prepared when trained to be strong through its own control of its path (Example: Dumbell Press).

With respect to athletes with large wingspan, shoulder movement independent from one another is also safer than fixated movement. Increased muscle mass restricts in some sports and helps in others, but overall, the barbell is counterproductive for the athlete.

Landmine Shoulder Press – Sport Assistive Movement

The Landmine Shoulder Press is a great method to strengthen the muscle while focusing on glenohumeral rhythm.


To build in the body’s capabilities to work at its highest demand, we need to reinforce the body’s desire to work in collaboration with coexisting parts of the system. The Landmine’s free pivoting base allows you to control the weight independently. Along with this, the path of the bar promotes scapular upward rotation along with force angle more appropriate for one of our most unstable joints.

Rotational Power

Power is only as good as it can be transferred. Its tough to turn on a light with a frayed power cord (don’t try that at home). The anterior and posterior core’s primary functions are to maintain spinal stability and transfer power. The inherently awesome part of rotational power is the body’s ability to work together and coordinate multiple segments to maximize output. This doesn’t happen without the core, and doesn’t happen without training the body in its full capacity rather than in isolated segments.

Power Cable Twist – Sport Restrictive Movement


Cable twists are commonly seen in gyms around the country as a method to great sick abs. Unfortunately, they aren’t great at that and are more detrimental to spinal integrity. Just as I wouldn’t swing a baseball bat without pivoting my feet, rotation without lower body rotation creates increased stress on the discs, vertebral columns, lumbar spine, hips, damn near everything. Creating rotational power generally starts at the medial foot and transfers up, so training in that manner is most appropriate.

Med Ball Throws – Sport Assistive Movement


The Med Ball Throw is one of the most similar movements to translation of rotational power. One key factor of power is the ability to go full throttle. Just like doing sprints on a treadmill is definitely not the same as doing full sprints outside, there is no restriction of full potential. Proper Med Ball throws can teach an athlete full power output, safely!

Multidirectional Movement

Side Shuffles – Sport Restrictive Movement


One of the hardest things for me to watch is a coach teaching an athlete to side shuffle. Usually, with the side shuffle, the athlete is instructed to keep their back foot in contact with the ground. This concept is generally contradictory to natural lateral movement. Try running while keeping one foot on the ground at all times. Chances are you are going to lose your race.

Lateral Skiers – Sport Assistive Movement

https://www.youtube.com/watch?v=aOI1exR6pSk


The medial foot is one of the primary points of the body where power starts. Stealing a base, juking a tackle, initial drive in the baseball swing, all start from medial foot. Lateral work is a great translator to rotational power and lower body reactive capability. Lateral Skiers allow you to focus on single leg accommodation and the ability to propel from that loaded position. This is a movement that every athlete should build do and practice.

Summary

Every program is going to be unique because of the athlete and specific coach writing the program. The purpose of this article isn’t to blast certain exercises but to bring up arguments to why other movements may be more appropriate for your athletes.

You don’t need a speed ladder to be sport specific.

The best sport specific movements are those done in practice. Unfortunately, as coaches, we may only work with certain athletes in a weight room setting. It is important to identify which exercises can translate, and which in the long term, could be holding back our athletes. Bottom line: don’t restrict your athletes by refusing to adjust from the status quo.

Author’s Bio
David Otey is a Strength and Conditioning specialist based out of New York City. David is the 2016 Fitness Manager of the Year for Equinox and has been featured in several major fitness publications on the topics of strength and Conditioning.

Categoriescoaching Exercise Technique Program Design Uncategorized

Box Jumps: You’re Not Jumping as High as You Think You Are. And, You’re Doing Them Wrong

Thump, thud, thump, thud.

“What’s that noise?” I thought to myself. “Thor whacking people’s faces with Mjolnir or a T-Rex break dancing to It Takes Two.”

I turn the corner….”please let it be a T-Rex. PLEASE!

Nope, just some asshat performing box jumps.

Copyright: ammentorp / 123RF Stock Photo


Now, before anyone gets their panties in a tissy….I am not against box jumps. I implement them into my training as well as into the programs I write for other people and think believe they have a time and place (as does most any other exercise in existence1).

I mean, any strength coach or trainer worth his or her weight in paleo brownies understands their role in helping to train explosiveness and athleticism. And, if we were to peel back the onion a bit further, we’d note the REAL benefit(s) of box jumps are:

  1. Force summation, Rate of Force Development, or learning to put force into the ground.
  2. Landing mechanics: or, learning to absorb force.

It’s not to try to jump onto a box at the highest height possible or to perform them for endless repetitions.

Dumb


Really Dumb


Dumber


Commentary on Video #1

Before the record button was pressed you know those two guys were thinking to themselves “Dude, if you hit this jump it’s going viral and you’re totally going to get laid tonight.”

He’s lucky he didn’t break his back or neck.

Commentary on Video #2

Considering the number of banged up knees and scraped shins I’ve come across I really wish CrossFit would begin to understand that box jumps aren’t a great conditioning tool, and that there’s an abyss of better options.2

Hell, running over your right arm with a Honda Civic would be better than high-rep box jumps.

Commentary on Video #3

Yeah, yeah, I get it: It’s JJ Watt, it’s an old video, he’s an elite professional athlete, he nailed it, quit belly aching Tony.

Admittedly that was a baller jump and I too would have full confidence in JJ’s ability to jump over Mordor and then some. However, from a cost-benefit standpoint…..as a coach who’s worked with plenty of high-level athletes myself, I wouldn’t touch that with a ten-foot pole.

I have to wonder, though, did the coaches in that video prescribe or allow this to happen because they felt it would make their athlete better, or because they were chasing YouTube views and likes?

Not worth the risk. Refer to video #1.

My Real Beef: Not Box Jumps, But HIGH Box Jumps

A few months ago I watched a stellar video by Nick Tumminello where he went into detail on why he didn’t like HIGH box jumps, and he made a brilliant point I had never thought of before.

High box jumps reward those people with excellent hip mobility, particularly those with great hip flexion. Here’s an example:

The distance from the bottom of your foot to top of box is the “real” distance you’re jumping. Not so impressive now, huh?

And this is what the same jump looks like when someone doesn’t have the ability to clear ample hip motion:

They start cranking through their lumbar spine, over and over and over and…..”awwwww, goddamit I blew out my back again.”

“Ma, meatloaf! We want it.”

And speaking of the lumbar spine, how many times do you watch someone perform their box jumps and it ends up looking something like this:

Box Jump: Poor Landing


Happens all the time right?

Yuck.

If your box jumps look like this you’re using too high of a box and are reaping ZERO benefit from doing them.

How you start (chest up, knees slightly bent and not caving in, athletic position) is how you should end. Like this:

Box Jump – Good Landing


Another not so great thing thing many people end up doing is landing too loud on the box. Remember: one of the main benefits of the box jump is absorbing force.

Box Jump – Loud Landing


If someone can hear your box jumps in Idaho you’re doing them wrong.

Instead, you want to make sure you land softly, or what I like to tell my clients “like a ninja.”

Box Jump – Who’s the Ninja? You Are That’s Who


A Few Other Random Thoughts

  • Even with a (seemingly) low box height, the idea is to cue your clients to jump as high as they can (and then to land soft). External cueing works wonders here:
    • Try to hit your head on the ceiling.
    • Jump away from the ground.
    • OMG, there’s a snake!
  • I like to program box jumps for low reps. Sets of 1-3 are ideal.
  • Moreover I LOVE performing box jumps on lower body days prior to squatting or deadlifting as it serves as a nice way to potentiate or wake up the nervous system.
    • Perform 3-4 sets of 1-3 reps and you’re good to go.
    • Quality over quantity.
Categoriescoaching Exercise Technique Program Design

The Humble Goblet Squat

Last week I broke down one of my favorite variations to teach the squat to beginners. I was expecting some blow-back because I had the audacity, nay, the cojones, to not mention the Goblet squat.

Of course, I love the Goblet squat. As you should too. It’s a wonderful little exercise that serves as a “catch all” to groove a better squat pattern. And on top of that…it’s super versatile.  As you’ll come to realize after reading this excellent guest post from Shane McLean.

Copyright: blanarum / 123RF Stock Photo

The Holy Grail

The Goblet squat has revolutionized the way the squat is being performed and taught throughout the world. If don’t know what a Goblet squat is, I’m getting Dan John to come over to your house and slap you upside the head.  

If you don’t know even who he is, I suggest you Google him.  Pronto.

Dan John stumbled upon this excellent exercise by chance.  

“Years ago, I was faced with teaching 400 athletes to squat correctly. I attempted move after move and lift after lift, yet I failed every time.

I saw glimmers of hope from teaching one kid the Zercher squat and a few picked up the pattern when we lifted Kettlebells off the ground but nothing was really working.

The answer was somewhere in between a Zercher and a Potato squat. It came to me when I was resting between swings with the weight held in front of me like I was holding the Holy Grail.

I squatted down from there, pushed my knees out with my elbows and behold, the goblet squat.” (1)

I guess you can say he choose wisely.

Thanks to Dan’s discovery people in gyms everywhere have discovered the joys of squatting. The Goblet squat is an exercise that’s great for beginners and advanced exercisers alike.

But what makes the Goblet squat so good?

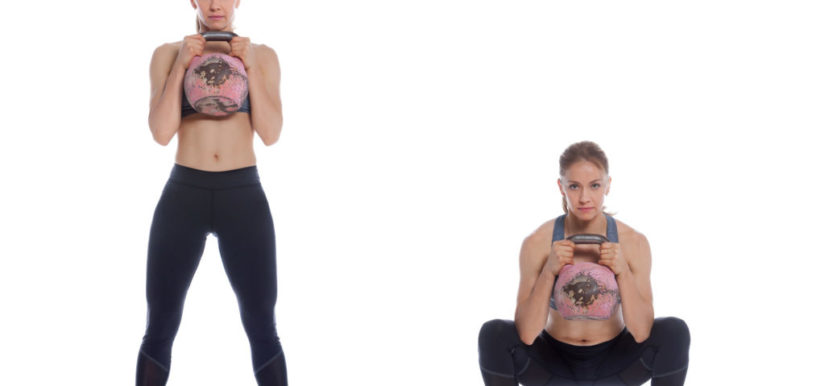
Holding the weight anteriorly encourages you to stand up straighter, get that upper back tight and puff out that chest which sets the table for good squat. Furthermore, the weight acts as a counter balance that encourages you to sit between your legs and not over your knees.  


For most gym-goers, the Goblet squat may be the only squat you’ll ever need.  It beats squatting on a stability ball by about a trillion. Why do people do that?

Now that I’ve established the Goblet squat is the bomb, let’s look at some variations so you can squat like a boss.

1. Goblet Box Squat


If it’s been a while since you’ve squatted or you’ve never done a Goblet squat before, this variation is a good starting point. Reducing the range of motion combined with a reference point with the box will help you groove proper technique.

Pairing this with single arm press/pull combined with a mobility drill works like a charm. For example:

1A. Goblet Box Squat

1B. Single Arm Row

1C. Half Kneeling Hip Flexor Stretch


2. KB Goblet Squat with Lowering


Tony calls this lowering but I’d prefer to calling this a biceps curl. Any excuse to work on the guns, right?


The pause at the bottom of the squat with the ‘curl’ helps you ‘own’ the bottom position and creates extra tension in the anterior core and the posterior chain. It’s going to tickle the legs a little also.  

Pairing this with a suitcase carry will provide a greater challenge for your lungs and grip strength. Try this little finisher that I borrowed from Dan ‘the man’ John.


  • 8 Goblet squat with lowering
  • Suitcase carry left hand 40 steps
  • 7 Goblet squats with lowering
  • Suitcase carry right hand 40 steps
  • 6 Goblet squats with lowering
  • Suitcase carry left hand 40 steps
  • 5 Goblet squats with lowering
  • Suitcase carry right hand 40 steps
  • 4 Goblet squats with lowering
  • Suitcase carry left hand 40 steps
  • 3 Goblet squats with lowering
  • Suitcase carry right hand 40 steps
  • 2 Goblet squats with lowering
  • Suitcase carry left hand 40 yards
  • 1 Goblet squat with lowering
  • Suitcase carry right hand 40 yards
  • Collapse

3. Goblet Squat with Resistance Band

Click HERE

How do you make Goblet squats more enjoyable? By adding a looped resistance band of course. Adding a band to the kettlebell helps you control the eccentric portion of the movement and provides extra resistance on the concentric portion also.

Furthermore, some gyms don’t have big enough kettlebells to challenge advanced lifters and adding a band helps…… or hurts depending on your perspective.

This exercise can be done for straight sets but if you’re feeling ambitious you can pair this with a little exercise called the Goblet lateral walk.  For example

1A. Goblet squat with band 8-12 reps

1B. Goblet lateral walk 8-12 steps each side

1C. Your grip will love you


4. Goblet Squat 1 ½


Adding a half a repetition to this exercise will make you hate life but will increase tension in your legs, anterior core and the posterior chain. These factors will give you a lower body of steel.

This exercise can be used as a finisher at the end of your leg training or can be super-setted with a core exercise for a rousing good time. For example:

1A. Goblet squat 1 ½

1B. Push up position plank


5. TG Addition: Goblet Elevator Squats

A nice progression for 1-1/2 rep Goblet squats would be elevator squats. I learned this one from my good friend Ben Bruno.

Here you’ll squat down into the bottom position, come 1/2 way up, back down again, then 3/4 of the way up, back down, and then stand tall. This is a great option for those who A) can’t think of any other way to make them hate life more and/or B) have limited options in terms of load you can use (the increased time under tension is a leg killer).


Wrapping Up

The Goblet squat makes it possible for most people to squat with good form and to reestablish the squat pattern for those who have ‘lost’ it. This also doubles as an excellent mobility exercise for the lower body.  

Start choosing squats wisely. Incorporate the Goblet squat into your routine pronto and make Dan a happy man.

About the Author

Shane “The Balance Guy” McLean, is an A.C.E Certified Personal Trainer working deep in the heart of Texas. Shane believes in balancing exercise with life while putting the fun back into both.

CategoriesFemale Training mindset muscle growth Program Design Strength Training

Maybe Less Isn’t More

Peruse pretty much any fitness magazine targeted to women and you’ll inevitably see words like, “lose, fat-loss, tight, drop a size, tiny, hot, and lean” plastered all over its pages. This is unfortunate.

Women are programmed, often at an early age, to be less, that in order to be attractive and have self-worth, the smaller you are the better.

I say: Bull to the shit.

It’s no secret I’m a firm advocate for women to strength train. Time and time and time again I witness women transform their bodies (and mindsets) when they choose to nix the endless elliptical sessions in lieu of picking up some barbells.3

There is nothing wrong with choosing to be more.

I am pumped to help promote The Bigness Project from Kourtney Thomas and Jen Sinkler. It’s everything I’m a fan of when it comes to directing women to the right kind of information.

Please enjoy the guest post Kourtney was kind enough to write below.

Maybe Less Isn’t More

I used to be one of those women who made a point to talk about how little space I took up. I’d brag about taking the first middle seat I came to on a Southwest flight because, “I’m just a little girl!” On top of that, I made a point of keeping everything about my already small body as tiny as possible. Because, after all, being less is more when it comes to women’s bodies, right?

More like “Yeah right!”

Over the years, I eventually began to see that there was another way to go. And while, yes, I do walk around in a petite frame, I’ve come to see that what I do with it and how I carry myself can convey a whole different message.

When I first got into fitness, though, it was pretty much cardio only for me. I loved group cycling and endurance running. I enjoyed sweating all over the floor teaching a high-energy cycling class, and I loved running out to the middle of nowhere and melting into nature and myself.

At the time, I didn’t yet grasp that my participation in each of these sports tended to reinforce that same, constant message for me: that less is more. Endurance runners have to be rail-thin so they can be fast. Group cycling classes will claim to burn a gazillion or so calories. The rest, if not explicitly stated, is often implied in skewed marketing messages: stay little.

In time, I experimented and found my way to some weight training. But I started with methods I thought wouldn’t make me too big or bulky. And obviously, to burn more calories, because I still believed that less was more. Along the way, I began to see glimpses of a different way though. Who is this Jen Sinkler person, and what is this Lift Weights Faster stuff I see? Oh my goodness, Girls Gone Strong?

Strong? What a novel concept!

And women were using…what was that called again? A barbell? I was clueless and petrified to touch the thing for the first time, but I eventually gave myself a dose of my own tough love, sucked it up, and walked into the weight room one day. As it turned out, it wasn’t so bad, and I felt capable of being there! (I also realized not everyone knew what they were doing in there.)

And, so, I started with strong, and I believe in that wholeheartedly. I completely agree with Tony when he says that training for performance in lifting is a great place to start. I not only saw my strength come up substantially, but as Tony has also mentioned many times before, I began to see significant physical changes in my body shape and composition.

I was getting bigger. Bigger! Everywhere. And I liked it.

I liked it so much, in fact, that it became my primary goal. I’ll never forget writing my initial email to my first coach and my No. 1 goal as “Gain some size. As much hypertrophy as possible.” Oh, how different that was from the last 30 or so years of my life — that a woman should actively say to herself, I don’t want to shrink. I want to grow! I don’t want to lose weight. I want to gain! And then deliberately work toward getting bigger?

It took a little time to get behind fully, I’ll admit. Just like so many other women, I’ve been conditioned by the mainstream messaging to know nothing other than slender, slim, and thin-is-in. Not to mention, quiet, polite, and ladylike. Flipping the script on all of that doesn’t happen overnight. But changing my training focus to hypertrophy not only helped me to discover the most fun kind of training ever (seriously!), but it helped me to embrace my own body, more than I ever thought possible.

I used to hate my “linebacker shoulders” and big arms. Now? Are you kidding me? Let’s beef ’em up so I can bust out of my sleeves! I used to cringe at my outer thighs and cover them up with my hands so they’d look like the ones I saw in the magazines. Now? I cannot stop leg pressing because I want to see my muscles through my pants.

Letting go of less is more was freeing. It was empowering. It was a gift, an open door to start exploring what other mainstream misconceptions might be out there. I’ve always been one to go a bit against the grain and question the norm, and while it took me a little while longer to do it when it came to what I wanted for my body, when I got there? Everything changed.

Loving my big arms (and doing 10,000 biceps curls) enriched my life exponentially and boosted my confidence about everything through the stratosphere. Who would have thought that working deliberately to bulk up would have that effect? Oh, and it also happened to have the effect of creating a physique that I, personally, consider totally rockin’.

More muscles has meant more everything for me. More quality relationships, more fun, more business, more love. All of it — seriously — because I made a choice to defy that less is more rhetoric and train specifically to be bigger.

Because, sometimes? More is more.


Are You Ready for the Bigtime?

The Bigness Project is a brand-new hypertrophy-training program built to get you built. Written by Kourtney Thomas, a strength and conditioning coach who has spent the last few years focused on the small details that will get you big, this program—or “brogram,” as she refers to it in the most gender-neutral of ways—delivers on the promise of bigger arms and a bigger life.

Consisting of tried-and-true muscle-building techniques, The Bigness Project will guide you through 14 weeks of training that will support your overall strength, develop a stronger mind-muscle connection, and give you a look that leaves no doubt that you lift weights.

Designed for lifters of any experience level, The Bigness Project includes:

  •       A comprehensive User Manual that explains the philosophy behind the program and walks you step-by-step through every aspect of Bigness training and lifestyle.
  •       14-week hypertrophy training program.
  •       A complete exercise glossary including 95 written and photo demonstrations of every movement in the program.
  •       A video library containing 20 in-depth explanations of the most detailed movements and components of the program.

Now available—all aboard the gainz train! To celebrate the kickoff of the Bigness Project, the program is on sale now. Get your copy HERE and join us in the gym this week!

About Kourtney Thomas

Kourtney Thomas is a personal trainer and Certified Strength and Conditioning Specialist with a passion for empowerment and hypertrophy training for women, which she coaches virtually with Kourtney Thomas Fitness. When she’s not at the gym doing some variation of biceps curls, Kourtney loves to ride her Harley-Davidson Softail Deluxe anytime the weather is above 50 degrees, travel to national parks, stay up too late reading copious amounts of science fiction and fantasy, and bake elaborate cakes and cookies—because something has to fuel those gains. Drawing on the above, her personal motto is “Big Arms, Big Life,” and she lives by that daily.

Categoriescoaching Exercise Technique personal training Program Design

If You Want Bigger Arms: Squat

At the expense of sounding like an uber meathead, squats pretty much solve anything. You want to be stronger? Squat. You want more muscle? Squat. You want to lose fat? Squat. You want to beat Captain America in an arm-wrestling match? Squat.

Copyright: Kurhan / 123RF Stock Photo


About the only thing squats can’t do is help you grow hair, make you an omelet, and cure cancer4.

There’s a reason squats are a staple in most weight training routines, and today’s guest post by strength coach, George Kalantzis, breaks down the proper progressions most people should consider when starting for the first time.

Enjoy.

The Squatzzzz

“If you want bigger arms- squat. Squatting makes everything grow.”

Sergio Olivia, 3 time Mr. Olympia, on offering advice on how to get bigger.

Squatting has been around for centuries. It is one of the primary movements that Dan John says can impact your life, and also one of the best movements for mass strength and muscle development. Yet unfortunately squats are still one of the most neglected and butchered exercises in the gym.

But Why?

Squats are tough and working hard separates the strong from the weak. Squatting heavy stresses the entire body and it takes a lot of will power and strength to put something heavy on your back, drop down, and stand back up. Therefore most people neglect them altogether.

Then you have some people who claim squats are bad for your knees and stick to leg extensions and leg presses. While it is true that squats can place a lot of stress on the knees, it is typically the form and amount of volume that is the cause of knee pain.

In fact, from a exercise science point of view leg extensions can actually place more stress on the knees than squats because they are an open chained exercises. Open chained exercises like leg extensions cause the quadriceps to contract and pull on the knee ligaments and surrounding muscles without counteraction of the hamstrings. Squats actually recruit both the hamstrings and quadriceps.

Research (Escamilla, 98) supports that squats generate twice as much hamstring activity as leg presses and leg extensions. That same research suggests hamstring recruitment is advantageous to enhancing knee stability and functional capacity of the hips. Squatting does not sound that bad now does it?

Ok, I’m Ready Where Do I Start?

It is always important to start with an assessment to figure out where the you will stand in reference to squatting. Tony wrote an in depth post on that HERE.

Mobility Drills

After establishing a baseline, it is time to begin start preparing the body to squat. Starting with some light soft tissue work and warm-up drills will help prepare the body for full ranges of motion needed to squat and prime the nervous system.

Most people have a hard time reaching full depth in a squat and I have found that it is usually a lack of mobility in the areas of the hips and ankles often leads to compensations in the squat..

Core Engaged Deadbug

A deep squat requires proper pelvic position. If you arch your back to hard during a squat , your femur will have a hard time moving around in the hip socket. This is often the cause of the butt-wink.

A core engaged deadbug will help you learn how to keep the ribs down and control the pelvis which are needed for a good squat pattern.


Wall Hip Flexor Mobilization

This drill really teaches you how to keep your glutes tight, extend the hip and flex the knee at the same time to get a deep stretch in the quads. You should focus on getting the range of motion through your hips and not lower back.


Kneeling Glute Mobs

I love this mobilization drill because it really looses up the posterior chain and allows you to safely work on hip internal rotation without cranking on the knee.


Ankle Mobilizations Drill

An often-overlooked area of squatting tends to be the ankles. In order to squat to full depth the ankle needs around 4 inches of dorsiflexion. If the ankle is lacking the appropriate mobility, you may see yourself coming up n your toes, or not hitting appropriate depth.


Squat To Stand With Reach

By the time you have complete the other drills your body should be primed to squat. The squat to stand synchs the entire body and recruits all the muscles needed to perform a good squat. If you have a hard time getting into this position, you may no the ready to squat to full depth.


Assisted Squat

Assuming no pain or restrictions are present a great place to start is an assisted version of the squat. There are many ways you can do an assisted squat, but I like using a suspension trainer for assistance.

Holding a suspension trainer allows the trainee to work on static stability and groove a great pattern. Make sure the trainee maintains a neutral back position and uses as much assistance as needed in order to get to the bottom position.


Bodyweight Squat Versions

Once someone has mastered the assisted squat, it is time to move onto a bodyweight squat. Here you can really learn how to squat to full depth and drive up under control.

Sometimes people will have trouble with their heels coming up of the ground. If that is the case, you can create a little heel lift with plates or shoes to help the body recognize how to sit back onto the heels and reduce coming up off the floor.

Another common error for someone just learning to squat is a knee collapse. A great trick for that is to put a mini band around the knees. The bands feeds into the bad movement pattern by pulling their knees farther in and the body reacts by correcting the movement.


Goblet Squat

For most people, a goblet will be the basis of a squatting program. Legendary coach Dan John says that goblet squat is all a lot of people will need and there is a good reason behind that.

Grab a Kettlebell or dumbbell and hold it close to your chest. With your elbows pointing down, lower your body into a squat. Allow your elbows to be inside your knees and put pressure on the outside of your heels to help keep your knees out. Return to the starting position.


Many people are under the assumption that the Goblet Squat is just this plain ol’ vanilla squat variation that offer no variety. Au contraire! There are any number of ways to make it more challenging.

Goblet Squat Against Wall

Cannot seem to keep your back straight and knees from caving in? Try the goblet squat against the wall. Face a wall with your feet around 6-12 inches away from it and work to actively pull down into the squat.

Start further away and work closer to the wall, as you get more comfortable with the position.


Goblet Squat With Pause

Mastered the regular goblet squat? No problem, try a pause in the bottom of the squat. Pause reps will keep you honest, and really challenge your strength because you cannot rely on the momentum to pop back up from the bottom.


Goblet Squat With Heartbeat

This is one of my favorites to use with people, and it is one version that is not used that much. I first saw it from Mike Robertson when I was learning progressions for group training. It is great for people who have shoulder issues and really challenges the core.


Offset KB Squat

Holding a kettlebell on one side of the body will expose any asymmetries from side to side and really teach the body to own the position. Try to really focus on driving through the entire foot rather then shifting to the side of the kettlebell.


Double KB Front Squat

It only makes sense that once you have mastered the above it is time to load up. The double KB front squat is a great squat version because it really teaches you to sit down rather than back and down.

Essentially what you get is all abs and quads without demanding mobility requirements. It can be very humbling if you have never tried this before.


Front Squat

If you have become comfortable with the KB front squat and are ready for more of a challenge it is time to move on the barbell front squat.

Just like the KB, barbell front squats are all abs and quads. They are great because you have to really sit down into the squat rather than sit back or you’ll loose the bar. Due to the position of the bar your body must learn to stabilize the core instead of using back muscles to stand up. If you constantly get stuck hitting depth on a back squat this is a great exercise for you.


Back Squat

At this point, we have covered a lot of information on squatting. The back squat requires tremendous strength throughout the quads, hamstrings, glutes, hips, abs, and back. There is a reason why most people mess the exercise up or neglect it all together. If you have truly mastered the above exercises then it might be time to try a back squat out.

If you want to learn how to set-up, Tony wrote an awesome post HERE.

Conclusion

Squatting is a lot tougher then it seems. Consider hiring a coach for help on some of the barbell work, and if you are just starting out, goblet squat variations will surely get the job done. Try not to be a hero and start with something that is in between.

Quick things to consider before squatting:

  • If it hurts, you should hire a coach for an assessment and or see a qualified physical therapist.
  • Not everyone is made to squat to full depth or made to squat.
  • Squatting with a bar is not for everyone
  • When you first start out, you will not need that much weight, typically 45-55 % of your true max. Working on technique and conformability with the different squatting positions should be your first goal before trying more advanced versions.

References

1) Escamilla RF, Fleisig GS, Zheng N, Barrentine SW, Wilk KE, Andrews JR. Biomechanics of the knee during closed kinetic chain and open kinetic chain exercises. Med Sci Sports Exerc. 1998 Apr;30(4):556-69.

About the Author

George began his time at Cressey Sports Performance as an intern in the fall of 2013, and returned in 2014 as CSP’s Group Fitness Coordinator, overseeing all Strength Camp coaching and programming responsibilities.

George is a veteran of the United States Marine Corps and was awarded an honorary discharge after eight years of service. He possesses an MBA from Southern New Hampshire University and is currently attending massage school to become a licensed massage therapist.

Outside of CSP, George maintains a fitness-related blog that can be found at www.sgtkfitness.com.

He and his wife Shawna reside in Manchester, NH.

Categoriescoaching Exercise Technique personal training Program Design Strength Training

The Beginner’s Checklist for Deadlift Badassery

It’s the start of a new year and with it a proverbial reboot or rejuvenation towards one’s health and fitness. Well that, and a metric boat load5 of Facebook statuses of people complaining about all the “newbies” crowding the gym.

Copyright: langstrup / 123RF Stock Photo


I am not one to complain because 1) I don’t typically work out in a commercial gym 2) Nah nah nana naaaaah and 3) I think it’s a good thing when people decide to be more proactive, take an active role towards their health and well-being, and join a gym. I mean, really? Are you that inconvenienced? I can appreciate it’s slightly annoying when there’s a traffic jam at the power rack (made worse when people are using it to perform bicep curls) or that it’s more or less an obstacle course to walk around all the meandering patrons doing this thingamajiggy or that whateverthef***.

Relax. Deep breaths. It’ll all be over by the second week of February…;o)

Nevertheless, as pumped as I am that people take the initiative to begin an exercise regime, I’d be remiss not to cringe – just a little bit – at the overzealousness of some as they begin their fitness journey.

Last week was one of the rare weeks where I trained every day in a commercial gym (my wife was on vacation and I joined her at her gym) and while it was great to observe people getting after it, the coach in me couldn’t help but start to hyperventilate into a paper bag want to be a coach.

For example I saw a lot of people deadlifting. It was cool. I wanted to go over and high-five every single person. However, that would have been weird and possible justification for a restraining order I kept to myself, but past all of that was an insatiable desire to want to fix a lot of deadlifts.

I admired their intent, but I’d be lying if I said a small piece of my soul didn’t die watching a few people doing their thing.

You see, for a lot of beginners what I “think” ends up happening is that they watch a re-run of the CrossFit games on ESPN or watch videos like this:


…and are all like “that’s badass, I want to do that,” not recognizing that 1) a deadlift is much more than just bending over and lifting a barbell off the ground (regardless of whether it’s 1000+ lbs or 50 lbs) and 2) a straight bar deadlift (from the floor) is the most advanced variation of a deadlift there is. Not many people are ready or prepared enough on Day #1 to perform this safely and with proper technique.

So I figured I’d offer a sort of “check-list” for beginners to consider, and what I feel would be the appropriate progressions to follow to work up to a straight bar deadlift.

Note to Internet Hero Trainer Guy/Girl Who Will Inevitably Call Me Out On Why I Didn’t Address This Thing Or That: This is not a dissertation, it’s a blog post highlighting a few candid thoughts and processes. This is no where near an exhaustive breakdown of deadlift technique or programming.6

Checks and Balances

Everyone is different and there’s no ONE right way or variation or cue that applies across the board. People have different leverages, injury histories, and experience levels and it’s important to take all those things into heavy consideration when coaching anyone up on the deadlift.

I will say: I know what I DON’T want to see. This:

That’s pretty much THE golden rule.

Because it makes me do this:

There are any number of reasons someone’s deadlift may look like the above picture:

  • Lack of hip mobility to “access” the hip flexion required to get that low to floor.
  • Lack of t-spine mobility (specifically extension).
  • Lack of ankle dorsiflexion.
  • Lack of kinesthetic awareness.
  • The novelty of the exercise.
  • They were born on a Wednesday. I don’t know.

Obviously step #1 would be to address and musculoskeletal/mobility restrictions that may be present.

Lack of Hip Mobility

Wall Hip Flexor Mobilization


Dynamic Pigeon to Half Kneeling


Shin Box


Lack of T-Spine Mobility

Side Lying Windmill


T-Spine Extension (Done Right)


Lack of Ankle (and Big Toe) Dorsiflexion

This is a component that’s often overlooked. If someone can’t access dorsiflexion it’s going to compromise their ability to get into deep(er) hip flexion to get down to grab the barbell.

Active Ankle Dorsiflexion


Metatarsal Active Squat Drill


Lack of Kinesthetic Awareness

Oftentimes it’s lack of awareness of what the body/joints are doing in space that’s the limiting factor. I like to use the Cat-Camel drill to build context and to demonstrate what I don’t want to see (rounded back) and what I do want to see (neutral spine)


Addressing Novelty (<— This is HUGE)

Here we have the nuts and bolts. Much of time, even though the stuff discussed above is very important, it comes down to the novelty or “newness” of the exercise as to why some people fail. To be blunt, and as alluded to earlier, much of the reason why many fail at deadlifting from the get go (and end up hurt and using the lame excuse that deadlifts are dangerous for everyone) is because they’re too aggressive and end up gravitating towards variations (and loads) they’re not ready for.

They either don’t understand what it actually means to hinge through the hips (which is all a deadlift really is: it doesn’t always have to mean pulling a heavy barbell off the ground) and/or they fail to progress accordingly based off their experience and leverages.

Learning what it means to dissociate hip movement from lumbar movement step #1 in grooving a bonafide hip hinge. One of the most popular drills to do so is the Wall Hip Hinge. Unfortunately, as harmless and innocuous as it looks it’s easily butchered. Here’s how I like to coach it up:


Another drill I like is the Tall Kneeling Handcuff Hip Hinge. Here we can take some joints of the equation and place a KB behind the back, which, for some reason, works. I think Gandalf made it up.


If you’re’ interested in learning some more hip hinge drills you can check out in THIS article I wrote a few months ago.

Assuming I’m comfortable with someone’s hip hinge now it’s time to start adding some load.

Remember: You DO NOT have to use a straight bar, and I’d caution against it for more beginners. The only people who have to use a straight bar are competitive powerlifters and Olympic lifters. Generally the people who say otherwise are those who don’t coach people. So if some Joe Schmo internet warrior tells you otherwise tell him to f off.

While there are always exceptions to the rules my progression series is as follows:

1. Master Hip Hinge Drills.

2. Cable or Band Pull-Through.


3. Kettlebell Deadlift: Elevated if need be. And from there we can progress to pulling from the floor as well as ramping things up to 1-Arm KB Deadlift (which adds an additional rotary component), 2-KB Deadlift, and even Hover Deadlifts:


4. Trap Bar Deadlift: The trap bar (or hex bar) deadlift is an excellent choice for beginners or those with limited experience because of its user friendliness. This is often my “go to” variation for everyone I begin working with.

https://www.youtube.com/watch?v=p-sA3PG1kGY


  • For starters one’s center of gravity is inside the bar, which makes it easier to maintain an upright torso angle and a better neutral spinal position. All of which translates to less shear loading on the spine.
  • The elevated handles make it easier for those with mobility issues/restrictions – such as limited hip flexion and/or ankle dorsiflexion – to perform in a safe and successful manner.

5. Rack Pulls or Block Pulls: Here we can start adding anterior load. With the barbell now in front of the body the axis of rotation is further away which can result in more stress on the lower back. This is fine so long as neutral spine is maintained.

I’d note here that I much prefer Block Pulls. I find they have more carryover to the actual deadlift as you’re still able to get slack out of the bar (which you’re unable to do with a rack pull). Both are great options, though, when introducing straight bar variations.

Is your spine still attached? Can you still feel your legs? Good. Lets move on.

6. Sumo Deadlift/Conventional Deadlift: Look at you, son! Pulling from the floor now. Whatever variation allows for the most success, feels better, and guarantees proper spinal position is the one I’ll run with.

Sometimes people picked the wrong parents and their anatomy dictates what will be the best fit long-term. Generally speaking those with mobility restrictions, longer torsos, and short(er) arms will prefer sumo style over conventional. I prefer a middle-ground approach for many and often use a Modified Sumo Stance with my clients/athletes:

https://www.youtube.com/watch?v=q6Xjb72gGTE


None of this speaks to the other particulars I like to go over with trainees with regards to foot placement, hand placement, leg drive, common mistakes with lockout and the descent, not to mention appreciating, getting, and maintaining body tension. You can do a search on the site and find an abyss of other deadlift articles that go over all those things.

The goal today was to showcase my (general) approach to deadlifting with beginners. I hope it helped.

Addendum (Other Stuff I Wanted to Say)

1. Consider hiring a competent coach to show you the ropes. A good litmus test to figure out whether or not they know what they’re talking about:

  • Ask them if they know who Andy Bolton is.
  • Have him or her point to their posterior chain. If they point to their abs. Walk away.
  • They can differentiate between a deadlift and a squat.
  • They actually look like they lift weights.

2. Stop BOUNCING your repetitions. It’s a DEADlift, not a BOUNCElift. On each rep, when you return to the floor, you should come to a complete stop. “Reset” your air and spinal position, and repeat.

3. I HATE high-rep deadlifts, especially for beginners. Fatigue is going to compromise form. Try to stick to no more than 5-reps per set.

4. Home base – in terms of loading – should be in the 65-80% range of 1-rep max. Not that this means you should test your 1RM right away. The thing to consider is that you don’t NEED to train heavy to start. Beginners or un-trained individuals can train with as low as 40% of 1RM (Hint: that’s super light) and still reap all the benefits and gain a training effect. Honing technique should be the main goal at this point.

5. Anyone see La-La Land yet?

Categoriescoaching Conditioning Program Design

The Bloop, Bloop, Bloop Workout

Anyone who grew up in the 80s and 90s is likely very familiar with the video game Super Mario Bros. I had my introduction to the game the morning of December 25, 1987 after spending half an hour going mental once I realized Santa had dropped off a Nintendo Entertainment System underneath our Christmas tree.

Copyright: nicescene / 123RF Stock Photo


Back in those days each system came with a few “complimentary” games: Super Mario Bros and Duck Hunt. The latter of which was included if you also had the system that came with the Zapper Gun.

Mine did.7

Anyways, Super Mario Bros has since had, I don’t know, 47 different iterations and has become a recognizable icon in our cultural fabric. As it happens my wife and I have a funny thing we do that’s a subtle reference to the game whenever we’re around each other and need a little “pick-me-up.” As an example she may hit up her Nespresso machine for a quick caffeine fix and I may inject an energy drink directly into my left ventricle.

What follows is often a sarcastic “bloop, bloop, BLOOP” sound that one of the two of us will make. You know, the same sound little Mario makes when he comes in contact with a Super Mushroom and becomes Super Mario.

https://www.youtube.com/watch?v=G4_nBSQ68A8


HAHAHAHAHAHAHA.8

Really, though, anything that provides a bit of a boost or “power up” can be substituted here. A large glass of water, a power nap, a zombie Apocalypse, anything.

Even your workout.

Your workouts don’t always have to be a grind or always make you collapse in a pool of your own sweat. There’s a time and place for that of course. Like I always say, lifting weights or training isn’t supposed to tickle. However I find far too many people fall into the trap where they’re more concerned with constantly killing themselves in the gym – be it because they feel that’s the only way to make progress, or worse, to win some sort of popularity contest on social media – rather than make a concerted effort to get better, see results, and/or work towards a legitimate goal.

Training with purpose or with a goal in mind is never a bad approach. That being said, every training session doesn’t have to be life or death. I think it was Paul Carter who came up with the idea of 80% workouts.

  • 10% of the time you will feel like garbage. These workouts are the worst. It happens. It’s likely you’ll need a change of plan.
  • 10% of the time you will feel amazing. You walk into the gym and feel like you could beat Jason Bourne in a fist fight.
  • 80% of the time you’re just, you know, there. Nothing spectacular.

It’s those 80% “meh” workouts that matter most. You get in, do the work, don’t miss any reps, and move on with your life. Instagram doesn’t even have to know about it. It’s unsexy and boring, but it’s that consistent attack on being consistent that we should all strive for.

I don’t want to leave you hanging. What do you do when you walk into the gym, have an epic session planned, but one of those 10% days happen where you feel like a bag of dicks? On one hand you could just reverse trek, hop back into your Camaro, go home and crush a steak. On the other, you could still workout…but in a way that will enhance recovery and help you feel like a million bucks.

The Bloop, Bloop, Bloop Workout

The following are some Super Mushroom options to help turn you turn Little Mario into Big Mario.

Option 1: Glutes/Core/Bodyweight

I see Bret Contreras use the option often and it makes a lot of sense. Your glutes and core musculature tend to be harder to fatigue and can generally handle a little more volume without it affecting your subsequent training sessions.

Plus most people could use some additional work in those areas anyways.

Here’s a favorite circuit I like to use myself (and with my clients):

A1. Band Resisted Hip Thrust x 15 or Frog Pumps x Infinity (<— 25-50+ reps)

A2. TRX Row x 10-15

A3. Bodyweight Squats x 15-20

A4. Yoga Push-Up Complex x 5/side


A5. Birrdogs w/ Band RNT – x10/side


A6. Half Kneeling Hip Hinge Matrix – x3-5/each/side


The idea is to perform in circuit fashion with 60s rest at the end. I like to shoot for a total of five rounds. Total work time = roughly 10-15 minutes.

Option 2: I’m an Athlete Tony, Treat Me Like One Dammit!

Alternatively we can implement what’s referred to as a Neural Charge Workout.

What’s a neural charge you ask?  It’s simply a way to train the CNS in an efficient and non-ball busting way (<=== how’s that for science?).

Implementing more of this type of training is a great way to not only help with recovery, but also to improve inter and intramuscular coordination, increase recruitment of high-threshold motor units, increase rate coding, and lets be honest: it’s just plain fun.

As well, I’d even argue it’s a great way to decrease joint stress (as your utilizing (mostly) concentric based movements), not to mention there’s an obvious metabolic component as well. And it gets people more athletic.

Nevertheless the basic premise is this: Pick 5-6 exercises or drills and perform them as explosively as possible in circuit fashion. I should also note that it’s important to allow full recovery between each exercise. So when I say circuit fashion it’s not like you’re going to rush through it. And you’re not going to perform many total reps. I’d say 3-5 max.

A1. Band Resisted Broad Jumps – x3-5


A2. Med Ball Floor Stomps – x3-5


A3. Sprinter Step-Up – x3-5/leg


A4. Explosive Push-Up to Box – x3-5


Height of the boxes (or steppers) will vary here depending on ability.

A5. HAS (Heavy As Shit) KB Swing – x3-5 (you know, heavy)


This is where I may swing the beast around like a boss.

What’s listed above are just options. You can substitute anything you’d like in their place: box jumps, Heidens, 10 yd starts, pressing variations vs. chains, or whatever.

The important thing to consider is alternating between upper and lower body exercises, and if you’re going to include things like med ball work, core specific work, OLY lift variations, sled work, and the like, you need to put some thought into the order.

From there, as noted above, you’re gong to cycle through the exercises (making sure to recover between each) for a specific number of rounds or for a specific amount of time. Six rounds takes me around 12-15 minutes which is just about right in my book.

Remember: the idea here isn’t to hate life and train until you shit a liver. If anything after this type of session you should feel refreshed and ready to take on the world. This is what I mean by Bloop, Bloop, Bloop. You should feel energized and good after this session.

There’s a bit of autonomy and personal preference with regards to exercise selection, but I’d caution against going overboard. Stick to “easy” stuff for no more than 3-5 repetitions. Try to shoot for no more than 15 minutes of work and GO HOME.

Seriously, go home.

CategoriesAssessment coaching Exercise Technique Program Design Strength Training

Deadlift Deep Dive: The Deficit Deadlift

First things first: Lets address the obvious. If there were a contest for best blog title of 11/22/16 featuring a kick-ass alliteration starring the letter “D,” I’d totally win it today.

I got the idea the other day after listening to a popular segment on EW Radio called Diva Deep Dive.9

It’s a killer idea and I am woefully unoriginal, so I took it upon myself to steal it and replace the word “Diva” with “Deadlift.” Because deadlift.

Copyright: spotpoint74 / 123RF Stock Photo


The Deficit Deadlift

The deficit deadlift is a variation where the trainee stands on an elevated surface – a plate or some form of platform such as an aerobic stepper or stacked rubber mats – and tries not to shit their spleen lifts a barbell off the ground.

Photo Courtesy of BodyBuilding.com

It’s viewed as more of an accessory movement to the deadlift and is often utilized to address issues with the initial pull off the ground. The idea being the increased ROM (Range of Motion) will make the lift harder and help those who are “slow” off the ground.

Some coaches love it and feel it’s a valuable asset to anyone’s training repertoire, while others hate it and view any of the following…

  • Jumping into a live volcano.
  • Swallowing a cyanide pill.
  • Juggling chainsaws.
  • Watching an episode of Downton Abbey.

…as a more valuable use of one’s time.

As with most debates in the health/fitness world the answer always lies somewhere in the middle. So lets break things down shall we?

Origins

I’m pretty sure this particular variation was invented by Ernest Hemingway, but I could be making that up.10 Unlike, say, the Jefferson Deadlift (named after old-time strongman Charles Jefferson) or the Romanian Deadlift (invented by someone from Romania?), no one really knows where the deficit deadlift came from. Besides, who cares, right? The name itself implies what it is.

Unless, and this will blow my effing mind if this is the case, the deficit deadlift IS actually named after someone with the last name Deficit. Man, how ironic would that be?

Addressing the Elephant in the Room

Most of the naysayers of the deficit deadlift will usually chime in with something like “it’s dangerous.” To which I counter…..

via GIPHY

There’s no better way for me to chime in on this matter than with this quote from strength coach Andrew Sacks taken from an article he wrote titled Defending the Deficit Deadlift:

“The main argument for dropping the deficit deadlift is that it’s dangerous, and by setting the bar at a height slightly below a traditional deadlift we’re turning a strength-training staple into a lower-back horror movie.

Consider that when we deadlift, the height of the bar is totally arbitrary. Nobody hired scientists to figure out the “ideal” diameter for 45-pound plates. Everybody just agreed that they all should be roughly 17.5 to 18 inches.

So if the diameter of the plates – and therefore the height of the bar – is arbitrary, does it matter where we pull from as long as we maintain form? The short answer is no.”

To that end, I don’t agree that the deficit deadlift is dangerous or that it should be contraindicated altogether. I do agree, however, there are contraindicated lifters, and that a lot of people – due to poor movement quality, anatomical factors, skill level, past or current injury history, and yes, their own stubborn stupidity – are unable to perform this variation with appropriate technique and therefore should avoid it.

^^^ That Stuff I Just Mentioned, Lets Talk About Em

Movement Quality: It’s a rare event when someone walks in on Day #1 and can perform a deficit deadlift flawlessly. I’d argue it’s rare someone can walk in on Day #1 and perform a conventional deadlift flawlessly. It’s human nature to think we’re all better than the average cat. Everyone thinks they’re a better driver than everyone else. It’s likely you’re just as horrendous at parallel parking as the next person.

This sentiment spills over into fitness too. Many people think they’re more advanced than they really are and like to skip over the seemingly “easy” stuff (Kettlebell Deadlift) and catapult themselves into expert level territory (Deficit Deadlift)…despite having the movement quality of a pregnant turtle.

By today’s standards, many people don’t move well and lack the mobility requirements to perform a standard deadlift, let alone one performed from a deficit. Getting down to the barbell requires a fair amount of hip flexion. And if someone lacks it (which is often), the end result is a compromised spinal position into lumbar flexion.

This is where good coaching comes into play. I’d caution people to jump to conclusions too quickly. It is possible to take someone in the picture above and cue them into a better position. However, taking that out of the equation, if it’s already a challenge for someone to bend over towards the bar and not look like their spine is going to break in half, why add more ROM?

Anatomical Factors: pigging back off the above, we can’t dismiss the idea that everyone is different. There are variations in torso lengths, femur lengths, arm lengths, not to mention bony structure considerations in the hip itself (hip width, acetabulum retroversion/anteversion, how the femoral head sits within the acetabulum (retroversion/anteversion), variations in femoral neck lengths, etc) that make the deficit deadlift a good fit for some people, and not so much for many, many others.

Respecting individual differences is key to long-term success and it’s something you can read more about HERE.

Some people simply won’t have access to the requisite hip flexion necessary to, you know, get into aggressive hip flexion. Unfortunately, none of us are Superman and have X-ray vision…but we can perform a simple Rock-back Screen to ascertain one’s available ROM.

Kneeling Rockback – WIN


Notice I am able to maintain a good spinal position throughout the full-ROM (there’s no “falling” into spinal flexion).

Kneeling Rockback – FAIL


Now we’re in trouble. For someone like this – where losing spinal position happens quickly – it’s likely that going into anything that requires deep(er) hip flexion will be a bad idea.

Again, this doesn’t mean we always have be a Johnny Raincloud. It may be a matter of cueing someone to adopt a better bracing strategy in order to maintain position. If they can do so passively (on the floor) and can then emulate the same ownership actively (standing)…then we know they can access the ROM, we just have to be really diligent with technique and progressing appropriately.

  • If they can access passively but not actively, it’s likely a motor control issue or the exercise itself is too much of a novelty.
  • If they can’t access it passively, nor can they perform it well actively…we’re likely looking at a structural issue and we need to be more judicious with exercise recommendations.

To the last point, again, adding in more ROM (deficit deadlift) won’t be a good idea.

Skill Level: Call me crazy, but the Deficit Deadlift is an advanced variation.

https://www.youtube.com/watch?v=-2kL-7IpYz0


I’d have to be very comfortable with someone’s skill-set and ability before I dumped it into their program. And while it can be viewed as a bit generalist, my “flow” of deadlift progressions are as follows.

Meaning, when starting with a new trainee, here’s how I progress them:

1) Understand that the deadlift = hip hinge. Deadlift doesn’t mean “heavy” or that it has to be loaded at all times or that it has to be done with a barbell.

To that end, we’re going to master the hip hinge.

2) Kettlebell Deadlift (and all it’s variations: Hover Deadlift, 2 KB Deadlift, 1-Arm KB Deadlift, Suitcase Deadlift).


3) Trap Bar Deadlift – first with high-setting, then with low setting. Center of Mass is INSIDE the barbell which makes this a much more lower back and user friendly variations

4) Rack Pulls or Block Pulls

5) Sumo or Modified Sumo Deadlift. 


6) Conventional Deadlift

7) Deadlift Whateverthefuck – Deficit Deadlift, Snatch-Grip Deadlift, etc.

Benefits of the Deficit Deadlift

Assuming this variation is “safe,” or a viable options what are the benefits?

1) I’ll concede that the increased ROM has merit, but it’s overplayed. More time under tension is rarely a bad thing, and considering many are weak in their posterior chain, the deficit deadlift is a good fit here.

BUILD THAT BOOTY!

2) I guess it can be argued that the deficit deadlift helps with the initial pull (with regards to the increased ROM). The idea being: make the lift harder and when one reverts back to “normal” ROM things will feel easier.

I’m not opposed to this train of thought. I get it. But to me, if I’m writing a program I want all accessory lifts to address a technique flaw or weakness in one of the big 3 (squat, deadlift, bench press). Making something harder for the sake of making harder won’t necessarily address anything.

Which leads to #3.

3) Being slow or weak off the floor with the deadlift is a thing. However, I find when this is indeed the culprit, utilizing the deficit deadlift here isn’t necessarily all about increasing the ROM as it is about better quadricep recruitment.

We’ve become so posterior chain-centric in the past decade or so that I find a lot of trainees have neglected their quads. And the quads DO play a role in the deadlift; especially with the initial pull (putting force into the ground). This, to me, is the main benefit.

Yes, smarty pants, squatting will help build the quadriceps. But the rule of specificity still reigns supreme. If I want someone to get better at deadlifitng, I’d rather they deadlift (and tweak it accordingly).

Some Closing Thoughts

  • As far as how much of a deficit to use: this can be individual, but I find 1-3 inches is more than enough for most trainees. So long as spinal position is maintained.
  • I’ll use sub-maximal weight on these (60-75%) for 4-8 reps.
  • Deficit deadlifts are aggressive – even for advanced lifters – so I’d caution anyone to use them for more than a few weeks or one training cycle (a month?)
  • If know someone with the last name Deficit, please tell me.
CategoriesAssessment coaching Corrective Exercise Exercise Technique Program Design

A Peek Inside Complete Shoulder and Hip Blueprint

WHEW – talk about a whirlwind day yesterday. I spent the bulk of it glued to my laptop11 making sure things ran smoothly with the launch, answering questions and emails, and trying to stay on top of social media engagement.

1) THANK YOU to everyone who has gone of their way to mention and/or plug Complete Shoulder and Hip Blueprint. Your support means a lot.

2) To those who may be on the fence, how about a sneak peek?

Copyright: eenevski / 123RF Stock Photo


This sucker contains 11+ hours of content covering everything from upper and lower extremity assessment, corrective exercise strategies, numerous hands-on breakouts, as well as program design and exercise technique troubleshooting (with maybe, 37 seconds worth of Star Wars references).

Here are two sneak peak segment from both Dean and I.

The One Where Tony Discusses Scapular Motion


The One Where Dean Talks Hip Integration (and makes a bunch of fitness pros groan)


And there is tooooooons more where that came from.

If you’re a fitness professional I can almost guarantee you’ll pick up something valuable (hopefully several) that will help your clients or athletes. And even if you’re not a fitness pro, and just like listening to two dudes talk shop about training or you’re just looking to pick up some cool new exercise variations to keep your shoulders and hips healthy this resource would be a home run.

cshb-screen

Complete Shoulder and Hip Blueprint is on SALE all this week (until midnight on Saturday, November 5th) at $60 off the regular price.