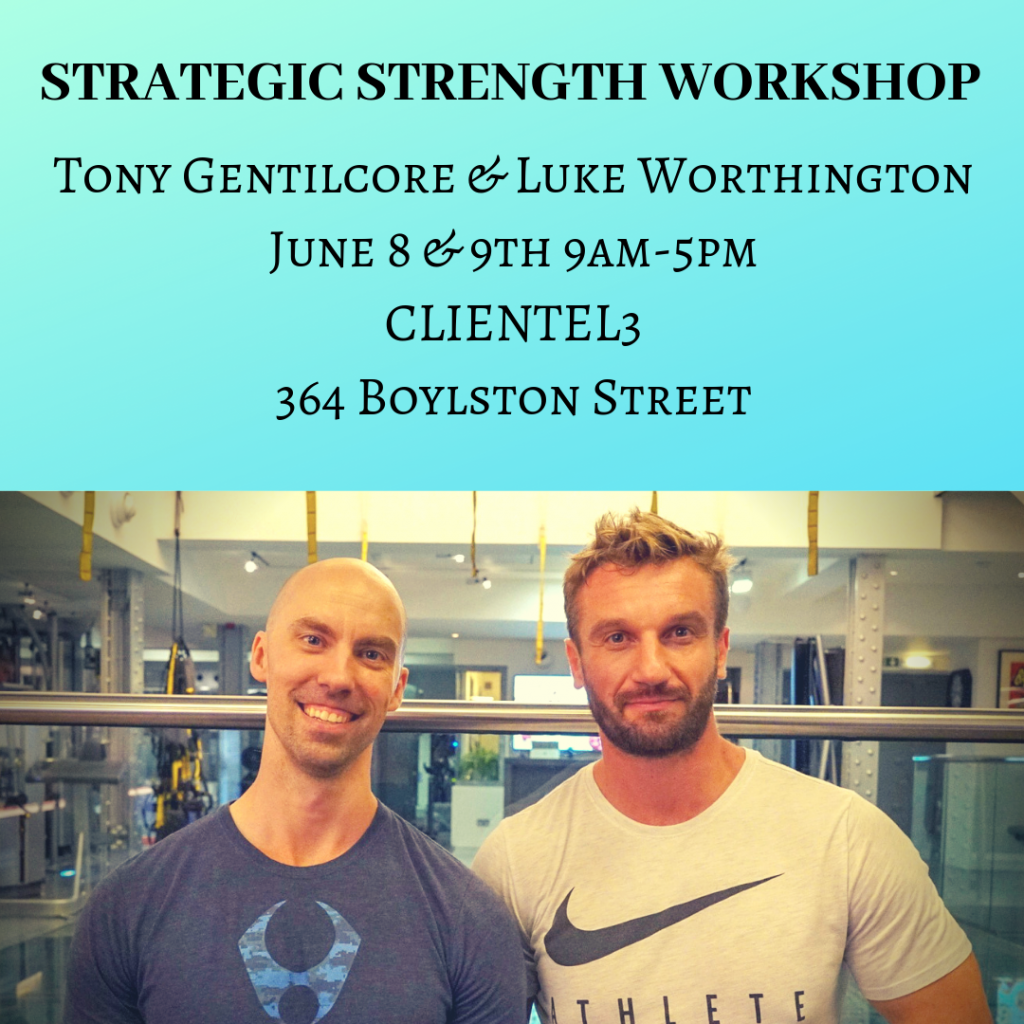
Melbourne, Australia: July 19-21st and Melbourne Strength & Conditioning. (<— Includes bonus “Psych Skills for Fitness Pros” pre-workshop with Dr. Lisa Lewis).
Luke (Worthington) and I did this workshop last summer in London and figured it’s only fair to bring it State side.
Combined we have 30+ years of coaching experience (I.e., one Mike Boyle or Dan John) and this workshop will be two days where we uncover every nook and cranny as it relates to how we assess our clients/athletes and how we best prepare them for the rigors of every day life/sport.
Upper/Lower Extremity Assessment
Technique Audits (how to coach common strength training exercises)
Ways to integrate PRI (Postural Restoration Institute) strategies that don’t make your brain hurt.
This will be a unique opportunity for people to learn from myself, but especially Luke, who is one of the best and brightest coaches I know. This will be his first time teaching in the States.
For more information and to register you can go HERE.
This will be the only time Dr. Lisa Lewis and I will be presenting this workshop together in 2019. In previous years we’ve presented it in Boston, London, Toronto, Bonn (Germany), and Austin, TX.
This 1-day workshop is targeted towards fitness professionals and digs a little deeper into what really “bogs” them down and stresses them out….
…their clients!
Click THIS link for more details on topics covered as well as date/cost/location.
SOCIAL MEDIA SHENANIGANS
Twitter
This may come across a bit sacrilegious, but I’m going to say it anyway.
More often than not, when working with general population clients, there’s limited need to follow an advanced periodized program.
Structure? Yes.
But that’s going to be day to day rather than months ahead
Today’s guest post comes courtesy of TG.com regular, Travis Hansen.
It mirrors a sentiment I’ve been championing for a few years now: That we don’t have to start hyperventilating into a paper bag the second we notice asymmetry in our clients/athletes.
It behooves us to maybe lean into it a bit more.
Not always, of course. But certainly more often than we think.
I’m sure there are many who read this article title and immediately wanted to grab their pitchfork.
Hear me out.
There are many times when you actually need to embrace the notion that our body’s natural anatomical design consists of several structural asymmetries perfectly balanced to allow us to perform at a higher level.
Cue dramatic chipmunk here.
https://www.youtube.com/watch?v=a1Y73sPHKxw
Moreover, there are even times when you can implement an imbalanced approach both through a direct exercise, but also through how much volume you incorporate, to help neutralize a dysfunction that currently exists.
And lastly, even in the presence of elastic/power, strength, and even limb length disadvantages, the body routinely seeks a way to remain healthy and perform at a higher level.
Note From TG:If you’re interested, HERE‘s my take on why leaning into asymmetry is likely the right branch to bark up.
Lets take a look at the first element of asymmetry that exists in the human body beginning at the foot.
I don’t think anyone would argue at this point that the various plantar flexors of the foot responsible primarily for propulsion in human movement vastly out-weight and out-perform the smaller and less powerful dorsiflexors of the foot.
Why would this be the case though?
If one group, which primarily lies on the backside of the lower leg, dominates the front side of the foot, wouldn’t there be tearing that would occur on the front eventually regardless of how much of an attempt to balance the leg is achieved?
The shin muscles do indeed tear from (mainly) eccentric overload and weakness but this can be solved.
Regardless, a balance exists at the lower leg just like many other areas, and there is just enough size and strength present in the leg in healthy individuals to allow this imbalance to occur without any problems.
Another example, can be seen at the shoulder.
Consider that your Latissimus Dorsi, teres major, biceps, anterior deltoid, and pecs all have the capacity to drive the shoulder into horizontal adduction and accelerate the arm explosively, while everything on the backside, which isn’t much, is stuck with the job of having to slow this arm action done.
Of course, the posterior muscles will fail to match the strength output of the powerful anterior shoulder group.
However, we’re designed pretty miraculously.
Our shoulder, specifically the posterior cuff, can slow “things” down just enough to bridge the large gap between front and backside and allow us to remain healthy and continue to increase throwing velocity without much issue.
Note From TG: Another way to think of it is that if the body WAS designed symmetrically or if we went out of our way to seek it, that would likely inhibit an athlete’s ability to throw a baseball in the first place. As a thrower throws, particularly at a young age, there’s a bony adaptation that occurs (retroversion) which then allows for an aggressive layback position to throw a baseball faster and faster.
If we tried to “fix” that or if the body was designed to be “equal” we’d have a lot of 72 MPH fastballs out there.
Of course, this isn’t to say there aren’t certain training modalities and manual therapy approaches we can implement to help “offset” this imbalance; there are many.
That being said, from an athletic development standpoint, the late Charles Poliquin even pointed out that elite sprinters carried a much more powerful posterior chain than anterior chain in attempts to sprint faster.
Charles declared a 100% ratio, but whether or not that figure is valid remains unseen.
To support his statement and raw figures aside, the body cannot run faster after initial phases of sprinting since vertical forces stagnate and any further increase in running speed stems from increased hamstring, glute, and horizontal force production.
The Second Layer of Asymmetry
The next example where we can begin to appreciate imbalances deals with a particular approach to program design in those people with “severe” asymmetries.
Take an anterior pelvic tilt for example.
If this message hasn’t been driven into your brain enough already, it’s worth repeating one more time since its still so prevalent:
…and that is utilizing a pre-dominant training ratio hip to quad exercises.
There is naturally a slight lordosis and anterior pelvic tilt that does and should exist in athletic and power-based postures, but excessive imbalance is what becomes problematic. The same scenario can be seen at the shoulder like was previously mentioned, anterior versus posterior core, and in other planes of motion as well.
Along these same lines, you will see training tactics such as RNT, PAILs, and RAILs all seeking to address imbalances by subtly or substantially inducing imbalances.
Alwyn Cosgrove first coined the idea of creating an imbalance to cure an existing one.
For example, if you present with a common lateral weight shift during a squat you can actually add increased poundage towards the side of the shift or set up a resistance band to pull you in that same direction to built an instinctive reflex to get you back towards center.
More importantly, it will create a tactile awareness of the issue that you will have memory of in the future in case that same issue decides to manifest again and you will know precisely how to correct it.
Third Layer of Asymmetry
Lastly, is the issue of seeking to reduce or even eliminate according to some, the effect of having one limb stronger or more powerful than the other.
In the most extreme cases, you can witness the damaging effects of strength discrepancies with common orthopedic evaluations such as the 90 degree isometric lateral raise test.
It’s been stated that if there is a strength imbalance or pain response that results in one arm being over +50 percent stronger than the weaker arm that could be indicative of a full thickness tear to the supraspinatus muscle.
So yes, there does need to be at least some balance or an attempt to balance out joints for an athletic performance standpoint to prevent scenario’s such as this one.
But is it fair to ever think that we could actually fully restore joint strength so that we are equally strong everywhere?
No.
1) For the reasons that were mentioned earlier based on our anatomical design, and 2) you just won’t see it happen.
If you truly test single leg strength with optimal testing selections such as pistol/single leg squats, or Bulgarian drills for strength capacity, or advanced bounding plyometric variations for power, you will witness differences in volume, endurance, and intensity more times than not.
A handful of my coaching colleagues have been posting rad videos recently of their young athletes doing rad things.
On a final note, consider that Usain Bolt has one leg that is inches longer than the other but contributes to key characteristics of sprinting speed, and this notion of imbalance is further perpetuated.
Maybe it’s time we start to look at imbalance differently when necessary and start embracing the notion rather than trying to erroneously fight it, and see what happens.
About the Author
Travis Hansen has been involved in the field of Human Performance Enhancement for nearly a decade. He graduated with a Bachelor’s degree in Fitness and Wellness, and holds 3 different training certifications from the ISSA, NASM, and NCSF.
He was the Head Strength and Conditioning Coach for the Reno Bighorns of the NBADL for their 2010 season, and he is currently the Director of The Reno Speed School inside the South Reno Athletic Club.
He has worked with hundreds of athletes from almost all sports, ranging from the youth to professional ranks. He is the author of the hot selling “Speed Encyclopedia,” and he is also the leading authority on speed development for the International Sports Sciences Association.
Who Did I Steal It From? – Virginia based strength coach Vernon Griffith. If you’re not following him on Instagram you should be. There aren’t many coaches putting out better content than he at the moment.
What Does It Do? – Well, lets take a look at it in action first, shall we?
See what I mean about coming up with a suitable name now?
Anyway, what I like most about this variation is that I can lean into the plate/bar which provides just a smidge of balance, but still allows me to focus on one leg at a time.
As it happens, when I saw Vernon first demonstrate this exercise he ended up lowering the moving leg to his knee (a gentle tap to the floor) whereas I chose to lower so that my foot contacted the ground.
Both are viable options. However, I’d encourage people to start with my option and progress to Vernon’s.
What I also like about this drill is that because I am leaning INTO the plate/bar I get more (closed chain) hip abduction on the standing side.
End Result?: GLUTE O’CLOCK.
Key Coaching Cues: I caution anyone from using an aggressive weight here. I was only using a 25 lb plate in this video and a part of my soul died it was challenging. I prefer a Zercher (in the crooks of your elbows) hold for this drill, but you could also utilize a supinated or underhand grip too.
From there it’s a fairly intuitive exercise. As noted above the lean helps to provide a bit of balance and because the barbell is situated somewhat in a fixed path, you’ll have all the “guidance” you’ll need to make it pretty smooth.
GO SLOW.
The real benefit here is learning control and to recognize how to move through your hips and not to compensate via the lower back.
Aim for 8-10 repetitions/leg.
You’ll feel things firing you’ve never felt before.
Glutes, deep hip stabilizers, core, your eyeballs, everything.
Whoa – who was the a-hole this week and barely wrote anything for the site?
And by “anything” I mean “zero, zilch, nada.”
My bad.
But it was for good reason. I travelled to Colorado Springs this week to film some stuff with the National Strength & Conditioning Association (NSCA) for their upcoming 2019 (Virtual) Personal Trainers Conference, as well as made a cameo appearance at T-Nation headquarters.
Man, between those two establishments AND the National Olympic Training Facility AND The Air Force Academy, Colorado Springs is one buff and beautiful city.2
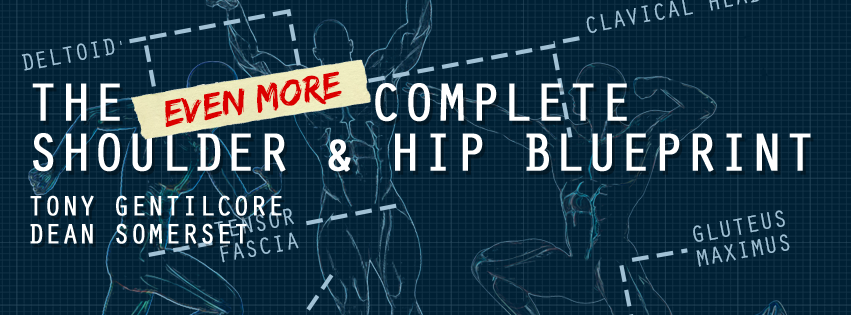
Also, as it happens, I’m off to Edmonton (<– that’s in Canada by the way) tomorrow to go film the (Even More) Complete Shoulder & Hip Blueprint with Dean Somerset this weekend.
So, yeah, it was a busy week. SO GET OFF MY BACK YOU BIG JERK
Melbourne, Australia: July 19-21st and Melbourne Strength & Conditioning. (<— Includes bonus “Psych Skills for Fitness Pros” pre-workshop with Dr. Lisa Lewis).
Luke (Worthington) and I did this workshop last summer in London and figured it’s only fair to bring it State side.
Combined we have 30+ years of coaching experience (I.e., one Mike Boyle or Dan John) and this workshop will be two days where we uncover every nook and cranny as it relates to how we assess our clients/athletes and how we best prepare them for the rigors of every day life/sport.
Upper/Lower Extremity Assessment
Technique Audits (how to coach common strength training exercises)
Ways to integrate PRI (Postural Restoration Institute) strategies that don’t make your brain hurt.
This will be a unique opportunity for people to learn from myself, but especially Luke, who is one of the best and brightest coaches I know. This will be his first time teaching in the States.
For more information and to register you can go HERE.
This will be the only time Dr. Lisa Lewis and I will be presenting this workshop together in 2019. In previous years we’ve presented it in Boston, London, Toronto, Bonn (Germany), and Austin, TX.
This 1-day workshop is targeted towards fitness professionals and digs a little deeper into what really “bogs” them down and stresses them out….
…their clients!
Click THIS link for more details on topics covered as well as date/cost/location.
SOCIAL MEDIA SHENANIGANS
Twitter
I still find one of the hardest things for me as a coach is to remember to keep things simple.
I get in my own way overthinking things. The best programs I write (and not coincidentally the ones clients tend to like the best) are the “simple” ones.
Fun Tony Fact: I can count on one hand the total number of times I’ve ever attempted to skate on ice. I say “attempted” because I believe the longest I’ve ever stayed upright before crashing to the ground (and taking someone with me) is nine seconds.
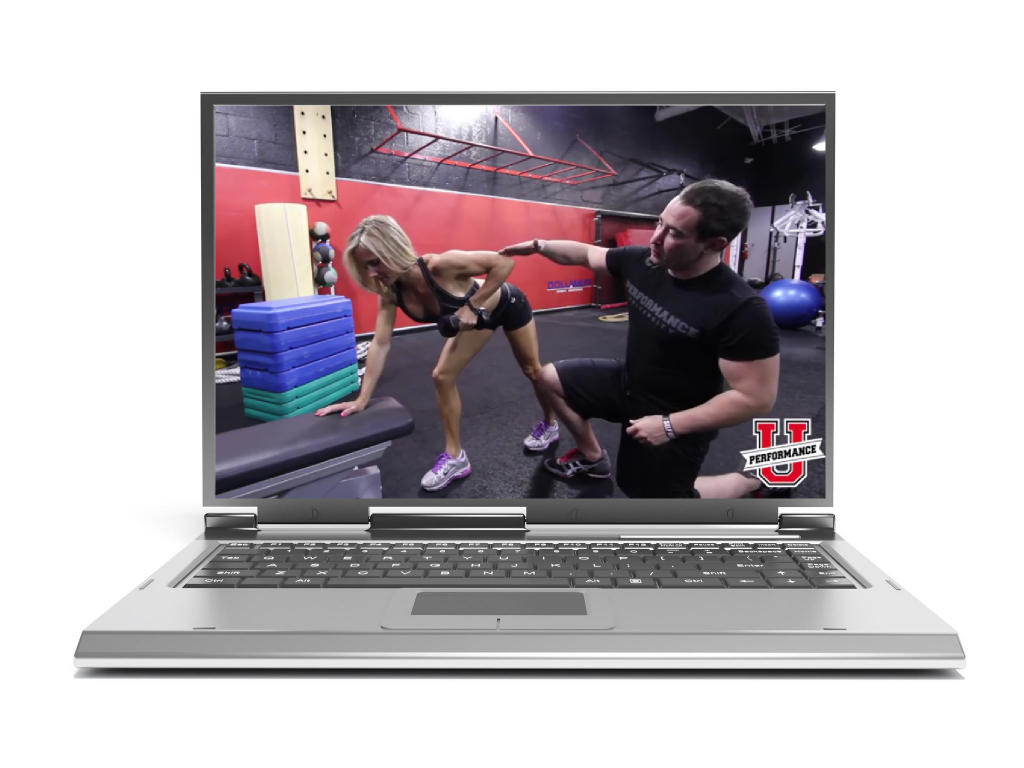
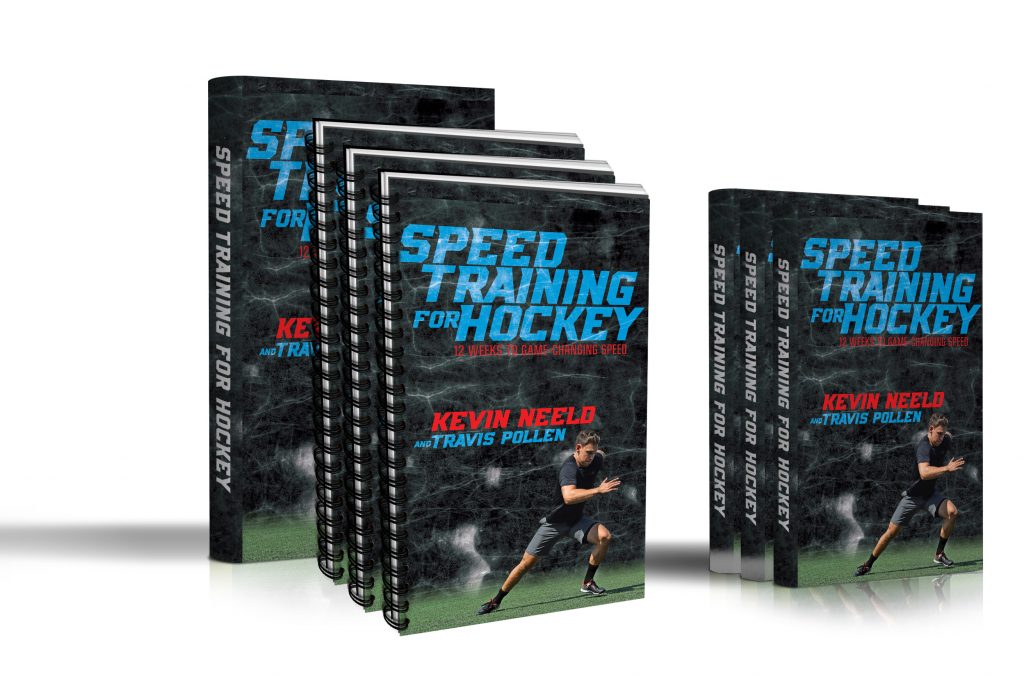
That said, despite my lack of skating skills I know a great program when I see it. Kevin and Travis have produced an outstanding resource here, and if you work with hockey players this is an absolute NO-BRAINER.
Speed Training for Hockey is currently on sale at a very fair price, but it only last through this weekend.
Today’s guest post comes courtesy of trainer, writer, and guy I hate because he is waaaaaaay too good looking, Michael Gregory.
Michael wrote an excellent post on nutrient timing for my site last year which you can check out HERE. He’s back again discussing an important topic: “reframing” injury and how to use (more) training to aid recovery.
Warning: Avengers: End Game spoilers ahead.
But come on: It’s been three weeks for crying out loud. If you haven’t seen it by now it’s your fault.
Let’s talk about acute injuries in your clients: those accidents that leave a scar in the shape of a teddy bear.
“Oh! What a cute injury!”
Allow me to elaborate, for those of you who aren’t a fan of Dad jokes.
If you hurt yourself, the best recovery plan you can follow includes continuing to train and actually treating the injury as if it is less egregious than it may actually be.
I’m not suggesting that you act as if nothing happened, but I am suggesting that you only adjust your training as much as you have to in order to work around the pain.
As a coach, you aren’t a doctor, so don’t act like one. You are, however, in the chain of recovery, and may be the only fitness professional around when an injury first occurs.
Know your role Snoop Lion
How you react matters to your client more than you realize.
The Assumption Is You Know What You’re Doing
You’re a shit hot programmer that doesn’t plan anything your client isn’t ready for because you follow the principle of progressive overload.
One-rep maxes are not a spontaneous event that you perform when the sunset is a particularly auspicious color. They are planned for and prepared for, for weeks or even months in advance.
Because you program smartly, you know that any injury a client sustains under your care isn’t going to be a career ender.
It’s simply a kiss from the weightlifting gods that initiates them into the barbell illuminati.
If you train hard you will have battle wounds. That being the case, it’s time you learn how to get your clients past their injuries in the most economical way possible.
The Biopsychosocial Model of Pain for Acute Injuries
This entire process is about facilitating the best environment for healing. That means not freaking out and quitting, but rather, changing training only as much as is needed.
Step 1: Reassure AKA “Don’t freak out.”
Even if someone’s eye is hanging out of their skull, the best thing you can do is keep your cool. The power of positive thought is a hot topic these days.
Even if those stories are only 10% accurate the power of the placebo effect is a wildy useful tool to have on your side. Keeping your cool and addressing unhelpful thoughts and fears are the first things you can to do to help your clients harness the effects of the placebo.
This is the psychosocial aspect of the model. It is the most important to get right the first time. Poisonous thoughts are really hard to uproot once they’ve been planted.
This whole step is the opposite of what my Junior Varsity football coach did to me and my relationship with the 2-plate bench press.
He told me I’d never be able to bench 225 with my long-ass arms unless I weighed 300+ pounds and the gravitational pull of the moon was twice its normal strength.
(Brief aside: Of course, the world’s weather and tidal patterns would be thrown into absolute chaos if all of a sudden the moon was twice as strong. So the joke’s on Coach J, because we’d all be dead before I could even make it to the gym. Try to remain calm after that sick burn.)
Regardless, I struggled for years with that negative reinforcement (nocebo effect) in my head. I could rep out 205 for sets of 5 but as soon as that second plate went on the bar “it was too heavy.”
Step 2: Assess the Situation
Like a good cub scout that just stumbled onto the remains of a deer that had been hit by a car, you’ve got to get your bearings.
Should you help it?
Put it out of its misery?
Add it to your Instagram story?
He already knows he messed up. Overreacting isn’t going to help the situation.
Start by asking the trainee what they were attempting and what they felt.
Remember, poker face: don’t let ‘em see you wince.
This is the first two “O’s” of the OODA loop, something that fighter pilots and military tacticians love to reference. Observe and Orient to the situation. (DA is Decide and Act, but you have to orient first).
No need to jump to any reactions here or start calling people lower life forms.
Be a professional.
Step 3: Move Forward by Reintroducing Movement in a Non-Threatening Context
Your special snowflake of a client is down, but not melted. You can still fix this and get them back to lifting heavy and kicking in doors faster than you can say “rubber baby buggy bumpers”.
Arnold said it first.
Your goal is to work your way backwards from the exercise that caused the injury in as short a distance as possible.
Start by asking these questions:
1st Question: Load. Is there a weight you can use that does not hurt?
If you can just reduce the weight of the exercise and the client no longer feels pain or discomfort then… do that.
If your client felt a “tweak” (technical term) in their mid-back while deadlifting, deadlift day isn’t over. Just take some weight off the bar. If it still hurts with 135, use the bar.
If it still hurts with the bar, use a PVC pipe.
The goal here is to show your client that the movement isn’t inherently dangerous at all weights.
2nd Question: Range of Motion. Where does it hurt?
If your client is still in pain conducting the movement with only their bodyweight, the next thing to adjust is range of motion.
In deadlifting, for example, if their pain is in the first two inches off the floor, elevate the bar until you are out of the danger zone.
No, this isn’t perfect form, for you deadlift sticklers out there, but your client isn’t going to be doing deadlifts from the rack or with the high handles on the trap bar forever. Pretty much as soon as you adjust the range of motion of a movement you should be planning for a progression to get the trainee back to the full movement.
If you haven’t seen it, consider this your warning.
Secondly, who the fudge decided what “full range of motion” is for any given exercise?
If your client isn’t a competitive lifter, it doesn’t actually matter.
I promise you won’t cause a rift in the space-time continuum resulting in an alternate timeline where Thanos succeeds in destroying half of all life in the universe and it stays that way. (Okay, that’s not really a spoiler so much as conjecture. Hey, spoiler warnings entice the reader to finish the article).
3rd Question (well, statement): Exercise Selection. If decreasing the weight and range of motion still results in pain, work your way backwards down the line of exercise specificity.
Only now should you be thinking about changing up the exercise entirely. This is assuming that you chose the initial exercise because it is the one which most completely trains you client to achieve their specified goal. If you just chose the exercise because it makes the vein in your biceps pop when you apply the Clarendon filter on Instagram I ask you the following question. How did you get this far in this article?
As an example, let’s say you were doing conventional deadlifts with your client. In my mind, the regression looks something like this:
Conventional deadlift
Snatch grip deadlift
Sumo deadlift
Straight leg deadlift
Romanian deadlift
Trap bar deadlifts
Rack pulls
Dumbbell deadlift variations
Single-leg DB deadlift variations
Single-arm DB deadlift variations
Single-arm single-leg DB deadlift variations
Good mornings
Cable pull-throughs
Hip thrusts
Okay, I digressed quite far there, but I think you get the point.
There are lots of exercises you can try with your client to teach them that they are not only not broken, but in fact still strong even with pain.
There is no excuse for the countless number of trainees doing leg presses and camping out on the stationary bike in the name of recovery.
Training is recovery.
It’s All Really Just Reassurance
This entire process of managing acute injuries is really just reassuring people that they aren’t fragile.
Some of our fellow humans, some of them your clients, have spent their entire lives avoiding pain at all costs. As a result, they’ve never had to learn how to overcome true adversity. By teaching this process to your clients, you are giving them the gift of self-reliance.
Resiliency is something most trainees are looking to build, mostly in the context of making their muscles more resilient. As far as I’m concerned, tenacity, fortitude, resilience, and mental toughness are all muscles. Each and every one of those is embedded in this process, and they are all made stronger every time someone learns to overcome something you or the barbell throws their way in the weightroom.
Does that tempt you to injure your clients on purpose now so that you can teach them about mental toughness?
Don’t do it.
But do be prepared to react calmly and with precision when accidents happen.
About the Author
Michael is a USMC veteran, strength coach, amateur surfer, and semi-professional mushroom connoisseur. As an intelligence officer and MCMAP instructor Michael spent the majority of his military career in the Pacific theater of operations.
He now lives in Bali where he writes, trains, and has had multiple near-death experiences in surf that is much too heavy for him.
Melbourne, Australia: July 19-21st and Melbourne Strength & Conditioning. (<— Includes bonus “Psych Skills for Fitness Pros” pre-workshop with Dr. Lisa Lewis).
Luke (Worthington) and I did this workshop last summer in London and figured it’s only fair to bring it State side.
Combined we have 30+ years of coaching experience (I.e., one Mike Boyle or Dan John) and this workshop will be two days where we uncover every nook and cranny as it relates to how we assess our clients/athletes and how we best prepare them for the rigors of every day life/sport.
Upper/Lower Extremity Assessment
Technique Audits (how to coach common strength training exercises)
Ways to integrate PRI (Postural Restoration Institute) strategies that don’t make your brain hurt.
This will be a unique opportunity for people to learn from myself, but especially Luke, who is one of the best and brightest coaches I know. This will be his first time teaching in the States.
For more information and to register you can go HERE.
This will be the only time Dr. Lisa Lewis and I will be presenting this workshop together in 2019. In previous years we’ve presented it in Boston, London, Toronto, Bonn (Germany), and Austin, TX.
This 1-day workshop is targeted towards fitness professionals and digs a little deeper into what really “bogs” them down and stresses them out….
…their clients!
Click THIS link for more details on topics covered as well as date/cost/location.
SOCIAL MEDIA SHENANIGANS
Twitter
I just left therapy.
I’ve been seeing the same therapist since 2011. At first we met 1x per week, for about a year. Now we meet 1x every 4-6 weeks; to check in.
It’s been an invaluable asset in my life. Just wanted to toss that tidbit out there. Your mental health IS important
Fun Tony Fact: I can count on one hand the total number of times I’ve ever attempted to skate on ice. I say “attempted” because I believe the longest I’ve ever stayed upright before crashing to the ground (and taking someone with me) is nine seconds.
That said, despite my lack of skating skills I know a great program when I see it. Kevin and Travis have produced an outstanding resource here, and if you work with hockey players this is an absolute NO-BRAINER.
Speed Training for Hockey is currently on sale at a very fair price, but it only last for one more week.
In all seriousness I haven’t worked in a commercial gym since the summer 0f 2007 when I “retired” to go off and help co-find Cressey Sports Performance.
It’s been a while.
That said, I did spend the first five years of my career working in both corporate and commercial fitness and even though I may be a bit rusty much of what follows is still relevant and undoubtedly help some of you reading to separate yourself from the masses.
Lets assume the obvious: 1) You have a degree or certification, 2) you’re competent in the areas of assessment, exercise prescription & technique, and Shaolin shadowboxing (hey, I don’t make the rules), 3) you practice basic hygiene and don’t smell like an old lady fart passing through an onion, and 4) at the very least you can name all four muscles of the rotator cuff and their functions (you’d be surprised how many trainers are unable to do this).
You’re already a step a head of your competition if you can place a checkmark next to all of those things.
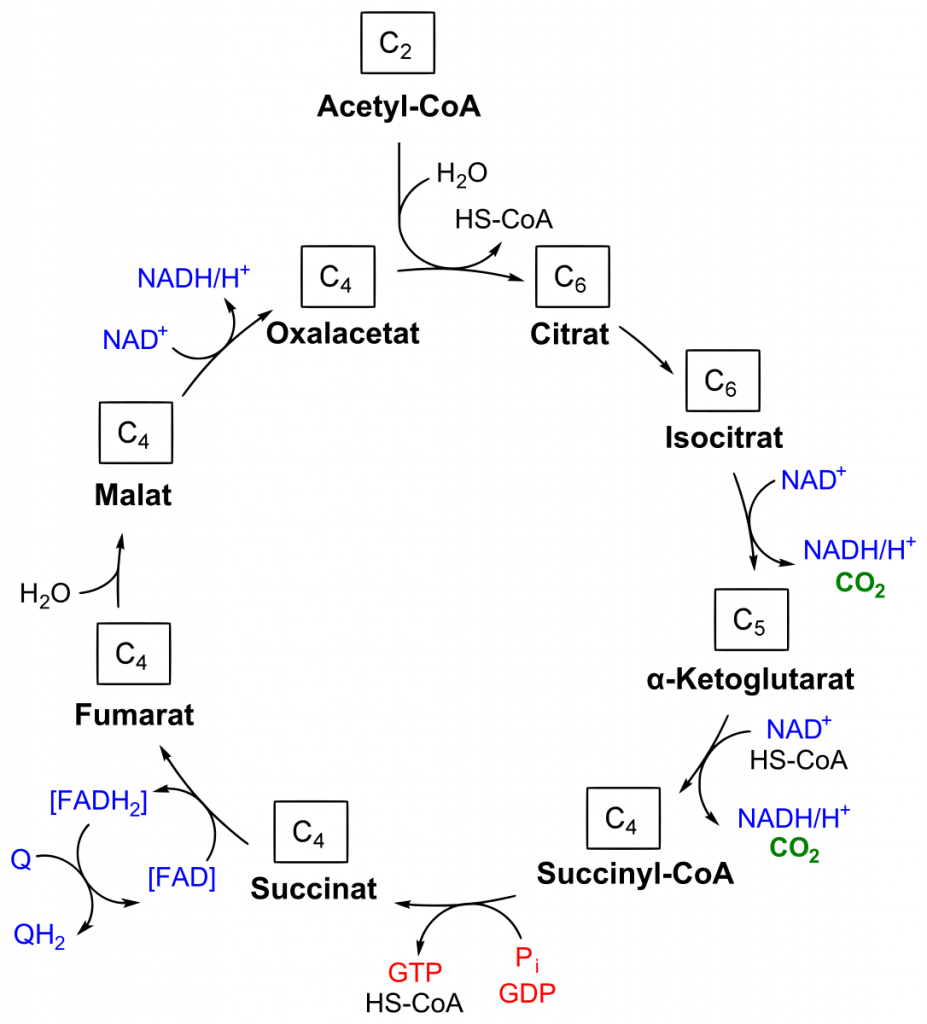
And while I can sit here and wax poetic on the importance of all the things mentioned above in addition to the nuances of psychology, basic anatomy, undulated vs. concurrent periodization (what they are and when you’d use them), how to write a program for someone dealing with secondary external impingement, breaking down the Kreb’s cycle, or, I don’t know, even knowing what the fuck the Kreb’s Cycle is….
…..none of that, truly, will be the “x-factor” in determining whether or not any one specific trainer is capable of filling their client roster.
Although, if you know this by heart we should hang out.
Will possessing those attributes help?
You betcha.
However, I think it was my good friend, former business partner, and Cressey Sports Performance business director, Pete Dupuis, who stated it best:
“If you can’t hold a basic conversation and make small talk with people, you’re going to have a hard time in this industry.
Also, Tony’s pecs can cut diamonds.”
You’re Always Being Watched…Always
The best piece of advice I can give any trainer is to always act as if you’re being watched and observed.
Because you are.
When I was a commercial gym trainer I always treated every session as an opportunity to audition for other prospective clients. Meaning, my actual client – you know, the person who was paying good money for a service – got my undivided attention.
I didn’t want to come across as the cliche trainer who just stood there counting reps waiting for the hour to be over with.
Or worse, this trainer:
An acquaintance of mine, who’s a coach himself, posted this picture on my Twitter feed today. This is a trainer “working” as his client attempts a 2x bodyweight squat.
#byefelicia
Now, if you’re a trainer struggling to fill your client roster or struggling to hit session quotas every month and EVERY other member of the gym saw that this is what they’d be paying for, would you have any room to bitch and moan about how the man is keeping you down?
A few months ago my wife and I were in Florida visiting family and we needed a place to train for a few days. We ended up going to a CrossFit that was two miles away. The first morning we arrived was Day #1 of the 2019 Open. The energy when we walked in was palpable.
Loud music, people getting after it, coaches coaching, it was awesome.
I just went into one of the corners and did deadlifts.
Fast forward 30 minutes, everyone left, and the next group came in which happened to be two older women not competing in the Open. The coach then sat down in a chair and maybe every ten minutes who would look up and half-heartedly say “nice job” and then go on doing whatever the hell she was doing.
Talk about a 180 (and a complete letdown as an observer).
Be a shark, in motion at all times.
Be an active coach…always.
Give feedback, provide cues, give a shit.
Be a participant for crying out loud.
That’s how you’ll get clients.
Oh, and Don’t Be An Asshole
This is Mike Boyle 101.
People don’t want to train with an asshole. They don’t want to train with someone who talks over their head and uses big words all the time and they don’t want to train with someone who’s a judgmental jackass.
YEAH…I ATE A CARB YESTERDAY, TONY. DON’T JUDGE ME!!
Smile, say hello to other members, introduce yourself, offer some pointers here and there, put on free 15-30 minute clinics to get more eyes in front of you to showcase your value, and, if you’re going to train where you work, maybe consider not turning into “I’m wearing headphones, I’m a psychopath, don’t you dare look at me guy,” or be overtly obnoxious, hooting and hollering all over the place and sniffing ammonia packs before a set of deadlifts.
Being approachable is part of the game.
If members are watching you sniff ammonia packs before every set deadlifts you’re not doing yourself any favors.
Kevin knows how to train hockey players. However, the information below can be applied to any athlete. In short: when it comes to making someone faster the answer is rarely “just go do some sprints.” Digging deeper and understanding inherent limitations from athlete to athlete needs to be considered.
Speed is one of the most highly coveted physical attributes in almost any sport, but particularly in ice hockey.
Unfortunately, many speed development programs take a bunch of dynamic warm-up and sprint exercises from track and field, scramble them together, and assume players will get faster.
There are two fundamental flaws in this line of thinking.
First, there is a lot more to speed development than simply sprinting.
Second, the assumption that all players (regardless of age, training background, physical development, etc.) will respond favorably to this type of program is clearly misguided.
The “this is what most people need” logic leading to this type of program is unique to the fitness industry and clearly unacceptable in almost every other area. For example, can you imagine picking your car up from a mechanic, and having he/she tell you…
“I rotated your tires, changed your oil, and topped off your windshield wiper fluid.”
“Why’d you do that?”
“Well that’s what most people need.”
“Yes…but I came in because my car is leaking transmission fluid.”
Having a diagnostic system to help identify limiting factors to speed development will help you avoid both of these mistakes by providing clarity on which physical qualities need to be the focus of a training program, and by tracking progress to ensure the training is actually leading to the results you desire.
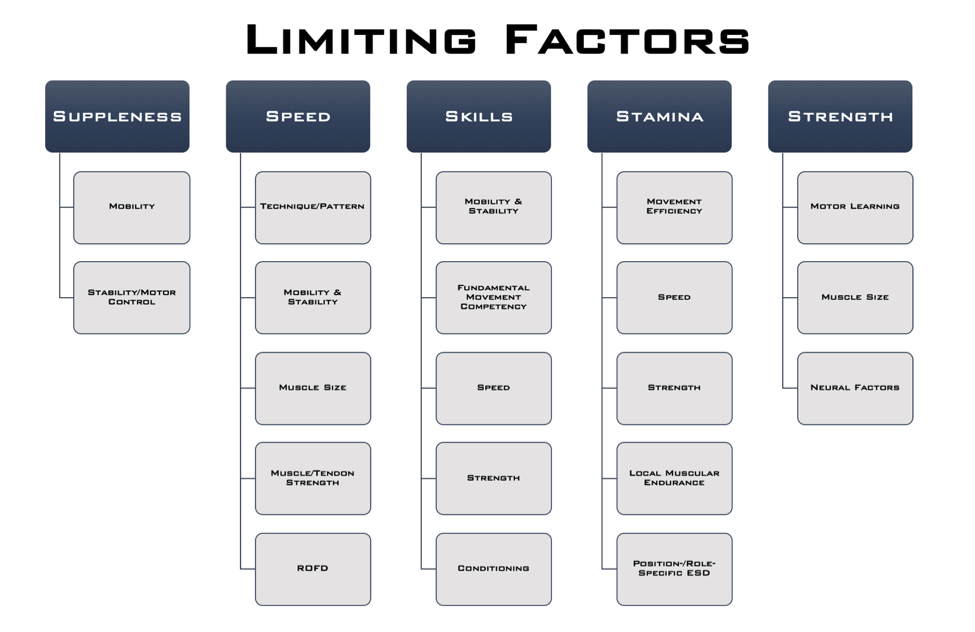
Limiting Factors to Speed Development
Below is a slide from a talk I gave at the NSCA’s Training for Hockey Clinic a few years ago. While this is overly simplistic, it provides a starting point for understanding the key elements that underlie performance in each area, and therefore what areas need to be “tested.”
Focusing in on speed, there are 4 key areas that contribute to speed development and expression.
1. Technique/Pattern
Speed can be limited by a player’s technique or skating pattern. This is why skating coaches are so important – if players aren’t taught to skate efficiently, to find their optimal skating depth, feel comfortable on their edges, learn optimal transition mechanics, etc., they’ll inevitably be wasting energy and skating slower than they could if they improved their mechanics.
2. Mobility/Stability
That said, from an off-ice training perspective, one of the major goals of training is to remove barriers that may be preventing a player from skating with optimal technique, which brings us down to the rest of the items on this list.
From a mobility standpoint, if a player doesn’t have the ankle and hip mobility to get into an optimal skating position and execute an effective stride, they’ll be leaving speed on the table.
In support of this concept, Upjohn et al. (2008) compared the skating patterns of high and low caliber players, and found that high caliber players set up with their hips, knees, and ankles all flexed more, and this allowed them to have a longer and wider stride length, and greater knee and ankle extension during the push-off phase of skating. In other words, a lower skating position translated into a longer stride length, which allowed for a more powerful push-off with each stride.
In this way, ensuring that the player has the adequate range of motion to get into a deeper skating position can be viewed as speed training.
This research is insightful because it highlights the importance of having adequate ankle mobility. A lack of dorsiflexion, or knees going over the toes, will limit your skating depth, and a lack of plantar flexion, or pointing the toes away from the ankle, will limit your power through the end of the push-off. What isn’t as readily apparent, is how a deeper skating stance will require increases in other components of hip mobility, notably hip abduction or moving the foot out to the side away from the hip.
Another way to illustrate this is to consider the lateral split.
The further apart the feet spread, or the further the hips move into this abduction position, the lower the hips drop. So if someone doesn’t possess the hip mobility in this direction, they’ll have to stand up higher to allow for a full stride.
This, along with a lack of ankle mobility, is one of the major reasons players will adopt a higher skating position. Again, all of this just illustrates that mobility in very specific areas can improve skating position, stride length, power through push-off, and ultimately speed. In other words, mobility work IS speed training, and if a player with a mobility restriction just runs more sprints, they’ll be missing out on a huge opportunity to improve their speed.
Note how greater hip abduction range of motion allows the player in red to achieve a much lower hip position, despite being several inches taller than the player in gray.
3. Muscle Size/Strength
Within a similar context, one of the major limitations to skating speed, particularly in high school and younger aged players, is a lack of lower body strength. Strength is a function of both how large the muscles are, listed as “muscle size” on the chart, and how effectively the brain can activate those muscles to produce force.
Strength can limit skating speed in two important ways.
First, if a player doesn’t possess the strength and local muscular endurance, listed in the stamina column, to maintain a low skating position, they’ll start to stand up taller as fatigue sets in. As they stand up taller, their skating stride shortens, they produce less push-off force with each stride, and they slow down.
Secondly, speed is largely determined by how much force a player can put into the ice with each stride. The more force that pushes into the ice, the further the player is propelled forward. By improving the player’s ability to produce high levels of force, you allow them to increase their propulsion with each stride, which simply means that each stride will push them further forward, allowing them to cover more ice with the same number of strides. Force is really just another way of saying strength. So in this way, strength training is really speed training.
Great example of a player possessing significant relative strength in a single-leg pattern.
4. Rate of Force Development
Lastly, ROFD stands for rate of force development. If a player produces the same amount of force, but does it faster, it will shorten the time it takes for them to complete the stride, allowing them to initiate their next stride sooner.
I don’t see this a lot, but in some players that have spent a lot of time developing strength using traditional bodybuilding or powerlifting methods, they’re capable of producing high levels of force, but they do so slowly, so the thing that’s limiting their speed the most is their ability to produce that force at a faster rate.
This is really the first time in this discussion where sprinting, plyometrics, and other more traditional speed and power work has a place in improving a limiting factor to speed.
That isn’t to say that these methods aren’t important in a comprehensive speed development program, but hopefully you now have a better appreciation for how speed training is MUCH more than just simply running.
Relevant Tests for Tracking Progress
There are a lot of performance tests available to help provide insight into limiting factors to speed development, and many of them have merit. Below are a few that I’ve found particularly effective, both in terms of the information they provide and the ease of implementation.
Mobility/Stability
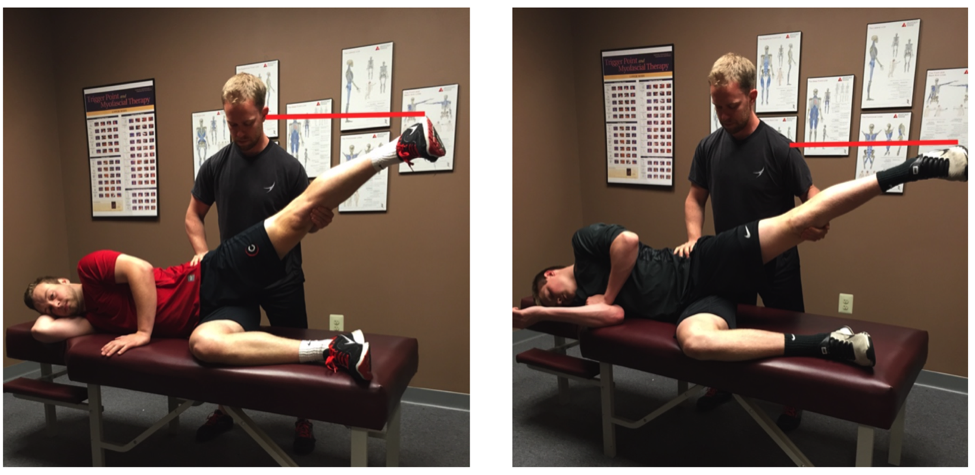
This section could easily be its own article, but in the interest of simplicity, players should have some assessment of ankle mobility, hip range of motion, and single-leg stability. I’ve used several tests over the years to accomplish this, but want to highlight the Y-Balance Test, which has a few notable benefits:
Performance in this test correlates with ankle dorsiflexion and hip flexion range of motion, two important areas for achieving an optimal skating depth
The test serves as a reasonable off-ice assessment of stride length
Some studies have found a relationship between performance in this test and injury risk
The Y-Balance Test is really designed to be an end-range stability assessment, but if you watch how the player goes through it closely, you can get a sense of what may be limiting them from going further. For example, if the knee doesn’t smoothly drift forward over the toes without the heel popping up, the player may have an ankle mobility restriction.
Addressing mobility restrictions and improving single-leg stability should improve performance in this test AND stride length on the ice.
Speed/Acceleration
20-Yard Sprint with 10-Yard Split Time: The body positions, movement pattern, and ground contact time in the first few strides of acceleration more closely resemble the characteristics of skating than top-speed running.
With this in mind, a 10-yard sprint provides valuable information about a player’s ability to accelerate.
However, because hockey players aren’t the most polished sprinters (and they don’t need to be, as mentioned above), there can be a lot of variability in the start. Extending the sprint 20-yards gives a great indication of the players early and late phase acceleration while minimizing the impact a variable start will have on the overall time.
Lower Body Power
Vertical Jump: The vertical jump is one of the most commonly used tests to assess lower body power, and has been shown to moderately correlate to on-ice sprinting speed.
Aside from published research studies, I’ve personally been involved with testing a wide range of players both on and off the ice (youth players, junior teams, NHL Development Camps, NHL Training Camps, Olympic Training Camps, etc.) and the relationship between VJ height and on-ice speed is consistent across all of these groups, making it a suitable option for all players.
Part of the value of the test is that it’s so heavily used that it’s fairly easy to find normative data to look at how a given player compares to others in his or her age group, playing level, etc.
Equipment can be a limitation for some, so using a broad jump (or long jump) is a reasonable alternative. However, I’ve found that broad jump distance correlates with height, so ideally you’d divide the jump distance by height to get a scaled number to track over time.
Lateral Bound: This is a movement included in most hockey training programs, but not one many players are using to track progress.
Compared to the vertical and broad jump, this tests power in a lateral/horizontal pattern, which is more specific to skating, and provides an opportunity to identify side to side imbalances. I’ve also found that in players that are quick on the ice, but don’t have great vertical jumps, they tend to perform well in this test. Including both tests gives a more complete picture of the power profile of the player.
Leg length also plays into jump distance in this test, so it’s important to take a quick measurement of that (or split distance) as well.
I’ve published normative data for players in different age groups here: Hockey Power Testing.
Lower Body Strength
Dumbbell Reverse Lunge (5-RM): For strength testing, it’s possible to get a really good snapshot of the player’s ability to produce force through their lower body with this test.
Similar to the lateral bound, the reverse lunge is a unilateral exercise requiring single-leg stability and dissociated movement between the two legs, two fundamental characteristics of skating. It’s also a fairly easy movement to teach, so it’s safe to implement with players across all age groups.
Strength will fluctuate across developmental years, but by the time players hit high school, they should be able to use at least their body weight in external load (e.g. 90lb dumbbells for a 180lb player).
Wrap Up
There are two major points I want to leave you with.
First, developing speed involves a lot more than running sprints. It’s important to recognize the potential limiting factors to a player developing and expressing higher levels of speed to ensure these are being addressed through a comprehensive training program.
Second, running through these (or similar) tests can be helpful in both identifying individual areas for improvement and ensuring that a player’s training program is leading to the desired results.
The ability to produce force is the foundation for producing force quickly, the recipe for speed. If a player does not have adequate strength, that should be the primary focus. If the player is very strong, but doesn’t perform well in the jumping or sprinting tests, then exercises to improve rate of force development and acceleration should be the primary focus.
A well-designed, comprehensive speed training program should lead to improvements in all of these areas. Addressing a player’s limiting factors is the key to optimizing his or her speed development.
This is a no-brainer if you happen to work with hockey players.
What’s refreshing about this resource is that, while Kevin works with NHL players and has worked with many elite level hockey players throughout his coaching career, this is about keeping things simple and honing in on the basics.
This is about making better athletes.
Speed Training for Hockey is currently on sale at a hefty discount for the next two weeks, so act quickly before the price jumps up.
Melbourne, Australia: July 19-21st and Melbourne Strength & Conditioning. (<— Includes bonus “Psych Skills for Fitness Pros” pre-workshop with Dr. Lisa Lewis).
NOTE: The Early Bird rate of $100 OFF the regular price ends THIS WEEKEND (May 5th)
Luke and I did this workshop last summer in London and figured it’s only fair to bring it State side.
Combined we have 30+ years of coaching experience (I.e., one Mike Boyle or Dan John) and this workshop will be two days where we uncover every nook and cranny as it relates to how we assess our clients/athletes and how we best prepare them for the rigors of every day life/sport.
This will be a unique opportunity for people to learn from myself, but especially Luke, who is one of the best and brightest coaches I know. This will be his first time teaching in the States.
For more information and to register you can go HERE.
This will be the only time Dr. Lisa Lewis and I will be presenting this workshop together in 2019. In previous years we’ve presented together in Boston, London, Bonn (Germany), and Austin, TX.
This 1-day workshop is targeted towards fitness professionals and digs a little deeper into what really “bogs” them down and stresses them out….
…their clients!
Click THIS link for more details on topics covered as well as date/cost/location.
This article doesn’t really have anything to do with fitness, but it does have A LOT to do with your health. My friend Tessa (who’s the head health/fitness honcho at Boston Magazine) asked my wife, Dr. Lisa Lewis (who’s the head honcho of Jedi mind tricks), to provide some basic suggestions on how people can begin to ween themselves off of social media.
Given how social media, in particular Instagram, has transformed the way we get and digest health/fitness information, this article is never more relevant.
I had a new client start at CORE recently who, before we even met in person, let it be known that 1) he hated techno and 2) he hated squats.
Well, why don’t you let me know how you really feel?
Personally, whenever I email someone for the first time, my approach is to just, you know, introduce myself, say I’m a big fan, and maybe butter them up with a savory compliment like “oh, and your cat’s adorable.”
I generally refrain from taking a proverbial shit on the things the person on the other end enjoys:
“…and while I’m at it, Tony, I also hate 8o’s cartoons, cheese, rainbows, and your kid.”
I’m exaggerating of course, but once I dug a little deeper and had a bit more back and forth with this individual I got a better sense of his lack of enthusiasm towards squatting.4
When “Ken” came in for his initial assessment he noted that he had, at one point, enjoyed squatting.
Admittedly, those days were more than a decade ago, and despite his current disdain for all things squatting, he was still very much interested in putting them back into his training repertoire and giving them a go again.
The obvious question from me was, “why?”
“If you don’t like back squatting and more to the point, they hurt, why insist on doing them? We can also perform other variations – Goblet, Front, Zercher – that may be a little more back friendly.”
“That’s the thing,” he said, “they didn’t always hurt. When I trained all through college and into my early 30s I never had any issues.”
“But then, you know, I became more sedentary due to life, was stubborn and not taking into consideration I wasn’t 25 anymore, and things just fell apart.”
SIDE NOTE: “Ken” is 47, works long hours mostly at a desk, and I can’t stress this enough, hates techno…;o)
To speed things up all I’ll say is that, while Ken isn’t the most supple person in the world, nothing during his initial assessment came up as a stern red flag or required an exorcism. Sure, he had a few aches and pains, but nothing outside of the normal “niggles” that come with the territory of lifting heavy things for a large portion of one’s life.
I did notice with his passive vs. active squat screen that his active ROM was limited (while his passive ROM was pretty darn okay).
Pertinent information. And if you want to know why that’s pertinent information read the article hyperlinked a sentence above this one.
He also noted he had worked with several trainers in the past who, like me, noticed his lack of ROM with his active squat.
Seriously, read the article.
It’ll help.
As a result he was used to being given a laundry list of hip mobility drills in addition to a plethora of aggressive soft tissue “smashes” to perform daily:
A1. Take a 88 lb barbell and roll it over your thighs. Have someone stand on it and jump up and down for added pressure. Doesn’t that feel great!?
A2. Take a lacrosse ball and poke around in your glutes. If you feel nothing, glue on some razor blades to make it more challenging. Splendid!
A3. If neither of those work, go get a chainsaw. RELEASE.
brb
Moreover, Ken was also given poor advice and told to arch his lower back aggressively whenever he squatted because, #powerlifting.
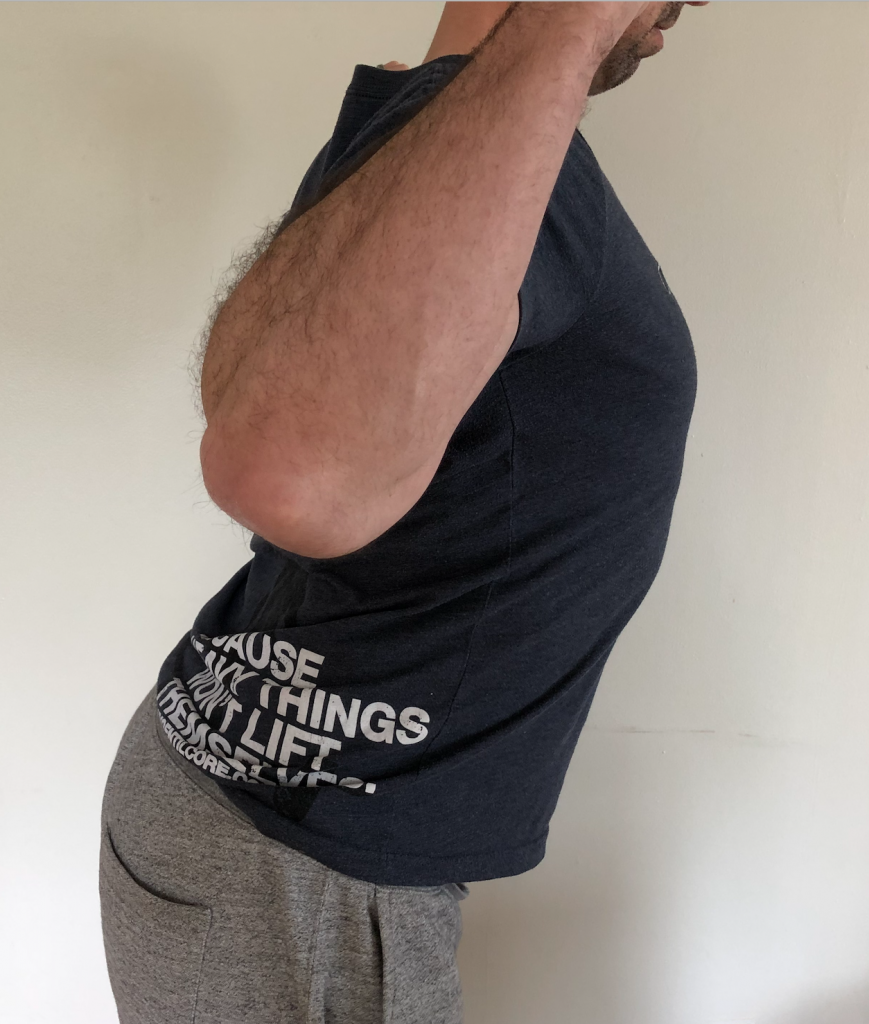
As a result, whenever he hit a certain depth – usually juuuuust as he passed 90 degrees of hip flexion – he’d compensate with more lumbar flexion and exhibit what’s often referred to as “butt wink.”
Photo Credit: GirlsGoneStrong.com
Again, pertinent information.
No wonder his back always hurt when he squatted:
His issue wasn’t a mobility issue, but rather a POSITIONING issue.
Squat cues that work for powerlifters usually don’t work well with non-powerlifters.
Alignment Affects ROM
To be clear: I am not some anti-anterior pelvic tilt lobbyist.
Anterior pelvic tilt is normal.
There’s a natural lordotic curve to the lumbar spine which is accompanied with a slight forward/anterior tilt of the pelvis.
It’s when it becomes excessive – or people are encouraged to seek it out – that it can (not always) elicit negative repercussions.
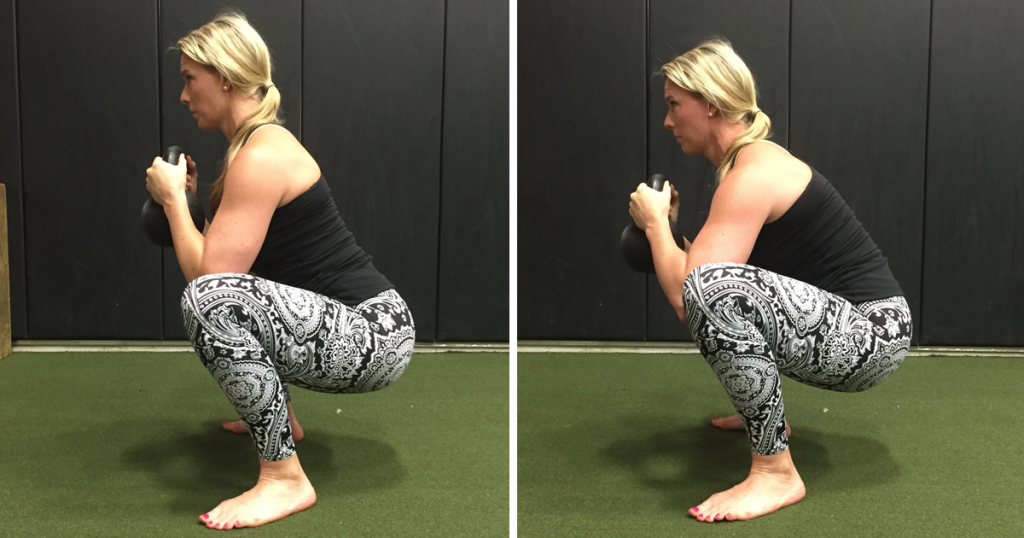
Ross et al (2014) noted that:
In 3D modeling of pelvic motion from x-rays of test subjects an increase of anterior pelvic tilt of 10 degrees resulted in:
In short: more anterior tilt (may) require more spinal motion during squatting exercises compared to more posterior tilt.
The dotted section(s) to the left represent the acetabulum (or hip socket). As you move down from A to C we lose site of the acetabulum due to increased anterior pelvic tilt. This will incite increased bone on bone contact – or impingement – sooner as we go deeper into a squat.
Now, I am not suggesting we all walk around in more posterior pelvic tilt like a bunch of Ed Grimley wannabes:
However, what I am suggesting is that nudging a little more posterior pelvic tilt so our clients/athletes get out of their aggressive anterior pelvic tilt (and closer to neutral) may be the more appropriate long-term play.
Sure, it may entail “some” releasing of this and “some” mobilizing of that…but not as much as most people think.
Much of the time the more pertinent approach is to have your clients adopt a better bracing strategy in addition to spending more time strengthening the anterior core and glutes (both of which aid in posterior pelvic tilt).
Likewise, I don’t feel cuing people to “arch their lower back” during a squat is beneficial. As pointed out above, increased anterior pelvic tilt resulted in increased impingement of the hip. Once someone runs out of room in his or her’s hips, in order to squat deeper they have to gain ROM elsewhere.
Their soul lower back.
Moreover, the reason many powerlifters adopt a hard arch when they squat is more out of necessity than because it’s better.
They wear gear/squat suits (that require an aggressive arch in order to hit passable depth).
Photo Credit: EliteFTS.com
People who don’t compete, don’t wear squat suits (and “passable” depth is arbitrary and highly individual anyway).
Circling back to Ken (remember him?), all I had him do in our initial session(s) was to appreciate POSITION. I took away the cue to arch his lower back, and instead had him focus more on posteriorly tilting his pelvis to scoot him closer to neutral (which, remember, is STILL an anterior tilted position).
He was able to squat pain free AND was able to squat deeper without “falling” into that butt wink posture.


 Michael is a USMC veteran, strength coach, amateur surfer, and semi-professional mushroom connoisseur. As an intelligence officer and MCMAP instructor Michael spent the majority of his military career in the Pacific theater of operations.