Categoriespersonal training Program Design

Building Your Sessions Around Effort

One of the more challenging concepts for new(er) clients to grasp is the idea of training effort. Sure, there are a select few who are psychopaths and think a training session only counts if you come close to shitting your spleen.

The vast majority, however, tend to UNDER-estimate what it takes to put forth appreciable effort during a training session.

Effort that will lead to consistent results.

I don’t know about you, but I find the missing link for most trainees (and why they never seem to make progress) is they lack a thorough understanding of what effort is and the types of effort that can be utilized.

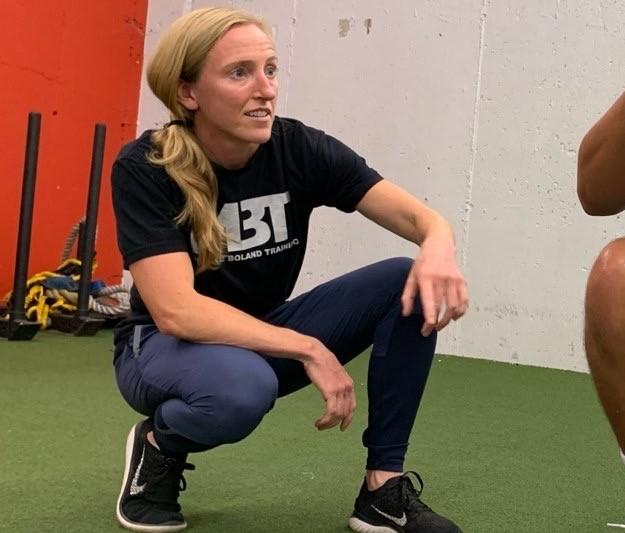
Today’s guest post via Boston based strength & conditioning coach, Dr. Michelle Boland, helps to shed light on this topic.

Making effort.

Building Your Sessions Around Effort

Are you constantly having to hold your clients back from giving TOO MUCH effort?

…yeah didn’t think so!

Effort is one of the most important variables for client and athlete success, while also being one of the hardest things to extract from the people that you coach. 

So, how often are you accounting for it, teaching it, and programming for it? 

As coaches, we want to make sure our clients are matching their effort with our goals for them. 

If we want Karen to improve strength, there needs to be a difference between the weights she grabs for a 5 rep set and a 15 rep set. Those two repetition schemes require two different efforts. 

We need to teach Karen how to choose the appropriate amount of weight, what different types of effort feel like, AND why they matter. Progress in the weight room can be dictated by four specific types of EFFORT

  1. Substantial Effort
  2. Sustainable Effort
  3. Sprint Effort
  4. Reset Effort 

When working with general population clients, prescribing a set amount of repetitions ISN’T always the best STRATEGY to get results. INSTEAD, cue different efforts and select exercise variations that will allow them to adequately express that effort. 

For example, if you want Karen to row for 10 minutes at a steady rate, Karen can’t start sprinting and crying 30 seconds into the row. 

Sportsmen doing exercises with rowing machine together

She needs to learn how to maintain her pace for the duration of the time and not be too gassed at the end. Hard work and effort have variations and aren’t always just maximum exertion. 

The more Karen understands this, the better she can perform the exercises you select with the appropriate amount of weights and with the appropriate amount of exertion. Thus, she will be able to express the appropriate outputs and get the BEST RESULTS

Now, let’s dive into the four different types of effort and how you can cue exercises and choose variations based on them… 

1. Substantial Effort

Think about the effort you would put into lifting a car off your child. 

Seems morbid, but I bet you wouldn’t hold back or look at your WHOOP band for advice.

A substantial effort should be challenging and be deliberate. You may have to tell your client to prepare and be ready to put in work. 

A strategy for teaching a substantial effort is to program separate repetitions. This DOESN’T mean max weight. It means allowing your clients to prepare for a considerable exertion without the momentum of bouncing the weight on the ground using a rebound effect. 

For a deadlift exercise example, cue your client to keep their hands on the barbell while letting the barbell rest on the ground after each repetition. Separate repetitions will teach the first pull from a dead stop, which requires the most substantial effort. 


For an exercise that is performed on one side of the body then repeated on the other, make sure you take a break between sides. For example, perform a heavy split squat for 5 repetitions with the right leg forward, then set the weights down to regroup mentally, then complete the split squat with the left leg forward. 


Keep the repetitions low (2-5ish), the speed will most likely be slow, and the weight should be RELATIVELY high. This again, doesn’t mean maximum. Submax loading is advised by TONY and works. Substantial efforts will be associated with the adaptive fitness quality of Max Strength.

2. Sustainable Effort

Think about speed walking.

It’s harder than regular walking but you can probably do it for a long duration of time. 

Nordic walking race, motion blur

Sustainable efforts should feel like they can be maintained over a long duration and continuous in their repetition. A coaching strategy for sustained efforts can be cueing the client to tap-and-go without resting the barbell on the ground. 


For an exercise that is performed on one side of the body then repeated on the other, DON”T take a break between sides. For example, perform the split squat for 8 repetitions with the right leg forward, switch legs, then perform 8 repetitions with the left leg forward, making the effort continuous between sides. 


Keep the repetitions moderate to high in the 6-30ish range.

This range may seem large, but most general population clients need a wide range to build an aerobic foundation, volume tolerance, and to learn associated weight ranges. Sustainable efforts will be associated with the adaptive fitness qualities of Strength Endurance and Hypertrophy.

The speed of the repetitions will be moderate: too slow and you may fall asleep, too fast and you won’t last…dang that rhymed! …Hence the word SUSTAINABLE.

3. Sprint Effort

Think about running for your life Karen. 

via GIPHY

Sprint efforts should feel powerful and quick. To program sprint efforts, find ways to help your clients be quick, such as…

  • Create some race challenges such as the Cone Stack Drill


  • If you have fancy velocity tracking equipment, use it
  • Find ways to unload them using bands


A coaching strategy to teach sprint efforts can be cueing the client to push the ground away and get tall to the ceiling during a deadlift. During the deadlift, the full rep doesn’t need to fast, focus on the pull from the floor (typically applied to the concentric portion of lifts) and they can lower the barbell down at a self-selected pace. 


For an exercise that is performed on one side of the body then repeated on the other, make sure you take a break between sides.


Keep the repetitions low to moderate (2-8ish) and low weight (better to have lower weight than to be slow). Cue your clients to move fast, “push the ground away”, and to get off the ground quicker by YELLING “the ground is LAVA, KAREN”.  Sprint efforts will be associated with the adaptive fitness qualities of Speed and Power.

Get YOUR CLIENTS to MOVE FAST.

4. Reset Effort

Think about being a light switch, have ‘on’ and ‘off’ modes. 

Closeup of switch on brick wall

A reset effort is being able to duplicate substantial efforts.

Why is this separate from substantial efforts? 

Substantial efforts are focused on a single attempt. Reset efforts are focused on your client’s ability to repeat high level effort.

Can they use the rest period to regroup and recover?

A coaching strategy to teach reset efforts is to program cluster sets. A cluster set can look like this: perform 3 substantial effort repetitions, then let go of the barbell, rest for 20-30 seconds, then perform 3 substantial effort repetitions, then let go of the barbell, rest for 20-30 seconds, then perform 3 substantial effort repetitions.

Rest should NOT include another exercise, it is a full rest period. 


For an exercise that is performed on one side of the body then repeated on the other, make sure you perform ALL repetitions within the cluster set on one side of the body before moving to the other side of the body. AND definitely take a break between sides. 


For a Split Squat example, perform 3 substantial effort repetitions with the right leg forward, then let go of the dumbbells, rest for 20-30 seconds, then perform 3 substantial effort repetitions with the right leg forward, then let go of the dumbbells, rest for 20-30 seconds, then perform 3 substantial effort repetitions with the right leg forward.

Put the dumbbells down, take a longer rest, then repeat that with your left foot forward. 

Summary

Teaching and cueing effort will allow you to get the best from your clients. You will be better able to match your exercise selection with their output and goals. Make different types of effort known to your clients and when you want them to express them. 

If you have any comments or questions please feel free to email me at mboland@michelleboland-training.com

If you enjoyed the exercise videos in this article, check out the MBT Exercise Database for 1,200 more videos to use, embed within your programming, and up your exercise selection game. 

About the Author

Dr. Michelle Boland

Categoriescoaching Corrective Exercise Exercise Technique Program Design

What’s All This Positional Breathing Stuff About?: The Implementation of Training Principles

You can’t go more than a few clicks on the internet before you inevitably come across some coach or trainer discussing the merits of positional breathing and how it can help improve performance in the weight room (and on the field).

(👆👆👆 I guess this depends on what part of the internet you peruse…BOM, CHICKA, BOM BOM   😉  😉  😉 )

Nevertheless, if you’re someone who geeks out over the human body and movement in general “positional breathing” is a term you’ve definitely come across.

And you likely still aren’t understanding it’s relevance.

I have a treat for you today. Dr. Michelle Boland (a Boston based strength & conditioning coach and one of the smartest people I’ve ever met) was kind enough to offer to write on the topic for this website.

Enjoy!

Copyright: stanciuc / 123RF Stock Photo

Positional Breathing: The Implementation of Training Principles

Note From TG: For a bit of an “amuse bouche” on the topic of positional breathing I’d encourage you to check out two posts I wrote on the topic HERE and HERE.

Identify

Our role as fitness professionals is to determine what is important for our clients. In order to do so, we need to identify what is important, formulate principles, and then follow through with implementation.

A way to identify and formulate what is important to us as trainers, is to create principles. Principles are simply what you believe in and what you teach your clients. Principles serve as a hierarchy of reasoning for your training methods, which include your choice of exercises, organization of training sessions, program design decisions, and communication strategies.

In this article, I am going to review my first two training principles:

  • Training Principle 1: All movement is shape change (influence from Bill Hartman)
  • Training Principle 2: Proximal position influences distal movement abilities

Formulate

Movement is about shape change.

We change shapes by expanding and compressing areas of the body.

Movement will occur in areas of the body that we are able to expand and movement will be limited in areas of the body that, for some reason, we have compressed. The ability of an athlete to transition from expanded positions to compressed positions informs their ability to change shape and express movement.

Movement occurs in a multitude of directions depending on both position and respiration. Certain positions will bias certain parts of the body to be able to expand more freely, allowing increased movement availability. Respiration can further support the ability to expand and compress areas of the body, as an inhalation emphasizes expansion and an exhalation emphasizes compression.

(👇👇👇 Just a small, teeny-tiny taste of importance of positional breathing 👇👇👇)


Position selection is my foundation of exercise selection.

Positions such as supine, prone, side lying, tall kneeling, half kneeling, staggered stance, lateral stance, and standing can magnify which areas of the body that will be expanded or compressed. Additional components of positions can include reaching one arm forward, reaching arms overhead, elevating a heel, or elevating a toe. Furthermore, pairing phases of respiration within these positions will further support where movement will be limited or enhanced.

The position of the proximal bony structures of the body, such as the rib cage and pelvis, can greatly enable or restrict movement. Positional stacking of the thorax and pelvis provides an anchor for movement. Respiration then provides the ability to create expansion in the thorax and pelvis, thus providing expansion areas of the body, within joint spaces, allowing our limbs to express pain-free movement.

Lifting heavy weights can often compress areas of our body and reduce our ability to expand and rotate through our trunk and hips, limiting movement, and negatively affecting our ability to perform. Remember, expansion begets movement freedom, so adding positional breathing work or pairing movement with respiration can create opportunities for expansion.

Implement

Where is a good place to start with positional breathing work?

Start by thinking about what you already do.

Then, apply your new lens of where you want movement to occur.

Finally, label the positions of the exercises and pair respiration within those movements. Pair an inhalation when you want to enhance expansion and an exhalation when you want to enhance compression. Here are a few examples of how I implement my two training principles into exercise selection. Movement within each example can be supported or limited with changes in position, respiration, or execution.  

1. Supine Reach

The supine position is combined with a bilateral arm reach forward with the intention to expand the upper thorax during inhalation. The position can also be used as a tool to teach stacking the thorax over the pelvis by cueing a hip tuck and soft exhale to move the front side of the ribcage downward. Our “stack” IS the set-up position for your main loaded, lift exercises (squat, deadlift, etc).

Check out how the inhalation expands the upper thorax and the exhalation creates compression.

Now you will not be able to take your eyes away from those two movement strategies.

2. Staggered Stance “Camporini” Deadlift

The staggered stance position is going to magnify the expansive capabilities of the lower, posterior hip of the back leg. The staggered stance position allows you to use the front leg to push back to the side of the back leg and align the pelvis and thorax back and to the side of the back leg.

The opposite arm reach allows you to transition the weight to the back leg. The expansive capabilities can be enhanced in the posterior hip with an inhale during the hip movement backwards (hinging).

3. Low Cable Step-Up

The staggered stance position puts the hip of the elevated leg in flexion (expansive) and the hip of the leg on the ground in an extension (compressive) biased position.

The addition of an opposite arm cable hold expands the backside of the upper back (avoid resisting the cable). The posterior hip of the elevated leg will compress as the individual pushes their foot into the ground and moves against gravity to perform the step-up.

At the bottom position, expansion can be enhanced in the posterior side of the flexed hip and posterior side of the arm holding the cable during an inhalation. Coaching cues may magnify expansion and compression within areas of the body by pairing respiration within phases of the exercise. Try inhaling at the bottom position and exhaling during the movement/step-up.

4. High Hip Reverse Bear Crawl

The bear crawl exercise is performed in a prone position. The additional component of the high hips and reverse direction promotes expansion in the upper thorax and posterior hips. You can coach continuous breathing through the movement or pause at certain points to inhale.

This is a fantastic warm-up exercise!

5. Tempo Squat Paired with Respiration

The squat starts in a standing position.

The assisted squat will also include a positional component of both arms reaching forward (same as goblet squat, zercher squat, or safety bar squat) which encourages the ‘stack’ position of the thorax and pelvis. The assisted squat is an example of turning positional breathing work into fitness. The squat movement requires both expansive and compressive capabilities within various phases of the movement in order to be able to descend and ascend against gravity.

The exercise can be used to teach people to change levels with a stacked, vertical torso. As a general notion, inhale down and exhale up.

6. Medicine Ball Lateral Stance Weight Shift Load and Release Throw

The exercise is performed in a lateral stance position.

Here, we are adding fitness with an emphasis on power, to positional breathing work!

Pair an inhalation with pulling the medicine ball across the body (transitioning weight from inside to outside leg) to bias expansion of the posterior hip of the outside leg. Then pair an exhalation with the throw to bias compression, exiting the hip of the outside leg.

This exercise also encourages rotational abilities and power through creating expansion and compression in specific areas of the body. For example, if you want to promote right rotation, you will need right anterior compression, right posterior expansion, left posterior compression and left anterior expansion abilities.

Conclusion


The use of positional breathing activities can improve our abilities to move with speed, free up range of motion at the shoulders and hips, rotate powerfully, and move up and down efficiently. My training principles are derived from this concept. My specific strategies are implemented through exercise selection, cueing, teaching, and pairing respiration with movement phases.

The ‘stacked’ position emphasizes a congruent relationship between the rib cage and pelvis (thoracic and pelvic diaphragm) and I believe it can serve as a foundational position to support movement. I want to thank Bill Hartman for exposing me to this lens of movement.

Implement these strategies with your clients and you’ll discover that positional breathing work WILL help your clients squat, hinge, run, rotate, and move better.

Principle Based Coaching

A strategy such as positional breathing work for better client movement is only as good as your ability to implement and communicate it with your clients. We become better at implementation and communication through analysis and development of our PRINCIPLES.

If you want to learn more about training principles, how to implement principles into your coaching, and the use principles to improve your continuing education, Join me Thursday, October 1st at 2:00pm EST for a FREE Webinar

In this webinar, we will take a step back and learn the skills to formulate principles, make new information useful, AND IMPLEMENT information. At the end of the webinar you will know how training principles can be used to:

  • Make new information useful to YOU, YOUR clients, and YOUR business
  • Clarify your coaching decisions
  • Develop a more pinpointed coaching eye
  • Plan more effectively to get your client results
  • Gain confidence in your abilities and formulate your own coaching identity

About the Author

Michelle Boland

  • Owner of Michelle Boland Training
  • PhD in Exercise Physiology
  • Instagram @dr.michelleboland

Link to FREE Webinar: https://michelle-boland-training.mykajabi.com/coachingwebinar