To mirror yesterday’s conversation on training around pain, today’s post delves a little deeper into a specific area that many lifters tend to have issues with:
Not enough bicep curl variations in their program
Forgetting to remove their shaker bottle from their gym bag for week
Knees.
The knees are a vulnerable joint and there are myriad of reasons why they can become achy, sore, cranky, or any other similar adjective you want to put here.
Sydney, Australia based physical therapist and trainer, Dane Ford, was kind enough to write this straight-forward article on some of the root causes of knee pain and ways to address them on your own.
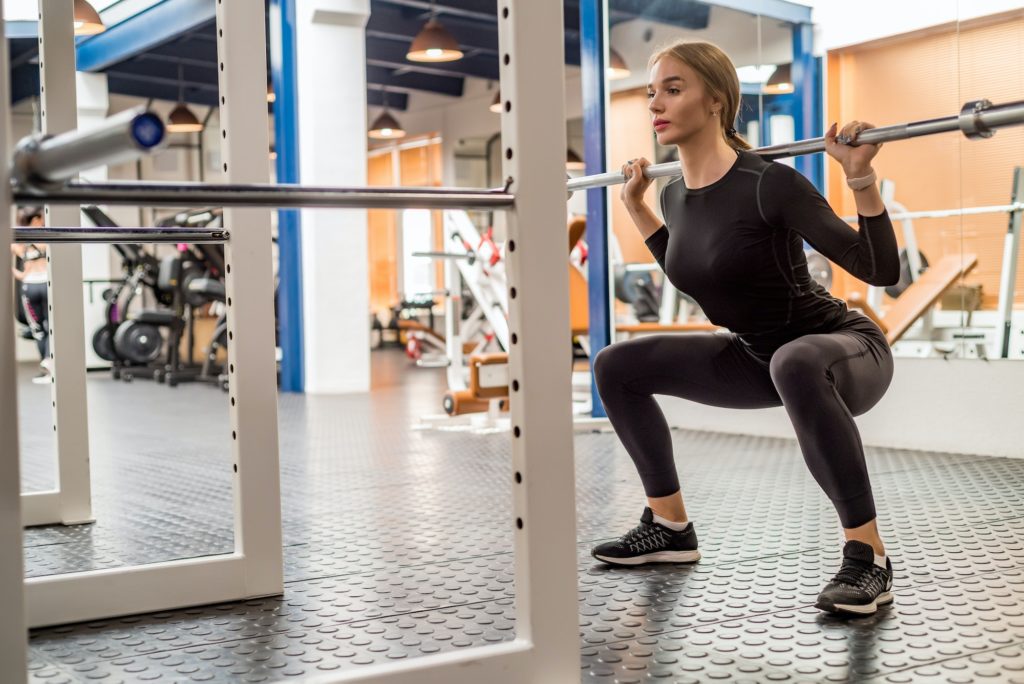
Squatting is an essential part of most people’s fitness routine, and it can be extremely frustrating when you experience sore hips or knees when you squat.
Today I’m going to share four killer exercise variations that will help take some pressure off your knee joints!
No matter what level your fitness is at – whether strength training or just getting healthy again after injury – these tips should work their magic in no time flat.
Let’s get started.
The Goods
Box squat.
The first variation for those who experience knee pain when squatting is the box squat. A box squat will strengthen your quads, glutes, and hamstrings. It’s also a great way to improve your squatting technique.
You’ll need a box squat or a bench around knee height to do a box squat.
Start by placing the box behind you.
Then, position your feet shoulder-width apart and push your hips back.
Next, bend your knees and lower yourself until your bottom touches the box. Pause for a second, then stand back up.
Step-Ups
Step-ups are another great variation for people who have knee pain when squatting. This exercise works your quads, hamstrings, and glutes and is a great way to build lower body strength.
To do a step up, start by placing your right foot on a box or bench.
Then, push off with your right foot and raise your body up until your leg is straight.
Pause for a second, then lower yourself back down.
Focus on keeping the hips level.
Start with a smaller step, and increase the step height as your body allows.
Hip Thrusts
Hip thrusts are a great exercise for people who want to build stronger glutes. This exercise can also help relieve knee pain when squatting by taking the pressure off your knees.
To do a hip thrust, start by sitting on the ground with your back against a box or bench.
Place your feet flat on the ground and raise your hips until your thighs and torso are in line with each other.
Pause for a second, then lower your hips to the starting position.
Progress this exercise by adding weight at your hips, like a barbell or plate.
Banded Crab Walks
Banded crab walks are an excellent exercise for people who want to build stronger glutes and legs. This exercise can also help improve your squatting technique by making it easier to push your knees out over your toes. This is a golden exercise for dealing with knee pain when squatting.
To do a banded crab walk, start by placing a resistance band around your feet. (You could place it around your knees or ankles, but the further down your legs, the harder the exercise will be).
Then, step one leg out to the side as far as the band will allow.
Keep the hips level, and the shoulders stacked over the hips.
Next, step in with the other leg.
Repeat.
Causes of Knee Pain
When addressing knee pain during squats, it’s important to understand some of the common causes. This way, you can be sure that you’re taking the right approach to fix the underlying issue. Here are three common factors which can contribute to knee pain when squatting:
Improper Form
Whilst there is no such thing as textbook technique, using ‘adequate’ form allows you to engage the right muscles when you lift and minimize injury risk. If you don’t utilize adequate form when you squat, the load in certain areas like your knee joints will be increased, instead of having the load evenly distributed through your entire body.
Our body’s tissues all have a maximum tolerable capacity. This means that we need to be able to go hard enough in the gym to stimulate adaptation and promote strength, whilst not overloading ourselves to the point of tissue injury.
Giving your body time to recover with rest or a de-load week every now and then is a great start, to allow proper cell regeneration, repair and adaptation to occur.
Adding variety into our movements is another great option to avoid overuse. Beyond the exercises we’ve covered above, mixing back squats with front squats, goblet squats, or other squatting variations will help to strengthen the squatting movement whilst providing a slightly different stimulus to our tissues, and reducing the overload injury risk.
Bad Shoes
If you’re wearing shoes that don’t provide adequate stability when you squat, then this can put unnecessary strain on your knees.
Be sure to wear shoes that provide you with a solid foundation from which to lift.
Health Conditions Related to Knee Pain
So now that we understand some of the mechanisms that can contribute to knee pain during squats, how do we know which structure in the knee is causing pain?
Knee pain can present as a number of different conditions depending on the injured structure. This can include:
Patellofemoral Pain Syndrome
PFPS or patellofemoral pain syndrome is a condition that affects the knee joint. It’s characterized by pain in the front of the knee and around the patella or kneecap, and is common in those who love to squat.
If you have PFPS, you might experience pain when climbing stairs, squatting, or sitting for long periods.
IT-Band Syndrome
ITBS is a condition that affects the iliotibial band, which is a long strip of connective tissue that runs down the outside of the thigh from the hip to the knee, and normally presents as pain on the outside part of the knee. But squatters need not worry too much about this – ITBS is much more common in runners rather than lifters.
Patellar Tendinopathy
Tendonitis is the inflammation of a tendon, which can occur in any tendon in the body. However, Patella tendonitis presents as pain just below the knee cap. If you perform a lot of explosive movements like box jumps, or fast tempo squats, you should be aware of patella tendinopathy.
Arthritis
Arthritis is a condition that causes inflammation in the joints. The two most common types that can cause knee pain are osteoarthritis and rheumatoid arthritis.
Osteoarthritis is a degenerative disease that causes the cartilage in the joints to break down. This can cause pain in your knees, as well as other joints in your body.
Rheumatoid arthritis is an autoimmune disease that causes the body’s immune system to attack the joints. It may cause swelling and pain around the knee, leading to pain, stiffness, and inflammation.
Load management is key in managing arthritis. This is because we want to keep the muscles around the joint nice and strong, without irritating the joint too much.
How to Prevent Knee Pain When Squatting
Aside from performing some of the killer squat variations listed above, you can do a few other things to prevent knee pain while squatting.
Warm Up Properly
A good warm-up will help to increase your heart rate, loosen up your muscles, and make your body’s tissues more elastic. I recommend doing a light jog or bike ride for 5-10 minutes, followed by some dynamic stretching.
Use the Correct Weight
Another important consideration to prevent knee pain while squatting is to use the right weight. If you go too heavy too soon, it will put extra stress on your knees and could lead to pain. Utilize progressive overload by starting with a light weight and gradually increase the amount of weight you’re using as your body gets stronger.
Blood Flow Restriction Training
Another great way to improve strength whilst using light weight is by incorporating Blood Flow Restriction Training into your routine. This involves using a BFR band to reduce venous blood return from your muscles, making them work harder.
This means that you can use lighter loads to achieve the same result from your workout. BFR training can be a great addition if you are struggling with knee pain from squatting or trying to train with an injury.
Use a Smaller Range of Motion
Squatting through a smaller range of motion by reducing squat depth will reduce the load going through the knee joint, and is a great way to modify the exercise if you are struggling with pain.
Listen to Your Body
If you still experience knee pain while squatting, stop the exercise and rest for a few days. If the pain persists, consult a doctor or physical therapist.
Wrap Up
If you’re experiencing knee pain when squatting, try one of the variations I suggested and see how they work for you. Remember to always start light and gradually increase the weight as your body gets stronger.
And, most importantly, have fun with it! Squatting can be a great way to improve your fitness level and get in shape, but only if you do it correctly and safely. Give these variations a try and let us know how they work for you.
About the Author
This article was written by Dane Ford, the founder of Lift Physiotherapy and Performance in Sydney, Australia. Lift Physio aims to help you overcome injury, optimize your health, and unlock your full movement potential.
It’s been a bit, but Part III of Kevin Mullins’ “Corrective Exercise” series is finally here.
I’d sorta mirrors the anticipation everyone had for the Game of Thrones season premiere this past week, except not even close.
Sorry Kev: dragons will always reign supreme over ankle dorsiflexion…;o)
NOTE: Stressing the word “finally” above had nothing to do with Kevin actually writing the article (which he submitted weeks ago), but everything to do with ME and my nincompoopness in actually publishing it.
You are a fitness professional who wants to train people – AKA provide them with enough of a fitness stimulus to generate the results they’ve paid you for. You also want to help them overcome pain and dysfunction in their body.
Thankfully, this series of blogs have got you covered and smothered like Waffle House hash browns.
Which brings us to the final piece of the puzzle – corrective exercises for the knee and ankle.
Many people who would consider personal training deal with some level of knee or ankle problems. In fact, it could be argued that everyone walking around this beautiful Earth has dealt with knee or ankle pain/dysfunction at some point in their lives.
(Tony raises hand. I spent the better part of two years in the early 2000’s working around a cranky left knee.)
A proper discussion of these two joints, one mobile and one stable, would not be complete without a discussion about the role of the hips and feet in the function and performance of the knee and ankle. Our feet are our first and only contact with the ground during much of our lives. Any disruption of their optimal function is going to send dysfunction up the kinetic chain into the ankles and knees.
Just the same, the hip, and its multitude of muscle attachments, functions, and movement possibilities can have a dramatic impact on knee function. Tight hip flexors or imbalanced anterior/posterior chain development can change how the patella tracks over the feet – a recipe for pain or less than desirable movement outcomes. As a proud fitness professional, you should be capable of assessing, correcting, and training clients past many of the common problems that might land on your doorstep.
In this post we’ll explore the anatomy and physiology at play when knees and ankles are the weakness in someone’s kinesiology. We’ll discuss the interplay between the hip-knee-ankle-foot. Then, like the other articles, we’ll discuss five specific issues that most trainers encounter and show off a few new exercises that you can use today.
And then we’ll tie a fancy bow on this corrective series, gather all our jackets and move towards the exits. I hope you’ve found a friend
Basic Knee and Ankle Anatomy – Skeletal
(nerds only)
When looking at the knee joint, we are only considering four specific skeletal structures:
The Femur – the longest bone in the human body is also our primary weight bearing skeletal structure. The femur’s entire function occurs at the hip. It can move through flexion and extension, abduction and adduction, external rotation and internal rotation, and circumduction.
The Tibia and Fibula – load bearing bones of the lower leg. Their design allows for weight transfer in gait and for optimal loading of the lower body during any exercise that creates knee flexion or extension.
The Patella – a bone unlike most others in the body, the patella is interwoven with the tendons that cross the knee joint and serves as a cover for those tendons. The structure of the patella also improves the mechanical efficiency of these tendons.
The ankle joint is a bit more complex though. We must consider the bones of the foot to some degree.
The Tibia – The load bearing bone from earlier is also a major contributor to ankle function. The medial malleolus, a bony growth on the inside of your ankle is located on the tibia. At the ankle, the medial malleolus plays a role in ankle eversion and inversion.
The Fibula – Like the tibia, the fibula is a load bearing bone that also functions during ankle eversion and inversion. It’s bony process, the lateral malleolus, is located on the outside of the ankle.
The Talus – a unique bone in a variety of ways, the talus serves as the base for the tibia and fibula to plant upon. Both dorsiflexion and plantar flexion involve the talus changing position in relation to the rest of the foot. The talus also plays a role in eversion and inversion.
The Calcaneus – connected to the talus via the subtalar joint – the calcaneus functions as a base of support for the structures above it. It hosts insertion points for a variety of muscles and tendons – most notably the Achilles tendon. It is the largest bone of the foot.
(Foot) Metatarsal – critical bone structures that connect the toes (phalanges) to the larger structures of the foot. The metatarsals are critical for weight transfer and distribution and while they don’t move like other bones in the body – their ability to adjust to pressure is critical for elite performance.
(Foot) Phalanges – the toes are the final element of this puzzle. Understanding that the toes can and should flex and extend as a result of ground force reaction or conscious neural action is critical to optimizing the foot’s function. While there may never be a “toe day” – we need to train the function of the phalanges to ensure their relationship with the other foot bones, the ankle joint, and even the knee and hip, are optimal.
Basic Anatomy of the Knee and Ankle – Muscular
It is important to discern the muscles that act on the knee and the ones that act on the hip.
Sure, both are in the thigh and run the length of the femur. However, since the knee joint is designed for flexion and extension – we are only considering the muscles that do just that. With that said, realize that the muscles that do function at the hip must do so properly. Otherwise, the knee joint will act to compensate for dysfunction at the hip and that will cause a host of problems too.
The following addresses strict flexion and extension of the knee joint.
The primary flexors of the knee are:
The muscles of the hamstrings (biceps femoris, semitendinosus, semimembranosus)
The gastrocnemius, popliteus, gracilis, and sartorius are synergistic muscles
The primary extensors of the knee are:
The muscles of the quadriceps (rectus femoris, vastus lateralis, vastus intermedius, vastus medialis)
Now, when looking at the ankle we find simplicity and complexity at the same time. On one hand, there are a bunch of muscles that control the toes and ankle joint that aren’t needed in the typical fitness professional’s vocabulary. Simply put, most trainers don’t need to know the minor details of how the fibularis brevis functions, or where the insertion point of the flexor hallucis longus is.
But they need to know they exist.
(Although, more knowledge is never bad and anyone with an interest in self-myofascial release therapy should understand the interplay between these lesser known tissues).
We do need to know that ankle and foot function relies on many more players than just the prime movers. We do need to understand that dysfunction at the ankle could be a myriad of things and not just a blanket statement about someone’s gastrocnemius.
So, we will address the for major movements of the ankle and point out the muscles for each.
** Take note of just how many more plantar flexors there are compared to dorsi flexors. This could explain why we are so strong with our “calf-raise” exercises and why we typically can access a greater range of plantar flexion under control than we could with dorsi flexion. **
Primary Movers of Eversion
Fibularis and extensor digitorum longus
Primary Movers of Inversion
Tibialis anterior and posterior
When looking at this from a slightly higher viewpoint – we see that we have significantly more muscularity driving both flexions of our ankle joint. The lack of muscularity controlling eversion and inversion explains why we don’t load up on an exercise that challenges that motion. Moreover, it probably explains why “rolling” an ankle can be so devastating – we have so little musculature to control that motion.
Going a little broader, we see that muscles of the lower leg have multiple functions. The tibialis anterior dorsi flexes and inverts the foot while the tibialis posterior contributes to plantar flexion and inversion. The extensor digitorum longus everts the foot while contributing to dorsi flexion. These functions are not accidental – they are essential evolutions and developments of our anatomy to meet the demands of our life.
If we are to succeed in our experience as human beings, then we must be able to communicate with the ground effectively. Thus, the muscles that control our foot, ankle, and knee become our first point of contact with outside world.
Understanding their function, their interplay, and their contribution to elite performance is critical to maximizing the impact you’ll have on your clients and your purpose as a coach.
Basic Movement Physiology
The function of the knee and ankle are highly dependent upon the task we are trying to perform and whether the hips are involved.
For example, the knee will flex and extend during traditional deadlift, but not at the same degree that they would during a front squat. The same logic also applies to the amount of dorsiflexion needed from the ankles to meet that demand.
A different example points to our running stride.
The gait pattern that most elite distance runners take involve very minimal action at the ankles and toes. This sort of “hammer-foot” stride is highly efficient and puts the emphasis on the hips and knees to generate all forward locomotion. Sprinters, however, require maximum action from all the joints of the foot and ankle in order to increase velocity and compete successfully.
Thus, understanding physiology of these structures requires an understanding that optimal function is dependent upon the demands of the task.
Still though, a few notable things exist:
1. When the ankle is in full eversion or inversion – there can be an issue with one’s ability to flex and extend the knee. This is because of the change in position of the inferior aspects of the tibia and fibula creating an up-chain manipulation in their superior aspects (which form the knee joint). It is minor in most but could explain why individuals who live in eversion or inversion find discomfort in their knees.
2. Triple-Flexion (hip, knee, and dorsi-flexion) is the most loaded position of the body because of the major muscles that have created force (tension). In most populations, the greatest power will come from individuals in this position. The stacking of joints lowers the center-of-mass and improves the ability to generate tension.
3. Triple-Extension (hip, knee, and plantar-flexion) is the “tallest” the structures of the lower body will get. The process of going from triple-flexion to triple-extension typically generates the greatest joint velocities.
4. The running stride requires a rhythm between hip-knee-ankle-toe action. Upon foot strike, the toes should flex, which drive the ankle joint into plantar-flexion, assist in driving knee extension, and hip extension. The cycling leg does the exact opposite as it returns to the pre-strike position.
The Major Issues
The knee and ankle joints can be seriously injured during sports and accidents in life. None of the issues discussed below involve torn ligaments, broken bones, or even severe tendonitis. The conditions listed are ones that routinely plague clients who are either inactive or too active with poor function.
In fact, many of the issues of the knee come from overuse of the joint without proper interaction with the hip and ankle. Runners and lifters alike may experience knee pain when their form is off. Likewise, many untrained or detrained individuals deal with knee and ankle dysfunction as a result of their sedentary lifestyles.
And don’t forget about footwear.
There is a cost and benefit to each type of footwear that you and your clients are wearing.
Dress Shoes and Boots – great for making a suit look dapper, or kicking tail on a job site, but atrocious for allowing mobility in the foot. Basically, you feel like you are walking inside of bricks.
High heels – an entire day spent into plantar flexion is not good for anyone. Spending additional time walking in them can hurt the wearer’s ability to distribute their weight once they are out of the heels. Great calves though.
Flip Flops – If you are wearing these, then you are probably at the beach. Sweet. However, that sliding and gliding motion that you are using to keep them on is wreaking havoc on your ankle function while also driving too much knee extension.
O-Lifting Shoes – Having your heels elevated when driving your heavy squats or cleans is awesome – can you say performance? However, if you spend most of your day in these shoes than you can bet your bottom that you’ll begin to lose optimal ankle function since you aren’t feeling the ground.
With all of that said, let’s focus on the five most common things you’ll see in your clients and discuss exactly what is going on.
Lack of Dorsi-Flexion
A lot of people struggle to dorsi flex their ankle in response to loading. In fact, a lot of great coaches, including Tony, have pointed out the importance of adequate dorsi flexion for someone to succeed in a squat pattern.
High quality athletes and desk jockeys can both suffer from this issue. It isn’t simply limited to an inactive or undertrained population. It must be dealt with though if someone is going to optimize the function of their hip-knee-ankle and drive greater results in their programs.
Strengthening the muscles that drive dorsi-flexion while also “stretching” the ankle into these positions with bands or straps is usually the best intervention. We aim to increase mobility, improve strength and stability, and begin providing context and practice with traditional strength training movements such as the squat or lunge.
Runner’s Knee (Patellofemoral Pain Syndrome)
A sort of unofficial name, runner’s knee refers to the over-development of the quadriceps (knee extensors) while also keeping the hamstrings (knee flexors) and glutes underdeveloped. In addition, tightness and exhaustion of the plantar flexors can lead to instability and pain at the knee joint.
In fact, there is some evidence out there that shows that some runners experience a mild shift of their patella in space. Only a few millimeters – this shift can cause significant pain and contribute to the official name of the condition (patellofemoral pain syndrome).
The training for individuals presenting this issue is quite simple:
Release and relax the muscles that plantar flex the ankle and extend the knee.
Strengthen and tighten the muscles that dorsi flex the ankle and flex the knee.
Train the glutes to improve hip drive in the running stride
Traditional strength training and myofascial release typically take care of the problem, although a cessation of running in the short term is almost always a good idea.
Knee Valgus
One of the most misunderstood dysfunctions of “the knee” is a hip issue. Many trainers can coach “knees out” until they’re blue in the face and still get no change in the performance of their client.
First, knee valgus refers to the inability of the hip abductors and external rotators to fire appropriately, thus causing a collapse once tension reaches a certain threshold (such as the bottom of a squat).
Image Credit: prehabguys.com
Now, sometimes this only requires good coaching as the client or athlete simply doesn’t know they are doing it or that isn’t ideal that they are doing it.
We must be wise though. Coaching knees out could be driving excess ankle inversion, which changes the relationship of the tibia/fibula with the knee and could lead to torque being experienced in the knee joint as the body seeks to overcorrect the inversion. This isn’t a common worry – but it is possible.
The training cure though will involve strengthening the abductors and adductors of the hip to improve knee tracking in a variety of exercises. It is important to keep in mind that overtraining the abductors can lead to other problems that only arise when the adductors are forgotten about.
There could also be something going on at the ankle too…
Inappropriate Eversion and Inversion
This one sounds a little silly, doesn’t it?
Inappropriate sounds like someone left their pants at home.
But it points out a deficiency that a lot of people have. Whether it be from a lack of coaching and training, or the development of patterns by accident through sport and training – many people lack the right ankle position to complete the task they are attempting.
Think of that client that can’t stop squatting without eversion. Every repetition pushes them into their toes and insole (often leading to valgus). It could be coaching (or a lack thereof), it could be muscle weakness, or it could be a neural disconnect between their brain and their ankles (they don’t know they are doing it).
Just the same, there are people who can’t seem to run on their big toe. They’ll stride flat footed, especially on the outside of their heels, and wonder why they aren’t getting any better at running. These people have not unlocked enough plantar flexion or awareness of their inversion.
It is exceptionally common to see in long distance runners.
Having the wrong ankle position is coachable and trainable. You must relax what is overused and overworked and strengthen what is left behind. There will be specific protocol for whatever you are seeing. Simply look back at the muscular anatomy and select exercises and interventions that are appropriate.
Disconnect of Hips from Knee/Ankle Function
The final issue that people have with their knees and ankles is that they have no idea they have a pelvis. It is as if they believe their lumbar spine connects to the back of their legs…
No really, you probably have a client or twelve who seem to have no idea how to flex and extend the hips. As a result, everything hurts their knees and ankles. Squatting hurts, running leaves them achy, and they absolutely despise lunges.
They aren’t broken thankfully.
They just need to discover their glutes.
They need to learn how to flex and extend the hip with a lot of exercises that leave the knees out of it. So, deadlifts, hip thrust, banded abductions, Copenhagen side planks, and some anterior core work will do wonders to wake up their hips, stabilize their core, and allow them to excel and knee-dominant and gait patterns. Want to learn more about this? Check out my last installment on the hips.
The Exercises
1. Bulgarian Split Squat to Ankle Glide
https://www.youtube.com/watch?v=2WO3-DQenTI
Your goal with this bodyweight exercise is to create a crossover effect between knee flexion and dorsi flexion. By working with the single leg variation – you’ll enhance your clients focus on one specific ankle while simultaneously exposing them to pause reps for the single leg squat variation. You can train them and correct them at the same time.
2. Banded Dorsi to Heel Raise
https://www.youtube.com/watch?v=qrMjjZKkQ8Y
Great for runners and athletes, but effective for everyone, this ankle exercise only requires a band and a seat.
The goal here is to maximize both dorsi flexion and plantar flexion in the same movement cycle. This sort of training allows for you keep the muscles that control both actions in relative balance. This is not unlike being on a calf raise machine and allowing your heels to dip below the step.
3. Barbell Hip Thrust w/ Banded Abduction
One day I want to call Bret Contreras and thank him for his research on the glutes. (Although this video is of Ben Bruno – a stud coach in LA who does NOT like burpees). Discovering that the hip thrust provides more activity of the glute muscles than other exercises is critical for the development of aesthetic and athletic glutes.
Adding in the abduction component at the top is a sure-fire way to ensure your “knees-out” coaching cue for valgus hits home. The band ensures they move from the hip joint instead of just torqueing at the knees. Add in the isometric hold of the glutes and you’ll be sure to work the hip component of knee stability.
4. Duck Walks
https://www.youtube.com/watch?v=beIn56rJGmU
This is an absolute torture device. Duck Walks, loaded or unloaded, drive the body into that triple-flexion position we discussed earlier in the blog. This coiled position strengthens the posterior chain and improves dorsi-flexion by keeping our feet in a set position.
A highly integrated exercise – the duck walk can be used for neural prep or as a burn out after your primary work is done. Sure, its goofy and it doesn’t “seem” like it is going to do your body any favors, but try it and feel how your systems work together to hold isometric tension.
5. Reverse Nordic Curl to Nordic Curl Superset
https://www.youtube.com/watch?v=H-WpX-dnBuY
We want the quadriceps and hamstrings to be in relative balance for optimal knee function. Depending on our choice of sports or training – one may overpower the other a little. That discrepancy though shouldn’t be a chasm.
Hitting both versions of the Nordic curl in a single superset provides an opportunity to train the muscles in a unique way using only bodyweight.
BONUS: Sprinting
https://www.youtube.com/watch?v=3YqQum4emVw
The act of sprinting is one of the most athletic things the human body can do. The whole body must get in on the act if we are to excel.
Specifically, for the knee and ankle, sprinting helps drive a low-level of eversion while demanding quality cycles through plantar flexion and (mild) dorsi flexion and knee flexion and extension. Add in the function at the hip and we’ve found the perfect lower body exercise for improving someone’s function and interplay between these regions.
Obviously, not every client could sprint or should sprint. Be wise with your prescriptions and coach who you are with, not who you wish they were.
Finding the Exit
So, once again we conclude that we can intervene in our client’s discomfort and dysfunction with exercises that not only correct issues, balance muscles, and improve coordination, but also drive a fitness stimulus.
The knee and ankle are interesting joints in a sense that they have less muscle mass around them than the hips and shoulders. But that doesn’t make them any less important. In fact, their proximity to the ground – a constant in our lives – makes them more important than most trainers think. Everything that is dysfunctional at the foot, ankle, and knee will run up the chain into the hips and spine and even the shoulders.
Help your clients discover their foot stability, ankle mobility, and knee stability and you’ll help them discover a better body – both in performance and in aesthetics.
Thank You
Thank you for your time.
Thank you to Tony for allowing me to share my ideas on his website – a treasured space on the internet.
Whether you visit him for his pop culture references, his biceps veins, or his absurd level of knowledge about the body – you’ve made a great choice.
I truly hope you have learned something from this series and enjoy my writing style. I poured a lot into this, and into my book, Day by Day. I hope I can download everything I have learned (good and bad) from me to you every chance I get.
Like I say to my clients, “let’s get just a little bit better every day.”
Check Out Kevin’s Shit
You can read more of Kevin’s stuff at his website HERE.
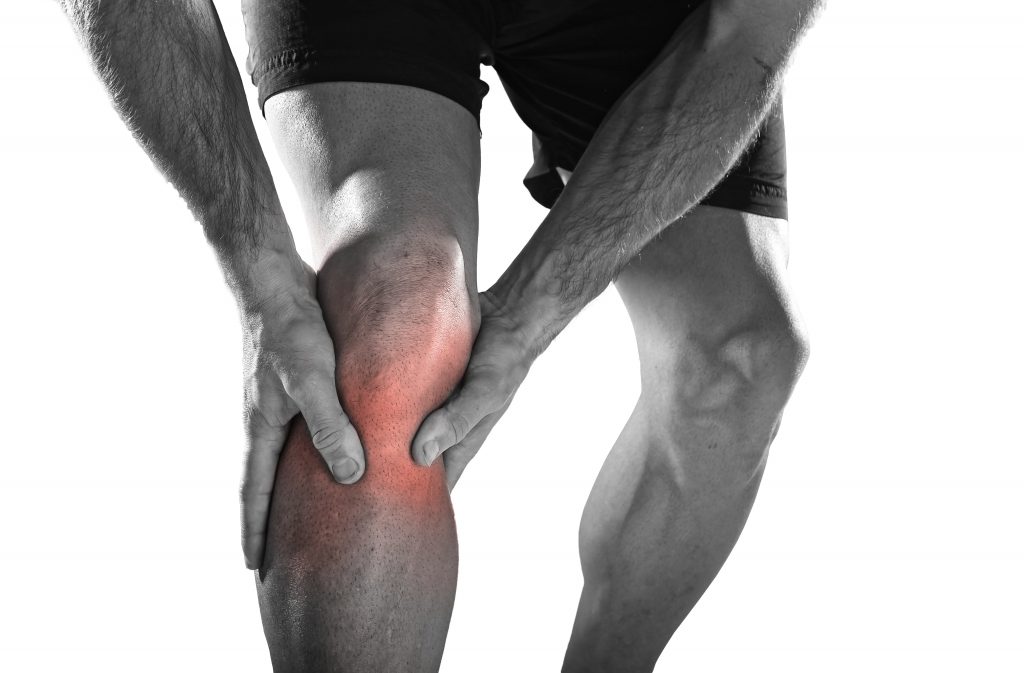
It’s kind of hard to achieve the holy grail of brohood – i.e., bigger, faster, and stronger (and tanned) – if you’re constantly banged up and/or hurt.
Our knees take a beating as it is, but if you’re a meathead this statement is exponentially true.
But even if someone says “my knees hurt!”……what does that even mean? Knee pain, or how smarty pants people refer to it – anterior knee or patellofemoral pain – is a very subjective term and doesn’t help explain the mechanism or cause of the pain in the first place. Hell, many scientist can’t even explain or agree what the term pain means or where it manifests from!
I guess to be more precise I should allude to the actual diagnoses of patellofermoral pain. There are many and it’s hard to pinpoint one major culprit over the other. We have patellar compression syndrome, patellar instability, general biomechanical syndrome, direct patellar trauma, soft tissue lesions, and overuse syndromes to name a few.
Too, we can’t deny that many people just move like complete shit. And while squatting is often poo-pooed or pointed to as Public Enemy #1 with regards to eating up someone’s knees, quite frankly (and more often than not) their squat pattern is atrocious. Sometimes all it takes a one minor tweak to their technique which can make all the difference in the world.
And then there’s other stuff like how to coach someone to perform a more “knee friendly” lunge, addressing weak hips, addressing alignment, mobility deficits, and engraining in people that you can always, ALWAYS train around an injury.
In my latest article on T-Nation.com I discuss all of the above and then some.
Trilogies usually suck. Sure we have the golden standards like Lord of the Rings, Star Wars (the first one, don’t even get me started on that piece of crap Phantom Menace that Lucas tried to pawn off on us), The Godfather, and The Dark Knight. But for every one that raises the bar, we have ten “sequels” that are just absolute garbage: Police Academy V, anyone?????
So what the heck does this have to do with anything?
Well, as far as fitness info products are concerned, you’d be hard pressed to find any series more impressive than the Muscle Imbalances Revealed franchise. Having been a part of the last installment – Muscle Imbalances Revealed – Upper Body – I can attest that the information routinely provided is top notch and will undoubtedly help any professional take his or her “game” to the next level.
I mean, if you want to become the best, you need to learn from the best. Right?
Today, as well as sporadically throughout the rest of the week, I’m going to be discussing the latest in the series (the third, in fact), Muscle Imbalances Revealed – Assessment & Exercise, which includes presentations from the likes of Rick Kaselj, Anthony Mychal, John Izzo, and Nick Rosencutter.
Assessment and Exercise for Knee Injury Recovery – Rick Kaselj
Since Rick is the “Oz” behind the Muscle Imbalances Revealed curtain, doing all of the behind the scenes work that never gets recognized (as well as serving as the figurehead of the series) I figured it only made sense to start here.
Before I begin, though, I just have to say that Rick is probably one of the most genuine and jovial human beings I’ve ever met, and his thirst for knowledge (and spreading it to others) is unparalleled.
As such, Rick has a lot of experience working with injured people (and healthy ones, too) and he’s recognized as one of the “go to” professionals with regards to assessment and rehabilitation. For those who aren’t familiar with Rick’s work, you can check out his website HERE.
Rick’s presentation spoke volumes to me personally because I’ve had a history of knee issues for the better part of the past decade, and he has an uncanny ability to break things down into manageable, “why the hell didn’t I ever think of that!?,” nuggets of information that can easily be implemented on day one
After giving a brief overview of general knee anatomy, here are a few bits of awesome that Rick provided:
1. When it comes to assessment, it’s important to test the knee in both PASSIVE and ACTIVE ranges of motion.
Passive = gravity or someone else is doing the movement.
Active = the individual themselves is doing the movement.
2. In terms of general ROM guidelines, we’re typically looking at an individual to be able to get to -5 degrees of knee extension, and around 140 degrees of knee flexion.
This is important because we need anywhere from 2-70 degrees of flexion in order to walk, and a loss of around ten degrees of extension can result in a limp, which, not surprisingly, will place a lot of undue stress on the ligaments and muscles. Not to mention put a damper on your ultimate frisbee plans this weekend.
Rick also noted we need 93 degrees of flexion to get out of chair, 106 degrees to tie shoe, 136 degrees to take bath, and 141 degrees to swift kick someone in the face.
I made that last one up, but the key point is that having full knee ROM is important for every day activities.
3. Speaking in more specific terms, Rick noted that a lack of knee extension also results in loss of what he referred to as the “screw home mechanism,” which serves its purpose by reducing stress on the quads and placing more on the passive restraints (cartilage, menisci, and bones).
This seems counterintuitive, and when I first heard Rick say this I tilted my head to one side and was like “what the what!?!?!?”
But once he explained his rationale in more detail, I was picking up what he was putting down.
In short, in stealing a line from Mike Roberston: stacked joints, are happy joints.
4. As far as the actual assessments are concerned, I like Rick’s approach because he takes more of a simpleton approach, which I dig. A lot.
There’s no smoke machines, or laser show,or any theatrics for that matter. I think a lot of fitness professionals fall into the trap that the more advanced or seemingly “cool” the assessment looks, the better it must be. I disagree.
Using one example from Rick’s presentation (and there are several): he likes to incorporate a bilateral standing calf raise into the mix to see whether or not someone can get onto their toes and attain knee extension.
For the record: When Rick demonstrated this, I couldn’t help but notice that basketballs he has for calves. Well played, sir. Well played. I hate you.
5. Rick then goes into several common exercises to regain ROM, and then progressing depending on how the knee responds.
I’ve poo-pooed on Terminal Knee Extensions (TKEs) is the past – namely because I feel they’re woefully OVERemphasized in knee rehab – but Rick does a good job of demonstrating several variations progressing from unloaded (d0ne actively) to loaded, to adding resistance.
On top of that, he even demonstrated several Terminal Knee FLEXION exercises using a towel that I thought were pretty neat.
If anything what I took most from Rick’s presentation is that we can’t always be meatheaded with our rehab. It’s REHAB for crying out loud!!! But there’s also a lot to be said about not treating our clients and athletes like they’re patients, and giving them a training effect.
As much as we want to think that squats cure everything from global warming to cancer, when it comes to knee pain and fixing it, that’s not necessarily the case.
More often than not, we must take it down a notch (or 20) to re-teach the body proper motor learning engrams, to teach it which muscles actually need to fire, and to prevent someone from overreaching their pain threshold.
Muscle Imbalances Revealed: Assessment and Exercise is on sale starting TODAY (Tuesday, August 14th) until this Friday for a redunkulous introductory price of $37. Considering you can get your learnification on from some of the industry’s best, all in the comfort of your own home, without having to spend an inordinate amount of money travelling, and you’ll simultaneously earn some CECs in doing so, well, that’s a bargain if there ever was one.
Not long ago I filmed a vlog about the difference between box squats and squats TO a box. While to the casual fitness enthusiast there may be no differentiation between the two variations (a squat’s a squat, right?), these are probably the same people who feel PCs are the same thing as Macs.
That’s just crazy talk.
Crazy I tell you!!!!!
I’m not going to beat a dead horse and go into the details here (you can just click on the link above to found out the difference between the two), but I will say that my fellow partner in all things awesome, Nia Shanks, wrote a similar blog (with video) HERE which expounds on the benefits of squats TO a box.
Anyhoo, a day or two after her post went live, she received a question from one of her readers:
“Any suggestions for squat variations for people with hip flexor issues? (Tendonitis)?”
Her response (what she actually wrote):
“Good question. I’m going to pass this on to one of my friends that could provide a better answer. I’ll post his response here.”
Her response (with what I would have added if I were her):
“Good question. I’m going to pass this on to one of my friends that could provide a better answer. I’ll post his response here.
Not that this matters, but he’s incredibly intelligent, good looking, and possibly more manly than a lumberjack.”
All kidding aside (although I’m not really kidding), Nia reached out to me and asked if I had any feedback. Below is what I wrote back to her last nightl, which I decided to make into a blog post because, well, I can.
NOTE: I was watching the RedSox game as I was typing it, so please forgive the ADD nature of the post.
Goddamit Youkils, you have to swing at that pitch!!!!!
1. Know the difference between tendonitis and tendonosis.
The former is generally accompanied with slight joint inflammation and typically goes away after a few days of rest, ice, and NSAIDS.
The latter, though, refers to more of a chronic condition where the joint itself has seen some (or maybe significant) degeneration. Basically, it’s something that doesn’t go away after a few days.
That being said, when someone complains of tendonitis, and it’s been an on-going issue, it’s probably really tendonosis.
…..and some of the following may help take some of the burden off the joint itself.
2. Take a grenade approach with soft tissue work.
Foam roll EVERY…….SINGLE…….DAY. Not once a week, not only on the days that you train, but every day!
It stands to reason that if one’s knees are bothering them all the time, they have less than optimal tissue quality and it’s something that needs to be addressed. Foam rolling is one of the best ways to do so.
Healthy tissue shouldn’t hurt when you palpate it, and if it does, that’s a tall tale sign that something’s up.
Hammering areas such as the hip flexors themselves (Rectus femoris, and TFL), as well as the adductors, ITB, and glutes will undoubtedly help and often alleviate much of the symptoms.
I also like to be a bit more “specific” and target both the vastus medialis and vastus lateralis with a tennis or lacrosse ball. Both are major trigger points for knee pain, and are an often overlooked area most people ignore – along with the glute medius for that matter.
People will ignore the areas that often cause the most discomfort, but those are the areas that SHOULD be targeted.
Better yet, seek out a reputable manual therapist who will get hers or his hands on you. Nothing bothers me more than PTs who do nothing but band exercises, electrical stim and then ultra sound.
Sure they all have a time and place, but finding a therapist who provides Graston, ART, or whatever will be a definite advantage.
3. Preach to yourself vertical shin angle.
“Stacked’ joints are happy joints (as Mike Robertson would say). More often than not, it’s not squatting that bothers people’s knees, but rather, what they’re doing that bothers their knees.
I can’t take credit for the vertical shin angle cue – that goes to Charlie Weingroff – but it’s something that works wonders for people with knee pain.
Many trainees make the mistake of breaking with their knees when squatting and end up with significant forward translation of the tibia. This induces a lot more shear loading on the joint, which as you can imagine, is going to piss it off.
Instead, I like to cue the following: Make sure to SIT BACK and PUSH THE KNEES OUT.
This does two things: maintains a more upright torso and ensures there’s proper task distribution.
The initial decent should be with the hips sitting back. Doing so will not only place more emphasis on the glutes and hamstrings (hips!), but also ensure more of a vertical shin angle, which is going to be MUCH more knee friendly.
I guess, in a way, this is just a long-winded way of saying that the reason most people’s knees hurt when they squat is because of technique that makes my eyes bleed.
4. Hammer hip stability.
The knees are at the mercy of the hips (and ankles). Most trainees have piss poor hip stability and are unable to control the femur properly, which is something that Mike Robertson touches on his is Bulletproof Knees Manual.
Taking a step back and implementing some simple drills like side lying clams, x-band walks, etc would bode well.
Yes, they’re girly and seemingly worthless, but you’d be surprised at how hard side lying clams are when done correctly. We use them quite a bit in our programming at Cressey Performance, and it’s always interesting when a dude who can squat 400+ lbs has a hard time performing clams.
Taking it a step further, I’d also make a concerted effort to include more single leg work into the mix as that will automatically force one to work on their hip stability. When in single leg stance, we’re forced to utilize what’s known as the lateral sub-system to keep the pelvis steady.
For those unaware what the lateral sub-system entails: it’s the glute medius and adductor complex on standing leg, along with the quadratus lumborom on the opposite leg.
One point to consider, however, is the type of single leg work you’re doing. For those with knee issues, variations like forward lunges or walking lunges are going to be problematic due to the deceleration factor.
Ie: You have to decelerate your bodyweight in order to perform the movement.
Reverse lunges will inherently be more “knee friendly” due to the more “accelerative” nature of the movement.
Along those same lines, don’t be a hero and be too aggressive with loading when it comes to single leg work. Most trainees use waaaaaaaaaaaaaaaaaaaaaaaaaaaaaaaaaaaaaaay too much weight, and as a result, end up using less than exemplary technique (which defeats the purpose in the first place).
5. Booty, Booty, Booty, Booty Rockin Everywhere
As a corollary to the above, placing a premium on more glute work isn’t a bad idea either. The glutes have a VERY strong influence with regards to control of the femur.
Think of what happens when the glutes aren’t doing their job.
– You see more of an anterior pelvic tilt.
– APT results in more internal rotation of the femur.
– IR of the femur also results in in internal rotation of the tibia (and pronation of the feet).
– Your knee hates you.
Once we got those puppies firing and doing their job, we see the opposite happen:
– We see more posterior pelvic tilt of the pelvis.
– In addition, because they control the femur, we see more external rotation of the femur
– Which, of course, leads to more external rotation of the tibia (and more supination of the feet).
– Now girls will want to hang out with you.
To that end, whether you keep it simple and perform more supine or 1-legged glute bridges, or start upping the ante and perform things like deadlifts, pull-throughs, glute ham raises, KB swings, sled pushes, or grizzly wrestling………
…..the name of the game is GLUTES!!!!!!
6. We can’t neglect the core either.
More specifically, we can’t neglect the anterior core.
Even more specifically, we can’t neglect the external obliques.
Much like the above, lack of core strength and stability (especially as it relates to the obliques) will cause someone to go into more of an anterior pelvic tilt.
Utilizing movements like various chops and lifts would be of great benefit.
As would some dedicated rectus abdominus work – GASP!!!!!!!!!
7. And what the hell, when all else fails, just deadlift
Deadlifts = less hip and knee flexion, which are going to be far more knee friendly than squats. What’s more, if you really wanted to get some more quad work into the mix, you could always revert to trap bar deadlifts which are more of a quad dominant hip dominant variation anyways.
But at the end of the day, I feel that squats TO a box will definitely be a step in the right direction as far as helping those with knee pain. For starters, the box will allow one to squat in a pain free ROM – whatever the height may be. But even more importantly, it will help re-groove the proper squat pattern which most people suck at anyways.
Then, at some point, one can work on getting to full depth (which can be argued are more knee friendly as well). But lets not get too off track here, because that can be another blog post in of itself.
Now, this doesn’t mean that all the other stuff discussed above is any less important. Far from it.
But I do feel that when it comes to technique, most fail miserably. Watch both the videos that both myself and Nia provide above, and you should be golden.
Hope that sheds some light on a pretty extensive topic.
Before I get into my three favorite metabolic protocols for people with bum knees, I have a very important announcement to make. No, it has nothing to do with a cannonball (ALA: Will Ferrell, in the movie Anchorman).
No, it has nothing to do with hitting a 600 lb deadlift (trust me, when that happens, you’ll know). And no, it has nothing to do with me divulging any plans to release a product anytime soon (although, that will definitely be in the cards at some point this decade year. I promise).
Actually, the truth is, my girlfriend and I signed a lease earlier this week, which makes it official: we’re moving in together. Yay for co-habitation!!!
Note to Lisa: Just a heads up babe – I pee in the shower.
Anyways, it’s a big step for sure, but it’s something that we’ve been discussing for a while now. We found a ginormous apartment in an area that we love in the city, and we’re really excited to make it ours.
The move in date is in less than a month, which means, among other things, I need to go through my t-shirt drawer and decide which ones I want to take with me. You could say that collecting vintage t-shirts is a hobby of mine, and while some (Cobra Commander) I’m going to keep forever, others are so old and crusty that I could probably walk over to the local nursing home and donate them as penicillin. HA! Get it?
So, that said, if any of you have any words of wisdom (or encouragement), please, feel free to chime in below. I mean, now that we’re moving in together, Lisa is pretty much obligated to make me ham sandwiches everyday, right? Right?
Okay, enough with beating around the bush – lets get down to business. Now, if you’ve been reading this blog for any length of time, it’s no secret that even though I’m 34 years old, I have knees that are seemingly older than Gandalf. Zing! Count it! Man, I’m on fire today!
As such, while I’m still able to hit my lower body pretty hard, I still have to be careful when it comes to things like squatting (consistently), sprinting, and any other modality that puts a lot of stress on the knees.
Now, before I go on, let me be perfectly clear: despite what a lot of people say – you can ALWAYS train around an injury. I won’t belabor the point – especially since I wrote on the topic already, HERE – but suffice it to say, while I definitely have to tweak my programming accordingly (not to mention stay on point with things like foam rolling and other soft tissue modalities), I still feel I’m able to get a great training effect and maintain (if not improve) my overall strength and conditioning levels following a few basic tweaks – seen below.
As the title above suggested, today, I want to focus more on the metabolic or conditioning side of things – because, lets me honest, when you have cranky knees, doing anything more than a light jog (or even walking) can oftentimes be problematic.
Here are my top three metabolic protocols in no particular order. And, as it so happens – there’s no smoke and mirrors involved.
1. Airdyne Bike Intervals
I’d argue that no one piece of equipment (other than the Prowler) is despised more in our facility than the airdyne bike.
When it comes to interval or metabolic training, not many pieces of equipment can trump the full body effect that the airdyne bike has on the body; which is why I like to follow what’s called the 180 Rule. Which is this: whatever you see the vast majority of people using in the gym (elliptical trainers, for example), do the exact opposite. In layman’s terms, the equipment that no one ever uses tends to be the ones that are the most useful.
See that airdyne that’s tucked over there in the corner of the gym that you thought was part of an antique exhibit? Yeah, you should use it.
People don’t use them because they’re hard, and they’re not fun (and coincidentally, they don’t have a flat screen television attached to them either).
While you can certainly keep things easy and just follow a simple 1:2 or 1:3 (work: rest) ratio – something like 15s of work, followed by 45s rest for a certain amount of time (say 10 minutes) – I like to kick things up a notch and follow a protocol popularized by Christian Thibaudeau:
1a: 30s, easy
1b: 20s, hard (and by “hard,” what I really mean is pretend that a lion is chasing you while you have a steak tied to your back. GET MOVING!!!!!)
2a: 60s, easy
2b: 30s, hard
3a: 90s, easy
3b: 40s, hard
4a: 120s, easy
4b: 50s, hard
5a: 150s, easy
5b: 60s, hard
6a. 180s, easy
6b: 70s, hard
Cool down for 5 minutes, and allot some time to catch your breath.
And yes, if you don’t have access to an airdyne bike, you can still use a regular bike here. The only thing you need to be cognizant of is that you must make sure to increase the resistance on the sprints, and lower the resistance during rest intervals. And clean up your pool of sweat, you jerk!
2. Slideboard
I’ll be honest here and say that there was a time where I felt the slideboard was a foo-foo piece of equipment that I would NEVER use. Then, I actually took my head out of my ass, started listening to people like Mike Boyle (who expounds on their efficacy religiously), and finally started seeing just how valuable and versatile they can be.
The slideboard may be the best, most cost effective conditioning mode available for athletes exclusive of actually running (which for those with bum knees, ain’t gonna happen).
Taking a page from Boyle, the slideboard offers the following:
Places the athlete n a sport-specific position, almost regardless of sport.
Positively stresses the abductors AND adductors muscles.
Allows athletes to work in groups of three to four on one piece of equipment
Provides work capacity training in an interval format with no adjustments, all for under $600.
What’s more, it’s a VERY joint friendly modality to use when someone suffers from knee pain. Moreover, think about how we generally train as a society: we tend to be VERY linear with our movements, doing things in a straight line all……….the………freakin………time. With the slideboard, however, we can now train lateral (side-to-side) movement, which undoubtedly is an important component of any well-rounded program.
Keeping things simple, I prefer to use standard work: rest ratios here. Meaning, one would basically slide for 20-30 seconds, rest of 60-90 (or longer) seconds, and repeat for a required amount of time.
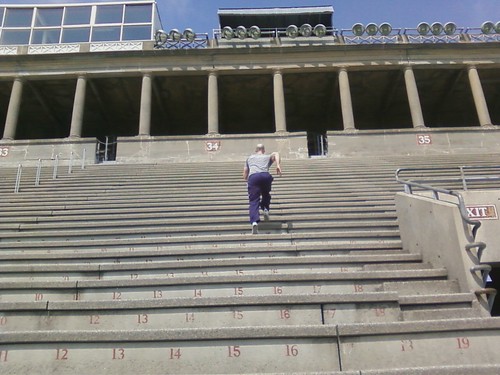
3. Stadium or Hill Sprints
My friend Nia Shanks is going to love this, since she’s ALWAYS telling people how running hill sprints is the bees knees.
I have to say, I kinda agree.
Now that the weather is nicer here in Boston, every Sunday my girlfriend and I head over to Harvard University and run sprints up the football stadium. Here’s me doing my last sprint last weekend:
It’s fairly standard:
Sprint Up (or walk briskly, depending on current fitness level)
Walk Down
Repeat
Hate Life
Because there’s very little (or less) stress on the knees running up stairs (or a hill), this is a fantastic modality for those with knee issues. But, in reality, it’s a phenomenal workout regardless, and I defy anyone to argue otherwise.
So, there you have it – my top three metabolic protocols for people with knee pain. While it’s definitely not an exhaustive list by any stretch of the imagination, I feel that these are the three that can most easily be implemented by most people given equipment availability. Have one to share? Let er rip below!