Categoriesbusiness coaching fitness business personal training

Fitness Industry Survival Tips

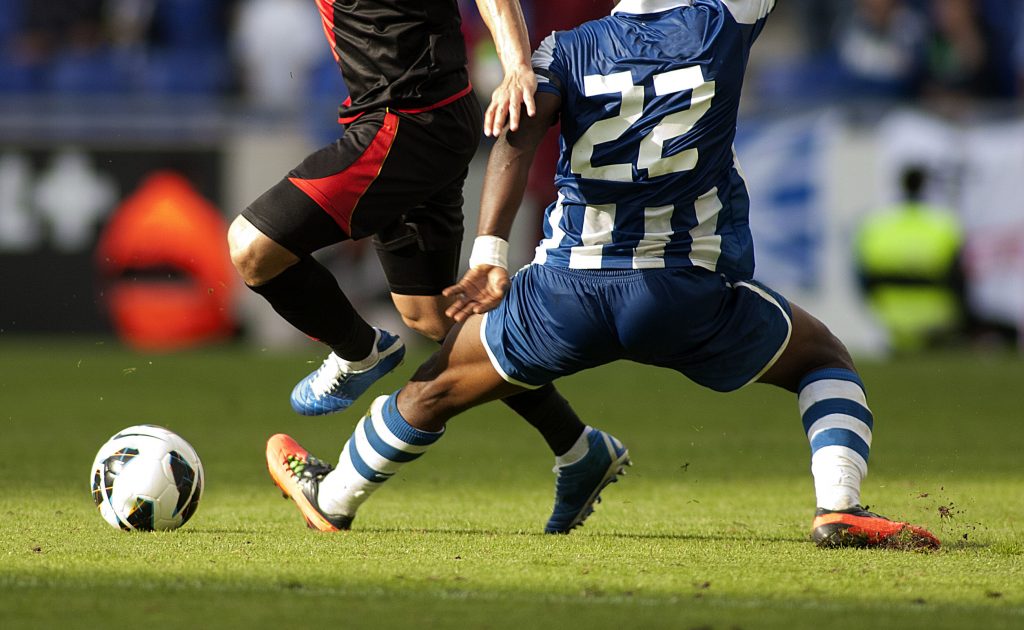
Surviving in the fitness industry is tough. Now, granted, this isn’t The Revenant…we don’t need to worry about wrestling grizzly bears or anything. But it is pretty cut-throat out there and the one’s who “survive,” and do well, are the ones who can separate themselves from the masses.

Today’s guest post by strength coach Travis Hansen showcases some ways you can do just that.

Copyright: enki / 123RF Stock Photo


Fitness Industry Survival Tips

Trying to be successful in the fitness industry is a lot harder than most people tend to think.

The temptation for instant gratification and fly by night credibility is a very strong one, and provides with it a common misconception that you won’t have to grind on a regular basis, learn, and actually train people, not to mention generate legitimate results to remain alive in the business.

I’ve heard from a few credible sources that far less than 10 percent of individuals who start in the fitness business remain alive after a decade, and based on my experience that definitely seems to be pretty true.1

In this article I am going to share with you some arguable principles that I’ve utilized over the course of the past 12 years to stay alive and grow both my online and personal/athletic training business. I am by no means the most successful individual and I’m sure that many others could add to the list, but I honestly think the issues I am going to share with you are essential to your survival if you love this business and ultimately want to help people. I think everything stems off of the two factors I just mentioned and they serve as the groundwork for everything else to help lead you on your way.

So here we go….

#1- What Room Are You In?

Something that is very common I noticed from other trainers or even just the general public, is that there seems to be a constant battle in determining who knows more than the other person, or someone immediately jumps out and gets defensive if their current thought process is challenged by someone who may in fact be right.

I would be willing to wager a bet that our industry is far more guilty of this problem compared to any other profession with all of the hyped up trends that are out there still, hands down!!!

If you watch closely you will notice that the best in the business often times have their note pads out, eyes locked in on the person they are interacting with, ears open wide when they are trying to learn anything they can take away from the present conversation, and more times than not, don’t engage in these petty intellectual ego driven arguments that accomplish zero in the long run, unless the individual is just that damn stupid and asking for it.

As Mike Boyle once said:

“ There is a reason we have two ears and one mouth.”

The harsh truth is that you should probably spend the first 10 years of your career searching out the people who make you uncomfortable and dumb for the moment and eventually it will all start to make sense, and I guarantee you will be surprised just how much better you get.

The last thing I want to discuss in this regard is that something world renown coach and gym owner Zach-Even Esh once said that really resonated, and that is that people are often times uncomfortable and unsupportive of successful people as it makes them introspect and assess where they are at relative to their goals.

I honestly feel if that you start admiring successful people and try to emulate and even beat them then good things start to happen.

Don’t hate congratulate!

#2- Sacrifice

What a lot of surviving comes down to is how much you’re willing to do and sacrifice in order to achieve your goals.

Once you have mentally committed to doing whatever the hell it takes in order to achieve your goals without being illegal or walking over someone in the process then eventually you can start to grow.

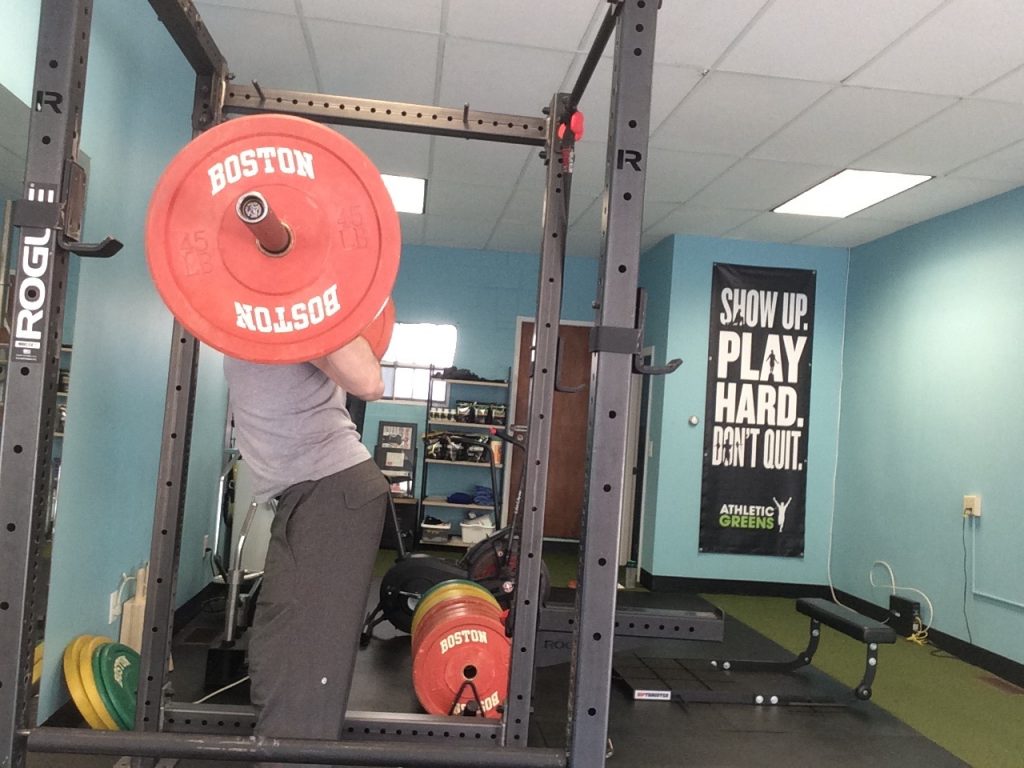
I remember when I first got into this business I would buy and immerse myself into any fitness related material I could get my hands on to help build a solid learning filter. I was working 6-7 days per week for 8-12 hours per day. I would contact and pester any expert that would respond back to me with questions I had.

Luckily I stumbled across some great people that I still consult with today. You need very strong mentors and a network to better yourself and help your people.

#3-ASK FOR HELP

Never be afraid to ask for help or admit to your clients that you do not know something.

This only improves your credibility and earns more trust from your people in the long run.

Conan O’Brian once said in his late night talk show that saying you don’t know is often a sign of intelligence.

If you elect to retain your massive ego and state of ignorance, then you are only setting your education and growth back, and eventually your people are going to catch onto your bullshit and you will join the massive crowd of fly by night trainers that exist in our society today.

And remember you are only as strong as your network or alliance.

#4- Re-Invest

If you pay attention on social media, many times the high level practitioners and coaches in the field will send you subtle hints on how to be successful by showing you pictures of their personal training library and such.

There is also generally a very robust “Resource” section on every one of their websites where they show you where they learned from and how to improve your potential knowledge gaps.2

Your success will be ultimately determined by how smart you are, how hard you work, and how much you invest in your education and business. I never personally took out a business loan, but every paycheck and sometimes my whole paycheck was dedicated to learning material or small equipment purchases that accumulated into a bigger and bigger training setting or environment.

And then eventually once people see that you know what you are doing, you’re legitimate, and you get results, then they will more than likely invest in you and the ball just keeps growing bigger and bigger!
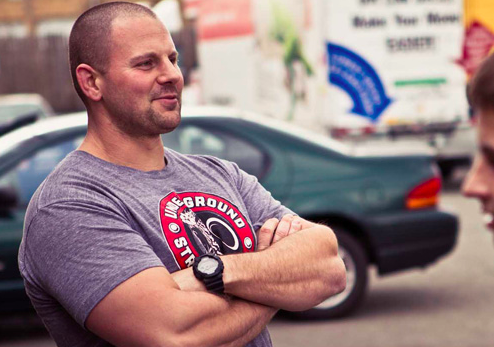
About the Author

Travis Hansen has been involved in the field of Human Performance Enhancement for nearly a decade. He graduated with a Bachelor’s degree in Fitness and Wellness, and holds 3 different training certifications from the ISSA, NASM, and NCSF.

He was the Head Strength and Conditioning Coach for the Reno Bighorns of the NBADL for their 2010 season, and he is currently the Director of The Reno Speed School inside the South Reno Athletic Club.

He has worked with hundreds of athletes from almost all sports, ranging from the youth to professional ranks. He is the author of the hot selling “Speed Encyclopedia,” and he is also the leading authority on speed development for the International Sports Sciences Association.

Categoriescoaching Corrective Exercise Program Design

How to Train Around a Groin Strain

Groin strains can be a stubborn son-of-a-bitch. Once you have one, it’s one of those pesky injuries that never really seems to go away. In today’s guest post by strength coach and physical therapist, Sam Spinelli, he breaks down some common ways to resolve the issue.

Awesome stuff. 

Copyright: sportgraphic / 123RF Stock Photo


How to Train Around a Groin Strain

Groin strains are often a hard problem for people to manage. We see them present in many different populations and occur with a wide range of activities. Strains are common in sports such as baseball, hockey and soccer where this is a huge demand on the groin.

With the groin musculature being a collection of numerous muscles, it is involved in so many different movements – flexing the hip, extending the hip, bring the knee towards midline, internally rotate the hip, and externally rotate the hip.

Due to the involvement in these movements, the “groin” can get stressed while performing them, but also get strained when the opposing movements are done as well.

For example, the adductor brevis (one of the higher up groin muscles) acts to adduct, internally rotate, and flex the hip.

If strained, during those three movements the muscle will be challenged to contract.

In contrast, during hip abduction, external rotation, and extension the adductor brevis will get lengthened. When the adductor brevis is strained, excessive lengthening can increase the damage to the vulnerable tissue.

The first step to managing these strains is to get things to calm down. Check out THIS article for more on that in regards to strains.

Get Long

When we say get long, we are talking about having someone comfortable with allowing the involved musculature to elongate.

This isn’t trying to lengthen the actual tissue – which is a topic we will discuss in a separate article/video series – but have the tissue be able to express the range it actually has with ease.

Below is a series of options – foam rolling, less dynamic movements, and more dynamic movements.

We start off with foam rolling as a means of helping in the short term, which we can use to help reduce the perception of tone in the tissue. Ideally this is used only briefly and removed as soon as possible so we are not relying upon it.

The less dynamic movements are one which have less involved movement, fewer joints involved, and more support. These are a great starting point for moving and reducing fear in individuals coming off a groin strain.

The more dynamic movements are things that will have more transfer to daily life and sporting activities.

Once we are in the phase of building things up, we will shift our focus to exercises to help make the tissue more resilient. In particular, we are going to start off with an approach to get long and get strong.

Soft Tissue – Adductors


Split Stance Adductor Mobilization


Frog


Frog 2.0


Lateral Lunge


Cossack Lunge

Cossack Squat


Get Strong

A muscle that is stronger can handle more stress placed upon it. This is why developing the musculature related to this injury can help in the future. In particular, we will look to increase the strength of the groin muscles, but also that of the abdominals.

When we look at where most of the groin muscles originate, we can see they share a common insertion with some of the abdominal muscles. This can be like a tug of war between the muscles. If we have one side not holding up its part, then we can be left with imbalanced force production and a not optimal tension-length relationship. This is often overlooked and can lead to reoccurring issues – which is why we address it here.

We use a similar approach here of utilizing less dynamic movements initially to help target the groin muscles, then build in more dynamic movement and load over time.

For the abdominals we use an approach of challenging the abdominals in both a isometric and isotonic format. This helps to integrate static strength to hold position, but also strength in being able to manipulate the pelvic positioning.

Adductor Strengthening

Side Lying Adduction

Feet Elevated Side Plank – Top Leg Only

Feet Elevated Side Lying Adduction

Lateral Lunge – DBs


Lateral Lunge – 1 Rack

Band Resisted Lateral Lunge


Abdominal Strengthening

Reverse Crunch


Hanging Knee Raise


Hard Style Plank


An Example Introductory Session

Upper Body Lift +

A1. Split stance adductor mob x10 x3sets

A2. Side lying adduction x10 x3 sets

B1. Frog x10 x3 sets

B2. Reverse Crunch x10 x3sets

As you start to build strength and comfort, we can progress to:

Modified Lower Body Lift (RFESS, deadlifts, etc.) +

A1. Lateral Lunge – DBs x6 x3sets

A2. Hard style plank – 3(10s) x3sets

B1. Feet elevated side plank – top leg only x3(10s) x3 sets

B2. Hanging knee raise

Wrap Up

Over time you would want to keep progressing the variations while also building to more advanced movements involving power, agility, and requiring greater motor control of positioning.

Move well, lift heavy, stay healthy,

Author’s Bio

Sam Spinelli is cofounder of The Strength Therapist, a company devoted to educating people about strength training for rehab and performance.

Coming from the great white north of Canada, Sam spent 5 years working with high level hockey as a strength and conditioning coach. Currently he has taken up a nomad status in the United States to pursue his doctorate of physical therapy and hang out with really smart people (Like Tony G).

Outside of spending his time reading research papers and drinking coffee, he is a competitive strength athlete in sports such as powerlifting, weightlifting, and strongman.

Websitethestrengththerapist.com

Instagram – https://www.instagram.com/thestrengththerapist/

Facebook – https://m.facebook.com/The-Strength-Therapist-200045793768153/

Categoriescoaching Exercise Technique

Deadlifts Are Only Dangerous Because You’re Unable to Coach Them

I doubt there’s any more dichotomous exercise in existence than the deadlift. Those who like it, really like it. Those who hate it, really hate it.

Copyright: andreypopov / 123RF Stock Photo


On the “Like It” side of the fence are powerlifters, people who like to lift heavy things, Gandalf, and otherwise those who view it as a basic movement pattern (hip hinge) which helps people get bigger, faster, stronger, more resilient, less likely to breakdown, and less likely to die during the impending zombie Apocalypse.

Gracing team “Hate It” is an eclectic group as well. While there are exceptions in each example given below, in my experience, those who have beef with the deadlift tend to be primary care practitioners, some physical therapists, some chiropractors, some fitness professionals, 90% of yoga instructors, every person with a vested interest in selling a product preying on women’s irrational fears of getting bulky, and rabbits.

I can’t explain it. Rabbits are weird.

Believe me when I say this: The list above is not concrete. I have many friends and colleagues who are physical therapists, chiropractors, yoga instructors, and the like who are fans of the deadlift and use it routinely with their clients/athletes/patients.

It’s just that, more often than not, whenever I do hear someone speak ill of it, it’s almost always someone with a lot of letters next to his or her’s name (or with limited experience in the weight room).

Take this recent email I received from a chiropractor friend of mine:

To answer your question:

1. Seriously, I can’t explain the rabbit thing.

2. A Pars Fracture is one of the most common causes of low back pain in general population clients, but also adolescent athletes. It involves a small connecting bone in the lumbar spine called the pars interarticularis, and it’s an area that’s (generally) compromised when excessive extension and rotation of the spine enter the mix.

As far as youth athletics is concerned, I saw this a lot in my time at Cressey Sports Performance as a result of one of two scenarios:

  • A sedentary kid jumps right into playing a rotational sport (baseball) without any window of preparation. These were the kids who would wait until a week or two before the season started before participating in any strength & conditioning work.
  • An overzealous kid (or, rather, parent) plays a sport, one sport, year round, and develops a pattern overload injury.

In both cases there can be deleterious effects, at worse, a condition called Spondylolisthesis or “spondy” or end-plate/pars fracture.

With regards to general population, many of the above still applies. But usually it’s a sedentary lifestyle resulting in poor hip mobility, t-spine mobility, which then compromises spine integrity resulting in faulty movement mechanics.

I.e., being “stuck” in extension.

As an example:

Deadlift Setup: Overarch/Gross Extension/Gross in General

Deadlift Setup: Doesn’t Make My Corneas Want to Jump Out of Their Sockets

In the first picture there’s an exaggerated extension pattern, which, over time, could (not always) have negative ramifications on spine health.

If so, fix it!

Clean up/regress the pattern to where someone is successful, limits compensation patterns, and can “own” the movement. Remember: A deadlift isn’t just a loaded straight bar on the ground.

Don’t demonize an entire exercise and label it the root cause of a specific type of back pain because you’re unable to coach it well or understand how to scale it correctly to fit the needs, injury history, and ability level of an individual.

What’s to say any ONE thing is the culprit in the first place? We don’t really know what cause back pain:

  • Lack of hip internal rotation.
  • Repetitive flexion, repetitive extension.
  • Weak anterior core.
  • Weak glutes.
  • Kitten cuddles.

It could be anything.

I think any health/fitness professional who frames any one exercise or modality as all-encompassing “dangerous,” at all times, for every individual, and is the root-cause of any one specific injury, is doing the industry a disservice.

The words we use and how we frame things can set a toxic precedent.

Messages That Can Harm People With Back Pain

Note: I found this list somewhere on the internet and saved if for a time I’d need it, like this. I have zero recollection where I found it, and I don’t even remember there being a source.

Regardless, thank you to the person(s) who made it. Please don’t sue me for plagiarism.

Promote Beliefs About Structural Damage/Dysfunction

  • “You have degeneration/arthritis/disc bulge/disc disease/a slipped disc”
  • “Your back is damaged.”
  • “You have the back of a 70 year old.
  • “It’s wear and tear.”

Promote Fear Beyond Acute Phase

  • “You have to be careful/take it easy from now on.”
  • “Deadlifts are dangerous/you should avoid deadlifts from now on.”
  • “Your back is weak.”
  • “You should avoid bending/lifting.”

Promote Negative Future Outlook

  • “Your back wears as you get older.”
  • “This will be here for the rest of your life.”
  • “I wouldn’t be surprised if you will always be in pain.”

Here’s my response to all of that:

via GIPHY


Messages That Can Heal People With Low Back Pain

Promote a Biopsychosocial Approach to Pain

  • “Back pain doesn’t mean your back is damaged. It means it’s sensitized.”
  • “Your Back pain can be sensitized by awkward movements, postures, muscle tension, inactivity, lack of sleep, stress, etc.”

Promote Resilience

  • “It’s very rare to do permanent damage to your back.”
  • “Your back is one of the strongest structures of your body.”

Encourage Normal Activity and Movement

  • “Your back gets stronger with movement.”
  • “Motion is lotion.”
  • “Protecting your back and avoiding movement can make things worse.”

Because It’ll Make You Feel Better To Say It

  • “The next time you tell me deadlifts are bad or dangerous, I’m going to tell you to eat a bag of dicks.”

Or, Maybe Don’t Do That and Take This Sage Train of Thought From Dean Somerset

“Anything “could” be bad if done improperly, or for the wrong reasons, wrong volume/load, or in people who don’t qualify to do the exercise. I would say it’s best to not blame the exercise as a cause, but to understand the mechanism of the injury and see if the exercise could contribute to it or not. There’s a lot of injuries that can come from deadlifts, not limited to only pars fractures.
I wouldn’t avoid programming them for people due to this alone, but would progressively build people up to doing them well and under control with a load that is within their abilities to perform and recover from appropriately.”

We owe it to ourselves (and the industry) to be a little more open-minded, responsible, and less magnanimous at making such boisterous claims.[WU-TANG’s FOR THE CHILDREN.[/efn_note]

Categoriescoaching Corrective Exercise mobility

It’s a Warmup, Not a Social Hour

I arrived back to Boston late last night from London and I’d like to say I woke up today well-rested and ready to wow everyone with some witty fitness prose.

I’d like to say that.

Not gonna happen today. I’ve got a ton of emails and programs to catch up on, but that doesn’t mean I don’t have any content prepared for you today. Andrew Millett, good friend and Boston based physical therapist/strength coach was kind enough to send along this baller post today.

You’ll love it.

Copyright: undrey / 123RF Stock Photo


It’s a Warmup, Not a Social Hour

I got the idea for this post after recently attending the Advanced Warm-Up and Recovery Workshop put on by Matt Ibrahim and Dr. John Rusin.  I didn’t know what new things I may learn at the workshop, but after taking pages of notes and getting new ideas for my clients and patients, it was definitely worth it.

You walk into any gym or fitness facility and you will see people warming-up on the bike, treadmill, elliptical, or maybe even rolling around on the foam roller.  It is great to see people putting in the time and effort to consciously warm-up their musculoskeletal, nervous, and circulatory systems prior to engaging in their exercise routine.

The key word in that last statement is:

Consciously

Too many times, people warm-up without any direct goals or agenda in mind.  They hop on one of the aforementioned cardio machines and watch TV or read a magazine and aimlessly pedal or step until they think they are ready to exercise.  If they are on the foam roller, they probably roll around on it like they are rolling out pizza dough or look like a boy scout trying to start a fire with 2 sticks.

When you are working with a client or are performing a warm-up in your own gym routine, there needs to be a specific goal in mind while warming-up prior to your exercise session.

First off, we need to assess our clients to see what areas they may be lagging in.  Here are a few quick and easy tests to see if there are any areas that need to be targeted for some type of self-myofascial release.

Ankle

In the sagittal plane, the ankle needs to be mobile.  It needs to be able to plantar-flex and dorsiflex for the demands of life as well as demands in the gym.

In order to perform a squat without compensations, the ankle must be able to dorsiflex and allow the tibia to translate anteriorly as the person descends down in the bottom position.  To determine if someone has adequate ankle dorsiflexion, try the Knee to Wall Test.

Knee to Wall Test


You instruct the client to place their foot on the tape strip.  On the tape strip, there are 4 lines, each 1-4 inches away from the wall.

Start with the client’s foot on the “4” line.  Four inches is required for adequate dorsiflexion in order to perform the squat.

Tell the client to try and touch their knee to the wall without letting their heel come up.  Also, make sure they are going into valgus or varus movements at the knee to potentially compensate for lack of dorsiflexion.

If someone cannot reach from the “4” line, then have them move up and determine where they can reach from.  Then test the opposite side.

If they cannot reach, ask them where they “feel it.”  If they feel they can’t go any farther due to tightness in the back of their ankle, then we know that some of the soft tissue structures on the posterior aspect of their lower leg could be to blame.

For that, some type of self-myofascial release (SMR) to the soleus, posterior tibialis, flexor hallucis longus/flexor digitorum groups could help to improve range of motion at the ankle.


If they feel a pinch on the anterior aspect of the ankle, that could potentially be a joint mobility dysfunction.

Try a Banded Ankle Mobilization.

Start by placing a thick superband around a post or squat rack; something that can’t move.  Then place the band at the ankle joint, just inferior to the medial and lateral malleoli.  Place a good amount of tension on the band.  While maintaining this tension, recreate the same movement as if you were performing the knee to wall test.  Go as far as you can comfortably go.  Hold for 2-3 seconds when you can’t go any farther.  Return to the starting point and repeat for 6-10 reps.

Then retest the Knee to Wall Test.

If it improves, then we know the Banded Ankle Mobilization worked.  Whether it improved or not, it might be wise to refer out to a licensed healthcare practitioner to further assess the ankle to determine what may be limiting that motion.

If there has been an improvement in ankle mobility, we want to be able to control that “new found” mobility.

Try the Heel Raises with Single Leg Eccentric.  I first saw this from Dr. Ryan DeBell of The Movement Fix.


Key Points:

– Perform the movement slow and controlled.

-When your foot is are parallel to the ground, slightly flex the knee and go slow and controlled towards the ground.

-Imagine like you are slowly pulling your heel to the ground.

Hip

At the hip, we need to determine a few different areas of mobility.  Starting in the sagittal plane, we need to determine if the client has adequate hip extension.  If the client doesn’t have adequate hip extension mobility, they will have a more difficult type using their gluteal musculature to perform some of the movements we ask them to.

In addition to not being able to effectively activate and use certain muscles, lack of hip extension mobility can place increased stress on the lumbar spine and the knees, as well as some other more distal joints.  By ensuring the client has adequate hip extension mobility, then we know some of the other joints of the body will be able to function properly.

To determine if someone has adequate hip extension mobility, we have two different options.  First off, you can perform the ½ Kneeling Hip Extension Test.

VID ½ KNEELING HIP EXT TEST

Have the client place one knee down on a padded surface and the other knee up.  Instruct them to contract their gluteus maximus on the down leg side, brace their abs, and slowly bring the hips forward.

We ideally would like to see 30 degrees of hip extension on the trail leg.  You can use the Inclinometer App on the Iphone to measure the angle.

You can also perform a Thomas Test.  This is a test that is typically taught in physical therapy schools to determine hip extension mobility.

*Disclaimer*:  First off, you need to ask your client if they are okay with you placing your hands on them to assess their hip mobility.

Thomas Test


Self Thomas Test (and Sick Beats)


You are going to have the client lie supine on the side of a table or bench.  Have them hold their knee at 90 degrees of hip flexion, or at hip height.  Place your thumb on their Anterior Superior Iliac Spine (ASIS).

Using your other hand, slowly lower the leg the client is not holding with their hands.

If you can lower their leg to the level of the table and their ASIS does not translate anteriorly, then we know they have adequate hip extension mobility.

If you lower the client’s leg and their ASIS DOES translate anteriorly prior to the leg reaching the level of the table, then we know there is some muscle group limiting hip extension.

To determine, which muscle group, then we need to change the position of the lower leg.

If we extend the knee and perform the same test, this will place tension on the Psoas and Iliacus muscle groups.  If you lower the leg with the knee extended and the ASIS translates anteriorly, then we can determine Psoas and Iliacus are to blame for decreased hip extension mobility.
If we lower the leg and the ASIS doesn’t translate anteriorly, then the only other muscular group to blame would be Tensor Fascia Latae (TFL).

To test for this, we slightly abduct the hip and perform the same test.  If the ASIS translates anteriorly, then we know TFL is to blame.

If we run through all of these tests and each test with the knee extended doesn’t cause anterior translation of the ASIS, but when the knee is flexed it does, then we can determine that Rectus Femoris is to blame.

To improve hip extension mobility, try SMR to whichever area you determine to be problematic.

SMR w/ Lax Ball to Iliacus/Psoas & TFL


SMR to Rectus Femoris


SMR to Vastus Lateralis & TFL

Then re-test to see if any of these SMR variations improved the client’s hip extension mobility.

Once someone’s hip mobility has improved or is normal, we want to make sure they can stabilize in that mobility.

The Cook Hip Lift is a great movement for accessing and stabilizing hip extension mobility.


Key Points:

-Place a ball in your hip crease.

-Use non-stance leg to keep ball in hip crease.

-Lift hips up off ground.  Do not let ball fall out

-Perform for 8 repetitions per side.

Thoracic Spine

The thoracic spine is another area of the body that needs adequate mobility.  If it doesn’t present with adequate mobility, areas of the lumbar and cervical spines and the shoulder can be affected.  It is one of the most influential areas of the body because of the impact it can have on so many different areas.

To determine if your client has adequate thoracic spine mobility, it is best assessed in quadruped using the Quadruped Thoracic Rotation Test.

Normal thoracic rotation in the general population should be 50 degrees.  To measure this, use the Inclinometer app and place it ½ way between both shoulders on the thoracic spine.

When you are passively bringing them through the movement, make sure there is no lumbar movement such as sidebending occurring as this will skew your measurements.  Also, gently rotate the client.  Don’t try to force rotation on someone that may not have it.

If the client does not have 50 degrees of thoracic rotation, there are various thoracic spine mobility drills that can be performed such as:

A-Frame T-Spine Mobilization


Side Lying Thoracic Rotation


Side Lying Rib Roll

If the client has 50 degrees or more of passive rotation, but less than 50 degrees of active rotation, a thoracic spine motor control drill can be performed.

Drills such as:

Quadruped Assisted Thoracic Rotation


Key Points:

-Perform slow and controlled.

-Make sure not to side-bend through your spine.  Make sure to rotate through mid-back.

Seated Assisted Thoracic Extension


Key Points:

-Squeeze ball between your knees.

-Slightly turn away from where band is attached.

-Slow and controlled, allow band to rotate body.

Shoulder

The last pertinent area of the body to address in a warm-up is the shoulder.  Limited shoulder mobility in shoulder flexion, abduction, or internal/external rotation can affect function at the shoulder, cervical spine, thoracic spine, and even the lumbar spine.

To assess the shoulder, movements such as:

Supine Shoulder Flexion Test

Supine Shoulder ER Test

If there are limitations in mobility, performing self-myofascia release as shown below can help:

Once mobility has been improved, now we want to make sure we can use that mobility.  Performing movements such as:

Back to Wall Shoulder Flexion


Key Points:

-Maintain low back flat to the wall.

-Raise arms up and when the reach shoulder height, gently reach 1 inch in front of your finger tips.

-Continue this gentle reaching as you continue to raise your arms overhead.

Forearm Wall Slides


Key Points:

-Slide arms up the wall.

-When your elbows get to shoulder height, gently press into the wall/push your trunk away from the wall.

-Maintain the pressure on the pinkie side of your hand as you slide up the wall.

Quadruped Assisted Reach Roll and Lift


Key Points:

-Perform slow and controlled.

-Slowly reach out.  Rotate palm up to the sky.  Slowly raise arm up.<

Yoga Push-Ups Sans Pushups


Key Points:

-Think of pushing the ground away from you with your hands.

-Should be felt in your upper back and out and around your rib cage.

If you have no mobility limitations in any of the aforementioned areas, feel free to use the motor control or stability drills to help primer your nervous system to prep you for your lift.

There you have it!  Create a plan for your warm-up, do said plan, and then go and get after your training!

About the Author

Andrew Millett is a Metro-West (Boston) based physical therapist

Facebook: From The Ground Up

Twitter: @andrewmillettpt

Instagram: andrewmillettpt
Categoriescoaching

Easy Training Is Good Training

It’s elegant as it is simple: Easy training is good training.

Much like we’re seduced into thinking that driving a certain car, wearing a specific perfume/cologne, or adopting certain fashion trends will lead us to greener pastures (whatever that means to you), it’s also common practice for many of us to be seduced by the “more is better” mentality when it comes to working out.

The harder, elaborate, or “sexier” our workout(s) and training program(s) are, the more results we’re going to get. And the more jacked, diesel, and, well, sexier we’re going to be.

That’s how it works…..right?

Copyright: yarruta / 123RF Stock Photo


Well, Not Really

A colleague of mine sent me this tongue-in-cheek message on Facebook Messenger last week regarding one of his clients:

I did CrossFit and got great results. I was always hurt, though.

Relax. This isn’t going to be a rambling anti-CrossFit diatribe. There have been roughly 317 of those posted this week alone on the internet (+/- 49). I was part of that train 6-7 years ago when CrossFit was really going mainstream. In recent years, however, I feel I’ve taken a pretty agnostic stance on it as a whole.

Some boxes do “it” very well, assessing people, scaling movements based off ability level and unique injury history, and otherwise giving a shit. Others take the Sweet Brown approach:

All told, I give CrossFit a ton of credit. Nothing, and I mean nothing has done more to make barbells and lifting appreciable weight cool.

Ten years ago if someone saw me deadlifting it would have been blank stare central:

via GIPHY

Nowadays, people see someone, anyone, deadlifitng, and they’re like “dude, you CrossFit? OMG….I do too!!!.”3

So, in all, we’ve come a long ways and I can dig it.

However, I’d be remiss not to toss a slight begrudging stone their way in that they’ve also helped “nurture” this mentality that every workout MUST to be an all out war, galvanizing the troops into an incessant “go hard or go home” mindset.

And, to some degree, this is okay.

Far be it from me to nudge people into not push themselves in the weight room. If anything, many people could use a little nudging in that direction; whether we’re referring to CrossFit or not.

That said, it’s foolhardy to believe this train of thought should be universal. All we have to do is revisit the quote from above:

I did CrossFit and got great results. I was always hurt, though.

To be fair, lets OMIT the “c” word and replace it with strength training, powerlifting, olympic lifting, or Jazzercising in a park.

If you’re always hurt at the expense of always making your workouts as hard as possible, are you really getting results?

Lets use a real live example: one of my own clients who I’ve only been working with for about two months.

She came to me with several issues that had been nagging her for a while: low back pain and a nasty case of Plantar fasciitis to keep it brief. We did her initial assessment and I pointed out a few “red flags” that may or may not have been the culprits: very limited ankle dorsiflexion, an inability to dissociate lumbar movement from hip movement, and a few technique snafus I felt could be cleaned up.

I wrote her program and at the end of Week #1 she reports back, “everything is going great, but my workouts seem easy.

I explained to her that was the point. I wanted them to feel easy, in no small part to help her gain some confidence and modicum of success. That she could train pain-free and make progress.

I wanted her to be consistent with a well-structured plan that (hopefully) addressed some root causes I felt would resolve her repeated setbacks with training.

Easy Training Is Good Training

My client was on board – and still is – and has been crushing her training since. But I’d be lying if I said it still hasn’t been a bit of a mind-fuck (my words, not hers. Although, I think she’d agree with my terminology here) on her end. She’s been programmed to think that training has to be hard, that it has to be “I think I just shit my spleen, yay!” brutal in order to get results.

Even as recent as two weeks ago she was still commenting how easy some of her workouts have been.

Me: “Are you getting all of them in?”

Her: “Yes.”

Me: “Do you feel good?”

Her: “Yes.”

Me: “Are you doing more work and adding more weight?”

Her: “Yes.”

Me: “Are you in as much pain?”

Her: “No.”

Me: “Excuse me while I go toss my face into an ax.”

I’m being facetious, of course. She gets my point of view and understands her flawed way of thinking. We’re making baby-steps…..;o)

I love an analogy I stole from T-Nation contributor and overall badass, Paul Carter (albeit I’m going to put my own spin on it).

  • 10% of your workouts you’re going to feel like Mick Jagger on cocaine. The weights will just fly up.
  • 10% of your workouts you’re going to feel like Mick Jagger the day after. You feel like a bag of dicks. I don’t know what a bag of dicks feels like, but I can assure you it (probably) ain’t good.
  • 80% of your workouts are the ones where you go in and just do the work. You show up, get your reps in, and leave. Easy peasy. <—-THESE are the workouts we should strive for and crush.

I’d argue for most people, most of the time, they should leave the gym wanting more. This is what 80% workouts are all about.

Don’t get me wrong: there’s a time and place for workouts and/or programs that exist solely to be ass-kickers and make you hate life:

  • Anything with the word Sheiko in it.
  • Smolnov
  • MASS by Pat Davidson.

The thing to consider, though, and what many fail to recognize, is that programs like the ones mentioned above are designed to be done once a year (if that) and only for a fraction of time.

A small window of hell if you will.

They’re not designed to be done week in and week out for an extended length of time.

I mean heck, if you don’t believe me, take a deep dive into many of the most popular (strength) training programs in recent memory (5/3/1, Juggernaut, Cube Method, any of Travis Mash’s programs). If you dissect any of them you’ll find the bulk of the work being done in those programs is in the 75-85% of 1RM territory.

Nothing hardcore or “ball-busty” about it.

It’s smart training, designed to ensure people feel fresh, recovered, and ready to attack every training session without, hopefully, all the bumps and bruises along the way.

And, to take it step further, freakin Dan John and Pavel wrote a book titled Easy Strength. It’s excellent by the way.

Wrapping Up

The umbrella message here isn’t that working hard should be avoided. On the contrary, there are some people who could use a nice warm cup of “suck it up buttercup.”

Lifting weights isn’t supposed to tickle.

Nevertheless, there’s a fine line between working hard and taking it so far that it becomes more of a hinderance than anything else.

After all, in the end, you’re at the mercy of how well you allow yourself to recover.

Hard training is fine and has a place. But it’s the “easy” training that will get to where you wan to go in the long run.

Categoriescoaching

The Trap Bar Deadlift is Not Cheating

The trap bar deadlift is not cheating.

Get over yourself if you think otherwise.

Copyright: tonobalaguer / 123RF Stock Photo


This train of thought is something I’ve experienced throughout my career on several occasions, first, when I was still at Cressey Sports Performance. Other coaches would stop by for the day to observe or shadow and inevitably one of them would inquire why we tended to solely use the trap bar for deadlifting.

Don’t you feel that’s sorta cheating?

Inside my head, whenever this was asked, I’d want to say something to the effect of:

Yes, because here at CSP we’re all about shortchanging our athletes and making them inferior in every way possible. Trap bar deadlifts, 1/4 squats, UP, UP, DOWN, DOWN, LEFT, RIGHT, LEFT, RIGHT, B,A, START, SELECT4, it’s all good.”

And if they didn’t pick up on my sarcasm I’d follow up with:

“I guess I’ll just go fuck myself. Ten points taken away from Gyffindor for being an inferioir coach and using the trap bar.”

I mean, really? Cheating?

Cheating?

That’s how you assume we (I) roll? Cheat?

In reality, I’d just smile and politely mention the trap bar deadlift was a starting point for pretty much everyone who walked through our doors, professional athlete or not.

Our version of “scaling” the movement.

I understood it was just a question, that it was harmless, and that there was (likely) no ill-intent on their end to be condescending.

But holy shit, it would take every ounce of restraint to not want to do this:

via GIPHY


And even now, on occasion, I’ll catch flak from other coaches via social media whenever I post videos of clients deadlifting with a trap bar.

The most egregious of the bunch will provide snide remarks like:

“1. Yeah, well, everyone in my gym performs conventional.”

My Response

https://www.youtube.com/watch?v=TAryFIuRxmQ


“2. Trap bar is great for beginners, but only for a few weeks. Eventually they’ll have to progress to the straight bar.”

My Response

Says who? You? The tooth fairy?

Listen, no one has to do anything. Unless you’re a competitive powerlifter or OLY lifter you don’t have to use a straight bar.

If it’s someone’s goal to straight bar deadlift, cool, lets progress accordingly. However, lets be clear that no one has to deadlift with a straight bar.

Advantages of the Trap Bar

1. It’s More Joint/Back Friendly

Because execution of the exercise requires standing inside the bar – rather than the bar in front of the body – the axis of rotation (hips) is closer to the line of pull reducing much of the shear load on the spine.

In English: It allows people to maintain more of an upright posture.

https://www.youtube.com/watch?v=p-sA3PG1kGY

Thus making the trap bar deadlift a much more joint-friendly way of deadlifting.

2. It Takes Into Account Mobility/Movement Restrictions

Those who lack the appropriate ankle dorsiflexion, hip flexion, and/or t-spine extension to get into proper (safe?) position to begin with will benefit greatly from the trap bar deadlift.

Likewise, from an anthropometric (individual differences in body types and levers) standpoint, the trap bar deadlift will lend itself more advantageous to those with longer torsos, longer femurs, and/or T-rex arms.

Basically, for taller individuals, in addition to those “stuck” in computer guy posture, the trap bar deadlift is a solid, almost long-term, fit.

3. Trap Bar Deadlift = Still a Deadlift

Correct me if I’m wrong: but the weight still starts from the floor, right? Someone still has to hinge from the hips with a neutral back position, lift the weight up, lockout, and reverse the action back down, right?

How is this not a deadlift?

How is this “cheating?”

Is an asterisk needed warranted upon the completion of each rep?

In the End

Relax. Take a deep breath. Get off your high-horse. If you’re a powerlifter or OLY lifter or Jason Bourne, then, yes, you should probably get really comfortable with straight-bar deadlift variations.

However, if you’re neither of those three, or if you work with athletes and general population clients who are not powerlifters, OLY lifters, or secret government assassins suffering from amnesia, then STFU.

The trap bar deadlift is not cheating.

Rather, you’re just being competent, well-intentioned coach who understands the balance between helping people get bigger, faster, and stronger AND keeping them healthy long-term.

Categoriescoaching Exercise Technique Strength Training

Stuff I Used to Say, When I Was An Idiot: Squat Edition

I remember the first time I saw Eminem perform. I was at my apartment in between classes watching a little TRL on MTV. It was spring break, 1999. I was in my living room. Many of my friends were somewhere else, not in my living room, galavanting around on some beach in Cancun soaking up some rays and debauchery.

Customary during Spring Break week MTV was also in Cancun, and hoping to catch a glimpse of my friends – and Britney – I tuned in.

Hi, my name is, what? My name is, who? My name is, chka-chka Slim Shady.

Mouth agape with a spoon full of Fruity Pebbles I was like, “what in the what is this?”

Eminem something er other now? Trying to impregnate Spice Girls?

“Pfffft, whatever,” I thought. “He won’t last.”

Ten #1 albums, 45+ million records sold, and one not so sucky movie – 8 Mile – to his credit, I guess you could say I was an idiot.

Eminem didn’t do so shabby for himself.

And while I could sit here and reminisce over you5other past pop-culture snafus I made….

  • Chicks will always dig stone washed jeans.
  • Robert Downey Jr will never make it as Iron Man.
  • ABC’s What About Brian? (2006) will become the next Grey’s Anatomy or Lost. It’ll be a sure fire hit.6

…lets not bask too much in my ineptitude.

I mean, Adele?

She’s okay. I guess.

Speaking candidly, my “misses” can extend to the coaching side of the spectrum as well. I can think of a few things I used to think or say back in the day that, upon reflection, were pretty idiotic.

What are some examples you ask?

Good question.

1. Telling People to Arch…HARD.

Like many people interested in lifting heavy things I used to read – and still do – anything and everything by the likes of Dave Tate, Jim Wendler, and Louie Simmons.

All three are strong mofos and have, arguably, put out some of the best training advice on getting strong within the past few decades.

I mean, are you going to argue with this guy?

Or this guy?

Or him?

Uhhhh, no.

They’ve all contributed to the greater good of the industry and many of us owe our PRs to any number of articles or resources they’ve produced throughout the years.

That being said, I had to audit myself a few years ago when it came to coaching the squat. After being introduced to the concepts of PRI (Postural Restoration Institute) and listening to other strong dudes like Chad Wesley Smith speak on the topic, I wondered if cueing people to “arch, hard!,” and to” sit back” were the right things to be saying to the bulk of my athletes/clients when they were getting under the bar?

Copyright: Kurhan / 123RF Stock Photo

Very few were competitive powerlifters and even fewer were geared lifers. I.e., none wore squat suits when training (which require an aggressive arch and sitting back to reap the benefits).

To be clear: There are still many very strong dudes (and coaches) who advocate squatting with a hard arch, and that’s their prerogative. The thing to appreciate, however, is that what works and is ideal for a geared lifter won’t necessarily (read: rarely) ever translate well to a non-geared lifter.

If I were to balance the “I want to be brutally strong AND not shit my spine on this next set” teeter-totter, I’d opt for not arching (aggressively).

The ribs & diaphragm are pointing in one direction (up) and the hips & pelvic floor are pointing in another (down).

Put simply, this is all sorts of fuckeduppery not a stable position.

We’re placing a ton of shear load on the spine.

What’s more, this will invariably force the lifter to initiate the movement by sitting back (rather than down. You know, a squat). As a result, often, the chest will fall forward, and the cue we default to is “arch, arch, arch, chest up, chest up, chest up.

This only feeds instability.

A better, I believe, approach (again, for non-geared lifters) is to tone down the arch and adopt what’s been referred to as the “canister” position.

Giving credit where it’s due, the first person I ever heard use this phrase was Dr. Evan Osar. A simple analogy he used was to think of your pelvis as one ring and your rib cage as a bunch of other rings.

We want all those rings to be stacked.

This will nudge us into a more stable, joint-friendly environment

Now, a minor glitch in this way of thinking is that some people think this infers going into posterior pelvic tilt, where we flatten out the lumbar spine.

This is not what’s happening. As you can see in the picture above, my hips are still behind the bar (still very important) but there’s less of an aggressive arch. Telling people to posteriorly tilt their pelvis towards spine neutral is different than telling them to flatten out their spine.

From there it’s a matter of owning the canister position and to squat down rather than back.

2. Knees Forward Instead of Knees Out

The “push your knees out” cue is something I’ve slide-stepped away from within the past year.

To defend my position I’ll need to piggy back off my comment above – the squat, for most trainees, is more about “sitting down” than it is “sitting back.”

I want the squat to look like a squat.

This means there will be forward translation of the tibia over the toes (but not so far that the heels come off the ground) and that there is equal parts knees coming forward and hips going back.

The net result = down.

My good friend, smart-as-balls physical therapist, and owner of Resilient Performance Physical Therapy (in NYC), Dr. Doug Kechijian, stated it best in a Tweet recently:

That’s right: it’s okay, nay, better?, for the knees to travel forward.

Cueing someone to break with their knees almost always negates the need to remind them to push their knees out.

They’ll do it automatically:


I’m all for using less coaching to clean up someone’s technique. The last thing most of your clients need is you barking a plethora of cues at them: “chest up, knees out, eyes forward, chin tucked, what’s the square root of 47?”

Play around with knees breaking first and then sitting down. My suspicions are that things will feel cleaner, more powerful, and the squat will feel like a squat.

Huh, weird.

ADDENDUM: NONE of this is to say I’m right. These are nothing more than cues and approaches that have worked for me in recents months/years with my clients and athletes. You may think I’m batshit crazy, and that’s cool.

I mean, to reiterate, I’ve been wrong on many things prior.

Amazon.com? Such a stupid idea.

I hope you’ll consider these suggestions however, and play around with them yourself. I think you’ll be surprised.

Categoriescoaching Exercise Technique

2-KB Front Squat: A Simple Looking Exercise That’s Anything But

Being a “good” coach and writing effective training programs isn’t about inserting the most demanding or most obnoxious looking exercises for your athletes & clients.

Peruse social media and you’ll inevitably come across any number of fit pros vying for everyone’s attention with elaborate looking exercises ranging from Quasi-isometric deadlifts vs. chains (from a deficit on one leg) to flag-holds with band abduction (think about it).7

I’m being facetious. But I’m not far off from being dead serious.

I’m lame, and could really care less about garnering “likes” by wooing people with circus acts.

Copyright: vadymvdrobot / 123RF Stock Photo


When I watch some of the things coaches put up on their IG feed or YouTube channel I have to wonder if they think about the following:

1.  What’s the likelihood that 3% of their audience can reproduce a modicum of what they’re viewing?

“Look at me, Weeeeeeeeeeeeeeee.”

2. How is said exercise going to help them?

I’m not trying to be a Johnny Raincloud here. I understand that, sometimes, people just want to do shit to do shit.

Great.

Do it.

There doesn’t always have to be a reason or rationale backed up by a Mel Siff quote.

However, too, I feel those who do have an audience and do pride themselves on sharing actionable content (and not just selfies) with the masses, share a responsibility to be practical – more often than not – with the content and information they’re relaying.

Just my two-cents.

Excuse me while I step off my soap-box.

On that note, lets talk about one of my favs.

2-KB Front Squat

I’m not the only coach who’s a fan of this squat variation. Others like Mike Robertson, Artemis Scantalides, Molly Galbraith, and pretty much every coach in the history of ever who’s been affiliated with StrongFirst or RKC certification are fans.

It’s one of my “go-to” squat variations that I use with athletes and general population clients alike for a variety of reasons:

1. It’s un-paralleled with how it helps people learn to appreciate FULL-body tension. The anterior placement of the load forces the core to fire like crazy and helps to promote ideal positioning of the torso:

  • Less rib flair and more of a “canister” position where the pelvis and rib-cage are stacked on top of one another, in addition to the pelvic floor and diaphragm. The abdominals are called into action to resist an excessive arch.

As a result…

  • A more upright torso comes to fruition which helps to offset excessive shearing of the spine. NOTE: this is NOT to insinuate a forward lean is wrong or “bad” when squatting, it’s not. In fact, it’s warranted and needs to happen. However, for a large chunk of people, especially in the beginning stages, it’s more “joint-friendly” to adopt an upright torso, accumulate reps there, and then progress to advanced variations where more forward lean enters the picture.

2. It’s a great way to load someone without crushing them.

To steal a train of thought from Artemis Scantalides:

The double kettlebell front squat allows you to train a decreased load for the same physiological effect. So even though you are not squatting as much weight, because of the asymmetrical shape of the kettlebell, and the placement of the kettlebells in the rack position, you are able to maintain squat strength by training the double kettlebell front squat regularly.

3. It humbles people. Even large humans who can seemingly squat Ohio will find this variation challenging. It doesn’t take much. Two, 24 kg bells will make many huddle in the corner sucking their thumb.

Below is a quick video I shot this AM which goes into slight detail on some of the components of the exercise, namely the set-up, how to transition the bells to the starting position, and basic cuing.

Hope it helps.

Quick-n-Dirty 2 KB Front Squat Tutorial

Categoriescoaching Corrective Exercise mobility

My Go To Mid-Back Mobility Drills

Mid-back (or T-spine) mobility drills are one of those things that, much like bacon, Jason Bourne movies, or LOLCat memes, most people just can’t get enough of.

Copyright: lightwise / 123RF Stock Photo


At this point I don’t think I need to belabor why t-spine mobility is a kind of important. But if I had to give a quick 10-second elevator pitch I’d say something to the effect of:

“It helps improve performance in sport(s) and in the gym, helps with posture, and also helps offset the likelihood of your shoulder, neck, or lower back from flipping you the middle finger.”

You’re not going to find that explanation on Wikipedia or anything, but it gets the point across. Having the requisite mid-back mobility – 0r, more to the point: having the ability to “access” mid-back or T-spine mobility (via rotation and eliciting an extension moment) as well as nudging more dynamic stabilization – keeps people healthy (namely shoulders and lower back) and not feeling like a bag of dicks.

Note to Self: I totally need to start submitting more often to Wikipedia.

There are a million and one different T-spine mobility drills and rarely is there ever a “bad” one. However, the three shown below tend to be the ones I gravitate towards the most when working with athletes and general fitness population clients alike.

1. Mid-Back Release

A common drill many people perform to improve T-spine mobility (more specifically, extension), especially when they’re more kyphotic and exhibit overly rounded shoulders, is to extend their mid-back over a foam roller.

First: Most people perform it poorly (see below).

Second: We’ve fallen into this trap of oneupmanship where the “harder” the surface the better the drill is.

Is it better?

Ten years ago it was a plain ol’ foam roller. Now people are rolling on lead pipes. Before you know it, the next iteration will be rolling on live grenades.

Regardless, Here’s How Not to Do It.


The mid-back area isn’t necessarily designed to have that much range of motion – to the point where someone can extend their shoulders all the way to the ground – and what most people end up doing is exhibiting excessive rib flair and plowing through their lumbar spine (where we don’t want a ton of movement).

The end result is nothing more than “feeding” what’s causing the issue(s) in first place: an un-stable core (lumbo-pelvic area) which forces the mid-back to lock-up for lack of stability where you want it.

Do This Instead (Seriously, I’m Not Kidding)


This mid-back release from the people over at AcuMobility.com is a game-changer.

The idea is to train STABILITY (by paying diligent attention to engaging and maintaining core activation) while also working on the areas we actually want to mobilize.

This drill is a catch-all for pretty much everyone: male, female, young, old, likes to deadlifts, hates it, office worker, Klingon….seriously, everyone.

It works – albeit for different reasons – whether you’re a computer guy with Quasimodo posture or someone who’s more athletic and exhibits more of a “flat” t-spine.

Computer Guy = the added extension is postural gold.

Opposite of Computer Guy = these people tend to be “stuck” in extension due to over-active erectors, rhomboids, etc from lifting heavy things repeatedly. Also, much like “computer guy” most people here will exhibit a weak or unstable core, which, for many, may be the culprit for why their mobility is poor to begin with.

The lack of base of support in the lumbo-pelvic region will have negative ramifications in terms of ideal positioning up and down the kinetic chain, and one’s ability to produce and transfer force.

When we dial down tonicity in the mid-back, we’re able to exhibit better positions (rectus abdominus less lengthened and rib flair less prevalent) and we’re then able to express our actual badassery.

I really love the content and material AcuMobility has been putting out over the past year. You can watch ALL their videos for free on their site HERE.

It’s awesome stuff.

Also, because I’m cool, you can get 10% off any AcuMobility orders by using the code “gentilcore” (no quotations needed) at checkout HERE.

2. Side Lying Windmill


It…..just…..feels…..so…..good.

Lots of cool things happening here: T-spine extension & rotation, in addition to a nice pec stretch (which is often overactive in many people).

A key point, however, is to make sure you’re not just flailing your arm and making it a shoulder circle thingamabobber exercise.

The motion should come for the scapulae (shoulder blade) itself, so don’t force ROM you don’t have. It’s okay if you’re unable to get close to the floor.8

The more you perform this exercise the better you’ll get

Also:

1. Place a foam roller underneath the top knee (at 90 degrees) so you lock the lumbar spine in place and don’t default into lumbar rotation.

2. Squeeze the glute of the leg that’s straight.

An exercise sibling – if you will – of the side-lying windmill is a variation I learned from Dr. John Rusin:

Side Lying Open Book


3. Quadruped Reach Through and Extension


I like this drill for a lot of people, but I really like it for rotational athletes (especially pitchers as it’s important for them to be able to follow-through and “access” flexion on their throwing side).

A key aspect of this drill is to sit back onto the calves/ankles (if your mobility allows and it doesn’t bother your knees) and to lock the lumbar spine in place and take it out of the equation.

From there it’s pretty self-explanatory:

1. Slide hand underneath and reach through as you exhale your air.

2. Reverse the action and extend back.

3. I tend to default to more of a “rib-roll” action as I feel it’s allows for less cheating and compensation.

Give these bad-boys a try and let me know what you think. Or, if not, I guess I’ll GFM….;o)

Categoriescoaching Corrective Exercise Exercise Technique

Exercises You Should Be Doing: Off-Bench DB Press

It’s been a few weeks since I’ve graced the internet with a new (to you) exercise, so lets jump in:

Copyright: maximkostenko / 123RF Stock Photo


Any bench-pressing variation can be a double-edged sword. On one hand the advantages are numerous:

  • Builds upper body strength.
  • Pecification of pecs.
  • And that’s pretty much it.

So maybe not as numerous as I thought. But there’s no denying the importance of horizontal pressing movements (barbells, dumbbells, people, etc) with regards to building and developing a well-rounded physique and/or athlete.

To their detriment, however, some people take the “well-rounded physique” idea to the extreme and often perform waaaaaaaaaay more pressing movements compared to anything else. Just walk into any commercial gym (literally, any one, just pick), and try sit there for more than five minutes and not see someone start to bench press.

It’s impossible.9

As a result we often see an uptick in shoulder ouchies due to muscular imbalances (over-developed pecs compared to under-developed upper back muscles) and wonky scapular mechanics.

The latter is not an absolute: You’ll often find shoulder blades that are “glued” together or stuck in downward rotation in people who bench a lot. This is good thing in that you WANT the shoulders to be retracted and depressed in order to move a lot of weight.

It can be bad in that you still should be able to “access” upward rotation, protraction, and all the other motions the scapulae are designed to perform in order to keep the shoulders healthy.

Unfortunately, this isn’t the case for many people.

Off-Bench DB Press


Who Did I Steal It From: Vin Diesel.10

What Does It Do: Pressing variations involving a bench are open chain and don’t allow the shoulder blades to move. As noted above: this is fine. In order to heave a significant weight off your chest you need to set a stable base. And in order to do so it’s crucial to retract and depress the shoulder blades.

The thing is, over time, this can produce less than stellar scapular mechanics and result in shoulder pain or discomfort.

The scapulae (shoulder blades) need to be able to move.

This variation allows such a thing to happen.

Not only is the shoulder blade now able to move through a more diverse ROM, but this exercise, too, is a great rotary stability exercise (you have to fire your core musculature to maintain a straight torso as to not fall off the bench) in addition to nudging a bit more glute activation.

Key Coaching Cues: There’s not much to it. Lie on bench and scoot over to one side or the other so that the shoulder blade of the pressing arm is off the bench.

And then, you press.

Try to avoid lowering the DB so low that your shoulder “rolls” forward. Also, I like to cue a bit of a PLUS or protraction movement at the top.

Bonus Tip: Make a fist with your free hand to aid in developing even more full-body tension.

Perform 8-12 repetitions and then switch.

Wrap Up

Will this movement help you press 300 lbs? No.

But it will help keep your shoulders healthy in the long-run, and I see no harm in peppering it into programs sporadically just to remind trainees/athletes that it’s okay to let their shoulder blades move and breath a little bit.

Moreover, you know and I know that when someone’s shoulder hurts and you tell someone to stop pressing, that they’re likely going to be an a-hole an press anyways. At least with this variation you can help keep them sane and still press while addressing all the other things they may need to be working on to solve the issue(s).