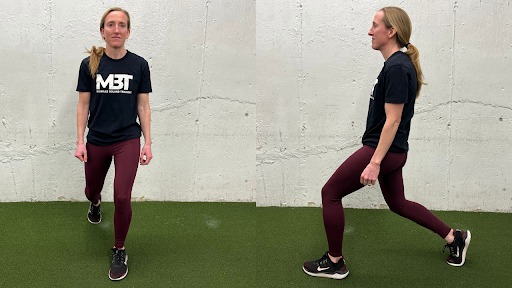
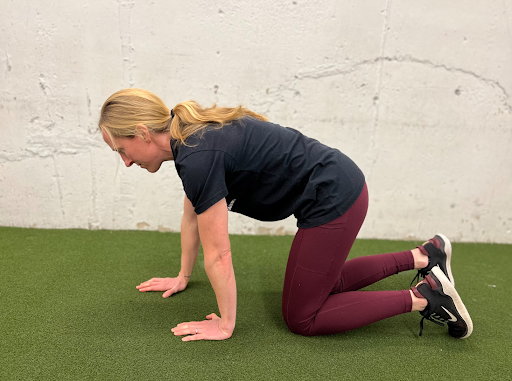
Today’s post was inspired by a client of mine who came in for their training session recently but confessed that their knee wasn’t feeling so great.
Given there were a bunch of squats on the agenda that day this wasn’t ideal news to hear. However, rather than sound the alarm and nix squatting altogether I wanted to see if I could alleviate their symptom(s) with a simple intervention.
Read below…
Quick-n-Dirty Knee “Fix”
I am not a wizard.
Surprise!
But this “trick” I’m about to show you has worked wonders – as in instant relief – for various clients of mine who have complained of cranky knees.
A few brief notes:
1. I receive no affiliate income or kick-back (other than unlimited hugs) from ACUMobility for recommending their product(s).
2. It’s unfortunate many health/fitness professionals fail to look BELOW the knee with regards to knee health and function. The knee joint is pretty stupid and is often at the mercy of either the hip or ankle. By all means I’d be remiss not to encourage practitioners (which isn’t my role as a lowly strength coach) to assess the knee to see if there’s any nefarious nonsense happening there.
However, in my own experience, when trying to dig a bit deeper as to WHY someone’s knee may be bothering them (outside of the actual knee itself), the lower leg gets the shaft.
3. One component is looking to see if the individual can actually rotate their tibia (lower leg bone) in relation to the femur. Many patellar tracking issues, for example, can be attributed to a lack of tibial rotation…
If I were to make a list of what ACTUALLY affects patellar tracking the most it would likely look like this:
1. Lack of ability to rotate tibia.
2. ITB/adductor “tightness.”
.
.
5. Lower leg (calf) griminess (<– technical term). See below.
18. Brexit.
19. Kitty cuddles.
.
.
.
277. Belly button lint.
.
.
.
412. Weak VMO
The tibial rotation thing is something I do want to address and is something I may write about in more detail soon. In the meantime, if you just can’t wait that long, Dean Somerset and I JUST ANNOUNCED we’ll be in Athens, Greece this October to reunite after 3+ years (and a pandemic) to put on our popular Complete Shoulder & Hip Blueprint Workshop – where we discuss this topic in more detail (and much, much more).
(Side Note: If traveling to Athens isn’t in the cards you can always follow along at home with our digital course HERE).
But First…
A caveat.
With regards to “general” knee pain I’ll typically start with a technique audit and then make some modifications in terms of volume/load and which variation of those exercises someone performs.
Sometimes the fix is some coaching to help clean up someone’s form.
Likewise, sometimes the fix is modifying the lift ever so slightly – reducing ROM, widening their stance, changing foot position – to make the lift (in this case, barbell squat) more tolerable.
I’ll always start there because it’s the lowest hanging fruit at my disposal and it ensures the client will still elicit a training effect. That and I’m a big fan of avoiding making my clients/athletes feel like a patient.
After that I’ll attempt to address tissue quality…particularly in the calves (an often neglected area).
Ouch (I mean, Great)
The gastronemius (or gastroc for those of us who are lazy) is a bi-articular muscle that crosses both the ankle AND knee joint.
It’s a nasty area that, for lack of a better term can “get nasty as fuck.”
I often find if I have someone work on their tissue quality in this area that they’ll find immediate relief in their knee(s) because it helps “unglue” their tibia to rotate more during the squat motion.
It’s not fun, but it works:
Try this the next time your knees toss you some attitude.
But I PROMISE I am going to 1) be brief, and more importantly 2) showcase why it’s important and why it will help you feel better, move better, perform better, and likely turn you into a Jedi Master Spartan Sex God of Minas Tirith.2
Deal?
Lets do this.
How You Breathe Matters
To be clear: This post has nothing to do with oxygen exchange.
I’m going to assume that if you’re reading this you’ve got that part nailed down, because, you know, you’re not dead.
Rather, the main objective is to shed light on HOW you breath and how, if it’s “faulty,” it can have ramifications up and down the kinetic chain.
To keep this as succinct as possible, I want you to take a moment to take a deep breath in and to note what happens?
Did you notice your chest move up or out?
Did you notice your belly move out or maybe it didn’t move at all?
How about your ribs? Did you notice any movement there?
The reason I ask is because, ideally, you want to see a 360 or 3D expansion of your ribcage when you take a breath in.
In other words you want to see a little of everything move – chest, belly, back, sides, not eyeballs.
Unfortunately, for the bulk of people out there, this isn’t the case. Many tend to be just be
“chest breathers” or just “belly breathers,” and what ends up happening is a poor Zone of Apposition.
A Zone of Appo Come Again Now?
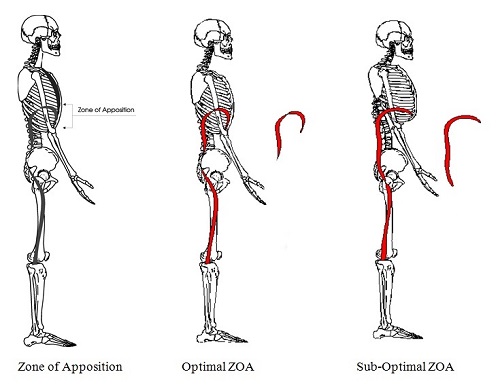
Zone of Apposition can simply be referred to as alignment. Or, more specifically, it can be described as the act of bringing together or into proximity.
Photo Credit: Postural Restoration Institute (<– AKA smart mofo’s)
If you take a gander at the Optimal ZOA picture (middle) you’ll see a diaphragm that’s domed out as well as aligned (stacked) above the pelvic floor; the ribcage is connected to the pelvis.
Conversely, in the Sub-Optimal ZOA picture (right), the diaphragm is flattened out and the ribs are in a more flared position; they might as well be located in Mordor in relation to the pelvis.
In non-nerd speak: Shit’s all out of whack.
At this point you may be thinking to yourself, “fuck outta here Tony. Who cares? Zone of Apposition sounds more like a term accountants use than anything I need to be worried about. Squats.”
Well, after listening to my colleague, Dr. Sarah Duvall, speak on the matter, here’s why it matters.
A Loss of Zone of Apposition Means:
Decreased core stability, control, respiratory efficiency, and exercise tolerance under fatigue…in addition to postural ramifications.
Increased accessory breathing muscle activity (scalenes, traps, levator), paraspinal activity, lumbo-pelvic instability, low back pain, SI joint pain, and even headaches.
A Quickie Breathing Assessment
Sit down in a chair and place your hands so that your fingers sit underneath and go around the sides of your ribcage.
Inhale.
What happens?
If an alien explodes out of your chest, that sucks.
You should feel LATERAL (into your fingers) expansion of the ribcage with a some motion in your chest and belly too. To steal another train of thought from Sarah, you should think of your breath as the handle at the side of a bucket.
As you take a breath in the handle should move out – LATERALLY – away from the bucket. This is a brilliant analogy for your ribs expanding.
Too, another overlooked aspect of the breath is what’s referred to as the High Hinge Point. This is the area that’s just underneath the bra line.
Can you (or your clients) expand air into this area.
Normal ZOA. Uncanny Jackedness.
Sub-Optimal ZOA (High Hinge Point). Still Uncanny Jackedness
Breathing into the back is an arduous and foreign task for many people, but it’s a key element to improving the ZOA.
Here’s a nice drill to help with that which I’ve used many times with my postpartum clients (as well as those attempting to resolve nagging low back or shoulder issues; encouraging the ribcage to move/expand works wonders for many people).
And That’s That
I suck at writing conclusions. To summarize:
1. Work on LATERAL rib motion.
2. Consider a high-hinge point in people and work to promote back-body expansion as well.
3. My wife and I bought the yellow chair on Wayfair in case anyone’s wondering…;o)
The topic of low back pain (LBP) – how to assess it, diagnose it, and how to treat it – can be a controversial one. I italicized the word “can” because I don’t feel it’s all that controversial.
Cauliflower as an option for pizza crust or Zach being chosen as the bachelor on the current season of The Bachelor (when it’s 100% clear that a ham sandwich has more charisma) = controversial.
Simple stuff to consider to help with one’s LBP = not so much.
Everything and Nothing Causes Low Back Pain
The topic of low back pain and how to address it is controversial because there’s no one clear approach or answer to solve it.
(And if the last 3+ years of this pandemic dumpster fire has taught us anything it’s that we looooooove to argue over what’s best and what works).
SPOILER ALERT: Everything and nothing causes LBP.
Have ten different doctors or physical therapists work with the same patient and it’s likely you’ll get ten different opinions as to what the root cause is and what tactics need to be implemented to resolve it.
One person says it’s due to delayed firing of the Transverse Abdominus (TA), while someone else states it’s due to someone’s less than great posture or tight hamstrings.
For the record, all are weak excuses at best.
The culprit can rarely be attributed to any ONE thing.
But it’s amazing how often “tight hamstrings” is the fall guy.
Low back pain? Tight hamstrings.
Knee hurts? Tight hamstrings.
Have Type II Diabetes? Tight hamstrings.
Brown patches on your front lawn? Hamstrings.
It’s uncanny.
I mean, I could just as easily sit here and say in worse case scenarios LBP results from drinking too much coffee. I have zero evidence to back that up, but whatever.
…neither do most of the other “culprits” people tend to use as scapegoats.
So, why not coffee?
Or Care Bears for that matter, those sadistic fucks.
What works for one person, may exacerbate symptoms for someone else. And as my good friend, Dr. John Rusin notes:
“Fact of the matter is: there is NO one right way. it’s a big mistake to lump all LBP into the same category and even a bigger mistake to assume all of it presents the same or should be treated the same.”
There’s no way for me to write a thorough blog post on such a loaded topic; especially one that will make everyone happy.
It’s impossible.
I have better odds at surviving a cage match with an Uruk-hai.
Part of me feels like the proper response to the question “what causes low back pain and what’s the best way to address it?” is this:
Most people reading aren’t clinicians or physical therapists. There’s very little (if any) diagnosing going on in the hands of a personal trainer or strength coach. And, truth be told, if you are a personal trainer or strength coach and you are diagnosing, YOU……NEED…….TO…….STOP.
Just stop.
It’s imperative to defer to your network of more qualified (and vetted) fitness/health professionals whom you trust to do that.
However, it’s important to also consider we (as in personal trainers and strength coaches) are often the “first line of entry” into the medical model. We’re the first to recognize faulty movement patterns, weakness, imbalances, and bear the brunt of questioning from our clients and athletes when they come to us with low back pain.
There’s quite a bit we can do to help people.
What follows is a brief look into my mind and what has worked for me in the past with regards to LBP; a Cliff Notes “big rock” brain dump if you will.
Sorry if I offended anyone who likes Care Bears.
1) Rest Is Lame
My #1 pet peeve (and many agree with me) is that “rest” is the worst piece of advice ever.
“Go stick your finger in that electrical socket over there” would be better.
This isn’t to say there aren’t extenuating circumstances where taking a chill pill is absolutely the right choice; sometimes we do need to back off and allow the body a window of time to heal or reduce pain/swelling/symptoms.
That said, I think it’s lame when a medical professional tells someone to “rest,” or worse, informs them that they’ll need to learn to “live with low back pain.”
It’s a defeatist attitude and will spell game over for many people. Before you know it they’re living on a foam roller and thinking about a “neutral spine” while washing their hands.
(NOTE: I am not anti-teaching neutral spine to people. It’s a lovely starting point for most people, but at some stage people need to learn to move in (and out) of precarious positions…because that’s life).
A common theme reverberated in the S&C community is to say “strength is corrective.” I wholeheartedly agree with this sentiment. In fact, why the hell has this not been made into a t-shirt yet?
However, I think a slightly better moniker may be to say:
“Movement is corrective.“
We can use movement (and yes, strength) to help people get out of pain. Rest has its time and place, but I find stagnation to be more of a problem.
The body is meant to move and is wonderfully adaptive. And that’s the thing: adaptation and forcing the body to react to (appropriate levels of) change and stress is paramount to long-term success with LBP.
Sitting on a couch watching Divorce Court in the middle of the day isn’t going to help.
2) Move, But Move Well
I was watching Optimizing Movement with Mike Reinold recently and he noted there are three key elements to movement and why someone may not do it well:
Structural Issues
Coaching/Technique
Programming
It’s important to understand that, in this case, everyone is a unique snowflake.
Structure: Anatomically speaking there is huge variance amongst the population. Hip structure, for example, can have a large effect on someone’s ability to squat to a certain depth or get into certain positions. Likewise, who’s to say the hips are always the culprit? Even upper extremity considerations – like one’s ability to bring their arms overhead (lack of shoulder flexion) – can have dire consequences on back health.
The body likes to use the path of least resistance (also the most efficient) to accomplish any task. However in this case, “most efficient” doesn’t mean best. As Reinold notes:
“Efficient in this case refers to energy, not movement.”
Lack of shoulder flexion will often lead to compensation via more extension through the lumbar spine. It’s efficient movement, but it’s not better movement.
Coaching/Technique: I’m a firm believer that everyone should deadlift (it’s a hip hinge, learning to dissociate hip movement from lumbar movement, doesn’t mean we have to load it), but I don’t feel everyone should do it from the floor or with a straight bar.
Cater the exercise to the lifter, not the lifter to the exercise.
More on this below.
Programming: If someone lacks hip flexion why have them conventional deadlift? If someone lacks shoulder flexion why have them perform overhead pressing or kipping pull-ups? Some of the onus is on YOU, dear fitness professional.
Find what actions hurt or exacerbate symptoms, and stop doing it.
I know I just blew your mind right there.
For example:
1. Client says “x” hurts, and then places their body into some pretzel like contortionist position that would make a Cirque du Soliel performer give them a high-five.
Me: “Um, stop doing that.”
2. But that could also mean addressing how they walk or how they sit in a chair. Someone with flexion-based back pain, will like to be in flexion, a lot.
Maybe taking them through a slump test will offer some pertinent info.
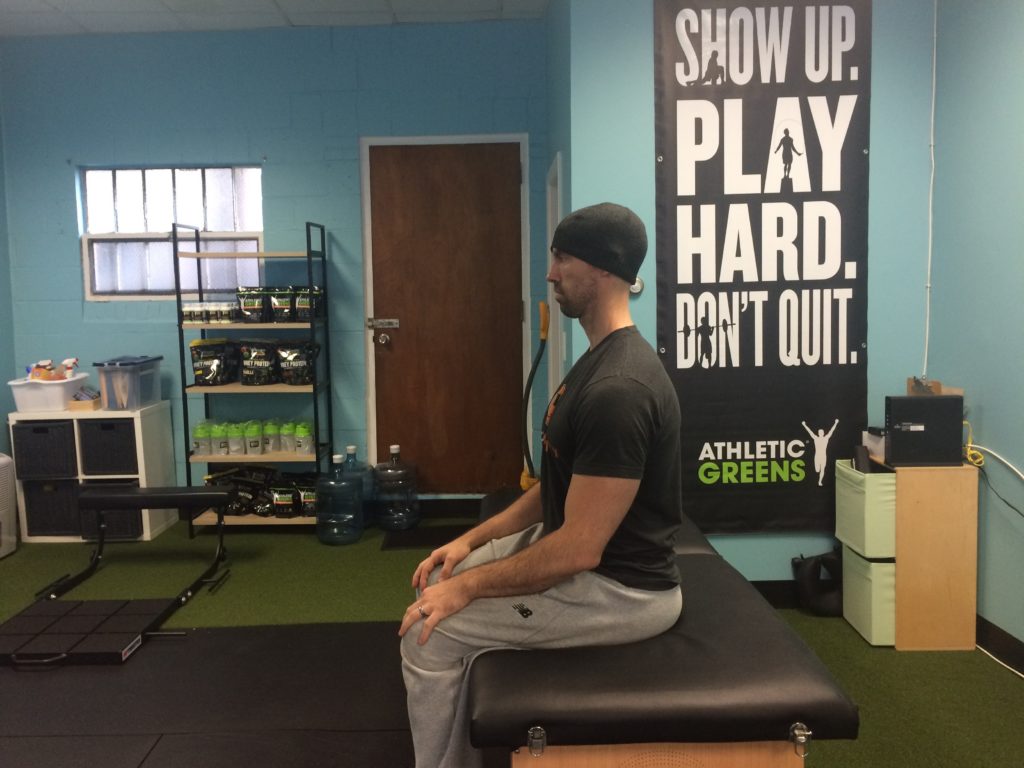
Have them start in a “good” position:
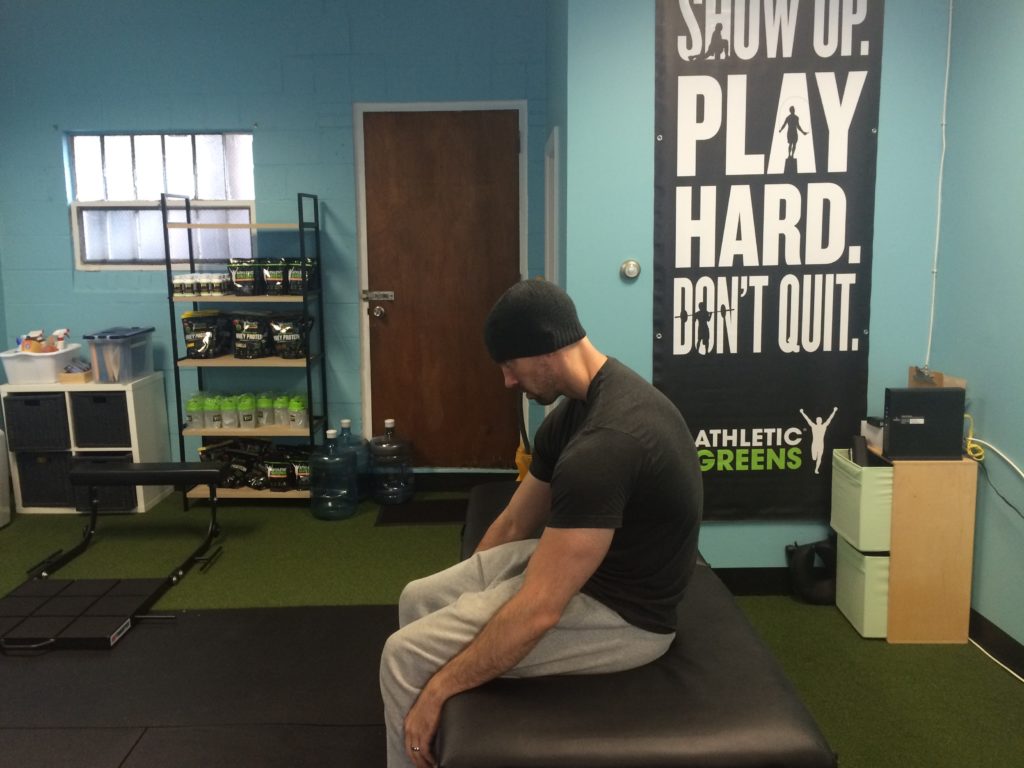
Then, have them purposely “slump” into excessive flexion:
Someone who is flexion intolerant – despite preferring to be in that position – will often say this causes pain.
Ding, ding, ding.
So, the “fix” is to coach them up and try to keep them out of excessive spinal flexion. Cueing them how to sit in their chair and to get up (wider base of support, brace abs, chest up), building spinal endurance (and strength) via planks, and having them hang out in more extension may be the right path to take.
3. On the opposite side of the spectrum is extension, which is often a problem in more athletic populations and in those occupations requiring more standing (ahem: personal trainers/coaches).
Here you might put them into extension and see what happens.
Much like people who are flexion intolerant “liking” flexion, those in excessive extension will like to live in extension.
This will likely hurt.
Finding their spinal neutral is key too.
Hammering spinal endurance/strength via planks (done well) still hits the nail on the head, as does nudging them towards exercises that emphasize posterior pelvic tilt (much of time cuing people NOT to excessively arch during their set up on squats and deadlifts), and even drills that promote spinal flexion…albeit unloaded.
Spinal flexion doesn’t always have to be avoided. In fact, it’s sometimes needed.
Either way, meticulous attention to detail on finding spinal neutral – or pain from ROM – is huge. Once that is addressed, and symptoms has subsided, we can then encourage them to marinate in more amplitude of movement, taking them OUT of spine neutral (cause, it’s gonna happen in everyday life) and use the weight-room to help strengthen those new ROMs.
But I digress.
4) Don’t Treat People Like a Patient
I know this will rub some people the wrong way, but I still use the deadlift for the bulk of people I work with you have LBP.
Nothing sounds so absurd to me than when I hear someone say how the deadlift is ruining everyone’s spines.
To recap:
Deadlift = hip hinge.
Hip Hinge = learning to dissociate hip movement from lumbar movement.
Mic drop.
Resiliency is key in my book. And not many movements make the body more resilient than the deadlift or any properly progressed hip hinge exercise catered to the individual’s goals, injury history, and ability level:
Assuming I have coached someone up enough to understand spinal neutral and they’re able to maintain it, why not poke the bear and challenge them?
A deadlift doesn’t always mean using a straight bar and pulling heavy from the floor until someone shit’s their spleen.
I can use a kettlebell and band to groove the movement:
I can also use a trap bar, which is a more user-friendly way of deadlifting as it allows those with mobility restrictions to get into a better position compared to a straight bar.
https://www.youtube.com/watch?v=p-sA3PG1kGY
Too, I have found great success with various other exercises:
Farmer and Suitcase carries
Shovel Holds
“Offset” loaded exercises like 1-arm DB presses or 1-arm rows, lunges or RDLs (where you hold ONE DB to the side and perform the exercise). It’s a great way to increase the challenge to the core musculature.
Or even outside-the-box exercises like Slideboard Miyagi’s
So long as we’re staying out of precarious positions or those positions which feed into the issue(s) at hand, we’re good.
Find a training effect with your clients/athletes.
Help them find their TRAINABLE MENU.
And That’s That
People have low back pain for a variety of reasons: They’re too tight, too loose, too weak, have poor kinesthetic awareness, or they’re left handed.
The umbrella theme to remember is that there is never ONE root cause or ONE definitive approach to address it across the board. However, that doesn’t mean there aren’t some “big rock” things to consider that will vastly improve your’s and their chances of success.
NOTE: There’s only a few more days to get my latest continuing education resource – Strategic Strength – at $50 off the regular price. Today’s post discusses one of the main topics covered in the course: Assessment.
Assessment.
People don’t like the feeling of being judged – especially by complete strangers.
However, when it comes to working with a coach or personal trainer for the first time, an “assessment” is pretty much standard procedure; a means to an end with regards to collecting data to better ascertain someone’s starting point.
In Short: An assessment guides the coach to help figure out the safest and most efficient path for a client to reach his or her’s goal(s).5
That being said…I feel many of us are approaching assessment the wrong way.
The Peculiar State of Fitness Assessments
I am not writing this as an attack against assessment
Likewise I am also not here to say one way or the other how you should assess your clients.
You know your clients/athletes better than I do.
I don’t care if your assessment of choice is the Functional Movement Screen, the Selective Functional Movement Assessment, PRI (Postural Restoration Institute), DNS (Dynamic Neuromuscular Stabilization), FRC (Functional Range Conditioning), whatever institutions like NASM or ACE prefer, or, I don’t know, duck-duck-goose.
Everything has it’s strengths and weaknesses.
More to the point, I would think that as people progress through their careers they’d take it upon themselves to actively change their minds the more they learn and gain experience.
They’ll experiment more and eventually “cherry pick” from several modalities to best fit their philosophy and approach to training.
Ideally “assessment” should be a smorgasbord of reaches, rolls, carries, squats, hinges, toe touches, twists, presses, and bicep curls (<— only half kidding on that last one), among other things.
Here is Gray Cook’s definition of assessment (a good one, mind you):
“In the assessment you take your education background, your professional wisdom, the particular situation, the time constraints, other historical information like a medical history or previous problems…and put all that together. That’s an assessment.”
Pretty hard to disagree with that, right?
Here’s my lame attempt:
“Can the person sitting/standing in front of you do stuff?”
I’m not tossing darts at everyone, but I do find that the bulk of fitness professionals out there use the initial assessment as an opportunity to search every crevasse (not that crevasse, get your mind out of the gutter), nook & cranny, and area of the body for “dysfunction.”
Many use the assessment as an opportunity to demonstrate to someone how much of a walking ball of fail they are.
“Okay Mr. Jones here’s what we got: your hip flexors are tight, you have forward head posture, you lack frontal plane stability, you lack ample scapular upward rotation, your left big toe has zero dorsiflexion, you have weak glutes, you’re quad dominant, your shoulders are slightly internally rotated, you’re probably gluten intolerant, your wife is cheating on you, and I’m about 37% convinced you have cancer.
If you purchase a 24 pack you’ll save $13 per session. Whataya say?”
Some of the above may be relevant and stuff you should focus on as a trainer. I mean, I’m not going to sit here and belabor a coach for wanting to improve a client’s thoracic spine mobility.
However, if I were the person listening to some laundry list of things I suck at or need to improve on, I’d be like………
………..”fuck off.”
Be Careful of Being Told to “Fuck Off”
There’s much I can wax poetic on when it comes to the topic of assessment. My biggest pet-peeve, though, is when coaches/trainers place waaaaaaaaaay too much emphasis on someone’s resting/static posture.
Lets revisit the picture from above.
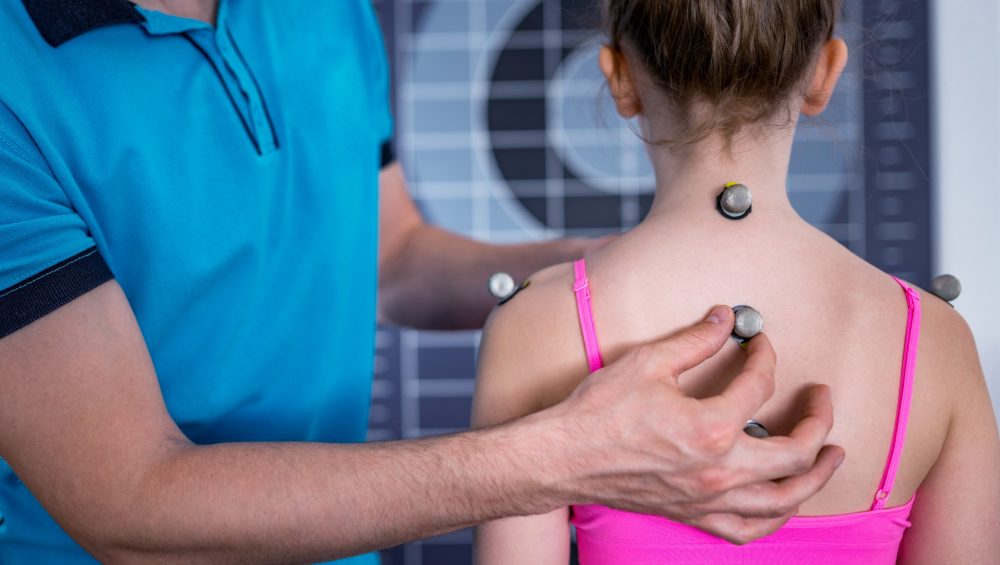
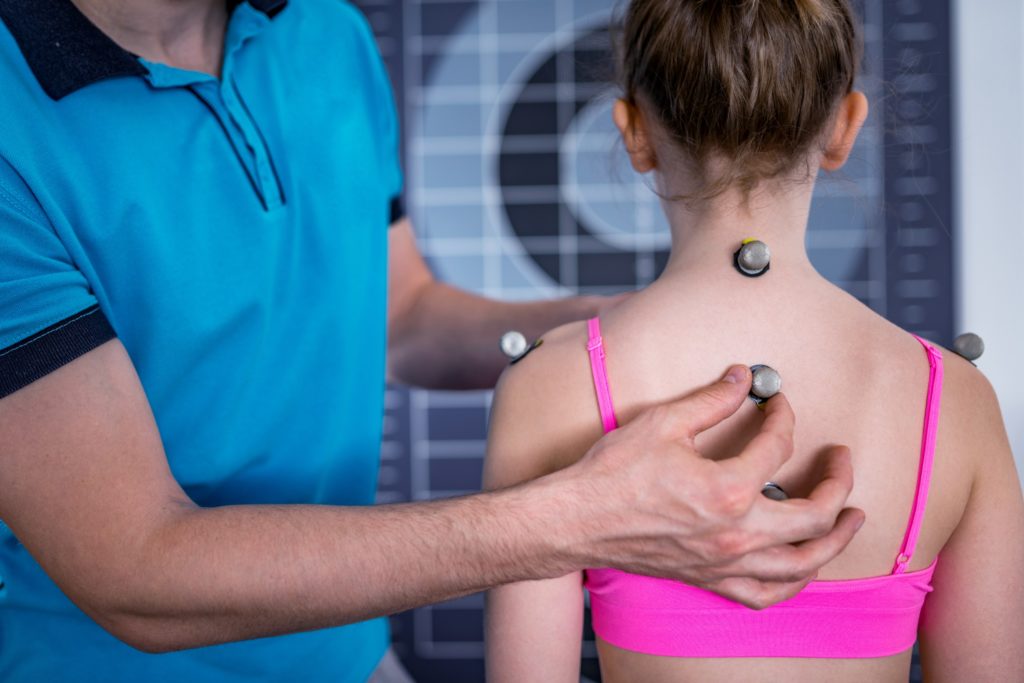
Many high-end gyms implement this advanced form of “postural assessment” as an up-sell to seduce more people into purchase training.
Said individual stands in front of a giant gridded screen and is then hooked up with a bunch of probes and what not that are placed at strategic locations around the body that bloop and bleep.
It’s reminiscent of one the most terrifying movies I have ever seen, Fire in the Sky.
Remember that one?
You know, that alien abduction movie from the early 90’s where the main character is relentlessly poked and prodded by a bunch of aliens on their spaceship?
It’s terrifying.
Anyway, I can’t help but be reminded of that movie whenever I see someone being told to stand in front of a grid so some trainer can scrutinize every inch of their posture in the hopes they’ll be hired to “fix” it.
Who says it needs to be fixed in the first place?
I’m reminded of a photograph shared by Fort Worth, TX based physical therapist, Dr. Jarod Hall a few years back which hammers home my point.
Here’s what he said/posted:
“I want everybody to look closely at this picture and tell me what you see…”
“I see 20 of the world’s top athletes that have tremendous range of motion, strength, body control, and physical capacity… Yet all have significant variances in their static posture as determined by the holy grail plumb-line.
Static posture is near worthless to measure for injury or pain prediction.”
Placing all your eggs into one basket – in this case static posture, which a lot of fitness professionals do – is unfortunate.
Posture is a Position, It’s Not a Death Sentence
To steal from another really smart physical therapist, Dr. Quinn Henoch, “posture will always be relative to two things:
the task at hand
and the load
If you’re not taking into consideration those two things during an assessment – in addition to movement, repetition, speed, etc – and you’re only assessing people based off static posture, well, you’re not smart.
The question, then, is….”what should an assessment look like or consist of?”
We moved both courses to a new platform which will make both the delivery and user experience more enjoyable and seamless.
Dean and I both have a bunch of new followers7 since we last put them on sale.
It’s a new year and as such a lot of fitness professionals will need to start thinking about ramping up their continuing education and getting their CEU requirements in order.
Last but not least, we’re awesome.
Go HERE to enroll in one (or both courses).
IMPORTANT: use the coupon code wutang50 to receive your $50 off credit at checkout.
Now to the Shoulder Stuff
We can easily make the case that the shoulders are the most annoying and often injured part of the body for many people, meatheads in particular. And, to be candid, there are any number of things to consider with regards to why:
Rotator cuff weakness
Poor scapular stability (<– better term would be Controlled Scapular Mobility)
Postural considerations
Acromion type
Scapular kinematics (inability to upwardly rotate, for example)
It’s weird, though, when it comes to programming for the shoulders there’s this dichotomous yin-yang approach we have to consider:
What’s best for optimal (shoulder) performance?
And.
What’s best for optimal (shoulder) health?
Shoulder Performance
I’m in the business of helping people get bigger, faster, stronger, and generally more dieselfied.
This usually (but not always) revolves around lifting objects of appreciable weight. Watch any strong person bench press, squat, or deadlift a lot of weight and there’s a common theme you’ll notice:
1. You’ll likely have to unclench your sphincter after watching someone do something you never thought humanly possible:
2. With regards to the shoulders – specifically the shoulder blades – there’s meticulous attention paid to their positioning.
Those bad boys are locked down. Retracted and depressed.
Or, in non-geek speak: They’re not moving.
Doing so provides an infinite more amount of stability to the joint and also provides a more stable base of support (particularly for the bench press) to push from. When it comes to the deadlift and/or squat it allows one to maintain a more “rigid” torso, stay tight, and decreases the chance of energy leaks.
Force is more efficiently transferred within the kinetic chain.
Also, in non-geek speak: Just fucking trust me.
I’m no Eric Spoto, but I know how to coach the bench press and what to consider when it comes to performing at a high(er) level and making it so your shoulders don’t hate you.
Bench Press Set-Up: Shoulders Together & Down
Shoulder Health
It’s funny, when Dean Somerset and I teach our Complete Shoulder & Hip Blueprint workshop I’ll spend half a day imploring attendees to adopt the strategies mentioned above.
“Lock them down.”
…is what I’ll tell them. Referring to the shoulder blades and how it’s crucial to recognize ideal placement for performance
Then, after the lunch break, I’ll do a complete 180 and spend the rest of the day saying something to the effect of:
“Let those fuckers move.”
The shoulder blades do a lot:
Retract and protract
Elevate and depress
Upwardly and downwardly rotate
Posteriorly and anteriorly tilt.
It’s imperative to have “access” to the full spectrum of scapular motion in order to obtain optimal shoulder health.
We spend so much time telling people to squeeze their shoulder blades together – which, all told, isn’t a bad cue in of itself, but can cause a whole host of shoulder ouchies; downward rotation syndrome for starters – that it’s no wonder I get a range of quizzical looks whenever I tell people to let them move.
Protraction (or reaching) is a game changer for many.
1-Arm Quadruped Protraction
Easy Scapular Winging “Fix”
To go a step further and outside the “corrective” realm, when I coach people through a push-up or any kind of row variation a common mistake I find people make is keeping their shoulder blades pinned or glued together.
With push-ups I try to tell my clients to push away or “finish” at the top.
I don’t want their shoulder blades making out the entire time.
And with rows…
This Makes Me Sad
You’ll notice my shoulder blade isn’t moving at all; it’s staying in the retracted position throughout the duration of the set. This often leads to bicep tendon issues and anterior shoulder instability, amongst other things.
Instead I try to tell people I want their scapulae to move around their rib cage. After all that’s what they’re meant to do.
That’s More Like It
It’s profound how much this seemingly minor tweak will help with a lot of shoulder woes.
That’s It
Pretty easy, right?
Short, precise, and won’t require a book report.
Making a concerted effort to recognize and address both ends of the shoulder performance-health spectrum can and will make a huge difference and help you write more effective programs.
I firmly believe static stretching is often over-prescribed; an easy default recommendation for some fitness professionals too lazy to dig a little deeper.
“Tight” hamstrings? Go stretch those bad boys.
“Tight” hip flexors? Better go stretch!
Bad hair day? Yup, you need to stretch.
SPOILER ALERT: 👇👇 this is not the correct way to stretch your hip flexors.
The “Real” vs. “BS” Hip Flexor Stretch
I don’t feel static stretching is a complete waste of time mind you.
Sometimes (<– key word, sometimes) it plays a crucial role in helping people get out of pain and addressing varying muscular imbalances or postural issues.
SIDE NOTE: Most people don’t realize that what we deem as “stretching” isn’t really doing what we think it’s doing. In order for a muscle to really gain length you need to increase the number of sarcomeres in a series. This takes a…………..metric………..fuck………ton…………of……………………………………………….time.
I could be out-dated in my research vernacular, but I believe it takes upwards of 20-60+ minutes of holding a continuous stretch to actually increase it’s length to any degree.
What most of use are doing when we drop down to the floor to stretch something for 30-seconds is increasing our tolerance to the stretch.
And even if static stretching is deemed necessary, none of this takes into account the most important – albeit most overlooked – detail.
Performing it correctly.
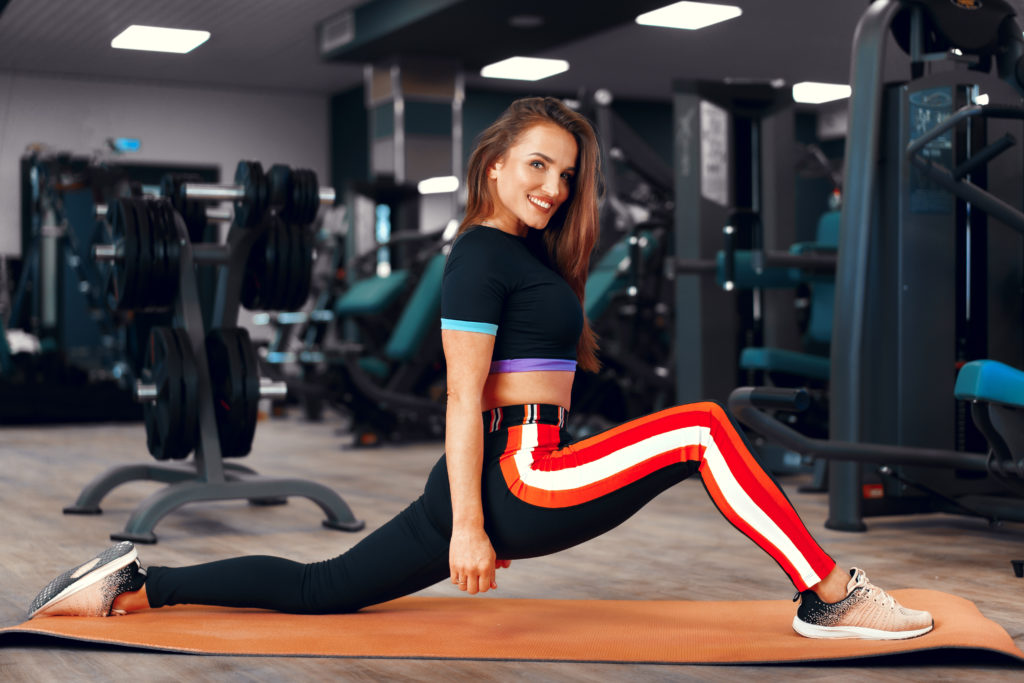
Take the hip flexors for example. Everyone loves stretching their hip flexors.
Weeeeeeeeeeeeee.
Thing is: You’ll rarely see someone do it right. Instead, despite endless efforts – sometimes to the tune of weeks, months, and years of “stretching” – nothing ever changes.
Many people will still point to the same area that feels “tight.”
I’m by no means the first person to point this out: guys like Mike Reinold, Mike Robertson, Dr. Evan Osar, and Cobra Commander have been pointing this out for years.
SIDE NOTE #2: I’m actually more inclined to toss in some dedicated hip flexor STRENGTHENING exercises in lieu of stretching (but that’s for another time).
So lets take a look at how to properly stretch the hip flexors, shall we?
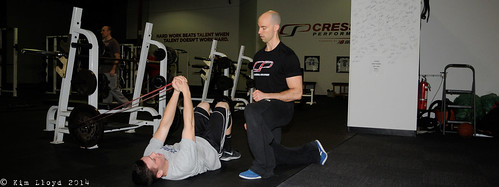
I’ve been a fan of “offset” loading for a number of years now. Without getting too deep in the weeds on what offset loading is and what the benefits are…
…it’s when you either stagger your foot or hand position on certain exercises OR you load an exercise a certain way (how you hold a DB or KB) to target or overload a specific limb or joint.
It has implications for both rehab (helping people to move better) AND for getting them jacked (self-explanatory). My good friend and Boston-based colleague, Dr. Michelle Boland, elaborates more on offset loading and how you can use it to your clients’ advantage below.
Enjoy.
Never Question Your Exercise Selection Again
I speak from personal experience, as a personal trainer, when I say it can be challenging to navigate through all of your client’s aches, pains, and movement hiccups.
It has caused me some serious headaches in the past.
In a social media guru filled world, there is so much information about magic tricks to FIX your clients movement struggles. These magic tricks are typically called corrective exercises.
We then think we are Harry Potter and build our client’s sessions and training programs around corrective exercises, making the perfect potion to have our clients move perfectly.
BUT, what ends up happening is that our FITNESS TRAINING sessions start feeling like a bad physical therapy experience.
Our clients are not TRULY becoming better movers.
Our clients are not TRULY gaining muscle or looking better in a bathing suit.
They are in no man’s land, not getting results, and being held back from their physical potential.
. Not to worry though!
(Check out THIS blog post to learn more about the mental barriers that may be holding your clients back.)
I am here to help!! Because I made these same mistakes and learned from them!
I am going to provide you with four simple rules to make sure your clients are still achieving their fitness goals while ALSO becoming better movers.
These rules will provide you the ability to build a training program and select exercises without having to choose between a simple corrective exercise that is targeted to help someone move better and a complex lift that is targeted to get them jacked.
Most coaches’ have go-to exercises for getting jacked and strong which is great but these same exercises can also create some movement restrictions due to the high levels of tension they require, such as a barbell back squat or bench press.
However, simple considerations to where the weight is placed, the type of grip, and feet position (stance) can be changed during these typical go-to exercises to prevent some of the possible movement restrictions.
Below, I am going to provide you with simple, practical programming strategies that will allow you to both load AND improve movement quality for all ages and training levels.
The four simple rules allow you to make small tweaks to exercises in order to help people move better, WHILE still getting 80-90% of a training effect from the loading. In other words, we can still get our clients strong and powerful without turning them into walking refrigerators.
(If you prefer to watch instead of read, Check out my video presentation of these Rules HERE.)
Rule 1. Choose Offset Positions
Offset positions include separating hands and feet from front to back. These positions will allow your clients to feel stable, so they can still try hard, without robbing them of their rotational abilities along the way.
Offset positions benefits include:
Improving rotational abilities from separating hands and feet front to back which helps to turn people’s hips and chests
Initiates alternating positions of the hips with one hip more extended and the opposite hip more flexed
Provides greater variation in your exercise selection especially for unilateral loading
Provides more options to add different weight shifting which helps to create unilateral loading challenges
Offset positions include:
1. The Staggered Stance position is standing with both feet flat on the ground and split front to back. Feet are typically hip-width apart from side to side and a half foot distance apart front to back, but the distance can be altered in relation to base of support needs. So, if your client has a difficult time balancing in this position, move their feet wider side to side. The position initiates alternating positions of the pelvis with one hip more extended and the opposite hip more flexed and can also create rotation towards the back side leg.
The Staggered Stance position can also be challenged with a variation called the ‘Loaded Step’. The Loaded Step variation is a weight distribution backwards onto the back leg. The center of mass should be about 80% on the back leg and 20% on the front leg.
Loaded Step benefits:
This position variation encourages rotation through the hips and chest
You can coach it to be a knee or hip dominant exercise (see examples below)
You will feel LOTS of inner thigh (adductor), glute, and hamstring on the back leg
It supports hip mobility and eases tight posterior hips by allowing someone to feel a stretch in the back leg posterior hip, but try to avoid squeezing glutes…I know how tempting this can be 😉
It encourages more single leg loading or shared loading
2. The Split Stance position is standing with a front to back separation of the legs and includes a reduction of foot contact on the back side foot. The leg separation is wider front to back than the Staggered Stance position and there is removal of full foot contact on the back side foot, such that the back heel is off the ground and the weight is rolled onto the ball of the foot. The position mimics (not equivalent to) a top of a split squat exercise.
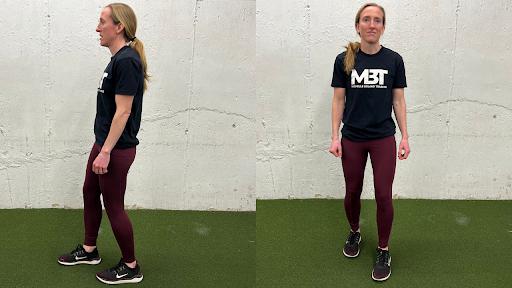
The Staggered Stance position can be challenged with a variation called the ‘Kickstand Step’. The Kickstand Step Split Stance variation position is a body weight distribution forwards on the front leg with supportive, light weight on the back toe. Body weight distribution should be about 80% on the front leg and 20% on the back leg.
Kickstand Step Consideration and Benefits:
This position variation encourages more single leg loading
This position variation encourages rotation through the hips and chest
You will feel LOTS of inner thigh (adductor), glute, and hamstring on the front leg
You can challenge the position with where you hold the weight:
Holding Weight With Two Hands Will Limit Rotation
Holding Weight In Opposite Hand As Front Leg Will Encourage More Rotation
3. The Staggered Hand position is a front to back separation of the hands on the ground. Staggering the hands can help with creating alternating movement in the ribcage. The side of the ribs of the back hand will be lower and the upper body will be more likely to be rotated in that direction. You can also help target more side abdominal wall muscles by staggering the hands.
Check out some exercises you can start incorporating today with offset positions:
Contralateral Loaded Step Hip Hinge
Loaded Step Ski Erg
1-Arm Kickstand KB Swing
Staggered KB Hang Clean
Offset Pushup
Salamander Pushups For Staggered Hands
Rule 2. Choose Offset Loading
Offset loading involves having your clients hold weight in less than obvious places that will challenge them in different ways. For example, instead of putting a barbell on your back, hold the barbell between your elbows (see Zercher hold below).
Holding a weight in the front will help target more abdominal wall muscles with less low back issues (see Goblet hold below). Instead of holding a kettlebell with two hands, you can also hold it with one hand to create some unilateral loading challenges.
Check out some exercises you can start incorporating today with offset loading:
KB Goblet Split Squat
Contralateral 1-Arm KB Split Squat w/ Opposite Arm Reach
DB Zercher Split Squat
Alternating 1-Arm KB Deadlift
Rule 3. Alternate Grips
Alternating your grip on the weights can improve your client’s ability to rotate, making them super athletes while ALSO being able to pick up heavy things and put them down. Turning one hand into supination and the other hand into pronation causes the upper body to turn towards one side.
Check out some exercises you can start incorporating today with alternating grips:
Jefferson Split Squat
Alternating Grip Pull-Up
Rule 4. Reduce Tension When It Is Not Necessary
Have you ever had a client who picks up five pound dumbbells to do a bicep curl and acts like they are 60 pound dumbbells?
I sure have.
Encourage clients to create tension and substantial effort WHEN THEY HAVE TO.
Other times, encourage them to back off a bit. Exercises that are not too demanding can encourage improvements to joint range of motion and movement quality IF they are performed with low tension, no squeezing, no death grips, or no breath holding.
Your clients do not need to be squeezing all of their muscles, all of the time, to get a good workout. Low tension exercises can stretch tight areas and improve mobility. For example, the Loaded Step RDL can improve hip mobility and stretch the back side of the hip when it is performed with low weight and low levels of tension.
Loaded Step RDL
A great start would be to select warm-up or cool-down exercises that can be performed with low tension!
QUICK Programming Tips To Incorporate These RULES:
Combine: Every exercise within your training session include the above four rules
Pair: Pair a heavy, bilateral lift with an exercise that incorporates the rules
Consider positions in your exercise selection process, to learn more click HERE.
Summary
Incorporating offset positions, offset loading, and alternating grips into your exercise selection will help your clients gain some rotational abilities, gain hip and rib cage mobility, and add some excitement into their training while STILL allowing them to get strong.
To learn more, check out my EXERCISE SELECTION PROCESS which layers positions, fitness qualities, then individualized variations. Position selection is the foundation of my exercise selection and all the information included in this article about offset positions comes from my quick and concise Position Principles course.
The Position Principles course will help you to avoid leaving behind the greatest factor in getting your clients and athletes to move better. The course provides clarity on positional biomechanics, clarity on terminology within the fitness industry for exercises, a downloadable programming template, and easy steps to organize your program design. After this course, you will never question your exercise selection again.
If you have any comments or questions please feel free to email me at [email protected].
If you enjoyed the exercise videos in this article, check out the MBT Exercise Database for 1,200 more videos to use, embed within your programming, and level up your exercise selection game.
There are many things that can make your shoulder(s) hate life.
Poor programming balance
Less than stellar exercise technique
Muscular imbalances
Bony adaptations (acromion type
Poor scapular kinematics
Orcs
And, for some, we could even make the case for faulty breathing mechanics and/or contralateral hip/ankle mobility restrictions.
I try not to get that into the weeds when it comes to people’s shoulders, though. It comes across as too voodoo(ish). That’s a word right?
If someone’s shoulders are cranky I like to keep things simple and start where I most often see issues…….
……their left ventricle.
HAHA, just kidding.
It’s the thoracic spine.
Accessing T-Spine Extension For Shoulder Health
Having the ability to extend the thoracic spine is a game changer for many people, especially for those who tend to be sequestered for hours on end in front of a computer on a day-to-day basis.
For lack of a better term, a lot of cool shit happens with extension:
The shoulder blades can retract and upwardly rotate.
It’s much easier to get the arms overhead.
It’s easier to keep the chest up during squats and deadlifts.
It makes for a “better” bench press. I.e., shoulder blades can retract and depress providing a more stable base of support.
The thoracic spine (thorax for the nerds in the room) is the “anchor” of the shoulder blades. Ideally we like to see congruency between the ribcage/thorax/t-spine/whatchamacalit and the shoulder blades.
When someone is a bit more kyphotic (rounded) in that area it makes it almost impossible for this to happen because the shoulder blades will often be more abducted and anteriorly tilted.
This can setoff a domino effect of other shenanigans such as a narrowing of the acromion space (for example), which in turn leads to rotator cuff issues, which then leads to not being able to bench press without pain, which, as we all know, means the Apocalypse is upon us.
Let’s avoid the Apocalypse.
To that end I’d like to take this time to share some of my “go to” T-Spine Extension drills I use with my own clients and athletes on a weekly basis.
1. T-Spine Extension Off a Foam Roller (Performed In a Way That Doesn’t Make Me Want to Swallow Live Bees)
Likely the most recognizable drill many gravitate towards – and for good reason (it’s a good one) – is T-Spine Extension off a foam roller.
However, many tend to go waaaaaaay too far with their total range of motion on this to where it becomes more of a lumbar spine movement.
Here’s how to do it correctly:
2. Prone T-Spine Extension
I reserve “fancy” for choosing a nice restaurant for a date night with my wife.10
I don’t feel the need to get fancy with my T-spine extension drills.
The Prone T-Spine Extension drill is a fantastic way to build mid-back endurance.
3. Child’s Pose Back Extension Off Med Ball
What’s great about this variation is that when we adopt the “child’s pose” (knees tucked underneath) we OMIT the lumbar spine.
So now the only area we can get movement is the t-spine.
4. Pigeon Stance w/ Reach Through & Extension
Taking the previous concept and upping the ante a little bit is this exercise I “stole” from Dean Somerset.
If we want to talk about a drill that provides a TON of benefit for our training buck this is it.
Here we get a stellar hip mobility/glute stretch, while at the same time taking the lumbar spine out of the equation (because that’s NOT where we want movement from).
Too, with the reach through (and then extension) we’re getting a double whammy effect of mid-back mobility goodness.
NOTE: I like to add in an inhale (through the nose) on the reach through and then a FULL exhale (out the mouth) as the individual extends back up.
NOTE #2: My tricep looks fucking amazing in this video.
5. Wall T-Spine Extension w/ Lift Off
This drill is a doozy as well.
Pushing the hips back and “settling” into your accessible t-spine extension ROM is money enough for most people. But when you add in the end-range “lift off” (lifting the hands off the wall) at the end, it adds that little “eff you” component not many people will like.
Be careful not to crank through your lower back on this one!
This one is more challenging than it looks, so way on the side of conservative when choosing the loads you use.
I’m using a 10 kg kettlebell in this video and am pretty sure I blacked out after shooting this video.
Want More Shoulder Magic?
Join me IN-PERSON for two upcoming Fall workshops I am putting on. I cover shoulder/hip assessment, programming strategies, the concept of the TRAINABLE MENU, favorite Decepticons, and much, much more.
Being human means being enamored by a litany of things in the health/wellness/physical preparation realm. Some people are easily swooned by fancy watches and elaborate looking exercises
Others by cryochambers and Paleo recipes that taste like sawdust.
I am not here to play judgement police. For the most part, everything has a time and place11 and everyone responds differently to different things.
What works for me may not work for you (and vice versa). It’s all good.
Back in 2009-2010, while at Cressey Sports Performance, I was introduced to PRI (Postural Restoration Institute). As a collective, we adopted some of their principles & protocols (specifically positional breathing) and applied them to our athletes’ and clients’ programming, I’d say with a high degree of success.
In the years since, PRI has grown in popularity and is still something I “subscribe” to. However, the key term I want to highlight here is “some.”
I’ve adopted some of their principles.
The thing about PRI (for better or worse) is that it has an uncanny ability to suck people in and plop them into a never-ending rabbit hole of mystery and multi-verses.
Today’s guest post is via Boston-based physical therapist, Mike DeMille, and offers a needed perspective on this phenomenon.
(PS: I’d encourage anyone interested with PRI to check out Mike’s course/mentorship below).
What Would I Say to Someone Starting Out?
In a world of biomechanics, neurology, complex chronic pain, and a desire to create resilience, it can be difficult to decide as a Physical Therapist or movement specialist what continuing education courses to take and why.
Personally, I have been a PRC (Postural Restoration Certified) Physical Therapist for five years, and anyone familiar with the Postural Restoration Institute (PRI) knows how easy it can be to go down the “rabbit hole”
Note From TG: I wrote a bit about this “rabbit hole” a number of years ago when PRI was first gaining steam in the S&C side of the spectrum. You can check it out HERE.12
After taking different courses, it can be very difficult to sift through the information and add principles to your practice (or programming), while leaving behind minutiae that ultimately won’t contribute to the further results of your clients.
What are those techniques, exercises, prehab/rehab protocol, cues, sick hip-hop rhymes that probably do not need to come along for the ride as you build out your systems as a coach?
That is exactly why we are here today.
After working in a cash-based Physical Therapy and Personal Training setting over the last four years and starting my own clinic (just outside Boston,. MA) I’ve developed rules (or tenets) of information to hold on to and which ones to leave behind.
Let’s dive in.
Think Practitioner/Coach, Speak Client
Your clients do not care what things are called, and neither should you.
Exhale, eccentrically orient, compress, early-mid-late stance, inhaling from an exhaled skeleton expansion, these terms can get complicated, if not bordering on someone speaking Elvish.
A general rule of thumb would be if you cannot explain a concept in very simple terms to your client, then you likely shouldn’t spend a ton of time thinking about it yourself.
I like to think of this as writing a letter with a big bold sharpie instead of a small fine pencil that is difficult to see and read.
For example, if you have a client who you feel like is in a position of lumbar extension and they need to learn how to exhale to help get them out of pain, then you can leave the messaging at just that.
You will create the buy-in from spinning a simple story and allowing your client to feel the difference when undergoing your program. You do not need to explain all of the varying “compensatory strategies” to them in an effort to create belief in your program.
This will more likely than not lead to confusion, in addition to increasing the urge they’ll want to punch you in the face.
Nothing Is New; It Just Has a Fancier Name
Remember that these principles existed long before the most recent course that you took. One of the biggest problems that I see mentees and fresh PTs and movement professionals face is shiny object syndrome.
Understandably, when you go to a course and watch someone’s shoulder flexion increase from 140 degrees to 8000 after a fancy breathing exercise, you want to give everyone that fancy breathing exercise.
Remember, there is a difference between a new technique that creates transient changes, and principles that create long lasting repeatable results.
Examples of a few principles that could make sense in a movement practice geared towards clients with pain:
Sound communication (avoiding nocebo).
Axial skeleton position that creates pressure underneath load bearing joints.
Progressive overload.
Does it feel less exciting to not be blowing all of your clients minds?
Sure it does.
But will these principles give you a sustainable business where you can more accurately sell results to potential clients?
Definitely.
Closing Thoughts
There is nothing wrong with taking new courses, finding helpful information, and creating buy-in with prospective clients, as well as appreciating the nuances of Physical Therapy and Strength and Conditioning.
But let’s not forget: the name of the game is being able to tie your name to something that can produce consistent results, and that is why we decided to take on this profession in the first place.
PRI Pique Your Interest?
Does this message resonate with you? Are you a Physical Therapist or movement professional looking to sift through the information and take the relevant principles into your practice?
Tyler Tanaka and I have created a community where we take individuals that are looking to finally apply the information that they have learned and effectively communicate with their ideal clients to build the business that they have always wanted.
This is your chance to learn the system of two PRC PTs and ask any and every question that you have ever had. In the 10 week Solidify Program you will undergo a detailed curriculum as well as take part in one on one Refinement calls to get your questions answered about those difficult patients that are the ”non-responders” as well as big picture questions about your practice and business.
Get your mind out of the gutter, I’m talking about muscles here…;o)
The Difference Between Good & Bad Stiffness
Having “tight” or “stiff” muscles is often viewed as a bad thing. Not losing a match of Squid Game bad, but bad nonetheless.
When someone presents with a (true) muscular length limitation there are increased risks of injury involved – strains, tears, explosive diarrhea13 – not to mention an increased likelihood of faulty movement patterns up and down the kinetic chain.
But injury isn’t always omnipresent.
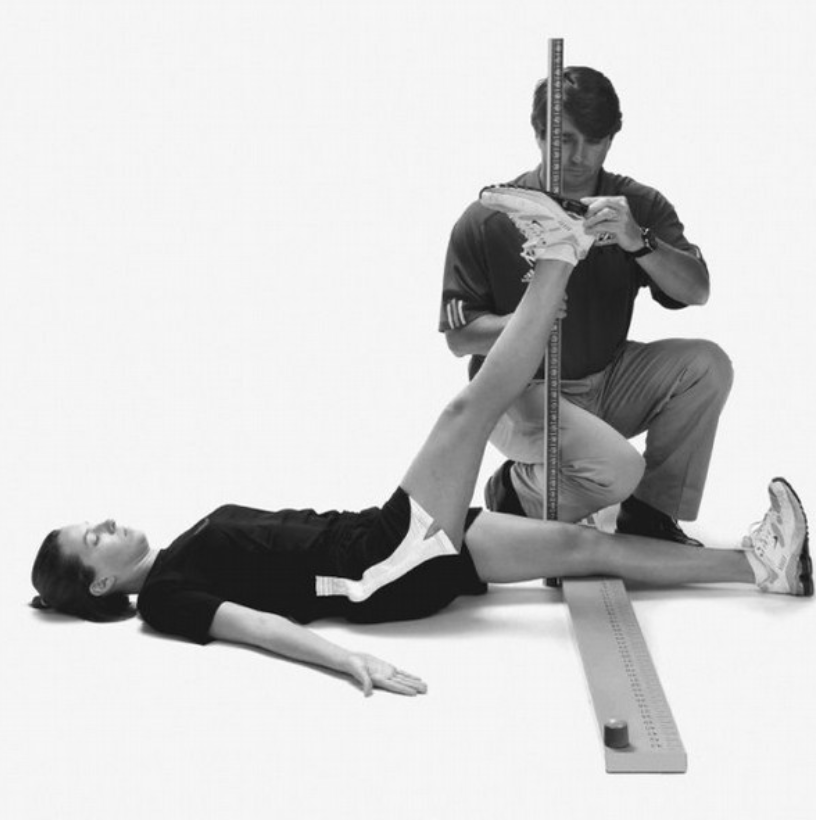
Take any NBA basketball player through the FMS (Functional Movement Screen) – specifically the Active Straight Leg screen – and you’re bound to open up a can of epic fail.
NOTE:I personally don’t use the FMS currently when assessing/screening new clients. I took both modules several years ago and gained a lot of insight and knowledge. But in the years since I have gradually weened away from the FMS for myriad reasons. I know a lot of fitness professionals who still utilize it though and feel it’s a relevant talking point in the context of this post.
Many would be lucky to score a “2” (which is an average score), and many would showcase a right/left asymmetry, which, as we all know, means a baby seal dies.14
As a result, we’re quick to go into corrective exercise overdrive and implement every strategy under the sun that’ll increase hamstring length.
Ironically, it’s “tight hamstrings” that allow many NBA players the ability to do what they do so well. Namely, jump through the roof.
In this case stiffness is a good thing. We don’t have to fix it.
Of Note:the ASLR screen isn’t necessarily a hamstring length screen to begin with. Sure, offhand, it can be a way to ascertain hamstring length…but what we’re really looking at is the ability to both flex and extend the hip.
Stiff hamstrings can affect the ability to do so. However, more importantly, the ASLR is about teaching people to get into better positions – improving stiffness in other areas – to “trick” the CNS into turning off the emergency breaks.
Get people into more optimal positions (nudge them into better alignment), and what presented as “tight” or stiff is no longer the case.
Core Engaged Active Straight Leg Raise
Here we engage the anterior core – increase stiffness – to promote more posterior pelvic tilt (decrease “bad” stiffness in lumbar spine) in order to improve ROM, in addition to getting movement from the right areas (in this case the hips).
Likewise we can throw the hip flexors underneath the bus. I think we all know someone who’s been stretching their “tight” hip flexors since 1997.
Newsflash: If you’re someone who’s been mindlessly stretching your hip flexors for that long, with no improvement, what the hell?
I’d garner a guess the reason they feel tight/stiff is due to protective tension (and not actual tightness).
The stretch you’re doing – what I like to call the BS Hip Flexor Stretch – is doing nothing more than increasing “bad” stiffness in the:
Lumbar spine.
Anterior hip capsule.
My eyes.
It exacerbates and feeds what’s causing the issues in the first place.
Instead, perform a REAL Hip Flexor Stretch by increasing (good) stiffness in the appropriate areas – the anterior core and glutes – and actually get at the crux of the issue.
Another prime example would be the lats.
Stiff lats can be a bad and a good thing.
When Shit Hits the Fan (I.e., Bad)
In mine and Dean Somerset’s Complete Shoulder & Hip Blueprint, we spend a large portion of time speaking about the lats and how, in the overhead athlete population (as well as in the general population), they’re often stiff/short and overactive.
As a result: Overactive/stiff lats will drive more shoulder depression, downward rotation, adduction, as well as lumbar extension in general.
Anyone familiar with PRI (Postural Restoration Institute) and their thought process and methodologies will recognize this “Scissor Posture,” where the pelvis is pointing in one direction (tilted forward in Anterior Pelvic Tilt) and the diaphragm pointing in another direction (due to an excessive rib flair and lumbar extension).
This is not only an unstable position to be in, but also keeps the nervous system “on” at all times, driving more sympathetic activity.
What’s more, with regards to shoulder health, overactive lats will make it much less likely someone will be able to elevate their arms overhead, as well as “accessing” their lower traps (which share a similar fiber orientation as the lats @ 135 degrees), which, in concert with the upper trap and serratus, aid scapular upward rotation, posterior tilt, and protraction.
Taking the time to coach someone to turn off (or down-regulate) their lats in order to flex, externally rotate, and abduct their shoulder works wonders.
Bench T-Spine Mobilization
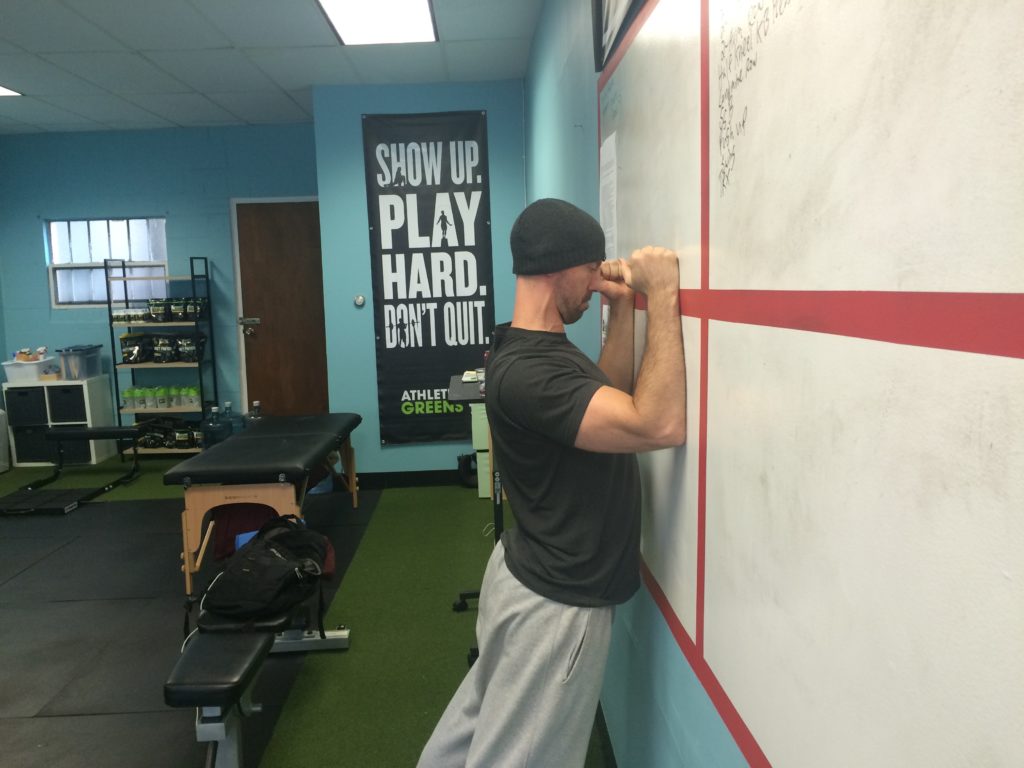
Wall Lat Stretch w/ T-Spine Extension & Lift Off
When Lats Can Increase Your Overall Level of Badassery (I.e., Good Stiffness)
And now it’s time to turn those fuckers on!
Your lats are a MAJOR player when it comes to performance in the weight room and lifting heavy things.
It also behooves you to turn them on in order to improve your technique in the “big 3.”
With the deadlift in particular there are some significant advantages:
Another trick I like to use to help people learn to use their lats during a deadlift is to attach a band to the bar and a stationary object.
Trainees will learn very quickly what it means to “pull the bar towards you” and to keep the lats engaged throughout the duration of a set.
You can also peruse a few more options in this IG post from a few weeks ago:
…it’s not always end of days or something that requires going into DEFCON 1 corrective exercise purgatory mode. Whether or not stiffness/tightness is bad or good depends on the context.