Fear not. I’ve still managed to queue up some stellar content for you in my absence.
Today Dr. Sarah Duvall is pinch-writing for me talking about a topic that’s relevant to anyone who likes to lift heavy things: Squats (and how to make them feel better).
Her new resource, which she developed alongside fellow coaching superstars Kellie Hart and Meghan Callaway – Glutes, Core, and Pelvic Floor Workout System – is on sale starting today (6/28) and runs through 7/2.
Are You Engaging the Right Muscles When You Squat?
Several months ago Tony and I met at Caffe Nero to talk shop.
After a combined 30 + years of working with people, we have both come to the conclusion that strength is your friend!
It’s your friend for rehab, for life and for aging.
In other words,
“You need to lift shit to fix shit.”
It can get a little tricky, because I’ve often found for patients with tightness or pain that we have to first make sure the right muscle is doing the work before overloading.
A great example of this is doing squats but primarily loading quads and low back instead of balancing the lift with glutes and abdominals. Or doing deadlifts but primarily feeling them in your back, never your glutes or hamstrings.
So you’re lifting and trying to get stronger, but in reality if you’re experiencing the above you’re overworking a subset of muscles instead of the intended target.
That’s why you should always know what muscles you want to work and where you should feel it.
Educated lifting!
Let’s take a second to break down the ever-elusive squat a little further. There are so many varieties from goblet to back to front squats and everything in between.
You’ll want to pick a variety that feels best for you, but I’d like to share a couple tricks for squatting in a way that targets your glutes and abs. This will be especially helpful if you primarily feel squats in your quads and low back.
Let’s work from the ground up at 4 key areas of the body.
#1. Keep Your Toes Firmly on the Ground
Somewhere along the way the cue to lift the toes got popular.
This is an easy way to shift your weight back to help get the squat more into your hips instead of your knees.
When we make cues too easy they often miss the mark. It’s true that you want to sit back into your hips, but the body follows patterns and when you pick up your toes you set off a flexion chain in your body that can increase hip flexor activation and decrease abdominals.
Give it a try now.
Pick up your toes for a squat and focus on how much you feel your abdominals. Now, give me a nice short foot (big toe down, arch engaged, weight spread evenly between the ball and heel) and see if this grounded foot turns your abs on more.
Those hardwired neuro patterns are hard to break, and having great foot placement sets the tone for the rest of the body.
So how do you sit back instead of coming forward onto your knees? Try practicing your squat by sitting back to a box or chair.
This will help train the pattern without picking up your toes.
#2. Sit Into Your Glutes
You want to feel your glutes lengthening for your squat.
It’s not a deadlift, your knees will bend, but it shouldn’t be all knees.
Two signs you’re not lengthening and sitting into your glutes:
You have to fold in half to sit back. (Now, if you have really long femurs or a narrow stance, you’ll need to lean forward a bit more. But if you widen your stance and you still find yourself bending over at the waist, it might be a good idea to check your rockbacks.)
You start with a neutral spine but then overarch your back to sit into the squat. Overarching the back and lengthening the hamstrings is a great way to look like you’re sitting back into your glutes when in reality you’re just going into a big anterior pelvic tilt. If this is the case, your low back will often feel tight after your squat.
To fix the folding in half, try holding on to something when you squat, like suspension straps. Then you can practice sitting back and down into those glutes.
#3. Neglecting to Keep a Neutral Spine
How we initiate a motion sets the tone for that exercise.
So if you arch your back to start, then your brain gets the signal, “this is a back exercise.” If you lengthen your glutes to start, then your brain gets the signal, “this is a glute exercise.”
Sitting the tone is important!
It’s much easier to do something right from the start than it is to play catch up. Wait, are we talking about life or squats?
See if you can spot the difference between initiating for the glutes lengthening vs the low back overarch?
#4. Head Alignment
Let’s do a test.
Look up at the ceiling and squat.
Did you feel how you wanted to overarch your back?
Now, put your chin to your chest and squat.
See how you wanted to tuck your bottom?
Our body follows our head. You’ll never see a gymnast look the opposite way for a flip.
Playing around with head positioning and where the eyes are looking can dramatically change a squat. If someone is having lots of trouble keeping their abs engaged, I might have them look down just a pinch more. If they are really having trouble sitting into their glutes, I might have them look up a pinch.
The real takeaway from this is to know where you should feel an exercise and make sure that is what’s working. When you’re doing squats, you should feel both your glutes and quads working, as well as your abs and low back. A balanced squat works everything, and working everything means you’ll be able to do more and get stronger without getting hurt because the effort is shared.
Want to learn more about where you should be feeling an exercise and which muscles should be working?
Three expert coaches in the fitness and rehab industry came together to build an incredible 12 week workout program to help you reach your fitness goals.
Everyone – women AND men, powerlifters AND CrossFitters, Batman AND Care Bears – can spend more time developing their glute, core and pelvic floor strength and integrity.
Sarah, Kellie, and Megan are phenomenal coaches and have put in a ton of work to make this a resource that can equally help (and be applied) fitness professionals and general population alike.
Fitness Professionals: to be able to assess and write effective corrective and training programs to address things like pelvic floor dysfunction, rectus diastasis (which effects males too), incontinence, and many other “intricate” issues that aren’t easy to train around (much less talk about).
General Population: to show you the basics needed to feel great and to set yourself up for as much success as possible if or when you choose to attack the iron.
Batman (in case you’re reading this): to fight crime in a more efficient and timely manner.
This program is thorough AF and the beauty is that it requires minimal equipment and can be done at home or in a gym.
I’ve performed a few of the workouts & movements myself and lets just say its highlighted a few glaring weaknesses on my end. What’s more, I’m learning a lot. This WILL make me a better coach.
The price is heavily discounted – $200 OFF – for two days only (6/28 and 6/29).
It increases $100 on June 30th – July 1st.
And then increases to full price on Monday, July 2nd.
You don’t have much time to take advantage, so I encourage you to do NOW.
Raise your hand if you watched The Royal Wedding this weekend.
*raises hand*
But I only tuned in because Julian was up so early Saturday morning and there was nothing else to watch.
Yeah, yeah….that’s it.
Anyway, I’ve got an excellent guest post for you today from Florida based trainer William Richards covering a topic pretty much everyone can get on board with…..
…..low back pain and how to choose or modify the best bang-for-your-buck exercises to help nip it in the bud.
4 Exercises to Strengthen Your Core and How to Program Them For Back Pain
When it comes to core training and sensitive lower backs I have been through the gauntlet.
I have experimented on myself and have worked with so many frustrated clients who want to train their core but always seem to re-injure their backs or stay on what I call their own pain cycle.
They go to the gym with minor inflammation thinking a good workout is what they need. They knock out what they think is a “safe” workout and spend the last 20-30 minutes hitting some hanging leg raises, decline sit-ups and maybe even some weighted jumping ball slams (because they heard a stronger core will beat their back pain). The intention behind this workout was good and hopeful but they go home and slowly start to experience this gradual increase in pain and tightness in their lower back.
Fast forward 24 hours and mornings feel like you have a tree branch wedged between two vertebrae.
Forget bending over to tie your shoes let alone put pants on. You feel 80 years old until the Extra Strength Tylenol and Ibuprofen concoction kicks in and you get a small glimpse of what it feels like to be pain-free and healthy. For most this is the only sense of relief they will ever experience.
We all know lower back pain can be complex. There could be a lot of different factors at play here but one of the key topics I want to shed light on is the core training approach.
How Should I Approach Core Training With Lower Back Pain?
In my experience with coaching corrective core training for sensitive backs, there are three key points I find myself covering over and over again.
(1) Safe modified approaches to “modern” exercises that have the sensitive back in mind.
When you here modification you immediately think “an easier version of what your showing me.” Which is true in most cases, but when dealing with a sensitive back your not looking for “easy” you’re looking for a certain pain threshold that the individual/you can control.
This threshold is extremely important to coaching sensitive backs because that very threshold can put someone on the couch for a week popping pain meds or training and moving towards freedom and a faster recovery.
So when picking and executing your core exercises think more about how the variation is affecting the way your lower back feels in the moment AND 24 hours after doing it.
Nothing you should be doing will consists of training through pain. Often times any irritation or discomfort from an exercise will kick in the next day once all the feel good chemicals have worn off.
(2) The correct coaching through these modifications to safely progress to the level of difficulty that is safe for you.
Once you have dialed in on your own safe threshold it’s time to start modifying the exercise to fit your needs. There are tons of ways to do this so I will highlight a few of my top cues here.
If you’re experiencing pain:
-1- Check the position of your pelvis.
Is it neutral?
Especially with exercises like the ones you will see below it’s paramount that you take unwanted stress OFF the lumbar spine. Some of this stress is commonly caused by an overextended or flexed lumbar spine. If you’re experiencing pain, simply being overextended or over flexed will only get worse when you add compression or a form of challenge to the position.
Note From TG: Here’s a great way to teach/cue people how to (safely) move their spine into flexion and extension IN CONTROL. Sometimes back pain is the result of being “stuck” in an over extended or flexed position. Allowing people “access” to range of motion can be a game changer.
-2- Bring the loads or limbs closer to your body.
Wait, what?
Try this out: If you have back pain, take a 10 lb plate and hold it straight out in front with your arms stretched out. How does that feel on your lower back?
Now bring the weight closer to your chest. Did that bring relief?
The majority of instability issues will produce pain with the outstretched arm. The closer the load or limbs are to your body the less your body (in this case your lumbar spine) has to work to keep you upright.
You can apply this cue to exercises such as the plank (side and front) or a Pallof press. The more fully weight bearing you are with the plank the more stress it will put on the irritated lower back. The same goes for the Pallof Press.
The further outstretched your arms are the more demand it will place on the lower back.
The more sensitive the lower back the more pronounced this will be.
(3) A Mindset Change
When training your core for back pain relief you have to adopt this way of thinking.
It’s not about the exercise you’re doing but the position of your painful points when doing the exercise. I did a quick 1-minute explanation of what I mean below:
Now that we have covered how you should be approaching core training, let’s get into applying what we learned. Below I want to show you four of my favorite exercises to use and modify for various levels of clients.
Let’s dive in.
1. Banded Quarter Crunch
One of the biggest reasons I love this exercise so much is because of the full upper body muscle recruitment it requires. Sometimes as new lifters or even those who are more seasoned we forget that bracing the trunk and engaging our body with a certain movement requires a lot of interaction between joints and muscle fibers.
To save on energy we subconsciously do the bare minimum to get the exercise done.
This is where weak links in our chain are created.
When doing these banded crunches I want you to think about bringing your arms down and out and engaging your lats before you begin moving anything. When in position be sure your spine is neutral, shoulder blades are tucked down and back and your chin is pulled in towards your neck.
When you go for lift-off, the goal is to move everything together and using the trunk as your primary mover while everything else upstream stays rigid and stiff. One way I like to cue this exercise so that the person isn’t trying to do too much of a sit up is to think about pushing your for-head up towards the ceiling. This will actually make the exercise seem a bit harder and trigger an even more intense muscle fiber recruitment.
You can get creative with this when it comes to the sets and reps scheme. You can do just reps or holds for a number of breath cycles. One rep would be a lift-off followed by a full cycle of breathing (inhale and exhale). For holds, after lift off, you can cycle 3-4 breaths before returning to the starting position.
2. Banded ISO-Deadbug
The dead bug can be a major let down for someone with a sensitive back. Most articles you find on the internet for lower back pain and core training you will find the dead bug. Unfortunately, those who take the dead bug at face value and don’t know how to tailor it to fit them are the ones who quit on the exercise before any benefit is seen.
In this video, I show you four variations that you can work from easy to more difficult with this exercise. We are going to use a similar band like the exercise above to help with upper body engagement.
3. Banded Sit Backs With ISO Hold
One thing I am a huge fan of other than hole-in-the-wall (probably should get shut down) Mexican restaurants are exercises that are designed or coached not only to make the individual stronger but to teach and groove healthy movement patterns.
One of these movements I see butchered is the hip hinge.
We do tons of exercises that include the hip hinge but with every rep and set we are putting ourselves in more danger than anything else. It’s hard to find an extra 30 minutes a day to practice proper bracing, coordination or healthy movement patterns separately. Which is why I will always work them into my workout like you see in this video.
I care more about the integrity of your body position then I do how many sets reps or weight you can do. You have to earn those gradual increments.
You want to stay within your pain threshold. No pushing through the pain to get a better burn. Leave that to the people who enjoy soaking in salt baths every night and are popping muscle relaxers and Percocet just to sleep at night.
4. Banded Birddog
This is another one of those exercises that can lead to frustration and more pain if not taken in small increments depending on how sensitive your back is to this type of movement.
I didn’t respect this exercise when I first introduced it into my personal rehab program. Instead, I just did what it LOOKED like I should be doing and went from there.
I want to help break this habit of the copycat approach. The more you know WHY you’re doing the variation of the exercise the better you will understand what you’re doing.
When doing this exercise, I want you to focus on the different modifications that are available with this move. We talked earlier about your specific pain threshold. These modifications should help keep in the safe zone.
Key things to remember:
Don’t rush the exercise. Start by breaking it down into segments and make sure there are no gaps or missing factors that are causing your pain.
You can attach the band to both the wrist or ankle to add difficulty to that individual limb either in the full Bird Dog or broken segments.
I Know What You’re Probably Thinking
Well, what exercise should I start with or which one is best for _________.
Don’t fall into this trap.
Remember, It’s not about what exercise you’re doing that will unlock your potential for long-term relief. It’s how you approach the exercise that you’re using. Focus on the position of your body BEFORE you even start the exercise then use the exercise to challenge that healthy position.
If you apply this to every core exercise, or any exercise for that matter, your ability to train towards lasting relief will significantly improve.
About the Author
After rupturing my L5-S1 disk over 7 years ago I was told that surgery and pain meds were my only option for a “pain-free” life.
I made a choice as a fitness professional to relentlessly pursue the truth to whether or not exercise could truly be the secret to getting relief.
After 10+ years coaching in the fitness industry I now focus the majority of my time teaching people how to pursue their own drug and surgery free path to back pain relief.
Aside from coaching you can find me on the Gulf Coast of Florida, surf fishing with my two kids and wife or eating my weight in Mexican food. For more info on me and what we have going on you can check out my website HERE.
I’m heading out to Kansas City today for The Fitness Summit.
My boy, Shane McLean, was kind enough to send along this stellar article extolling the merits of “reaching” and how it can help make your shoulders not hate you.
Reaching: The Underrated Key to Key to Shoulder Health
When you’ve lifted weights for any length of time (I’m assuming you do because you read this site) you’ve probably had some type of shoulder injury. They suck as hard as a mother in law getting all up into your business.
And as a result, your gains and patience grind to a halt.
The shoulder is a shallow ball and socket joint that has the incredible ability to move in multiple directions. This allows you to lift humongous weights, throw baseballs and footballs really fast or to do the wave when you’re bored out of your mind at a baseball game.
All that mobility is great, but the shoulder needs stability too. The four muscles of the rotator cuff work hard to keep this ball and socket joint in a vertical position no matter you do to your shoulder.
However, the rest of the stability equation is up to you by getting the muscles around the shoulder girdle strong. This is (usually) achieved by doing variations of pushes, pulls, shoulder raises and planks.
Push-Up Palooza
Pull-Up Palooza
Meathead Palooza
Even when you minimize the risk of injury by doing the right things, the occasional shoulder injury can happen while lifting because sometimes we (yes me too) can get a little over ambitious.
However, there’s one little movement that most lifters neglect to do that can help prevent niggly shoulder injuries from occurring at all.
Do you what it is?
Reach, baby, reach.
What were you, thinking? More bicep curls?
Reaching is a movement that you perform every day. You reach for
the food in the fridge
the food in the pantry
the door
the dumbbells to do more curls
Adding a reach while performing pushes and pulls is important for your shoulder health because this allows the shoulder blades to move across your ribcage as intended.
The muscle that allows this magic to happen is the often neglected and unloved Serratus Anterior. This a broad muscle that wraps around the ribcage and acts to stabilize the scapula by holding it against the back of the thoracic wall.
In other words, it’s kind of a big deal.
When you’re lifting in the horizontal plane with exercises such as one arm cable chest presses/ rows or pushups, the Serratus Anterior main job is to protract/abduct the shoulder blades.
Now if the Serratus didn’t do its job correctly, then the scapula doesn’t move around the ribcage like it should (scapular winging) and muscular imbalances and mobility limitations may result.
And nobody has time for that.
However, just by adding a simple reach to a horizontal push or pull will help strengthen the Serratus and take your shoulders through a fuller range of motion which makes for happier shoulders and maybe a happier mother in law.
You can only hope.
Reaching vs. Rounding
Reach and Row
The simple act of adding a reach has huge implications for your shoulder health and strength and it’s an easy movement to add to your lifting repertoire.
The Serratus also plays a vital role in scapulohumeral rhythm as an outward rotator of the scapula that allows your arms to get into an overhead position. This is vital for lifting weights overhead and for reaching for anything above your shoulders.
If the Serratus is inhibited in any way, the body will find a way to perform the movement regardless and that faulty pattern over a period of time may lead to pain and dysfunction. This usually occurs in the upper traps, neck and lower back.
Stop for a moment and see if you can raise your arms above your head, getting your biceps by or behind your ears without your ribcage coming forward or your lower back over arching.
This test is best performed in front of a mirror without a shirt on. I thought you’d like that.
Now, if you can that’s great but if you can’t, try foam rolling the lats and performing some Serratus wall sides and then re testing your shoulder mobility for any improvement.
Serratus Wall Slide Variations
However, even if you don’t have any problems in that department, performing the Serratus wall slide is still a fantastic warm up and mobility exercise for your shoulders.
Wrapping Up
Taking care of the shoulders is imperative when you’re crushing the weights because you probably don’t think about the health of your shoulders until it’s way too late.
However, by showing a little love and affection to the Serratus Anterior, you can keep lifting pain-free and stay off the Physical Therapists table to boot.
Therapy, who has time for that?
About the Author
Shane “The Balance Guy” McLean, is an A.C.E Certified Personal Trainer working deep in the heart of Texas. Shane believes in balancing exercise with life while putting the fun back into both.
We’ve all seen the statistic: 80% of the population will experience low back pain in their lifetime.2
Back pain is the single leading cause of disability worldwide. Americans spend upwards of $50 billion per year on back pain. Back pain is the nemesis of all ninjas.
The struggle is real folks.
Given how pandemic the issue is and the sheer number of resources there are on the topic, why is LBP still such a nuisance and the Bane of many people’s existence?3
When it comes to low back pain there is no one clear cut answer or way to explain things. As my good friend David Dellanave would say “different shit is different.”
It’s impossible to definitively point the finger at one or two things and say “there, that’s it. THAT’s why everyone’s back feels like a bag of dicks.”
Certainly we can proselytize, but at the end of the day we’re mostly just guessing at what may be causing someone’s low back pain. We’re using an amalgamation of relevant anecdotes, experiences, expertise, and evidence based research to make those educated guesses.
But it’s guessing nonetheless.
[BEFORE WE MOVE ON: Another good friend, physical therapist Zak Gabor, sent me THIS rather thorough paper on management of low back pain. To quote Zak…”Movement is key, but EDUCATION on false beliefs about the body is arguably most important.”]
A week or so ago as I was watching an episode of VICE News on HBO and one of the main stories that night was on opioid addiction and of a former drug representative who, sadly, because of debilitating low back pain, had become addicted to the very pain killers that had made him so successful years prior.
In the story he described a seemingly endless barrage of treatments ranging from massage therapy and acupuncture to ultrasound treatments, physical therapy, and traction.
It was a hefty list and I can’t remember all of it.
In the end he ended up having back surgery, yet unfortunately was still reliant on pain killers to help with his chronic low back pain.
As the story unfolded they panned to the same individual miniature golfing with his family and I ended up taking a screenshot of him bending over to pick up the ball after sinking a shot.
If I could add sound it would be accompanied with a cacophony of painful grunting akin to a rhinoceros passing a kidney stone.
Now, what follows is not an attempt at me diminishing his experiences, and I’m fully cognizant my only source of info regarding his “treatment” was/is the five minute snap shot I was given from the story.
That said, I wonder how much agony and frustration might have been prevented in his lifetime if someone took the time to show him some basic “spinal hygiene” (to steal a phrase from Dr. Stuart McGill and his book Back Mechanic) tactics to clean up his daily movement?
What might have happened (what can happen?) if, instead of acupuncture, he was shown how to hip hinge well or given a healthy dose of Deadbugs, Birddogs, and Breathing Side Planks?
Repetitive (aberrant) flexion, as shown in the still shot I took, certainly isn’t doing his back any favors. And, I have to assume this type of thing is happening dozens (if not hundreds) of times per day, whether he’s picking up a golf ball or getting out of a chair.
It glaringly demonstrates how we often neglect to address the obvious and simple everyday “hammers” in our lives that can (not always <— this is important) lead to back pain.
I’m talking about the kind of hammers – repetitive movement (repeated spinal flexion, and extension for that matter) – that start off as innocuous nothings (the twist there, the bending over there), yet manifest into something far more nefarious once one’s tissue tolerance is surpassed.5
As my friend and strength coach, Joy Victoria, notes:
“Habitual daily postures and movement strategies have a greater influence, than intentional exercise.”
Massage, ultrasound, etc, while likely part of the puzzle (and can provide immediate, albeit temporary relief), are just band-aids.
I think exercise, and to be more specific, strength, can play an integral role in the grand scheme of things.
However, as fitness professionals it’s imperative we keep a keener eye. Deadlifts don’t cure everything. Recognizing run-of-the-mill wonky movement and attacking that, as trivial as it may seem, can make all the difference in the world for those who suffer with low back pain.
Anyone who’s spent any significant time in the weight room knows how vulnerable the shoulders are to injury.
This isn’t to downplay other areas of the body prone to nefariousness like the lower back or knees. Let’s be clear: those deserve some shade thrown their way too.
Rather, it’s just to point out that, for lack of a better term, trying to train around or even fix a pissed off shoulder sucks donkey balls.
It can be tricky and there are a lot of factors to consider: Exercise selection, exercise technique, posture, access to appropriate scapular motion (upward vs. downward rotation), soft tissue considerations, and breathing patterns to name a few.
Taking all of the above into consideration is a good thing, and I applaud those coaches and trainers who go out of their way to peel back the onion as much as their expertise and experience allows in order to get at the crux of the issue.
I do find, though, that sometimes, not always, we get a little too cute or rabbitholey with our approach to shoulder health.
Coach A will tell one individual that their shoulder hurts because their left big toe lacks dorsiflexion.
Coach B tells them it’s because their Posterior Mediastinum is shutting off their diaphragm.
Coach C says “nope, your shoulder hurts because you’re not back squatting enough.”
And Coach D, well, he’ll say something really asinine like, “I think it’s because you’re wearing purple. This makes your shoulder sad.”
And yes, while I am being a tad facetious here, I don’t feel I’m coming entirely out of left field. I’ve heard some doozies from past and current clients about what they were told was the impetus behind their shoulder woes.
Moreover, as a result, many clients and trainers alike tend to fall under the same trap….
….OverCorrectiveExerciseitis
This falls under two camps:
Camp 1: Trainer gives or person is handed a laundry list of “corrective exercises” that take 327 days to complete.
Camp 2: Trainer prescribes or person is told to perform redundant, borderline stupid exercises.
Stop OverCorrectiveExerciseitis
All of this isn’t to say I’m anti “corrective exercise” or that it should be avoided altogether. There’s a time and place for just about everything6, and sometimes people do need a little bit more TLC to improve motor control, activation, and/or positioning.
PSA: Doing stuff correctly can be corrective. Avoiding excessive anterior humeral glide during push-ups or rows can be a game changer for shoulder health.
However, Dr. Quinn Henoch brought up a valid point when I listened to him speak a few months ago with respects to corrective exercise.
Maybe the real fix for most trainees is something as simple as adjusting their training volume.
Maybe they’re doing too much of one thing or too little of another?
Generally speaking, when someone’s shoulder hurts I find most need less bench pressing and more posterior cuff and upper back strength in addition to a healthy dose of scapular stability.
Instead of boring them to tears with warm-up drills they’re likely not going to do on their own anyways, I prefer to include the bulk of the “correctivy” stuff IN THEIR ACTUAL PROGRAM.
That way they just think it’s business as usual and I come across as a straight up boss for helping them cure their shoulder woes.
On Bench Pressing:
There’s lots more to say here, and this will likely make for a good blog post in the future, but in the interim the Tweet below sums things up succinctly:
Bench press hurts your shoulder checklist/hierarchy: 1) audit setup/technique, 2) adjust volume, 3) grip…the…bar….harder, 4) corrective considerations, 5) maybe not bench press? (with a straight bar).
Below are two drills I like to use as fillers that can be performed after sets of squats, deadlifts, and even bench presses. It’s a foolproof way to add more volume to something they’re probably not doing enough of anyways.
It’ll look something like this:
A1. Deadlift/Squat/Bench Pressing/Not Kipping Pull-Ups A2. Filler (<— correctivy stuff that people just think is part of their program so they actually do it. Hahahahahahahaha. Jokes on them).
As you walk back you need to resist the pull of the band, which torches the rhomboids, muscles of posterior cuff, and scap stabilizers. Be careful you don’t “shrug” throughout, you want to keep shoulder blades depressed and together.
NOTE: 118% more effective if you yell “this….is….Sparta” as you perform your set.
I like to have my clients perform anywhere from 5-10 reps per set.
2. Racked ISO Shoulder Holds
This is another drill I stole from someone smarter than myself, this time a Doctor: Dr. Ryan DeBell of The Movement Fix.
I’ll usually start with 10 second holds at each position per set and ramp up to 20-30s holds per set for my clients (depending on how sadistic I feel).
I’ve seen some very big individuals succumb to this drill. It’s very humbling.
That’s It
Pepper these two drills into your workouts or that of your clients/athletes more sporadically. I’m certain everyone’s shoulders will start feeling better.
Bicep Tendonitis? When In Doubt Check These 5 Muscles Out
Knowledge and wisdom are not one in the same. A profound statement for an article that is going to discuss pain at the plain old bicep tendon. The reason I bring this up is because an endless amount of information is available to you through the internet.
When you search bicep tendon pain you will likely run into 100,000 articles that talk about pain local to the bicep tendon. I could make an argument that less than 1% will discuss techniques that you can implement to independently resolve your pain.
That is our plan for today.
Before we start drawing up a six week rehabilitation plan for your shoulder or sending you to the nearest orthopedic surgeon, lets attempt some quick fixes. Please, do not mistake a quick fix with a half-hearted attempt.
Refrain from replacing the whole roof when a few shingles will do.
Step one is making sure you are an appropriate candidate for this article. Let’s rule out a bicep tendon rupture!
Schedule an appointment immediately with an Orthopedic Physician if:
1. You heard a sudden “ pop” at the shoulder, along with swelling and bruising around the bicep.
This typically occurs when you are trying to “man up” and carry something that is a tad bit too heavy for you. Often a result of your best friend refusing to pay for a moving company.
2. You have a nice “Popeye” deformity at the bicep.
This doesn’t imply that you have impressive biceps. It means you tore the bicep tendon.
Other Reasons For Concern:
Weakness and pain local to the bicep when flexing the bicep or rotating your palm up to the sky with the elbow partially bent. This does not indicate a rupture, but a partial tear is still possible.
I don’t think I tore my bicep tendon. What else could cause irritation to the bicep tendon?
It is common for the bicep tendon to be a pain generator because of its location. The bicep tendon is often impinged between the humerus and surrounding structures in the shoulder (usually the acromion and the coracoid process).
Keep in mind that impingement is normal.
We have nice “cushions” named bursae that are built to tolerate this compression. It is when this compression becomes too frequent or too intense that we see injury occur at the bicep tendon. We tend to see this in people who perform a lot of overhead activities in athletics or with work requirements.
It hurts when I rub my fingers across the bicep tendon. Doesn’t this mean it is a bicep tendon problem?
Simply rubbing your finger across the bicep tendon is not an accurate way to diagnose a bicep tendon injury. This is the most common mistake I see by medical providers and those with a certification in WebMD browsing. This is not a specific or sensitive test for diagnosing a bicep tendon injury. (Gill, HS)
What is the best way to determine if the bicep tendon sustained an injury?
The gold standard would be an ultrasoundfrom a physician (Skendzel, JG). Isolating the bicep is the next best method. Resistance to the bicep, or lowering yourself in a reverse grip pull up is also useful information.
It is possible that you have developed some inflammation local to the bicep tendon. Most of the special tests specific to the bicep do not have great statistics. We can make a more accurate diagnosis by considering how you sustained your injury and the movements that provoke your pain.
Could pain at the front of my shoulder be related to something else besides the bicep tendon?
Absolutely. Muscles throughout the shoulder and neck can refer pain to the front of the shoulder. The same way that organs can refer pain to different regions of the body.
Let’s check out 5 muscles that commonly refer pain to the front of the shoulder.
Note From TG: A lacrosse or tennis ball work well for all the drills demonstrated in the video, but my preferred “tool” is the ACUMobility Ball by ACUMobility.com.
Use the coupon code GENTILCORE at checkout for an additional 10% off your purchase.
Deltoid
People often forget that the muscle fibers of the deltoid run over the bicep tendon. When you feel pain while pressing around the bicep tendon it may actually be an irritated deltoid.
Biceps
Another no brainer if you are having pain around the bicep tendon. Overuse of the biceps or a quick force applied to the biceps (eccentric force) can cause trigger points to develop in this muscle. If you notice increased discomfort around the bicep some soft tissue work and a few days off from the “gun show” should help.
Pectorals/Subclavius
The real problem here could be too many chest days and not enough leg days!
Poor resting posture during the day and poor technique with exercise are often the true culprits. Falling into a slumped position on a regular basis can put the pectorals in a shortened position.
This faulty posture can lead to excessive impingement, as well as increased tone and trigger points in the pectoral muscles.
The subclavius runs deep to the pecs. It attaches between the clavicle and the first rib, often referring pain to the front of the shoulder. You can usually address this spot while working on the upper fibers of the pecs.
Scalenes
These muscles run on the front, side and back portion of your neck.
The scalenes are one of the many muscles responsible for moving your neck. If you tend to adopt a forward head posture or a slight tilt of the head to the left or right these muscles may be engaged more often than necessary.
Having a forward head posture means that you are passively hanging on these muscles for support during the day. This can lead to increased tone and trigger points. We also tend to see issues in the scalenes show up following a whiplash injury.
The scalenes are also involved in breathing. If you tend to be an upper chest breather these muscles may be taking a beating. Keep in mind, adopting this breathing style can lead to increased tension in the neck and thorax, as well as feelings of anxiety. After you do some soft tissue work, be sure to be more aware of posture and work on accessing your diaphragm.
Infraspinatus
The infraspinatus in one of the four infamous rotator cuff muscles.
It runs right on top of your shoulder blade.
Dysfunction in this muscle tends to show up regularly with shoulder pain. Trigger points in the infraspinatus are a problem because they alter timing and strength of this muscle (or any muscle). This alters normal mechanics at the shoulder with overhead activities. Often leading to an unstable shoulder with excessive impingement taking place.
We wrote another article in the past that discussed how referred infraspinatus pain also resembles carpal tunnel syndrome. This is not the easiest muscle to treat on your own, but don’t skim over it.
Final Consideration:
In some instances, performing soft tissue work around the shoulder will do the job just fine. This does not mean we can overlook the pieces that may have contributed to this injury in the first place. Your goal is to control what you have the ability to control.
What can you control?
1. You can normalize the tissues surrounding the shoulder.
Treat local trigger points, normalize muscle flexibility and reduce stiffness. The goal is to restore normal shoulder mechanics to the best of your ability. Treating muscle stiffness and trigger points helps optimize the timing and strength of the muscles around the shoulder to enhance stability.
2. You can also modify your activity for the time being.
If a certain activity worsens your pain, back off. It is possible that your shoulder is inflamed and needs some time to recover. This is not a fast pass to weeks off from the gym with your best friend Netflix. This means more attention on soft tissue work and flexibility. You also want to gradually return to exercise. Experiencing some discomfort during exercise is ok.
“Poke the bear, but don’t take it to dinner.”(in reference to pain)
– Adriaan Louw
Interested in a FREE Mobility Program to treat pain at the front of the shoulder? Click here
About the Author
Dr. Michael Infantino is a physical therapist. He works with active military members in the DMV region. You can find more articles by Michael at RehabRenegade.com.
References
Gill HS, El Rassi G, Bahk MS, et al. Physical examination for partial tears of the biceps tendon. Am J Sports Med 2007; 35:1334.
Skendzel JG, Jacobson JA, Carpenter JE, Miller BS. Long head of biceps brachii tendon evaluation: accuracy of preoperative ultrasound. AJR Am J Roentgenol 2011; 197:942.
Stephen M Simons, MD, FACSM, J Bryan Dixon, MD Section, Biceps tendinopathy and tendon rupture
Uptodate.com
Taylor SA, O’Brien SJ. Clinically Relevant Anatomy and Biomechanics of the Proximal Biceps. Clin Sports Med 2016; 35:1.
If you’re a human being reading this blog post it’s a safe bet you 1) have impeccable taste with regards to the strength coaches you choose to follow 2) have a pair of shoulders and 3) are likely interested in keeping them healthy and thus performing at a high level in the weight room.
NOTE: If you happened to have come across this blog post by Googling the terms “world’s best tickle fighter” or “The Notebook spoilers”….welcome!
I’m a little biased given my years of experience working with overhead athletes and meatheads alike, but I’d garner a guess that nothing is more annoying or derails progress more than a pissed off shoulder…or shoulders.
My friends Dan Pope and Dave Tilley of Champion Physical Therapy & Performance just released a stellar resource, Peak Shoulder Performance, that’s perfect for any coach or personal trainer looking to help their clients/athletes nip their shoulder woes in the bud. AND it’s on sale for this week only at $100 off the regular price.
Guess what most people think is the cause of their shoulder woes?
The rotator cuff.
Guess what’s likely not the cause of their shoulder woes?
The rotator cuff.
It’s lost on a lot of people that the “shoulder” isn’t just the rotator cuff.
I mean, N’Sync back in the wasn’t just Justin Timberlake, right?
JC, Lance, Chris, and Joey (<— didn’t have to look up all their names) deserve our respect and admiration too. They all played key role(s) as individual entertainers to make the group more cohesive, successful, and relevant.
The phrase “the whole is greater than the sum of its parts” has never rang more true than right here and right now, reminiscing on long past their prime 90’s boy bands.
[Except, you know, we all know Justin was/is the only one with talent. He can sing, he can dance, he can act, he’s got comedic timing. He’s a delight.]
The rotator cuff is Justin Timberlake.
It gets all the credit and accolades and attention with regards to shoulder health and function. However, the shoulder consists of four articulations that comprise the entire shoulder girdle:
Glenohumeral Joint (rotator cuff) – Justin
Acromioclavicular Joint – JC
Sternoclavicular Joint – Lance
Scapulothoracic Joint – Joey and Chris
I’d make the case, and this is an arbitrary number I’m tossing out here (so don’t quote me on Twitter), that 80% of the shoulder issues most people encounter can be pin pointed to the Scapulothoracic area (shoulder blades) and what it is or isn’t doing.
The shoulder blades, since you have two of them, are Joey and Chris.
Think about it:
Justin, JC, and Lance were generally considered the heartthrobs of the group and were always taking center stage, in the forefront, and amassing Tiger Beat covers.
Conversely, who was in the shadows, taking a back seat, presumably doing all the heavy labor, regional Mall appearances, and B-list talk shows the other guys didn’t want to do?
That’s right…..Joey Fatone and motherfucking Chris Fitzpatrick, son!
Lets Give the Scaps Some Love
All of this isn’t to insinuate the rotator cuff alone is never the culprit or that pain in that area should be shrugged off, ignored, and not addressed directly.
However, when lumping shoulder pain and the rotator cuff into the same sentence we’re often referring to something called “shoulder impingement.”
Shoulder impingement is a thing – loosely defined: it’s compression of the rotator cuff (usually the supraspinatus) by the undersurface of the acromion – and it is a nuisance.
There’s even varying types of shoulder impingement – Internal vs. External Impingement. Moreover, just saying “shoulder impingement” doesn’t say anything as to it’s root cause.
Many factors come into play:
Exercise Technique
Poor Programming
Lack of T-Spine Mobility
Fatigue (rotator cuff fatigue = superior migration of humeral head)
Faulty Breathing Patterns
Wearing White Past Labor Day
And Scapular Dyskinesis…to name a few
Just saying someone has “shoulder impingement” and telling him or her to perform band external rotation drills (oftentimes poorly) till they’re blue in the face doesn’t solve WHY it may be happening in the first place.
Often, the rotator cuff hurts or isn’t functioning optimally because something nefarious is happening elsewhere.
And on that note I’d like to point your attention to the shoulder blades.
Release, Access, Train
I have a lot of people/athletes stop by CORE because their shoulder(s) don’t feel great. Many have gone to several physical therapists prior to seeing me frustrated they’re not seeing progress, and if they are it’s often fleeting.
Full Disclosure: I know my scope and am never diagnosing anyone or anything.
Actually, Things I Can Diagnose = poor deadlift technique, poor movement in general, and epic poops vs. average poops (#dadlife).
Things I Can’t Diagnose = MRIs, musculoskeletal injuries/limitations, gonorrhea.
I find it amazing, though, whenever I do work with someone with shoulder pain, how much of a rare occurrence it is anyone ever took the time to assess scapular function.
If the scapulae are in a bad position to begin with (maybe in excessive anterior tilt or downwardly rotated) and/or are unable to move in all their glory (upward/downward rotation, anterior/posterior tilt, adduction/abduction, elevation/depression), or altogether move poorly…is it any wonder then, why, possibly, maybe, the rotator cuff is pissed off?
Photo Credit: EricCressey.com
While not an exhaustive list or explanation – everyone’s their own unique special snowflake – the following approach covers most people’s bases:
Release
Scapular position is at the mercy of the thorax and T-Spine.
Those in a more kyphotic posture – think: computer guy – will tend to be (not always) more anteriorly tilted and abducted.
Those in a more extended posture – think: athletes/meatheads – will tend to be (not always) more downwardly rotated and adducted.
In both cases the congruency of the shoulder blade(s) and thorax is compromised often resulting in an ouchie.
“Releasing” the area is often beneficial:
Access
Now that the area is released we can then gain “access” to improved scapular movement by nudging the ribcage/thorax to move via some dedicated positional breathing drills.
Think of it this way: if the ribs/thorax are unable to move because they’re glued in place, how the heck are the scapulae going to move?7
A few of my favorites include:
NOTE: Which one you use will depend on an individual’s presentation. A good rule of thumb to follow would be for those in a more extended posture to include breathing drills that place them in flexion and vice versa. There are always exceptions to the rule, but for the sake of brevity it’s a decent rule to follow.
All 4s Belly Breathing
The Bear
Supine 90/90 Belly Breathing
Prone Sphinx
NOTE: I didn’t discuss it in this video but I’d also encourage people to include a full inhale/exhale with each “reach” or repetition on this exercise.
Train (and Go Lift Heavy Things)
Now that we’ve released and gained access to the area, we need to train. Specifically, almost always, we need to improve one’s ability to move their arms overhead (shoulder flexion) without any major compensations.
In order to do so, the scapulae need to do three things:
Posterior tilt
Upward rotation (which, as a whole, describes the end goal)
Protract
All three entail utilizing the force couples of the upper/lower traps and serratus anterior in concert to help move the shoulder blades into the upwardly rotated position we’re after.
There are a litany of drills and exercises that can be discussed here, and it’s important to perform a thorough screen/assessment to ascertain which ones need to be prioritized.
When it comes to neck pain, as a strength coach, I (generally) don’t touch that with a ten-foot pole. It’s case dependent of course, but more often than not, if someone I’m working with walks in with a some significant discomfort in their neck I 1) start hyperventilating into a paper bag and 2) immediately refer out to a someone who has more diagnostic and manual therapy skills.
This is not to say, however, that there aren’t any avenues to take if you’re a personal trainer or strength coach. It’s not like you can’t do anything. In today’s guest post physical therapist, Dr. Michael Infantino, goes into great detail on some things to consider if you ever find yourself in this predicament.
The Gym Is a Pain In My Neck: Two Movements To Cure Them All
Are you struggling with neck pain?
Does the gym make it worse?
Do you find yourself looking at a lot of informative websites for ways to resolve these issues, but wish it were compactly put in one place?
Does this sound like an infomercial?
Well it’s not!
But for just $29/month you can… just kidding.
This article is here to solve all of those problems. Neck pain is often blamed on poor form when exercising. This is absolutely true. Unfortunately this does not answer a crucial question, “why?” Discovering WHY your form is poor is the goal. On top of that, people often fail to recognize other human errors that are contributing to their symptoms. We will provide a guide for figuring out why you have neck pain and how to resolve it.
In most cases, pain attributed to the gym can be tied to the following:
Limitations in the necessary mobility to perform a movement
Limitations in the skill needed to perform a movement
Limitations in the capacity to perform a movement (Strength and Endurance)
Human error [Electrolyte and Fluid balance, Self-Care, Rest, Sleep, Breathing, Posture, Medication and Fear.]
Limitations in MOBILITY: 2 movements to cure them all!?
Limitations in your ability to put yourself in optimal positions during almost any upper body movement are a result of two movement limitations.
Limitations in these positions can lead to a host of different complaints. For the sake of time we are going to pick on NECK PAIN. If you are struggling with one exercise you are likely struggling with another, you just might not realize it.
Position #1: Shoulder Extension Test
Movements: Push Up, Pull Up, Row, Dip, Pull Up (top), Jump Rope, Punching someone in the nose because they have one of those weird miniature poodle mixes.
Attempt to perform the ^^THIS^^ motion
Instructions: Keep the neck retracted while extending the shoulders just beyond the trunk without the following:
Increased forward head position
Forward shoulder translation
Shoulder shrug
If you are unable to replicate the picture above you likely have a MOBILITY problem.
If you can’t perform this motion when you aren’t under load, you will definitely struggle when you are. Especially with repeated repetitions and the addition of weight.
Target Areas for Treatment
Soft Tissue Mobility
Pecs
Serratus Anterior
Upper Traps
Stretches and Joint Mobilization
Chin Retraction
Thoracic Extension (arms overhead)
Open Book Stretch
After working these bad boys out I want you to RE-CHECK the test position.
Is it better?
If not, you need to keep working on it.
Assuming you now have the necessary MOBILITY to perform this motion, we need to make sure you have the required SKILL with the particular movement you are interested in.
Skill: the necessary strength, stability and coordination to perform the most basic form of a loaded movement (pull up, push up, dip, row, etc.).
Are you able to maintain a good position in the:
Bottom of your push up
Row
Top of your pull up
Bottom of your dip
Jump roping
As you load the arm for a hay maker!
We aren’t as complex as you might think. Many of our daily activities are broken into a few movement patterns.
Follow this sequence:
Create the mobility necessary to perform the pattern in its most basic form. (In this case, Position #1 and #2).
Ensure you have the skill needed to perform your desired movement (Push Up, Pull Up, etc.)
Build capacity with that movement (Endurance and Strength).
If you don’t have the skill to perform a specific exercise or movement, you need to practice. Look at the above definition of skill to make that judgement. If you don’t have the baseline strength to perform one good push up, pull up, dip or row, see below for regressions that will allow you to maintain good form as you work your way back to mastering these moves.
Here are some ideas:
Push Up: Inclined position (Ex. against weight bench or counter), knee push ups
Pull Up: Assisted with a band, inverted row
Dip: Assisted with a band, bench dip
Row: Kind of an outlier since this move typically doesn’t require body weight. Use a weight that allows good form. TRX Row and inverted row are body weight options. Adjust the angle of your body to reduce the difficulty.
The goal here is to demonstrate the ability to maintain proper form throughout each movement with a regression that is appropriate for you.
Joe Muscles next to you may need to take 50 lbs. off his 200 lb. weighted belt during his pull-ups to maintain good form. You may need to work on getting one pull up with good form without any extra weight.
Most of us have one or two good pull ups in our bag of tricks to whip out for an “impromptu” Instagram post. Preventing injury is going to require you to build the strength and endurance to exceed Instagram’s one-minute time cap. DAMN you Instagram!
Adding repetitions and weight to the regression will help you work your way back to a standard pull up, row, dip, push up, etc.
I can’t emphasize this point enough.
We all have high expectations of ourselves. Neck pain after 10 reps is not necessarily a “push up” problem. It may be the fact that you did three other exercises before push ups that started to fatigue the neck. The push up was the breaking point. You need to have a realistic expectation of your current ability, or capacity.
Position #2: Overhead Test
Movements: Overhead Press, Pull Up (bottom position), Snatch
Instructions: Lie on your back with knees bent. Tuck chin (neck flat to ground) with arms flat to the ground in the start of a press position. Press arms overhead by sliding arms along the ground.
Common Faults:
One or both arms come off the floor at any point in time.
Compensatory forward head or extended neck position to keep arms on floor
Compensatory spine arch to keep arms on the floor
Assuming you repeatedly tried to replicate this position without success, once again we have a MOBILITY PROBLEM.
Target Areas for Treatment
Soft Tissue Mobility
Pecs
Lats
Rhomboids
Stretches and Joint Mobilization
Chin Retraction
T-Spine Drop In (or T Spine Extension)
Open Book Stretch (Add: External Rotation at Shoulder)
1st Rib and Scalene mobility
After finding the weak link, it is time to RE-CHECK. If it looks better, great let’s move on. Similar to Position #1, assuming you now have the pre-requisite MOBILITY to perform this motion we need to make sure you have the SKILL necessary.
*If you are having trouble improving your mobility or resolving pain, seek the advice of a qualified medical provider or fitness professional.
Can you maintain the same control and form during your overhead press, snatch, hang position of your pull up (or any variation- kipping pull up, toes to bar)? If not, we need to REGRESS the move. Unlike the shoulder extension position, many of the overhead exercises can be regressed by reducing the weight or working on single arm presses instead of two arms. Other regressions include:
Regressions:
Overhead press: Landmines (Tony goes into more depth in this article).
Snatch: Cleans, Single arm overhead kettlebell squat, single arm overhead lunge
Pull up (bottom): use a resistance band for support, inverted row
Human Error
Now that you have mastered Position #1 and #2, it is time to make sure that you are limiting HUMAN ERROR.
I think everyone should have someone in their life that serves as an extra pair of eyes. Even the best fitness trainers and medical providers in the world have a hard time being objective toward different areas of their own life. Barbers don’t cut their own hair, right? Not positive about that one. Either way, you can’t go wrong with some quality feedback!
Most of us are quick to blame the boulders in our life when it comes to pain, but we overlook the pebbles.
With pain we can’t overlook the pebbles.
The pebbles are diet, water intake, sleep, and self-care habits.
Patients usually tell me that they are doing “better than most” or that they are “pretty good” about optimizing these areas of their life. It isn’t until their spouse shows up to the appointment that we get the whole truth.
I love it!
Proper Fluid and Electrolyte Balance
Paying attention to what you consume pre and post workout is important. Proper fluids and electrolyte intake prior to exercise can help delay muscle fatigue and cramping.
Many people can get by with less than optimal effort when it comes to this category. However, if you are having neck pain you need to give yourself the best chance at success.
“At least 4 hours before exercise, individuals should drink approximately 5-7 mL·kg−1 body weight (~2-3 mL·lb−1) of water or a sport beverage. This would allow enough time to optimize hydration status and for excretion of any excess fluid as urine” (Sawka, 2007).
This is not always possible, I understand. Do your best. Some is better than none.
Warm Up
Proper warm up is also important.
Engaging in a warm up that gradually increases heart rate and muscle flexibility is a great way to prime the muscles. Dramatic increases in blood pressure and heart rate can lead to less than optimal muscle performance and increased risk of exertion headache during your workout.
Your warm up should be focused on getting the heart rate up; along with preparing the body for the movements you are going to perform during your workout (squat, push up, deadlift, clean, etc.).
Taking the time to stretch and do some soft tissue work after exercise will help reduce muscle soreness in the days following your workout (Gregory, 2015).
Leaving your body more prepared for the next workout. It is a great way to improve muscle extensibility and eliminate trigger points that aren’t allowing your muscles to perform effectively (Lucas, 2004).
Adequate rest is also important for recovery.
Going hard every day and not getting adequate sleep does not allow your body to grow and repair itself. Neglecting proper recovery leads to a less than optimal immune system and central nervous system.
Sleep deficits can also lead to an increase in the intensity of pain and alterations in mood. This is some serious shiznit. Can’t express enough how important this category is. I am a huge fan of the “grind.” It just sounds cool. You aren’t meant to grind everyday though, so please take some time to recover.
Breathing and Posture
Proper breathing is something that is often overlooked, but may be contributing to neck pain.
Gritting it out is cool, I highly recommend it. It builds character.
However, regularly holding your breath or clinching of your teeth when exercising can lead to increased tension around the neck. This could end up resulting in tension headaches as well.
Many of us without realizing it spend most of our day performing shallow breaths. We often over utilize the neck musculature. Shallow breathing into the chest can increase tension in these muscles and even increase feelings of anxiety.
It is recommended that people learn how to perform relaxed diaphragmatic breathing to reduce tension in the neck muscles. Staying in sustained postures throughout the day can also be contributing to your neck pain.
Many studies continue to show that sustained postures throughout the day (typically with office workers), especially with a forward head position, can increase neck pain and headaches (Ariëns, 2001).
Symptoms are also more common in people that hate their job.
Really off topic, but it is true …
Consider how stress in your life (emotional or physical) is amplifying your feelings of pain. Emotional pain and physical pain are HEAVILY connected. Check out this video by Tony to learn a little more about proper breathing strategies.
The Advil Fix
This may not seem to fit with the other categories.
Nonetheless, it is super important.
Side effects related to over the counter anti-inflammatory use are becoming common knowledge. Every now and then I run into someone that isn’t aware of the potential risks of regular use.
Popping over the counter anti-inflammatories (i.e. advil) before or after your workouts IS NOT recommended.
It’s like sweeping the dirt under the rug.
“The most common side effect from all NSAIDs is damage to the gastrointestinal tract, which includes your esophagus, stomach, and small intestine. More than half of all bleeding ulcers are caused by NSAIDs, says gastroenterologist Byron Cryer, MD, a spokesperson for the American Gastroenterological Association.”
Fear
One of the reasons that I started RehabRenegade.com was to help share information like this with as many people as possible. Many of the complaints I get in clinic can be fixed SUPER QUICK. Having a basic understanding of how to care for yourself and knowledge of the body can remove the “threat” of pain.
Red flags (serious pathology) represent less than 2% of the cases that are seen in a clinical setting (Medbridge, Chad Cook: Cervical Examination).
The Internet can be a blessing and a curse.
It can either lead you down the right road or scare the living crap out of you. We all know that any injury or illness is usually presumed to be cancer after a late night search on WebMD. Here are some discussions and advice I found on the inter-web related to neck pain in the gym.
Great intentions, but poor advice.
We tend to blame everything on a “pulled muscle,” whatever that means.
Rest?
What year is it?
We stopped recommending straight rest in like 1902.
By all means, take time off from the gym.
This doesn’t give you free rain to lie in bed all day watching re-runs of Game of Thrones.
It’s true… you may have over done it. Your muscles were overworked. Likely leading to a nice amount of local inflammation and some trigger points. The more constructive advice would be to perform some soft tissue work, light stretching and low intensity non-painful exercise to keep that area mobile.
Resorting to pain medication is not a healthy option. Last but not least, mentioning damaged discs and compressed nerves never makes someone feel at ease. Trauma to the neck may be a reason for disc injury. Overdoing your push ups and pull ups is NOT.
Fun Fact: The prevalence of disk degeneration in asymptomatic (without symptoms) individuals increased from “37% of 20-year-old individuals to 96% of 80-year-old individuals. Disk bulge prevalence increased from 30% of those 20 years of age to 84% of those 80 years of age” (Brinjikji, 2015).
Positive findings on MRI are common in people without pain. Don’t get too caught up in images and diagnoses. Do the things we know are healthy. If you hit the gym hard this morning and then followed that up with a CROISSAN’WICH from Burger King, and a cigarette at lunch we have bigger fish to fry.
First and foremost, muscle and joint strain at the neck commonly refers pain to the head. We call this a cervicogenic headache. Rest assured that it is very rare that you have a more serious pathology requiring immediate medical attention. Give the tips in this post a shot, if it doesn’t help by all means see a medical professional. The worst thing you can do is show up to your medical provider without attempting to improve your flexibility, tweak your form or get adequate rest.
If I had a dollar for every time a therapist told someone they had the tightest (fill in the blank) they have ever seen I would be a little better off.
If this poor girl wasn’t worried enough… Now she has the tightest back he has ever seen… really?
As providers we need to be very careful with our words. It is really easy for us to turn neck pain into chronic neck pain.
It is called an iatrogenic vortex.
When people get tied up in the medical system too long they often see symptoms worsen or develop other unexplained diagnoses.
Overview
In most cases, pain attributed to the gym can be tied to the following:
Limitations in the necessary mobility to perform a movement
Limitations in the Skill needed to perform a movement
Limitations in the Capacity to perform a movement (Strength and Endurance)
Human Error [Electrolyte and fluid balance, Self-Care, Rest, Sleep, Breathing, Posture, Medication and Fear]
You could be one small modification away from eliminating your neck pain.
The big takeaway here is to make sure you have the ability to perform various exercises with good skill.
From there, you need the knowledge and self-awareness to know when you have exceeded you capacity.
You also need to look at the big picture to ensure that you are checking the boxes when it comes to living a healthy life. If you are someone that often finds yourself worried or anxious when injury sets in please take a step back and look at the big picture. Use this article to see where your gaps are. If you still can’t get relief please see a medical provider. Nothing makes medical providers happier than working with patients who demonstrate a willingness to learn and grow.
About the Author
Dr. Michael Infantino is a physical therapist. He works with active military members in the DMV region. You can find more articles by Michael at RehabRenegade.com.
References
Ariëns GAM, Bongers PM, Douwes M, et al
Are neck flexion, neck rotation, and sitting at work risk factors for neck pain? Results of a prospective cohort study. Occupational and Environmental Medicine 2001;58:200-207.
Brinjikji, W., Luetmer, P. H., Comstock, B., Bresnahan, B. W., Chen, L. E., Deyo, R. A.,Jarvik, J. G. (2015). Systematic Literature Review of Imaging Features of Spinal Degeneration in Asymptomatic Populations. AJNR. American Journal of Neuroradiology, 36(4), 811–816. http://doi.org/10.3174/ajnr.A4173
Gregory E. P. Pearcey, David J. Bradbury-Squires, Jon-Erik Kawamoto, Eric J. Drinkwater, David G. Behm, and Duane C. Button (2015) Foam Rolling for Delayed-Onset Muscle Soreness and Recovery of Dynamic Performance Measures. Journal of Athletic Training: January 2015, Vol. 50, No. 1, pp. 5-13.
Lucas KR, Polus BI, Rich PS. Latent myofascial trigger points: their effects on muscle activation and movement efficiency. J Bodyw Mov Ther. 2004;8:160-166
Sawka MN, Burke LM, Eichner ER, Maughan RJ, Montain SJ, Stachenfeld NS. American College of Sports Medicine position stand. Exercise and fluid replacement. Med Sci Sports Exerc. 2007;39:377-90.
I’m currently with my family taking a little vacation down in Florida.8 I’ll be checking in at some point this week with some content, but on the meantime I’ve got some awesome people pinch-writing for me this week.
Today’s post is written by physical therapist Dr. Michael Infantino on a topic that’s a pain in the ass foot for a lot of people: plantar fasciitis.
The 411 On Plantar Fasciitis & How to Make It Vanish
Lets set the scene: It’s a little after 5:00 am. As you open your eyes the sun is just starting to peak through your window. To your right, your husband; to your left, the band Maroon 5 casually playing an old hit. “Sunday morning rain is falling, steal some covers share some skin….”.
Just kidding it’s Sunday morning, rain is falling and you are dead set on getting that five-mile run in.
As you take the first step out of bed, the pain in your heel makes you rethink this whole running idea.
Unknowingly to your heel, your mind knows your day is going to drag if you don’t accomplish this feat.
I know the “drive” that runners possess.
The word “drive” and addictive personality disorder can sometimes be inter-changed, but that’s neither here nor there. This post is going to give you the 411 on everything plantar fasciitis is in as concise of a fashion as possible.
To make life easier we will just say heel pain.
Quick Rundown Of Todays Topics:
WHO is more susceptible to developing plantar fasciitis?
WHAT is plantar fasciitis? [Sounds like a skin eating disease.]
WHAT can I do to treat this damn pain? [I know, I put “WHAT” twice. I wasn’t an English Major.]
WHY am I not seeing progress?
WHO Is More Susceptible To Plantar Fasciitis?
Straight from the Journal of Orthopaedic & Sports Physical Therapy Guidelines for Plantar Fasciitis.
Overweight & Un-Athletic
I know, I know. This sounds awful. No one wants to be called overweight. More than that they don’t want to believe they fall into the un-athletic category.
Prime example: My dad (I love you dad). He has gained some lbs. over the years, and I wouldn’t classify him as an athlete by any means at this stage in his life. Despite my opinion, he still thinks he is SUPER.
His workouts usually come few and far in between. To my surprise, he can never quite understand why his body hurts after his impromptu 3-mile sprint (he calls it a jog) once every 3 months.
Runners
Yay runners! You made it into the JOSPT Guidelines. Victory! Wear this as a badge of honor… I think?
Workers That Spend Increased Time On Their Feet (i.e. factory workers)
Fearful Avoiders
No one wants to admit this characteristic. Regardless, it exists. Many people who actually develop chronic pain fall into this category. Your worries about causing more “damage” to your body often make you think bed rest is still a reasonable option.
I am sorry to say that it is not.
Runners, don’t smirk. You fall into the “overboard” category where your “driven” personality encourages you to push through pain. Because it is weakness leaving the body! Sometimes… not always.
The big takeaway here is to accept the fact that your job, your hobby or your current weight just makes this injury more likely. Knowing that this injury comes with the territory allows you to switch your focus to PREVENTION.
Give Me The Low Down On Plantar Fasciitis.
Research has continuously stated that your heel pain isn’t typically an “iitis,” or inflammation.
Ultrasound actually reveals increased thickening of the fascia near the insertion on the heel (Fabrikant, 2011). This sort of debunks the old “RICE” concept when trying to manage this injury.
It is safer to say plantar fasciopathy.
This could mean either an inflammatory or a degenerative process. Degenerative sounds scary. It isn’t. Changes in tissue quality are normal, not everyone has pain with these changes. [This one’s for you Fear Avoiders].
Diagnosing TRUE Plantar Fasciitis, Or “Fasciopathy.”
1st step in the morning reproduces heel pain
Tenderness to touch at the insertion of the fascia on the heel
“Both were positive! Am I sentenced to months of night splints, orthotics and stretching?”
Not necessarily. If it is a true plantar fasciitis the research shows that these things can help. They may diminish symptoms, but it’s a Band-Aid.
JOSPT Guidelines
We need to be careful here. Some studies also showed that increased arch height was a predictive factor for pain. Your best bet is to have someone perform a running analysis to see what your foot is doing during the loading phase of running (preferably someone with a ton of knowledge about the human body).
If you don’t display “excessive pronation” or actually lack adequate pronation, an orthotic may not be a good fit. Excessive supination (opposite of pronation) while the foot is in contact with the ground during running or walking could actually be exaggerated with an orthotic.
Leading to ankle sprains.
JOSPT Guidelines
In my experience, night splints are hit or miss. With a true plantar fasciitis it could be a big hit. As I mentioned earlier, it is not actually fixing the source of the problem (the way you move, strength deficits, poor pacing etc). Before you sentence yourself to months of night splinting try to push the RESET button first.
Lets Get Started! Address Limitations In Ankle Mobility First.
1. Trigger Points
Work out those nasty tender points in your calves and the bottom of your feet. Calf trigger points can cause referral pain to the heel and bottom of the foot. Mimicking plantar fasciitis. Trigger points are responsible for reduced mobility, strength and timing of muscles! (Lucas, 2004)
BONUS: Self Instrument Assisted Soft Tissue Treatment (better than the roller stick… in my opinion.)
This is more of a soft tissue mobilization than trigger point treatment. It can actually be a great lead in to trigger point treatment. It helps reduce tone in the muscles. It is also a quick way to scan for areas that are more “stiff” and more irritated (increased trigger points local to that tissue). This is why I prefer it to the roller stick.
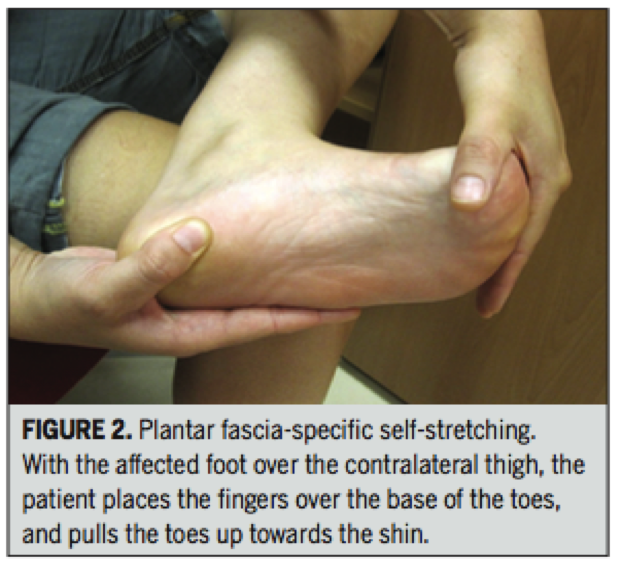
2. Stretch The Calves and Foot Musculature
Stretching feels good and it can help restore motion. BUT do not neglect the importance of strength and endurance at the shin musculature when looking to maintain that new length.
Performing strengthening drills, like the Shuffle Walk (courtesy of The Gait Guys) demonstrated in the video below will prevent increased tone in the calves from returning.
Prescription:
To make this more effective, actively pull the forefoot and toes up as you are stretching.
Pull the toes and forefoot up for 10 seconds (keep the heel down) followed by a 30 second stretch (work into it slow to get the desired effect). Repeat for 3 minutes.
Renan-Ordine R, 2011
3. Attack The Joints
Get the joints in your ankles and feet moving more freely. Don’t forget about motion at that BIG TOE. Without proper extension at the big toe you can forget about actually accessing that new ankle motion.
This means you can’t access that hip extension while running. This equals poor gluteal function. It all goes down hill after that…
1st Toe Mobilization + Shuffle Walks
Banded Ankle Mobilization With Active Dorsiflexion
This one is all over the Internet. From personal experience, having someone mobilize the ankle for you ends up being way more effective. But better than nothing!
Self Ankle Manipulation
Great way to get some quick improvements. Combine with the other techniques!
Gave It A Go For A Couple Weeks And Still No Change?
The loss of considerable amounts of body fat obviously doesn’t occur overnight. Stick with a guided nutrition plan and exercise routine to work on weight loss without further aggravating any painful regions. This may require modifications in exercise choices for the time being.
If You Are An Avid Runner Or Stand A Lot For Your Job Consider The Following:
Regular Shoe Rotation was found to be helpful in workers that spent more time on their feet. (Werner, 2010)
Your shoes really tell a story. Excessive pronation and supination start to wear down parts of the shoe. This exaggerates pronation and supination at the foot leading to increases in the speed at which these motions occur. Potentially leading to increased risk of injury.
Orthotics/Taping
We discussed this earlier. Orthotics don’t always fix the problem, sometimes they can worsen it. Taping to support the foot or promote increase stability at the foot could be a safer and cheaper 1st step.
Strengthening
The focus is typically on reducing “pronatory tendencies” at the foot. Sounds promiscuous, grrrrr! Tony can help you with that one.
Your ability to land in a good position during the loading phase of running, and continually do that over the course of a run is the primary goal; despite the addition of weight (maybe a ruck sack), speed or exertion.
Strangely, I find joy in watching people run. It is easy to tell which people skipped some developmental milestones growing up or didn’t take part in too many athletic events. If you fall into one of those categories I would definitely recommend some training to improve your running mechanics.
Leg Length Discrepancy (LLD)
I was hesitant to mention this because of how common LLD is in symptomatic and asymptomatic populations. However, it is mentioned in one study in the Plantar Fasciitis Guidelines (Mahmood, 2010). In various studies, a LLD of as little as 4-6 mm is considered clinically significant. In rehabilitation and the fitness world neuroscience is getting a lot attention; often disregarding biomechanics. It is probably in our best interest not to sweep this under the rug if we aren’t seeing progress. LLD will have an impact on your mechanics when walking and running.
Lets Wrap This Up!
The important thing to remember is that the recommendations made today are just guidelines based on an overwhelming amount of research. If you are in pain let these tips guide you. Don’t grasp on to them like they are the word of God, Buddha or The Dos Equis Guy. Accept the fact that your job, hobby, weight or lack of athletic ability make you more susceptible to this injury.
Fix the things you can, accept the things you can’t. There is no harm in trying out a cheap orthotic or heel pad for a little relief. If you want to take it a step further see a professional trained in running evaluations to determine needed changes in running mechanics, programming, proper shoe fit and/or orthotic fit. Knowledge is potential power. Go forth and conquer!
About the Author
Dr. Michael Infantino is a physical therapist who works with active military members in the DMV region. You can find more articles by Michael HERE.
References
Cotchett MP, Landorf KB, Munteanu SE. Effectiveness of dry needling and injections of myofascial trigger points associated with plantar heel pain: a systematic review. J Foot Ankle Res. 2010;3:18. http:// dx.doi.org/10.1186/1757-1146-3-18
Eftekharsadat, B., Babaei-Ghazani, A., & Zeinolabedinzadeh, V. (2016). Dry needling in patients with chronic heel pain due to plantar fasciitis: A single-blinded randomized clinical trial. Medical Journal Of The Islamic Republic Of Iran, 30401.
Fabrikant JM, Park TS. Plantar fasciitis (fasciosis) treatment outcome study: Plantar fascia thickness measured by ultrasound and correlated with patient self-reported improvement. Foot (Edinb) 2011;21:79–83. [PubMed]
Lemont H, Ammirati KM, Usen N. Plantar fasciitis: a degenerative process (fasciosis) without inflammation. J Am Podiatr Med Assoc. 2003;93:234-237.
Lucas KR, Polus BI, Rich PS. Latent myofascial trigger points: their effects on muscle activation and movement efficiency. J Bodyw Mov Ther. 2004;8:160-166
Martin, R. L., Davenport, T. E., Reischl, S. F., McPoil, T. G., Matheson, J. W., Wukich, D. K., & McDonough, C. M. (2014). Heel pain-plantar fasciitis: revision 2014. The Journal Of Orthopaedic And Sports Physical Therapy, 44(11), A1-A33. doi:10.2519/jospt.2014.0303
Mahmood S, Huffman LK, Harris JG. Limb-length discrepancy as a cause of plantar fasciitis. J Am Podiatr Med Assoc. 2010;100:452-455. http:// dx.doi.org/10.7547/1000452
Renan-Ordine R, Alburquerque-Sendín F, de Souza DP, Cleland JA, Fernán- dez-de-las-Peñas C. Effectiveness of myofascial trigger point manual therapy combined with a self-stretching protocol for the management of plantar heel pain: a randomized controlled trial. J Orthop Sports Phys Ther. 2011;41:43-50. http://dx.doi.org/10.2519/jospt.2011.3504
Werner RA, Gell N, Hartigan A, Wiggerman N, Keyserling WM. Risk factors for plantar fasciitis among assembly plant workers. PM R. 2010;2:110-116. http://dx.doi.org/10.1016/j.pmrj.2009.11.012

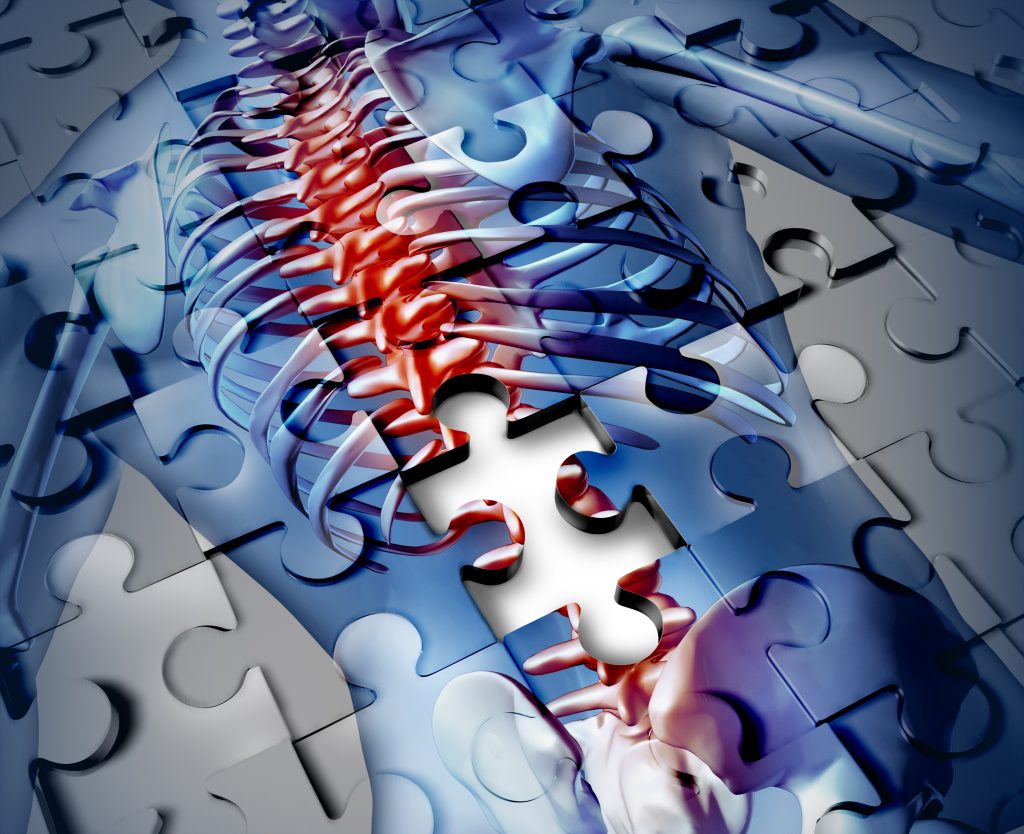
 After rupturing my L5-S1 disk over 7 years ago I was told that surgery and pain meds were my only option for a “pain-free” life.

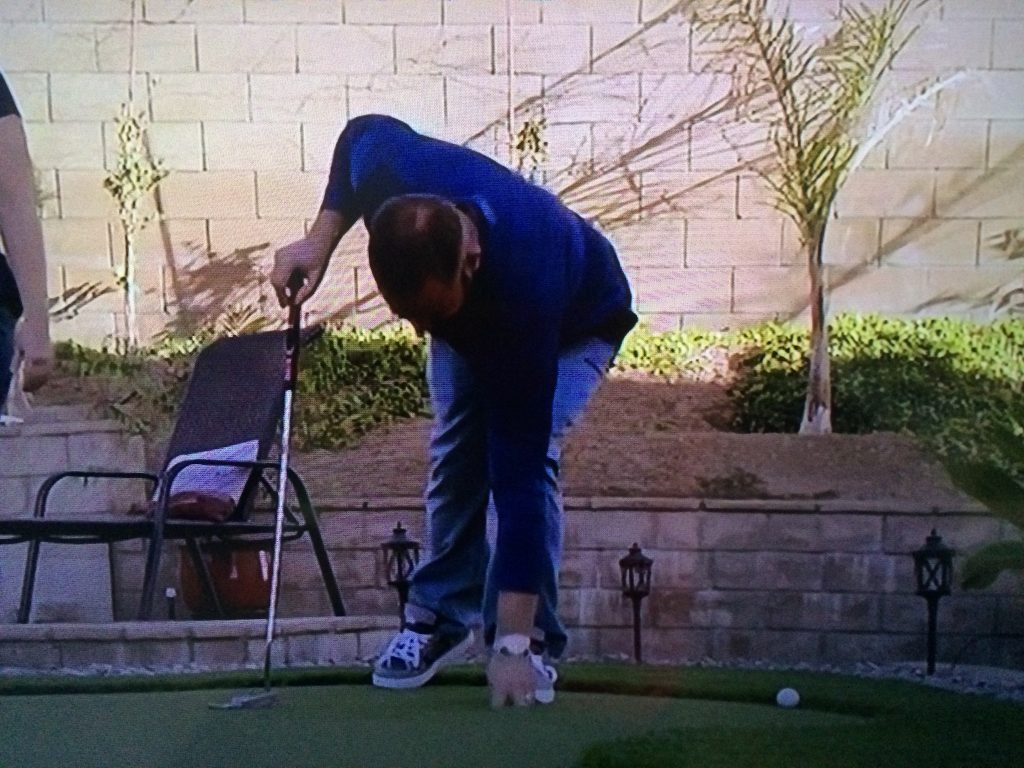
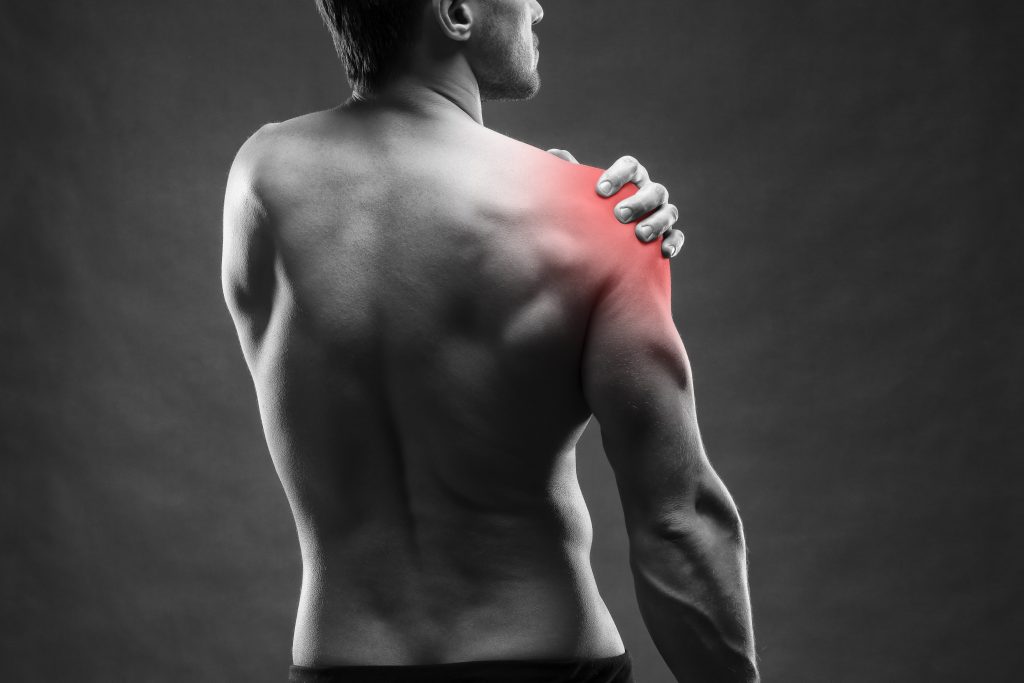
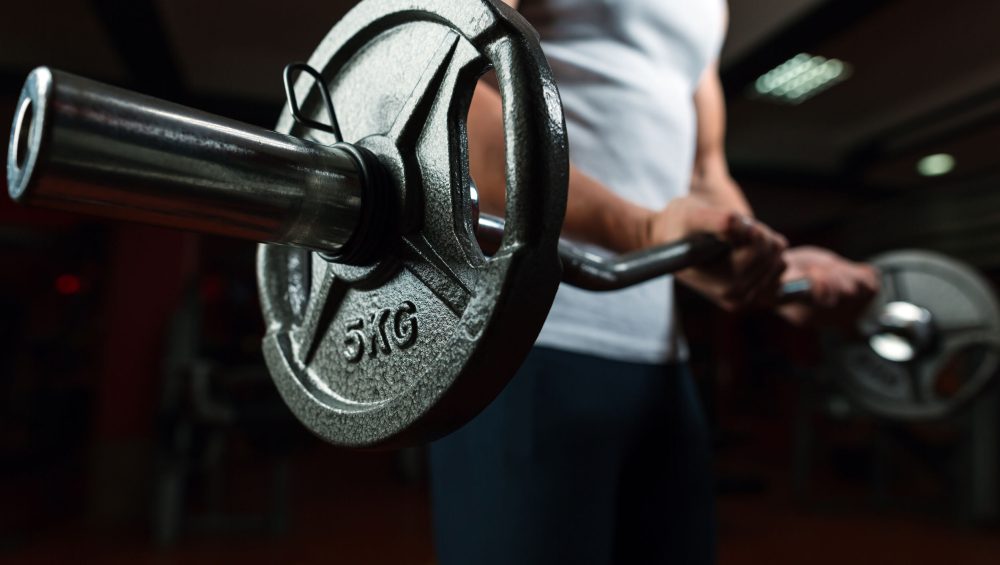
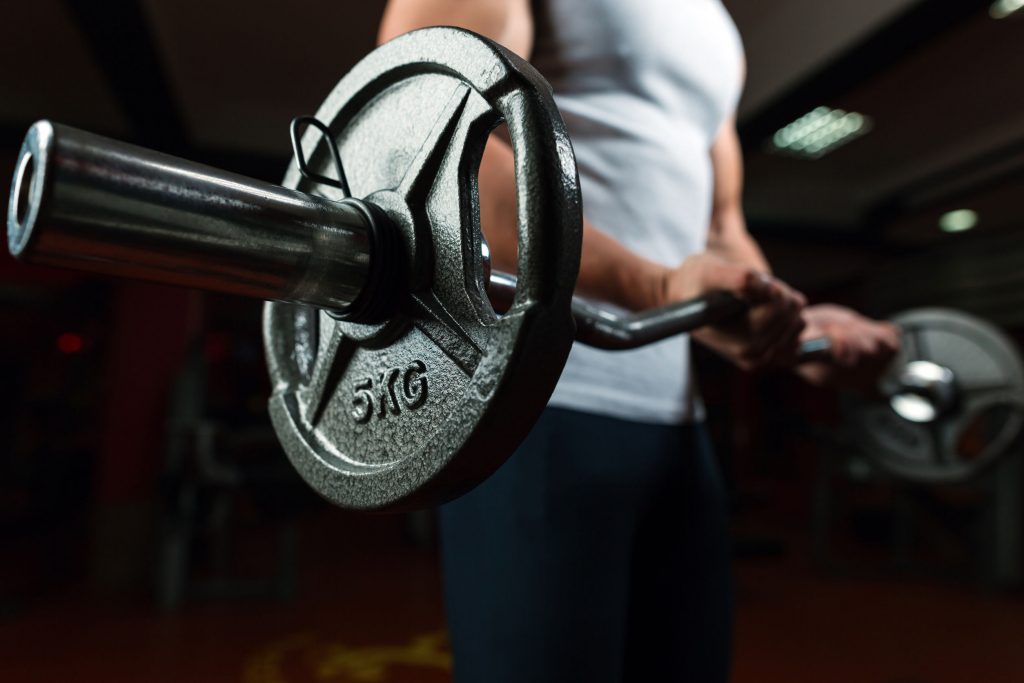

 Dr. Michael Infantino is a physical therapist. He works with active military members in the DMV region. You can find more articles by Michael at
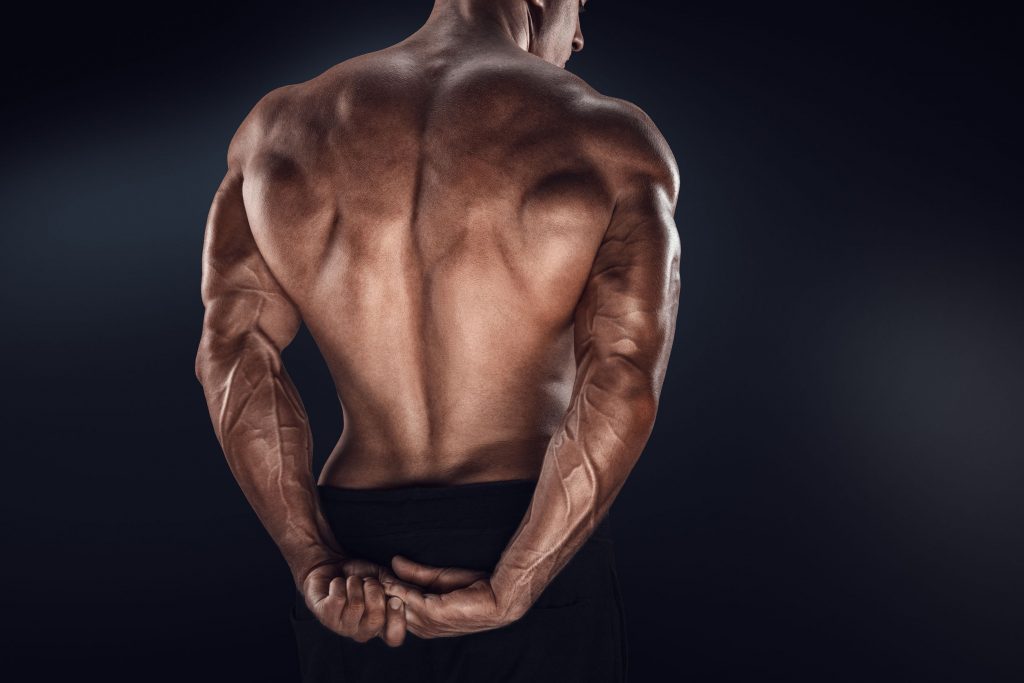
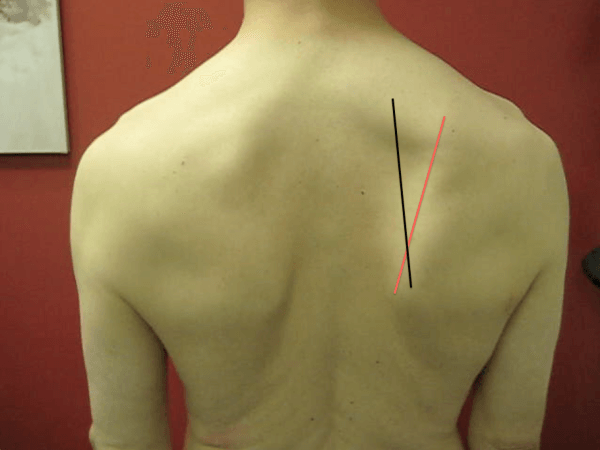
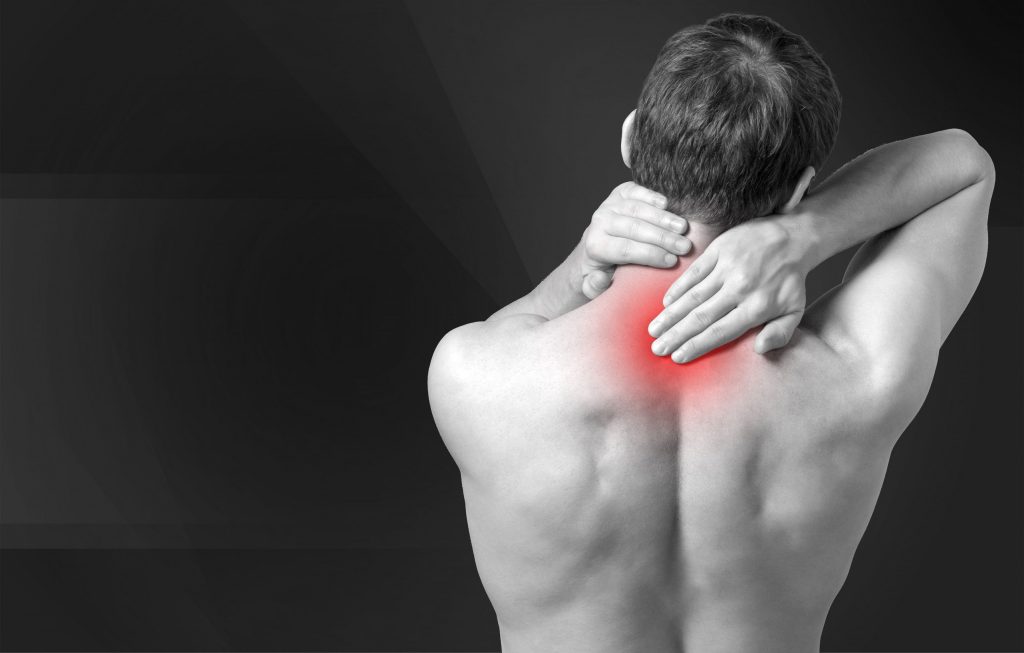
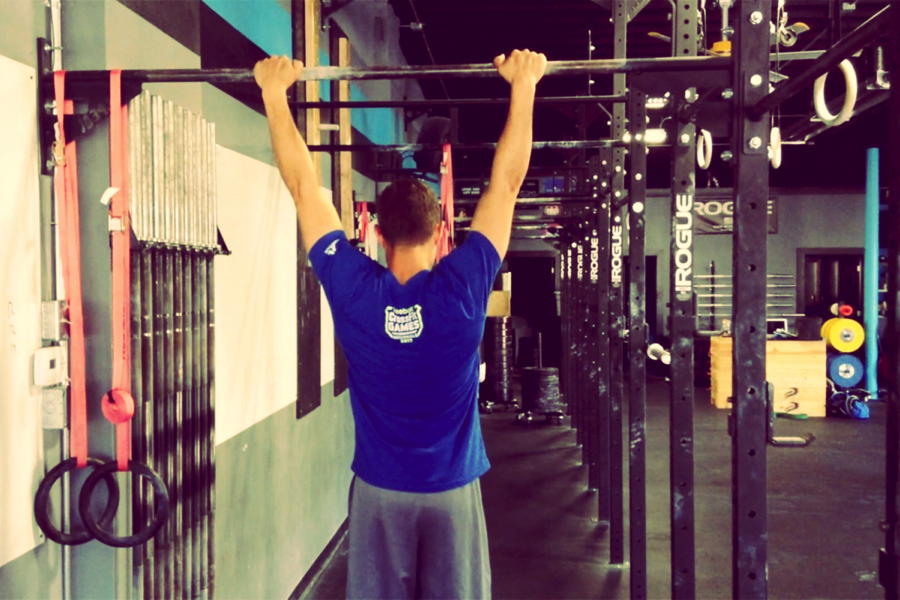
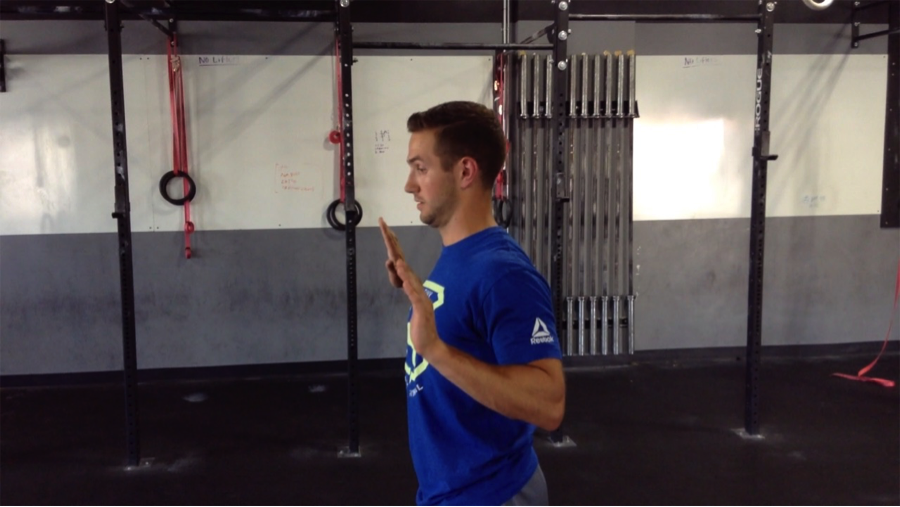

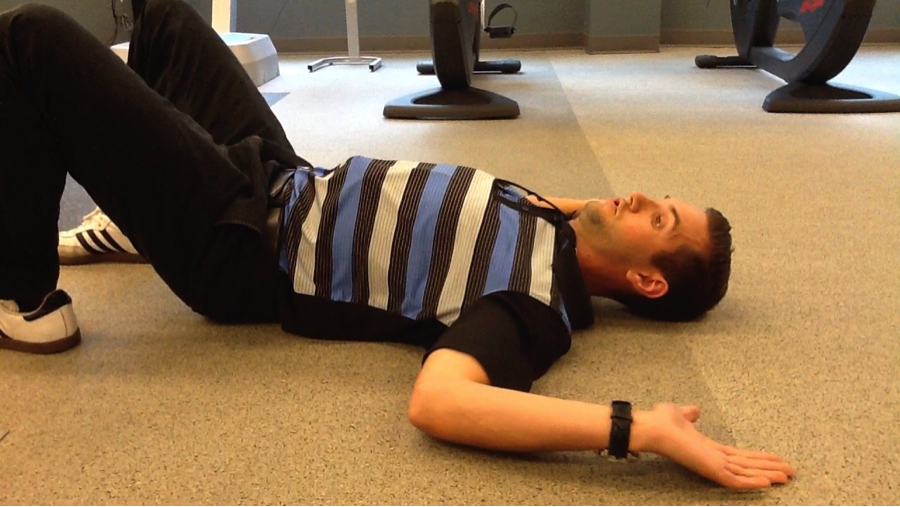

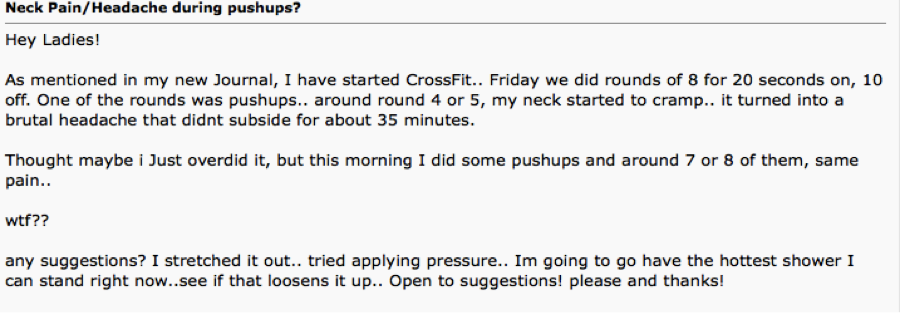
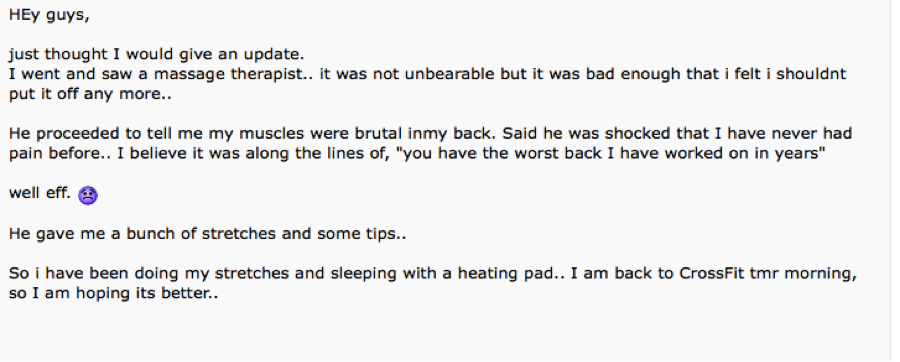
 Dr. Michael Infantino is a physical therapist. He works with active military members in the DMV region. You can find more articles by Michael at