Categoriescoaching Corrective Exercise mobility

It’s a Warmup, Not a Social Hour

I arrived back to Boston late last night from London and I’d like to say I woke up today well-rested and ready to wow everyone with some witty fitness prose.

I’d like to say that.

Not gonna happen today. I’ve got a ton of emails and programs to catch up on, but that doesn’t mean I don’t have any content prepared for you today. Andrew Millett, good friend and Boston based physical therapist/strength coach was kind enough to send along this baller post today.

You’ll love it.

Copyright: undrey / 123RF Stock Photo


It’s a Warmup, Not a Social Hour

I got the idea for this post after recently attending the Advanced Warm-Up and Recovery Workshop put on by Matt Ibrahim and Dr. John Rusin.  I didn’t know what new things I may learn at the workshop, but after taking pages of notes and getting new ideas for my clients and patients, it was definitely worth it.

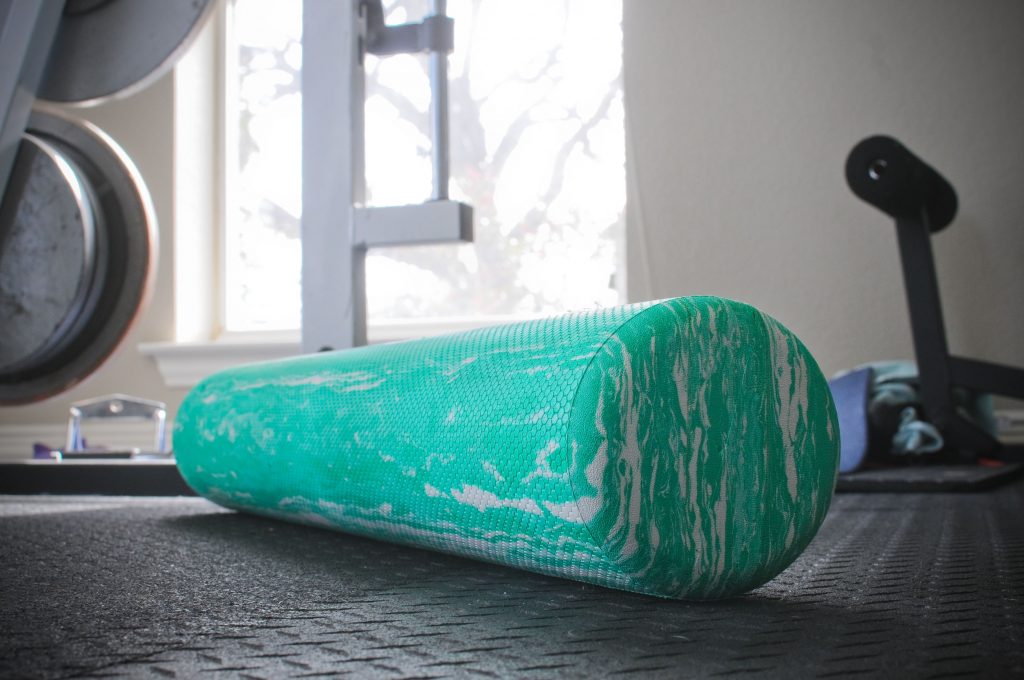
You walk into any gym or fitness facility and you will see people warming-up on the bike, treadmill, elliptical, or maybe even rolling around on the foam roller.  It is great to see people putting in the time and effort to consciously warm-up their musculoskeletal, nervous, and circulatory systems prior to engaging in their exercise routine.

The key word in that last statement is:

Consciously

Too many times, people warm-up without any direct goals or agenda in mind.  They hop on one of the aforementioned cardio machines and watch TV or read a magazine and aimlessly pedal or step until they think they are ready to exercise.  If they are on the foam roller, they probably roll around on it like they are rolling out pizza dough or look like a boy scout trying to start a fire with 2 sticks.

When you are working with a client or are performing a warm-up in your own gym routine, there needs to be a specific goal in mind while warming-up prior to your exercise session.

First off, we need to assess our clients to see what areas they may be lagging in.  Here are a few quick and easy tests to see if there are any areas that need to be targeted for some type of self-myofascial release.

Ankle

In the sagittal plane, the ankle needs to be mobile.  It needs to be able to plantar-flex and dorsiflex for the demands of life as well as demands in the gym.

In order to perform a squat without compensations, the ankle must be able to dorsiflex and allow the tibia to translate anteriorly as the person descends down in the bottom position.  To determine if someone has adequate ankle dorsiflexion, try the Knee to Wall Test.

Knee to Wall Test


You instruct the client to place their foot on the tape strip.  On the tape strip, there are 4 lines, each 1-4 inches away from the wall.

Start with the client’s foot on the “4” line.  Four inches is required for adequate dorsiflexion in order to perform the squat.

Tell the client to try and touch their knee to the wall without letting their heel come up.  Also, make sure they are going into valgus or varus movements at the knee to potentially compensate for lack of dorsiflexion.

If someone cannot reach from the “4” line, then have them move up and determine where they can reach from.  Then test the opposite side.

If they cannot reach, ask them where they “feel it.”  If they feel they can’t go any farther due to tightness in the back of their ankle, then we know that some of the soft tissue structures on the posterior aspect of their lower leg could be to blame.

For that, some type of self-myofascial release (SMR) to the soleus, posterior tibialis, flexor hallucis longus/flexor digitorum groups could help to improve range of motion at the ankle.


If they feel a pinch on the anterior aspect of the ankle, that could potentially be a joint mobility dysfunction.

Try a Banded Ankle Mobilization.

Start by placing a thick superband around a post or squat rack; something that can’t move.  Then place the band at the ankle joint, just inferior to the medial and lateral malleoli.  Place a good amount of tension on the band.  While maintaining this tension, recreate the same movement as if you were performing the knee to wall test.  Go as far as you can comfortably go.  Hold for 2-3 seconds when you can’t go any farther.  Return to the starting point and repeat for 6-10 reps.

Then retest the Knee to Wall Test.

If it improves, then we know the Banded Ankle Mobilization worked.  Whether it improved or not, it might be wise to refer out to a licensed healthcare practitioner to further assess the ankle to determine what may be limiting that motion.

If there has been an improvement in ankle mobility, we want to be able to control that “new found” mobility.

Try the Heel Raises with Single Leg Eccentric.  I first saw this from Dr. Ryan DeBell of The Movement Fix.


Key Points:

– Perform the movement slow and controlled.

-When your foot is are parallel to the ground, slightly flex the knee and go slow and controlled towards the ground.

-Imagine like you are slowly pulling your heel to the ground.

Hip

At the hip, we need to determine a few different areas of mobility.  Starting in the sagittal plane, we need to determine if the client has adequate hip extension.  If the client doesn’t have adequate hip extension mobility, they will have a more difficult type using their gluteal musculature to perform some of the movements we ask them to.

In addition to not being able to effectively activate and use certain muscles, lack of hip extension mobility can place increased stress on the lumbar spine and the knees, as well as some other more distal joints.  By ensuring the client has adequate hip extension mobility, then we know some of the other joints of the body will be able to function properly.

To determine if someone has adequate hip extension mobility, we have two different options.  First off, you can perform the ½ Kneeling Hip Extension Test.

VID ½ KNEELING HIP EXT TEST

Have the client place one knee down on a padded surface and the other knee up.  Instruct them to contract their gluteus maximus on the down leg side, brace their abs, and slowly bring the hips forward.

We ideally would like to see 30 degrees of hip extension on the trail leg.  You can use the Inclinometer App on the Iphone to measure the angle.

You can also perform a Thomas Test.  This is a test that is typically taught in physical therapy schools to determine hip extension mobility.

*Disclaimer*:  First off, you need to ask your client if they are okay with you placing your hands on them to assess their hip mobility.

Thomas Test


Self Thomas Test (and Sick Beats)


You are going to have the client lie supine on the side of a table or bench.  Have them hold their knee at 90 degrees of hip flexion, or at hip height.  Place your thumb on their Anterior Superior Iliac Spine (ASIS).

Using your other hand, slowly lower the leg the client is not holding with their hands.

If you can lower their leg to the level of the table and their ASIS does not translate anteriorly, then we know they have adequate hip extension mobility.

If you lower the client’s leg and their ASIS DOES translate anteriorly prior to the leg reaching the level of the table, then we know there is some muscle group limiting hip extension.

To determine, which muscle group, then we need to change the position of the lower leg.

If we extend the knee and perform the same test, this will place tension on the Psoas and Iliacus muscle groups.  If you lower the leg with the knee extended and the ASIS translates anteriorly, then we can determine Psoas and Iliacus are to blame for decreased hip extension mobility.
If we lower the leg and the ASIS doesn’t translate anteriorly, then the only other muscular group to blame would be Tensor Fascia Latae (TFL).

To test for this, we slightly abduct the hip and perform the same test.  If the ASIS translates anteriorly, then we know TFL is to blame.

If we run through all of these tests and each test with the knee extended doesn’t cause anterior translation of the ASIS, but when the knee is flexed it does, then we can determine that Rectus Femoris is to blame.

To improve hip extension mobility, try SMR to whichever area you determine to be problematic.

SMR w/ Lax Ball to Iliacus/Psoas & TFL


SMR to Rectus Femoris


SMR to Vastus Lateralis & TFL

Then re-test to see if any of these SMR variations improved the client’s hip extension mobility.

Once someone’s hip mobility has improved or is normal, we want to make sure they can stabilize in that mobility.

The Cook Hip Lift is a great movement for accessing and stabilizing hip extension mobility.


Key Points:

-Place a ball in your hip crease.

-Use non-stance leg to keep ball in hip crease.

-Lift hips up off ground.  Do not let ball fall out

-Perform for 8 repetitions per side.

Thoracic Spine

The thoracic spine is another area of the body that needs adequate mobility.  If it doesn’t present with adequate mobility, areas of the lumbar and cervical spines and the shoulder can be affected.  It is one of the most influential areas of the body because of the impact it can have on so many different areas.

To determine if your client has adequate thoracic spine mobility, it is best assessed in quadruped using the Quadruped Thoracic Rotation Test.

Normal thoracic rotation in the general population should be 50 degrees.  To measure this, use the Inclinometer app and place it ½ way between both shoulders on the thoracic spine.

When you are passively bringing them through the movement, make sure there is no lumbar movement such as sidebending occurring as this will skew your measurements.  Also, gently rotate the client.  Don’t try to force rotation on someone that may not have it.

If the client does not have 50 degrees of thoracic rotation, there are various thoracic spine mobility drills that can be performed such as:

A-Frame T-Spine Mobilization


Side Lying Thoracic Rotation


Side Lying Rib Roll

If the client has 50 degrees or more of passive rotation, but less than 50 degrees of active rotation, a thoracic spine motor control drill can be performed.

Drills such as:

Quadruped Assisted Thoracic Rotation


Key Points:

-Perform slow and controlled.

-Make sure not to side-bend through your spine.  Make sure to rotate through mid-back.

Seated Assisted Thoracic Extension


Key Points:

-Squeeze ball between your knees.

-Slightly turn away from where band is attached.

-Slow and controlled, allow band to rotate body.

Shoulder

The last pertinent area of the body to address in a warm-up is the shoulder.  Limited shoulder mobility in shoulder flexion, abduction, or internal/external rotation can affect function at the shoulder, cervical spine, thoracic spine, and even the lumbar spine.

To assess the shoulder, movements such as:

Supine Shoulder Flexion Test

Supine Shoulder ER Test

If there are limitations in mobility, performing self-myofascia release as shown below can help:

Once mobility has been improved, now we want to make sure we can use that mobility.  Performing movements such as:

Back to Wall Shoulder Flexion


Key Points:

-Maintain low back flat to the wall.

-Raise arms up and when the reach shoulder height, gently reach 1 inch in front of your finger tips.

-Continue this gentle reaching as you continue to raise your arms overhead.

Forearm Wall Slides


Key Points:

-Slide arms up the wall.

-When your elbows get to shoulder height, gently press into the wall/push your trunk away from the wall.

-Maintain the pressure on the pinkie side of your hand as you slide up the wall.

Quadruped Assisted Reach Roll and Lift


Key Points:

-Perform slow and controlled.

-Slowly reach out.  Rotate palm up to the sky.  Slowly raise arm up.<

Yoga Push-Ups Sans Pushups


Key Points:

-Think of pushing the ground away from you with your hands.

-Should be felt in your upper back and out and around your rib cage.

If you have no mobility limitations in any of the aforementioned areas, feel free to use the motor control or stability drills to help primer your nervous system to prep you for your lift.

There you have it!  Create a plan for your warm-up, do said plan, and then go and get after your training!

About the Author

Andrew Millett is a Metro-West (Boston) based physical therapist

Facebook: From The Ground Up

Twitter: @andrewmillettpt

Instagram: andrewmillettpt
CategoriesCorrective Exercise Female Training

5 Things to Consider With Postpartum Training

My wife gave birth to our son on January 31st, which was a Tuesday. She was back in the gym that Friday. Although, admittedly, all she did was a few easy bodyweight exercises and listened to my advice on hammering drills like deadbugs, birddogs, and anything else that would help to build back her core strength and integrity.

Postpartum training is a very tricky topic, and a serious one. Many women make the mistake of jumping back into (aggressive) exercise before their body is ready and sometimes suffer the consequences.

In today’s guest post, Dr. Sarah Ellis Duvall, helps shed some light on a delicate topic.

Copyright: maximkostenko / 123RF Stock Photo


Recently, I saw an awesome Instagram post by Tony of his wife, Lisa. She was maxing out on bench press when she was only a few weeks postpartum. Go Lisa!

She is kicking butt and taking names and I was totally impressed.

Note From TG: THIS is the post Sarah is referring to. It was an awesome lift. What was not so awesome was how another trainer came in to highjack the thread and grandstand about how “dangerous” it was that Lisa was lifting so heavy so soon after giving birth, despite, you know, Lisa having been training all through her pregnancy, taking her time after giving birth to get back up to that point, AND being cleared by her doctor.

Since she has an awesome coach, her programming is perfect, but what if you are postpartum, headed back to the gym and not being trained by Tony?

Well, your life is probably a little less fun and devoid of Star Wars humor but here are 5 things to keep in mind before maxing out on your lifts postpartum.

#1. Do You Have Full Core Strength Back?

Start by checking for a diastasis. This is a thinning of the fascia (think shiny layer when you pull the skin off a chicken) that connects the front of your abs. It should feel like a trampoline when you lift your head and poke it. If your finger sinks in, that’s telling us your core is not connecting yet.

Lie on your back, knees bent

Place your fingers in the middle of your stomach

Lift your head just a little and push

Do they sink or do they spring?

Check halfway between your ribcage and your belly button, right above your belly button and halfway between your pubic bone and your belly button.

Anything that sinks in or is more than two-fingers wide is considered a diastasis. I consider the sinking part more important than the width.


Think about this as how well your core is transferring a load or pressure. It will not transfer well if there is a gap or hole in the system.

#2. Check for Doming.

When you do a crunch, sit up or plank your abs should flatten, they shouldn’t dome out in the front.

Doming tells us that your abs aren’t firing together correctly.

Along with not supporting the spine and pelvis enough, doming can also lead to hernias. Prevention is definitely the best medicine when it comes to hernias!


#3. Is Your Deep Breathing System in Place?

Does your inhale reach your pelvic floor or is it all upper shoulders or belly?

This is also part of building correct core strength.

Your diaphragm is the top of your core. Think about it as the top of a pressure cooker. We use pressure to help support our spine. If your diaphragm and core muscles are not firing correctly, it can either create too much or too little pressure. The pelvic floor really hates both those scenarios because that can lead to leaks and prolapse (months and months down the road).

I love the umbrella analogy. If you breathe up into your neck and shoulders, you will never open the umbrella. If you only belly breathe, that’s like opening a broken umbrella where only one side works. Aim for your back, sides and front around your ribcage to expand with every breath.

#4. Make Sure Your Pelvic Floor is Timed With Your Diaphragm

A long pushing phase or holding too much tension in the pelvic floor can disrupt the natural movement of the pelvic floor. Make sure you can feel your inhale pushing down on your pelvic floor – pelvic floor responds by relaxing down, then naturally recoils up on your exhale.


#5. Be Aware of What Happens Under Exertion

The more demand, the harder the exhale, the more your pelvic floor should contract. Sometimes this gets mixed up and instead of your pelvic floor contracting it bears down in response to pressure.

Bearing down is a great way to cause leaking and pelvic organ prolapse.

I’ve seen many women in person and received many, many more emails from women that have gotten pelvic organ prolapse 3, 8, and even 10 months after having a baby.

They thought things were going well.

They thought they were in the “clear.”

Then they tried some new crazy bootcamp class with lots of jumping or they maxed out on a lift or they simply lifted something heavy over their heads. Getting prolapse at anytime can be very heart wrenching and frustrating, but getting it months after you thought you were fine is the worst.

I’m not saying, don’t exercise hard.

I’m simply saying be aware of what’s going on and make sure you have the groundwork laid before pushing your body. If you don’t know what your pelvic floor does under pressure, that’s the same thing as not knowing your knee caves in during a squat. If any professional saw you, they would immediately fix the knee caving in issue and tell you how they just saved your knee from years of pain.

Pelvic floor prolapse is a real issue with real consequences, and it’s crucial to take the requisite steps a head of time to (hopefully) prevent it from happening.

About the Author

A wife, mom and adventure sports athlete, Dr. Sarah is a women’s health specialist that believes in teaching. Helping women understand how the body works is the basis for her results-driven online program. She focuses on issues from the pelvic floor and diastasis to building strength injury free. When she is not hanging off the side of a mountain, Sarah enjoys writing and presenting at Core Exercise Solutions and figuring out how her patients can continue to pursue their dreams and lead a strong, adventurous life. 

Find out more about her Pelvic Floor and Diastasis Programs here: http://www.CoreExerciseSolutions.com

Categoriescoaching Corrective Exercise mobility

My Go To Mid-Back Mobility Drills

Mid-back (or T-spine) mobility drills are one of those things that, much like bacon, Jason Bourne movies, or LOLCat memes, most people just can’t get enough of.

Copyright: lightwise / 123RF Stock Photo


At this point I don’t think I need to belabor why t-spine mobility is a kind of important. But if I had to give a quick 10-second elevator pitch I’d say something to the effect of:

“It helps improve performance in sport(s) and in the gym, helps with posture, and also helps offset the likelihood of your shoulder, neck, or lower back from flipping you the middle finger.”

You’re not going to find that explanation on Wikipedia or anything, but it gets the point across. Having the requisite mid-back mobility – 0r, more to the point: having the ability to “access” mid-back or T-spine mobility (via rotation and eliciting an extension moment) as well as nudging more dynamic stabilization – keeps people healthy (namely shoulders and lower back) and not feeling like a bag of dicks.

Note to Self: I totally need to start submitting more often to Wikipedia.

There are a million and one different T-spine mobility drills and rarely is there ever a “bad” one. However, the three shown below tend to be the ones I gravitate towards the most when working with athletes and general fitness population clients alike.

1. Mid-Back Release

A common drill many people perform to improve T-spine mobility (more specifically, extension), especially when they’re more kyphotic and exhibit overly rounded shoulders, is to extend their mid-back over a foam roller.

First: Most people perform it poorly (see below).

Second: We’ve fallen into this trap of oneupmanship where the “harder” the surface the better the drill is.

Is it better?

Ten years ago it was a plain ol’ foam roller. Now people are rolling on lead pipes. Before you know it, the next iteration will be rolling on live grenades.

Regardless, Here’s How Not to Do It.


The mid-back area isn’t necessarily designed to have that much range of motion – to the point where someone can extend their shoulders all the way to the ground – and what most people end up doing is exhibiting excessive rib flair and plowing through their lumbar spine (where we don’t want a ton of movement).

The end result is nothing more than “feeding” what’s causing the issue(s) in first place: an un-stable core (lumbo-pelvic area) which forces the mid-back to lock-up for lack of stability where you want it.

Do This Instead (Seriously, I’m Not Kidding)


This mid-back release from the people over at AcuMobility.com is a game-changer.

The idea is to train STABILITY (by paying diligent attention to engaging and maintaining core activation) while also working on the areas we actually want to mobilize.

This drill is a catch-all for pretty much everyone: male, female, young, old, likes to deadlifts, hates it, office worker, Klingon….seriously, everyone.

It works – albeit for different reasons – whether you’re a computer guy with Quasimodo posture or someone who’s more athletic and exhibits more of a “flat” t-spine.

Computer Guy = the added extension is postural gold.

Opposite of Computer Guy = these people tend to be “stuck” in extension due to over-active erectors, rhomboids, etc from lifting heavy things repeatedly. Also, much like “computer guy” most people here will exhibit a weak or unstable core, which, for many, may be the culprit for why their mobility is poor to begin with.

The lack of base of support in the lumbo-pelvic region will have negative ramifications in terms of ideal positioning up and down the kinetic chain, and one’s ability to produce and transfer force.

When we dial down tonicity in the mid-back, we’re able to exhibit better positions (rectus abdominus less lengthened and rib flair less prevalent) and we’re then able to express our actual badassery.

I really love the content and material AcuMobility has been putting out over the past year. You can watch ALL their videos for free on their site HERE.

It’s awesome stuff.

Also, because I’m cool, you can get 10% off any AcuMobility orders by using the code “gentilcore” (no quotations needed) at checkout HERE.

2. Side Lying Windmill


It…..just…..feels…..so…..good.

Lots of cool things happening here: T-spine extension & rotation, in addition to a nice pec stretch (which is often overactive in many people).

A key point, however, is to make sure you’re not just flailing your arm and making it a shoulder circle thingamabobber exercise.

The motion should come for the scapulae (shoulder blade) itself, so don’t force ROM you don’t have. It’s okay if you’re unable to get close to the floor.1

The more you perform this exercise the better you’ll get

Also:

1. Place a foam roller underneath the top knee (at 90 degrees) so you lock the lumbar spine in place and don’t default into lumbar rotation.

2. Squeeze the glute of the leg that’s straight.

An exercise sibling – if you will – of the side-lying windmill is a variation I learned from Dr. John Rusin:

Side Lying Open Book


3. Quadruped Reach Through and Extension


I like this drill for a lot of people, but I really like it for rotational athletes (especially pitchers as it’s important for them to be able to follow-through and “access” flexion on their throwing side).

A key aspect of this drill is to sit back onto the calves/ankles (if your mobility allows and it doesn’t bother your knees) and to lock the lumbar spine in place and take it out of the equation.

From there it’s pretty self-explanatory:

1. Slide hand underneath and reach through as you exhale your air.

2. Reverse the action and extend back.

3. I tend to default to more of a “rib-roll” action as I feel it’s allows for less cheating and compensation.

Give these bad-boys a try and let me know what you think. Or, if not, I guess I’ll GFM….;o)

Categoriescoaching Corrective Exercise Exercise Technique

Exercises You Should Be Doing: Off-Bench DB Press

It’s been a few weeks since I’ve graced the internet with a new (to you) exercise, so lets jump in:

Copyright: maximkostenko / 123RF Stock Photo


Any bench-pressing variation can be a double-edged sword. On one hand the advantages are numerous:

  • Builds upper body strength.
  • Pecification of pecs.
  • And that’s pretty much it.

So maybe not as numerous as I thought. But there’s no denying the importance of horizontal pressing movements (barbells, dumbbells, people, etc) with regards to building and developing a well-rounded physique and/or athlete.

To their detriment, however, some people take the “well-rounded physique” idea to the extreme and often perform waaaaaaaaaay more pressing movements compared to anything else. Just walk into any commercial gym (literally, any one, just pick), and try sit there for more than five minutes and not see someone start to bench press.

It’s impossible.2

As a result we often see an uptick in shoulder ouchies due to muscular imbalances (over-developed pecs compared to under-developed upper back muscles) and wonky scapular mechanics.

The latter is not an absolute: You’ll often find shoulder blades that are “glued” together or stuck in downward rotation in people who bench a lot. This is good thing in that you WANT the shoulders to be retracted and depressed in order to move a lot of weight.

It can be bad in that you still should be able to “access” upward rotation, protraction, and all the other motions the scapulae are designed to perform in order to keep the shoulders healthy.

Unfortunately, this isn’t the case for many people.

Off-Bench DB Press


Who Did I Steal It From: Vin Diesel.3

What Does It Do: Pressing variations involving a bench are open chain and don’t allow the shoulder blades to move. As noted above: this is fine. In order to heave a significant weight off your chest you need to set a stable base. And in order to do so it’s crucial to retract and depress the shoulder blades.

The thing is, over time, this can produce less than stellar scapular mechanics and result in shoulder pain or discomfort.

The scapulae (shoulder blades) need to be able to move.

This variation allows such a thing to happen.

Not only is the shoulder blade now able to move through a more diverse ROM, but this exercise, too, is a great rotary stability exercise (you have to fire your core musculature to maintain a straight torso as to not fall off the bench) in addition to nudging a bit more glute activation.

Key Coaching Cues: There’s not much to it. Lie on bench and scoot over to one side or the other so that the shoulder blade of the pressing arm is off the bench.

And then, you press.

Try to avoid lowering the DB so low that your shoulder “rolls” forward. Also, I like to cue a bit of a PLUS or protraction movement at the top.

Bonus Tip: Make a fist with your free hand to aid in developing even more full-body tension.

Perform 8-12 repetitions and then switch.

Wrap Up

Will this movement help you press 300 lbs? No.

But it will help keep your shoulders healthy in the long-run, and I see no harm in peppering it into programs sporadically just to remind trainees/athletes that it’s okay to let their shoulder blades move and breath a little bit.

Moreover, you know and I know that when someone’s shoulder hurts and you tell someone to stop pressing, that they’re likely going to be an a-hole an press anyways. At least with this variation you can help keep them sane and still press while addressing all the other things they may need to be working on to solve the issue(s).

CategoriesAssessment Corrective Exercise

Foam Rolling: This Is How We Roll

Foam rolling was never a “thing,” at least in mainstream fitness circles, until the early 2000’s. Since then it seems you can’t lift a weight or make a tuna salad without first taking yourself through a myriad of foam rolling drills to ensure “safety.”

Do I have my clients foam roll? Yes. Do I feel it’s imperative? It depends. In today’s guest post by Dr. Nicholas Licameli, he sets the record straight on what foam rolling is and what it isn’t

Copyright: tammykayphoto / 123RF Stock Photo


Foam Rolling: This Is How We Roll

In the fitness world, foam rolling has become just about as popular as yoga pants, bright stretchy shirts with motivational and quirky quotes, and transformation pictures on Instagram. That being said, a foam roller can be an effective tool, if used correctly.

Some buzz terms you may have heard when it comes to foam rolling are muscle lengthening, breaking down scar tissue, freeing up adhesions, remodeling of collagen, curing cancer, etc., however recent research does not support these claims as the mechanism by which foam rolling works.

In reality, we as humans cannot produce the amount of force necessary to remodel our tissues. Our tissues are much more resilient than that. It actually takes thousands of pounds of force to accomplish this, which is probably a good thing because we don’t want our tissues breaking up or remodeling when we’re carrying groceries, sitting on a park bench, squatting with 500lbs on our backs, or anytime we put weight into them.4,5,8

Last time I checked, no one is foam rolling with that much force!

But…We Feel Better and “Looser” After We Foam Roll. Why????

The mechanism by which foam rolling works seems to be neurophysiological rather than physical.

Neurophysio what? Neurophysiological.

This means that foam rolling induces a global decrease in muscle tone. Muscle tone is the continuous passive contraction of a muscle controlled subconsciously by the brain. In other words, it’s a muscle’s resistance to passive stretch. Tone is created by a constant subconscious message from the brain telling a muscle to contract. Many times the sensation of muscle “tightness” has more to do with tone and less to do with actual muscle length.

This is similar to how pain is perceived. Pain is a sensory input. Foam rolling adds a sensory input (the pressure) to override another sensory input (tightness or pain) to disrupt that subconscious message between the brain and the muscle to contract or perceive pain.1,6,8 This is why we feel better, looser, and less pain after foam rolling.

A Word (Or two. Or three.) On the Iliotibial Band (IT-Band)

By understanding the neurophysiological mechanism by which foam rolling works, it is now clear why you should NEVER FOAM ROLL THE IT-BAND.

The IT-band is a long tendon that has connections to the hip musculature, lateral quads, and lateral hamstrings…but it is only a tendon, not a muscle.

It is not made up of contractile tissue and therefore cannot have tone. The IT-band becomes tight as a result of increased muscle tone of its muscular attachments.

Think of it like this…imagine attaching the rear bumpers of two tractor-trailers with a chain. Both drivers hit the gas and the trucks try to move away from each other, increasing tension on the chain. In order to lessen the tension on the chain, it’s obvious that you would have the drivers ease off the gas. The chain itself does not cause the tension. The force of the trucks causes the tension.

The same goes for the IT-band. To improve IT-band tightness with a foam roller, focus on the hip musculature, lateral quads, and lateral hamstrings. By rolling directly over the IT-band, you are only causing yourself pain, which is most likely causing a global increase in muscle tone throughout the body.

Great Let’s Get Rolling! I’m Going to Foam Roll Every Muscle of My Body 3x/day For the Rest of My Life!

Not so fast.

The above-mentioned benefits of foam rolling seem to be very short lived. If you spend 10, 20, or 30 minutes foam rolling different muscle groups, by the time you’re done, you’ve likely lost the benefits of the first 5-10 min.

Although the research has not shown an optimal dosage for foam rolling, it has been shown that short bouts of 10-60 seconds is effective.7,8,9 That being said, do not focus on time. Focus on “feel.” Feel that muscle release!

Don’t just roll and roll and roll.

Note From TG: ^^^ Sorry, I couldn’t resist. And, you’re welcome.

Start off with a slow, steady roll covering the entire muscle group scanning the area for tender spots. Think of scanning the area as a blind person would scan a new environment.

Once you find a tender spot, pause and hold on that spot until a release is felt and the tenderness lessens. Follow this up with another slow, steady roll over the entire muscle just like you started. It is true that foam rolling should be a bit painful, but too much pain will cause an increase in muscle tone, which, as previously mentioned, is exactly the opposite of what we want to do.

More pain is not better. Better quality is better.

Foam rolling should be done with a specific purpose targeting specific muscles (see a qualified healthcare practitioner to pinpoint target areas specific to you). Stop mindlessly flailing around on the dirty gym floor rolling every muscle of your body. Foam rolling should address a specific movement that is limited.

ALWAYS TEST/RETEST.

Test/retest means you test a movement (like a squat) before and after performing soft tissue work to determine if there was any significant change. A useful way to do this is between warm up sets.

So I Understand That the Benefits of Foam Rolling Are Relatively Short Lived, but Can Foam Rolling Help Achieve Long-Term Improvements in Tissue and Movement Quality?

Yes!

That is where loaded movements come in. During the window following foam rolling, it is important to load the movement that you are trying to improve. This is why I recommend performing soft tissue work between your warm up sets.

It will allow you to test/retest as well as gradually load the movement, given you are gradually increasing load with each warm up set.

Take a squat for example.

You feel tightness and restriction in your hips halfway into the descent of your squat. You test and retest your squat and notice you are able to squat deeper and with less tightness. As you load the squat and work up to your working/heavier sets, this newly achieved movement pattern will be trained.

Training this movement with loads will, over time, lead to long term improvements in tissue and movement quality.2,8   Foam rolling can also be a great way to kick-start the recovery process by tapping into the parasympathetic nervous system, but that’s for a different article.

So do not fall victim to the latest trend or claims from gurus. I hope this helps shed some light on what foam rolling is, what it isn’t, how it works, and how to implement it into your training routine.

Let’s roll!

Author’s Bio

Dr. Nicholas M. Licameli, PT, DPT

Nick’s passion lies between his love for the journey of bodybuilding, education, spreading happiness, and helping others. He views bodybuilding through the eyes of a physical therapist and physical therapy through the eyes of a bodybuilder. Nick is a doctor of physical therapy and professional natural bodybuilder. He graduated summa cum laude from Ramapo College of New Jersey with his bachelor’s degree in biology, then furthered his education by completing his doctoral degree in physical therapy from Rutgers School of Biomedical and Health Sciences (previously the University of Medicine and Dentistry of New Jersey) at the age of 24. His knowledge of sport and exercise biomechanics, movement quality, and the practical application of research combined with personal experience in bodybuilding and nutrition allows him to help people in truly unique ways. Passion. Respect. Humility.

References

  1. Andersen, L. L., Jay, K., Andersen, C. H., Jakobsen, M. D., Sundstrup, E., Topp, R., & Behm, D. G. (2013). Acute effects of massage or active exercise in relieving muscle soreness: Randomized controlled trial. The Journal of Strength & Conditioning Research, 27(12), 3352-3359.[PubMed]
  2. “Andrew Vigotsky: Foam Rolling”. Iraki Nutrition Podcast. N.p., 2016. Web. 22 May 2016.
  1. Beardsley, Chris, and Andrew Vigotsky. “Foam rolling and self-myofascial release. “www.strengthandconditioningresearch.com. N.p., n.d. Web 19 Sept. 2016. https://www.strengthandconditioningresearch.com/foam-rolling-self-myofascial-release/
  2. Chaudhry, H., Schleip, R., Ji, Z., Bukiet, B., Maney, M., & Findley, T. (2008). Three-dimensional mathematical model for deformation of human fasciae in manual therapy. JAOA: Journal of the American Osteopathic Association, 108(8), 379-390.[PubMed]
  3. Chaudhry, H., Bukiet, B., Ji, Z., Stecco, A., & Findley, T. W. (2014). Deformations experienced in the human skin, adipose tissue, and fascia in osteopathic manipulative medicine. Journal of the American Osteopathic Association, 114(10), 780-787.[PubMed]
  4. Goats, G. C. (1994). Massage–the scientific basis of an ancient art: Part 2. Physiological and therapeutic effects. British Journal of Sports Medicine, 28(3), 153-156.[PubMed]
  5. MacDonald G., Penney M., Mullaley M., Cuconato A., Drake C., Behm D.G., Button D.C. An acute bout of self myofascial release increases range of motion without a subsequent decrease in neuromuscular performance. J of Strength Cond Res. 2012. (published ahead of print).
  1. “Mobility Myths With Dr. Quinn Henoch- Foam Rolling”. JTSstrength.com. N.p., 2016. Web Sept. 2016.
  1. Sullivan, K. M., Silvey, D. B., Button, D. C., & Behm, D. G. (2013). Roller-massager application to the hamstrings increases sit-and-reach range of motion within five to ten seconds without performance impairments.International Journal of Sports Physical Therapy, 8(3), 228.[PubMed]
CategoriesAssessment coaching Corrective Exercise Exercise Technique

The “My Shoulder Hurts” Checklist

“Wha, what was that? Was that him?”

It was 1:30 AM, maybe even 2:17 (it’s always a blur, sucky, and when it’s that late doesn’t it even matter?) as my wife nudged me to see if the baby was alright. I turned over to my left, peeled my eye open just enough to press the button to turn the screen to the monitor on, and indeed it was our newborn, Julian, making his case for one of the two of us to get our asses out of bed and ascertain the situation.

Julian, during one of his non-Gremlin moments

Our little guy passed the 4-week old mark earlier this week and in that time Lisa and I have had a crash course in sleep deprivation training (I’m basically a Navy SEAL by now) in addition to learning baby-speak, or what I like to call “What are you trying to tell me? Please stop crying. I’ll do anything. No, really, anything………”

[Jumps off roof] 

We don’t have much to complain about in the grand scheme of things. Julian has been awesome. Much like any baby in the history of ever, and as any parent in the history of ever knows, when your newborn starts crying it’s indicative of one or two factors to get them to (hopefully) settle back down:

  1. They need a diaper change.
  2. They need to be fed.
  3. They need to be swaddled,
  4. They need their binkie.
  5. They need to be swung or need movement (or maybe they’re overstimulated).
  6. WILDCARD: They need more cowbell.


As time passes you learn to not panic, run through the checklist, and before long you’re a first class baby-calmer-downer.

It’s funny, though.

Since I’ve been neck deep in baby shenanigans the past few weeks it’s been a trip to see how I make connections and correlations between that and stuff I see and come across in my professional life… training and coaching athletes/clients. One of the purest examples is something I witness on an almost weekly basis.

Many of the new people who start with me are beginner or intermediate level meatheads (male and female) who, for whatever reason(s), have been dealing with a pissed off shoulder that inhibits their ability to train at the level or intensity they’d like. It’s frustrating on their end and it’s my job as the coach to try to peel back the onion and see what may or may not be the root cause or causes.

Copyright: staras / 123RF Stock Photo

The “My Shoulder Hurts” Checklist

1) Technique

Most commonly people will note how bench pressing bothers their shoulder(s). Working on their technique is the baby check list equivalent of blow out explosive diarrhea.

I.e., It’s code mother-fucking red.

Following the mantra “if it causes pain, stop doing it” is never a bad call, and I am all for nixing any exercise or drill that does such a thing. However, I don’t like to jump to conclusions too too quickly. Sometimes making a few minor adjustments to someone’s technique or setup can make all the difference in the world.

Almost always I’ll have to spend some time on their set-up. I like to cue people to start in a bridge position to drive their upper traps into the bench and to set their scapulae (together AND down).

We can make arguments as to what this is actually doing. Some will gravitate towards it improving joint centration. Cool (and not wrong). I like to keep a little simpler and note that all it really does is improve stability.

Stability = strength

Another thing to note is many people tend to flare their elbows out too much when they bench which leaves the shoulders out to dry and in a vulnerable position.


MINOR NOTE: Since recording that video above (two years ago), I have since changed my views slightly thanks to some cueing from Cressey Sports Performance coach Tony Bonvechio. Elbows tucked on the way down is still something I’m after (albeit some are too aggressive at the expense of placing too much valgus stress on the elbows). However, when initiating the press motion, in concert with leg drive, allowing the elbows to flare out a teeny tiny bit (in an effort to keep the joints stacked and to place the triceps in a more mechanical advantage) will often play huge dividends in performance.

In the end, much of the time it comes down to people not paying any attention to how crucial their set-up is. It’s amazing how often shoulder pain dissipates or disappears altogether with just a few minor adjustments.

2) What People Don’t Want to Hear: Stop Benching, Bro

This is where the Apocalypse begins. Telling a guy (usually not women, they could care less) that he should probably stop benching for the foreseeable future is analogous to telling Donald Trump he can’t Tweet.

The thing about holding a barbell is that it “locks” the glenohumeral joint into internal rotation which can be problematic for a lot of people and often feeds into impingement syndrome.

[The rotator cuff muscles become “impinged” due to a narrowing of the acromion space.]

NOTE: I hate the term “shoulder impingement” because it doesn’t really tell you anything. There are any number of reasons why someone may be impinged. Not to mention there are vast differences between External Impingement and Internal Impingement….which you can read about in more detail HERE.

If bench pressing hurts, and we’ve tried to address technique, I’ll often tell them to OMIT barbell pressing in lieu of using dumbbells instead. With DBs we can utilize a neutral grip, externally rotate the shoulders a bit more, and open up the acromion space.

Or, maybe they can still barbell press, albeit at a decline. When you place the torso at a decline the arms can’t go into as much shoulder flexion and you’re then able to avoid the “danger zone.”

Something else to consider is maybe pressing off a foam roller. Sure, you won’t be able to use as much weight, but as Dr. Joel Seedman explains in the video below you’ll be able to work on better joint centration AND the scapulae can actually move (an important variable discussed more below).


If all else fails, sadly, you may have to be the bearer of bad news and tell someone that (s)he needs to stop benching for a few weeks to allow things to settle down.

3) Let the Scaps Move, Yo

Above I mentioned the importance to bringing the shoulder blades together and down in an effort to improve stability.

If you want to lift heavy shit, you need to learn to appreciate the importance of getting and maintaining tension. That said, if lifting heavy shit hurts your shit, we may need to take the opposite approach. Meaning: maybe we just need to get your shoulder blades moving.

When the scaps are “glued” together and unable to go through their normal ROM it can have ramifications with shoulder health. Push-ups are a wonderful anecdote here.

Unlike the bench press – an open-chain exercise – the push-up is a closed-chain exercise (hands don’t move) which lends itself to several advantages – namely scapular movement.


4) More Rows

This one will be short and sweet. Perform more rows. Many trainees tend to be very anterior dominant and spend an inordinate amount of time training their “mirror muscles” at the expense of ignoring their backside. This can lead to muscular imbalances and postural issues.

This makes me sad. And, when it happens, a kitten becomes homeless.

You sick bastard.

The easy fix is to follow this simple rule: For every pressing motion you put into your program, perform 2-3 ROWING movements. Any row, I don’t care.4


5) Address Scapular Positioning

I’m going to toss out an arbitrary number and I have no research to back this up, but 99% of the time when someone comes in complaining of rotator cuff or shoulder issues the culprit is usually faulty scapular mechanics. Sometimes people DO need a little more TLC and we may need to go down the “corrective exercise” rabbit hole.

The scapulae perform many tasks:

  • Upwardly and downwardly rotate
  • Externally and internally rotate
  • Anteriorly and posteriorly tilt.
  • AB and ADDuct (retract and protract).
  • Will clean and fold your laundry too!


They do a lot. And for a plethora of reasons, if they’re not moving optimally it can cause a shoulder ouchie. Sometimes people are too “shruggy” (upper trap dominant) with overhead movements, or maybe they’re stuck in downward rotation? Maybe they can’t protract enough and need more serratus work? Maybe they lack eccentric control and need a heavy dose of low trap correctives?

It dumbfounds me the number of times I have had people come in to see me explaining how they had been to this person and that person and NO ONE took the time to look at how their shoulder blades move.

I don’t like to get too corrective too soon (as I prefer to not make my clients feel like a patient), but if I’ve exhausted all of the above and stuff still hurts….it’s time to dig deeper.

If only there were a resource that dives into this topic in a more thorough fashion.

Hmmmm…………..Sha-ZAM.

CategoriesAssessment coaching Corrective Exercise Exercise Technique

Porcelain Post: The Birddog Exercise: Please, Start Coaching It Right

NOTE: the term “Porcelain Post” first came to fruition last year between Brian Patrick Murphy and Pete Dupuis. Without getting into the specifics, it describes a post that can be read in the same time it takes you to go #2.

Huh, I guess that was more specific than I thought.

Enjoy.

Copyright: fizkes / 123RF Stock Photo


The Birddog Exercise: Please, Start Coaching It Right

The birddog exercise is a common drill used in many components of health/fitness. It’s most commonly utilized within yoga/pilates circles and referred to as either the donkey kick or chakaravakasana. Which, as we all know, is Elvish for, “doing something poorly and making my corneas jump out of their sockets into a fiery volcano.”

Okay, that’s not true.

But we all know that the bulk of people performing this exercise, whether they’re in a yoga class, performing it on their own, or following the tutelage of a strength coach or personal trainer, end up looking like this (not always, but enough to warrant an intervention in the form of this brief post):

Copyright: fizkes / 123RF Stock Photo

The birddog exercise not only targets the back, but also the hip extensors. It also, and more importantly, teaches the discipline of using proper hip and shoulder motion while maintaining a stable spine.

The picture shown above is the complete opposite of that. What we see instead is a gross exaggeration of lumbar (lower back) extension and a lengthening of the rectus abdominus compounded with excessive rib flare and cervical extension.

Essentially this person is tossing up a ginormous middle finger to any semblance of spinal stability.

Now, in fairness, maybe the woman pictured above was coached into that position for a specific reason:

  • Prepping for the World “How to Eff Up Your Back” Championships?
  • Because it’s Wednesday?

I don’t know the true details. Maybe I should lighten up.5 But what I do know is that I find little benefit in performing the birddog, and it’s likely doing more harm than good.

And when I see it performed this way it makes me do this:

via GIPHY


Lets Clean Things Up, Shall We?

What’s most frustrating is the reactions I get from some people when I ask them to perform the birddog. I’ll get someone coming in with a history of low-back pain, and after taking them through a series of screens to see what exacerbates their symptoms I’ll then have them demonstrate this exercise.

What follows is typically a few eye-rolls and a seemingly crescendo of “come on Tony, really? I’ve been doing this exercise all along, can we please turn the page?” 

Low and behold 9/10 (if not 10/10), the same person who has been complaining of weeks/months/years of low back pain in addition to a bevy of other fitness professionals espousing the merits of the birddog, when asked to demonstrate it, ends up looking exactly like the second picture above.

Case in point. I had an eval with a new female client last week. She was a referral from another trainer located here in the Boston area and she informed me that this client had been battling some chronic low-back shenanigans for the past few years. To the other trainer’s credit: much of what she had been doing with this client was spot on (and I have zero doubts this client was coached very well). However, the birddog lends itself to be one of those “hum-drum, don’t worry, I got this” exercises where people (I.e., the client), when left to their own devices, becomes complacent and lackadaisical in its execution.

Play close attention to the before and after videos below:

The birddog exercise is a well known exercise to help build core strength/endurance and spinal integrity, and many people do it very poorly. It’s one of those exercises that gets the “yeah, yeah, I already know how to do that one” treatment because it looks so simple and easy. Here’s a new client that came in yesterday for an eval and described a long history of chronic back pain. She actually presented with both flexion & extension intolerance. Sucks. I asked her to show me her birddog because she mentioned she had been performing it all along (top video). I wanted to swallow a live grenade. It wasn’t a great looking exercise. She’d fall into an excessive arch on every rep more or less “feeding” her symptoms. So I took a few minutes and coached her up to clean up the pattern. I got her to find “spine neutral” and cued her to instead of thinking about raising her back (moving) leg UP, to move it BACK instead. To help with this I also had her place her foot on a ValSlide so as she extended her leg back she couldn’t arch through her lower back (sorry my video taking skills sucked here and I didn’t show the ValSlide. I promise it’s there though). Once there, and her leg was fully extended, I had her ever so slightly lift her foot off the slide an inch or two (not much) and then “own” the position for a few seconds. As you can see a HUGE improvement. Talking the time to coach your clients up, even on the seemingly “easy” exercises can make all the difference. I suspect we’ll be able to accomplish a lot in the near future.

A post shared by Tony Gentilcore (@tonygentilcore) on


Before = her execution of the exercise was “feeding” into her symptoms and most likely resulted in a kitten dying.

After = ticker tape parade for coaching!

With a just a few subtle cues and a “molding” of the exercise to better fit her current ability level, we were able to significantly clean up her technique and the exercise not only felt more challenging, but she felt better.

  • The difference maker was placing a ValSlide underneath her moving leg so that she’d be less likely to fall into extension.
  • From there, with the leg fully straight, I then had her lift her foot off the ground an inch or two and then “OWN” the movement/position.
  • She then held for a 3-5s count, performed 3-5 repetitions per side, and we then fist pumped to some Tiesto.

Coaching oftentimes involves paying closer attention to the details, even with the more mundane exercise that we often take for granted. With the birddog it often behooves us to slow people down, get a little more hands on with them (provide more kinesthetic awareness), and hold then accountable to be SPOT ON with their technique each and every rep.

This is what separates correctives and programs that work (and serve a purpose) and those that lead to less than exemplary results due to haphazard execution.

CategoriesAssessment coaching Corrective Exercise Exercise Technique

My Go To Squat Progression For Pretty Much Everyone

Teaching a beginner how to squat well can be challenging. There’s no denying there are a lot of moving parts that can derail our best efforts to do so.

Copyright: rawpixel / 123RF Stock Photo


My intention of this quick-n-dirty post isn’t to break down the squat in its entirety. For that I’d encourage you to check out Greg Nuckols’ How to Squat: The Definitive Guide.

It’s basically the War and Peace of squat biomechanics and technique. Except, you know, not written by a Russian.

Instead, my goal today is to hammer home a few candid points when working with beginners on their squatting technique.

1. “Beginners” in this sense could mean a 13 year old who’s never touched a weight or a 57 year old who’s had a few decade hiatus. And everything in between. Male, female, athletes, non-athletes, centaurs, you name it.

2. The squat is a basic human movement pattern. Unfortunately, in today’s world, we don’t move as much as we used to, and subsequently many struggle with the movement. Oftentimes one’s only source of physical activity is if or when they get their butts to the gym.

And even if they do that, there’s no guarantee they exercise in a range of motion below a certain degree of hip flexion.

There’s truth to the common phrase “if you don’t use it, you lose it.”

This isn’t to insinuate that everyone has to squat to a certain level or that you’ll lose some street cred if you happen to not squat ass-to-grass. As I’ve repeatedly stated on this blog everyone is different (leverages, anthropometry) and it’s silly, nay, fucking moronic to think everyone has to squat deep.

So whenever I work with a beginner or someone coming off a significant injury it’s on me – the coach – to take the time to groove a solid squat pattern.

This rarely (if ever) involves placing a barbell on someone’s back on Day #1.

Why?

  • Because I said so….;o)
  • Many people lack the requisite t-spine (extension) and shoulder mobility (abduction/external rotation) to hold a barbell in that position without it feeling weird of wonky.
  • Many lack the kinesthetic awareness to sit back (and down) in a fashion that emulates a squat.
  • There’s no Golden Rule that we have to load people right away.
  • I’m more concerned with teaching proper position.

It’s that last point – teaching proper position – that’s a game changer in my eyes. You see, many people tend to “sit” in a state of perpetual (excessive) extension where their pelvis tilts forward, otherwise known as anterior pelvic tilt (APT)

To be clear: APT is not bad or wrong or needs to be fixed. It’s normal. However, when it’s excessive it not only places more strain on the spine (particularly the facet joints), but it also leads to poor alignment where the diaphragm and pelvic floor point in different directions.

Within PRI (Postural Restoration Institute) circles (<— total nerd fest) this is called the “Scissor Position.” What we’d like to strive for is what’s known as the “Canister Position,” where the diaphragm and pelvic floor are aligned or stacked on top of another.

Another way to think of it, is something I stole from Dr. Evan Osar.

“Think of your pelvis as one ring and your rib cage as a bunch of more rings. What you want is to stack those rings on top of one another.”

Mike Robertson is also a fan of this approach and even goes a step further and notes the importance of reaching, and how that can have a positive effect on one’s overall positioning. When we “reach” we nudge ourselves into a little more posterior pelvic tilt (back to “neutral”) and we then achieve proper diaphragm/pelvic floor alignment. Bada bing, bada boom.

If all of that comes across as me speaking Elvish, watch this video.

Plate Loaded Front Squat


The plate loaded front squat is now my “go to” squat progression when working with beginners. It’s something I’ve used for years for a few reasons:

1. The plate serves a counterbalance as one squats down towards the floor helping them to learn proper torso positioning and balance. It’s makes things infinitely easier with regards to sitting back & down into a squat.

2. Pressing the plate out front also helps to better engage the anterior core musculature. This is so crucial. I can’t tell you how many times people have come in for an assessment telling me stories of trainer upon trainer telling them how “tight” they are because they couldn’t squat past parallel. Prior to coming to me they had spent years, years stretching and working on any number of hip mobility drills.

Thing is: they weren’t tight. People rarely are. Or, at least it’s rarely ever that cut and dry (tight vs. not tight). In reality most are weak and unstable. For many, their nervous system is putting on the brakes because it perceives a lack stability. By having trainees press the plate out front it automatically forces the core to fire – thus providing more stability. And miraculously they’re able to squat deeper.

And I come across as the next Professor Dumbledore.

Moreover, it was Mike Robertson who pointed out to me the added benefit of the plate loaded front squat. The “reach” results in better diaphragm and pelvic floor alignment.

It teaches people context, and to own the “canister” position (preventing the ribs from flaring out). That way, when they progress to barbell variations, they’ll have a better understanding of what we’re after and what will (in all likelihood) allow them to perform at a higher level for longer periods of time reducing the risk of injury.

Want More Mike Robertson Nuggets of Programming Badassery?

Physical Preparation on Sale

I owe much of my programming savvy to Mike Robertson. It’s little nuggets of wisdom (as demonstrated above) that helps to separate him from the masses. I’ve always enjoyed his approach and way of explaining things. There aren’t many coaches who have the innate ability to take complex topics and “dumb them down” for the masses (like myself).

His excellent resource, Physical Preparation 101 is currently on sale at $100 off the regular price from now through this Friday (2/10).

It’s basically his entire philosophy on program design. 12 DVDs of Mike Robertson knowledge bombs. I have zero doubts the money you invest in this will pay for itself tenfold in client retention.

Do yourself a favor, go HERE and thank me later.

CategoriesCorrective Exercise Exercise Technique

The Missing Link: Changing Body Positions Could Spark Your Gains

Today’s guest post comes courtesy of Texas-based personal trainer Shane McLean. Shane’s a regular contributor on this site so you know his stuff is top-notch and will be applicable to many of you reading.

Enjoy!

Copyright: siraphol / 123RF Stock Photo


When you were a baby (a long time ago for some) you loved lying on the floor and staring up at the world above.

If you wanted to go anywhere or were hungry, all you needed to do was cry and wail until your slaves came running to meet your every need. Life was so much simpler back then.

However, getting back on the floor and lifting, no matter how old you are, can spark new gains, work around niggling injuries and work muscles that you never knew existed.

Because lifting is not all about standing in front of the mirror to curl and grunt to your heart’s content. Yes, that means you excessive gym-grunter guy.


Let’s cover exercising from supine, tall kneeling and half kneeling positions and how lifting from those could be the missing link that’s needed to spark new gains.

Supine

This is lying on your back while facing upwards, like when you were a baby. We often lie supine after collapsing after a hard set or when you see someone on the floor crunching like a bat out of hell.

Please leave the crunching to the monkeys.

https://www.youtube.com/watch?v=0tBOcFT1oTQ


However, lying and lifting from the floor can be a great core and upper builder as evidenced by the single arm floor press.

Single Arm Floor Press


This pressing variation will turn on your core and shoulder stabilizers due to the offset load that gets neglected during bilateral bench/overhead pressing. It’s also a shoulder saver because it eliminates the lower half of the press where the shoulder is externally rotated and where nasty things like shoulder impingements can happen.

If you want to take this up a notch and improve your numbers on the barbell bench press, try the barbell floor press. This improves your lockout strength as you receive no help from the bench or your lower body while pressing from the floor.

Barbell Floor Press


Let’s not forget about the back and shoulders which also play a part in pulling heavy from the floor, pushing heavy off the chest and giving you a great looking back that your friends will envy.

Check out this cool variation from Jordan Syatt that does all of this and more.

Pullover with Reactive Floor Press


Work your legs while you’re down there with the stability ball hip extension/hamstring curl. This exercise trains the hamstrings as a hip extensor and a knee flexor, which are its two major functions.

You’ll get more bang for your hamstring buck and they will love you for it afterwards, trust me. J

Stability Ball Hip Ext. /Hamstring Curl


This is great exercise for runners because the instability of the ball during the curl portion mimics the unevenness of the road while running, proving the stability ball is not a completely useless piece of equipment.

Tall Kneeling

 The tall kneeling position looks like this.

Photo courtesy of FunctionalMovement.com

The toes on the ground, knees underneath hips and the core, pelvis and glutes all turned on. This is the position that babies step up to after crawling on all fours to determine whether they have the balance to start standing up.

For the rest of us, the tall kneeling position will help with posture and balance because if anything is not working as it should, our pretty face will head towards the floor and none of us want that.

You should use this position if you lack glute strength or have poor posture or non-existent balance. If you cannot do an exercise in the tall kneeling position, chances are you won’t be able to do it standing without some sort of compensation.

If that sounds like you or you need a new lifting challenge, consider taking these exercises out for a test run. Your glutes will be pleased.

Bench Kneeling Overhead Press


If anything is off with your overhead pressing mechanics, this exercise will pick it up, if somewhat brutally.

You can regress this exercise by kneeling on the floor and using dumbbells because an appearance on America’s Funniest Home Video show can wait.

Tall Kneeling Lat Pulldown


This pulling variation is great for developing core stability and training the entire backside of the body. This is exercise is outstanding for people who are yet to do their first chin up as it simulates the core strength necessary to pull yourself up over the bar without any extra compensation.

Sorry CrossFit, this is a no kipping zone. Please don’t sue me.

He will be missed

Tall Kneeling Pallof Press


Pallof press is a great stand-alone exercise but adding some tall kneeling into the equation takes a great lateral core stability, anti-rotation exercise to the next level. You’ll be a core badass.

Half Kneeling

The half kneeling hip flexor stretch is usually the go-to stretch to open up our hip flexors which are always tight but that’s an article in itself, so let’s leave that alone and lift from here instead.

Lifting in the half kneeling position has many benefits. By lowering our center of mass we can move our hips and shoulders without too much compensation from the pelvis/lower back, which is godsend if you’re a suffer of low back pain.

With the narrower base of support, you’ll receive extra core stability and glute activation benefits, too. So doesn’t it make perfect sense to lift from this position? I knew you would see it my way. J

So kneel, lift and be great with these half kneeling exercise variations.

Half Kneeling Lat Pulldown


The 45-degree angle of this variation makes it more shoulder friendly than other vertical pulling exercises, so if shoulder mobility is a problem for you this exercise is perfect.

Half Kneeling KB Bottoms Up Press


Holding the Kettlebell bottoms up creates more tension in the arm through a process called irradiation. This gives you more strength and stability in the shoulder region which makes this a great exercise for people with shoulder issues or for those who want a break from barbell/dumbbell overhead presses.

Half-Kneeling Med Ball Rotational Throw


A common error with med ball throwing is gym goers using other parts of their body like the low back to create extra power, which is a big no-no. However, throwing in half kneeling position reduces this compensation and increases the reliance of the hips and core, which are the muscles needed for rotational power.

Wrapping Up

Whether you’re returning from long layoff, working around niggling injuries or you’re wanting to spice things up to spark your gains, getting back on the floor could be just what you need.

However, please don’t cry. You’re an adult now.

About the Author

Shane “The Balance Guy” McLean, is an A.C.E Certified Personal Trainer working deep in the heart of Texas. Shane believes in balancing exercise with life while putting the fun back into both.

CategoriesCorrective Exercise Exercises You Should Be Doing

Exercises You Should Be Doing: Prone Hip Flexion-Extension

Admittedly today’s Exercise You Should Be Doing won’t win a “sexiness” award like, say, pretty much any deadlift variation would, or maybe a pistol squat6, or pillow-fighting. Truth be told it’s a relatively unexciting, mundane looking exercise, but whoa Nelly! does it humble even the meatiest of meatheads.

But first pillow fighting.

Copyright: dgm / 123RF Stock Photo


Don’t knock it: pillow fighting is an excellent way to address core stability, primitive patterns, appropriate scapular upward rotation, basic combat skills, (and every teenage boy’s fantasy).

Okay, in all seriousness…lets get to today’s exercise

Prone (Val Slide) Hip Flexion-Extension


Who Did I Steal It From: this exercise has its roots in many arenas, but the person I need to give the most credit to is strength coach Dan Hechler. I saw him use this exercise with a client of his a few weeks ago and really liked it.

UPDATE: Dan actually refers to this exercise as a glorified Mt. Climber. I need to figure out a catchy name for this one other than the one I gave it. I’m so lame.

Sliding Mt. Climber?

Mt. Climber McSuckington?

I don’t know, I’m lame.

What Does It Do: It’s challenging to pin-point what, exactly, I like most about this exercise. Of course most long-time readers know I’m a huge fan of push-ups. Yeah, yeah there’s that whole broken record diatribe on improving lumbo-pelvic-hip control and how I feel that’s one of the main advantages.

It still is.

However, what I also love about push-ups is their ability to allow people to reach. Meaning, pushing into the ground (reaching) to promote 1) better scapular movement and 2) more of a canister position so that the diaphragm and pelvic floor are more in line with one another. Promoting a position of alignment/stability is almost always going to allow people to express better movement and strength.

As you can see, we’re not performing a standard push-up with this exercise. Instead, there are a few other components at work.

1. We’re adding hip flexion-extension. The idea here is to work both hip flexion and extension simultaneously so that we can learn to dissociate hip movement from lumbar movement.

2. We’re adding in a full EXHALE. As a bring one leg into hip flexion I’m pushing/reaching into the floor as best I can while also performing a full exhale (which will help to maintain the canister position mentioned above).

Key Coaching Cues: Some cues I gave away above. Assume a strict push-up position with both feet on a pair of Val Slides or standard furniture gliders or even a slideboard. There should be no excessive forward head posture or lumbar extension (hips sagging). Inhale and as you bring one knee towards your chest, push into the ground with your hands and slowly exhale. The idea is to maintain a strict torso position and to limit any lumbar movement. Return back to starting position, again, controlled, and repeat.

I like to perform 3-4 reps per side.

This would be a fantastic progression for those clients with chronic low-back issues once they have conquered the plank. But I also like to use it with my “healthy” clients too as a way to make them hate life for a few seconds.