CategoriesAssessment coaching Exercise Technique

Textbook Technique and Why it Doesn’t Exist

It’s not lost on me that the title of this post will raise some eyebrows. The title shouldn’t be taken too literally, because I do feel there are ideal approaches, methodologies, and “rules” to consider when coaching any lift in the weight room.

That said, when it comes to exercise technique (or human movement in general) why are textbooks the metric at which we compare everything?

Textbooks provide context, information, and sometimes make for handy coffee table improvers.

However, we don’t live in textbooks. What a squat, sprint, overhead press (or hell, even a carrot cake) looks like in a textbook can (and usually is) a stark contrast from what is emulated in real life.

Copyright: <a href='http://www.123rf.com/profile_spotpoint74'>spotpoint74 / 123RF Stock Photo</a>
Copyright: spotpoint74 / 123RF Stock Photo

Textbook Technique & Why It Doesn’t Exist

I do believe there are some universal tenets to coaching a deadlift or squat or bench press or kettlebell swing1 that will not only allow a client or athlete to marinate in its benefits, but to do so in a fashion that won’t increase their likelihood of injury (or their contributions to their physical therapist’s mortgage payments).

I’m interested in making people savages, but I’m also interested in the long-game. It wouldn’t bode well for business (or my reputation) if all of my client’s deadlifts looked like this:

To that end, with regards to universal tenets for deadlifting:

  • Loaded spinal flexion is a no-no.
  • That’s pretty much it.

If you’re following that one golden rule, you’re doing a better job than most. It’s sad, but true.

However, golden rule(s) aside, there are many intricate, more nuanced things to consider person to person. One’s training experience comes to mind. We can’t hold someone holding a barbell in their hands for the first time to the same standard as someone who’s been a competitive powerlifter for 17 years.

Likewise, someone with a vast and delicate history of lower back issues is not going to take the same path as someone with a “clean” health history. And, of course, other factors come into play such as goal(s), movement quality, favorite color, and anatomical/structural differences between individuals.

Someone with hips like this…
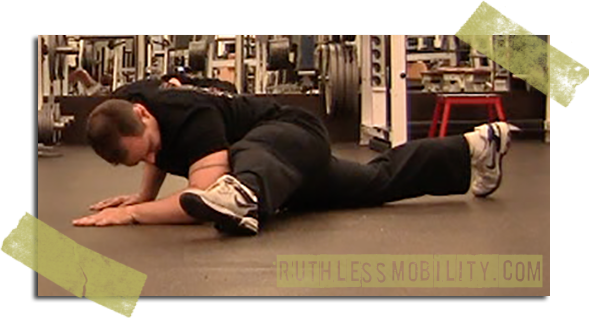
…is going to move differently – and presumably be coached differently – than someone with hips like this:

There are many, many fantastic resources out there that help to break down anatomy, assessment, biomechanics, joint positions, and what’s considered ideal exercise technique. I have my biases as to what I feel is correct – as does everyone – but it’s important to take every resource with a grain of salt, because…

“Textbook technique only exists in a textbook.”

When I heard Mike Reinold say this sentence years ago my immediate reaction was this:

via GIPHY

My second reaction was to start doing handstands down the sidewalk outside my apartment, but I didn’t.

You know, cause that’s fucking weird.

And because I can’t do a handstand.

Either way, what Mike said was/is 100% correct.

Textbook technique, in the real world, is every bit as much of a myth as detox diets making you pee rainbows or me riding a Dire wolf to work today

What we read or deem as “ideal” on paper, while often a great starting point for many people, doesn’t always translate to real-life. As coaches it’s important to understand this. Anytime we corner ourselves into one-train of thought or that any one thing applies to everybody, we’re doing the industry – and our clients/athletes – a disservice.

A Real-Life Example

A few months ago I started working with a woman who had been battling some low-back issues, yet wanted to hire me to take over her programming and help clean up her technique.

Specifically she wanted to hone in on her deadlift.

She was frustrated because no matter what she did (or who she worked with), her back always bothered her.

I like to be a fly on the wall and just watch people do their thing during an initial consult. I want to see what their default movement schemes are. In this case I set up a barbell on the floor, loaded it up with a weight I knew she could handle safely, and then asked her to do her thing. Her “default” stance was a conventional stance, and while it wasn’t the worst one I had ever seen, I could clearly see why her back may have been bothering her.

We had established earlier in her assessment that she lacked t-spine extension and her hip mobility wasn’t great either.

More to the point, after doing a simple hip scour and Rockback test, I surmised she was able to attain more hip flexion ROM with more hip abduction. An important point, as you’ll soon see.

Note: the Rockback test is a great assessment to use to figure out one’s “usable” ROM in hip flexion. The idea is to see if or when the lumbar spine loses positioning.

Bad Rockback Test

Notice when spine loses position.


Dead Sexy Rockback Test

Notice the spine stays relatively “neutral” throughout. Also, notice those triceps.


We can then compare what we see here with what we see on the gym floor.2

Going back to my client, she read a lot of articles and books on deadlifting, most of which told her that deadlifting = conventional stance. Always. Moreover, other coaches/colleagues she had consulted with in the past told her to use the conventional stance.

No exceptions.

This is what I mean by falling into the “textbook technique” trap. On paper everything sounds (and looks) great. Everyone can and should be able to conventional deadlift.

In real-life, though…not so much.

Here’s a before and after picture I took of my client. The top picture shows her original set-up with a conventional stance. The bottom demonstrates me putting her into a modified sumo stance.

sarah-z-deadlift

Immediate improvement in her lower & upper spine position. Having her adopt a wider stance better complimented her anatomy, which then resulted in an infinitely better starting position to pull (no lumbar flexion, improved t-spine extension).

What’s more, with that modification alone she noted there was zero pain.

She left that session feeling motivated and hopeful about training. A win-win if you ask me.

I posted the above picture on some social media accounts – explaining much of what I mentioned above. And wouldn’t you know it: I was called out by a handful of coaches.

One stated the problem wasn’t with her anatomy, but that the real issue was my poor coaching. A funny assertion given he wasn’t in the room with me. Another coach agreed stating something to the effect of:

“No client has walked into “x gym” and not have been able to perform a conventional deadlift after a little coaching on day #1.”

I guess all I could have done at the time was to just go fuck myself.

I demonstrated I was able to clean up someone’s deadlift and do so in a way that was pain-free, and yet, here I was being told by a crew of All-Star coaches I had failed because I didn’t have her conventional deadlift. My actions, apparently, were on par with drop kicking a baby seal in the mouth.

Pump the Brakes

I hope people can appreciate the narrow-mindedness of this type of thinking. To expect everyone to fit into the same scheme or way of doing things because that’s what YOU prefer to do (or because a textbook told you to do so) is about as narrow-minded as it comes.

No one has to conventional deadlift.

Likewise…

No one has to low-bar squat or squat with a symmetrical stance.

No one has to bench press or bench press with an aggressive lumbar arch.

And no one has to start watching Severence on Apple TV. Except, yes you do.

I’d argue a “good” coach understands and respects that everyone is different, and that he or she will be humble enough to put their own personal biases in their back pocket and appreciate there is no ONE way to perform any exercise.

Cater the lift to the lifter, and not vice versa.
CategoriesExercise Technique Strength Training

The Bar Every Gym Should Have: Safety Squat Bar

When Dean Somerset & I created the Complete Shoulder & Hip Blueprint and the (Even More) Complete Shoulder and Hip Blueprint (both currently on sale for the next 72 hours at 40% off their regular price…wink wink, nudge nudge) our goal was to provide a resource for people to better connect the dots between assessment and performance

Too, it was to champion the idea that strength is corrective. It’s rarely necessary to send someone off to corrective exercise purgatory when their shoulder or hip is acting up. While it’s inevitable a swath of time & effort may have to be dedicated to proper breathing mechanics or improving scapular upward rotation, what I have found that often “sticks” the most and provides a greater “buy in” to rehabbing an injury…

…is to make rehab look and feel more like training.

Much of the time the “fix” is a matter tempering one’s training volume (most people are simply doing too much of something) or adjusting a specific exercise – stance, ROM, tempo – in an effort to better mirror one’s injury history and (current) ability level. <— FYI: Dean & I cover this extensively in CSHB 1.0 and 2.0.

If a part of the body hurts when someone performs an exercise it doesn’t automatically mean we have to cancel the exercise altogether.

Cancelling Nazis (and Birthday clowns)  = good.

Cancelling Squats = whoa, whoa, whoa…pump the brakes a bit.

The Bar Every Gym Should Have

This post is not meant to wax poetic on the back squat.

If you want to do it, cool.

If you don’t, that’s cool too.

No one outside of a competitive powerlifter (and maybe He-Man) HAS to perform a traditional barbell back squat. I think they’re a great option if your goal is to be brutally strong & athletic and you want to build an impressive physique.

They’re a tool in the toolbox.

I will say, however, the back squat (when performed with a straight bar) does tend to eat up a lot of lifters’ shoulders. In fact, I’d go so far as to say that straight bar back squats are more of a shoulder destroyer than the bench press any day.

Yeah, that’s right…I said it.

via GIPHY

I know the barbell back squat provides a degree of  prestige and “street cred,” and I’d be lying if I said there wasn’t a time in my career as a personal trainer & strength coach where I’d ride and die with the statement that everyone, regardless of goal, sport played, or highest Scrabble score should have back squats in their program.

Alas, with age (and experience) comes wisdom.3

That said, I’ve always prided myself in taking a middle-of-the-road approach to most things in the health/fitness industry. I know some coaches who are adamantly PRO back squat and others who are just as adamantly against.

Which brings me to the point of today’s post.

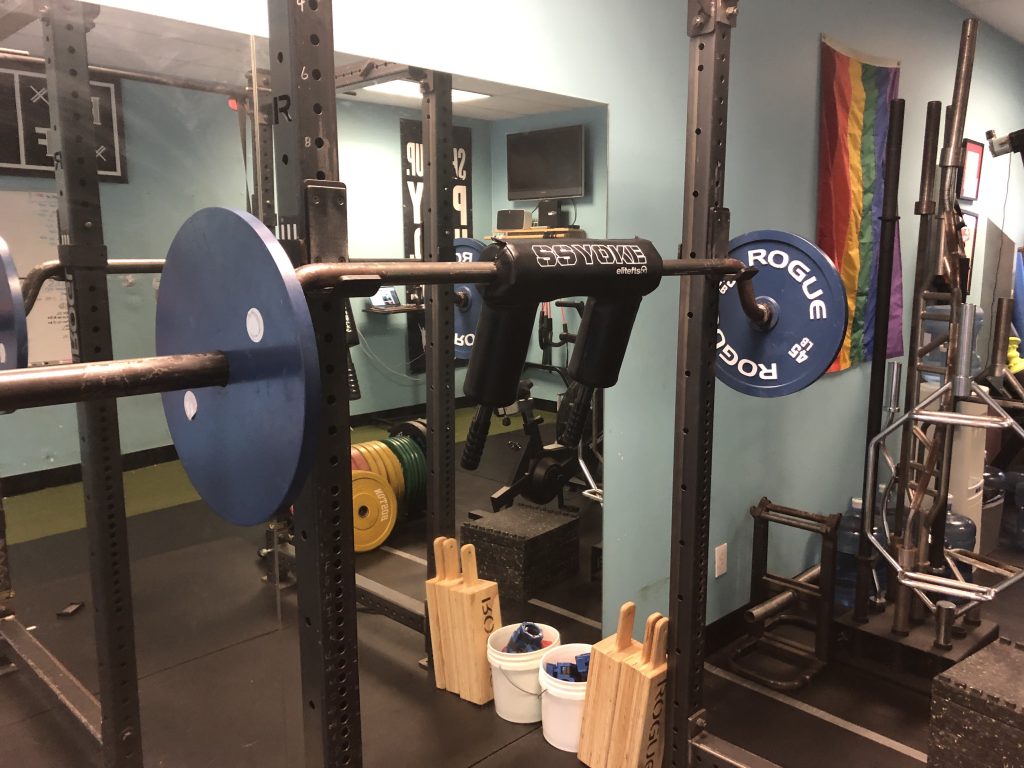
The Safety Squat Bar (also referred to as SSB or Yoke bar), while still technically a back squat, has grown into one of my preferred ways to program (back) squatting into most people’s programs. I also take the stance that it’s a bar that EVERY gym should add to their equipment arsenal.

Why Your Gym Needs an SSB Bar

1. Shoulder Friendly

Back squatting with a straight bar requires a fair bit of shoulder mobility. Many lifters lack the requisite shoulder abduction & external rotation to be able to comfortably rest the barbell on their upper traps (high-bar position) or rear delts (low-bar position).

As alluded to above, part of the appeal for me is that SSB bar coincides very well with my mantra “strength is corrective.’

There’s an element of literal synergy here; the SSB bar still allows someone to lift heavy things. However, the obvious advantage of the bar is its design, and the fact that the handles are located in FRONT of the lifter.

There’s zero shoulder mobility required. To that end, if I am working with someone who’s shoulders don’t handle the straight bar well, I can have them use the SSB bar and continue to TRAIN without irritating the joint.

2. More Upright Torso

There will ALWAYS be a degree of forward lean when squatting. This is not to suggest a more forward leaning position when squatting is inherently wrong or deleterious.

However, back squatting lends itself to more of a forward lean compared to a front squat. As a result, and as a general rule, the more of a forward lean there is, the more “shear” loading will take place on the spine.

Photo Credit: www.PowerliftingTechnique.com

The high(er) bar position with the SSB bar allows for the torso to be more upright (similar to a front squat) and as such a bit more back friendly as well.

Personally speaking, I know when my deadlift volume is high I’ll revert to SSB squats for the bulk of my squatting during that particular phase of training because my lower back will take less of a beating and thank me in the long run.

3. Increased ROM & Upper Back Strength

Pigging back on the above point, because the high(er) bar placement of the SSB bar allows for a more upright torso it’ll also equate to a more robust range of motion for most trainees as well.

In addition, the high(er) bar placement will force the upper back to work overtime because that area needs to work harder to prevent the bar from “rolling” the shoulders over.

So, in effect…we can make the case that the safety squat bar recruits the upper body more (compared to traditional squats).

4. Reneges Upper Body Injuries

The SSB bar does a splendid job at opening up one’s TRAINABLE MENU in lieu of an upper body injury. Lets say you just had surgery on your shoulder and you’re in an arm sling for several weeks. Or, I don’t know, you got in a tickle fight with an Uruk-hai and ended up busting up your wrist.

Both situations make back squatting problematic if not altogether impossible.

Not with an SSB bar, though.

LOL.

You can still train your lower body.

Nice try.

5. Hatfields!

Last but not least, the SSB bar allows you to CRUSH “supported” single-leg training like Hatfield Split Squats.


I’m certain I’m neglecting to think of other cogent benefits, but that’s what I have at the moment. Feel free to forward this post to your local gym’s owner/manager so that you can start incorporating this SSB bar soon!

CategoriesExercise Technique personal training Program Design

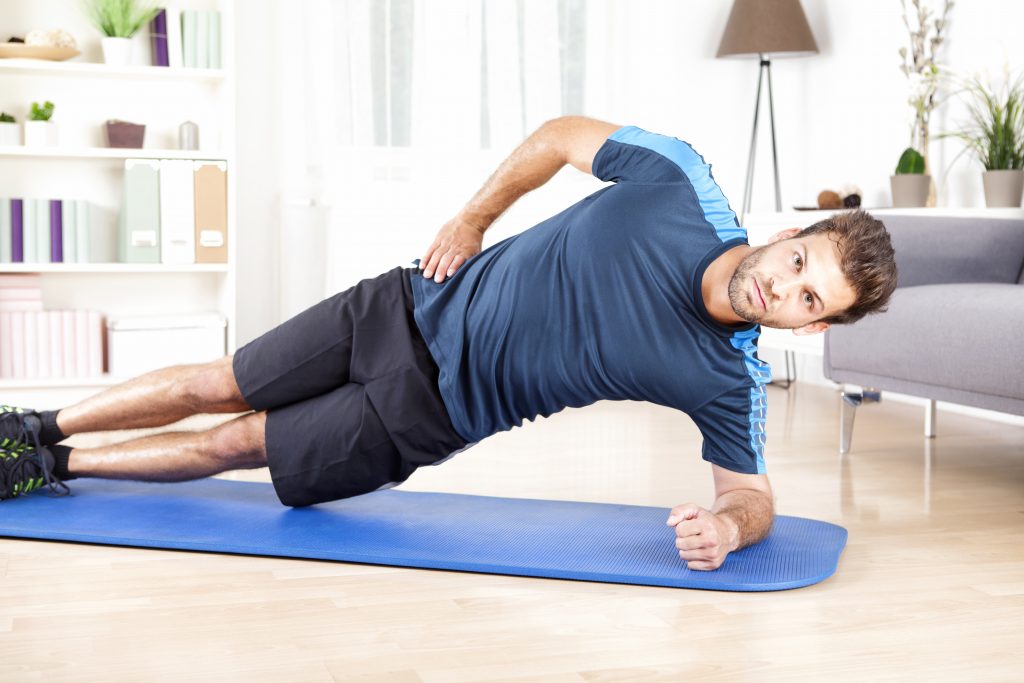
2 Side Plank Drills to Perform That Don’t Have the Words Side Plank In Them

I’m not here to hate on the side plank.

Truth be told: It’s a rare occurrence that I start working with someone and (s)he can perform it well. It’s a staple exercise with myriad benefits in both rehab and traditional strength training to target the core musculature – particularly the obliques.

Too, it’s also no coincidence, thanks to Dr. Stuart McGill, it’s considered one of the “Big 3” with regards to spinal health and working around and managing low-back pain.

When done correctly, the side plank can be a very challenging and worthwhile exercise to include in most programs.

  • Check out THIS article for particulars on common mistakes and how to progress the side plank.
  • Check out THIS article for other plank variations you should consider.
Copyright: Sebastian Gauert

But Seriously, Do These Instead of Side Planks

I find the side plank to be the exercise of choice for lazy trainers. It’s the sort of exercise a shitty trainer will prescribe for their client when there’s 5-10 minutes left in a session and the trainer just wants to run out the clock.

“Okay Hank, we’re going to finish with Side Planks today. Three minute holds per side. Blindfolded. While reciting the Elvish alphabet backwards. Go!”

And then, of course, Hank loses all the perceived benefits of the exercise because his technique has been compromised after 15 seconds.

“Come on Hank, 2 more minutes, keep reciting, Ampa, Anto, Hwesta…”

To be clear: I think everyone should take the time to master the side plank. It’s an important drill. It’s just that after a certain point there’s a rate of diminishing returns.

Personally, if someone can perform it perfectly for a minute per side I’d rather go a head and make the exercise more challenging than force someone to go for longer periods of time.

More to the point, can I just go a head and say it?

The Side Plank is just a boring exercise.

I’d rather spend the same amount of time scooping up my cat’s fur vomit.

To that end, here are two exercises that mirror all the benefits of the Side Plank but don’t make you want to commit seppuku when you actually do them.

1. Chaos March


Take a kettebell and wrap a band around one end. Grab onto the other end and hold it to your side as if you were holding a suitcase.

While maintaining a completely upright posture (no leaning!) march in place and try to keep the kettlebell “quiet.”

Also: In case it wasn’t obvious by lurking at my bookcase in the background: My kid loves puzzles.

Also (Part II): That’s Molly Galbraith’s book, Strong Women Lift Each Other Up, that’s upright and facing the screen.

That wasn’t done on purpose. But it IS a great read and you should check it out.

2. Offset Farmer Hold


1. Grab a Trap (Hex) Bar, or even a standard straight bar, and load one end with a plate.

2. Stand upright.

3. Don’t tip over.4

Even though nothing is moving, I find this drill much more palatable for the bulk of my clients because it simply looks badass.

WU-TANG!

CategoriesExercise Technique

1-Minute Deadlift Tip: Connect the Barbell to Your Lats

Copyright: spotpoint74 / 123RF Stock Photo

Connect the Barbell to Your Lats

Admittedly, this seems a bit strange to say given we have two HANDS to grab onto the barbell with.

However the LATS are a key player in “connecting” us to the barbell during deadlifts. It ensures more full-body tension, but also hands (👈 HA, see what I did there?) us a slight biomechanical advantage via scapular posterior tilt.

Hey…every little bit helps!

Ensuring the lats are engaged also helps with preventing the barbell from drifting away from the body. Not only does this make things harder from a leverage standpoint, it can be injurious to the back as well.

Telling some people to turn on their lats is akin to speaking Elvish, though.

I’ve found two things that help.

1️⃣ The ever popular “squeeze the oranges in your armpits” cue. Works most of the time…🍊

2️⃣ Although if things still aren’t computing I’ve found this nifty trick useful.

A simple drill I like to use is adding a band. Wrap one end around the barbell and the other around something that won’t move – a power rack, or my bicep, for example.

The idea is to resist the pull of the band in order to engage the lats and keep the bar close throughout the duration of the set.

If someone doesn’t know where his lats are, he will after this drill.

CategoriesExercise Technique Program Design Strength Training

Top 3 Single Leg Exercises For Yoked Ass Legs

Coincidentally enough I choose the picture for today’s guest post before actually reading it. 

Oops, a minor editorial mistake.

You see, as you’ll learn below, placing a barbell on your back during single leg exercises – while not a wrong strategy to partake – does have a distinct disadvantage.

HINT: More load isn’t always the “x-factor” with regards to making exercises more challenging.

Suffice to say, lesson learned (but I’m too lazy to go back and find a different picture).

I hope you enjoy this excellent piece by two colleagues of mine – Dr. Michelle Boland (a phenomenal local coach here in Boston) and Tim Richardt (a former coach at CORE who’s now located in the Denver area) – that gave me a few Ah-HA moments.

Copyright: serhiibobyk / 123RF Stock Photo

Top 3 Single Leg Exercises For Yoked A$$ Legs

Quarantine have your legs and butt looking skinnier than Gollum’s?

An excellent example of commitment to a singular goal, but not of muscular development. 

Get your quads, glutes, and hamstrings looking more bountiful than a post-Mordor-crumbling Shire feast with these single leg exercises!

We’re done with the Lord of the Rings references now, we promise.

We’ll explore loading options, body positioning, front versus rear foot elevation, and direction of center-of-mass (COM) movement to help you taste those sweet, sweet single-leg gains.

Let’s get right to it…

#1 Front Foot Elevated Zercher Split Squat

Load Position Advantage 

Holding the weight in the crook of your elbows allows for more relaxation of muscles on the backside of your trunk, enabling increased depth WHILE circumventing grip strength as a potential rate-limiter for loading.

A barbell placed in the traditional “back rack” may rob you of comfortable hip range-of-motion (ROM) due to compression of muscles on the backside of your trunk.

Loading in the Zercher position lets you maintain more VERTICAL displacement throughout the movement, and more pure-up-and-down displacement means more stimulation of muscles that DO vertical displacement (i.e. glutes and quads), leading to more gains and more eventual jealousy from your high school ex after they see your jacked wheels on Facebook.

No barbell? We can accomplish a similar effect with 2 DBs

https://www.youtube.com/watch?v=WlVELvq-ijg&list=PL2C3q7iaQQIVqmCkqxRFaIpiHffq-YcrQ&index=1


Vertical displacement whilst keeping a STACKED position during a split squat, vital to loading muscle tissue (yay!) and minimizing joint strain (boo!), is reviewed,
HERE

Why Front Foot Elevation?

Elevating the front foot shifts your COM backwards, meaning the muscles of the front leg can relax to a greater degree to allow for more depth during the lowering (eccentric) portion of the movement. Additionally, raising the front foot shifts the trained range of motion into deeper degrees of hip flexion, leading to greater mechanical stress placed on the musculature that extends the hip (dat booty). 

Bonus; Heel Up?


Try
elevating your front heel to enable increased loading of the knee and hip whilst maintaining the “vertical stack” during this drill.

Be sure to maintain heel contact and allow your knee to drift forward over the mid-foot to allow for more hip and knee flexion.

#2 Staggered Stance Retro RDL

Why Backwards is Better…

The Staggered Stance Retro RDL allows you to use the front leg to push your COM backwards towards the leg that’ll be doing all the work. This exercise HAMMERS glutes and hammies, and is a great stepping stone towards an eventual unassisted SLRDL.

The KEY distinction between the conventional RDL (or Heels on Wall Variation) and the staggered stance retro RDL is the direction of your COM travels. In the rear foot single leg deadlift, your COM translates forward, whereas in the staggered stance retro RDL, your COM migrates backwards. 

Going front foot supported allows for more of a sit “back” scenario encouraging a more advantageous orienting of the hips to access ROM (remember: more ROM, more loading, more gainz) as well as reducing the challenge of NOT falling forward onto your (pretty) face.

Why Single Arm Loading?

We love a single KB held in the opposite hand (in reference to the back leg), as this encourages rotation of the ribcage TOWARDS that rear leg. Rotation towards the side we’re loading means we’re able to load muscles of that hip to a greater degree, and the combination of an opposite hand reach AND a front foot support ensure we’re loading the back leg’s hamstrings and glutes as much as we possibly can.

Technique 

Some pointers with the Front Foot Supported Single Leg Deadlift:

  1. Position the non-working leg in front of the working leg and use the front (non-working) leg to push the back (working) leg backwards. This results in a hip “shift” TOWARDS that back leg.
  2. The arm opposite the working leg holds the KB and maintains a path over the big toe of the back foot. That reach further supports the shift you obtained in step 1.
  3. Sit your hips back in space, feeling loading on the heel, base of the big toe, and base of the little toe. Reverse this motion by pushing through this “tripod foot” back to the starting position.

#3 Rear Foot Elevated Split Squat

Jack Up That Back Foot

The Rear Foot Elevated (RFE) Split Squat is a variation that places greater emphasis on the front leg. This exercise is also a good progression towards a strict single leg activity, such as a single leg squat

While performing a boring ‘ol split squat, the load is fairly evenly distributed between the front and back legs. However, elevating the rear foot shifts your center of mass forward, dramatically increasing the loading of the front leg. Train this sucker and that leg’s getting more yoked than a Marriott Courtyard omelette bar. 

The RFESS is #3 on this list because it trains a little like a cross of exercises #1 and #2.

It’s a vertical movement (like our FFESS), but the forward lean created by the elevation of the rear foot enables some degree of forward/backwards COM displacement (like our deadlift variation). The result is an unholy cross of glute and leg destruction.

Placement of Load

To optimize loading with this drill, we recommend dumbbells in each hand- like THIS. As we mentioned previously, a barbell placed in the traditional “back rack” position tends to compress muscles on the backside of the body, robbing the body of hip flexion availability and trainable range of motion. 

The distance between your front and back legs- your “stride length” during a split squat- also matters.

A short stride length (front foot closer to back foot) will bias hip musculature (glutes). If you elongate the stride length you’ll shift the loading to more quads, leading to more yoked legs with which to better fill out those new early-Christmas jeggings. 

And Now, This…

You can check out these three extra loading variations that target different planes of motion in the RFE split squat: RFE Split Squat Planes of Motion Variations

Bonus Yoked-Worthy Exercise: Walking Toe Touch Lunges

Muscle Recruitment 

Walking Lunges with an opposite arm reach facilitate more high hamstring recruitment by biasing a posterior tilt of the pelvis. High hamstrings fix the position of the pelvis, enabling greater loading of the hip extensors (butt), making this drill an excellent choice for a “finisher” after your main exercises. To quote our good friend, the wise and powerful Tony, after performing a set of these, “I FELT it in my soul”!

DISCLAIMER; Michelle and Tim are NOT responsible for any Soul-Delayed-Onset-Muscule-Soreness (SDOMS) experienced after performing this drill.

Technique

Big pointers with the Walking Toe Touch Lunges

  1. Maintain up/down motion by keeping your head stacked over your chest and stacked over your hips… put simply “mostly elevator, a little escalator”
  2. Reach your opposite arm to your front big toe keeping your breastbone pointed straight ahead and letting your shoulder blade reach around your ribcage
  3. “A little” hinge at the hips is necessary to stay moving FORWARDS, but “a little” is all you get
  4. Be nice to your back knee, a soft surface is ideal with this drill
  5. Focus on turning into your abs on the same side as the front leg 
  6. Stand up by pushing the ground away with the front foot (that same tripod foot as we discussed previously)
  7. You get no bonus points for lunging LONG- keep your stride length short and controlled

Summary

  • Choosing single leg exercises that will allow you to achieve the greatest ROM while moving heavy loads are key to targeting more muscle mass. Gettin’ more yoked than a 12th century plow animal is all about moving load over ROM. 
  • Intelligent holding positions, such as DBs at sides and zercher, beget more motion availability. 
  • The positioning or elevation of your feet relative to one another is VITALLY important in ensuring we’re loading the target tissue through as large of an available range as we can muster.

Now go get those legs so HUGE that grandma’s gonna have to buy you new Christmas stockings.

About the Authors

Michelle Boland

Tim Richardt

CategoriesExercise Technique personal training Program Design

The New Essential Leg Exercise

Copyright: milanmarkovic / 123RF Stock Photo

The New Essential Leg Exercise

It all started with a “huh.”

I was perusing Instagram a few months ago when I came across my friend’s, Andrew Coates, feed. He had just posted a video of himself performing an impressive set of Supported Bulgarian Split Squats.

Or, Hatfield Squats for the meatheads in the house.

It was something like 365 lb for 5 repetitions.

As I said, at first I was like “huh.”

Then I was like, “damn, that’s strong.”

And then I was like, “pffft, whatever, I want in on this parade.”

At that point I was roughly 5-6 weeks post Achilles repair surgery and was training pretty aggressively in the gym. That said I was still looking for ways to expand or improve upon my Trainable Menu.

I.e., Focusing on stuff I could train rather than stuff I couldn’t.

A day or two later I posted a video of myself performing a set of close to 300 lb for 6-8 reps on my NON-affected leg. I tagged Andrew who then tagged a few other colleagues who were also inspired by his escapades; one of whom was Luka Hocevar, owner of Vigor Ground Fitness in Renton, WA.

Some good ol’ fashioned friendly competition ensued.

Each week we continued to post our progress and I enjoyed it, which was weird because, despite what coaches on the internet like to pretend, I fucking hate performing single leg work.

Like, haaaaaaaaaaaaate it.5

Things I hate….

1. Nazi’s
2. Kipping pull-ups
3. People who wax poetic about keto.
.
.
.
44. Single leg work.
45. Talking about feelings.

Anyway, as it happens, myself, Andrew, and Luka teamed up to write an article for T-Nation.com that just went live today. In it we break down anything and everything as it relates to the Supported Bulgarian Split Squat and why you should consider adding it to YOUR training arsenal.

Check it out HERE.

CategoriesExercise Technique Program Design

1 Minute Deadlift Tip: When To Consider Using a Sumo Style Deadlift

Copyright: miljanzivkovic / 123RF Stock Photo

When To Consider Using a Sumo Style Deadlift

To me, the conventional deadlift (feet closer together, hands outside knees) is the most advanced variation of the deadlift and likely not the best starting point for most lifters.

Yet, purists out there would prefer passing a kidney stone through their eyeballs than ever consider reverting to a sumo style.

Whether it’s someone’s anatomy (short arms and/or long torso) or mobility deficits (hip flexion ROM, thoracic spine extension, or even ankle dorsiflexion) the conventional style deadlift might not be a great choice…for now.

A sumo-style deadlift (wider stance, hands inside the knees) may be the better option. It allows for a more upright torso, decreasing shearing forces on the spine, which can make things infinitely friendlier.

Stop being a slave to your ego and realize you don’t have to pull conventional all the time (or ever) despite what that dude at the YMCA who competed in one powerlifting meet back in 1998 told you.

Categoriescoaching Corrective Exercise Exercise Technique Program Design

What’s All This Positional Breathing Stuff About?: The Implementation of Training Principles

You can’t go more than a few clicks on the internet before you inevitably come across some coach or trainer discussing the merits of positional breathing and how it can help improve performance in the weight room (and on the field).

(👆👆👆 I guess this depends on what part of the internet you peruse…BOM, CHICKA, BOM BOM   😉  😉  😉 )

Nevertheless, if you’re someone who geeks out over the human body and movement in general “positional breathing” is a term you’ve definitely come across.

And you likely still aren’t understanding it’s relevance.

I have a treat for you today. Dr. Michelle Boland (a Boston based strength & conditioning coach and one of the smartest people I’ve ever met) was kind enough to offer to write on the topic for this website.

Enjoy!

Copyright: stanciuc / 123RF Stock Photo

Positional Breathing: The Implementation of Training Principles

Note From TG: For a bit of an “amuse bouche” on the topic of positional breathing I’d encourage you to check out two posts I wrote on the topic HERE and HERE.

Identify

Our role as fitness professionals is to determine what is important for our clients. In order to do so, we need to identify what is important, formulate principles, and then follow through with implementation.

A way to identify and formulate what is important to us as trainers, is to create principles. Principles are simply what you believe in and what you teach your clients. Principles serve as a hierarchy of reasoning for your training methods, which include your choice of exercises, organization of training sessions, program design decisions, and communication strategies.

In this article, I am going to review my first two training principles:

  • Training Principle 1: All movement is shape change (influence from Bill Hartman)
  • Training Principle 2: Proximal position influences distal movement abilities

Formulate

Movement is about shape change.

We change shapes by expanding and compressing areas of the body.

Movement will occur in areas of the body that we are able to expand and movement will be limited in areas of the body that, for some reason, we have compressed. The ability of an athlete to transition from expanded positions to compressed positions informs their ability to change shape and express movement.

Movement occurs in a multitude of directions depending on both position and respiration. Certain positions will bias certain parts of the body to be able to expand more freely, allowing increased movement availability. Respiration can further support the ability to expand and compress areas of the body, as an inhalation emphasizes expansion and an exhalation emphasizes compression.

(👇👇👇 Just a small, teeny-tiny taste of importance of positional breathing 👇👇👇)


Position selection is my foundation of exercise selection.

Positions such as supine, prone, side lying, tall kneeling, half kneeling, staggered stance, lateral stance, and standing can magnify which areas of the body that will be expanded or compressed. Additional components of positions can include reaching one arm forward, reaching arms overhead, elevating a heel, or elevating a toe. Furthermore, pairing phases of respiration within these positions will further support where movement will be limited or enhanced.

The position of the proximal bony structures of the body, such as the rib cage and pelvis, can greatly enable or restrict movement. Positional stacking of the thorax and pelvis provides an anchor for movement. Respiration then provides the ability to create expansion in the thorax and pelvis, thus providing expansion areas of the body, within joint spaces, allowing our limbs to express pain-free movement.

Lifting heavy weights can often compress areas of our body and reduce our ability to expand and rotate through our trunk and hips, limiting movement, and negatively affecting our ability to perform. Remember, expansion begets movement freedom, so adding positional breathing work or pairing movement with respiration can create opportunities for expansion.

Implement

Where is a good place to start with positional breathing work?

Start by thinking about what you already do.

Then, apply your new lens of where you want movement to occur.

Finally, label the positions of the exercises and pair respiration within those movements. Pair an inhalation when you want to enhance expansion and an exhalation when you want to enhance compression. Here are a few examples of how I implement my two training principles into exercise selection. Movement within each example can be supported or limited with changes in position, respiration, or execution.  

1. Supine Reach

The supine position is combined with a bilateral arm reach forward with the intention to expand the upper thorax during inhalation. The position can also be used as a tool to teach stacking the thorax over the pelvis by cueing a hip tuck and soft exhale to move the front side of the ribcage downward. Our “stack” IS the set-up position for your main loaded, lift exercises (squat, deadlift, etc).

Check out how the inhalation expands the upper thorax and the exhalation creates compression.

Now you will not be able to take your eyes away from those two movement strategies.

2. Staggered Stance “Camporini” Deadlift

The staggered stance position is going to magnify the expansive capabilities of the lower, posterior hip of the back leg. The staggered stance position allows you to use the front leg to push back to the side of the back leg and align the pelvis and thorax back and to the side of the back leg.

The opposite arm reach allows you to transition the weight to the back leg. The expansive capabilities can be enhanced in the posterior hip with an inhale during the hip movement backwards (hinging).

3. Low Cable Step-Up

The staggered stance position puts the hip of the elevated leg in flexion (expansive) and the hip of the leg on the ground in an extension (compressive) biased position.

The addition of an opposite arm cable hold expands the backside of the upper back (avoid resisting the cable). The posterior hip of the elevated leg will compress as the individual pushes their foot into the ground and moves against gravity to perform the step-up.

At the bottom position, expansion can be enhanced in the posterior side of the flexed hip and posterior side of the arm holding the cable during an inhalation. Coaching cues may magnify expansion and compression within areas of the body by pairing respiration within phases of the exercise. Try inhaling at the bottom position and exhaling during the movement/step-up.

4. High Hip Reverse Bear Crawl

The bear crawl exercise is performed in a prone position. The additional component of the high hips and reverse direction promotes expansion in the upper thorax and posterior hips. You can coach continuous breathing through the movement or pause at certain points to inhale.

This is a fantastic warm-up exercise!

5. Tempo Squat Paired with Respiration

The squat starts in a standing position.

The assisted squat will also include a positional component of both arms reaching forward (same as goblet squat, zercher squat, or safety bar squat) which encourages the ‘stack’ position of the thorax and pelvis. The assisted squat is an example of turning positional breathing work into fitness. The squat movement requires both expansive and compressive capabilities within various phases of the movement in order to be able to descend and ascend against gravity.

The exercise can be used to teach people to change levels with a stacked, vertical torso. As a general notion, inhale down and exhale up.

6. Medicine Ball Lateral Stance Weight Shift Load and Release Throw

The exercise is performed in a lateral stance position.

Here, we are adding fitness with an emphasis on power, to positional breathing work!

Pair an inhalation with pulling the medicine ball across the body (transitioning weight from inside to outside leg) to bias expansion of the posterior hip of the outside leg. Then pair an exhalation with the throw to bias compression, exiting the hip of the outside leg.

This exercise also encourages rotational abilities and power through creating expansion and compression in specific areas of the body. For example, if you want to promote right rotation, you will need right anterior compression, right posterior expansion, left posterior compression and left anterior expansion abilities.

Conclusion


The use of positional breathing activities can improve our abilities to move with speed, free up range of motion at the shoulders and hips, rotate powerfully, and move up and down efficiently. My training principles are derived from this concept. My specific strategies are implemented through exercise selection, cueing, teaching, and pairing respiration with movement phases.

The ‘stacked’ position emphasizes a congruent relationship between the rib cage and pelvis (thoracic and pelvic diaphragm) and I believe it can serve as a foundational position to support movement. I want to thank Bill Hartman for exposing me to this lens of movement.

Implement these strategies with your clients and you’ll discover that positional breathing work WILL help your clients squat, hinge, run, rotate, and move better.

Principle Based Coaching

A strategy such as positional breathing work for better client movement is only as good as your ability to implement and communicate it with your clients. We become better at implementation and communication through analysis and development of our PRINCIPLES.

If you want to learn more about training principles, how to implement principles into your coaching, and the use principles to improve your continuing education, Join me Thursday, October 1st at 2:00pm EST for a FREE Webinar

In this webinar, we will take a step back and learn the skills to formulate principles, make new information useful, AND IMPLEMENT information. At the end of the webinar you will know how training principles can be used to:

  • Make new information useful to YOU, YOUR clients, and YOUR business
  • Clarify your coaching decisions
  • Develop a more pinpointed coaching eye
  • Plan more effectively to get your client results
  • Gain confidence in your abilities and formulate your own coaching identity

About the Author

Michelle Boland

  • Owner of Michelle Boland Training
  • PhD in Exercise Physiology
  • Instagram @dr.michelleboland

Link to FREE Webinar: https://michelle-boland-training.mykajabi.com/coachingwebinar


CategoriesExercise Technique Strength Training

1 Minute Deadlift Tip: Neck Position

  • High Bar vs. Low Bar
  • HIIT vs. Steady State Cardio
  • Carnivore Diet vs. CICO
  • Godzilla vs. Godsmack

There’s no shortage of “debates” in the health/fitness space. Ideal neck position during a deadlift is also a hotly debated topic and I can appreciate both sides of the argument. Here’s my take and what has worked well for me and my clients.

(I’m not saying I’m right, but I kinda am.)

Copyright: zamuruev / 123RF Stock Photo

What’s the “Right” Neck Position?

Maintaining a “neutral” spine during a deadlift is paramount.

It’s the first commandment of deadlifting.

Neutral in this sense means “maintaining the spine’s natural lordotic (lower back) and kyphotic (upper back) curvature.”

Coaches will start hyperventilating into a paper bag if they see an athlete round his or her back during a deadlift. Okay, so why do we not hold the same standard to the cervical spine or neck? Is the neck not part of the spine?

I prefer people adopt a chin tucked or “packed” neck position:

👉 It reinforces the neutral spine, which the neck is part of. I understand the other side of the argument. There are many examples of people extending their head back during a deadlift (i.e. a not-packed neck) and they’ve been fine.

👉 But in the beginning stages, a packed neck is my preference. Then as someone grows more proficient with the movement they’re allotted more leeway. Besides, what often happens during a max effort attempt – extended neck, and yes, sometimes a rounded back – should not be held to the same standard as a sub-maximal attempt or to someone just learning the lift.

👉 In terms of how to cue the proper neck position, I like to have lifters stare at a target 10-15 feet in front of them on the floor. This helps with better neck position and actually helps increase full-body tension.

Win-win.

CategoriesExercise Technique Strength Training

60 Second Deadlift Tip: Get the Slack Out of the Bar

“Get the slack out of the bar.”

You hear this cue a lot with regards to deadlift technique and performance.

I could say something as equally abstract like, I don’t know, “banana honkeydorey train whistles” or “please pass the parmesan, Chad” and seemingly get the same message across.

Which is to say…

…what the heck does “get slack out of the bar” even mean?

Copyright: nomadsoul1 / 123RF Stock Photo

Well, I’ll Tell You

In short, it refers to getting better leverage and “connectivity” before you initiate the pull.

Many lifters yank the bar off the ground, which in turn makes me cringe because I’m always afraid someone’s going to rip their bicep tendon off the bone. Moreover, the yanking action elicits a loud “clank” noise (barbell hitting inside of plates).

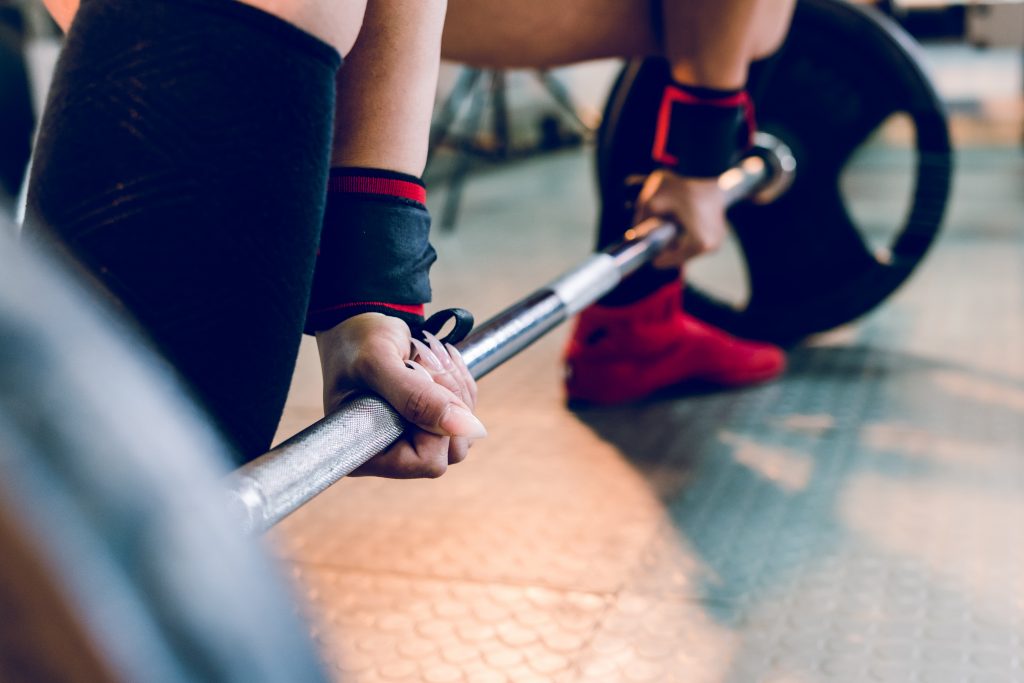
Getting the slack out of the bar means using the barbell as a counterbalance to 1) gain leverage, and 2) get everything connected – inner cylinder of the plates “connecting” with the barbell – BEFORE you initiate the lift.

I like to tell my clients/athletes to get two clicks: bend the bar (get the slack out), then pull.6