CategoriesExercise Technique Program Design

Want to Get Better And Feel More Comfortable Squatting? Do This.

Squats. You either love them, or hate them.

If you’re reading this site, you’re probably a member of the former camp.

You love them.

But even if you love squats, I think it’s safe to assume that we all secretly love to hate them.

Squats aren’t easy.

They take a lot of practice, patience, and attention to detail to perform correctly. And even when all of that is taken into consideration – and you’ve anointed yourself the Ambassador of Squatting Badassery – there are still days when you step into a squat rack and it feels like riding a bike for the first time.

The sucktitude is always right around the corner.

I’ve written my fair share of articles on squat technique.

HERE’s one discussing the set-up which, more often that not, is going to be the determining factor on the success of a set.

99.94% of the time, anytime you see a technique flaw or breakdown during a set it can be attributed to a lackluster set-up.

Pigging back on the set-up conversation, HERE’s one where I discuss Active Foot vs. Passive Foot and how getting & maintaining TENSION is a huge factor in squatting success.

Annnnnd, running with the whole “setting up” theme (are you catching onto the gist that the set-up is kind of a big deal yet?) here’s a video where I discuss how cueing more of posterior pelvic tilt can help with squatting (and deadlifting) performance.


And that’s just glossing over the tip of the iceberg. Entire books and weekend seminars have been dedicated to the squat. The technique differences between all the different variations (back squat vs. front squat vs. powerlifting squat vs. ATG squats vs. high-bar squat vs. low-bar squats…..ALL vs. Godzilla), programming considerations, periodization schemes, corrective strategies….you name it, there are any number of resources out there that covers all of it.

I wouldn’t be at all surprised if Bret Contreras has written a 10,000 word blog post on hand position during the squat alone.

If anyone can do it, he can……;o)

There is one “thing,” however, I feel is often overlooked with regards to helping people get better at squatting and feeling more comfortable while doing it.

And yes, I realize that using the word “comfortable” in the same sentence as “squatting” is a bit of an oxymoron. Kind of like “deafening silence” or “random order” or “non-douchey Justin Bieber.”

Work with me for a second.

What’s that one “thing”?

Paused Squats

As in, actually pausing at the bottom of your squat. Not fake pausing. But actually STOPPING at the bottom.

[And maintaining good spinal position]

In Brospeak: pausing in the hole.

It’s by no means an Earth shattering suggestion, and I highly doubt it’s going to win me any “Strength Coach of the Year” Awards…but it is something I find not many people (coaches and trainers included) utilize enough.

Let me ask you this.

1. Where do most people “fail” or dump the weight when squatting?

2. What portion of the squat are most people weakest and feel less comfortable?

The bottom.

Here’s a quick video I shot yesterday of one of our female clients, Emma, who’s training for her 3rd powerlifting meet, performing her paused squats:

A Few Things To Note:

1. Most cogent to the conversation, you’ll note she comes to a complete stop. Kind of a crucial component for paused squats.

2. Generally speaking, a 1-3s pause is the goal. If we want to be super meanie-heads, we can up that to 5s holds.

3. Most important: she MAINTAINS TENSION in the bottom. Far too often I see people just kind of “hang out” in the bottom position and don’t actively use their musculature to do the work. Instead they use their passive restraints – ligaments, tendons, etc – and aren’t really doing much work to begin with.

Not coincidentally these are often the same people who complain of back pain.

It’s important to learn to stay tight throughout the entire set, even in the bottom.

4. Emma was only doing 2-3 reps per set in this case, with a relatively short pause (1-2s) so her breath didn’t play too much of a role here.

However, it’s not uncommon to have people perform paused reps for a longer duration and work on owning the position while maintaining their breath.

This is something Greg Nuckols has discussed in the past:


5. It’s also important to note that paused squats don’t always have to be performed in the lowest position. I’ve played around with having people pause at a certain point on their descent AND/OR on the ascent (out of the hole).

Practicing pauses in the hole is where I feel most people, most of the time should focus their time.

All of this to say: paused squats are an awesome way to not only help people get better at squatting (learning to get and maintain tension, increasing time under tension, even working on breathing) but also to feel more comfortable in the positions where they feel most vulnerable.

Don’t dismiss them.

Yes, you’ll need to use lower loads (I rarely ever go above 80-85% of 1RM with them, and most often stay in the 60-75% range for 3-6 sets of 4-6 reps)….but it’s the notion that paused squats will help you address a weakness in your technique that makes them so valuable in the first place.

Have fun.

CategoriesProgram Design Strength Training

How the Powerlifts and Sport(s) Go Together Like Peanut Butter & Jelly

Today’s guest post comes courtesy of strength coach, and good friend, Kelsey Reed. Some of you may recall Kelsey’s popular post – Fitness Marketing to Females: Don’t Be a Victim! – from a few months ago.

She’s back. And this time she’s discussing the powerlifts and how applicable they are when training for sport(s).

Enjoy.

Recently, I have been immersed in Easy Strength by Dan John and Pavel. (Tony mentioned it HERE.) If you’re a strength coach and you have not read it, do yourself a humongous favor and do so. Your athletes will thank you.

Dan and Pavel divvy up the various types of trainees into four quadrants. Today’s post will focus on Quadrant III: athletes/clients who possess a symbiotic relationship of strength training and their sport or goal in question. I’ll leave the other three quadrants as a mystery awaiting your discovery.

Unless you work with elite athletes, Olympic hopefuls or professionals, the bulk of your clients will be in QIII.

The mentality when working with said clients should be:

They are ___ athletes (i.e. football, soccer, or fill-in-the-blank) who happen to lift, NOT lifters who play ____.

Personally speaking, this has always been helpful for me to keep in mind when I’m tempted to allow one of my teenage boys to go for a 1RM (the answer is usually “No.”). After all, my athletes are training with me to improve their sport performance, not their weight room performance.

In general, there are two types, or spheres, of training: general physical preparedness (GPP), and special physical preparedness (SPP).

As strength coaches, our job often falls more in the realm of GPP rather than that of SPP. The bulk of GPP training is derived from the basic human movements: push, pull, hinge, squat, carry/walking pattern, and crawling. Those look remarkably like, bench press, rows, deadlifts, squats, and farmer carries.

Nikolay Vitkevich, a full-contact black belt and world-class powerlifter, says:

“You must clearly understand the difference between basic training and special physical preparation. [SPP] is different for everybody; one beats up on a tire with a sledgehammer, another does figure eights with a kettlebell, and someone incline presses. Basic training is roughly the same in all sports and aims to increase general strength and muscle mass. Powerlifting was born as a competition in exercises everybody does.

Did you read that last sentence? Read it again and let it sink in.

A strength coach can easily accomplish 90% of what an athlete needs by intelligently dispersing those movements throughout the training week. From a training economy standpoint, you can’t go wrong by placing a premium on squatting, deadlifting, and pressing.

Deadlifting, squatting, and pressing are exercises every athlete should perform. They are the meat and potatoes (or meat and sweet potatoes for the Paleo adherents out there) of strength and conditioning. The number of muscle groups involved in the powerlifts allows for higher poundages to be used, which in turn, stimulates the neuromuscular and endocrine systems in ways not found in other exercises. The effect produces really strong people. And with everything else being equal, the stronger athlete will win.

Not that it’s impossible to become strong without the powerlifts, it just takes much, much longer. You cannot beat the efficiency and efficacy of picking up heavy things in building powerful athletes.

The powerlifts are also scaleable to each athlete’s strength and experience level.

A 9 year-old can benefit from the squat while using a 5 pound plate as much as a 20 year-old with 200lb on the bar in the next rack over.

That same little guy can deadlift with 15 lbs, while our older athlete has 300lb on her bar: both will increase the strength in their posterior chains. The 9 year-old may learn how to hold a plank (still a press) while an older athlete benches, again both are developing full body strength.

What’s more, the powerlifts are broad enough to apply to every sport and so effective at strength building, why wouldn’t you use them?

Now, before you attack me with pitchforks and PubMed articles, I know that some lifts are not optimal choices for all sports or for all athletes. It’s the difference between contraindicated exercises and contraindicated people.

For example, I will rarely (if ever) bench press an overhead athlete, but will defer to one of the hundreds (literally) of push up variations.


I would be remiss to note, too, that non-powerlifter athletes should use the powerlifts, but should not train like a powerlifter.

The powerlifts, programmed appropriately, build a solid strength foundation from which speed and power will spring.

What do I mean by that?

Powerlifting methods can produce CNS fatigue, joint/muscle soreness, and require substantial recovery time. Which is fine if the athlete’s sole goal is to add weight to the bar. But, the human body has only so much capacity for adaptation and recovery. QIII athletes are focused on another goal, typically involving their sport, and need to have plenty of gas in the tank for sport practice.

Another point to remember, in most, if not all athletic endeavors, power (force x velocity) is driving force behind quick athletic movement, like this dude:


Max strength does contribute to maximal power output, but only up to a point. If it takes .3 seconds to reach maximal force output but a broad jump only takes about .1 second, you’re not going to be able to express your full strength in that brief amount of time.

Therefore, power athletes (which is pretty much every sport) need to increase their rate of force development. To prevent this post from becoming longer than the lines for the new Star Wars movie, read this and this for more in-depth information.

Max strength and power are not distinct entities, but the latter is built upon the former. Thus, it is imperative to develop a solid strength foundation from which an athlete’s power explodes (pun definitely intended). How to train for power is another post for another day.

As Yoda Pavel says, “Power is strength compressed in time, so to get powerful, you must get strong.”

Athletes have a limited amount of time and energy therefore, exercises that require minimal amount of time are ideal; the powerlifts fit the bill. Like peanut butter is to jelly, barbell work should complement sport practice in an athlete’s overall development.

About the Author

Kelsey Reed is head strength coach at SAPT Strength & Performance located in Fairfax, VA. Bitten by the iron bug at 16, Kelsey has been lifting ever since. Her love for picking up heavy things spurred her to pursue a degree in the Science of Exercise and Nutrition at Virginia Tech.

Now she spends her days teaching and coaching others in the iron game. In her down time, she lives life on the wild side by not following recipes when she cooks, fighting battles through characters fantasy fiction novels, and attempting to make her cats love her.

Kelsey, along with her husband, Coach Steve.

Categoriespersonal training Program Design Strength Training

The Key to Program Design. Diamonds?

I’m heading to my alma mater this weekend to take part in the 2nd Annual Strength & Conditioning/Personal Training Symposium at SUNY Cortland.

I – along with my colleagues Nick Tumminello, Mark Fisher, John Gaglione, and Joy Victoria – will be speaking to undergrad and graduate students (in addition to the event being open to the general public) on a variety of topics ranging from the meaning of life and other existential things like how to survive cafeteria food and nightmare roommates to more pertinent things like deadlifts and assessment.

A wide spectrum to say the least!

Okay, we’re not going to discuss cafeteria food or anything related to the meaning of life. Unless, of course, Mark (Fisher) goes into detail on leotards, ninjas, and unicorns. If that’s the case I’m all ears. The man knows a thing or two about living an epic life.

Our objective is to arm the attendees with some “real life” anecdotes on what it takes to be successful in this industry. For instance Mark will discuss what it takes to build a popular (and very successful) gym – built around culture – in one of the most saturated markets on Earth; the concrete jungle, New York City.

Nick (Tumminello) will discuss some of his secrets to single leg training. John (Gaglione) is going to coach the s*** out of everyone. Joy (Victoria) is going to discuss female fitness and how, to a large degree, it’s marinated in negative commentary and connotations.

And what am I going to discuss?

Plot details of Star Wars VII

How to Prepare For the Zombie Apocalypse

My Man Crush on Mark Fisher

Program Design

Or to be more specific: offering up the basic tools, insight, and inner dialogue young trainers (and old) will need to arm themselves with in order to write effective training programs.

I’m not going to discuss how to break down and/or choose the optimal set/rep schemes for any particular exercise. I’m not going to discuss ideal exercise order. Nor am I going to broach the idea of tempo, rest intervals, super-sets, tri-sets, how many days per week someone should train, or body-part splits vs. full-body vs. upper-lower splits vs. Godzilla.

Why?

Because none of it matters.

At least not for most young trainers anyways. Far too often young, impressionable trainers get too caught up in the minutia of program design. Often to the point where they’re stymied or paralyzed and are unable to think “big picture.”

“It is better to have someone squat past parallel with a 5-1-2 tempo with feet 17 degrees externally rotated; or should I have them deadlift instead using the rest/pause method with 6, no, 7 seconds rest between each set?

Some of you reading may be laughing, but scenarios like what’s described above happens all….the…..time.

Trainers and coaches get too caught up in the methods rather than the means.

One of the BIG ROCK themes I’m going to hammer this weekend is the notion of exercise variability. How much variety to trainees actually need?

We’ve all heard the concept of “muscle confusion” before. To dumb it down to it’s lowest possible dumbness (because, you know, it’s dumb): it can be watered down to the idea that we need to constantly “confuse” the body in order to make progress in the gym.

We need to go out of our way to change up our exercises every so often so that we don’t stagnate and/or lose all our gainz and turn into some catabolic ghost.

Now, before someone gets all huffy and thinks I’m telling everyone that exercise variety is  a waste of time, hear me out.

I’m not saying you can’t switch things up every now and then – whether due to a change of goals or sheer boredom. I understand that sometimes we just need to do something different in the gym.

What I can’t stand is when we have trainers telling people that they have to switch up their exercises because the body will get used to them and then they’ll be unable to make any progress.

The human body is not stupid. And, correct me if I’m wrong……people back in the day did just fine with just a barbell. Plenty of people got massive and and in shape with very little variety. I suppose it’s just the nature of the beast when we live in a society where entire conversations take place in 140 characters or less.

Is someone really going to try to make the argument that if we perform back squats for eight straight weeks – and we’re staying cognizant of progressive overload – that the body will somehow stop making progress because there’s not enough variety?

Puh-lease.

Having said that, I do agree with Chad Wesley Smith in that the more advanced someone gets in their training career (I.e, strong) – and especially if they compete – their programming will reflect less variety, because the objective, then, is to hone in on their competitive lifts.

Powerlifters will focus on their competitive lifts: squat, bench press, and deadlift. Their accessory work will address a weakness or technique flaw in those specific lifts.

Weightlifters will focus on their competitive lifts: snatch, clean & jerk; with a healthy dose of front squats, deadlifts, and clean and presses.

CrossFitters, well, they’ll still need to focus on their competitive lifts too. I just don’t know what the hell that is. They’re a bit of an outlier.

In his article, The Pyramid of Strength, Chad notes that the tip of the pyramid is where advanced lifters will live. They won’t need much variety. This SHOULD NOT be interpreted as there is NO variety (there is!). It’s just not as diverse as many are led to believe for advanced lifters.

Yes, they rotate exercise or implement the conjugate method – but if you take a deep look at what their programs look like, for many advanced lifters – especially world class, elite level – they don’t stray too too far from their competitive lifts. Particularly the closer they get to an actual meet day or competition.

Conversely, at the bottom, where the base of the pyramid is wider, this is where most beginners will live.

Here variety is more or less open to interpretation. Using an easy analogy, I find one of the biggest mistakes young athletes make is to concentrate or specialize in ONE sport too soon. I encourage every young kid to play as many sports as possible throughout the year to ensure a more saturated motor learning environment. An environment where there’s no pattern overload and where they can explore new movements and stimuli.

I can see this mentality falling into the strength training side of things as well, but we have to be careful.

Here motor learning is still important and I want to ensure that the BASICS are stressed. Squat pattern, hip hinge, lunge, push-up, core stability, carry, crawl, etc. There’s variety, but it’s still manageable and not crazy. Beginners, for the most part, don’t necessarily need to be too concerned with high bar vs. low bar position on their squat, adding in chains and bands on their deadlifts, or performing board presses to help with their bench lockout.

The pyramid is a great starting point, but I do feel there’s an even better model to emulate, and what I feel is the key to better program design.

The Diamond

This is a concept I believe James “The Thinker” Smith first came up with, and something I heard Greg Robins discuss in the past.

Instead of a pyramid, think of program design as a diamond.

At the bottom are your beginners, and at the top are your advanced and high-level competitive clients/athletes. Neither need a ton of variety in their training.

Beginners need to learn and master the basics.

Advanced trainees/athletes need to be concerned their competitive lifts and/or because they’re so strong, don’t require a ton of variety (or stimulus) to maintain that strength.

In the middle, however, are the intermediates. Not coincidentally this is where most of us (even myself) reside.

It’s here where we can be a little more Willy Wonka(ish) and immerse ourselves in the crazy, zany world of variety.

In this stage we’re past being labelled a beginner – I can hip hinge like a boss, thank you very much – but we’re not where near the advanced level.

Here is where adding in some semblance of variety will come in handy and have more of a place. Here’s where maybe switching up from a low bar position to a high bar position on the squat – to help with staying more upright- can be beneficial. Or maybe adding in chains to work on bar speed?

Here’s where rotating through various deadlift iterations has a place. Maybe your hips come up too fast due to weak quads. If that’s the case, maybe performing some deficit deadlifts will help with that?

Maybe you’re weak off the chest on your bench press. If that’s the case, some dedicated speed/technique work using sub-maximal weight (55-70%) may be in order.

I don’t know: Maybe it’s Thursday and you just want to blast your biceps?

Whatever the case my be, it’s in the middle of the diamond – where intermediate lifters reside – where the concept of “exercise variety” has more applicability and more wiggle room.

Just something to think about.

CategoriesExercise Technique Program Design Strength Training

Pause Your Lifts For Better Performance

I was teaching a workshop not long ago, and the topic of corrective exercise came up.

It’s a term some fitness professionals live by, and often make their living bastardizing. It’s also a term that makes some fitness professionals – including myself – want to jump into a live volcano.

All you have to do is “Google” the term corrective exercise and you’re flooded with images of people squatting on BOSU balls and performing any number of circus-like feats on stability balls in the name of balance, proprioception, and [cue Jaws theme music]…core engagement.

There is a time and place for such things.

Corrective exercise almost always mirrors the rehab setting when injury and re-grooving motor control are reverberating themes; rarely is it used in the strength and conditioning setting.

When it does, however, corrective exercise simply means doing stuff right.

In other words: Correct movement is corrective.

It’s a running commentary whenever I speak to a group of trainers and coaches:

Q: “what’s the best way to get someone to squat correctly?”

A: “Squat!”

Tah-dah.

There you go. It’s science.

Rather than write the 7,893,904th  article on the internet on the finer points of the “Big 3” (squat, bench press, deadlift) and breaking down technique, I’d like to instead spend some time on the importance of accessory work and how we can manipulate it to correct our performance in those lifts.

What Is Accessory Work?

If you ask ten different coaches this question you’ll get ten different answers. But inevitably most (not all) will tip toe around one common theme: accessory work is used to make something harder.

Many will choose an accessory lift – and subsequently the set/rep scheme – based on how hard or challenging the exercise is. I call it the “will this make me shit a kidney” conundrum.

Making a particular exercise harder for the sake of making it harder isn’t a wrong approach, nor do I feel should it be avoided.

Lifting weights isn’t supposed to tickle, right?

However I’d argue it’s not something that’s going to help improve your numbers in the main lifts in the long term.

For me the main purpose or goal of accessory work should be to address a technique flaw or weakness in something. Put another way: there’s a purpose for the lift and a reason why it’s in a program.

It’s not there just to make you feel tired. That’s easy. Go push a Prowler for 30 minutes or attend a CrossFit class and perform 500 burpees…..on one leg. There you go, hard.

As noted above, correct movement is corrective. You’re not going to get better at squatting by riding a bike. You need to squat, and then squat some more. Squatting is the best accessory movement for squatting.

I know, weird.

The same can be said for deadlifting and bench pressing. As much as trainees hate to hear it, you don’t need as much variety as you think.

As a good friend of mine once said, “the hack for performance is mind-numbing monotony.”

Unfortunately boring isn’t sexy, and for many people they’re more concerned with being entertained with their exercise than to actually make progress.

“Look ma……chains on a barbell!”  Weeeeeeeeeeeeeeeeeeeeeeeeeeee.

Put a bar on the ground and lift it. Add weight next week, and lift it again. Repeat.

Repetition with less variety is the key to better performance (and strength) for most trainees.

Is Pausing the Key?

I’m a huge advocate of making people pause their lifts. This isn’t a new concept as competitive powerlifters and numerous strength and conditioning coaches (myself included) have been touting the benefits of paused training long before I wrote this.

The concept is simple: take the range of motion (ROM) where most people are weak or generally “miss” their lifts, and force them to spend more time in that ROM.

It’s not fun, it’s humbling for most trainees (many will have to check their ego at the door and reduce the weight significantly, and it works.

Lets take a look at some basic iterations.

Paused Bench Press

When it comes to complimenting the bench press, I mirror many of the same sentiments as fellow Cressey Sports Performance strength coach, Tony Bonevechio (AKA: the other Tony), in that board presses are an overrated accessory bench press movement for raw lifters.

Don’t get me wrong, I think board presses are an amazing exercise to build monster triceps (which may or may not be a limiting factor for some lifters) and to help supplement the bench press. But for raw lifters – I.e., those who do not use a bench shirt – they take a back seat to good ol’ fashioned paused bench presses.

For shirted lifters board presses make a lot of sense, as there’s a fair amount of technique involved in learning how to use the shirt. You have to actually “pull” the bar to the chest.

For raw lifters, though, using board presses to build the bench press can be a catch-22. They’re great in that they allow guys to “feel” heavy weight in their hands and to help conquer that “holy shit this is heavy” moment that we all go through.

But most tend to “relax” when they sink the bar into the boards. As Tony B notes, “I want guys to learn to maintain tension [in the lats] throughout the lift.”

This is hard(er) to do with board presses.

With board presses, the bar sinks into the boards and guys tend to lose tension because the boards aid with taking the brunt of the weight.

Take the boards out of the equation, and have guys bench to their chest (still using the lats to “pull” the bar down), and then force them to add a pause, and it’s much easier for guys to feel what it means to actually (attempt) to maintain tension.

For me, with the majority of athletes and clients I train (particularly the 99.7% that aren’t competitive powerlifters) this has much more of a carry over to bench press performance.

Here’s a nice video I came across of both Chad Wesley Smith and Brandon Lilly discussing some finer points on benching technique.

Paused Squats

In much the same way, paused squats – where you descend into the hole and pause for an allotted amount of time (anywhere from 1-5 seconds) – is an excellent way to get trainees to learn how to maintain tension throughout the entire lift.

You shouldn’t “relax” in the hole and “hang-out” on your tendons and ligaments. Rather, there should be a conscientious effort to stay tight, upright, and active in an effort to explode out of the hole.

For more on this topic, I’d encourage you to read Passive vs. Active Foot For Squatting Performance.

As an accessory lift, paused squats are an excellent way to improve your squatting. Most guys hate paused squats because they have to use less weight. But so what!?

Here, rather than adding more weight or sets/reps we can manipulate time under tension to address a technique flaw (almost always: falling over due to a shitty set-up and lack of tension) and help get trainees more comfortable where they’re weak or when they enter compromising positions; which for most is at the bottom of the lift.

Paused squats help to hone technique (because it forces people to use sub-maximal weight) in addition to helping train power and explosiveness out of the hole.

After a few sets of heavy squats, I love following that with a few sets of paused squats (2-4 sets of 2-5 reps) using anywhere from 60-80% of 1RM. It’s important, however, to be honest with yourself and come to a complete PAUSE. And the pause can be anywhere, really.

In the hole, at parallel, during the descent, on the ascent (out of the hole, pause at parallel)…..back squat, front squat, pin squats, there are a litany of options.

Here’s a video of Greg Nuckols performing a pause front squat for 5s, because he’s a big jerk.

https://www.youtube.com/watch?v=yzwAnDE0KoM

Paused Deadlifts

Admittedly less popular, but paused deaslifts are fantastic for those who tend to be slow(er) off the floor and tend to “grind” their pulls half-way up. Again, the key here is to maintain tension.

Pausing a few inches off the ground will:

  1. Increase time under tension in a ROM where you’re weak.
  2. Help you learn to explode through your sticking point (in this case, a few inches off the floor).
  3. Help you learn to engage your lats to a higher degree (not allowing the bar to get away from you), which is a huge component to pulling big weight and helps to better stabilize the spine.

This is NOT a deadlift variation where you’re going to use max effort weight, so you can relax “guy who is invariably going to scoff at this exercise because I’m going to tell you to use 50-70% of your 1RM.”

Remember: the objective of accessory work is to address a technique flaw (see points 1-3 above), which down the road will (hopefully) improve your 1RM.

To that end, I like using these after I pull heavy. I may work up to a few sets of heavy triples or if I’m feeling good, singles, and then follow those up with 4-6 sets of 4-6 reps in the 50-70% 1RM range.

Note: Yes, I’m wearing shoes in the video above. I know it’s borderline sacrilegious to deadlift with shoes on and that I should hand in my CSCS certification and banish myself to some remote island where people do nothing but squat in Smith Machines and watch Tracy Anderson DVDs.

I was just too lazy to take my shoes off during filming. Sorry.

To Summarize

       Correct movement is corrective. If you want to improve your performance on any lift, you need to perform that lift.

Variety, in this instance, is not the spice of life.

       Accessory movements should address a technique flaw or imbalance with a “main” lift. Their purpose is not to simply make stuff harder. There should be a purpose for choosing your accessory movements.

       Pausing your (accessory) lifts can have a profound affect on increasing the overall poundage you can lift on the main lifts.

– Paused training is one component I utilize quite often with my Premium Workout Group on WeightTraining.com. I write the program, you follow it, and increase you general level of awesomeness. It’s that simple.

– Did you hear it was announced that Matt Damon and Paul Greengrass are going to make another Jason Bourne sequel? OMG – BEST DAY EVER!!!!!!

CategoriesExercise Technique Program Design

The Right Tool(s) For the Job

For many people walking into a gym can be just as confusing as long division, watching a leaked copy of House of Cards spoken in Mandarin (shit!), or a Lady Gaga outfit. I don’t get it.

Lets put it like this: there are a lot of machines, trinkets, and gadgets in the gym and trying to figure out which “tool” to use for whatever goal can be daunting.

We have barbells, dumbbells, kettlebells, suspension trainers, ab wheels, squat racks, power racks, platforms, specialty bars (trap bar), not to mention a litany of different brands such as Cybex, Hammer Strength, LifeLine, and Swole Patrol (<— not a brand, but it should be).

While nothing is set in stone – besides, only Sith’s deal in absolutes – generally speaking we can “pigeon hole” certain exercise/training equipment into categories to better match with certain goals.

My latest article on BodyBuilding.com better elucidates my thoughts on this topic. Check it out…..

The Right Tools For All Types of Weight Training

CategoriesProduct Review Program Design

Lets Talk (Over) Conditioning

Today I have a guest post from the one and only (and lovely), Jen Sinkler. It’s a timely post because 1) I’m in Australia and Lisa would kill me if I spent all my free time working and 2) Jen’s just released her updated Lifts Weights Faster 2.0.

I loved the first version when it came out last year; and to be speak candidly, outside of the athletes I train who need more specificity with their conditioning, when it comes to writing conditioning based programming (whether for myself or for my general fitness clientele) I tend to flip through LWF 1.0, find something the fits (10-30 minute workout), and sucktitude follows. But in a good way.

LWF 2.0 is 10x better and Jen has gone out of her way to provide an epic product that I feel is one of the best of its kind.

But that doesn’t come without a brief caution: OVER-conditioning. It’s a topic that Jen discusses below.

Lets Talk (Over) Conditioning

If you’re feeling pressure to make all your workouts the hardest, biggest, and most intense ever or else you’ll end up like this guy, you’re not alone. The go-hard-or-go-home mentality is pervasive, making many people fret worry that if they don’t do a body-crushing session every time they work out, they’ve failed.

In reality, the truth is nearly exactly the opposite. You can still make progress without destroying yourself. In fact, you can make bigger strides, more consistently and for the long term, when you don’t leave it all on the gym floor.

That doesn’t mean take it easy — it just means don’t run your body (and along with it your mind and spirit) into the ground by forcibly pushing past your limits every workout (maybe even any workout). You’ll find that this bod-friendly approach will net you even more positive results in the long run.

CHILL, HONEY BUNNY!

As a culture, we are obsessed with extremes. And maybe we don’t need to be. One of my fellow trainers at The Movement Minneapolis, “Cardigan Mark” Schneider, puts fitness on a spectrum — from ill to athlete.

From a marketing standpoint, the “athlete” end of the spectrum is sexy, but it can come at a high cost, in the form of overuse or acute injuries, chronic wear-and-tear on the body, and amount of time invested.

So let’s flip the script: What can you gain by easing off the gas slightly? Fewer injuries, less stress on the body, and a more sustainable fitness regimen — which is clutch, considering consistency is one of the keys to long-term success. Consider it a huge deposit in the bank for your future self; the you 10 years from now will be eternally grateful that you didn’t empty your account and push your body to the point of injury today.

Not always turning the dial up to 11 will also net you more time, money, and energy. If every workout has a cost, overdrawing our accounts means our bodies simply won’t function well — not ideal if your fitness goals include feeling better, moving better, and living better. A consistent, positive balance will better support your fitness goals.

KEEP IT SHORT AND SWEET

When we talk about conditioning, short, intense-enough sessions are the answer to keeping your account in the black and your fitness on track

A well-structured conditioning circuit will often move you out of the sagittal plane that many of the big movements (such as squats and deadlifts) in by asking you to rotate (or resist rotation), perform more unilateral movements, and crawl, roll, or jump.

You’ll involve different energy systems when you incorporate different levels of intensity by performing a variety of different movements with a spectrum of different tools and weight used. All of it adds up to more adaptation (i.e., progress), and more adaptation equals a stronger, fitter you.

CHECK YOURSELF BEFORE YOU WRECK YOURSELF

So…how do you keep your intensity in check? Easy — monitor how you’re feeling during the circuit.

When a conditioning circuit calls for five rounds, you don’t want to flame out after round three. Don’t push to failure on the repetitions and, if need be, take a longer rest than what is assigned in the workout. In the end, you’ll likely up the number of quality reps performed — and reap the gains from your hard (hard-enough) work — without having to deplete your account to do so.

One last thing! When deciding how hard to workout, consider the sum total of your stress.

Your body can’t differentiate between workout stress and other stress. So if you’re experiencing a lot of heart-rate-raising, cortisol-spiking events in your daily life, take the opportunity to chill and scale back your workouts for a while.

When life quiets down, your workouts can ramp up again. You do the math on who makes more progress: The person who goes hard for 52 minutes or the person who works within their limits for 52 weeks?

READY FOR BETTER RESULTS…FASTER?

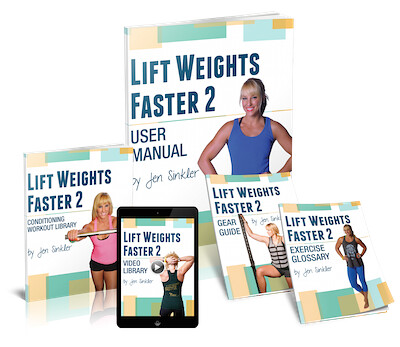
If you’re looking to amp up your conditioning in creative and productive ways, I’ve put together a mammoth 181-workout pick-and-choose library called Lift Weights Faster 2.

Complete with a full exercise glossary that includes written descriptions and photographic demonstrations of nearly 270 exercises (from classic moves to more unusual ones — the Jefferson deadlift, anyone?), a video library that includes coaching on 30 of the more technical lifts, 10 challenge-workout videos, plus a dynamic warm-up routine, I’ve combined my training and athletic experience with my long background in magazine publishing to create a clear-cut, easy-to-use resource that you’ll want to turn to all the time.

Every workout is organized by the equipment you have available and how much time you’ve got, with options that last anywhere from five up to 30 minutes.

Lastly, I’d be remiss if I didn’t mention I teamed up with my husband, David Dellanave, to create a strength program companion resource called Get Stronger Faster 2 to help you take your strength level to the next level. This completes the total workout package and helps you get results, faster.

Click below for more information.

Lift Weights Faster 2.0 

Jen Sinkler is a longtime fitness writer for national magazines such as Women’s Health and Men’s Health. A former member of the U.S. national women’s rugby team, she currently trains clients at The Movement Minneapolis. Jen talks fitness, food, happy life and general health topics at her website, www.jensinkler.com.

CategoriesExercise Technique Program Design

Are You Part of the Resistance (or the Assistance)?

T-minus eight hours before Lisa and I hop on a plane and make our way to Australia and never come back.

It’s a 20-hour long trip from Boston to Brisbane (where we land), and then a bit of a car ride to Ballina where I’ll be conducting the first of TWO workshops while there.

One 2-day workshop in Ballina.

One 1-day workshop in Sydney.

If you live in Australia and this is the first you’re hearing about this 1) what the hell? and 2) you can go HERE if you’re interested in attending either of the two.

I wanted to thank everyone who chimed in on Facebook for their suggestions on how to best prepare for the marathon flight. You’ll be happy to know that in lieu of the suggestion to “swim in a bottle of Tequila,” I contacted my doctor and I will be sufficiently drugged up to ensure that I get some sleep.

A few housekeeping points to hit before I sign off:

1. While I’ll be trying my best to update the blog while away (Read: pissing Lisa off that I’m on my computer), I’ve lined up several excellent guest authors to fill in during my absence.

2. For those interested – and why wouldn’t you be? – Lisa will be writing a (hope to be) daily diary on this website highlighting our trip. She’ll be sure to include a lot of pictures – especially of me tweaking out every time I see snake or attempt to enter the ocean – in addition to writing about places we eat and stay.

You can keep tabs on us HERE (<— the Miscellany section of this blog).

On that note I’m out. bitches. I’m done with this snow.

Today’s guest post comes to you courtesy of personal trainer, Travis Pollen.

Are You Part of the Resistance (or Assistance)?

Maintaining a website is a big responsibility. That’s why with Tony headed down under for the ‘Because Heavy Things Won’t Lift Themselves 2-Day Workshop,’ I asked him if he needed anyone to website-sit while he was gone.

If you’re not familiar with website-sitting, it’s about as pointless as house-sitting. Basically, the sitter logs onto the traveler’s website each morning while they’re gone and meticulously checks each post to see if any fitness celebrities have left a new comment.

This task is akin to checking for burglars. There’s rarely anything valuable enough in your house or on your website for anyone cool to actually give a crap.

As with house-sitting, the sitter continues to check in on the website periodically throughout the day, though perhaps more frequently when website-sitting, since ‘refresh’ is never more than a few clicks away.

Additional website-sitter duties include removing negative reader feedback (i.e. “whacking the trolls”), sharing recent posts on various social media outlets under assorted aliases to create the illusion of viral content, and obsessively checking the mailing list for new subscribers.

Depending on the sitter’s virtuosity, they may even perform these tasks sporadically over the course of the night, as well. The Internet doesn’t sleep, you know. Tony has fans all over the world, OKAY?!

Unfortunately, when I asked Tony if he would like me to take on this big job, his response was a little disappointing. He replied, “No, Travis… they actually have Internet in Australia, so I’ll be sitting for my own site remotely.”

Not only do they have internet in Australia, they also have censorship

Thinking back now, disappointed, I console myself by remembering that I made this entire interaction up in an attempt to make the guest blogging process sound more exotic.

The boring, naked truth is that Tony once called me a “one-legged pirate,” and for this he owed me an opportunity to share some knowledge bombs on his website.

Note from TG: [jaw drops] I did!?!?! OMG, that’s embarrassing. It had to have been a Halloween joke. Right? RIGHT??

Well, Travis didn’t send me a bomb in the mail so I guess he wasn’t offended….;o)

For those not privy to the inside “joke,” check out Travis’ Facebook Page or watch the videos below and you’ll immediately understand my reaction, which went something like this:

RIP Spock

Lifting Heavy Things with Bands

Just like Tony, I’m a firm believer in the “because heavy things won’t lift themselves” doctrine. As such, we meatheads must do so ourselves.

But not all of us will be doing every gym movement the same way, at least not a first. That is, some of us may require exercise regressions (i.e. lat pull-downs on the way to pull-ups), and others may require progressions (i.e. pull-ups to front levers).

Here I am showing off a pull-up/front lever hybrid I stole from Max Shank:


While every coach has his go-to progressions and regressions, one particularly handy tool is the giant rubber band known to the exercise world as a resistance band. Resistance bands come in all shapes and sizes (and colors!) and have endless applications to both assisting (regressing) and resisting (progressing) movements.

The best part about bands is that they require little to no change to the way in which the exerciser sets up and executes a movement. This feature makes bands highly specific to the target movement — even more so than the above example of lat pull-downs for pull-ups.

A strategically placed band basically works like magic. For a regression, it can provide maximal assistance in the most difficult phase of a lift and decreasing assistance where the lifter is naturally strongest. For a progression, it can add “accommodating resistance,” whereby the tension in the band increases during the phase of the movement that would normally be easier.

This last part is especially good news if you’re cheap like me, since it means I can simply throw a band onto an exercise and avoid having to purchase heavier weights.

Below are some of my all-time favorite band assistance and resistance techniques. The setup can be tricky on some of them, so be sure to pay close attention to the placement of the band.

Goblet Squat

Band-Assisted


Execution tips: Push back into the band as you squat, and strive for an upright torso position.

Band-Resisted


Execution tips: Load the bell into the goblet position at the bottom of the squat, then stand and rep away.

Kettlebell Deadlift

Band-Assisted


Execution tips: Like a rack pull (elevated deadlift) the band-assisted deadlift allows for the use of a heavier than normal load in order to develop lockout strength.

Whereas the rack pull simply eliminates the bottom portion of the deadlift, the band provides just enough help to break the bell off the ground. The lifter then handles progressively more of the load as he or she approaches lockout. The advantage of the band-assist over the rack pull is that it includes the entire range of motion of the hip hinge movement.

Band-Resisted


Execution tips: Like the band-assisted deadlift, the band-resisted deadlift also overloads the top portion of the movement. If the band-resisted deadlift still proves easy, try your hand (and hips) at a band-resisted kettlebell swing:

Barbell Bench Press

Band-Assisted


Execution tips: Double loop the band around your upper arms just above your elbows. If you’re a girl, watch out for the girls. Or just leave these for the men to inflate their egos by using heavier loads than they could otherwise handle.

Band-Resisted


Execution tips: Un-racking the bar tends to be the biggest challenge here. When working with heavy loads, always use a spotter. Alternatively, forget the bar and grab a set of dumbbells instead.

Barbell Overhead Press

Band-Resisted


Execution tips: Due to the longer lever arms, these get challenging in a hurry. Practice with just the bar at first, and leave a little slack in the band in the bottom position.

(Sorry, there’s no band-assisted version of the overhead press. Deal with it!)

Pull-Up

Band-Assisted


Execution tips: Knee or foot in the band will depend on what band thicknesses you have available and which position you find more comfortable. In my experience, knee tends to be easier logistically.

Band-Resisted


Execution tips: Secure the band to a heavy enough dumbbell on the floor that it doesn’t flop around as you pull-up.

For all of the following row and push-up variations, the position of the band (chest/upper back versus hips/lower back) will be a matter of where the assistance or resistance is desired.

Inverted Row

Band-Assisted


Execution tips: Positioning the assistance higher up unloads the upper body to a greater extent. Assistance lower down provides more support for the core but less for the pulling muscles.

Band-Resisted


Execution tips: Place the resistance closer to hip level to challenge the hips to remain in extension. Place it higher up towards the chest to really tax the upper body.

Beware: if your spot pins tend to pop out when an upward force is applied, make sure you secure them down!

Push-Up

Band-Assisted


Execution tips: Feel free to use a thick band and really go to town with these, even going so far as to incorporate a plyometric component (i.e. a clap).

Band-Resisted


Execution tips: Two options are shown for these, depending on where you want the resistance and how crazy you feel like going with the setup. The band-around-the-upper-back option is quicker but does tend to chafe a bit.

As with the resisted inverted row, be very careful if your spot pins pop out when an upward force is applied.

If you’re still looking for additional uses of bands, you can always make a giant ball.

About the Author

Travis Pollen is an NPTI certified personal trainer and American record-holding Paralympic swimmer. He is currently pursuing his Master’s degree in Biomechanics and Movement Science at the University of Delaware. He maintains a fitness blog and posts videos of his “feats of strength” on his website, www.fitnesspollenator.com. Be sure to like him on Facebook at www.facebook.com/fitnesspollenator.


CategoriesProgram Design

13 Ways to Transmogrify Any Exercise

I’ve been lucky to have so many people offering to write stellar content for me lately. Today I have a post by none other than Jon Goodman; friend, colleague, best selling author (Ignite the Fire), and pretty much the Don Corleone of personal training information.

He won’t leave severed horse heads in your bed, but you should listen to what he has to say if you want to do well in this industry as a personal trainer.

Today’s post deals with how you can make any exercise harder or more challenging.

So you wanna change up your routine, bro?

Not a problem and there are many options, but you’ve got to keep your goals in check. There’s wobbly boards, rolly thingies, and rubber whathaveyous that take up space in the gym and really don’t add much to anybody’s program.

Variation can put a hamper on your results if you’re not careful. So today I want to talk about variation done right. Below are 13 ways to alter any exercise; when to use each, and what to be careful of.

Some of these variations make the movement harder, some easier. Others change the purpose of the exercise altogether.

Some of these principles you may have seen before, others maybe not. I hope that, after reading this article, you know how to vary movements and loading schemes to better achieve your goal, whatever that may be.

1. Balance.

The more balanced you are, the more force you’ll be able to produce. Altering your center of mass or putting yourself off-balance changes the challenge of the exercise.

Not only that, but the closer your center of gravity is to the ground, the more balanced you’ll be. Ever take a look at the body composition of top wrestlers or judokas? They’re usually as wide as they are tall and the result is that they’re much more difficult to knock down.

If you want some real-World proof, the next time that you see Tony in-person take out his legs. The first thing that he’ll do is crouch and then probably deadlift you off of the ground and Hulk smash you.

So a few things: First, If you ever want to generate more force on a movement you can either widen your base of support (lowering yourself) or crouch down further. If you want to increase the stability challenge you can do a whole bunch of stuff ranging from standing on one leg to putting your feet together to using a variety of wobbly, bouncy, shaky things you’ll find in most gyms.

This comes with a warning — always keep your goal as the #1 priority. A squat on a Bosu ball makes the exercise harder, but it isn’t going to make you stronger. Always respect the rule of specificity.

Out of all the tools in the gym, the stability ball is Tony’s favourite.


2. Manipulate reps.

Certain exercises can have their reps manipulated more than others.

You would have a hard time performing the lateral raise, for example, in the heavy-weight/low-rep zone. The movement doesn’t allow lifting heavy loads explosively. How much to manipulate reps is contingent on your goal.

One other fun way to manipulate reps is by doing partials. In a conventional rep, tension is relieved before starting the next (i.e. locking your elbows at the top of a bench press to rest for a second before starting the next rep). In a partial, each rep becomes extended for 1 and ½ or more times putting the muscle under more tension.

Here’s Ben Bruno crushing some 1-1/2 rep ring chin-ups


3. Tempo

Tempo is ignored far too often. In order for me to talk about it, you’ve got to understand the nomenclature. Every rep of a lift can be broken up into 4 phases: eccentric, pause, concentric, pause, all measured in seconds.

A bench press with a “41X0” tempo would call for 4 seconds in the down phase; a 1 second-pause at the bottom; an explosive press (denoted by the “X”); and no pause at the top before starting the next rep.

Often when you see a workout printed in a magazine or given to you by a trainer, you’ll see 3 or 4 numbers like what I’ve noted above (sometimes the final rest isn’t listed). A tempo will change dependent on the goal of the exercise.

A blocker on a football team, for example, would do a more explosive version of the bench press – somewhere in the 20X1 range. Somebody looking for max hypertrophy is going to want more time under tension (TUT) and may opt for a 4020 on that same bench press.

4. Weight.

If it’s heavy, it’s hard.

5. Lever length.

The human body is really just a series of levers and, like any lever, the closer the load to the fulcrum the easier it will be. Now that you understand this basic biomechanical principle you know how to make any exercise easier or harder.

Want to increase the difficulty of movement? Move the weight away from the fulcrum. An example of this is performing the plank with straight arms in front of your shoulders.

Want to make an exercise easier, move the weight closer to the fulcrum. This explains, in part, why you can lift more in a bent arm lateral raise than you can with straight arms.

While this principle applies to any exercise, please note that it’s a simplistic approach. There’s some muscle physiology mumbo-jumbo like motor unit size and optimal recruitment patterns that also has an effect. For most it’s a good heuristic to train with.

Watch how Tony makes use of this transmogrification here:


6. Shape of Implement.

While not always commercially available, odd-shaped implements are fun to lift and can add in a new dimension to training. One could argue that it’s also a more functional way to train (although the word “functional” has lost all meaning). Sandbags, for example, have uneven and changing weight distribution. Be creative and you can build some fun equipment pretty cheap.

Perhaps the most common example today is the kettlebell. Because the weight distribution isn’t uniform (the weight is concentrated at the end) the bell generates more inertia farther away from the body. This forces a different muscle engagement pattern than a conventional weight – even swinging a DB is different. The extra inertia caused is the primary reason why it’s such an effective piece of equipment to develop the posterior chain.

For years I organized a get together every Sunday morning in the summer. Along with my kettlebells, my arborist friends brought rope (makeshift battle ropes), and we built tools like slosh pipes from PVC piping bought at Home Depot.

You can have some fun with this. Don’t think that you need to lift perfectly symmetrical DB’s and lubed-up machines to get strong.

The video below shows Tony doing a suitcase carry with a rope slung around a kettlebell. The instability and grip challenge here will definitely be different from anything you’ve done before.


7. Stance.

Despite popular belief, the only way to stand when performing an exercise is not with soft knees and your feet shoulder-width apart. Stance, when manipulated properly, is a powerful variable that can jumpstart your program. Here are my favorite variations:

Split stance. This is easier on the back and allows you to maintain a strong posture. The wider the split, the more balanced you’ll be. Switch the leading leg evenly to get an oblique benefit on each side.


Kneeling. A great way to get the abs firing on a host of upper body exercises is to do them on your knees. Instead of sitting on a bench or ball, do your shoulder presses or biceps curls kneeling maintaining a strong upright posture. This variation is especially good for me because I travel a lot and heavy weights are hard to find. That, and the extra ab work doesn’t hurt, you know, for the beach.


Half-kneeling. This is in-between standing and kneeling. There’s a great core benefit here and the glutes on the side of the resting leg will fire as well. Not only that, but you’ll get a nice stretch in the hip of the trailing leg.


Wide stance. A wide stance makes it easier to balance. It also gives the adductors a stretch, which almost every lifter needs. It’s probably not advantageous for most exercises but works well for things like cable chops.


8. Slow Eccentrics (Negatives).

A “negative” is a very slow, controlled contraction that causes a lot of muscle damage. These should only be used for advanced trainees and definitely only with sets of fewer than 3 to 5 reps. A negative usually lasts around 10 seconds. Use a spotter to assist in the concentric portion of the lift or do an easier variation of the exercise as a “cheat” to get the weight back up.

Negatives will make you very, very sore the next day and are only advised for advanced lifters. They’re especially good for breaking through plateaus.

In the video below, notice how Tony’s client is jumping up, or cheating, and then focusing on the eccentric, or negative, phase of the movement.


9. Rest Time.

Rest between sets is another one of those variables that isn’t used properly often enough. Most people have an idea of how long they should rest but few give it the conscientious attention that it deserves. A basic overview:

0-45 seconds of rest builds endurance.

45 seconds to 90 seconds (1.5 minutes) of rest builds muscle.

1.5 minutes and more of rest is for strength training.

Have a stopwatch with you. Set it to your rest interview. The minute that you finish a set, hit the button. When the timer beeps noting the end of your rest, start right away. Don’t screw around in the gym if you’re serious about your results.

You can vary the rest intervals by decreasing or increasing the time (duh). Decreasing the time will make the exercise more aerobic. You won’t be able to lift as much weight but if you’re looking for fat loss it may be warranted. Increasing the rest period to a maximum of 3 minutes is advised for power training. Higher rep ranges are generally used on large multi-joint exercises like a squat or bench press if the lifter wants to keep the reps low and lift heavy.

10. Loading Schemes.

Loading schemes can add or decrease intensity of a workout, or the challenge to a particular muscle group. I use the term “loading schemes” to describe the order that exercise appear in relation to one another.

There are too many to list here but two favourites are pre-fatigue and post-fatigue.

Pre-fatigue. This is when an exercise is performed that exhausts a single muscle group, immediately followed by a multi-joint exercise using that muscle. This can be dangerous if the lifter isn’t experienced. For example I wouldn’t perform hamstring curls before a deadlift unless the lifter has a couple years of lifting experience.

Post-fatigue. This is when a multi-joint exercise is followed immediately by a single joint movement using one of the main muscles of the multi-joint movement. For example, a deadlift followed by a hamstring curl would be considered post-fatigue. I use this loading scheme often when ramping up intensity and volume in my programming.

What it comes down to is this: Despite what your high school gym teacher told you, there are other ways to build a program than starting with a large multi-joint exercise followed by isolating muscle groups and ending with abs before a slow jog.

11. Pauses.

Pausing could be incorporated into the earlier discussion of tempo but I decided to give it its own category. Momentum is a powerful way to generate force but sometimes it’s not warranted. Pausing can be used for 3 purposes:

Increase intensity – Pauses at various stages of a rep can lengthen the total time under tension (TUT) of a rep, adding to the difficulty of each set.

Improve power generation – Lifting with momentum (like bouncing the weight on a deadlift) can be good or bad. If you’re working on your power then you probably want to avoid it. Additionally, pauses can be good to strengthen weak points of a lift.

Learn form – You cannot unlearn habits. Instead you’ve got to learn a new habit powerful enough to replace the existing one. It follows that the stronger an existing habit, the harder it will be to replace it. When learning a new exercise it’s important to only practice it well. This generally means reducing fatigue in the learning stage. Pauses after each rep to recompose yourself and ensure good form will speed up the learning curve.

The video below shows Tony pauses and resetting himself after each rep of a deadlift to improve the speed of the lift.


12. Range of Motion (“ROM”).

We’re taught to perform full ROM movements all the time and, for the most part, it’s a good idea. There are times when cheat techniques of semi-reps are warranted as long as they’re performed safely.

I always said:

“If the choice is to get 0 percent because you cannot perform a full rep or get 30 percent and perform a partial rep. I would choose the 30 percent.”

Partial reps are also great for keeping constant tension on the muscle. The next time that you do lunges don’t lock out at the top, keep tension on your hammies and glutes the entire set. It’s nasty. You’ll see what I mean.

If you’re already proficient with your form then partial reps can add more intensity into the movement. Especially on arm day. You know, for the pump.

13. Grip.

I saved grip for last because of how strongly I believe every trainee should master it. Different grips force the body into different positions, engage different recruitment patterns, and force the body to use different muscles.

There are countless ways to alter the grip on most major exercises. I’ll use the chin/pull up as an example. You can perform the exercise with your hands wide, medium, or close together. It can be done on a thick bar; a thin bar; rings; or even playground equipment. You can also grip the bar with your palms facing up, down, or each other. These are just some examples.

Note from TG: here’s a video of a former 50+ y/o client of mine performing chin-ups with softball grips. And yes, she’s shrugging a bit on her reps…..relax.


Every major exercise has a host of different grips. These nuances are what makes training fun and interesting. If you’ve been doing a lat pull down or chin up for a while, change your grip to any-or a combination of the options I’ve listed above.

Thank me tomorrow when you have to ask a friend to help you open a door.

I mentioned at the beginning of this article that the human body is relatively simple when you break it down. A muscle only has so many functions. The biceps flexes the elbow and internally rotates; the pec major flexes, internally rotates, and horizontal adducts (think pec fly); the gastrocnemius (calf) points the toe; and so on.

When you consider all the ways to vary an exercise it’s easy to see how diverse your options are. Have fun, but don’t lose sight of your goal.

Also, I made up the word transmogrify and then I found it that it was actually a real word. Guess I did learn something from Calvin and Hobbes, eh?

About the Author

Jonathan Goodman is the author of Ignite the Fire, a book that teaches how to become a personal trainer and build a successful career. To learn more about his personal training books and free collaborative resource for trainers, go to the Personal Trainer Development Center.

CategoriesExercise Technique Program Design Strength Training

The 7 Habits of Highly Effective Deadlifters – Part 2

In case you missed it, last week I shared a few thoughts on deadlifting. You can check out part one HERE.

In it, rather than regurgitate the same ol’ obvious things most people who write about deadlifts regurgitate (don’t round your back!, good deadlifters don’t “jerk” the bar off the ground, 2+2 = 4, water is wet, Kate Upton is hot, my cat is the cutest cat in the world) I opted to highlight a few things I feel most lifters overlook or aren’t aware of in the first place.

Things like:

– how the lats play a key role in pulling big weight off the floor.

– how to engage the lats more optimally.

– how paying closer attention to your setup may result in better performance.

– and what it really means to pull the slack out of the bar. I promise, despite the nefarious connotation, the explanation is completely PG rated.

– But seriously, my cat is off the charts cute.

Pretty much the best writing partner a person could ask for.

A photo posted by Tony Gentilcore (@tonygentilcore) on

As promised I wanted to continue my stream of thought and hit on a few more “habits” of highly effective deadlifters.

4. Think of 315 as 135.

Chad Wesley Smith of Juggernaut Strength hammered this point home a few weekends ago during a workshop he put on here in Boston at CrossFit Southie.

To paraphrase: You can’t be intimidated by the weight. You need to approach the bar on every set and show it who’s boss. Every time.

Like this monster.

https://www.youtube.com/watch?v=q4jO21-a2W0


Setting a little expectation management, though, if you’re training in a commercial gym and acting like this before a set of 225, you’re an a-hole. Lets calm down a little bit and put down the ammonia packets mmmm kay?

Many trainees will attack a lighter load and then turn into Bambi once the barbell hits a certain weight or threshold. Lighter loads will generally go up faster than heavier loads…..duh, I get it. However, this point does speak to something larger, and something that’s a bit more psychological in nature.

If you approach the barbell with a defeatist attitude – oh shit, oh shit, oh shit – before you even attempt the lift, how will you ever expect to improve, much less lift appreciable loads?

If you watch good (effective) deadlifters you’ll notice that every set looks the same. Regardless of whether there’s 135 lbs on the bar, 315, or 600 lbs, everything from the set up to the execution of the lift is exactly the same.

Which is why, flipping the coin, we could also make the argument that 135 lbs should be treated like 315. Getting good at deadlifting requires attention to detail and treating every set the same. Even the lights ones.

5. Don’t Just Think “Up.” Think “Back.”

The deadlift is nothing more than bending over and picking up a barbell off the ground, right?

Well, yes….but it’s a bit more complicated than that.

Many will view the deadlift as a pure up and down movement. Meaning, the barbell itself will move in a path that’s literally straight up and down.

Ehhhhhhhhhhhh, wrong.

23.7% wrong, at any rate (<—- trust me it’s science).

The deadlift is actually much more of a horizontal movement than people give it credit for. To quote my good friend, Dean Somerset:

“Deadlift drive comes from the hips when you start in flexion and move into extension. In other words, deadlift drive comes through hip drive. Driving your hips forward, coupled with vertical shins and a stable core, causes the torso to stand up vertically, pulling the weight with it.”

When people get into the mindset that deadlifitng is more of vertical movement they’ll often resort to initiating and finishing the movement with their lower back rather than their hips. Which, as you can guess, leads to some wonky habits of the rounded back nature (which we’d like to avoid as much as possible).

A cue I like to use to help initiate more of a horizontal vector is to tell people to think about “driving their sternum to the back wall.”

When they initiate the pull, they shouldn’t think up but rather……..BACK!

It sounds weird, but I like to describe this phenomenon by telling people that if they do it right – and think about pulling their sternum back – that they’d fall backwards if they decided to let go of the bar.

6. Deadlifts Don’t ALWAYS Need to be Max Effort, I’m Going to Shit My Spleen, Heavy.

Yes, you’ll need to train with max effort loads in order to improve your deadlift. To quote Ronnie Coleman, you’ll need to “lift some heavy ass weight.”

That’s pretty much a given.

But you DO NOT need to do it all the freakin time.

This is another point that Chad Wesley Smith touched on a few weeks ago. To paraphrase him (again): “I could care less about gym PRs. I want to PR when it counts.”

Understandably, most of the people reading this post aren’t competitive powerlifters like Chad, so how he trains and prepares (and peaks for a meet) is going to be drastically different from most of us.

But the message still resonates and reigns true for most trainees. You don’t need to train balls to the wall 100% of the time.

This is a tough pill to swallow for many people, especially in the shadow of CrossFit where training all out, to the point of exhaustion is not only encouraged but accepted as normal.


Don’t get me wrong: I LOVE when people train hard, and I think CrossFit has done some good in terms of getting more people excited to not run a treadmill.

However it’s also set a dangerous precedent in brainwashing people into thinking that a workout or training session is pointless if you don’t set a PR or come close to passing out.

NOTE: this doesn’t apply to every box or every Crossfit coach. So relax guy who’s inevitably going to shoot me an email saying I’m nothing but a CrossFit hater.

1. I actually have written a fair amount praising CrossFit. Like HERE

2. I also workout at a CrossFit 1-2x per week – albeit during “off” hours when I have the place to myself along with the other coaches.

3. Shut up.

More often than you think, training with SUB-maximal weight (60-85%) is going to be the best approach for most people, most of the time. Not only does it allow for ample opportunity to focus on and work on technique, but it also allows people to train the deadlift more often.

The best way to get better at deadlifitng is to deadlift. A lot.

If you’re someone who constantly trains with max-effort loads this is going to be hard to do because 1) you’re going to beat up your joints 2) you’ll fry your CNS and 3) this requires more recovery time.

Not every training session requires you to hate life. This is especially true when it comes to improving your deadlift. QUALITY reps are the key. Oh, this is weird…..it just so happens I have a deadlift specialization program that follows this mantra to a “t.”

You should check it out.

Pick Things Up

7. Pull & Push

The deadlift is a pulling dominant movement. But it also involves a fair amount of pushing.

Yep you heard me right, pushing.

Think of it like this: in order to pull an ungodly amount of weight off the floor (or for those less interested in ungodly amounts, a boatload or shit-ton) you need to generate a lot of force into the ground and push yourself away.

I’ve heard this best described as “trying to leave your heel print into the ground.”

It’s a subtle cue, but it works wonders and it’s something that effective deadlifters keep in the back of their mind all the time.

And there you have it. While not an exhaustive list of habits, I do feel the one’s highlighted in both parts of this article will help many of you reading dominate your deadlifts moving forward.

Got any of your own habits to share? Chime in below.

CategoriesExercise Technique Program Design Strength Training

The 7 Habits of Highly Effective Deadlifters – Part 1

When I was a junior in college one of my professors had us read The 7 Habits of Highly Effective People by Stephen Covey.

Yeah, I didn’t read it.

But who actually reads in college anyways? I was too busy playing baseball, lifting weights, watching Party of Five, and not hanging out with girls because, well, I was watching Party of Five.

I mean, all I had to do was look at the title and I knew it was going to put me to sleep within five minutes of turning the cover. And besides, was this book going to add 5MPH to my fastball and get me drafted? Pffffft, I think not!

Fast forward five years.

Surprise! Nothing I read added 5MPH to my fastball. Professional baseball didn’t pan out and I was a year or two into my career as a personal trainer. I finally listened to my professor and read the book. And it was game changer.

I won’t bore you with the details – it’s a quick read – but The 7 Habits of Highly Effective People speaks to things like how to be more proactive, why it’s important to think about the future so that you can more concretely figure out what to make a reality, the value of the “win-win” mentality, seeking to understand shit before you open your mouth (<— that’s my own interpretation), and what it means to “sharpen the saw” (I.e., seek out activities like exercise, yoga, meditation, etc. to expedite mental focus), among a handful of others.

Needless to say it’s a book I recommend to a lot of people, and something who’s theme I’m going to rip off today.

The 7 Habits of Highly Effective Deadlifters

Being a massive human being helps (^^^^^^^^^), so I’ll just skip that one and try to focus on some less obvious points.

NOTE: What follows is more of a commentary on deadlift technique with the goal to lift a lot of weight. It’s not going to cater to CrossFit and more of the tap-n-go, bounce off the floor, (high) hinge deadlift.

NOTE II: Please don’t take this as a knock against CrossFit. It isn’t. I get that the tap-n-go approach is more relevant to the demands of a CrossFit class or competition, where high(er) reps are performed. I also recognize that there are some strong people who do CrossFit.

But if you’re a CrossFitter and you’re that easily butt-hurt over me poo-pooing a tap-n-go deadlift, I’ll ask you this: why is the exercise called a DEADlift?

NOTE III: Nothing I mention below is concrete and will apply to every lifter in every situation. While I feel much of what I have to say with resonate with a lot of people, I’m not that much of an egotistical asshat to think that it will apply to 100% of the lifting population. So take that for what it’s worth.

Anyways……..

1. Your Lats Are the Key (Point #1)

In order to move big weights (safely, and long-term) you need two things to happen: you need to place a premium on tension and alignment.

If either of the above are lacking you’re not going to be able to develop as much force.

To the former point (tension), the lats are kind of a big deal.

The latissismus dorsi (or “lats” in bro-talk) are a massive muscle, which, on top of playing a role in humeral extension, internal rotation, and adduction (blah, blah, blah), also has significant play in breathing patterns and more germane to this conversation spinal stability.

In short: get the lats to engage and garner TENSION during the setup of a deadlift, the more stable you’re going to be, and the less likely you’ll look like this:

To do this I like to use any one of the following cues:

1. Squeeze an orange in your armpits

2. Protect your armpits.

3. Phew…your armpits stink.

4. Put your shoulder blades in your back pocket.

All are fantastic external cues to help people get the lats to fire to provide more tension and thus, stability. Despite this, some people may still look at you as if you’re speaking Elvish when you tell then to “turn on” their lats.

Sometimes it’s beneficial to give them more tactile feedback or cues.

Band Lat Activation with Hip Hinge

Or what I like to call “TRICEPS”


Lat Activation (via Mike Robertson)


2. Your Lats Are the Key (Point #2)

Pigging back on the point above, your lats are what “connects” you to the bar. Yes, your hands are grabbing the bar, but it’s where your armpits (where the lats insert) are located – in relation to bar placement – that plays a huge role in deadlifting badassery.

I’m a fairly decent deadlifter. I’ve pulled 3x bodyweight….570 lbs at a bodyweight of 190. I’m no Andy Bolton, but not many people are.

For years I’ve set up with my shins as close to the bar as possible, and while it led to some success it also led to some pesky back issues.

Why?

When setting up as close as possible to the bar, think about what’s happening.

1. My shins are more vertical.

2. And because my shins are more vertical, my armpits are in front of the bar, creating an awkward line of pull I have to overcome.

This not only puts me in a mechanical disadvantage, but over time is going to make my lower back flip me the middle finger. And it has, many times.

In the past few months I’ve had to overhaul my setup so I’m a little further away from the bar in that my shins can translate forward a bit, which then allows me to get my armpits directly over the bar, which in turn puts me in a more mechanical ADvantage (which helps me garner more tension), which in turn makes my lower back happy.

FYI: the picture below doesn’t show that right before I pull, I’ll push my hips back a smidge

And no, I’m not squatting the deadlift…….;o)

3. Pulling Slack Out of the Bar

Running with the tension theme, another habit of highly effective deadlifters is learning how to take the slack out of the bar.

It’s important to leverage yourself against the weight when you’re setting up. Another way to think about it is to act as if you’re “pulling” yourself (against the bar) into proper position.

This is what it means to get the slack out of the bar or what I like to say instead “bending the bar before you pull it.”

NOTE: I was in the middle of filming a video of this last night when my camera puttered out. Damn you Droid!

Luckily CSP coach, Greg Robins, filmed a video not too long ago on this very concept:

That’s it for today. I’ll be posting part II of this article sometime soon. But in the meantime I want you to recognize the key theme of all the points listed above:

That the setup is very, very, VERY important.

Like almost as important as Bilbo giving Frodo Baggins the blade Sting when leaving Rivendell on his way to Mordor.

95% of the time any mistake or snafu in technique with the deadlift can be attributed to how someone sets up in the first place. Far too often trainees fail to put much thought into it and just haphazardly bend over and pick up the bar. And far too often people end up getting hurt and/or never making any progress.

Place more precedence on getting tension and watch your deadlift take off.