CategoriesProgram Design Strength Training

Yet Another Reason to Include Barbell Glute Bridges Into Your Program

Like many boys during that time in their life, I was a Boy Scout when I was 10-13 years old.

Dedicated to train youths to become responsible, altruistic citizens, building character, and self-reliance through participation in a wide variety of outdoor activities, educational programs, and community events…the Boy Scouts is definitely something I cherished when I was a kid and something I’d recommend any child today to pursue.

But here’s the kicker: I was a horrendous Boy Scout.

I wasn’t what you would call the “outdoorsy type.” Being a Boy Scout was all about starting a fire, rustling up some grub, lashing spars, setting up shelter, and being able to find your way out of the woods through unfamiliar territory with nothing but a cloths pin, duct tape, and a rubber ducky.

That wasn’t my bag if you catch my drift.

Funnily enough I grew up with a sawmill in my backyard. My step-dad was (and still is) a lumberjack (I know, pretty badass). In the winters, because we had a wood burning furnace to heat the house, me and my brother would have to cut wood every weekend. It sucked. But what are you gonna do, freeze to death?

I did it every….single….weekend.

I remember one of the badges you had to earn for Boy Scouts was to split wood for some random people as a nice gesture (and to coincide with the whole altruism thing). I also remember thinking to myself when I saw that, “eff that. I’m out.”

However, one of the highlights of the year when I was a Cub was the annual Pinewood Derby. In short it was an event where you were given a “kit” that contained a block of wood, wheels, glue, paint, and all the works to construct a car that you would race during the Pinewood Derby.

Some people went all out….constructing these spiffy works of art that defied aerodynamics and looked beautiful. Others, like myself, took the piece of wood and put the wheels on it, painted it some random color and WAH-LAH…..we had a winner.

Well, not so much. I got my ass handed to me. But the point is, my brain just didn’t (and still doesn’t) work in a creative fashion. Sure I can tell a story, relay information and write pretty sentences where I use hoity-toity words like facetious, acetabulum, and poop; and I can differentiate between your/you’re, too/to, and their/they’re/there (sometimes). But when it comes to being creative with my hands or being creative for the sake of being creative (like coming up with new exercises ALA Ben Bruno)…my brain just doesn’t work that way.

It just doesn’t.

Take the barbell glute bridge for example.

Bret Contreras has written anything and everything as it pertains to this exercise and there’s nothing I could add to the conversation that would shed some more light on how awesome of an exercise it is.

You’d be hard pressed to find any other exercise which serves so many functions with regards to building sexy-ass asses, training the hips in an anterior/posterior fashion, addressing lower back pain, posture, and helping to improve overall athleticism, to name a few.

As a coach who writes a lot of programs for athletes and general fitness clients I’ve used the barbell glute bridge as a strength exercises, as a “corrective” exercises, and as a way to build more glute hypertrophy. I’ve incorporated them into maximal strength programs, fat loss programs, and have utilized them when people are injured and I need to find a way to get a training effect.

In addition, because it’s such a versatile exercise (and because the learning curve is relatively low), the barbell glute bridge can easily be regressed or progressed to fit the needs and current abilities of the lifter. A newbie may be limited to performing 1-legged glute bridges with their bodyweight only, while a meathead or gym veteran may be performing traditional barbell glute bridges with significant weight on the bar.

And all of this doesn’t even take into account all the other things we can manipulate like sets/reps, tempo, rest periods, bands, chains, rest/pause method, AMAP, and all the other permutations and adjustments we can make.

We’ve pretty much exhausted and thought of every possible “thing” of how we can use the barbell glute bridge for. Right?

Right??

Well, not so much.

Here’s something to consider (and all the credit goes to CSP coach, Greg Robins for this).

What about using the glute bridge as a way to “potentiate” the glutes to fire to help improve bench pressing performance?

I hired Greg to take over my programming to help me address some nagging injuries, reach some goals of mine, and more importantly to allow me the luxury of not having to do any thinking for myself.

I’ve never made it a secret that I’m not the best bench presser in the world. It’s my weakest lift and something I’ve always struggled with. I can coach it like a bastard, but I’m most likely never going to be breaking any world records.

While the squat and deadlift get most of the love from a coaching technique standpoint, we could make the case that the bench press is FAR more coaching intensive than the two combined. It’s MUCH more of a full-body lift than most people give it credit for.

In particular, leg drive is an important component of pressing big weight. And even more particular to that, being able to activate the glutes to not only aid with transference of force from the lower body to the upper body, but to also “protect” the lower back, is an often massively overlooked component of bench pressing.

So, why not perform a few sets of barbell glute bridges prior to benching in order to activate or “potentiate” the glutes????  It’s brilliant, right? And something that I haven’t seen many people discuss as to how the glute bridge can be useful.

As an example, here’s what I’ve been doing (through Greg’s programs) for the past few weeks on my heavy bench days.

Four sets of barbell glute bridges (2×10,2×5) done with SPEED in mind. These aren’t ball busting sets.

2×10 can range from 135-185 lbs (for women, 85-135lbs).

2×5 can range from 205-225 lbs (for women 115-185 lbs).

** These numbers will obviously depend on one’s ability in terms of a starting point, and will also be PROGRESSED as time goes on.

All I’m worried about here is QUALITY reps, and fast reps! With a TWO SECOND pause at the top of each rep.

So there you have it: Yet, another way to incorporate barbell glute bridges into your training repertoire. Give it a try and let me know if you notice an improvement in how your bench press feels.

CategoriesProgram Design Strength Training

But Can You Move Your Body?

I hate Max Shank.

He’s a phenomenal strength coach with a unique perspective and approach that I admire. He’s also a lovely human being. But I still hate him.

Why?  Because I’m not him.

He can do cool stuff like deadlift 315 (for reps)….on one leg. He can do handstands, backflips, L-sits, overhead press a human being, squat a metric shit-ton, and probably win a fight against Batman and/or a pack of ninjas. And he’s ripped. What a jerk!

It’s really impressive to watch the things he can do. And it’s even more impressive to watch him coach regular people to do all of the same things (except maybe the whole fighting Batman thing). Which is why I admire his work.

He just released his new resource, Ultimate Athleticism, this week. While I’ve only had the chance to peruse the first few chapters, I can tell you that Max’s approach to training is different compared to anything else you’ve ever come across. While it may seem like the things he can do are superhuman, it’s important to understand that, despite not having a gymnastics background, he taught himself how to do those things through persistence, practice, and implementing the proper progressions.

What’s more, he teaches regular people how to do all the same things….every day! He’s adamant that lifting heavy things is important. But in addition to that he feels building more overall athleticism is the key to help fill in the gaps to better performance and a better body (and one that’s less likely to break down!).

In today’s guest post he discusses a few ways to accomplish this feat. Enjoy! And be sure to check out Ultimate Athleticism HERE.

But Can You Move Your Body?

Smashing weights in the gym makes me feel all warm and fuzzy inside. I can’t get enough of it.

Warm and Fuzzy Pic Credit: Snuggle Pup

I feel like the tides are shifting in the sense that more people are sharing that same passion for fitness.

But like everything else, it leads to extremes on both sides. This is especially true with those of us who are smashing weights.

It’s a bit silly how getting winded while walking up the stairs or not being able to squat to full depth without 300lbs on your back can somehow be a badge of honor among heavy lifters.

Some of you are probably thinking, “this guy doesn’t even lift, bro.” Here’s the deal; the pendulum has swung to far to the right. The goal hasn’t become, get stronger, or more athletic–it’s become lift more weights, or do more reps.

Before you excommunicate me from the lifters guild, just hear me out.

I’m still suggesting we all continue to hammer away at heavy deadlifts and throw ridiculous weights overhead, but let’s do just a couple things to make it more well-rounded. Let’s get more athletic for life, not just for gym movements.

So without further ado, here a couple simple things you can do to get more athletic without losing your heavy lifting gainz.

Mobilize

Combining yoga, dance, martial arts–whatever floats your boat–move around and improve your coordination at the same time. Throw this in at the beginning of your session and splice it in to your heavy lifts as an active rest.

Jump/Sprint

Don’t just jump straight up, and don’t just sprint straight ahead. Move in a variety of directions! Jump onto things, off of them. One leg, two legs. Lateral bound, maybe even learn how to do some basic tumbling if you have anyone willing to teach you.

Gymnastics

Upper body strength has, for whatever reason, become very one-dimensional. There are so many gymnastics, or even breakdancing movements with steady progressions starting out at a beginner level that will give you an even greater stimulus, and ultimately more gains than traditional gym movements targeting the upper body.

My two personal favorites are L Sit to Handstands, and Front Levers. If you’re confused, just go balance on your hands and climb stuff–a great substitute for overhead presses and pull-ups, respectively.

If your goal, like mine, is to be able to crush it athletically in any situation I am ever tossed into, you’re going to have to widen your spectrum of athleticism. Keep smashing heavy weights but add in some other movements to fill the gaps in your overall athleticism.

Ultimate Athleticism is on sale NOW through the end of the week. You can check it out HERE.

About the Author

Max is an author, coach, and owner of Ambition Athletics in Encinitas, CA. He also competes in a wide variety of sports ranging from Muay Thai and Jiu Jitsu to Scottish Highland Games.

Max’s desire to constantly improve his knowledge and personal skills has led him to be a sought after international presenter of his unique and pragmatic blend of strength, flexibility, health, and overall athleticism.

www.ultimateathleticism.com

www.maxshank.com

https://www.facebook.com/MaxShank

Instagram: maxshank

Twitter: maxshank

CategoriesProgram Design Strength Training

Rethinking Percentage Based Training

I like to think of myself as an open-minded kind of guy:

– I used to hate Brussels sprouts, now I love em. Especially when they’re drowned in bacon fat.

– The other weekend, while dining out in DC, Dean (Somerset) and Ann (Wendel) ordered some sweetbreads for an appetizer. In my mind I was like, “Sweet! Sweetbreads! Are we talking cinnamon raisin here? Something with a cheesecake frosting?”

I’m not what you would call an adventurous omnivore.

They were “breaded” so I ate them. They weren’t sweet (weird), but tasted good.

When it comes to things like calamari, pate, fois gras, or putting anything other than caramel on ice-cream, I’d rather jump into a live volcano than eat that stuff. It wasn’t until a week later when Lisa and I were watching the season premier of Top Chef Boston that I learned what sweetbreads really are.

Noooooooooooo.

I’ll get over it.

– I went to a screening of Brokeback Mountainby myself, mind you – when it first came out in theaters. Two dudes making out in a tent? Whatevs.

– I once voted for a Democrat (even though I’m a registered Republican).

– And, I’m not skeered to rock a pink shirt when the occasion calls for it.

In the above scenario I believe it was because it was Wednesday.

This open-mindedness doesn’t just default to regular life stuff either. I’m pretty open when it comes to fitness-related things as well.  Sure, I have my biases and preferences on certain things – I think kipping pullups are dumb, I believe everyone should perform some sort of deadlifting 1-2x per week, I loathe how yoga is marketed towards women (if I hear one more “long and lean” muscles diatribe I’m gonna snap) – but for the most part I take a “middle-of-the-road” attitude on most things.

I can see the rationale or benefit on just about everything. What I can’t stand is when fitness peeps are so far to the left or right on any given topic that they become irrational.

We have people arguing over the merits of organic vs. conventional foods (GMO), and yet a vast majority of people aren’t even eating a serving of fruit or vegetables per day! Who cares if it’s organic or GMO? I hate to break it to you, but 95% of what we eat is GMO anyways, including those organic cherry tomatoes.

Photo Credit: val’sphotos

We like to argue over minutia and it’s human nature to be set in our ways I suppose. We like to believe we live in a black or white world (where you’re right and everyone else who disagrees is wrong), but so much of it is grey.

More to the point, whatever the debate may be or question being asked, in the entire world, but especially in the fitness world, everything can be answered with one simple (albeit complicated) phrase……

It Depends.

Is Paleo a good fit for you? It depends.

What about intermittent fasting? It depends.

CrossFit – yay or nay? It depends.

HIIT over steady state cardio? It depends.

A roast beef sandwich is smarter than Tracy Anderson? No debate. Abso-freakin-lutely.

But lets get serious for a second. What about percentage based training?

I used to dismiss this type of training, but as of late I’ve been having a bit of a change of heart and have been incorporating it more and more with my own programming, as well as that of my athletes and clients.

But, as with everything else, there’s a time and place for it and whether or not it’s a good fit for YOU will, wait for it……………..

…………………………………………………………………………………………………………………….depend.

What Is It?

Many programs will utilize percentages (based off of one’s 1RM) for loading schemes and provide detailed set and rep schemes for the lifter.

For example, a day may call for 4 sets of 6 reps with 75% of 1RM.

The Advantages

1. Such an approach takes a lot of guess work out of the equation and provides instantaneous direction to many trainees who otherwise would be confused as to how much weight they should be using.

All you have to do is figure out one’s 1RM for any particular lift, type out some numbers in a calculator, bleep, bloop, beep, beep, bloop, and PRESTO, you have a training session!

2. Olympic weightlifters use this approach religiously, and they’re ridiculous athletes. I hate them…..;o)

3. Percentage based training makes a lot of sense when working with larger groups or team based training. Some collegiate strength coaches I know are in charge of 3-4 teams which is a crap load of programming for one person.

This approach drastically reduces the workload, while still allowing for some tweaking and individualization.

4.  And, it works!

Some of the most successful training programs in the past few years, Jim Wendler’s 5/3/1 and Brandon Lilly’s The Cube Method are two gleaning examples.

Not to mention, of course, the classics like Shieko, Smolov, and The Russian Squat Routine….those sadomasochist bastards!

The Disadvantages

1. Some coaches, myself included, can see the benefits percentage based training has for beginner and intermediate lifters. Like I mentioned above, it provides structure and takes out a lot of the guesswork.

That said, the knock against it is that it doesn’t take into account one’s preparedness for any given day. One day may call for 80% and you feel like you could deadlift a bulldozer. You get your reps in, but it was too easy.

Conversely, one day you walk into the gym feeling like you got run over by a bulldozer and your programs calls for 2×3 @ 90%. You miss reps and your entire session is a train wreck.

Expounding on this point a bit further, I’ll steal some insight from Bret Contreras:

Programming just isn’t that simple. My colleague Brad Schoenfeld and I recently collected data for an upcoming study we intend on publishing that examines the EMG activation in the leg muscles with heavier weight (75% of 1RM) versus light weight (30% of 1RM) to failure. While we weren’t particularly interested in the number of repetitions the subjects achieved during exercise performance, we were intrigued to find that with the 75% of 1RM loading, the ranges of repetitions achieved by the subjects varied dramatically from one lifter to the next. While most subjects performed between 10 and 15 repetitions, one subject performed a whopping 21 repetitions, and another subject performed just 7 repetitions (with 30% of 1RM, the range was 30 to 71).

What does this mean for percentage based training?

For some it will be on point. The load, sets, and reps mirror that of the person’s ability and they’ll see great progress.

For others it will be too much.

2. Another thing to consider is the argument that strength doesn’t happen in a linear fashion. As Eric Cressey notes:

I rarely use percentages. Think about it this way…

If you test your squat and it’s 500 at the beginning of a 16-week cycle, and then put 50 pounds on it over the course of that period, the percentages based on that 500 number aren’t very accurate by the time week 11, 12, 13, etc. roll around, are they?

In short, you’d have to re-test your 1RM every four weeks or so to update your program calculator which is a major pain in the ass (not to mention detrimental in that people spend waaaaaaay too much time testing their 1RM rather than actually building it. More on this below).

3.  Something else to consider is that some programs that utilize percentage based training are absolute eye wash and make no sense.

As Jesse Irizarry notes in THIS article, a large number of programs have rep counts assigned to percents that don’t factor cumulative stress on the body of doing multiple reps at that given percent.

Performing 5 reps of any movement at 80% of 1RM doesn’t sound too hardcore, right? Easy peasy.

The FIRST rep is the only one that represents 80% of 1RM. Every rep thereafter represents cumulative stress on the body and is greater than the demand of 80% 1RM.

And then we’re asking some trainees to perform 5,6, even 7 SETS at that percentage!?!?!

That’s going to smoke some people.

Rethinking Percentage Based Training

Here’s my thought process today as I tap away on my keyboard.

1. For beginners and a fair portion of intermediate trainees, I feel percentage based training can work, but it may not be a good fit right out of the gate. To be blunt, most just aren’t strong enough to even worry about it. Yes, it provides structure – and I can’t argue that. But if you’re a grown man and your 1RM squat is only 185 lbs, is it really going to make a huge difference if you train at 90% (which is 166 lbs???).

Yes, it’s relative – 90% is 90%, and heavy is heavy – but I think most people in this camp would be better served using an RPE (Rate of Perceived Exertion) scale or following something like THIS.

2. In addition to the point above, most beginners aren’t remotely ready to handle loads upwards of 85-90%+ of 1RM. That’s just silly talk.

3. Remember earlier when I said a lot of trainees spend too much time testing their 1RM rather than building it?

This is something fellow CSP coach, Greg Robins, has discussed as of late and I couldn’t agree more.

Percentage based training helps people build a wider foundation in order to build a higher peak.

Photo Credit: Circled Thrice

How you get strong is by moving what you could originally do for 3 reps and perform it for 5.

What was originally your 92.5% 3RM is now 87.5% (<– based off of Prilepin’s Chart).

You can only do this by accumulating volume and by putting in the work. It’s not just going to happen. And this is where using percentage based training has a TON of merit, and, not coincidentally, is why Wendler’s 5/3/1 is so effective!

If more upper level intermediate lifters (and advanced lifters) bought into this mantra, I’m sure they’d see some improvements in their numbers.

4. I think too, percentage based training, more so for advanced lifters, provides some semblance of forced autoregulation.

Speaking from personal experience I know I’d always get into trouble when I consistently forced myself to train my deadlift in the 90% and up range. At some point, by week 4 or 5, my back would be like, “hahahahahahaha, not gonna happen Tony.”

Utilizing more percentage based work forces me to tone it down a bit, place more of a premium on bar speed and technique, and allows me to accumulate more volume without my back flipping me the middle finger. And I’m cool with that.

Percentage based training isn’t the end-all-be-all approach, and it isn’t going to work for everyone.  But that’s my thought process as it stands today. What do you think?

CategoriesMotivational Strength Training

Lessons Learned Preparing For My First Powerlifting Meet – Part II

Today’s guest post comes from one of my good friends, Ryan Wood. Ryan wrote Part One of this series a few weeks go (which you can check out HERE) prior to his first powerlifting meet, which took place two weekends ago.

I thought he did a fantastic job with it, and it ended up getting a lot of positive feedback and was well received because a lot of people who read this blog have contemplated competing down the road.

In Part Two (below), Ryan discusses his first meet and some of the lessons he learned.

Enjoy!

Back on October 11th, I competed in my first ever power lifting meet.  The meet was held in Everett, Massachusetts, right around the corner from Total Performance Sports.

On meet day, I arrived to the rec center around noon to listen to the rules. Jumping the gun on commands was the last thing I wanted to do in my first meet. I was pretty nervous when I got there, and even more so as the actual meet time approached. The morning session was set to finish a little bit early, so I began preparing and lightly warming up for the 2:30 start time.

Luckily my good friend and competitive power lifter himself, Adam Pine, was there to coach me throughout the day. I really can’t thank him enough for his expertise during my first meet.

Note from TG: you can check out Adam (and Jordan Syatt) in their new YouTube video series: The Angry Coaches.

Here they make a plea to fitness professionals to “quit telling your clients they’re broken.”

There’s a lot that goes into having a successful meet, and having someone there to guide me sure took off a ton of pressure. Keeping this in mind, here are some key lessons I learned from my first power lifting meet.

1) Have a Handler

Basically a handler is someone who guides you during meet day. They help with the logistics of the meet and also provide bench press hand-offs.

Note from TG Again (Shit, sorry to hijack your article Ryan!!!!): here’s a quick video I shot at BU Strength and Conditioning on how to properly hand off to someone. Yes, it matters.

Adam took care of getting my squat rack height set properly, sending in my attempts, telling me when to warm up and giving me cues to focus on.

I was very fortunate to have his guidance because without him I would have been a nervous wreck. Instead, he took care of the details which allowed me to focus on lifting and just enjoying my first meet.

Plus, it’s not like I’m going to argue with a guy who deadlifts 700 lbs….

2) Bring Plenty of Food/Water/Gatorade

This one is pretty self-explanatory but very important.

Power lifting meets are very long and tiring. I showed up for rules at noon and didn’t leave the rec center until 9pm.

Nine hours is a long time, but picking foods you know settle well in your stomach is key.

It’s not a good idea to crush some random exotic food if you don’t usually tolerate it well. Snacks like trail mix, beef jerky, protein bars and shakes, peanut butter sandwiches, water and Gatorade are some good examples to keep you fueled and ready to lift.

The worst thing is to be starving while you’re trying to get amped up for a PR deadlift attempt.

3) Know the Layout of the Meet and the Flights You Are In

Flights are basically what order you are lifting in.

The meet is organized based on weight lifted. Check the order as soon as it’s posted so you can begin to plan when to warm up so that you don’t finish warming up 30 minutes before your first attempt.

Again, I had Adam there to help me time my warmups so I was ready when my name was called.

Once I was finished benching, I still had about 2 hours until deadlifts even started. Since I was in the 2nd flight for deadlifts, I knew I could add another 15-20 minutes to the start time. Adam recommended that I just relax and get a little food in me as I had plenty of time to warmup once the first flight of deadlifts began.

 Photo Credit: Elitefts

Along the same lines as knowing the layout, it’s also important not to go nuts in warmups. Adam suggested I take jumps like I normally would in training when working up closer to my attempts.

Try to do your last warmup about 4-5 minutes before you’re set to lift on the platform.

4) Take PR Attempts Even If They Are Small PR’s

I opened my first meet with a 315 squat. This was easy, as it should have been.

Because it was my first meet, it was recommended to me to open light and show the judges that I could handle the weight

My next attempt was 350 which also felt really great.

My best squat coming into the meet was 365. During my training as the meet approached, I wanted to hit a 385 squat. But things change a little on meet day, and while the 350 felt light, I jumped too much and ended up missing 385 in the hole. Adam suggested I go 375, which would have been a 10lb pr. I decided I wanted to go for 385 but it didn’t pay off.

The lesson I learned from failing on my 3rd squat attempt is this. Take a PR when you have the chance.

For my first meet, I should have listened to Adam. It really didn’t matter whether I squatted 375 or 385 because either weight was a PR since it was my first meet.

Instead of listening to his advice, I told him 385 and ended up being frustrated after missing it. The point is to take a PR even if it’s a small PR.

Honestly 370 probably would have been more realistic but I got greedy and paid the price.

5) Build Weaknesses

The only lift I failed on was my 385lb 3rd attempt on squats.

As you’ll see in the video, I didn’t stay controlled enough on the descent, which caused me to lose tightness in the hole. Once I started up out of the hole, I leaned forward just slightly and was out of position to stand up with the weight. I will specifically need to work on staying more upright, as well as building strength through my erectors, and overall back strength.

I will continue to work on taking it down with more confidence, and staying tighter throughout the entire lift.

Here’s the video of my 385 lb, attempt:

At the end of the day I ended up going 8/9, posting a 1020 total with a 350 squat, 210 bench, and 460 deadlift. I tested my strengths and was able to see my weaknesses as well.

I want to thank everyone that helped me along the way as well as my buddies who were there on meet day to cheer me on! Big thanks to Adam Pine for helping me have a successful first meet!

Here are videos of my successful lifts:

350 Squat

210 Bench – apologies for the grainy video

460 Deadlift -5lb PR

Some Other Great Resources on the Topic

All About Powerlifting – Tim Henriques (this book literally covers everything about powerlifting).

2×4 Strength Program – Bret Contreras (this program is basic and boring. But basic and boring is what works!).

Learn to Squat Seminar – Jordan Syatt (<— he holds world records. You should listen to him).

Building the Big 3 – Greg Robins (fantastic powerlifting program co-written by Eric Cressey)

About the Author

Ryan Wood is a Certified Personal Trainer through the American Council on Exercise. He interned at Cressey Performance in Hudson, Massachusetts, coaching athletes, professional baseball players, and general population clients for the last several years. He now works as a personal trainer in the Boston area.

He is passionate about about all things lifting and wants to help his clients reach their ultimate goals. He recently began powerlifting and will compete for the first time in October 2014.

You can check out his website HERE or become BFFs with him on Facebook HERE.

CategoriesProgram Design Strength Training

5 Reasons You’re Not Getting Stronger

Getting strong is easy. Focus on compound, multi-joint movements – preferably the squat, deadlift and bench press – and then try to move more weight in those lifts on a weekly, monthly, and yearly basis.

Photo Credit: JD Hancock

Basically, lift heavy shit, a lot. Repeat. Forever.

So why do many people fail to make appreciable progress with their strength goals? In my latest article published on T-Nation.com today I delve into five mistakes you can fix:

Continue Reading…..

CategoriesProgram Design Strength Training

Pick Things Up – Month #2

I hope everyone enjoyed their extended Columbus Day weekend (for those who had the additional day off anyways).

Mine was lovely. I took Lisa to go see Gone Girl – you know, a nice romantic comedy. And by “nice romantic comedy,” I mean the exact opposite of that.

It was my second time seeing it. You can read my initial thoughts on it HERE.

Lisa and I also spent a fair portion of Sunday taking engagement photos in and around Boston. I know, I know: for most of you the last thing you want to read about is something on our photo shoot, and I PROMISE I won’t be that guy who routinely “vomits” relationship/engagement cuteness stuff your way.

But come on!  You have to admit: we’re so cute you want to punch us in the face.

Did I mention we’re engaged?

We’re engaged…..;o)

I also spent a good portion of the weekend prepping for the new website launch.  I’m soooooo excited for all of you to see the new site, and I about peed myself a little when Jason and the peeps over at Copter Labs revealed the new digs.

I’m still sorta knee deep in website jargon today, and don’t really have a ton of time to put up a content heavy post.

But I do have something cool for you to check out! 

Pick Things Up – Month #2

While it’s technically a deadlift-centric program, in reality it’s a program that will get you strong. If that’s your bag.

You will deadlift, a lot.  But it’s a well-balanced program under the umbrella them of STRENGTH!

Another cool aspect of this program – and something I feel separates it from the masses – is that it utilized the WeightTraining.com platform.

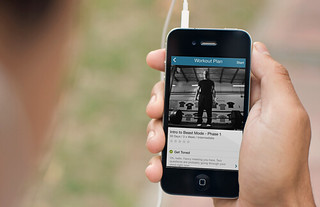
What this means is that not only do you get 24/7/365 access to a 4-month program that I designed, but you’ll also have the opportunity to set your own schedule (with email reminders), log your training sessions online, have the ability to use your iPhone, iPad, or Droid to do so, in addition to having access to WT.com’s extensive video library (as well as other features).

Remember

Hiring me for one month of individualized distance coaching will cost you more than it will to follow this program for FOUR MONTHS.

And, you have the benefit of all the goodies that come with using the WeightTraining.com platform.

For those who missed out on Month #1 go HERE.

But for those who want to continue the awesome, you can purchase Month #2 HERE.

Thanks, and happy lifting!

CategoriesProgram Design Strength Training

How to Program Farmer Carries

I know Dan John has relentlessly sung their praises. And, after listening to him speak last weekend, I know Gray Cook is a big fan of them too.

What am I referring to? CrossFit? ShakeWeights? One Direction? Bacon wrapped figs?

None of the above.

Besides, everyone knows that Dan is an N’Sync‘er for life. And urban legend suggests the inspiration behind Gray Cook developing the FMS is from him watching Backstreet Boys videos and being in awe of their movement quality.

Clearly none of that is close to being true.

And now that I’ve opened myself up to a libel civil case, lets push all that under the rug and get to what I’m actually referring to (not that the title didn’t give it away or anything).

Farmer Carries

Dan John loves carries. Just last weekend Gray Cook named them his #1 most functional exercise. And while I’m not close to being at the same level as those two – I’m still eating at the proverbial “little kids table” with regards to my place on the fitness authority totem pole – I too am a huge fan, and feel they’re one of the most underrated and least utilized exercises out there.

I’m a huge advocate of carries as I feel they offer a gulf of benefits.  Everything from grip strength to improved hip stability to increased core strength to helping to build a yoked up upper back.

Breaking things down further:

– When performed unilaterally, they’re a fantastic way to train core stability – specifically anti-lateral flexion.  But even when performed bilaterally, they’re still an awesome “core” exercise.

– As noted above, they obviously help improve grip strength.  Taking it a step further, though, they do an amazing job of “activating” the rotator cuff through a process called irradiation.

In non-geek speak, all this means is that when you squeeze something with a death grip, the rotator cuff turns on, and as a result the shoulder “packs” itself.  In a sense, carry variations are a great exercise for those with chronic shoulder issues.

The only caveat would be for those with a depressed shoulder girdle or who present with downwardly rotated scapulae (or, more specifically, those who are symptomatic and have shoulder pain along with the aforementioned criteria). In this scenario, loaded carries may not be a good fit.

– Farmer carries do an amazing job at challenging hip stability – especially when performed unilaterally (one arm at a time).

– They condition the shit out of you. The next time someone asks you whether or not weight training has any cardiovascular benefit, have him or her do a few rounds of carries for 50-75 yds.  And then laugh at them.

– And lets just state the obvious:  they do a superb job of increasing one’s overall sense of badassessey.

How to Program Carries

I received an email from a reader the other day asking how I go about programming carries into people’s programs and figured it was something that could benefit more people if I answered it here.

1. How should one program loaded carries into training? I.e., should it be in an upper body day or lower body? I tend to do farmers walk on lower body days while I do goblet or racked carries on upper body days.

As always, the answer is…….it depends.

Carries can be used for so many different things.  I’ve used them with people suffering from low-back pain; I’ve used them as a conditioning tool; I’ve used them as part of a strength pairing (one of my favs is pairing heavy bench press with carries); I’ve used them as a stand alone “thing” on off-days.

Much of it depends on someone’s goals.  If they’re a Strongman competitor for example, carries could very well be a “main movement” on a given day and will be prioritized accordingly.

Conversely, for the more mortal of us, I like to use carries towards the tail-end of a training session as either a C1-C2 circuit (think: carries paired with Goblet Reverse Lunges. It’s important to think about grip being a limiting factor when pairing exercises with carries. Goblet variations don’t require as much grip), or maybe as a finisher where I want to, you know, “finish” someone.

Try this:

A1.  1-Arm KB Carry – Right Side (30 yds)
A2. KB Swing x 15
B1.  1-Arm KB Carry – Left Side (30 yds)
B2. KB Goblet Squat x 10

*** Perform in circuit fashion and rest for 60-90s at the end.  Perform 3-5 rounds depending on how much you want to hate life that day.

I think the approach you laid out above is spot on.  If I had to choose, I’d place loaded (heavy) carries on lower body days, and maybe some low-level/low-intensity racked or Goblet carries on upper body days as part of an extended warm-up or towards the end of the training session.

Another option to consider, and something that some of us coaches at CSP do on occasion, is to have a dedicated “carry day.” We’ll pick a day of the week after work and just work up to a set TOTAL DISTANCE we want to hit.

Week 1: 160 lbs (per side) x 20 yds per trip.  Work up to 80 yds

Week 2: 160 lbs (per side) x 20 yds per trip. Work up to 100 yds

Week 3: 200 lbs (per side) x 20 yds per trip. Work up to 80 yds

Week 4: 220 lbs (per side) x 20 yds per trip. Work up to 100 yds

NOTE:  I wouldn’t do something this aggressive the day before a significant lower body session.

The weight selection can obviously be tweaked to fit one’s ability, and in between sets we can add in fillers like wall hip flexor mobilizations, band pull-aparts, reverse crunches, deadbugs, or any other low-grade activation/mobility drill that 1) won’t impede performance on the subsequent sets of carries and more importantly 2) helps address and fix shit.

2. Is there a specific weight/timing/distance on how long to walk for different objectives?  If I want to be strong, what kind of weight should I be looking to use and what distance or timing should I be looking at?

And if I want muscle gainzzz, I suppose that would require more TUT and so, what should I be looking for again?

In terms of weight, I feel most people, most of the time tend to be overzealous with their weight selection.

This isn’t to say that every set has to look pristine – heavy carries are heavy, and it won’t look fantastic 100% of the time.  However, I do feel there’s a cost/benefit of going too heavy, which I address in THIS post.

Technique does matter here.

If someone is performing carries with an excessive forward head posture and/or excessively leaning to one side or the other (or rounding their back), are they really gaining any benefit other than bragging rights and a few high fives?

If strength is the goal is you need to make sure you’re progressing in some fashion, whether it’s actively increasing the weight used each week, the distance travelled, or both. See circuit I described above.

I think a bit of variety comes into play here.  I LOVE offset (1-arm) carries. I also like Crossbody carries (assuming one has ample shoulder flexion to do so safely).

And if you REALLY wan to get crazy and inventive, you can do something like this:

So yeah, staying cognizant of factors such as how much weight you’re using, distance travelled, Time Under Tension (TUT)……aim for a total amount of time under tension (say, 3-5 minutes), and even adding in a little variety all enter the conversation.

There’s no right or wrong approach.

3. I always wanted to ask: why 40 yards? I realise unlike normal exercises with sets/reps panned out, loaded carries are more unconventional and I can’t seem to find more info on how to program them to meet specific objectives. I’m hoping you could help me address this issue.

I think we tend to gravitate towards 40 yds as our marker at the facility because we have 40 yds worth of turf we can utilize. Understandably, not everyone has access to that much space in their gym.  Using smaller increments is fine.

Some distance coaching clients of mine have super limited space – I’m talking 10-15 ft, or the equivalent of their living room – and I’ll have them perform toe-to-toe carries where they literally walk toe-to-toe across the floor.  It’s harder than it sounds.

Nevertheless, I hope I was able to shed some light on how I go about programming loaded carries into the mix.  There are a million and one different ways to go about it. What I described above are just a handful of my “go to” strategies.

Cause I want it thaaaaaaaat way……..

CategoriesMotivational Strength Training

Lessons Learned Preparing for My First Powerlifting Meet

Today’s guest post is brought to you by a good friend of mine, Ryan Wood.  I first met Ryan back in 2010 when he came up to Cressey Sports Performance from Virginia as a collegiate baseball player.

In the years since he has played professionally, interned at CSP, and since retiring from baseball has moved to Boston to pursue a career in fitness in addition to spreading his love for the word “BOOOOOM.”

Seriously, I’m not kidding. He’ll scream it every time someone hits a big lift, or whenever he walks into a room, or if it happens to be a Tuesday. It doesn’t matter.

Ryan’s gearing up for his first powerlifting meet in a few weeks and I asked him if he’d be interested in shedding some insight on some of the lessons he’s learned in the process. I really enjoyed what he had to say. And even if you don’t compete or have any interest in competing, I feel much of what he says applies to everyone regardless of their goals.

Enjoy!

At the beginning of 2014, I decided to move on from baseball and jumped right into power lifting. For the longest time, I had a burning desire to train the big 3, and train them hard. I wanted to get stronger, and because of  my competitive nature I had to find something to fill the void from no longer playing baseball; I knew I wanted to “compete” at some point, and powerlifting seemed like the perfect fit.

I was a pitcher for many years so my training wasn’t geared towards getting as strong as humanly possible. Due to the nature of the sport, it wasn’t of tremendous benefit to back squat, barbell bench press, or even conventional deadlift.

Once I retired, it didn’t take long for me to decide to register for my first power lifting meet. I started training right away. In preparation for my upcoming meet October 11th, I’d like to share some lessons I’ve learned along the way.

While I have been strength training consistently for the last 4-5 years, my time spent training for powerlifting is fairly limited. My training was geared towards making me a better baseball player, and much of my time was spent training at Cressey Sports Performance in Hudson, Massachusetts.

With limited experience back squatting, barbell benching, and conventional deadlifting, it was time to get under the bar. A lot.

I’d like to thank Jamie Smith and Greg Robins for helping me prepare for my first meet.

1. Experience is Important

To get better with the Big 3, I needed to get some quality training in.  My competition was many months away so my training began more generalized. I started out doing 50 total reps for each lift.

I can remember starting with 135lbs on squats just to get the patterning down and get more comfortable with the bar on my back. I had done plenty of front squats, cambered bar squats, and safety bar squats, but time spent back squatting was very limited since I began training seriously for baseball.

My goal was simply to get more experience with the competition lifts.

I trained four times a week and the bulk of my training time was spent getting better with squatting, benching, and deadlifting. I started light with these movements and increased the weight steadily during the first few months of my training. If you have limited experience with a certain lift, you have to get experience with that movement or else you won’t get stronger. I soon became more familiar with the competition lifts and steadily increased my weights.

Greg’s Building the Big 3 Plan served as the backbone for much of my training during the initial months.

2. Technique Actually Does Matter

Although I was brand new to the world of powerlifting, I was familiar with how the lifts were done. I learned a lot of technical cues from my time spent at Cressey Sports Performance, surrounding myself with guys that were way stronger than myself.

In the sport of powerlifting, technique plays a major role. An individual can get stronger with poor form, however at a certain point the gains will come to a halt and technique will become the limiting factor.

One thing I learned from the very beginning of my training was that good technique from the get go would be crucial to my success. Creating tension will make or break a solid lift.

Here are some key technical points I learned for each lift:

Squat

Photo Credit: Alastair Montgomery

  • Find a bar position that suits your squatting style. I have been experimenting with bar positioning and have seem to found that a slightly higher bar position works best for me.
  • Get tight and stay tight. Drive your upper back and chin back into the bar and fill your belly with air. Keep this tension during the entire squat.
  • Do not worry about “sitting” back so much if you are a raw lifter. Think more in terms of unlocking the hips by pressing the glutes back slightly and then squatting between your knees.

Bench

  • Get as tight as possible through your entire body.
  • Drive your upper back into the bench.
  • Bar speed is important. When I first started benching, I brought the bar down to my chest way too slow. In doing so, I became fatigued by the time I went to press off the chest. Try bringing the bar down with good tempo but not dropping the bar onto the chest.
  • Stay up the entire time. Driving the lats up and keeping the sternum as high as possible will not only shorten the distance the bar has to travel, but will also allow you to press more weight.

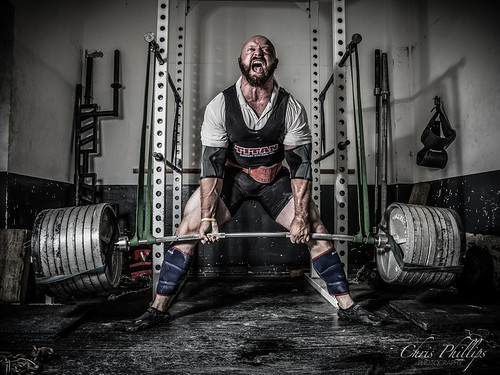
Deadlift

Photo Credit: Chris Phillips

  • Get your air before you pull. Some like to get their air twice, others prefer once. Do what works for you. Think about putting air into your abdomen, sides, and lower back.
  • Pull the slack out of the bar and get your chest up. Try to get your shoulders over the bar whether you pull sumo or conventional.
  • Start pulling back as soon as you break the ground. This will create tension in the glutes and hamstrings which will make the lift much smoother and connected.

3. Follow a Plan

My training partners, Jamie and Greg, introduced me to Block Periodization. There are many different programs designed for building maximum strength but Block Periodization is the one they believe in and utilize themselves.

Note from TG:  Triphasic Training by Cal Dietz is a nice introduction to the “idea” of block periodization.

Sticking to a plan is critical to staying healthy while continuing to get stronger in the gym. With block training, there are periods of heavier loading and volume, and times with less volume and lighter percentages.

With this type of training, I was able to hit my percentages during each block, which I feel will help set me up to be successful at my first meet.

Following a plan will keep you honest and keep your ego in check.

Greg Robins always tells me to work on building my strength instead of constantly testing my strength. During the last few months, I have been working on building strength so that I can test it come meet day.

4. Have a Mentor/Coach

Without Jamie and Greg’s coaching and programming, I would have been completely lost trying to prepare for my first meet.

As I progressed with my training, Jamie took over programming for me and set me up with a block periodization plan to help me  prepare. Having someone to help you along the way is crucial.

Jamie gave me cues to help me with proper technique week in and week out. I took his advice seriously because I knew that it would help me immensely in the long run.

With benching in particular, doing pause reps were very important for me. Jamie stressed the importance of doing pause reps because this ensured that I was staying tight and keeping my sternum up throughout the lift.  He recognized a weakness in my technique, kept me honest, gave me feedback and coaching, and I’m all the better for it.

Moreover, a mentor and coach is also a great support system. As weights start getting heavier, having a coach to guide you with cues during a set is priceless. I’ve been fortunate enough to train with Jamie and Greg and have learned many invaluable pieces of information from them both.

5. Build Strength, Don’t Test It

Photo Credit: Greatist

Building strength takes time.

Sometimes several months go by before your strength can come to fruition. With the way my training was set up, I was able to increase my strength over the course of months with the intent of peaking for my upcoming meet. Work on hitting your numbers during training. Do not miss reps.

The preparation I went through was not designed so that I could set gym PRs. It was designed for me to peak on the platform.

I’m looking forward to competing for the first time. I can’t wait for the adrenaline to rush through my body as I step onto the platform. Getting stronger is a hell of a lot of fun, and displaying that strength will be the real test.

Some Other Great Resources on the Topic

All About Powerlifting – Tim Henriques (this book literally covers everything about powerlifting).

2×4 Strength Program – Bret Contreras (this program is basic and boring. But basic and boring is what works!).

Learn to Squat Seminar – Jordan Syatt (<— he holds world records. You should listen to him).

About the Author


Ryan Wood is a Certified Personal Trainer through the American Council on Exercise. He interned at Cressey Performance in Hudson, Massachusetts, coaching athletes, professional baseball players, and general population clients for the last several years. He now works as a personal trainer in the Boston area.

He is passionate about about all things lifting and wants to help his clients reach their ultimate goals. He recently began powerlifting and will compete for the first time in October 2014.

You can check out his website HERE or become BFFs with him on Facebook HERE.

CategoriesExercise Technique Program Design Strength Training

Q&A: Does Age and Heavy Training Take a Toll on the Spine?

As you can imagine I get a lot of emails on a daily basis.  I get emails from friends, colleagues, clients, Nigerian Princes wanting to give me all their money, and I also get a fair number of emails from people I don’t know asking me any number of health and fitness questions.

Below is a question I received the other day which I had never received before and something I felt I could elucidate on here in more detail (while at the same time helping others who may have the same question).

Q: Can people squat and deadlift because they have strong backs, or do they have strong backs because they squat and deadlift?

After squatting and deadlifting for the first time in 8 years, I found that my back (lower and thoracic) is by far the weakest it has ever been – it holds my numbers back substantially and if I push just a little too hard, my back feels like its about to go.

Not only that but my back stays incredibly tight the following days.

Prior to this hiatus, I was almost bullet-proof and could do nearly everything without pain. I’ve since had chronic tightness in literally every muscle, but switching to unilateral lower body movements resulted in a dramatic training difference with no after pain or tightness.

I may have my biases, but is this why I see so little older individuals continuing to squat and deadlift the numbers they used to? Or to reiterate, do those rare older individuals who squat and deadlift heavy already have strong lower backs to begin with, or did they build up this strength by squatting and deadlifting heavy?

Lastly, is unilateral lower body movements substitutes for squats when long-term joint health is concerned? Thanks!

Spencer

A: Thanks for the question, Spencer. There are a few angles I’d like to take to answer this.

1.  I kinda-sorta hit on the topic earlier this year when I wrote THIS blog post on Programming Strategies for the Old(ish) Meathead.

I’m 37 now, and while I don’t consider myself old by any stretch of the imagination – although Lisa and I love early bird dinners before 5:30 PM on the weekends, and I’m usually in bed before 9 PM – I understand that what I used to do in the gym when I was 25, and what my body was able to handle back then, no longer holds weight (<—- HA! Pun totally intended).

This isn’t to say I don’t still get after it, but I’d be lying if I said that I haven’t accumulated a few aches and pains throughout the years and that I haven’t had to “tone down” my training to a small degree.

The article linked to above taps into some of my thought process(es) with regards to programming strategies for guys who don’t feel like Batman or Superman anymore.

2. A believe a little dose of expectation management needs to be addressed here.  You mentioned that it’s been eight years since you last squatted or deadlifted with any frequency. Don’t you feel that that plays a bit of a role in the grand scheme of things?

Are the squats and deadlifts themselves to blame for your soreness and tightness? Maybe. Or should we point the finger at the eight year absence from any significant loading?

I remember back in the summer of 2008 I decided to play in an over-30 adult baseball league. I had obviously thrown a baseball here and there up to that point, but I hadn’t played competitive baseball or thrown any significant innings since the summer of 1999 and 2000. An eight year hiatus itself.

Me, circa 1999, my senior year at Mercyhurst University. I had hair back then. The good ol’ days.

On the batshit scale on which WTF “why is my arm killing me?” was measured, what was to blame more: the actual act of throwing a baseball, or the fact I took an eight year break from throwing a baseball?

I went from zero innings pitched over the span of eight years to over 70 innings pitched in one summer.

To be fair (to myself), I did hold my own that summer. I went 8-1 with an ERA under 1.00 and had over 100 Ks in those 70 innings.

Funny story:  my best game that summer was the first game after my then girlfriend broke up with me out of nowhere. I showed up to the game and struck out 20 batters in nine innings. Granted, I was probably crying on the mound during the entire game…..but my fastball was un-hittable that day!

I even tossed a no-hitter that summer. I didn’t suck or embarrass myself during the season. But by the end, my arm was hanging on a thread.

The only person to blame was myself because I didn’t do much to properly prepare myself.

It’s analogous to what you’re going through, Spencer, and what I’m sure a lot of people in the same situation are going through.

3. Barring any current injury, the body will adapt to whatever stress you place upon it.

Consider Wolff’s Law and Davis’s Law.  You can’t discount physics. The former states that bone in a healthy person or animal will adapt to the loads it is placed under. The latter states the same thing, except with regards to soft tissue.

Deadlifting/squatting = strong bones + soft tissue. You need a minimal essential strain (MES) in order for tissue to adapt. Likewise, in order to strengthen tissue, you need to load it.

Neither of the two just happen. So no, I don’t believe people “just automatically have strong backs,” therefore they can squat and deadlift to their hearts content with little ramification(s).

I do believe heavy training (which I understand is all relative) does take a toll on the spine. However, I also believe that if someone takes the time to learn and hone technique, implement appropriate progressions based off their needs and ability level, and refrain from taking eight year breaks, that they’d best set themselves up for long-term success….;o)

Lastly, as far as unilateral lower body training is concerned and whether or not that’s a more “joint friendly” substitute for squats……..it depends.

There’s no denying that performing unilateral movements will lead to less axial loading on the spine. But we could also make the case that how people squat – even when it’s not with heavy loads – can place more stress on the joints, particularly the spine and knees.

– Are you squatting with an overly rounded back? How about the exact opposite end of the spectrum: are you overarching?  Both can be detrimental.

– Are you ensuring upper back stiffness when you set up to squat?

– Are you performing more of a “quad dominant” squat or a “hip dominant” squat? With the latter, you’ll need to sit back with the hips more, push the knees out, and use more of your hips and posterior chain to perform the movement.  This can make a profound difference on not only how the squat feels, but performance as well.

It is possible to make squats more knee friendly.

All of this is not to say everyone has to squat and deadlift.

Especially the older we get.

Sometimes it just doesn’t feel good no matter how on-point someone is with their technique and programming. If either of the two movements aren’t a good fit, they’re not a good fit. It’s not the end of the world.

But I do know plenty of people older than myself who are still deadlifting and squatting with abandon and do quite well.

That being said: I feel the above suggestions are an excellent way to audit yourself and to troubleshoot a few things.  Hope that helps!

CategoriesExercise Technique Strength Training

3 (Not So Common) Mistakes People Make (That Many Don’t Think About) When Trying to Improve Their Deadlift

I don’t claim to know everything.

Sure I can regurgitate all the muscles that attach to the scapulae, list all the muscles involved with posterior pelvic tilt, name all the members of the starting line-up for the 1990 Oakland Athletics, recite line-for-line the “I will find, and I will kill you” monologue Liam Neeson uses in the movie Taken, and, on a good day I can crush my multiplication table.

I know stuff, but I don’t know everything.

One of the exceptions, however, is the deadlift. I know the deadlift. As a strength coach it makes sense. I mean, it’s my job to help get people freaky strong, and it’s kinda hard to do so without at least a casual relationship with the deadlift. Don’t worry I always buy it dinner first….;o)

Moreover, most serious weightlifters recognize that the deadlift is what often separates the men from the boys.

As an example here’s Cressey Sports Performance athlete, Dave Stanton, deadlifting 600 lbs for an easy set of three.  With no belt (at a bodyweight of 192 lbs).

Yes, we recognize he’s bouncing the weight off the floor a little bit.  Relax, internet.

David is a bit of an outlier. A freak if you will. We often joke at the facility that he’s a deadlifting savant because he’s always been good at it. It’s as if he was built to deadlift – look at those leverages!

But that doesn’t mean he hasn’t had to work his ass off in order to get to this point.

He’s been training with us for over four years, and has spent a lot of time working with us under our supervision.

Using David as our inspiration and model, I wanted to discuss what I feel are some things that a lot of trainees overlook when it comes to their approach to the deadlift.

1. Not Placing a Premium on Technique, Technique, Technique

Playing the Captain Obvious card, it goes without saying that in order to get better at the deadlift, you need to deadlift. It’s the Law of Specificity played to it’s most specific tune.

Quarterbacks don’t get better at throwing a football by playing Madden.

Chefs don’t get better at food preparation by watching Top Chef.

And you don’t get better at deadlifting by watching Youtube videos or by just “showing up” at the gym and doing leg curls.  YOU NEED TO DEADLIFT!!!!

More to the point, you need to hone technique. Technique trumps everything.

Not all deadlift variations are created equal. When most people think of a deadlift they automatically leap to the conventional deadlift, which, by all accounts, can be argued as the most advanced variation.

Not everyone can show up on day #1, walk up to a bar, pick it up off the ground, and make it look passable. I.e., not make me want to pour battery acid into my eyes.

Which is why it’s important to regress the movement to fit the current ability level and needs of the lifter. Learning the hip hinge pattern is vital and serves as a precursor more advanced exercises down the road.

There are a million and one different ways to regress the deadlift to help someone learn to hip hinge, which is why I feel it’s such an invaluable exercise.

At the lowest level we have drills which help engrain the motor pattern we’re looking for and to teach “neutral” spine:

Wall Tap Hip Hinge

KB Behind the Head Hip Hinge

Band Lat Activation w/ Hip Hinge

Once we’re confident they’re able to groove the hip hinge and control their spine, we can then start adding load with more rudimentary deadlift exercises like kettlebell deadlifts, suitcase deadlifts,  and “potato sack” or DB deadlifts.

From there, when we want to start adding more appreciable load the order we typically use at Cressey Sports Performance is Trap Bar Deadlift —> Sumo Deadlift —> Conventional Deadlift —> Dude, you’re like Han Solo now.

And, to be honest, it’s not until someone has a good 1-2 years of solid, legit training that we start implementing more superfluous things like chains, bands, and the like.

There’s plenty we can do with JUST a barbell.

Below is a video I originally shot for the release of Mike Robertson’s Bulletproof Athlete, which goes into more detail on some of the ways I progress (and cue) the main deadlift variations.

So to reiterate – TECHNIQUE is kind of important.  Learn it. Also, take into account the importance of properly placed progressions. Not everyone is Gandalf and can walk into a gym on day one and crush a perfect deadlift.

Also, if you want to read something that will give you a deadlifting boner I’d suggest reading THIS magnum opus by Mike Robertson, or check out any of THESE 22 articles listed by T-Nation as the best deadlifting articles on their site.

2. Speed Work? Technique, Technique, Technique (Part II)

Listen, most people who train don’t need to worry about “speed work.” Yes, getting faster and honing bar speed is a factor in improving strength, but for most people, most of the time, it’s a complete waste of time.

Let me explain.

First off, unless you’re pulling (at least) 2x bodyweight I don’t feel adding in speed work or a dynamic speed day – or any other connotation you use to pretend like you train at Westside Barbell – into your training repertoire is going to serve as the x-factor.

Lets just call it what it is.  TECHNIQUE WORK!!!!

Using sub-maximal loads forces people to dial in their technique, and THAT’S where I feel the true value of “speed work” lies.

Instead of calling it a speed work, I just call it a technique work and I try to implement it into most people’s programs at least once per week (especially if they’re trying to work on a specific movement, like the deadlift).

It may look something like this:

Week 1: 12×1 @ 55% 1RM

Week 2: 10×1 @ 60% 1RM

Week 3: 8×1 @ 65% 1RM

Week 4: 6×1 @ 70% 1RM

I’ll typically allot 30-45s rest between each rep.

Another approach I use (with more intermediate and advance lifters) is to have someone use 70% of the 1RM and to then set a timer for 10-15 minutes and they perform ONE rep every minute, on the minute for the allotted minutes.

Week 1: 65% at 10 Min

Week 2: 65% at 12 Min

Week 3: 70% at 12 Min

Week 4: 70% at 14 Min

Either way the idea is to use lower loads to HAMMER technique (which in turn is going to help with bar speed and overall performance in general).

3. Lack of Upper Back Strength

Like it or not, most people have weak upper backs and they don’t train it enough. I’m a HUGE proponent of adding in some form of dedicated upper back work in every training session.

I think this serves several benefits:

1.  It will undoubtedly help with deadlift technique in the long run.

2. From a posture standpoint, it will help to offset the endless hours we all spend in front of our computers watching LOLCats working.

3.  A thick, wide, upper back just looks badass.

To that end, I feel most trainees should go out of their way to add in some upper back work – both horizontal AND vertical – into their programs.

Now, this doesn’t mean you have to go balls to the wall and load yourself heavy every session, but it stands to reason most people won’t be doing themselves a disservice by incorporating this mindset.

I like to add in some high(er) rep TRX Rows or face pulls on my lower body days, and I’ll sometimes perform heavy chin-up variations too.

On upper body days, I’ll almost always be including some form of heavy barbell row or DB row.

Make no mistake:  a strong upper back will help you deadlift more weight.

Pick Things Up and Put Them Down

And it’s on that note I want to remind everyone that my new Deadlift Specialization Program hits on all the above points (and then some).

It’s a FOUR-month program that will not only turn you into a deadlifting Jedi, but you’ll get hella strong to boot.

What’s more, not only do you get a program written by me, but you also get the advantage of using WeightTraining.com’s user friendly platform to receive workout reminders, track and log your workouts, and watch videos, all by using your smart phone.

I also included a 30% discount that will last for the next 24 hours (through Wednesday, September 10th), because I’m cool like that  All you have to do is type in IncreaseDeadlift30 within the Coupon Code area at checkout.

For more information and to get your deadlifting on go HERE.