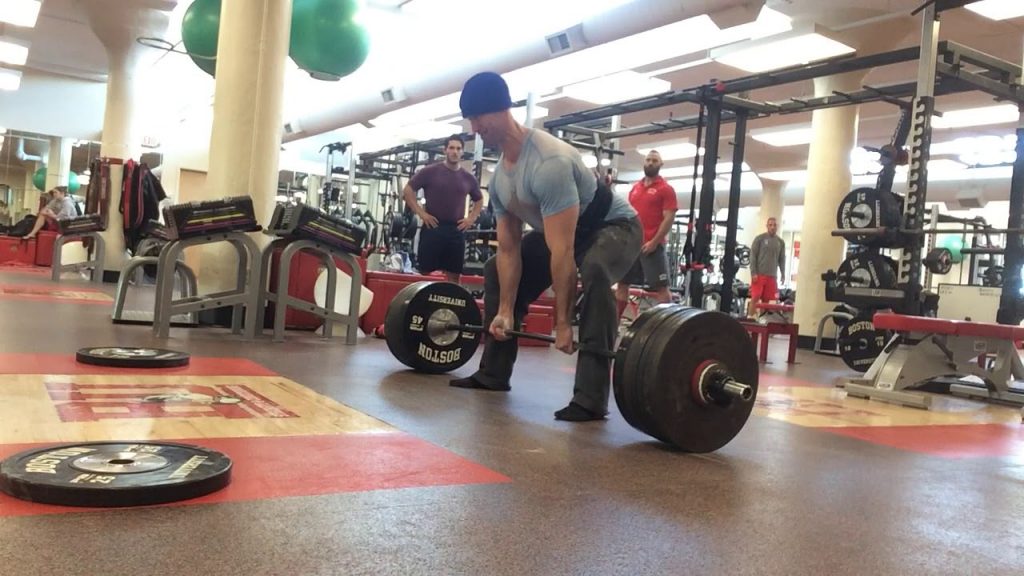
I’ve always been painfully slow off the floor when I deadlift.
Like, you could be watching the movie Titanic and I’d juuuuust be getting the barbell off the floor by the time you got to the part where Rose lets go of Jack.
If this sounds like you, you may need some more squats in your life.
A few years ago I made a concerted effort to prioritize my front squats (and upping my squatting volume in general) and was finally able to conquer a 600 lb pull.
The additional squatting undoubtedly helped improve my quad strength and ability to push away from the floor when I initiated my pull.
Heed my warning, though. If your deadlift volume is up it’ll behoove you to opt for more front squats or high-bar back squats since both will allow you to maintain a more upright torso (less shearing on spine). If your deadlift volume is on the low end, feel free to implement more low-bar back squatting.
👇👇👇 Check out a sample training split below (after the video) 👇👇👇
Here’s a quick example of how I’d structure the deadlift to squat ratio based off deadlift frequency:
Deadlift 1x Per Week (2 Lower Body Sessions)
Day 1:
A. Back Squat: 5×2 @ 60%, 60s rest
B. Deadlift: 2×2 @ 85%
C1. Deadlift – For Gainz: 4×4 @ 70-75%
C2. Deadbug Variation 4×5/side
C3. Stab Someone in the Face 4×3
Coincidentally enough I choose the picture for today’s guest post before actually reading it.
Oops, a minor editorial mistake.
You see, as you’ll learn below, placing a barbell on your back during single leg exercises – while not a wrong strategy to partake – does have a distinct disadvantage.
HINT: More load isn’t always the “x-factor” with regards to making exercises more challenging.
Suffice to say, lesson learned (but I’m too lazy to go back and find a different picture).
I hope you enjoy this excellent piece by two colleagues of mine – Dr. Michelle Boland (a phenomenal local coach here in Boston) and Tim Richardt (a former coach at CORE who’s now located in the Denver area) – that gave me a few Ah-HA moments.
Quarantine have your legs and butt looking skinnier than Gollum’s?
An excellent example of commitment to a singular goal, but not of muscular development.
Get your quads, glutes, and hamstrings looking more bountiful than a post-Mordor-crumbling Shire feast with these single leg exercises!
We’re done with the Lord of the Rings references now, we promise.
We’ll explore loading options, body positioning, front versus rear foot elevation, and direction of center-of-mass (COM) movement to help you taste those sweet, sweet single-leg gains.
Let’s get right to it…
#1 Front Foot Elevated Zercher Split Squat
Load Position Advantage
Holding the weight in the crook of your elbows allows for more relaxation of muscles on the backside of your trunk, enabling increased depth WHILE circumventing grip strength as a potential rate-limiter for loading.
A barbell placed in the traditional “back rack” may rob you of comfortable hip range-of-motion (ROM) due to compression of muscles on the backside of your trunk.
Loading in the Zercher position lets you maintain more VERTICAL displacement throughout the movement, and more pure-up-and-down displacement means more stimulation of muscles that DO vertical displacement (i.e. glutes and quads), leading to more gains and more eventual jealousy from your high school ex after they see your jacked wheels on Facebook.
No barbell? We can accomplish a similar effect with 2 DBs.
Vertical displacement whilst keeping a STACKED position during a split squat, vital to loading muscle tissue (yay!) and minimizing joint strain (boo!), is reviewed, HERE.
Why Front Foot Elevation?
Elevating the front foot shifts your COM backwards, meaning the muscles of the front leg can relax to a greater degree to allow for more depth during the lowering (eccentric) portion of the movement. Additionally, raising the front foot shifts the trained range of motion into deeper degrees of hip flexion, leading to greater mechanical stress placed on the musculature that extends the hip (dat booty).
Bonus; Heel Up?
Try elevating your front heelto enable increased loading of the knee and hip whilst maintaining the “vertical stack” during this drill.
Be sure to maintain heel contact and allow your knee to drift forward over the mid-foot to allow for more hip and knee flexion.
#2 Staggered Stance Retro RDL
Why Backwards is Better…
The Staggered Stance Retro RDL allows you to use the front leg to push your COM backwards towards the leg that’ll be doing all the work. This exercise HAMMERS glutes and hammies, and is a great stepping stone towards an eventual unassisted SLRDL.
The KEY distinction between the conventional RDL (or Heels on Wall Variation) and the staggered stance retro RDL is the direction of your COM travels. In the rear foot single leg deadlift, your COM translates forward, whereas in the staggered stance retro RDL, your COM migrates backwards.
Going front foot supported allows for more of a sit “back” scenario encouraging a more advantageous orienting of the hips to access ROM (remember: more ROM, more loading, more gainz) as well as reducing the challenge of NOT falling forward onto your (pretty) face.
Why Single Arm Loading?
We love a single KB held in the opposite hand (in reference to the back leg), as this encourages rotation of the ribcage TOWARDS that rear leg. Rotation towards the side we’re loading means we’re able to load muscles of that hip to a greater degree, and the combination of an opposite hand reach AND a front foot support ensure we’re loading the back leg’s hamstrings and glutes as much as we possibly can.
Technique
Some pointers with the Front Foot Supported Single Leg Deadlift:
Position the non-working leg in front of the working leg and use the front (non-working) leg to push the back (working) leg backwards. This results in a hip “shift” TOWARDS that back leg.
The arm opposite the working leg holds the KB and maintains a path over the big toe of the back foot. That reach further supports the shift you obtained in step 1.
Sit your hips back in space, feeling loading on the heel, base of the big toe, and base of the little toe. Reverse this motion by pushing through this “tripod foot” back to the starting position.
#3 Rear Foot Elevated Split Squat
Jack Up That Back Foot
The Rear Foot Elevated (RFE) Split Squat is a variation that places greater emphasis on the front leg. This exercise is also a good progression towards a strict single leg activity, such as a single leg squat.
While performing a boring ‘ol split squat, the load is fairly evenly distributed between the front and back legs. However, elevating the rear foot shifts your center of mass forward, dramatically increasing the loading of the front leg. Train this sucker and that leg’s getting more yoked than a Marriott Courtyard omelette bar.
The RFESS is #3 on this list because it trains a little like a cross of exercises #1 and #2.
It’s a vertical movement (like our FFESS), but the forward lean created by the elevation of the rear foot enables some degree of forward/backwards COM displacement (like our deadlift variation). The result is an unholy cross of glute and leg destruction.
Placement of Load
To optimize loading with this drill, we recommend dumbbells in each hand- like THIS. As we mentioned previously, a barbell placed in the traditional “back rack” position tends to compress muscles on the backside of the body, robbing the body of hip flexion availability and trainable range of motion.
The distance between your front and back legs- your “stride length” during a split squat- also matters.
A short stride length (front foot closer to back foot) will bias hip musculature (glutes). If you elongate the stride length you’ll shift the loading to more quads, leading to more yoked legs with which to better fill out those new early-Christmas jeggings.
Bonus Yoked-Worthy Exercise: Walking Toe Touch Lunges
Muscle Recruitment
Walking Lunges with an opposite arm reach facilitate more high hamstring recruitment by biasing a posterior tilt of the pelvis. High hamstrings fix the position of the pelvis, enabling greater loading of the hip extensors (butt), making this drill an excellent choice for a “finisher” after your main exercises. To quote our good friend, the wise and powerful Tony, after performing a set of these, “I FELT it in my soul”!
DISCLAIMER; Michelle and Tim are NOT responsible for any Soul-Delayed-Onset-Muscule-Soreness (SDOMS) experienced after performing this drill.
Technique
Big pointers with the Walking Toe Touch Lunges
Maintain up/down motion by keeping your head stacked over your chest and stacked over your hips… put simply “mostly elevator, a little escalator”
Reach your opposite arm to your front big toe keeping your breastbone pointed straight ahead and letting your shoulder blade reach around your ribcage
“A little” hinge at the hips is necessary to stay moving FORWARDS, but “a little” is all you get
Be nice to your back knee, a soft surface is ideal with this drill
Focus on turning into your abs on the same side as the front leg
Stand up by pushing the ground away with the front foot (that same tripod foot as we discussed previously)
You get no bonus points for lunging LONG- keep your stride length short and controlled
Summary
Choosing single leg exercises that will allow you to achieve the greatest ROM while moving heavy loads are key to targeting more muscle mass. Gettin’ more yoked than a 12th century plow animal is all about moving load over ROM.
Intelligent holding positions, such as DBs at sides and zercher, beget more motion availability.
The positioning or elevation of your feet relative to one another is VITALLY important in ensuring we’re loading the target tissue through as large of an available range as we can muster.
Now go get those legs so HUGE that grandma’s gonna have to buy you new Christmas stockings.
Today’s guest post comes courtesy of Dr. Michael Mash.
I have a legit man-crush on him ever since I’ve started diving into his online resource Barbell Rehab. As the name implies: Its mission is to help barbell athletes (and aficionados) overcome pain and improve performance WITHOUT being forced into “corrective exercise” purgatory.
In a sense, it’s designed to use barbells (and lifting stuff) to help fix shit. What’s more Tony G than that? Okay, maybe Jason Bourne fight scenes.
Or dragons.
Or an endless cheese plate.
Regardless, Barbell Rehab speaks to my strength coach love language, and as it happens Michael is offering his course to all my readers at $50 off the regular price for this week only.
All you have to do is click THIS link and enter the coupon code TONYG50 to receive your $50 credit.
And even if you’re not keen to saving money (weirdo) you should still give his blog post below a read because it’s riddled with common sense and practical applications you can use TODAY to improve your squat screen or assessment.
When it comes to effectively screening the squat, many personal trainers and strength coaches have different approaches. From not utilizing a screen at all, to performing dozens of assessments prior to implementing a bodyweight squat, what is the best way to screen the squat?
Before we answer this question, let’s first talk about the function of a “screen” in general.
What is a Screen and Should We Use it?
According to John Hopkins…
“…a screening test is done to detect potential health disorders or diseases in people who do not have any symptoms of disease.”
If we apply this definition to the squat, one could say that a squat “screen” is a test performed to detect potential joint, muscle, or movement impairments in those who don’t have any pain.
In order for a screen to be effective, a “failed” test must be highly predictive of future injury or pain. If it’s not, this could create a lot of false positives results (a.k.a telling someone they’re doomed for injury if they really aren’t). So on one side, you want to make sure your client is “safe” to squat before loading them up, but you also don’t want to prevent them from squatting if they don’t really need to.
Oh the dilemma!
It’s Tough to Really “Predict” Pain and Injury
As mentioned, in order to analyze the efficacy of a screen, we need to know if it can indeed accurately predict injury. As it turns out, the research isn’t so sure about this.
In fact, it has been shown that one of the most common movement screens, the FMS, is only slightly better than a 50/50 coin flip at predicting injuries. This doesn’t mean, however, that you need to throw the baby out with the bathwater. While both myself and the authors of this paper note that the FMS can be used to see HOW a person moves, it shouldn’t be used as a way to predict injury.
If the FMS can’t reliably predict injury or pain….what can?
Because pain is a multidimensional experience driven by biological, psychological, and sociological factors, it is really a reductionist mindset to blame pain solely on “tight hamstrings” or “poor form” in general.
In fact, factors such as stress, anxiety, depression, lack of social support, job dissatisfaction, and poor sleep and nutrition can ALL affect a person’s pain experience. This is why we need to zone OUT when it comes to “predicting” injury and really take a comprehensive approach. The WAY someone moves is certainly important, but it’s just one tiny piece of a much larger puzzle.
What is an Effective Movement Screen?
So how should you effectively screen the squat? In order for a screen to be effective, it needs to be SPECIFIC, and there’s no better way to be specific than to actually perform the movement itself. Yep, that’s right. The best way to “screen” the squat, is to actually have the client perform a squat.
This process will give you ALL of the information you need in order to make a decision on whether or not they are “safe” to proceed forward with loading the squat.
And guess what?
It doesn’t involve any kind of joint-by-joint assessment, specific muscle flexibility testing, or any other long drawn out processes either.
While the aforementioned approaches can be beneficial to “dig deeper” if someone already has pain, they’re rather unnecessary as part of a screening process in asymptomatic individuals.
For those without pain, here’s a simple process I recommend in order to determine if they are safe to squat.
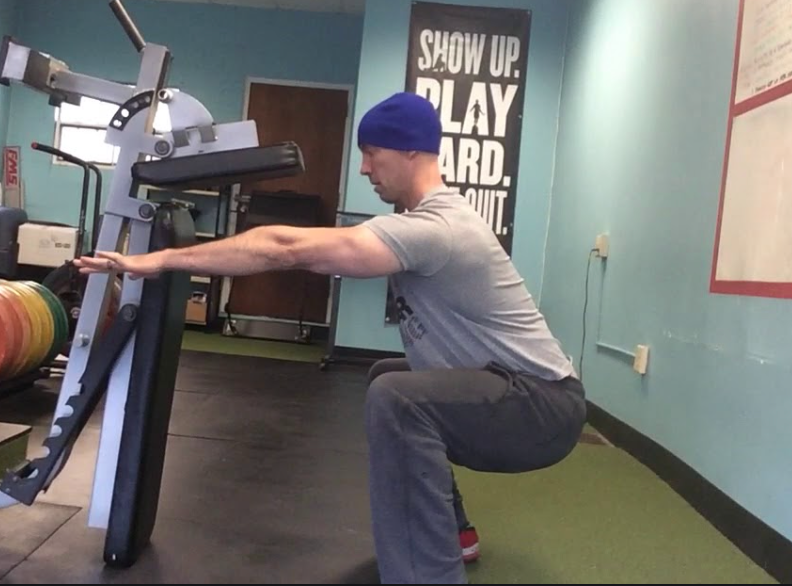
Step 1: Show Me Your Squat
The first step of our world’s simplest squat screen is to simply ask the client to “show me a squat.” I like to do this for a few reasons. First, it will give you an idea of what they “think” a squat is and how they move in general. Two, it will also give you an idea of how hesitant they are to move.
Some will just drop it low into a perfect squat and others will hesitate to start and move really slowly. You may see the latter example if someone has a history of pain or has fear with movement in general.
This is all useful data to collect on this important first step. If the squat looks good, congratulations!
Your job is easy today, and it’s time to load them up!
If it needs some work, it’s on to the next step.
Step 2: Coach the Squat
After asking the client to show you their squat, it’s time to coach it. While everyone is going to squat with a different stance width, degree of toe out, and torso angle, it helps to at least have a frame of reference to start from.
I recommend cueing them into a heels shoulder-width stance with a moderate 20-30° toe out, and then asking them to squat as far down as they comfortably can. While this foot placement won’t work for everyone, it’ll work for the majority of people. In this initial bodyweight squat coaching phase, some people may have discomfort or won’t be able to quite get to parallel…and that’s ok.
That’s why we have Step 3.
Step 3: Modify Stance and Depth if Needed
If you coach the client into a shoulder-width slightly toed out stance, and they have pain with this, or they can’t squat very deep, all is not lost yet. Two of the most common pains you’ll see with a bodyweight squat are hip and knee pain. And just because they have pain, doesn’t mean they are injured or need to be referred out to a rehab professional. It may simply just be the way they are built.
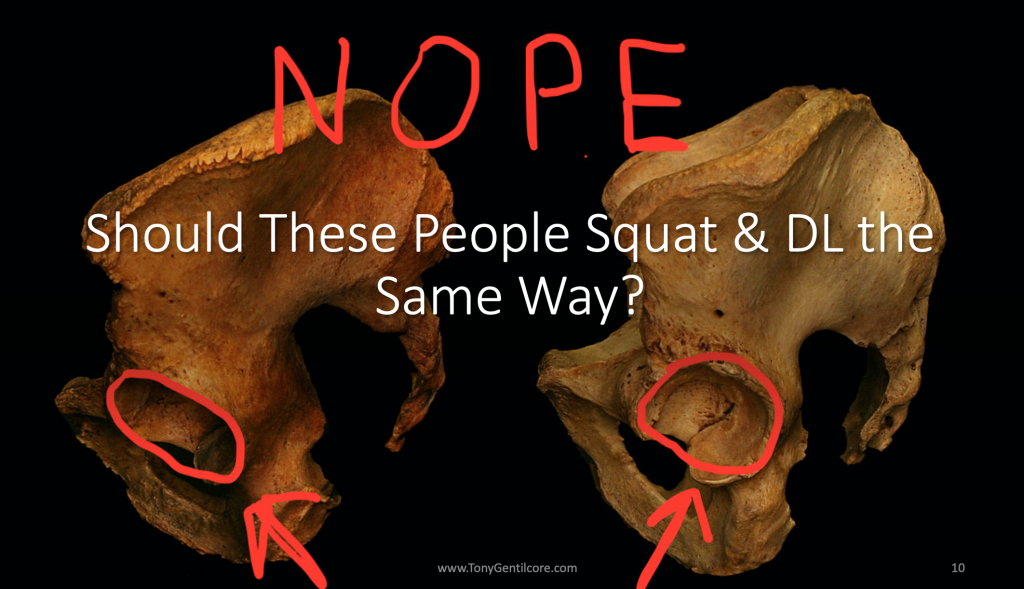
For example, if you take someone with highly retroverted hips, and have them try to squat with a narrow stance with minimal toe out, they may get a “pinch” in the front of their hips at the bottom. This can usually be remedied by widening the stance a bit and turning the toes out more. This doesn’t mean anything is wrong with them…it’s simply the way they are built!
Tying it all together, if someone has pain when you coach them into a bodyweight squat, see if it’s relieved with a simple stance adjustment. This is 100% within your scope to do as a personal trainer or strength coach, as you’re not diagnosing, assessing, or putting your hands on the client at all.
Step 4: Change the Exercise and/or Refer Out
Sometimes the squat pattern itself is so sensitized, that a stance or form adjustment isn’t enough to eradicate pain. If this is the case, I’d recommend NOT proceeding forward with having the client squat, and instead, finding a similar exercise like a rear foot elevated split squat or a lunge variation that they can tolerate.
If the client’s goal is to squat, it would also be best at this point to refer out to a qualified rehab professional as well. This is why interdisciplinary care is so important in the health and fitness world. At this point, as the personal trainer or strength coach, you can continue to train your client with what they can tolerate (full upper body workouts and modified lower body exercises) while the rehab professional addresses the pain itself.
A Quick Note on Squat Depth
Sometimes no matter how much you modify stance, degree of toe out, or hip position, your client won’t be able to squat to “depth.” Depth is defined as when the greater trochanter of the hip goes below the top of the patella from a side view.
In this case, you need to find out if it’s simply because they feel “tight” or if it’s limited by pain.
If it’s limited by pain (even after stance adjustments) then you may want to refer out. If they just feel “tight,” then you can proceed forward with loading them up to tolerance….even if it’s not quite to depth. That’s right. There is no evidence to suggest that squatting above parallel is inherently dangerous.
Rather than spending six months working solely on mobility to increase squat depth, you can work on BOTH simultaneously. Train the squat to the depth the client is comfortable with and tease in mobility drills at the same time.
This one-two punch of increasing mobility and loading through it, will help your clients squat deeper (if that’s their goal) much quicker than not squatting at all.
Tying it All Together
The squat is one of the most beneficial lower body movement patterns to coach your clients through. While everyone will squat with a different stance, degree of toe out, and variation, there’s no need to take clients through an extensive “screening” process prior to loading them up.
Instead:
1️⃣ Ask them to “show me a squat” to get an idea of how they move to begin with
2️⃣ Coach the squat. Cue them into a moderate stance with slight toe out and ask them to squat as deep as they can
3️⃣ If they have pain, see if you can find a stance width, degree of toe out, and depth that is tolerable for them. If so…it’s time to load them up!
4️⃣ If they still have pain after a stance adjustment, it’s probably best to hold on squatting for now and to refer out to a rehab professional for further assessment.
About the Author
Dr. Michael Mash is the owner and founder of Barbell Rehab, a continuing education company dedicated to helping fitness and rehab professionals improve the management of barbell athletes. Check out his CEU approved online course, The Barbell Rehab Workshop at this link and use coupon code TONYG50 for $50 off.
Whenever someone rounds their back on a deadlift two things happen:
A baby seal dies.
I have to fight off the urge to throw my face into a fire.
Caveats exist, however.
Everyone at some point will round their back.
Elite lifters will do it – sometimes on purpose – to lock out a max effort lift.
Newbie and intermediate lifters will do it – almost always not on purpose – to lock out any lift…🤪
The difference is that elite lifters are strong (and knowledgable) enough to know how to self-correct when teetering with a precarious position (end-range spinal flexion), and mostly everyone else is not an elite lifter.
As I’ve noted repeatedly, if your goal is to become a deadlifting Terminator then the bulk of your accessory work should address either a weakness or technique flaw.
The SLOW START deadlift is a superb choice for those lifters who have trouble with their hips coming up too early and/or have a difficult time with maintaining upper back tension. I’ve been using this with a my clients and it’s been magical to see the progress they’ve made with their technique.
Performing 3-5 sets of 3-5 reps using 50-70% of 1-rep max should do the trick.
Some people will read the title of this post and see what they want to see…
“…Tony G has lost his mind. He’s telling people that doing eccentric only pull-ups to help build their actual pull-up is wrong. He also hates kittens.”
Others will know better and actually continue reading.
The Missing Ingredient to Conquering Your First Pull-Up
I’d be remiss not to note that most competent programs designed to help people become pull-up badasses either emphasize or incorporate eccentric only variations.
Hell, one of the most baller programs out there (and one I reference often myself) – Meghan Callaway’s Ultimate Pull-Up Program (ahem, it’s its 3-year anniversary this week and it’s on sale for 50% OFF the regular price hint, hint, nudge, nudge) – incorporates a bevy of eccentric only pull-ups…
…among many, many other things.
I mean, it’s well established that the eccentric (or lowering) portion of any exercise is generally where a trainee is strongest, can handle the most load, and, potentially, leads to the most muscle growth.
All the above being the case, when it comes to BUILDING the pull-up, I still feel too many trainees (women AND men, mind you) miss the forest for the trees.
Despite it being an excellent choice, performing 5 to 10 lackluster eccentric only pull-ups week in and week out does not a pull-up make.
It’s akin to me posting a shirtless pic on my Match.com profile – and only a shirtless pic – and then underneath that pic typing…
First of all: I’m a happily married man and don’t have a Match.com profile. It’s just a metaphor. But, coincidentally enough, I did meet my wife there…;o)
Second: I’d like to think my superior writing skills and uncanny wit was what won her over and led to us meeting for our first date four days after crossing paths digitally.
Third: In the age of Tinder, Bumble, and the litany of other dating apps at society’s disposal, do people even use Match.com anymore?
Where was I?
Right, what else to focus on other than eccentric only pull-ups.
Do More
I think one of the biggest mistakes I see most people make with their pull-up/chin-up programming is that they simply don’t train the pattern enough.
Most people will train their pull-up once, maybe twice per week.
This isn’t enough.
Pull-up badass, Artemis Scantalides, will often advocate a frequency of 4-5x per week.
However, this approach only works well for those who can already perform 3-5 pull-ups and are looking to level up that number.
If you can’t even perform one this would be a daunting prospect to say the least.
That said, I think staying cognizant of total VOLUME is an often overlooked component of pull-up progress.
As in: A metric fuck ton (which is just a tad below a metric boat load) of pulling volume is undoubtedly going to result in some cool things happening.
I like to incorporate the following (hybrid) vertical pulling progressions when working with an individual working toward their first pull-up
This is hands down one of my favorite accessory “pull-up builder” exercises (and upper back exercises in general).
I LOVE the lat stretch in the bottom position.
If someone is looking to conquer their first pull-up I’d be more inclined to include one of these exercises as part of EVERY training session aiming for 2-4 sets of 5-15 repetitions
The “easier” drills are assigned more sets and reps.
The “harder” drills are assigned less sets and reps.
Sick beats optional.
Ultimate Pull-Up Program & Ultimate Push-Up Program
All this week you can purchase Meghan Callaway’s Ultimate Pull-Up Program at 50% off the regular price. Meghan is one of the best coaches I know and this program is without hesitation THE “go-t0” program if you’re looking to take your pull-up game to the next level.
Moreover, you also have the option of purchasing both the Ultimate Pull-Up Program & the Ultimate Push-Up Program at a heavily discounted price.
Nevertheless, given many people have lost access to their regular gyms due to COVID-19 and have been regulated to training mostly at home these two programs couldn’t come at a better time.
I’m a firm believer in many things: The Earth is round. The Bourne Ultimatum is the best Bourne movie. And most accessory work should address a weakness or technique flaw with one of your main lifts.
Enter paused deadlifts.
There’s no sugar coating here: these can be absolutely brutal, but they accomplish a few important things:
They help synchronize the shoulders and hips (namely the latter) from coming up too fast.
They help improve upper back (lat) tension.
They get people stronger in ranges of motion where they’re weakest.
For programming purposes, aim for sets of 3-5 reps using 50-65% of 1-rep max, pausing 2-3 inches off the floor (or at mid-shin level depending on the individual and where the bar tends to stall) for a 2-3 second count each rep.
If you want to up the ante even further, perform a full pause in the same spot on the way up AND the way down.
My good friend – and currently #7 on my list of Top 10 man crushes – David Otey was in town to teach the course.
It was lovely to spend time with my friend whom I hadn’t seen in several months. But too, after an equal gap in absence, it was downright biblical to finally be amongst a group of fitness professionals in a learning environment. I didn’t realize how much I missed in-person continuing education until I was marinating in it for a few hours.
I took home a bounty of insights and ideas in the few hours I was there, however there was one analogy in particular David used that really resonated with me
Do Not Cross Doesn’t Really Mean You Can’t Cross: Fitness in a Nutshell
Anyone who lives in a large city is familiar with the throng of “Do Not Cross” signs peppering the sidewalks and streets.
Pedestrian life is controlled by their never-ending playlist counting down when it’s safe to cross a street and when it’s not.
They’re there for a reason; for our safety and the public good.
Not surprisingly, most people ignore them and cross the street anyway.2
And 99.9999% of the time…it’s fine. We survive. Not a scratch.
…but your head better be on swivel.
The same theme applies to lifting weights. As David noted during his talk on squat assessment and squat technique, people can back squat with a straight bar (often considered at the top of the pyramid in terms of most advanced squat variations), but it only takes that one time using too much load or being too overzealous where something goes awry.
Likewise, think about the conventional deadlift.
I’d argue the conventional deadlift – particularly when performed from the floor – is the most advanced variation of deadlift one can perform:
Axis of rotation is further away from the barbell.
More shear load on the spine.
More likely your soul will leave your body.
It requires a fair amount of mobility (access to requisite hip flexion, thoracic extension, ankle dorsiflexion) as well as picking the right parents (short torso, long arms) to be able to get into and maintain the proper spine position to perform safely.
NOTE: I believe Dr. Stuart McGill has noted in his research that something like 93% of the people he’s assessed during his career could not perform a conventional deadlift from the floor without compensating through their lumbar spine in some fashion (I.e., loaded spinal flexion).
NOTE II: Maybe it’s 91%. No, wait, 87%. Either way, it’s a lot…;o)
All of this to say: Yes, back squatting is fine. As are conventional deadlifts. But they’re both examples where the bulk of trainees are crossing the street when the “do not cross” sign is flashing.
Most can do them.
And most will probably be fine.
However, this is why it’s imperative to assess your clients/athletes and be more cognizant of “fitting” any program to THEM – and their injury history, their goals, their ability level, and yes, their anthropometry – rather than the other way around.
We can vastly reduce the risk of injury with most trainees by utilizing safer alternatives that tend to be a better fit across the board anyway – like the Trap Bar Deadlift, Front Squat, or even a SSB Bar Squat.
It’s still squatting and deadlifting…
…you’re just, you know, less likely to be taken out by a moped.
You’ve heard these before: Chest up. Extend your T-spine. Create torque in your hips.
Those are cues which work well for some, but can sound like Elvish to many trainees, particularly when they’re new to deadlifting. Instead, get more acquainted with external cues which, contrast to their internal counterparts (which speak to what the body is doing in space), imply intent or direction.
These can be game changers when it comes to helping people better understand what you’re asking them to do as a coach.
There’s no shortage of “debates” in the health/fitness space. Ideal neck position during a deadlift is also a hotly debated topic and I can appreciate both sides of the argument. Here’s my take and what has worked well for me and my clients.
Maintaining a “neutral” spine during a deadlift is paramount.
It’s the first commandment of deadlifting.
Neutral in this sense means “maintaining the spine’s natural lordotic (lower back) and kyphotic (upper back) curvature.”
Coaches will start hyperventilating into a paper bag if they see an athlete round his or her back during a deadlift. Okay, so why do we not hold the same standard to the cervical spine or neck? Is the neck not part of the spine?
I prefer people adopt a chin tucked or “packed” neck position:
👉 It reinforces the neutral spine, which the neck is part of. I understand the other side of the argument. There are many examples of people extending their head back during a deadlift (i.e. a not-packed neck) and they’ve been fine.
👉 But in the beginning stages, a packed neck is my preference. Then as someone grows more proficient with the movement they’re allotted more leeway. Besides, what often happens during a max effort attempt – extended neck, and yes, sometimes a rounded back – should not be held to the same standard as a sub-maximal attempt or to someone just learning the lift.
👉 In terms of how to cue the proper neck position, I like to have lifters stare at a target 10-15 feet in front of them on the floor. This helps with better neck position and actually helps increase full-body tension.
You hear this cue a lot with regards to deadlift technique and performance.
I could say something as equally abstract like, I don’t know, “banana honkeydorey train whistles” or “please pass the parmesan, Chad” and seemingly get the same message across.
Which is to say…
…what the heck does “get slack out of the bar” even mean?
In short, it refers to getting better leverage and “connectivity” before you initiate the pull.
Many lifters yank the bar off the ground, which in turn makes me cringe because I’m always afraid someone’s going to rip their bicep tendon off the bone. Moreover, the yanking action elicits a loud “clank” noise (barbell hitting inside of plates).
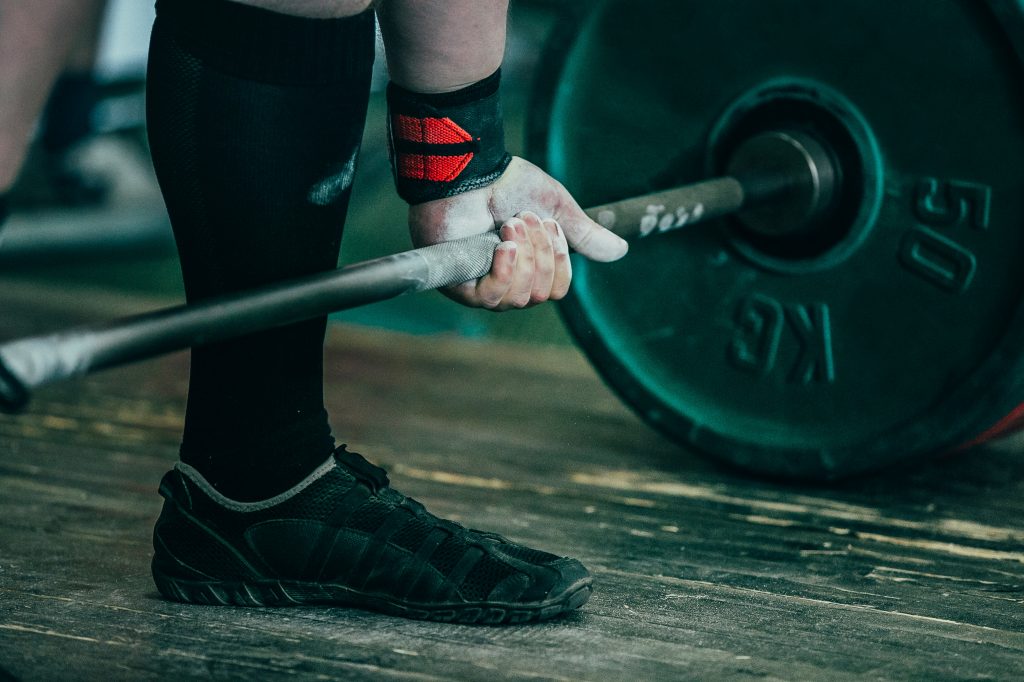
Getting the slack out of the bar means using the barbell as a counterbalance to 1) gain leverage, and 2) get everything connected – inner cylinder of the plates “connecting” with the barbell – BEFORE you initiate the lift.
I like to tell my clients/athletes to get two clicks: bend the bar (get the slack out), then pull.3