There’s no shortage of “debates” in the health/fitness space. Ideal neck position during a deadlift is also a hotly debated topic and I can appreciate both sides of the argument. Here’s my take and what has worked well for me and my clients.
Maintaining a “neutral” spine during a deadlift is paramount.
It’s the first commandment of deadlifting.
Neutral in this sense means “maintaining the spine’s natural lordotic (lower back) and kyphotic (upper back) curvature.”
Coaches will start hyperventilating into a paper bag if they see an athlete round his or her back during a deadlift. Okay, so why do we not hold the same standard to the cervical spine or neck? Is the neck not part of the spine?
I prefer people adopt a chin tucked or “packed” neck position:
👉 It reinforces the neutral spine, which the neck is part of. I understand the other side of the argument. There are many examples of people extending their head back during a deadlift (i.e. a not-packed neck) and they’ve been fine.
👉 But in the beginning stages, a packed neck is my preference. Then as someone grows more proficient with the movement they’re allotted more leeway. Besides, what often happens during a max effort attempt – extended neck, and yes, sometimes a rounded back – should not be held to the same standard as a sub-maximal attempt or to someone just learning the lift.
👉 In terms of how to cue the proper neck position, I like to have lifters stare at a target 10-15 feet in front of them on the floor. This helps with better neck position and actually helps increase full-body tension.
You hear this cue a lot with regards to deadlift technique and performance.
I could say something as equally abstract like, I don’t know, “banana honkeydorey train whistles” or “please pass the parmesan, Chad” and seemingly get the same message across.
Which is to say…
…what the heck does “get slack out of the bar” even mean?
In short, it refers to getting better leverage and “connectivity” before you initiate the pull.
Many lifters yank the bar off the ground, which in turn makes me cringe because I’m always afraid someone’s going to rip their bicep tendon off the bone. Moreover, the yanking action elicits a loud “clank” noise (barbell hitting inside of plates).
Getting the slack out of the bar means using the barbell as a counterbalance to 1) gain leverage, and 2) get everything connected – inner cylinder of the plates “connecting” with the barbell – BEFORE you initiate the lift.
I like to tell my clients/athletes to get two clicks: bend the bar (get the slack out), then pull.1
I remember a few years back when I was still coaching at Cressey Sports Performance another trainer who was there observing for the day walked up to make casual conversation and to ask a question he wanted my opinion on.
Him: “Hey Tony.”
Me: “Hey, what’s up?
Him:“Oh, not much. Say, I noticed pretty much everyone here only deadlifts using the trap bar.”
Me:“Indeed. We don’t feel the majority of people need to use the straight bar or anything. It’s a risk-reward scenario where we feel the risk isn’t worth any inherent (ego) reward.”
Him:“Huh, but don’t you feel you’re feeding dysfunction or that they’re cheating by using the trap bar only?”
And by that what I mean is that it took every ounce of willpower for my eyeballs not to roll out of their sockets.
Let me address each point separately.
“Do I feel I’m feeding dysfunction?”
Due to improved mechanics with regards to the center of mass (you’re inside the barbell) and axis of rotation (hips closer), the trap-bar deadlift is a safer, more user-friendly variation.
A deadlift is a deadlift is a deadlift.
So long as someone hinges at their hips, maintains a neutral spine, and then proceeds to lift something off the ground from a DEAD stop, I don’t care if it’s a barbell, a trap bar, or a Volkswagon.
My job as a coach is to do the best I can to “match” an exercise to the injury history, ability level, and goal(s) of the individual I’m working with.
Almost always the trap-bar is going to be the best option in terms of not only performance, but safety as well.
“Do you feel they’re cheating?”
Nope.
Unless you’re a competitive powerlifter or weightlifter, you don’t HAVE to use a straight bar. It’s not cheating.
I often tell people that what “connects” you to the barbell during the deadlift isn’t your hands.
Rather, it’s your lats.
Having the ability to engage them and firing on all cylinders during the set-up and execution has profound ramifications on deadlift technique and performance.
The thing is: For some trainees, asking him or her to “turn on your lats” is akin to understanding Klingon or, I don’t know, being able to perform long division.
When COVID unveiled its ugly head this past winter and forced the health/wellness industry to shut down I did what every fitness professional did:
Hyperventilated into a paper bag.
But after that, I did the second most germane thing:
Watched the entirety of Ozark on Netflix.
But after that, I created CORE @ Home: A weekly “stream” of 30-40 minute workouts people could perform in their living rooms (or wherever: bedroom, man-cave, hovercraft) using minimal equipment.
You can now purchase the entire series (3 months worth of programming which includes 36 total workouts) for whatever it is you want to pay.
Starting today you can purchase the entire enchilada for $1 or $1,000,000.00 or $47 (or anything in between).
Your choice.
What Do You Get?
Three workouts per week divided into three sections: Athlete, Build, Condition.
Athlete = Simple, anyone-can-do-them-trust-me-you’re-not-LeBron-James plyometric drills to help you conjure your inner athlete.
Build = The meat & potatoes or “traditional” iron work centered around exercises that use bodyweight, bands, kettlebells and/or dumbbells.
Condition = The part where you’ll hate life. Hahahaha. Just kidding.4[
Each workout includes coaching instruction providing simple cues to follow as well as options to make exercises more challenging or easier.
You also get a cameo from my Achilles rupture.
NOTE: To clarify: I didn’t rupture my Achilles during the actual filming of the workouts – I did it sprinting during a workout I was doing on my own. However, about half way through you’ll notice the model becomes infinitely more attractive because my wife was a trooper and filled in for me for a handful of weeks to demonstrate all the drills and exercises.
Nevertheless, given many of us are still reticent (or in many cases unable) to head back to our regular gyms it’s become apparent more and more people are seeking out quality programming they can do in the comfort of their own home.
Programming that’s simple, easy to follow, effective, and also fun.
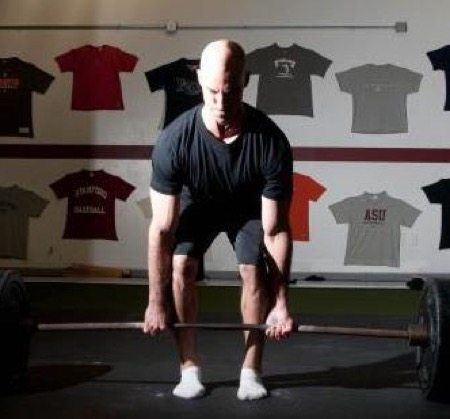
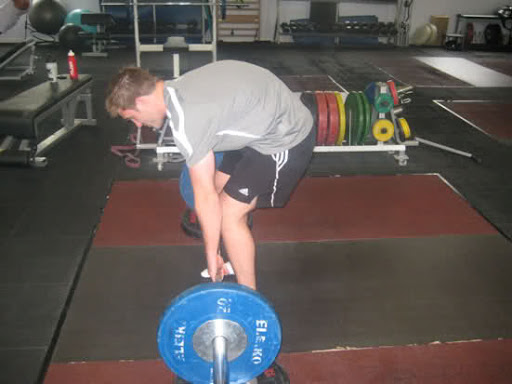
In the most rudimentary sense the deadlift can best be described as an action where one bends over at the waist, wraps his or her’s hands around a barbell, and then “pulls” said barbell off the ground until they’re standing fully upright with their knees and hips locked.
Of course, there are a few important nuances with regards to back position to consider.
For brevity’s sake you can think of the setup as shoulders above the chest, and chest above the hips.
This.
Not This
Ya Heard
Anyway, you want to think about putting force into ground and pushing away, rather than just pulling the bar off the floor.
In my experience whenever I see someone’s back rounding or I see their hips come up a bit too early I find they’re not placing any emphasis on the PUSH (and using their quads to help with leg drive).
Another option is to think about “pushing the ground away from you.” This subtle reframing has made a profound difference with many of the lifters I’ve worked with.
In this one I discuss how to figure out your best stance for deadlifting success as well as some of my go to cues to help clean up deadlifting technique.
It even includes a 20-30 minute video of me taking Dani Shugart through the process.
Granted I’m biased, but I truly feel making a concerted effort to get strong(er) in the gym is the way to go for most people.
Strength is the base for pretty much everything; it’s the “thing” that most all other attributes we strive to improve upon is tethered to
Speed, power, endurance, Laser Tag world dominance, literally, pretty much everything performance based has its “roots” in improved strength. What’s more, there’s also a significant interplay between strength and improved body composition (strong people typically have more muscle), not to mention a high correlation of less risk of getting injured.5
I’m not saying strength is the end-all-be-all-answer-to-everything-and-you’re-totally-going-to-be-the-hero-of-your-recreational-slowpitch-softball-team-and-have-the-stamina-of-37-Spartan-Warriors-in-bed…
But How Can You Tell If You’re Getting Strong(er)?
There’s a lot of nuance as to HOW to get stronger (HINT: lift heavy things consistently) in addition to HOW to measure it.
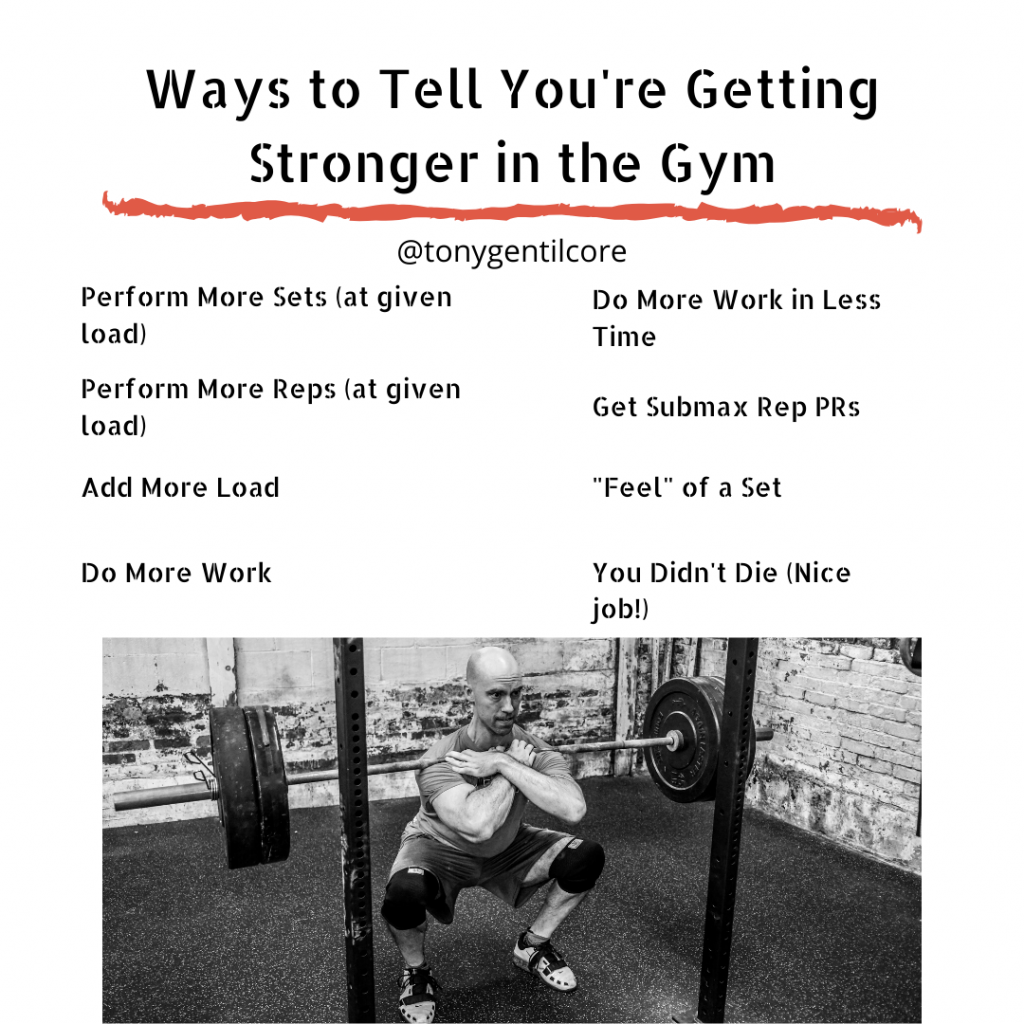
However, for the sake of brevity I made this handy Cliff Notes graphic to hammer home the key components at play:
The left-side of the graphic is fairly self-explanatory, but in case some people reading are looking at this as if it were written in Elvish let me elaborate.
If you make a consciouses effort to perform either more reps, sets (or both) at a given load…you’re winning.
Example
Front Squat (225 lb)
Week 1: 3 sets of 5 reps = 15 total reps at a total tonnage (volume) of 3,375 lb lifted.
You know you’re getting stronger if you stay at the same weight and you perform either an additional set or more repetition(s).
This is also called PROGRESSIVE OVERLOAD.
So, Week #2 could go as follows:
3 sets of 6 reps = 18 reps completed at a total tonnage (volume) of 4,050 lb lifted.
4 sets of 5 reps = 20 reps completed at a total tonnage (volume) of 4,500 lb lifted.
Likewise, if you add more weight to the bar and lift that once, twice, eleven times, well, the secret’s out…you’re stronger.
Hell, I may as well just hand you the Sword of Grayskull and give you a killer bowl cut at this point.
To simplify things further: You’re going to get stronger if you DO MORE WORK over the course of several weeks, months, years.
To Note: Beginners will have a much easier time with this than advanced lifters. Most beginners can just gaze at a dumbbell and they’re going to get stronger.6 The first year or two of training can easily be boiled down to what’s described above; linear periodization at its core.
The more time under the bar someone has, however, and the stronger they are, the more “fluctuations” in training parameters have to be taken into consideration.
There’s going to be more peaks and valleys in training stress/load throughout the year in order to improve strength, as well as more meticulous attention to things like bar speed, ability to recover, and what accessory work needs to be done to address weak points in technique.
Lets just say more things need to be taken into consideration to take someone from a 400 lbs. deadlift to 500 compared to someone going from 200 to 300 lbs.
The cool thing, though…once you ARE strong (whatever that means to you), while the work to get there is no walk in the park, it doesn’t require nearly as much effort to maintain it. Maximal strength, for example, has a “residual” duration of 30 (+/- 5) days.
Meaning, so long as you remind the body (to be more specific, the central nervous system) that it can do something, you don’t have to do a lot of that something to maintain it.
To summarize the left side of my handy graphic above:
“What gets measured gets managed.”
That being said, where many people seem to miss the mark is that, where strength is the main goal, it isn’t just about always doing more reps, sets, and/or adding more weight to the barbell.
1. Do More Work in Less Time
This is density training 101.
Not only is this indicative of improved strength, but work capacity as well.
2. Get Submax Rep PRs
Dan John is known for a bevy of remarkable quotes.
“The goal, is to keep the goal the goal,” is a popular one.
One of my favorite of his, though, is this:
“Easy training is good training.”
There’s a time a place for training to suck and to make you come close to shitting your spleen.
Here’s a hint: That time is not every…single…workout.
It’s music to my ears when I client says “your pecs are looking awfully pecy today, Tony.” But it’s a goddamn symphonic masterpiece when a clients says “I could have done more” at the end of a session.
This doesn’t imply that they didn’t work hard or that the training session wasn’t challenging (trust me, it was). Rather, what it implies is that they got their work in and will likely show up for their next session feeling refreshed and ready to go.
It’s hard to make strides in strength when you constantly feel like you got run over by a Mack truck.
In short: Make your 3-rep Max your 5-rep Max. Chances are your 1-rep max will improve too. You don’t always have to pursue ABSOLUTE strength in order to get stronger.
3. “Feel” of a Set
I find a lot of people are too quick to add weight to the bar at the expense of their technique.
Sure, you may complete all desired repetitions of a given exercise, but if my eyes start bleeding watching it or I could watch an entire episode of The Mandalorian before you complete five repetitions…
This is a Tony Gentilcore & Matthew Ibrahim collaborative post.
Or, as I like to call it: A Gentilhim (or Ibracore?) production.
The Safety Squat Yoke Bar (also referred to as “SSB”) is a popular speciality bar that’s most often affiliated with collegiate strength & conditioning facilities, powerlifting gyms, or gyms that are a bit more “serious.”8
However, the Safety Squat bar has grown in popularity in recent years and it’s popping up in more commercial and boutique style gyms as well.
This is great because Matt and I both feel the Yoke Bar is a valuable piece of equipment, one that should be in every gym, with a variety of training applications.
Before I proceed it would make sense to show you a picture of the bar so you know what we’re talking about.
Advantages
1. The SSB is a more “shoulder friendly” way of squatting. Because you grab the bar by the handles which, when the bar is on your back, are located below your shoulders and a smidge in front of the body, it doesn’t require as aggressive of a set-up as a traditional back squat.
Traditional Back Squat (Straight Bar) = Shoulders maximally abducted and external rotated. Many lifters don’t have access to this range of motion and as a result their shoulders are like…
SSB/Yoke Squat = Not the above.
2. The SSB is more of a “hybrid” squat. As Matt notes:
“Since the SSB has a longer bar camber from side to side (as opposed to a traditional barbell) plus a unique loading position for weight plates, it offers the lifter a fine balance between what they would expect from a barbell back squat and from a barbell front squat.“
3. The SSB “fixes” your squat. Mirroring what Matt mentioned above, because of how the bar is designed, you have to fight like hell to stay upright (which, not coincidentally, makes it a great option to strengthen the upper back AND help work on thoracic extension; two things most people need more of).
As you get stronger with the SSB/Yoke Bar it’ll make things infinitely easier to stay upright if or when you revert back to a straight bar.
4. The SSB = 110 Power Boost in World of Warcraft (but only with a +1 Shield and Infinity Cloak).
Nerd.
5. The SSB helps with depth. Because the bar is situated higher up on the back it promotes more of a “squat down” pattern rather that “squat back.”
This, in turn, will often help a lot of people squat deeper (if that’s something they’re interested in).
Here’s an SSB Squat in action.
The SSB Squat exercise is quite common and frequently used.
We wanted to delve a bit deeper to provide several other lower body training exercises you could perform with the SSB that you may not be using already in your overall strength and conditioning program.
1. SSB Hatfield RFE Split Squat (Matt)
Description: This exercise targets lower body strength and power, primarily in the quadriceps, hamstrings and glutes.
The trunk stability challenge here is the real deal as well, since you’re holding on to each side of the squat rack with your hands while the SSB rests on your shoulders. Be sure to press the entire surface of the working foot down through the ground as you power up from the bottom position to the top during each rep.
I’m a monster fan of this exercise due to the strength and power development components.
2. SSB Reverse Lunge (Tony)
Description: This was a staple exercise we utilized when I was coaching at Cressey Sports Performance due to it’s shoulder friendliness in addition to the fact we could be more aggressive with loading compared to dumbbells (grip becomes less of a limiting factor).
As with any single leg exercise there’s also a hefty balance and coordination component as well. I prefer a bit of a forward lean when executing this exercise as it places less stress on the lower back and also allows for more emphasis to be placed on the hips.
3. SSB 1-Leg RDL (Matt)
Description: This exercise targets lower body strength, primarily in the posterior chain muscle group (hamstrings and glutes). As the SSB rests on your shoulders, be sure to hold the handle grips tight with each hand to ensure trunk stability.
It’s important to also mention the relevance of keeping a neutral-ish spine as you descend down into the bottom position due to the orientation of the load on your shoulders. I like this exercise due to the single leg strength and stability demand it poses to the athlete.
4. SSB Front Squat (Tony)
Description: This is a variation I first witnessed my man Jim Smith – of Diesel Strength – recommend a few years. ago. I won’t go into the weeds on the benefits of a front squat
– you can read more HERE – but what I will say is that this variation is a wonderful way to counterpoint any client/athlete who insists that barbell front squats are too uncomfortable for him or her to perform,
I get it.
They suck.
They’re uncomfortable.
I don’t care, do this instead.
5. SSB Good Morning (Matt)
Description: Talking about posterior chain development without mentioning the Good Morning exercise is like eating eggs without the bacon; you just don’t do it.
The Barbell Good Morning has been a staple training tool for years when attempting to develop the glutes and hamstrings of the posterior chain muscle group. The SSB offers a slightly anterior loaded position when compared to the traditional barbell loaded version, which forces you to hinge your hips back even more than usual. I enjoy using this exercise as a way to really “feel” the hamstrings under load.
6. SSB Pin Squat (Tony)
Description: I loooooooooove9 this variation as an accessory movement to the deadlift.
The key is to try to approximate the pin height to one’s hips height so that it “matches” their deadlift setup. In other words: the starting position of the Pin Squat should mirror their deadlift setup.
Factor in the increased demand to maintain an upright torso (t-spine extension) and your entire posterior chain is going to be challenged with this exercise.
I thoroughly enjoyed her previous resource, The Ultimate Pull-Up Program, and used it with several of my own clients with great success.
I envy Meghan’s brain. She thinks of stuff I never would have thought of, and this latest program of her’s exploits that to the umpteenth degree.
Check it out HERE (it’s on SALE this week only), and also check out her article below showcasing some not-so-common core exercises utilizing the Landmine.
3 Landmine Core Exercises You May Have Not Seen Before
Landmine training and the countless exercises you can perform are badass, empowering, and extremely beneficial, and can be a key component in your training program. I am a huge fan of landmine training, and have been for a long time.
To be clear, while using a landmine attachment is great, it is not mandatory.
You can rest the barbell against a secure surface like a wall, box/other object, or on a no-slip surface. So really, all that is required to perform landmine exercises is a barbell and perhaps several weight plates.
Here are three landmine core exercises you might not have seen or tried before.
While these landmine exercises absolutely involve the upper body as well, and provide many benefits, these unique variations especially work wonders for improving lumbo-pelvic stability.
#1) Landmine Tall Kneeling Presses + Band Resistance
This exercise strengthens the chest, shoulders, and triceps, improves shoulder and scapular controlled mobility, and lumbo-pelvic stability. This exercise (and many other landmine pressing exercises) can be a great option if you struggle to perform overhead pressing movements.
Coaching Tips:
Set up a barbell so it is lengthwise, and is in line with the center of your body. You may anchor the barbell against a stable surface like a wall, weight plate, or box, or on a no slip surface. You may also use a Landmine attachment.
Loop a resistance band over the top of the barbell, and rest the band underneath your knees. There should be tension in the band for 100% of the movement.
Grab onto the top portion of the barbell. As for your grip, I like to interlock my fingers and place my hands on top of each other as this makes the body more symmetrical.
Get into a tall kneeling stance. Place your knees so they are approximately hip to shoulder width apart, and have a very slight forward lean in your torso. Your head, torso and hips should be in a stacked position.
Before each rep, take a deep breath in (360 degrees of air around your spine), brace your core (360 degree brace around your spine), tuck your ribs towards your hips (close the space in your midsection), and squeeze your glutes.
Now extend your elbows and press the barbell to a range where you are able to maintain proper form, then “row” the barbell back in to your body. In fact, your ability to control the movement of your shoulder blades plays a big role in your ability to perform this exercise. Do not keep your shoulder blades pinned. They are meant to move.
As you bring the barbell back in towards your body, stop just before your elbows touch your sides.
For the duration of the exercise, your head, torso and hips should remain in a stacked position. Do not allow your lower back to hyperextend, ribcage to flare, or your torso, spine or hips to rotate.
Exhale after you have initiated the press and as the barbell is traveling away from your body. Inhale and reset as the barbell is returning towards your body, or pause in the starting position, and inhale/reset there before the next rep. Do what works and feels best for you.
Regression:
Make this exercise easier by using less weight, or by using a band with less resistance.
Progression:
Make this exercise more challenging by using more weight, by using a band with more resistance, or by performing negative reps and taking 3-5 seconds to “row” the barbell back down to the starting position.
#2) Contralateral Bird Dog Hold + Landmine Single Arm Rows
This deceptively challenging exercise strengthens the mid and upper back, improves grip strength, shoulder and scapular controlled mobility (and stability on the planted side), and lumbo-pelvic stability.
This exercise requires a significant amount of lumbo-pelvic stability and is arguably more of a core exercise than an upper body movement. Be conservative when you are selecting your weight, and opt for 25-50% of what you’d use to perform single arm rows.
If you are performing this exercise correctly, aside from the arm that is performing the rowing movement, the rest of your body should remain in a fixed position.
Coaching Tips:
Set up a barbell so it is lengthwise, and is behind your body. You may anchor the barbell against a stable surface like a wall, weight plate, or box, or on a no slip surface. You may also use a Landmine attachment.
Kneel with one leg on a bench, and place the hand that is on the opposite side of your body on the bench. Make sure that your shoulder is directly above your hand. Spread your fingers, and pretend you are suctioning your hand to the bench.
Extend your leg that is on the opposite side of your body as the rowing arm, and so it is parallel to the ground.
Set your body so it is in a straight line from your head to heel, and maintain this position for the duration of the exercise. Make sure that your torso and hips are square to the bench. Also, do not allow your leg to drop, or conversely, lift too high (avoid hyperextending your lower back).
Before each rep, take a deep breath in (360 degrees of air around your spine), brace your core (360 degree brace around your spine), tuck your ribs towards your hips (close the space in your midsection), and squeeze your glutes.
Initiate the movement by using the muscles in your mid and upper back and draw your shoulder blade in towards the spine (retract). Do not initiate the movement with your arm, and do not use excessive momentum.
In the top position, do not allow your elbow to flare out; instead keep it close to your side.
Lower the barbell with control, and make sure you keep your shoulder from collapsing. During the lowering/eccentric component, do not keep your shoulder blade pinned. It is meant to move, and should perform the reverse movement (protraction) as it did during the rowing/concentric component.
Pay attention to your non-working/supporting side. Push away from the bench and protract your shoulder blade (move it away from the spine). Do not mindlessly hang out.
For the duration of the exercise, your head, torso and hips should remain in a stacked position. Do not allow your lower back to hyperextend or round, ribcage to flare, or your torso, spine or hips to rotate. Your torso and hips should remain square to the bench.
Exhale right after you have initiated the rowing movement; you may inhale/”reset” as the barbell is returning to the starting position, or hold your breath for the duration of the rep, exhaling, inhaling, and re-setting between reps. Do what works and feels best for you.
Regression:
Make this exercise easier by using less weight.
Progression:
Make this exercise more challenging by using more weight.
#3) Dead Bug + Single Arm Landmine Presses (Weight Behind)
I am a huge fan of dead bugs, and use many different variations in my training, and in the programs of the many people I work with. This innovative dead bug variation improves lumbo-pelvic stability, and shoulder and scapular controlled mobility.
Coaching Tips:
Set up a barbell so it is lengthwise and behind you, and is in line with your armpit. You may anchor the barbell against a stable surface like a wall, weight plate, or box, or on a no slip surface. You may also use a Landmine attachment.
Lie on the floor. Lift up your legs so they are in a vertical position, straighten your knees, and point your feet towards you (dorsiflex). If you cannot fully extend your knees, or if you are unable to maintain proper form, you can keep your knees bent at a 90 degree angle. Make sure they remain at a 90 degree angle for the duration of the exercise.
Keep your chin tucked and neck in a neutral position, extend your arms so they are above your chest, and tuck your ribs towards your hips (close the space in your midsection).
Pay attention that you are not “cheating” by using the muscles in your neck and/or upper body in place of the muscles of the anterior core.
Before each rep, take a deep breath in (360 degrees of air around your spine). Now steadily exhale through your mouth, contract your anterior core muscles as hard as you can, slowly “row” the barbell down towards the floor and simultaneously lower the leg that is on the same side of the body, and to a range where you are able to maintain proper form. Once you reach your full range, simultaneously press the barbell up and return your leg to the starting position.
You have the option of keeping the non-working arm in a vertical line over the armpit, or you can reach back with your arm as you lower the weight and your leg.
As for the shoulder blade of the side that is performing the pressing movement, do not keep it pinned. It is supposed to move.
For the duration of the exercise, do not allow your lower back to hyperextend, ribcage to flare, torso, spine or hips to rotate, or your hips to leave the floor.
Keep your legs relaxed so they do not dominate.
Make sure that your knee remains in a fixed position and that the movement occurs from your hip.
Regression:
Make this exercise easier by using less weight, by decreasing the range of the leg lowering, or by bending your knees to 90 degrees.
Progression:
Make this exercise more challenging by using more weight, by increasing the range of the leg lowering, or by adding in band or kettlebell resistance (on the hand that is not holding the barbell).
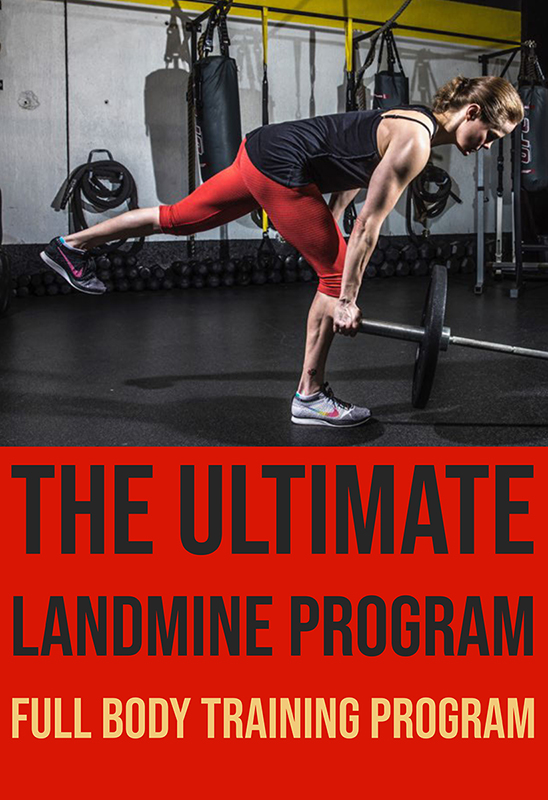
Ultimate Landmine Program
The Landmine has grown to be one of the most versatile pieces of equipment on the gym floor. You can train the entire body and if you’re someone pressed for time, prefers a more minimalist approach to training, or just likes trying new stuff, this resource will be a great fit.
It’s on sale TODAY (6/25) for $67 through Friday, June 29th so you only have a few days to take advantage. If you’re already familiar with Meghan’s work you know this is a no-brainer. If you’re unfamiliar with her work, trust me: you won’t be disappointed.