For starters I’m involved with a pretty cool product – The Trainers Toolbox – that’s set to be released next week that’s going to set the fitness industry on fire. I won’t give away too much here, but suffice it to say it’s going to help a lot of fitness professionals.1
Second, we’ve had a cranky toddler on our hands all week this week (wake-up call of 4:30 this morning as a matter of fact), so, basically, FML.
Hence I haven’t had much time to write for my own site this week. Thankfully I have some awesome contributors – like Dr. Nicholas Licameli – who are more than willing to send me articles out of the blue and make me want to buy them a steak dinner.
There are some things that you just don’t hear everyday”
-“Who keeps eating all of the kale!?!?”
-“Of course I understand why my cable bill is $37.97 more this month than it has been in the past 15 months.”
-“I hope I get placed in Ravenclaw or Hufflepuff…please, Ravenclaw or Hufflepuff…”
-“Let’s talk about Fight Club.”
-“A strong core? No thanks, not interested.”
There seems to be a slight stigma surrounding training the abs and core while lying down because, as some say, there are “better” and more “functional” ways to train.
While this may have some truth to it, I don’t mind training the abs and core on the ground. Whether or not something is “functional” really depends on the individual and his/her goals (is a standard plank really “functional?”).
In order to have functional carryover to the task at hand, the training must be specific to the activity (more on this below).
This means that “functional” will be different for everyone.
If you’re a weight lifter or powerlifter, “functional” core strengthening may include tempo reps, pause reps with postural bracing, breathing drills under sub-maximal loads, etc.
If you’re a baseball player (check outMike Reinold and Eric Cressey, if you haven’t done so already), “functional” core strengthening may include plyometric twists, anti-rotation movements, quick accelerations and directional changes, etc. The point here is that “functional” is different for everyone and if the goal is simply to progressively load and train the abdominals, don’t fear the floor.
Today I’d like to share with you an exercise that I call the lying overhead pullover (LOP) (see the video link at the end of this article). I think I invented this exercise, however Chuck Norris and Total Gym do have a variation of it in their manual and let’s be honest, I do not want to get on the bad side of a man who once challenged Lance Armstrong to a “Who has more testicles” contest and won by five.
Other than the Total Gym variation, I have not seen it anywhere else.
How To Do It
Before we dive into how to perform the LOP, let’s have a quick review on what it means to “brace the core:”
“From the top down, we have the diaphragm, from the bottom up we have the pelvic floor, and around the sides we have the deep abdominals that surround the midsection like a corset. To engage the diaphragm, take a breath in through the nose and brace. To engage the pelvic floor, pull up as if holding in gas or urine. To engage the deep abdominals, tighten up the midsection as if putting on a tight belt after Thanksgiving dinner or walking into a cold pool as the water drifts up to your navel.”
It is imperative that you understand how to perform a pelvic tilt and properly brace the core…the entire exercise depends on it.
For more on this, check out my videos right here and here (these are from the archives, so bear with me…but the content is still relevant!).
To perform the LOP, lie on your back in front of a low cable station or a low anchored resistance band. Bend the knees and perform a posterior pelvic tilt by pressing the small of your back down into the floor. Reach overhead and grab the rope or band. Maintaining the pelvic tilt, bracing the core, and keeping the arms straight, pull the rope down toward your knees.
Squeeze the abs for a count, and slowly return to the start position.
Progressions and Regressions
As with any exercise worth writing about, it must have the ability to be modified to better meet individual needs such as level of experience, pain, personal preference, etc. It may seem intuitive that decreasing or increasing the resistance would make this exercise easier or harder to perform, however how changing the range of motion affects the difficulty of the exercise may be less intuitive.
The LOP is an anti-extension exercise, which means it challenges primarily the anterior abdominals to resist spinal extension.
During this exercise, the spine and pelvis collectively become a fulcrum and our arms and legs become levers. The lever arm and extension moment increase simply by stretching out a leg or stretching the arms overhead. As the lever arm increases, it becomes more challenging to prevent the spine from arching off the ground into extension.
By maintaining that pelvic tilt, we are resisting extension.
Looking for a nasty little extended set to take past failure?
Start with the most difficult position and regress in a stepwise fashion to easier versions as muscle failure is reached, again and again.
Another simple way to alter the range of motion would be to add a small crunch to the mix.
This would allow us to not only resist extension, but also overcome it with slight flexion. Be sure to crunch up almost into a 45-degree diagonal as opposed to down toward the feet or straight up toward the ceiling. This will ensure proper tension and alignment with the line of pull and resistance curve of the exercise.
Why I Like the LOP
There is one very important function of the abs that is often overlooked, and that is resisting movement. Sure, everyone knows that the abs flex, side bend, and rotate/twist the spine, but besides causing movement, the abs collectively function to resist movement and stabilize the spinal column.
The LOP challenges that function nicely.
Another reason why I like it is that the LOP trains lumbo-pelvic stability during upper and lower extremity movement.
Why is that important?
In order to perform pretty much any sport, exercise, or functional task, the spine has to provide a stable base for the extremities to move about, otherwise it would be like vertical jumping on sand or firing a bazooka off of a kayak (why you’d have a bazooka on a kayak is beyond me…).
I am not saying that performing the LOP will directly increase power output and safety during running, cutting, kicking, punching, squatting, overhead pressing, etc.
Nope. Sorry, but the principle of specificity still reigns supreme.
If you want to improve your 40 time, better get sprinting! If you want to improve power output when kicking a soccer ball, better get out on that field and kick! If you want to improve your squat, better read this article and of course…squat!
What I am saying is that the LOP is a great way to feel, get accustomed to, and train spinal stability with extremity movement, which is foundational to all of those previously mentioned tasks.
And That’s That (LOP in Action)
So be sure to give the lying overhead pullover a shot. Depending on how it is done, the LOP can be used as a top down ab movement, a bottom up ab movement, or a core stability movement. Feel free to experiment and find what works best for you and your goals.
Enjoy!
About the Author
Nicholas M. Licameli, PT, DPT
Doctor of Physical Therapy / Pro Natural Bodybuilder
Nick believes in giving himself to others in an attempt to make the world a happier, healthier, and more loving place. He wants to give people the power to change their lives in hopes to leave this place better because he was here. Bodybuilding and physical therapy just act as mediums for carrying out that cause. Love. Passion. Respect. Humility. Never an expert. Always a student. Love your journey.
The beauty of fillers is that, much like tv shows based in the city of Chicago – Chicago Fire, Chicago Med, Chicago Justice, Chicago Sanitation, Chicago Teacher’s Union2 – there’s an endless array to pick and choose from.
What follows isn’t close to an exhaustive list.
What’s more, fillers can serve as a splendid opportunity to individualize someone’s program to hone in their unique injury history or their unique mobility/stability deficits.
QUICK ASIDE: When it comes to writing training programs for people, there are more similarities across the board than there are differences.
Far too often I find coaches/trainers making things more complicated than they have to be. Mike Boyle spoke to this not too long ago on social media:
People really want training to be complicated? Same group today 1 Euro BBall, 2 MLB pitchers, 2 position players, 2 national caliber female lacrosse players, 1 national level field hockey player, 1 NCAA female ice hockey player. 90% same. #sportspecific ?
Training programs, more often than not, revolve around these movement patterns, and the individualization generally comes down to what iteration of said movement pattern best fits the goal(s), injury history, and ability level of the athlete/client.
More to the point, instead of focusing on the facade of “sport specific training,” the better moniker should be centered on “people specific training.”
But that’s a hefty conversation for another time.
In the end, like I said, fillers are an ideal way to provide some semblance of customization into a program.
Fillers For Squats
Much like the deadlift, there are many moving parts to a squat which the body requires access to.
Starting from the bottom-up:
Ankle Dorsiflexion
Hip Flexion, in addition to Hip Internal Rotation
T-Spine Extension
Shoulder Mobility (specifically glenohumeral external rotation with regards to back squats)
Here are a handful of fillers for your consideration:
1) Hip Flexor Mobilization with IR/ER
The plain ol’ vanilla Wall Hip Flexor Mobilization is still one of my all-time favorite fillers, but this variation, which I stole from my boy Dean Somerset, adds another level to it.
Squatting requires hip flexion, and deep(er) hip flexion also requires hip internal rotation. Adding this in between sets of squats will make your hips feel nice-n-juicy.
The key, though, is to actually get motion from the HIP and not just crank through your lumbar spine. I like to put my hand on my ASIS and then “drive” that towards and away from my opposite (up) knee. In short, I think about opening and closing my pelvis.
There isn’t a ton of range of motion with this drill, but serves as a nice way to “unglue” the hips.
5 reps per direction/side is money.
2) Seated 90/90 Hip Switch (Progressions)
What I like most about this drill is that it hits both hip INTERNAL and EXTERNAL rotation simultaneously. The objective is to keep your chest up as best you can, along with your feet staying cemented to the floor.
1st Progression = Supported (hands)
2nd Progression = Unsupported (no hands)
3rd Progression = Adding in additional end-range Hip IR on the trail leg (be sure not to crank through your QL).
4th Progression = I don’t know, blindfolded? A new Bird Box challenge?
Shoot for 5-8 repetition per side (depending on which progression you’re doing). Hands Supported = high(er) reps. End Range Hip IR = you’ll hate life.
3) Side Lying Open Book
This one is pretty self-explanatory, and a great drill to help open up the chest and work on mid-back mobility.
Lie on the floor with a foam roller (or yoga block) underneath your top knee to prevent you from falling into excessive lumbar rotation. With your hips & shoulders starting stacked, “open” your top side by following your hand with your eyes.
BE SURE YOU’RE BELLY BUTTON DOESN’T GO ALONG FOR THE RIDE (it should stay put).
If you’re a personal trainer or strength coach you likely work with clients and athletes who 1) have glutes4and 2) are looking to up their glute game.
Today’s guest post by strength coach, Menachem Brodie, goes a bit further down the rabbit hole than just giving you a bunch of glute-centric exercises to consider. There are a plethora of factors to consider when trying to ascertain what exercise will be the best fit for any one individual’s derriere.
What is it about glutes that has made them the “back to the future” of strength and performance training?
Was it Bret Contreras creating the Barbell Hip Thrust and spreading the Gospel of Glutes?
Was it the invention of Yoga Pants?
Or maybe it was Mike Jureller going on his “International Tour of CrossFit gyms” that made them popular… The world may never know.
What is undisputed, is that glutes (and mid & lower traps) are signs that someone is an athlete, or at least training like an athlete.
Today we’ll grab our Glute Dolorean’s and head back to the past, to help us understand why glutes are so important, why squats are not enough, and what you need to consider when programming glutes for your athletes and clients.
The glutes, all three of them: Glute medius, Glute minimus, and Glute maximus, need to be developed in proper proportion to allow the hip joint to sit more properly. As the glutes lose strength they tend, like every muscle, to lose their optimal resting length.
This in turn affects performance, and in the case of the hip joint, can lead to the head of the femur sitting at a poor angle in the acetabulum, which as I found out, over time can lend to bone growth in paces we don’t want it, leading to impingement, or other mechanical issues.
One such issue that can arise, is what has been called “gluteal amnesia,” which simply put is the glutes losing the ability to execute hip extension, leaving the hamstrings to do all the work and can cause the head of the femur to clunk around in the acetabulum like a drunkard in a demolition derby.
Putting Down a Great Base
In order for us to have the best chance of fully expressing our athleticism, we have to have a solid base.
Now while (especially) the average client, cyclists, and triathletes tend to think of “core” as being the base, this is not the full truth.
The base involves the Axial Skeleton (Spine & rib cage) + the Pelvis. This is of critical importance, as failure to stabilize these two together can sap power and strength. There are of course sports that are exceptions to this, such as rowing, but it’s this author’s opinion that this is why we tend to see disc injuries in that population.
Butt, developing your glutes REQUIRES that you have a stable and strong midsection: the rectus abdominus, internal and external obliques, the pelvic floor, and quadratus lumborum all work together to stabilize the pelvis from the top & middle. I won’t go into these items in this post, but you can read more and learn a few exercises to help address your midsection in this great post from Sarah Duvall, DPT.
It’s often necessary to break down movement(s) into their respective parts to make certain we’re getting motion from the right areas and that we’re using/engaging the areas we want to use/engage to perform exercises well, which is what we’ll dial in on next.
Cycling and Sitting: The Bane of Gluteal Existence
When glutes are strong and full and the diaphragm, ribs, and pelvic floor all move properly for breathing, EVERYTHING works better: Squats are more full range, your back feels like a titanium beam, and jumping and sprinting tend to be out of this world (for a 6th grader).
Butt (<– haha, I see what you’re doing there Menachem) when one starts spending more time in a seated position where the glutes are partially stretched, but not used, and the diaphragm is out of alignment with the pelvic floor, these muscles tend to lose some of their abilities, as they are essentially being told to shut off in those static positions: We don’t need them to work because we are slouching and hanging off the ligaments/connective tissues instead.
Cyclists and triathletes also suffer this problem due to the inherent position of their sport.
You lose power potential in a muscle that cannot stretch, or is in a stretched position for so long. This is an issue many cyclists, triathletes AND our clients/ athletes face, due to the long periods of time that we spend sitting with our glutes in an elongated position, and “the rings” (pelvic floor + diaphragm) out of alignment.
Glutes Are a Keystone to Performance Oft Neglected
While the running joke is that “I got glutes cuz I squat a lot,” Squats actually are NOT enough to fully and properly develop the glutes. There is far more that goes into developing glutes than being able to perform the 30+ something squat variations.
I know what you’re thinking:
But this is important, as it relates to an oft-missed portion to training the glutes: PELVIC CONTROL.
Pelvic stabilization and control is extremely important if we are to get true hip extension, and not extension from places not intended to work “like that”, such as the lumbar spine.
If I had a dollar for every time I saw a trainer or coach working on “Hip extension” with a client/ athlete who was getting movement from the lumbar spine, I’d be a very rich person.
In order for us to build up the glutes properly, we have to begin by thinking about giving stabilization to the pelvis through teaching the hamstrings, internal obliques, the deep hip rotators (pelvic floor), rectus & transverse abdominus, and Quadratus lumborum to all fire in good sequence and with great strength.
This is a challenge for many, as we tend to perform our front planks by hanging off the hip flexors, we work our hamstrings by laying down on the machine, and often don’t include many anti-rotation exercises (although, you ARE reading Tony’s blog, so you’re officially “one of the smart ones” who does in fact train rotary stability).
Getting to Work
Glute work isn’t simply throwing a few exercises into your dynamic warmup and main routine, there is much more that needs to be done to maximize your athletes results.
We MUST think about the different positions the athlete will be required to perform in their sport:
Do they include deceleration and change of direction?
Is it a fixed motion similar to cycling or rowing, or is their sport more dynamic, such as basketball and rugby?
Is the athlete in anterior pelvic tilt for their sport, such as hockey, bowling, or cycling?
Each of these questions must be answered, as they help us understand the joint positioning of the hip….and as we all know:
JOINT POSITION DICTATES MUSCLE FUNCTION
If we’re actually to train the athlete and their glutes to perform in their sport, we MUST know how the muscles will be asked to work in the “real world”- that of dynamic movement and uncertainty required by their sport.
This is one of the things many of us forget as we write programming: What positions are the joints going to be in, and due to these changes in joint position, how will the muscles ACTUALLY be responding/used for movement?
Stabilizer?
Prime mover?
Prime mover through full range of motion?
Next we need to answer:
What kind of lever arm should you use for the athlete when training the glutes?
Weighted at the lower leg? (Reverse Hypers)
Weighted at the shoulders? (Barbell good mornings)
Weighted at the hip? (Barbell Hip Thrust)
Weighted long fulcrum? (Deadlifts)
Weighted medium fulcrum? (Sumo Deadlifts)
Resistance bands at the knees?
Resistance bands at the shins?
Resistance bands at the feet?
Resistance band at the crotch? (Band Pull throughs)
The answer to this can and should vary throughout the training year, but there should always be one or two lever arms which are staples to that athletes program, to help combat the movement deficiencies that their specific sport, AND POSITION in that sport, entail.
After all, you wouldn’t train a pitcher as you would train a shortstop.
Programming Glutes for Your Clients & Athletes
Every single warmup we do here at Human Vortex Training starts with some form of the hip series, depending on the athletes ability to recruit the glutes & stabilize their midsection. This doesn’t mean that these exercises are the only warmup, that would be poor planning. Rather, we should be looking to include at least 1-2 of these moves in our dynamic warm up to help the athlete/client connect with, and utilize their glutes.
Here are the foundational warm-up exercises which I’ve used a mix of over the years:
1) Side Lying Straight Leg Lift
1 @ 8-15 each
2) Hip Lifts
1 @ 15-30
3) Clamshell Variation
Side Lying Clamshells (beginners)
1 @ 8-15 each
Side Lying Half Clamshells (intermediate/advanced)
1 @ 8-15 each
4) Side Lying Straight Leg Adduction
1 @ 8-15 ea
5) Birddog Variation or Regression
1 @ 5-8 each
PLEASE Don’t butcher the Birddog exercise! Our affable, giant-triceped host, Tony Gentilcore, has a great video about this and how to better teach it here:
6) Single Leg Hips Lift
1 @ 8-15 each
7) Banded Lateral Walks
8) Banded Monster Walks Forward/ Backward
Along with 2-4 of the above exercises, we would get 1-2 breathing exercises, and 2-4 other dynamic warm-up exercises to prepare for that specific days session.
Burnout Session at the End of Your Lift for Glutes? No Problem!
At the end of a session is a great place to add in some more sport-related fatigued state specific glute training. These are usually done bodyweight only, as we’re looking to help improve the athletes resilience and strength-endurance in sport-specific positions, although it’s best to find what works for YOUR athlete….Some respond better, or actually need weighted or resisted variations.
Use your best judgement to find what’s best for your athlete at that time.
1) Back on Bench Single Leg Hip lifts (Rotary Stability) (Sprinters, Track and Field, Triathletes)
3) Frog Hip Lifts (Weighted or Unweighted) (BJJ, Hockey)
But It’s Not All Strengthening
As we all know, simply making a muscle stronger and better able to work in chorus with other muscles, doesn’t make it a rock star. We still need to ensure it’s able to work through it’s full intended range of motion, as well as to rest at its ideal resting length.
For this, we can do a few different exercises:
1) Brettzel
2) Half-Pigeon Stretch
3) Dynamic LAX Ball Glute Release with Mid-Trap Activation
I like all of these as they also help the athlete learn where the rest of his or her body is & what it’s doing as they get into the proper positions… a big win for Proprioception!
Give these a shot, and let the glute gains begin!
About the Author
Menachem Brodie, NSCA-CSCS, PCES, is a leading Strength Coach for Cyclists & Triathletes. In the health, fitness, & wellness fields for nearly 20 years, he has worked with professional & amature atheltes from around the world. He has authored 2 courses: Strength Training for Cycling Successand Strength Training for Triathlon Success, and has presented internationally on Strength Training for Endurance Athletes, including at the 2018 USA Cycling Coaching Summit.
The closest I’ve ever been to calling myself a “ranger” was when I used to watch Walker, Texas Ranger growing up and pretend to roundhouse kick unsuspecting (and imaginary) bad guys in the face.
Oh, and there was that one time I dressed up as the Green Power Ranger for Halloween.5
I am not, nor have I ever been, an Army Ranger.
I did stay up past midnight the other night, though. That’s kinda badass.
A big “thank you” to ACTUAL Army Ranger, Tom Coffey, for pinch-writing for me today as I make my way to Los Angeles this weekend to present.
Fate whispered to the warrior ‘you cannot withstand this storm.’ The warrior whispered back, ‘I am the storm.’
For thousands of years, before comfortable fitness centers dotted every corner, the world’s greatest warriors relied on a steady dose of bodyweight exercises—from building high levels of superhuman strength, to increasing cardiovascular conditioning, and even developing mental toughness bodyweight exercises accomplished it all.
In the rest of this article I want to briefly share with you what my experience as an Army Ranger taught me about getting strong, using only my body.
Life as an Army Ranger
The life of an Army Ranger is quite busy.
Between endless training and extended “business trips” to lands far away there is often more to do than hours in the day. Yet the job requires a certain level of what we’ll call “real world strength.”
Let me give you an example of what I mean: I weighed about 250 pounds in full military gear (+80 pounds above my bodyweight). Do you think you could also throw on 80 pounds of your own gear, pick me up, throw me over your shoulder, and sprint full out for 100 or 200 yards?
That’s what I’m referring to when I say real world strength.
But, no matter what elite military unit you’re talking about there is always a high premium placed on being functionally strong. Admittedly, as much as possible my Ranger buddies and I tried to workout in an actual gym. However, life liked to throw us curve balls and often times we were in situations with no iron around at all.
But not having access to a gym simply wasn’t an excuse to not workout and get weak. So, how did my Ranger buddies and I keep getting stronger when we didn’t always have access to a gym?
The answer: using the best only gym we had available—our body.
Are Bodyweight Exercises Better for Building Strength Than Barbell Exercises?
Ok, before we dive headfirst into this rabbit hole I know someone is going to ask if bodyweight exercises are better for building strength than barbell exercises.
The word “strength” can mean a lot of different things. And, depending on who you ask you’ll likely get a lot of different answers.
Listen, if you want to get strong AF there’s no arguing that picking heavy shit up and hoisting it over your head is the way to go. Unless you’re humongous, green, and your name is Hulk, you very likely won’t be joining the 1,500 pound club by using bodyweight exercises.While you probably definitely won’t build world class powerlifting strength with bodyweight exercise, they do offer tremendous value in building real world strength.
Bodyweight exercises strengthen the body and allow you to express that strength in ways which the barbell can’t.
They can humble even the most experienced of lifters.
I’ve seen, with my own two ocular receptors, guys who can easily squat four wheels crumble like dust when attempting a simple pistol squat (one legged squat).WTF?
How is that even possible?
Ok dude I get it, but how do you build strength using only your bodyweight?
I’m glad you asked.
And, I’m making the assumption here that you’re stranded on a desert island with no gym equipment in sight. This is only to hammer home the point that you literally need zero equipment to make this stuff work.
Obviously, if you start adding gym equipment back in the mix your strength building options skyrocket.
But, that’s easy.
If you learn how to manipulate your body for strength building purposes you become bulletproof. You can literally get strong from anywhere in the world.
Pretty cool, right?
Anyway, below are four ways you can turn lowly bodyweight exercises into serious strength builders.
Did someone order a serving of humble pie?
NOTE:I chose to demonstrate each of these ideas using the pushup. However, you can apply these principles to any number of bodyweight exercises.
1) Remove a Limb (Or Two)
Removing a limb (or two) creates a very unstable environment. Instability causes your muscles to tense harder, and tension is good for building strength. That’s just good science.
Also Useful For:
– Pistol squats
– Single leg hip bridges
– BW romanian deadlifts
– Free standing handstand pushups…if you dare.
NOTE FROM TG:For those watching Tom perform a 1-arm, 1-leg pushup and thinking to themselves “that’s a whole lotta nope,” I’d encourage you to check out THIS article by Nick Tumminello on how to progress towards it.
2) Remove a Limb, Slow Down the Rep, and Add Pauses
Speaking of tension, another great way to increase it is by slowing down your repetitions. This is also known as time under tension (TUT). Pausing at certain points in the rep ensures that you kill all momentum.
Again, this makes the exercise much harder because you have to be stay tense and in control through the entire rep.
There is an inherent difference between taking 30 seconds to perform 1 pushup vs. cranking out 30 pushups. Try a 30 second (or 60 second) pushup and you’ll see what I mean.
Also Useful For:
– Frog holds
– Human flag hold
– Single arm/leg planks
Be Explosive
To be explosive you must be powerful. And power is more or less strength expressed over a very short time. Paradoxically, you must first be strong before you can be powerful. Explosive bodyweight exercises are great for training you to express the strength you’ve built.
Also Useful For:
– Jump squats
– Jump lunges
– Muscle ups
4) The Kitchen Sink Approach
Have you ever opened the drawers under your sink only to find soap bottles, cleaners, yellow gloves, old sponges, bleach bottles, leaky pipes…etc.
I mean, it’s chaos.
The kitchen sink approach is our version of controlled chaos by combining many different strength building elements together. In the video below the spiderman pushup involves using slow reps, removing a limb, dynamic movement, abdominal bracing, and re-distributing weight.
Pro Tip: Make sure that if you’re doing Spiderman pushups in a field with fire ant hills that you don’t unknowingly place your hand directly on top of one. I did this once, and can safely say I’d rather get stabbed by a Nazgul (like twice) than ever do that again.
Desert Island Strength Building Workouts
Ok, now you know how to use bodyweight exercises for strength building. So, my challenge to you is try it.
Below are examples of two ways you can spin basic bodyweight exercises into tough little workouts. And the best part, you can literally do these anywhere, anytime—no equipment needed.
Sample Routine 1- “Destroyer of Legs and Core”
(1)
Three rounds of:
5 pistol squats, per leg → Pause for 1 second at the bottom of every rep
8 single leg hip bridges, per leg → After the 8th rep hold the top of the bridge for 8 seconds (ouchy)
20 second plank w/ left arm lifted
20 second plank w/ right arm lifted
30 second hollow hold
Sample routine 2- “Pushups Seem Harder Today”
(1)
Three rounds of:
3 explosive pushups→ focus on being fast off the ground
(2)
Three rounds of:
2 single arm/single leg pushups, per side
(3)
Four rounds of:
1 thirty second pushup w/ a leg lifted → take 10 seconds to lower, pause above the ground for 10 seconds, take 10 seconds to raise
*On sets 1 & 3 keep your left leg off the ground
*On sets 2 & 4 keep your right leg off the ground
Final Thoughts
Building strength is certainly a noble and worthy pursuit of one’s time. Yes, you’ll make the fastest gains when you have access to all the bells and whistles of a fully equipped gym.
However, when life throws you the inevitable curveball and you don’t have access to the iron, it’s an invaluable skill to be able to bust out a strength workout anywhere, anytime.
I appreciate your time, and I hope you enjoyed the read.
About the Author
Tom Coffey is a former Army Ranger, certified nutrition coach, and currently pursuing a master’s degree in Exercise Science.
Due to his last name, he is on a lifelong quest to brew the absolute “perfect” cup of coffee. You can follow Tom’s quest for coffee brewing perfection, or just read more of his other work, over at his blog: https://tomcoffeyfitness.com
Filling my wife’s love tank by making the bed every morning.
Few things give me as much jubilation as deadlifts, though. I like performing them, I like coaching them, I like dreaming about them, and I like writing about them.
I did a series on Instagram not too long ago called “30 Days of Deadlifts.”
Each day, for 30 days, but not necessarily in a row, I provided a quick 60 second programming note, technique consideration, and/or general piece of advice on the deadlift.
It was a big hit.
So much in fact that T-Nation.com asked to repurpose the whole enchilada to use on their site; albeit I’d expound on things a bit more in exchange for them tidying up my prose.
I’m always asked what’s the main difference between training professional athletes and those who think they’re still an athlete.
Not much, really.
I still very much prefer to treat my general population clients like athletes – encouraging them to lift, hoist, push, toss, and drag things every which way – if for no other reason than they can.
However, part of my job as their coach is to know when to pump the brakes and to keep their ego in check. In today’s guest post, California based strength coach Scott Hansen discusses some subtle nuances and tweaks that can be made to a strength & conditioning program catered to the more “mature”” crowd.
Favorite Movements For Athletes and Modifications For Adult Athletes
When I was 20 years old, I could do just about anything.
Squat 10×10, sure.
Hell, we did that a for a few months out of each year back then.
Deadlifts so heavy you could feel your soul cracking?
Check.
And with ugly technique that would make the Diesel Weasel blush.
Note From TG: 10 points to Gryffindor for the Diesel Weasel reference.
With time, experience, injuries, and spending a solid percentage of my yearly income over the last decade plus on learning from people smarter than me, I’ve come to realize a few things:
1) Young athletes need load and stress to build strength and physical resiliency.
I.e., Full ranges of motion and big lifts that require a lot of work. Cleans, snatches, barbell bench presses, chin ups, front squats, deadlifts, etc.
Planet Earth is trying to make you small, frail, and weak from the time you turn about 20 years old onward
Unfortunately, after you’ve spent a couple of decades on the planet, you’ve accumulated some wear and tear.
It’s kind of like an apartment: You might take pretty good care of it for the most part, but every now and then you throw a ripper and the carpet gets stained. Over 20 or more years, there are lots of little stains and dings on the walls.
The stains and dings aren’t necessarily bad enough to knock the building down, but it’s certainly not in the kind of shape it was in when you first moved in.
Well, that beat up apartment is more or less your body.
The way we trained when we were young might have been the best possible way to train then, but we probably need to make some modifications to it as we get a bit older. I’m not saying to train solely with resistance bands and shake weights in group exercise classes. I’m just saying that we can train hard and more intelligently to respect how our bodies have changed over time.
The same qualities still have to be trained, mind you. We still need to get strong and train to build and maintain muscle. We need to be mobile, athletic, and not gas out walking down to the mailbox. As a matter of fact, we can still thrive and be better than we were in our younger years, as long as we’re smart.
Here are my favorite lifts for each movement pattern/quality for those under 25 years old, and how things should be modified for the slightly more, uh, mature crowd.
Power
Athlete: Hang Clean
Adult Athlete: Box Jump
https://www.youtube.com/watch?v=Xbg7sxs_Auc
I love Olympic lift variations.
From creating power to absorbing force on the catch, hang cleans can be a great tool for a younger athlete. They also require a ton of wrist and thoracic mobility, and an awkward catch might just make you have to call out of work the next day.
Replacing cleans with box jumps means you get a huge percentage of the pros, and none of the cons, so I use it as a main power exercise in my adult athlete programs.
Just make sure to do them right!
Squat
Athlete: Front Squat
https://www.youtube.com/watch?v=9xzNc–18as
Adult Athlete: Double Kettlebell Front Squat
https://www.youtube.com/watch?v=8bx9IP49B-w
I’m a big front squat fan.
You really can’t do them wrong, you have less shear stress on the spine, and you get a ton of good stuff expressed: thoracic spine mobility, upper back and core strength, hip mobility, and of course lower body strength.
Similarly to cleans, you need solid wrist mobility, and since the majority of adults have spines that look like question marks, I don’t love front squatting for most adult athletes, most of the time.
Rather, I like hammering double kettlebell front squats.
Similarly to box jumps and cleans, I feel like you get a huge chunk of the benefits of front squatting without the learning curve or discomfort on the wrists, and you can keep the spinal loading down.
Deadlift
Athlete: Trap Bar Deadlift
https://www.youtube.com/watch?v=T_1CdItspHk
Adult Athlete: Trap Bar Deadlift/Kettlebell Deadlift
Note From TG: That time when I thought it would be cool to grow a beard.
Trap bar deadlifts are a great full body lift, and I tend to prefer them over conventional pulls. With the weight evenly distributed around you, you can load these up pretty heavy and get a huge training stimulus without having such high prerequisites as barbell deads.
I certainly employ these for my adult athletes, and heavy, but I’m even more diligent on technique than I am with any other exercise, which means I tend to progress it a little more slowly. Wendler’s 5/3/1 works great here, just stop on the top set at 10 at the most.
Otherwise, you’re liable to take a nap for 3 days.
For the much older athlete, I just go back to the question “how strong is strong enough?” If I can get that with a kettlebell instead of a trap bar, then I’ll go with that, but that might come down to how heavy your bells go.
Split Stance
Athlete: Rear Foot Elevated Split Squat with Front Foot Elevated
https://www.youtube.com/watch?v=6_4AoHwncBI
Adult: Rear Foot Elevated Split Squat OR Double KB Front Rack Split Squat
https://www.youtube.com/watch?v=WJxBWyfc1Iw
RFESS have a special place in my heart after coaching them at Mike Boyle Strength and Conditioning for so long, and because getting brutally strong on these is vital to being able to perform on the court, field, ice, or mat.
By elevating the front foot as well, you get an even bigger range of motion, and moving big weight through big ranges of motion is how you get strong.
Adult athletes can certainly do these as well, but sometimes are a bit limited with ROM for the front foot elevated version. I also like to keep them with split squats to allow for some extra big toe mobility work built into the lift, as so many people tend to get stiff there over time, and stiff toes lead to balance issues and falls.
By front loading it, we can get more core work in and reinforce thoracic extension as well.
Horizontal Press
Athlete: Close Grip Bench
Adult Athlete: Low Incline 1-Arm DB Bench
I’m a big advocate on narrower grips on presses for most people, so naturally I love close grip benches. They’re a little easier on the shoulders and you still build the same upper body strength as with a wider grip.
I like index fingers on the edge of the smooth part of the bar, so not crazy close.
The wrist and shoulder issues with the aging athlete play a role here, and I prefer to see them doing more one-arm pressing, and on a low incline. This is more shoulder friendly, brings a bigger core component into the mix, and allows for asymmetries to be worked through, rather than around.
I know, I kind of copped out here and picked two.
Sue me.
Vertical Press
Athlete: Standing DB Press
Adult Athlete: Landmine Press OR Half Kneeling 1-Arm Bottoms Up Kettlebell Press
https://www.youtube.com/watch?v=ev9yVuAfeiY
I know a lot of people love the press done traditionally with a barbell, and I do too. If you put a gun to my head and ask me what my favorite vertical press for athletes is, I’m going with the dumbbell version, though.
Again, I don’t have any problems with barbell pressing, I just like the more natural rotation in the shoulders with dumbbells, and as we see more and more young athletes developing nasty forward head postures and stiff thoracic spines from all the phone and video game time, the dumbbells just seem to be a better fit.
Most adult athletes would benefit from spending the majority of their “overhead” work in a more “high incline” space, which the landmine allows. It all comes back to shoulder and thoracic spine health, and life just tends to cause us issues over time.
One caveat to this is the half kneeling bottoms up kettlebell press. The bottoms up bell triggers the rotator cuff to work to a greater degree, and the half kneeling position keeps from being able to use lower back extension as a replacement for the arm to move overhead.
I’ve seen a lot of people who couldn’t go overhead without pain, but the bottoms up press felt great, so it’ll depend on the individual here.
Chalk this up to cop out number two.
Horizontal Pull
Athlete: 1-Arm DB Row
Adult: TRX Inverted Row
DB rows should be a staple in every program, and especially so in those of our athletes. Building a big, strong back helps us obviously in sports, and helps to keep our shoulders strong and healthy as well.
I have no problem with doing these with adult athletes at all, I just like to slow down the tempo and try to get more out of less load. Body English tends to be a factor in these as the weight goes up, and even a little bit with someone who’s got a history of lower back crankiness can cause issues.
This is why I love TRX inverted rows for this population. They allow for a natural rotation on the shoulders, you can load them up with vests or elevate the feet, and people can generally do them more frequently than more traditional heavy rows.
Vertical Pull
Athlete: Heavy Chin Up
Adult Athlete: Ring Chins
Mike Boyle has talked in the past about how he likes athletes to have at least a 1-1 strength ratio of chin up strength to bench press strength to mitigate shoulder injuries, and I concur on that wholeheartedly.
When we start getting older, though, shoulder issues can lead to elbow soreness on chins, so if people have the ability to go overhead, I prefer they do their chins on rings for better shoulder mechanics, and if that’s still too much, X pulldowns are a great solution.
Much like landmine presses, they aren’t 100% overhead, but still get a lot of the benefits.
Core Anti Extension
Athlete: Medicine Ball Rollouts
https://www.youtube.com/watch?v=iYslVkCzvUk
Adult Athlete: Bodysaw
https://www.youtube.com/watch?v=ON54UuYBycc
Loading rollouts takes some creativity.
Sure you can use a vest, but eventually, when you’re wearing 2 or 3, they can get cumbersome and they’re a pain in the ass to take on and off between sets. I’ve found that using a heavy slam ball is a great way to continue challenging rollouts and it’s become my favorite variation.
Much like a lot of the other modifications, the overhead movement for the aging athlete can be problematic, so hammering bodysaws is my preference.
Locomotion
Carries are great, and there are a ton of variations on these, all of which are great. Farmer’s walks, suitcase carries, overhead walks, and the like all have their benefits, but I don’t think any of them quite give the same bang for the buck as heavy ass sled pushes.
There’s no eccentric component, so they’re great for people with knee issues, and give a huge single leg strength benefit. And since there’s no eccentric, they don’t need a ton of recovery, and can be used more frequently.
I’ve found that farmer’s walks, when done really heavy, can kind of fry people’s nervous systems more, so, while I use them frequently, if I had to choose, I’d go sleds.
Obviously, the issues that tend to limit our adult athletes are things that we want to address in our programming and improve upon, but we can still be safe and train hard given the circumstances, and not be relegated to endless hours of correctives and foo foo exercises.
Don’t stop challenging yourself or your clients, but keep them challenging in ways that make sense so they can keep excelling for many years to come.
About the Author
Scott Hansen is a Bostonian transplanted in Southern California, a strength/fitness/wrestling coach, educator, sub par surfer, and die hard New England sports fan.
He works with adult athletes, as well as an assistance wrestling coach and strength and conditioning coach for La Costa Canyon high school wrestling in Carlsbad, CA.
I’m heading back to Boston after spending the weekend in Houston, TX with Dean Somerset teaching our (Even More) Complete Shoulder & Hip Blueprint workshop.
Pinch writing for me today is Lana Sova, personal trainer and competitive power lifter6 based out of Boston, MA.
After almost five years in the fitness industry working almost exclusively with women, I can tell you that although all of us are the same gender, we are all built differently.
Woah!
Shocker! I know.
Throughout this time I’ve had hundreds of women deadlifting, squatting, benching, and overhead pressing big numbers. But more importantly, they got slimmer and stronger, and kept these results long term.
But their thing might not be your thing — what worked for them may not be 100% working for you. However, ladies who successfully deadlifted, squatted, and in some cases benched their body weights had these three things in common.
To help you stop wasting your time and start succeeding in strength training, here are three things you must do if you want to get strong AF.
#1. Once Again, Eat More Protein
If you look at bodybuilders, whose job is to get as big — muscularly — as they possibly can, they eat, drink, and breathe protein.
Your goal might not be to become the next Ms. Olympia, but if you want to get stronger so you can pick up your kid off the floor, carry groceries in one trip, install a window A/C all by yourself, or, IDK, tow out your car when it’s jammed between two others somewhere in downtown Boston, your muscles need protein.
PERIOD.
And I’m sure you’ve heard about it, you’ve known about it, but it’s not the knowledge about needing the protein where women go wrong.
It’s their choice of protein source.
For some reason, things like chia seeds, nuts, sunflower seeds, and flax seeds became a staple of “feminine” food. Go to any health-related hippie cafe and you’ll find all of the above (often) included in one smoothie.
Well, I’ll tell you what. Save your money, and go buy yourself a nice piece of steak (or tofu for my vegan friends).
While I don’t dismiss the health properties of seeds, nuts, and the like — there are plenty — when it comes to protein, the amounts are so small that you need a truck load to get the amount of protein needed to trigger muscle synthesis. Which means you’ll eat a ton of fat, which then will have an impact on your physique and THAT’s what’s going to make you look bulky. Not the muscle itself.
So, what do you eat then to hit your protein target, and what’s that target anyway?
For active fitness enthusiasts, the number ranges from 1.8g/kg to 2.2g/kg
But, when you have a life, counting every ounce of protein is time consuming. Instead, try this nutrition habit I teach my clients:
Protein hits the plate first. No matter where you are — home, Mom’s house, restaurant, a buffet — a lean source of protein lands on your plate first, and then you add whatever else your heart desires.
If you’re not sure what’s a lean protein, here are a few examples for you: chicken breast (to which Tony G is allergic — fun fact7) turkey breasts, 93/7 ground beef (or any piece a meat that has less than eight to ten grams of fat), plain Greek yogurt, tvorog, and cottage cheese.
If you eat these with every meal, I can guarantee you will improve your gym performance and very likely get slimmer.
Steady state cardio has its benefits and should be included in your monthly workouts. Cardio is good for your heart, and if you’d like that thing to work for longer than the average lifespan, you need to do cardio.
Where many women go wrong is the amount of cardio.
Seriously— if we were to use all the cardio machines in every gym in America to power the entire country we’d never have a problem with energy.
If you’re coming to strength training as the last resort to finally tone out and maintain the results, you may still have the mentality that you should do as much cardio as you possibly can, a belief that’s hard do deviate from.
I mean look at any Instagram Fitness Guru and she will without a doubt tell you that you absolutely have to hop on a cardio machine and eat tons of celery to get toned and strong.
But please don’t be fooled — all she’s trying to do is build an army of bunnies. You are not one of them.
And yes, if you are looking to lose weight, cardio will help you burn some calories off. However, if you’d like to get stronger and slimmer, and keep the results, your approach to cardio needs to be a little bit different.
There are two types of cardio training I see women perform often: steady state and High intensity interval training with lots of jump. Both types are usually done for hours with just one goal — burn as many calories as possible.
But when you switch to strength training, cardio training serves a different purpose — to help you to recover from your strength training sessions. The perfect type of cardio training for this is steady state.
Therefore, anything between 20 and 30 minutes of light, steady-state cardio is more than enough for said purpose. And a good rule of thumb is to have at least 24 hours between your strength and cardio sessions.
If you must include HIIT workouts in your program simply because you love it, you can. But be aware that these type of workouts generally do more muscle damage, taking your body longer to recover. So you might have to wait longer than even 24 hours between strength training sessions and HIIT sessions.
#3. Stop Going From One Extreme to Another
So you’ve decided to give strength training a try. You’ve read it’s good for you and it’s something that can help you tone out and get a bit stronger.
And you put on your “I’m a big girl” pants and you step into the strength training area.
You see tons of huge dumbbells, and decide to choose the smallest one — 5 pounds.
With it, you perform about a hundred repetitions of lunges, squats, and tricep extensions and call it a day.
While this is admirable and I’d be the first one to high five you, the thing is, if you’re a normal human being who picks up and carries her kids around, or carries a heavy backpack, or ever, even once in her lifetime, got ready for a party and had to carry a few cases of wine, I can guarantee that all of those things weighed more than five pounds.
If you want your muscles to get strong, you need to give them an appropriate stimulus. One of the most common ways to do so is via resistance — free weights, or a resistance band, or even your body weight.
And often five to ten pounds isn’t enough to reach and trigger that stimulus. It’s simply not challenging enough.
On the other side of things, there are those women who’d like to go all out each and every workout — testing their strength every single day of every single week.
While at the beginning they might see huge jumps in their strength because #beginnersgains, soon they stop seeing increases in their lifts, or even become demotivated.
Why?
Because they haven’t managed their fatigue levels properly. If you workout at 100% capacity all the time, you accumulate fatigue quickly, which then will interfere with your body’s ability to build muscle and get stronger. It’s like if you had to work 24-hour shifts seven days a week. You’d probably be dead by now.
So how heavy should you go?
For my online clients, I like to use a rate of perceived exertion (RPE) scale. The scale ranges from 1 to 10, where anything below 6 is a warm up — pretty light.
But then:
6 = you could do 4-5 more repetitions with this weight
7 = you could do 3-4 more
8 = you could do 2-3 more
9 = you could do 1-2 more
10 = you can do just that one
When you just start with strength training, you need to play with the weights a bit. But a general rule of thumb is to work with weights between 7 to 9 RPE if you’d like to get stronger.
Here’s an example.
A1. Front Squats 4×6 @ RPE 7
A2. Dead Bugs 4×6/side
B1. BB Bent-Over Rows 3×10 @ RPE 8
B2. DB Incline Bench Presses 3×10 @ RPE 8
B3. Cable Face Pulls 3×10 @ RPE 8
C1. Reverse Lunges 4×8 @ RPE 8
C2. Farmer’s Carry 4x 20 yards @ RPE 7-8
As you can see, just going and doing strength training isn’t enough.
In order to get stronger and better at strength training you need to supplement your program with important lifestyle habits — like eating protein, going for a walk instead of dying on the stairmaster, and adjusting your efforts to make your workout truly challenging.
The women I’ve worked with who followed these rules always make the strength goals they set for themselves.
About the Author
Lana Sova is a coach at Shameless Strength Academyand a personal trainer in Boston, MA She empowers women to build and own their strength via powerlifting and strength training.
Few things are more annoying than a nagging (sports) injury.
Okay, I can think of some:
A piece of popcorn lodged between your teeth during a three hour long movie and no floss in sight.
Flat Earthers.
Poodles.
Talking about feelings.
Outside of those things, having (and trying to train around) a nagging injury is the worst. I live in Boston which has a thriving endurance training-centric community. As it happens I’ve seen my fair share of people walking through the doors of CORE suffering from shin splints.
Not in the sense that having shin splints is a shit show. Hey, they happen. Rather, it’s a shit show with regards to how most people (not all) tend to address the issue.
Shin splints (or, for the more hoity-toity in the crowd, Medial Tibial Stress Syndrome) is a common injury found in endurance athletes (namely runners) as well as those who engage in a lot of jumping activities, and is often described as “my fucking shin hurts”“pain or discomfort along the inner edge of the shin bone (tibia).”
As far as the root cause?
It can be left up for debate, but the consensus tends to point towards increased activity that overworks the muscles and soft-tissue surrounding the area of the lower leg leading to swelling and pain.
In short (and more often than not): It comes down to someone doing too much, too soon.
OMG, I Have Shin Splints. Am I Going to Die?
No
Whew, Okay, How Do I Address It?
There are a number of obvious, if not overly simplified approaches that are worthwhile and can get the job done.
Commonly these range from rest (from the problematic activity, not just Netflix and Chilling) to stretching your calf muscles (Gastrocnemius & Soleus) and Achilles tendon to implementing some additional manual therapy in the form of massage, Graston, and/or self-“release” with The Stick or foam roller.
Like I said, these are all fine and dandy….albeit a bit reductionistic in nature; or a quick Band-Aid if you will.
Some other poignant options to consider:
1) Reduce Training Volume
Hey, here’s an idea: If shin splints are often the end-result of overtraining or surpassing one’s ability to recover, why don’t we, you know, latch onto the crazy idea of reduce training volume?
Weird, I know.
But something to consider and not to be trifled with.
2) Strengthen Anterior Musculature of Lower Leg
Namely, this means strengthening the Tibialis Anterior.
A popular exercise prescribed in this case is something like standing upright and “pulling” your toes towards your knees for “x” sets and reps.
Okay, cool.
I prefer something like ACTIVE ankle dorsiflexion vs. a band.
WARNING: Possibly the most boring video on the internet.
Here I’ll have the person pull his or her’s toes towards their chest against a band, but instead of mindlessly performing reps, I’ll have them actively pull against the band for 5-10 seconds for 5-8 repetitions.
It sucks.
3) Follow a Ketogenic Diet
Hahahahahaha. Just kidding.
Jumping into a shark’s mouth would be more worthwhile.
4) Emphasize Deceleration/Landing Tactics
Taking the time to coach people on how to LAND properly and to decelerate their bodyweight can have a huge impact on the reoccurrence of shin splints.
Meaning, when they master a good box jump (for example), and it doesn’t sound like an elephant being suplexed off the top rope of a wrestling mat when they land, the likelihood of shin splints rearing their ugly head is drastically reduced.
NOTE: This would also be an opportune time to address gait and running mechanics too. Not my area of expertise, but worthwhile to mention.10
But Wait, There’s More (The Really Important Stuff)
One of the major “drivers” of shin splints is thought to be over-pronation of the feet. It makes a lot of sense, but I’m often flummoxed as to how archaic the fitness industry can be in addressing this issue.
Orthotics are often seen as the end all-be all fix.
Full Disclosure: I am NOT a doctor and understand there are many people out there who benefit mightily from being prescribed orthotics.
However, for the bulk of people trying to conquer shin splits I do not feel what follows is the most germane approach. A few years ago I remember reading something physical therapist, Bill Hartman, wrote on the topic that really resonated with me and helped to shape my current thoughts on the topic.
Think about what happens when someone (over) pronates:
If we were to reverse engineer the anatomy/biomechanics it would look something like this:
Do More Anterior Core Work & Butt Stuff (Glute Work) —-> Nudge Posterior Pelvic Tilt —-> Femoral External Rotation —-> Tibial External Rotation —-> Supination of Foot.
I explain things a bit more in this quickie video.
To that end, below are a handful of exercises I feel should take more precedent when addressing shin splints.
Hammer anterior core/glute strength and hip stability.
Deadbugs
I think Deadbugs are a vastly underrated exercise, which is a shame because they’re an MVP when it comes to developing anterior core strength and pelvic control.
And while many people will scoff at how “easy” this exercise is, I’d argue that if it’s done RIGHT (as discussed in the video above), they’d have a newfound affinity for it.
Active Foot Squat w/ Band
Passive Foot = Deafaulting into a pronated (flat foot) position.
Active (Tripod) Foot = Maintaining three points of pressure in the heel, pinky toe & big toe.
Placing a band over the feet is an easy way to provide kinesthetic feedback to the trainee so (s)he can stay more cognizant of their foot position.
I.e., Resist pull of band, supinate, get an arch, and then maintain position throughout set.
Standing KB Swap
Popularized by Dr. Joel Seedman, this is a fantastic drill that provides a ton of value for our training buck. The idea is to GO SLOW and to “own” each transition. If you have to speed up in order to stay balanced that defeats the purpose.
It hammers home the concept of active foot.
It lights up the glutes and surrounding hip musculature.
It will humble the shit out of you.
I like to have trainees perform 3-4 sets of 6-8 reps/side with this drill.
1-Legged RDL KB Swap
This is more or less a progression to the KB Swap above. All the same benefits apply, except now you’re upping the ante in an RDL position (and really challenging hip stability).
Glute Bridge w/ Band Abduction
When it comes to the Glute Bridge I’d encourage everyone to experiment to see where they feel these these the most.
#1 you want to FEEL YOUR GLUTES WORKING.
You’d be amazed how many people come into my studio telling me “yeah, yeah, yeah, I do glute bridges, whatever,” only to find out, after watching them perform a few reps, they don’t even feel them in their glutes.
I’ll often play around with foot position – narrow stance vs. wid(er) stance, heels close to tush vs. heels further away from tush, pants on vs. pants off – to see when and where they feel their glutes the most.
Everyone is different.
But yeah, first and foremost, make sure they actually feel their glutes when they perform this exercise.
Once they master that, if you want to make their glutes feel even juicer, add a band and have them perform a few hip abductions at the top of each rep.
This is a double-whammy on glute activation.
Side Plank Hip Clam
This is one of my favorites, and admittedly a very advanced drill. I think Bret Contreras was the first to popularize this drill first and it’s definitely one that targets the glutes in a way not many exercises can.
I’m currently in the throes of jet-lag sucktitude.
I’ll be back on my writing content horse next week, but I’ve got a treat for you today. TG.com regular contributor, Dr. Nicholas Licameli, is subbing in for me today and he went to TOWN in today’s guest post.
This is one of the most thorough articles I’ve read in a while on the topic with a metric shit ton11 of information with many additional links to help you nerd out a bit more if you so choose.
The squat is a topic that has gotten a great deal of attention among many fitness and medical professionals since mankind first started lifting heavy things against gravity. Since then, much of the conversation has changed (with the advent of civilizations, roads, running water, Instagram.
However much has stayed the same.
I understand this isn’t the first article written about the squat.
Some of the greatest minds in fitness and strength and conditioning have written on the topic, and I encourage you to dive into the multitude of references that I’ve provided.
My goals for this article are to help make your squat look and feel better, improve performance and effectiveness, un-complicate the complicated, and give you the confidence to perform this foundational movement without fear.
Unfortunately, there are those that say to avoid squatting.
As a physical therapist, I have to apologize because much of that flawed thinking stems from misinformed and unqualified professionals in the medical field that are pleasantly ignorant to current practices.
The squat and hip hinge are foundational to basically all movements in and out of the gym.
Whether you’re hitting a PR on the platform or sitting down on the toilet, you are squatting and you better be using proper technique. I’ve treated injuries as a result of poor squatting in both of those previously mentioned instances. Why avoid the squat in the gym if we’re going to do it constantly throughout our day anyway?
I say train it rather than avoid it.
Why not be prepared and do it right?
The squat and hip hinge require total control of the deep abdominals as well as the hips, pelvis, and entire spinal column. We can all agree that teaching proper abdominal bracing, pelvic positioning, and proper lifting mechanics are of utmost importance for the treatment of musculoskeletal injuries including knee, hip, and low back pain. For some reason however, we don’t all agree that squatting is necessary.
Newsflash…when done correctly, THEY’RE THE SAME THING!
As both a doctor of physical therapy and professional natural bodybuilder, it should come as no surprise that in my opinion, people of all ages and from all walks of life should be squatting. This includes the young athlete just starting his/her training career, those recovering from injury, those trying to prevent injury, and even (and especially) the elderly.
No matter if you are an athlete or a great grandparent, we are all essentially “squatting” multiple times throughout our day, so why not train it, strengthen it, and perfect it?
You can release this muscle or stretch that muscle but if patients and clients don’t know how to squat and hip hinge, we are spinning our wheels and wasting valuable time.
How to Squat
While this isn’t a step by step “how to squat” article, here is a quick and dirty rundown of some things to keep in mind.
There is a plethora of information out there about thoracic spines, knees, ankles, spinal positioning, foot placement, etc., and sometimes it can complicate things, make people fearful, and mystify the movement.
Basically, a proper squat and hip hinge starts (obviously) at the hips with the spine in a neutral position (more on this later). After a breath in, tension should be kept throughout the body and throughout the movement. The entire spine, including the neck, mid back, and lower back, should be kept in a relatively stable and neutral position. The feet should remain actively planted on the floor with the weight evenly distributed.
More on all of this to come.
In the beginning of my lifting career, I struggled with finding the “groove” of the squat. This is partially due to improper mental cueing during the movement. Some of my mental cues during the squat were:
“Arch the back hard to avoid spinal flexion.”
“Keep the head and chest up so they remain in line with the horizon.”
“Sit back and push through the heels.”
“Always squat below parallel.”
While there could be worse things, especially considering that, like most beginners, my sources of information were muscle magazines and of course the biggest guy(s) at the gym, I think these cues can be quite misleading and detrimental to squat technique.
Here’s why.
“Arch the Back Hard to Avoid Spinal Flexion.”
Avoid a hard arch in the lower back.
Don’t let the lower back round of course, but rather maintain the natural arch of the lumbar spine.
Hard lumbar extension will crunch down on the delicate structures of the spine, put the glutes in a less than optimal position to stabilize the pelvis, and place the hip in slight flexion before the movement even starts.
Starting in hip flexion will cause the femur to run out of room in the acetabulum for hip flexion when you want it most…at the bottom range of the squat. This could result in femoral acetabular impingement (FAI) and labrum pathology.
Get out of that hard arch and find your neutral.
“Keep the Head and Chest Up So They Remain in Line With the Horizon.”
Keeping the head and chest up isn’t necessarily a bad thing, however if we achieve that position by hyperextending our backs and flaring our ribs forward, it becomes problematic and essentially unstable.
Cueing a slight posterior pelvic tilt prior to un-racking the weight and maintaining that position throughout should do the trick. This will place the spine and ribcage in more of a neutral position.
We maintain the position by taking a breath, contracting the upper back, lats, mid section (as if putting on a tight belt or walking into cold water up to your navel), pelvic floor (as if holding in gas or urine), and even the feet (more on this to come).
Check out my explanation of what it means to “contract your core” right here. Tony does an awesome job of explaining this here, as does John Rusin here. Quinn Henoch and Ryan Brown also hit the point home here. Eric Cressey nails the upper body and lat set up here.
“Sit Back and Push Through the Heels.”
It’s true that we don’t want to push through our toes and allow our heels to rise off the floor, however it is also true that we don’t want to shift our weight so far backward that the toes lose contact with the floor and most of the force goes through our heels.
Yes, we want to descend slightly backward, but the focus should really be on descending down between our hips.
When we say we put an adversary on “his/her heels,” we are saying that we put them in a vulnerable position and on the defense, which will likely lead to a step backward. Why would we want to put ourselves on our own heels while squatting?
A better cue is to have an “active foot,” evenly maintaining 3 points of contact with the floor: base of big toe, base of little toe, and heel. Tony explains this really well here. This foot position will help stabilize the hips and knees, as well.
Mastering the “active foot” takes practice, but once you feel it, there’s no going back.
For everything you (and your children and their children’s children) will ever need to know about squatting, check out this bad boy by Greg Nuckols.
Find Your Squat
Hey fellow millennials!
Remember what our mothers taught us…we are all special, we are all unique, everyone is a winner, Mufasa died of natural causes, and most importantly, we are all different!
When it comes to the squat, this last point is key.
We are all structured differently, which is why there is no particular squat that is perfect for everyone. Things like foot position, stance width, and squat depth will all be impacted by things like the size of our torsos, length of our femurs, and the structure of our hips and pelvis. We need to find the squat variation that best “speaks” to us.
The classic example of this is hip flexion range of motion and lumbar compensatory spinal flexion.
Much has been written about this topic, and to avoid making this more like a Harry Potter book rather than a guest post, I’m going to refer you to some excellent articles down below.
Keep in mind that a range of motion measurement taken while lying on a treatment table DOES NOT always necessarily correlate to what we observe during an actual movement pattern like a squat and vice versa.
That being said, a 2008 study (stolen by me from afantastic articleby Bret Contreras) showed a 60 degree difference in hip flexion range of motion between the least flexible (80 degrees) and most flexible (140 degrees) subjects out of a total of 200 hips.
That’s quite a large difference, considering exercises like a deep squat require about 120 degrees of hip flexion. Differences in femoral anteversion/retroversion (how much the head of the femur faces forward or backward), acetabular anteversion/retroversion (how much the the hip socket faces forward or backward), and inclination angle of the femoral neck (angle of the neck and shaft) are seen from individual to individual as well as from hip to hip within the same person.
These genetic structural differences all change an individual’s ability to squat.
Thanks Mom and Dad…
Pushing past end range hip flexion in the descent of a squat for the sake of going deep will cause compensations up and down the chain, particularly flexion of the lumbar spine, AKA the dreaded “butt wink” (cue the tire screech and screams).
While some amount of lumbar flexion and “butt wink” is acceptable (we’ll get to that in a minute), too much, too often, in an uncontrolled manner, can be problematic.
So you can see why being married to a certain squat variation can be inappropriate.
If you are an individual that is unable to squat deeply but force yourself to perform deep barbell squats because your lifting partner says so, you’re setting yourself up for injury and a faulty and uncomfortable squat.
When it comes to varying your squat type, be sure to know your goal.
Why are you squatting?
To improve overall strength?
Hypertrophy?
To get a stronger squat?
To impress a member of the opposite sex (spoiler alert, they don’t care)?
To be able to pick up your child without pain?
There are many variations of the squat.
The conventional barbell back squat is just one option and unless you are training for a powerlifting meet, where you will be required to perform the conventional barbell back squat, there is no reason to lock yourself into only one type of squat.
Why not try a goblet squat? Or a sumo squat? Or a front squat? Why not use dumbbells or kettlebells instead of a barbell? If structured correctly, any variation of the squat will improve strength and hypertrophy as well as train the hip hinge and proper bending/lifting mechanics.
What’s the take home? We are all structurally different and it is important to find the squat pattern that works best of us.
Here are some great resources that will help you find the squat pattern that works best for you and your anatomy:
Note From TG: Nicholas is kind to include me amongst such elite company (Note to Self: you owe Nick 1000 Predator handshakes), but mine is easily the least pithy of the bunch.
Neutral Spine…Does It Exist?
Yes and no.
Research has shown that lumbar flexion, particularly at the bottom of a squat (the previously mentioned butt wink), is quite natural in a squatting pattern, particularly at the point in the movement where the hips start to run out of space for further flexion.
I agree with Quinn Henoch that neutral spine is more of a range rather than a set position, so don’t lose sleep over a little spinal flexion.
How much excursion is too much?
You knew the answer before you asked it.
It depends!
That being said, you definitely want to avoid movement at the spine and pelvis as much as possible. A moving base causes leaked energy and therefore less stability and built up tension. This means less force produced, less strength, and less Instagram pictures with a bumper-plate loaded bar on your back.
Don’t Stop Squatting Because You Have Pain Or Feel Restricted
If you experience pain during a squat, SEE A QUALIFIED HEALTHCARE PRACTITIONER.
You want someone that will question the type of squat that hurts, ask when in the range of motion the pain occurs, analyze your squat pattern, ask about weekly volume and load, inquire about recovery and sleep, and do everything in his/her power to keep you squatting.
There are always ways to modify the squat in order to keep training this key movement pattern while training with an injury.
Sharp pain at the bottom of a squat?
Try using a more neutral spine with slight flexion using a goblet squat to free up some space in that acetabulum.
No good?
Try adding a band around the knees during a few warm up sets.
Still no good?
Add a box to squat to at a level just above where the pain is felt.
The point is, you deserve better than a rushed, “Stop squatting for 4 weeks, take these anti-inflammatories, and see me in a month.
Oh, and if that doesn’t work, try foam rolling, cupping, turmeric, an oxygen deprivation mask, and VooDoo floss bands in a bath of apple cider vinegar and creatine.”
Fixing the symptoms with things like medication and surgery without considering the cause is an all too common theme.
These things have their place, of course, however they must be used appropriately. For example, surgery to repair a labrum that was damaged after repetitive impingement due to faulty lumbo-pelvic mechanics would be like fixing ceiling tiles in your living room instead of fixing the leaky roof.
After the surgery, if the individual returns to squatting with the same mechanics that got him/her under the knife in the first place, what good has been accomplished? Doesn’t make sense to repair, install, and paint shiny new ceiling tiles without fixing the roof first. Check out a video I made on this a while back right here.
So What Can We Do To Improve How The Squat Looks And Feels?
This is a tough question, because, as you probably guessed, everyone is different and it depends.
I recommend seeking out a qualified healthcare practitioner that will assess, reassess, and give you the tools to improve your individual squat.
Gone are the days of performing long, drawn out warm ups in the name of injury prevention, mobility, and movement optimization. A warm up should increase your heart rate and mentally and physically prepare you for the specific movements of the day.
The warm up should be active, specific and purposeful, not a cookie cutter series of activities like flailing around on the dirty gym floor or jamming a lacrosse ball into your sciatic nerve in hopes to break up adhesions in your piriformis.
Things like static stretching and foam rolling are passive activities.
In contrast, light cardio, dynamic stretching, loaded eccentrics, and actually getting under the bar and grooving the squat movement with sub-max loads are all active.
Passive activities like foam rolling do have their place, but they should be used appropriately. The benefits of foam rolling are short-lived, so if you’re going to foam roll, I’ve found it best to do it in between warm up sets. Of course, the specific muscles you target will be individual to you, your body, and your squat. For more on this, check out my article and videoas well as this fantastic episode of Mobility Mythsby Quinn Henoch.
Don’t feel obligated to use cardio as the only way to increase heart rate.
A dynamic series/circuit of exercises, combined with specific mobility work using active techniques such as loaded eccentricsand reciprocal inhibition (here and here), followed by some squatting with bodyweight or just the bar, will increase your heart rate just fine, not to mention both physically and mentally prime your system.
You get more bang for your buck.
For more on a proper warm up, including explanations of how to put it all together, check out my current lower body warm up right here as well as a great hip mobility exercisenot in included in my warm up video.
Also, Quinn Henoch (<— can you tell I have a little man-crush on him?) nails it in this episode of Mobility Myths about stretching.
And That’s That
I hope this helps in your journey to finding and perfecting your individual squat.
Remember, there is nothing to fear about the squat and there is no need to overcomplicate this foundational movement. Don’t forget to take advantage of all the resources provided in this article, as they are from some of the greatest minds this field has ever seen. Happy squatting!
Oh, and one more thing…knees drifting over toes is OK.
About the Author
Nicholas M. Licameli
Doctor of Physical Therapy / Pro Natural Bodybuilder
Every single thing he does, Nick believes in giving himself to others in an attempt to make the world a happier, healthier, and more loving place.
He wants to give people the power to change their lives. Bodybuilding and physical therapy serve as ways to carry out that cause. Nick graduated summa cum laude from Ramapo College of New Jersey with his bachelor’s degree in biology, furthered his education by completing his doctoral degree in physical therapy from Rutgers School of Biomedical and Health Sciences (previously the University of Medicine and Dentistry of New Jersey) at the age of 24, and has earned professional status in natural bodybuilding.
His knowledge of sport and exercise biomechanics, movement quality, and the practical application of research combined with personal experience in bodybuilding and nutrition allows him to help people in truly unique ways. Love. Passion. Respect. Humility. Never an expert. Always a student. Love your journey.
It’s not lost on me there’s an easy Lord of the Rings reference to be had here, and I’m going to try my best to be professional and abstain and….
Fuck it.
One ring………..to bind them.
Okay, with that out of the way, what do I mean when I say “stacked rings?” and how how can that possibly help your squat?
I had to audit myself a few years ago when it came to coaching the squat. After being introduced to the concepts of PRI (Postural Restoration Institute) and listening to other strong dudes like Chad Wesley Smith speak on the topic, I wondered if cueing people to “arch, hard!,” and to” sit back” were the right things to be saying to the bulk of my athletes/clients when they were getting under the bar?
Very few were competitive powerlifters and even fewer were geared lifers. I.e., none wore squat suits when training (which require an aggressive arch and sitting back to reap the benefits).
To be clear: There are still many very strong dudes (and coaches) who advocate squatting with a hard arch, and that’s their prerogative. The thing to appreciate, however, is that what works and is ideal for a geared lifter won’t necessarily (read: rarely) ever translate well to a non-geared lifter.
If I were to balance the “I want to be brutally strong AND not shit my spine on this next set” teeter-totter, I’d opt for not arching (aggressively).
Like this.
The ribs & diaphragm are pointing in one direction (up) and the hips & pelvic floor are pointing in another (down).
Put simply, this is all sorts of fuckeduppery not a stable position.
We’re placing a ton of shear load on the spine.
What’s more, this will invariably force the lifter to initiate the movement by sitting back (rather than down, you know, like a squat). As a result, often, the chest will fall forward, and the cue we default towads is “arch, arch, arch, chest up, chest up, chest up, you crap you’re going to fall on your face, too late.”
This only feeds instability.
A better approach, I believe (again, for non-geared lifters) is to tone down the arch and adopt what’s been referred to as the “canister” position or to “stack the rings.”
Giving credit where it’s due, the first person I ever heard use this phrase was Dr. Evan Osar. A simple analogy he used was to think of your pelvis as one ring and your rib cage as a bunch of other rings.
We want all those rings to be stacked.
This will nudge us into a more stable, joint-friendly environment
Now, a minor glitch in this way of thinking is that some people think this infers going into posterior pelvic tilt, where we flatten out the lumbar spine.
This is not what’s happening. As you can see in the picture above, my hips are still behind the bar (still very important) but there’s less of an aggressive arch. Telling people to posteriorly tilt their pelvis towards spine neutral is different than telling them to flatten out their spine.
From there it’s a matter of owning the canister position and to squat down rather than back.
Maybe this quick 3-minute video will help:
Want More Tips Like This?
Yeah, I thought so.
My friends Dr. Sarah Duvall, Kellie Hart, and Meghan Callaway released a stellar product this week – Glutes, Core, and Pelvic Floor Online System – and it hammers home points like the one above. It’s often necessary to break down movement(s) into their respective parts to make certain we’re getting motion from the right areas and that we’re using/engaging the areas we want to use/engage to perform exercises well.
GCPF is a 12-week online course that will teach you how to assess movement and how to implement the correct drills and exercises to help you (or your clients) get stronger and to move better.
TODAY (6/29) is the last day to get it at it’s FULL sale price. You can still get it at a discount until Monday (7/2), however today is your last chance to get it at $200 OFF.
It’s a great resource and one I feel will help a lot of people.



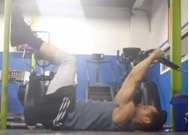
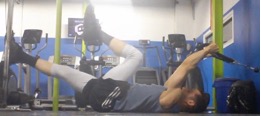
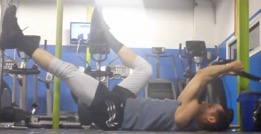

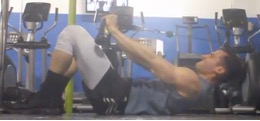
 Nicholas M. Licameli, PT, DPT
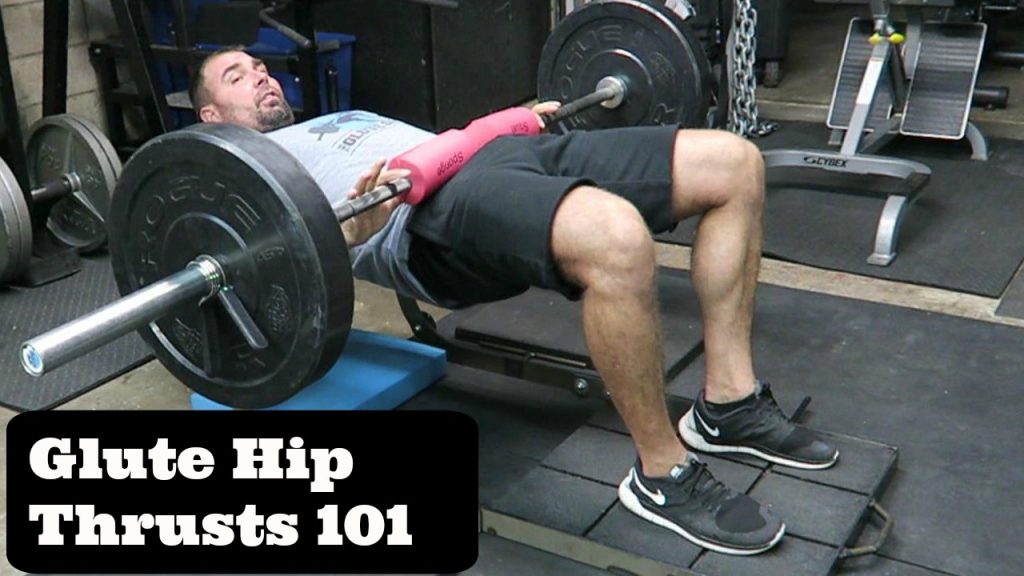
 Tom Coffey is a former Army Ranger, certified nutrition coach, and currently pursuing a master’s degree in Exercise Science.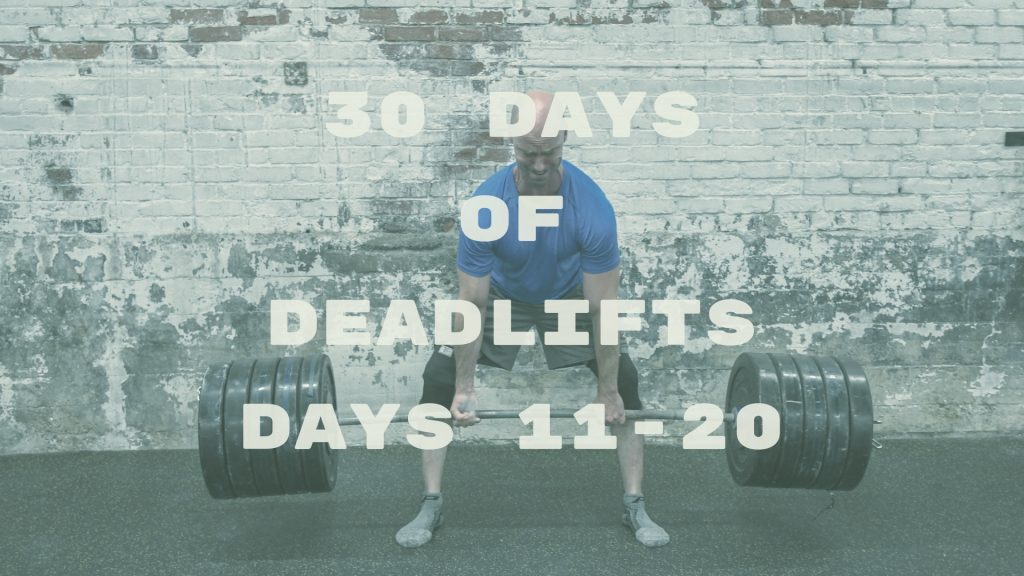
 Scott Hansen is a Bostonian transplanted in Southern California, a strength/fitness/wrestling coach, educator, sub par surfer, and die hard New England sports fan.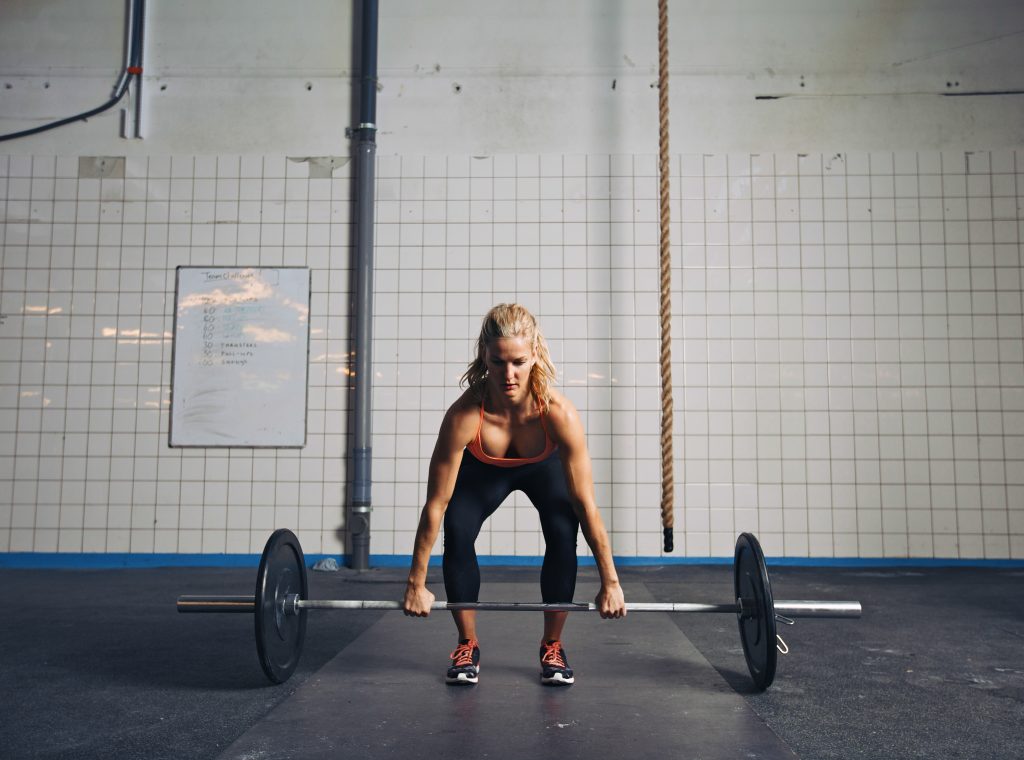
 On the other side of things, there are those women who’d like to go all out each and every workout — testing their strength every single day of every single week.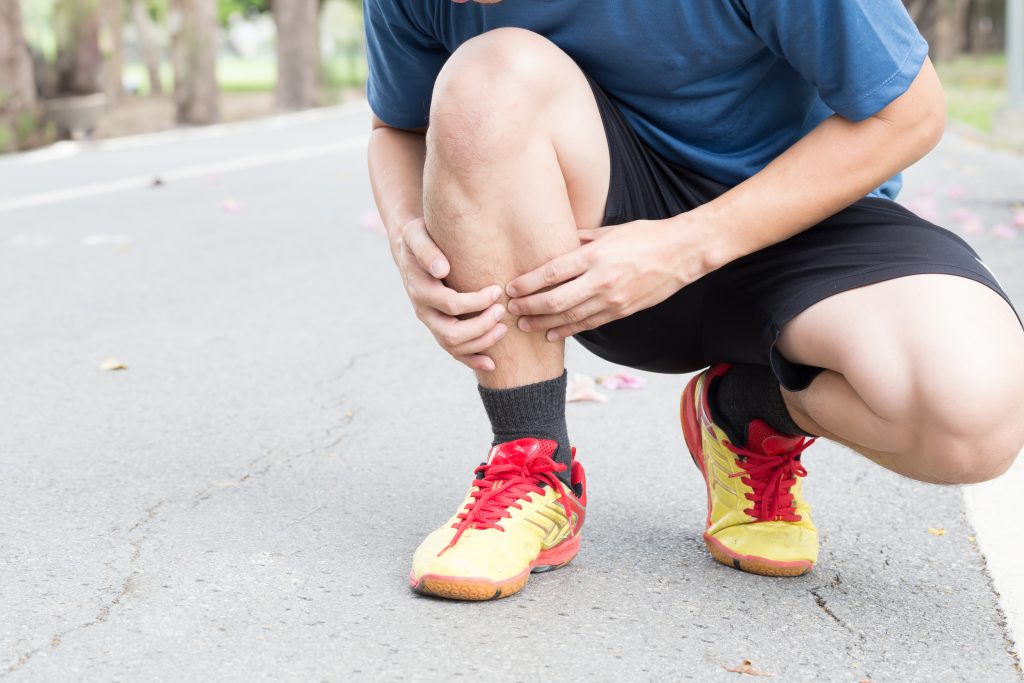
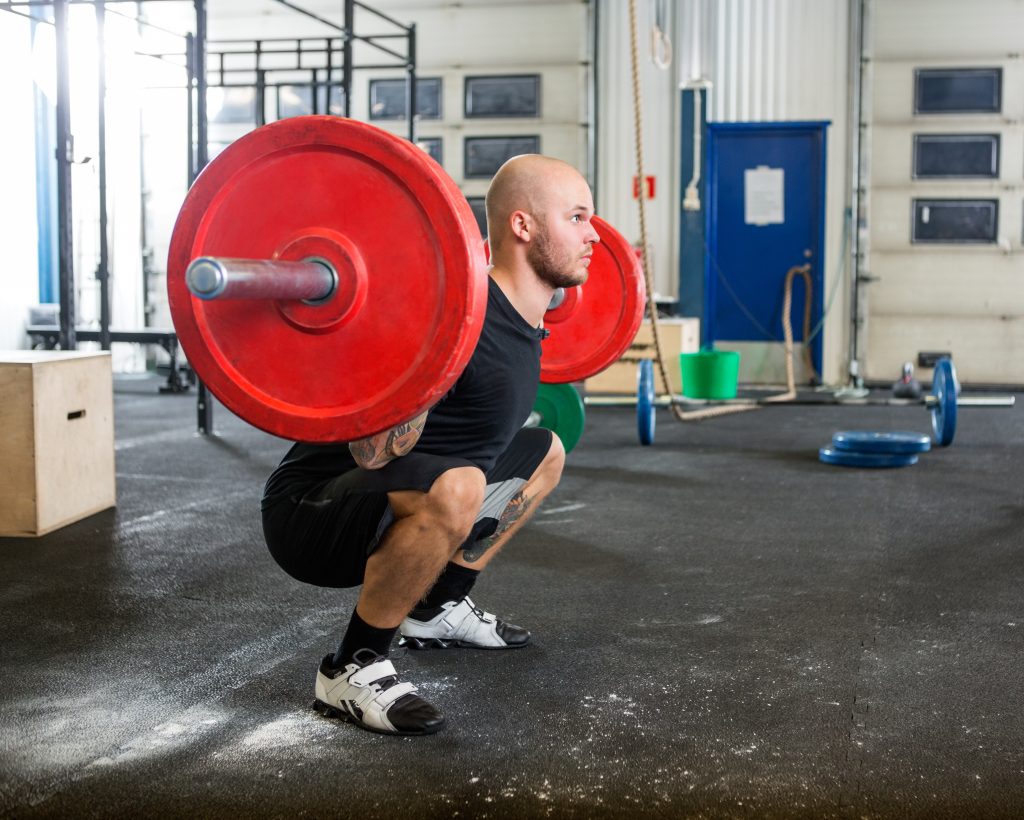
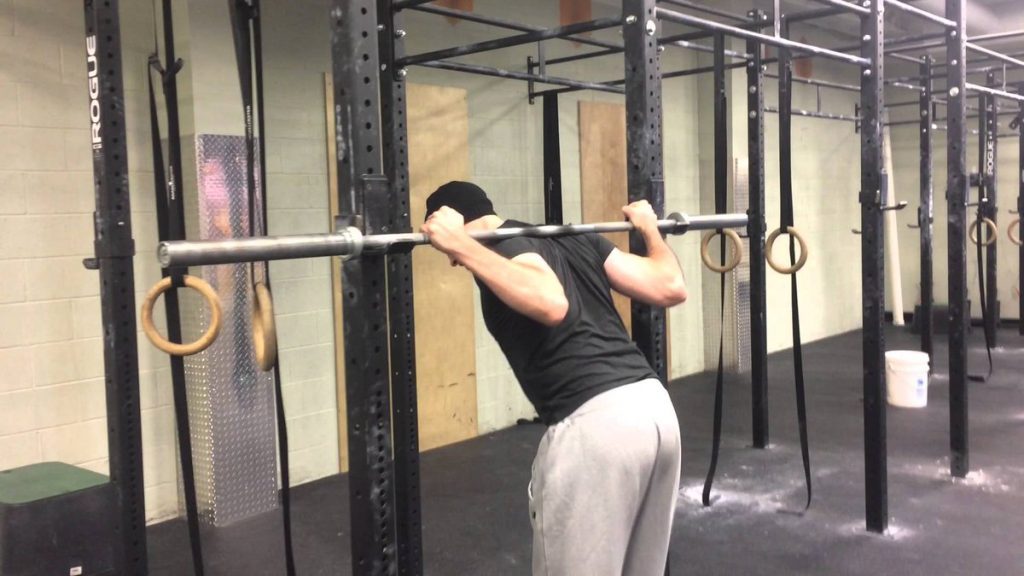
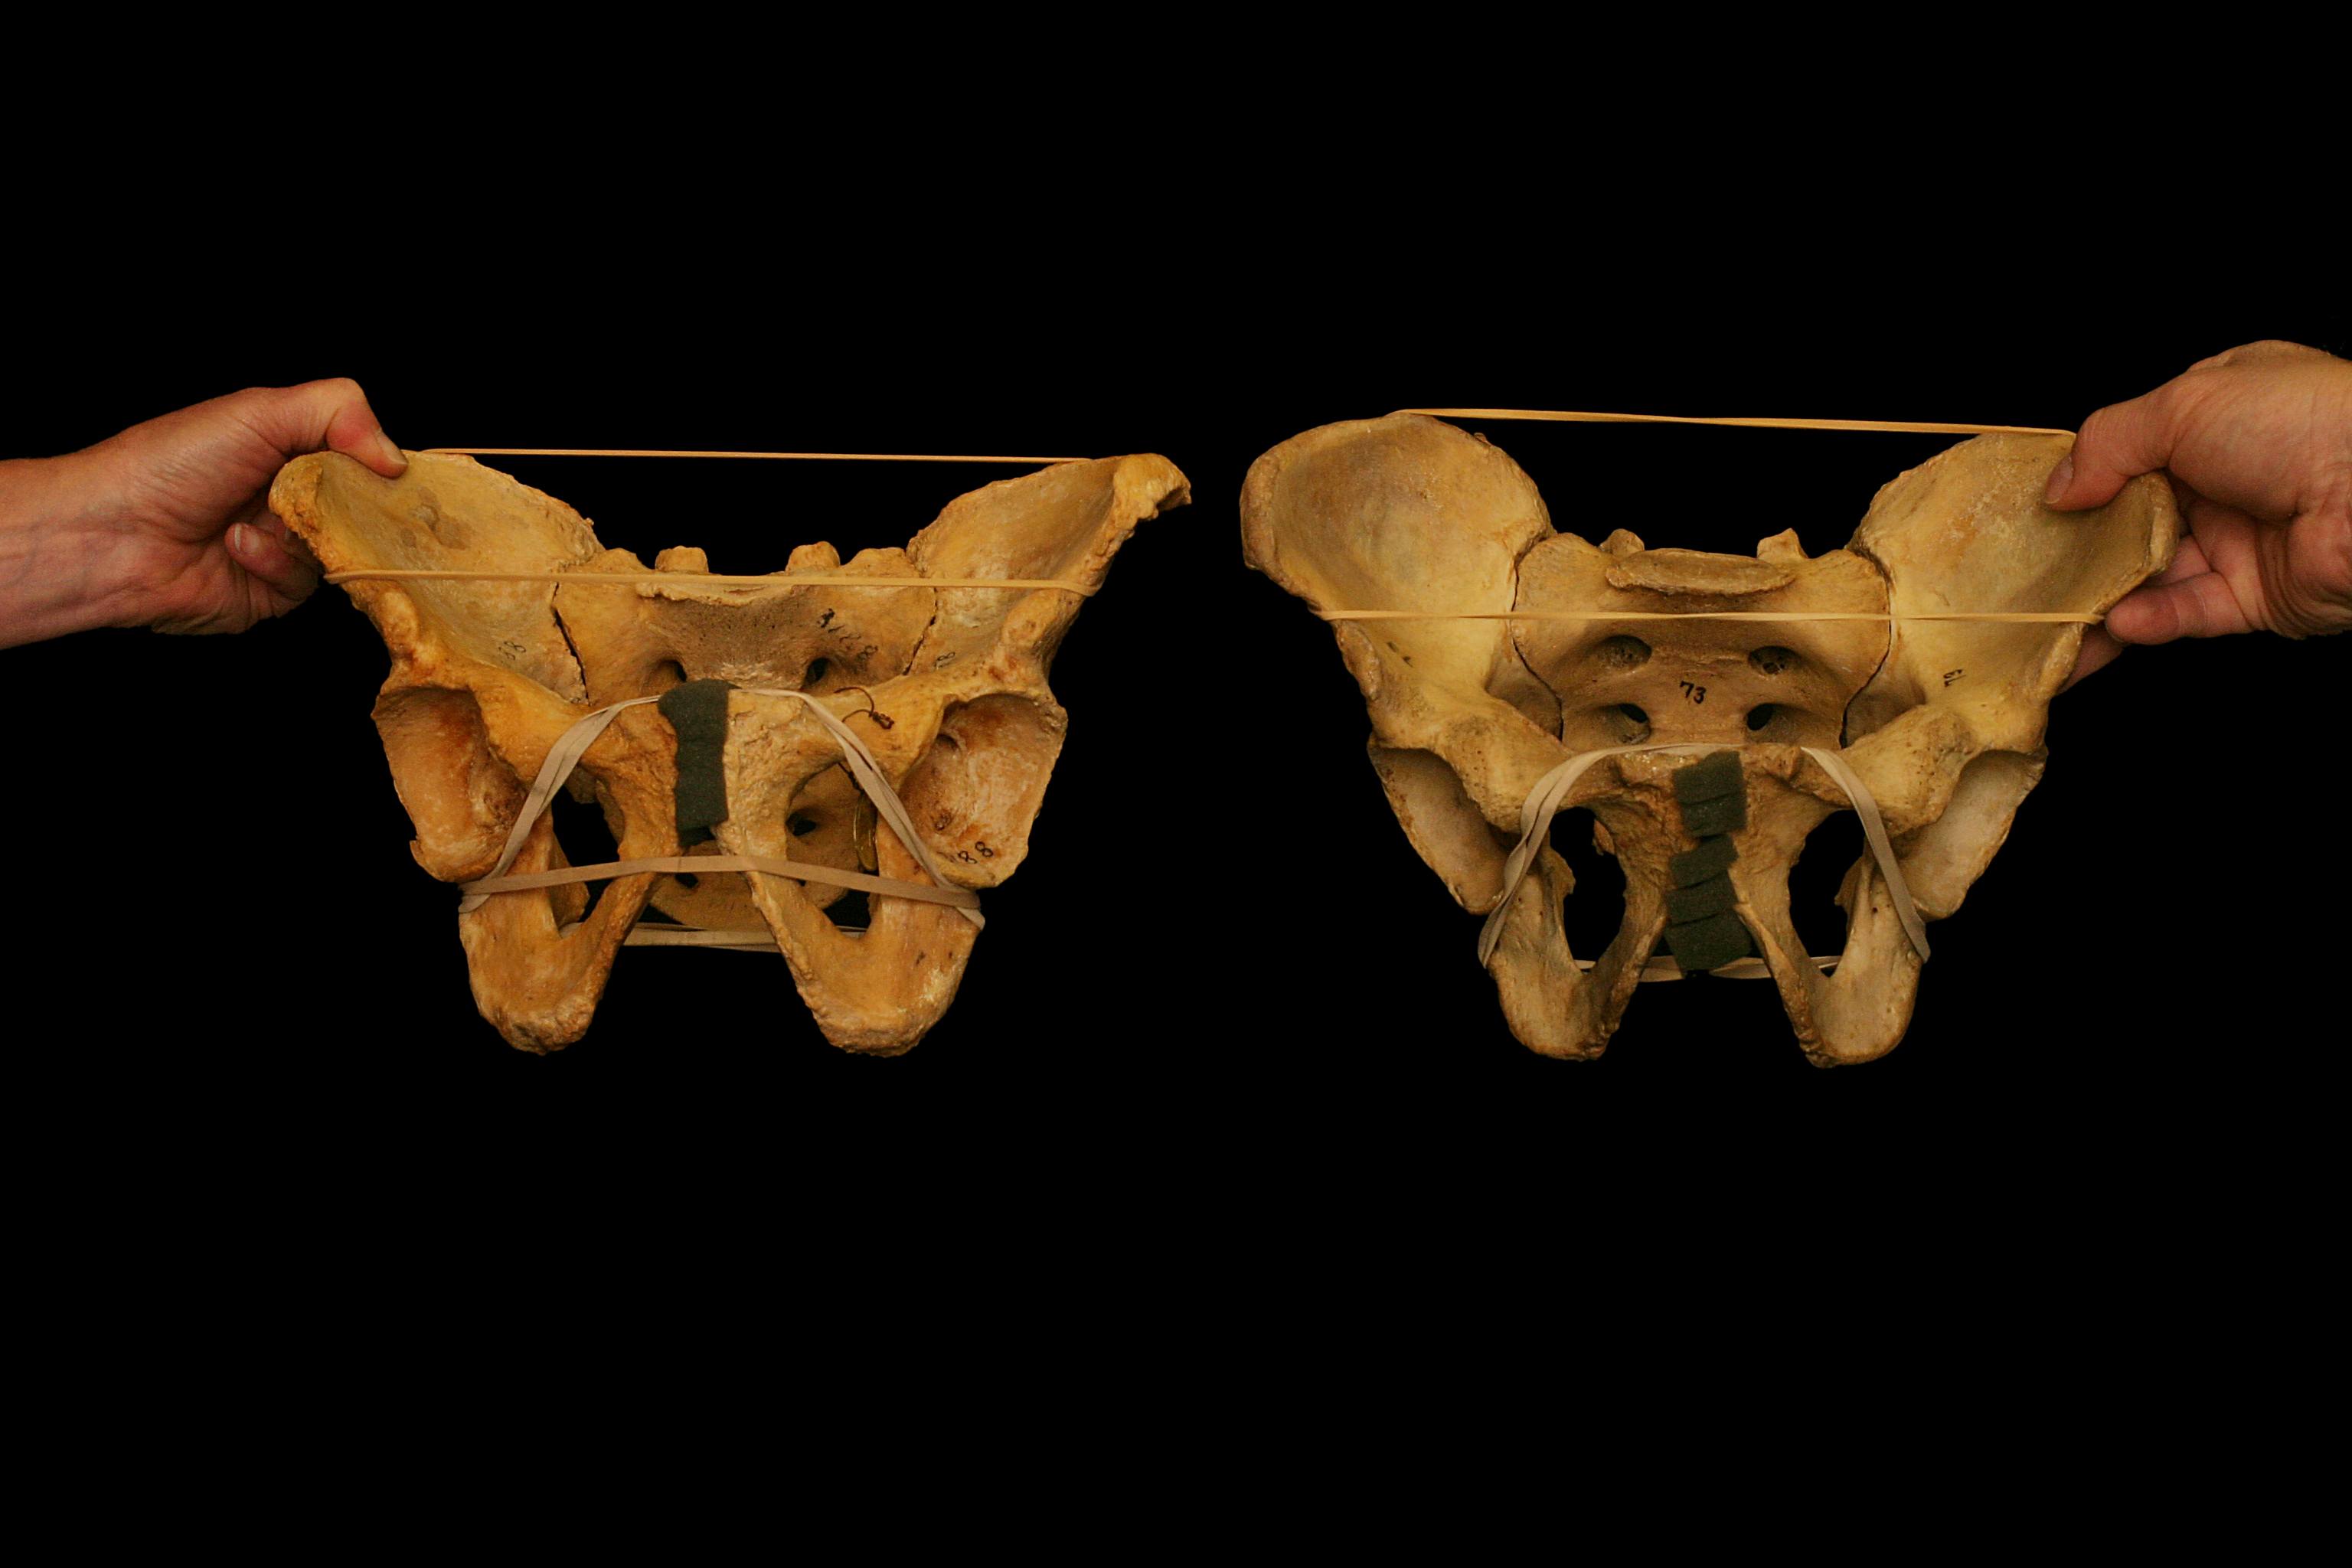
 Nicholas M. Licameli