Since I won’t be traveling anytime soon to present, I decided why not bring one of my workshops to YOU? I will be putting on my popular Coaching Competency Workshop this March over the span of three weekends.
I figured chances would be high many attendees would be fighting off the urge to commit seppuku staring at their computer screen for seven straight hours so made the executive decision to spread things out
3 Hours on 3/7
2 Hours on 3/14
2 Hours on 3/21
All attendees will receive a recording (and CEUs)1.
You can register at the EARLY BIRD rate now through 2/15. For more info go HERE.
I’m excited to announce that I’ll be one of 55+ industry leaders taking part in Kabuki Education Week that’ll be taking place February 1-7, 2021.
Kabuki Education Week – Hosted by Kabuki Strength – is a unique opportunity to attend 40+ live hour-long lectures (with Q&A) presented by the most respected and well established educators, coaches, clinicians, and athletes in the strength & fitness industry. This event brings together a wealth of knowledge across multiple domains; all condensed into week-long virtual format that allows you to attend as many courses as you choose with the added opportunity to purchase recordings.
You can register for my presentation (and save 50% through the end of the year) – The Hip: From Assessment to Badass –HERE.
Alternatively you can register for the ENTIRE event at the Early Bird rate – HERE.
This will undoubtedly be an event you won’t want to miss as the line-up, speaking as a fan boy myself, is one of the most impressive I have ever seen.
You can now purchase CORE @ Home for whatever you want to pay.
During the first quarantine I started a platform where I’d deliver 20-40 minute workouts that could be performed in everyone’s living room using minimal equipment.
In all I filmed 36 workouts using nothing but bodyweight, bands, and kettlebells and/or dumbbells. With many people still reticent to head back to their regular gyms (not to mention the scarcity of gym equipment out there to purchase) I figured this would be a nice opportunity to help.
Now that many parts of the US (and world) have started to implement a second wave of shut-downs, this resource is timely.
Whether you want to spend $1 or $99 (FYI: the latter enters you to win a 5×7 shirtless pic of me), the workouts are ready and available to start.
In lieu of yet anotherrecent episode of “who’s being an epic asshat in the fitness industry” (I.e., another fitness pro taking credit for another’s work) – I wanted to re-hash an old(er) article I wrote a few years ago on the topic of plagiarism.
Speaking of entry points: I sat down with my four-year old this past weekend to watch Jurassic Park. Now, most coherent parents would start with something a little less scary.
You know, say, Dino Dana or, I don’t know, Care Bears.
Nope, I went with the ginormous, scary T-Rex.
In hindsight, it probably wasn’t the best “entry point” for someone who has no idea dinosaurs aren’t real. Again, maybe Toy Story or, hell, Mighty Morphin Power Rangers would have been a more germane choice?
I gotta say, though…
…Julian handled the T-Rex like a champ.
He didn’t blink once. He giggled when the guy sitting on the porto-potty met his demise.
I didn’t know whether to be proud or scared shitless.
Kid’s the next John Wick in the making.
Okay, Cute Story Tony. But WTF Are We Talking About Here?
Yeah, yeah, yeah…
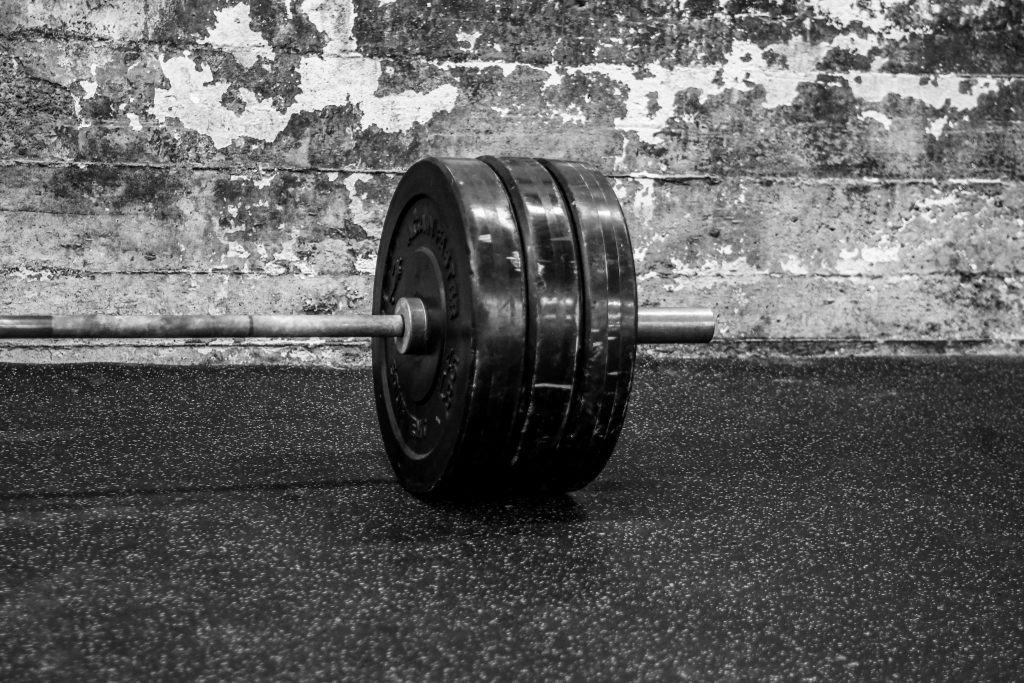
Lifting heavy things.
Entry Points.
I’ve recently been making my way through Dr. Michael Mash’s excellent resource, Barbell Rehab, and giving credit where it’s due…he’s spends quite a bit if time throughout the course discussing the idea of entry points and how to use the concept to guide anyone’s return back to a specific lift after injury.
Let’s use the bench press as an example.
If someone has pain when he or she bench presses with a straight bar, finding their entry point is nothing more than altering the lift the minimal amount possible in order to gain the minimum desired training effect.
For the visual learners out there it may look something like this:
Adapted from Barbell Rehab
TO BE CLEAR: If pain exists in the shoulder the idea is NOT to automatically regress all the way back to a push-up.
I know some people who’d rather swallow a live grenade than do that.
Instead, the goal is to be as specific as possible in order to elicit a (relatively pain-free) training effect.
If someone has pain with a straight bar FLAT bench press, however it alleviates significantly when you switch them to a decline bench press.
Sha-ZAM.
You just found their entry point.
Maybe it’s DB Floor Presses for one person, and yes, maybe it’s a push-up (albeit loaded) for another. The idea is to TRAIN.
Moreover, it also could just come down to tweaking their grip slightly or adjusting some component of their technique.
Rehab doesn’t always have to result in sending someone to corrective exercise purgatory.
Likewise, using the squat as an example, sometimes the entry point is using a different bar (Duffalo or Safety-Squat Bar) if the shoulder is the issue, or maybe it’s having someone squat ABOVE parallel if it’s their knee(s) or hip(s) bothering them.
Sometimes, and hear me out, we may have to combine the two: Not a straight bar AND above parallel.
Full Disclosure: Friend and colleague, Mike Perry, serves as inspiration for today’s post.
He posted something very similar on his various social media feeds last week and I was inspired to toss in my two cents on the matter after reading his list.1
Send any hate mail to: relax@thisisntanindictmentonyourcharacterifyouhappentodisagreewithme.com
1. I don’t pigeon hole myself into any one way of thinking; except for Tuesdays are for Techno Tuesday and Wednesdays are for Wu-Tang.
But take squatting for example.
Some of my clients squat to parallel (or even above), while others squat below.
2. Outside of someone coming in with an extensive injury history, my assessment is generally just taking someone through a “doable” training session: squat, push-up, hinge, amongst other things.
Can they do stuff? And can they do it without this being my reaction?
3. Speaking of assessment: Asymmetries are normal. I don’t make a big deal out of it. It’s most likely nothing and by highlighting them you’re leaning into the notion that people are inherently broken.
It’s information, of course. But I’ve long gotten over the idea that asymmetries are the end-all, be-all of predicting jack squat
(NOTE: Read THIS for a better understanding of what I mean).
4. Getting people stronger isn’t always about more reps or more sets or more load. “Feel” of a set matters too. If a certain weight “feels” faster or easier week to week that’s progress as well.
5. This doesn’t have anything to do with anything, but figured I’d say it anyway:
Ted Lasso is a splendid show.
6. Sometimes my only verbal cue to a client when they’re performing a new exercise is “figure it out,” or “find a way,” or
“WU-TANG PROTECT YA NECK.”
Inundating people with incessant cues can be more detrimental than helpful. Sometimes it’s prudent to just let people figure it out on their own. You know, assuming they’re not going to shit a spleen or anything like that.
7. I don’t begin to hyperventilate into a paper bag whenever I see a client flex their spine. In fact, sometimes I encourage it.
8. I’ve never read the book Supertraining. I don’t know who’s more annoying: a CrossFitter who’s keto or a strength coach who can’t talk shop without quoting Mel Siff…;o)
9. Most of my general population clients (read: all of them) don’t follow a periodized program. Life – sick kids, overbearing bosses, global pandemics, Thursdays – tend to get in the way.
This is NOT to insinuate I don’t feel general pop clients don’t require planning or structure within their programming. I just don’t feel having them follow a Block Periodized program so that their bench press peaks to coincide with their kid’s clarinet recital in the Spring is really the panacea for progress.
10. In terms of building increased motivation with clients I find two things help:
Allowing the client – sometimes – to choose their main lift of the day. If they’re going to deadlift, I’ll let them choose the variation that fills their training love tank for the day.
Ending sessions with a 5-10 “arm farm (I.e., biceps & triceps)” or “badonkadonk (I.e., butt stuff)” circuit.
IN SHORT: Allowing a smidgeon of CHOICE can be a game changer.
11. Almost always, when a client experiences a niggle (cranky shoulder, tweaked knee) it’s either a programming volume issue or a technique issue.
I’m less inclined to give clients a laundry list of corrective exercises to perform and more inclined to simply audit my programming and/or exercise selection.
12. Easy training is good training. I’d rather a client/athlete leave a session feeling as if they COULD do more. This way I know they’re likely going to recover well and be ready for their next session.
13. Seriously, give Ted Lasso a look. It’s wonderful.
Since I won’t be traveling anytime soon to present, I decided why not bring one of my workshops to YOU? I will be putting on my popular Coaching Competency Workshop this March over the span of three weekends.
I figured chances would be high many attendees would be fighting off the urge to commit seppuku staring at their computer screen for seven straight hours so made the executive decision to spread things out
3 Hours on 3/7
2 Hours on 3/14
2 Hours on 3/21
All attendees will receive a recording (and CEUs)1.
You can register at the EARLY BIRD rate now through 2/15. For more info go HERE.
I’m excited to announce that I’ll be one of 55+ industry leaders taking part in Kabuki Education Week that’ll be taking place February 1-7, 2021.
Kabuki Education Week – Hosted by Kabuki Strength – is a unique opportunity to attend 40+ live hour-long lectures (with Q&A) presented by the most respected and well established educators, coaches, clinicians, and athletes in the strength & fitness industry. This event brings together a wealth of knowledge across multiple domains; all condensed into week-long virtual format that allows you to attend as many courses as you choose with the added opportunity to purchase recordings.
You can register for my presentation (and save 50% through the end of the year) – The Hip: From Assessment to Badass – HERE.
Alternatively you can register for the ENTIRE event at the Early Bird rate – HERE.
This will undoubtedly be an event you won’t want to miss as the line-up, speaking as a fan boy myself, is one of the most impressive I have ever seen.
You can now purchase CORE @ Home for whatever you want to pay.
During the first quarantine I started a platform where I’d deliver 20-40 minute workouts that could be performed in everyone’s living room using minimal equipment.
In all I filmed 36 workouts using nothing but bodyweight, bands, and kettlebells and/or dumbbells. With many people still reticent to head back to their regular gyms (not to mention the scarcity of gym equipment out there to purchase) I figured this would be a nice opportunity to help.
Now that many parts of the US (and world) have started to implement a second wave of shut-downs, this resource is timely.
Whether you want to spend $1 or $99 (FYI: the latter enters you to win a 5×7 shirtless pic of me), the workouts are ready and available to start.
Surgery is never fun and should usually be used as a last resort. That said, for some it’s inevitable and the conversation of “prehab” work (and its efficacy) often comes up.
That’s a good question, and one I feel I don’t have a concise way of answering.
I mean, some questions are a cinch to answer:
Q: What would be your weapon of choice during the zombie apocalypse? A: Easy. Samurai sword.
Q: If you could pick one career to have what would it be? A: Professional Jason Bourne. Boom.2
Q: Who’s the best Care Bear? A: Birthday Bear. Come on.
But to definitively answer the question…”what is strong?”
Well, that’s a bit more abstract.
For some, strong is looking a certain way, and for others it’s about how much weight you can lift on a certain exercise. And maybe, to some faction out there, strong is about how many tacos you can eat in one sitting.
While I certainly have my biased take given I’m a strength & conditioning coach, I think in the grand scope of it all…
Recently, actress Rosamund Pike (of Gone Girl fame) shared a video on her Instagram feed from when she and I worked together while she was in Boston – in the before times – filming her latest movie.
The video shows her hitting a personal best 100 lb. deadlift for multiple reps (and making it look easy).
Secondly, I can’t take full credit for Rosamund’s technique and overall badassery in the video above.
She had plenty of experience beforehand working with other trainers, and to her credit was no rookie in the weight room.3
Nevertheless, I was elated that she took it upon herself to share that video with her fans and followers if for no other reason that it showcases to women that they CAN lift appreciable weight and that they won’t turn into Conan the Barbarian after one set.
I have long been a champion of encouraging women to strength train and to help them recognize the myriad of benefits it can provide:
Improved strength – obviously – and to be better prepared for life’s curve balls.
Improved performance.
Improved body composition.
Improved bone density.
Improved confidence and body image.
Improved mental health & stress relief
Telling societal norms to f**k off.
Unfortunately, much of the mainstream media muddies this message.
Instead we’re inundated with images of women lifting dainty weights.
Take for example this image, which, I kid you not, was one of the top suggestions while doing a search for “strong” within the stock photo service I subscribe to:
Many women (not all of course) are programmed, if not indoctrinated, into thinking that that is strength training and that anything involving a barbell (or a modicum of effort) is, well, let’s be honest…
…for men.
And it’s bullshit.
Granted, at the end of the day whether or not an individual does this exercise or that, and more to the point: if they’re performing it with appreciable weight, depends on their injury history, ability level, and more importantly, their goals(s)
However, speaking for myself, the last thing directing my thought process or programming is whether or not someone has Y chromosome.
Which is why I dig (profusely) the message Rosamund conveyed in her video above:
“Marla Grayson (NOTE: that’s the character she plays in her upcoming movie) is a lioness. And lionesses need to be strong. Tony celebrates the strength of everyone he trains, and pushed me to find more than I knew I had. Thanks Tony.”
Again, strong is a sentiment with many iterations and roots of inspiration.
Today’s guest post comes courtesy of TG.com regular contributor, Shane McLean and touches on a topic that may resonate with many reading…
…Top 10 keto recipes that don’t taste like sawdust.
LOL – just kidding.
How to finally conquer that hurdle of starting an exercise program.
It’s not quite as daunting as you think it may be…;o)
SIDE NOTE: Be sure to check out Shane’s latest resource, his six-week ‘Back in the Saddle‘ program; perfect for beginners or anyone who’s stuck in a rut and needs some direction.
No one wants to look like a fool, especially when you’re starting an exercise program with the will and determination to finally get in shape.
You want to know what you’re doing or at least fake it until you make it. And If you’re NOT confident, you’re less likely to start and finish. Then you’ll (maybe) chalk it up to another failure which you’ll add to your ever-increasing list.
Am I the only one who keeps track?
How Do I Know This?
Because I tried and failed several times when I started exercising and now I’ve been a trainer for 13 years and have seen people start, stop, and fail with the greatest of intentions.
I’ve trained clients who have made great progress to only then see them fall off the wagon when their accountability disappears, or life gets in the way.
Plus, I’ve watched the gym flood with new year’s resolution goers who are eager to put all their failures behind them to finally lose the flab.
But slowly and surely, they drop by the wayside when their motivation wave crashes.
Your health and fitness requires time and an emotional commitment, not a six-week shred. Instead of crashing and burning in your fitness quest, use my advice below to avoid adding another failure to the list.
1. Starting Easy
There’s a plethora of health and fitness info on the worldwide web. Enough to have your brain spinning around and around. You should try to avoid this analysis by paralysis by
Just starting
Picking something doable
If you don’t understand the article or program with the big fancy words then move on to something else. Because when you’re starting something, complicated things don’t work because this leads to confusion. Then this confusion may lead to throwing in the towel.
You know what does work? Starting easy.
2. Start With The Basics
There are fundamental human movements which were installed in your brain before you were born. These are squats, pushing, pulling, locomotion (walking, running, carrying), hip hinging and groundwork (rocking, rolling, crawling and everything else).
Don’t believe me? Ever seen a baby drop into a deep squat without a coach yelling in their ear?
And when you’re starting out, these need to be your focus and not walking on a treadmill or watching yourself do curls.
Although there is nothing wrong with either because something beats nothing every time, training the fundamentals will reestablish neglected movement patterns and get you where you want to go faster.
3. Don’t Program Hop
And once you’ve chosen a program, it’s natural to think the grass is greener on the other side. After all, you’re saturated with new exercise fads and their results look incredible. Besides, your program sucks and you’re not making any progress anyway.
However, change is not always a bad thing.
Change may be needed if you’re plateauing or when your routine (or you) is stale. But too much change doesn’t give your body a chance to adapt to your current program because not everything happens right away.
There is plenty of room in the middle of these two extremes.
My general rule of thumb is finishing the program first and then evaluating whether it worked or not. For example, loss of body fat, smaller waist, or bigger muscles. If you have not seen any positive changes after 6 weeks, then it’s okay to try something new.
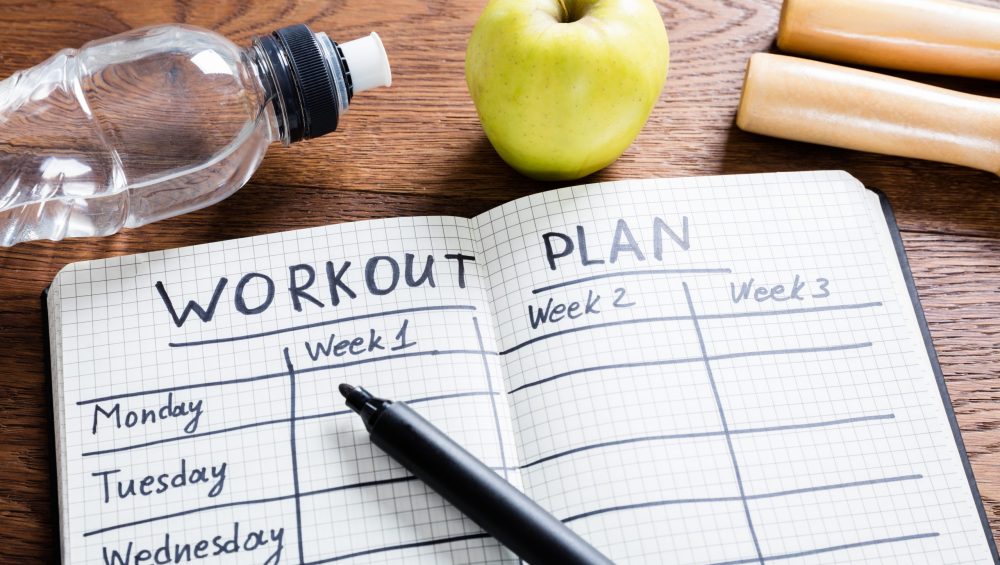
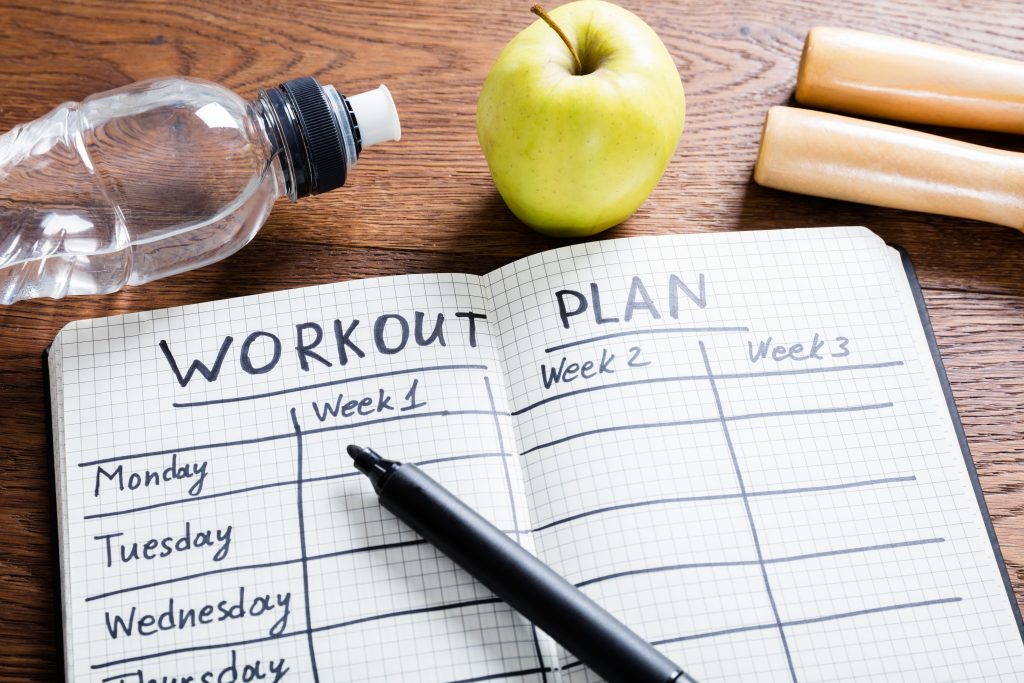
4. Schedule Your Training Time
During the COVID-19 pandemic a lot of us have more time on their hands than usual. And finding time to exercise is not a problem but it’s not always going to be this way.
Regardless of how much time you have scheduled, treat your exercise like you would any important appointment. Setting aside time for training will help get you in the right mindset and not another thing you can blow off on your to-do-list.
For example, I train Monday, Wednesday and Friday at the same time and is scheduled in my Google Calendar which reminds me 30 minutes before go time. It’s now a habit I follow through on even when ‘I don’t feel like it.’
Which leads me to my next point.
5. Showing Up And Being Consistent
Nothing gets done without being present, so ‘show up’ even when you don’t feel like it. 99 % of anything you do (based on scientific fact 😊) needs you showing up and being present.
Without it, it’s pointless.
It doesn’t matter if you exercise 2, 3 or 4 days a week, pick a day, schedule a time, show up and get it done. Then do this over and over for the foreseeable future. Yes, life is going to get in the way and when exercise is the furthest thing from your mind.
However, finding a way to stay active, even when the odds are stacked against you does wonders for your health and sanity. Being consistent is not about being perfect, it’s about showing up.
Wrapping Up
These five suggestions will hold you in good standing when starting and continuing any exercise program. Because exercise isn’t just for a six-week burst to lose the fab, it’s for life and your health.
If you’re looking for an exercise program to start after a layoff or if you’ve never resistance trained before, I have a 6-week program called ‘Get Back In the Saddle’ that will give you a fantastic exercise foundation to build on.
Since I won’t be traveling anytime soon to present, I decided why not bring one of my workshops to YOU? I will be putting on my popular Coaching Competency Workshop this March over the span of three weekends.
I figured chances would be high many attendees would be fighting off the urge to commit seppuku staring at their computer screen for seven straight hours so made the executive decision to spread things out
3 Hours on 3/7
2 Hours on 3/14
2 Hours on 3/21
All attendees will receive a recording (and CEUs)4.
You can register at the EARLY BIRD rate now through 2/15. For more info go HERE.
I’m excited to announce that I’ll be one of 55+ industry leaders taking part in Kabuki Education Week that’ll be taking place February 1-7, 2021.
Kabuki Education Week – Hosted by Kabuki Strength – is a unique opportunity to attend 40+ live hour-long lectures (with Q&A) presented by the most respected and well established educators, coaches, clinicians, and athletes in the strength & fitness industry. This event brings together a wealth of knowledge across multiple domains; all condensed into week-long virtual format that allows you to attend as many courses as you choose with the added opportunity to purchase recordings.
You can register for my presentation (and save 50% through the end of the year) – The Hip: From Assessment to Badass –HERE.
Alternatively you can register for the ENTIRE event at the Early Bird rate – HERE.
This will undoubtedly be an event you won’t want to miss as the line-up, speaking as a fan boy myself, is one of the most impressive I have ever seen.
You can now purchase CORE @ Home for whatever you want to pay.
During the first quarantine I started a platform where I’d deliver 20-40 minute workouts that could be performed in everyone’s living room using minimal equipment.
In all I filmed 36 workouts using nothing but bodyweight, bands, and kettlebells and/or dumbbells. With many people still reticent to head back to their regular gyms (not to mention the scarcity of gym equipment out there to purchase) I figured this would be a nice opportunity to help.
Now that many parts of the US (and world) have started to implement a second wave of shut-downs, this resource is timely.
Whether you want to spend $1 or $99 (FYI: the latter enters you to win a 5×7 shirtless pic of me), the workouts are ready and available to start.
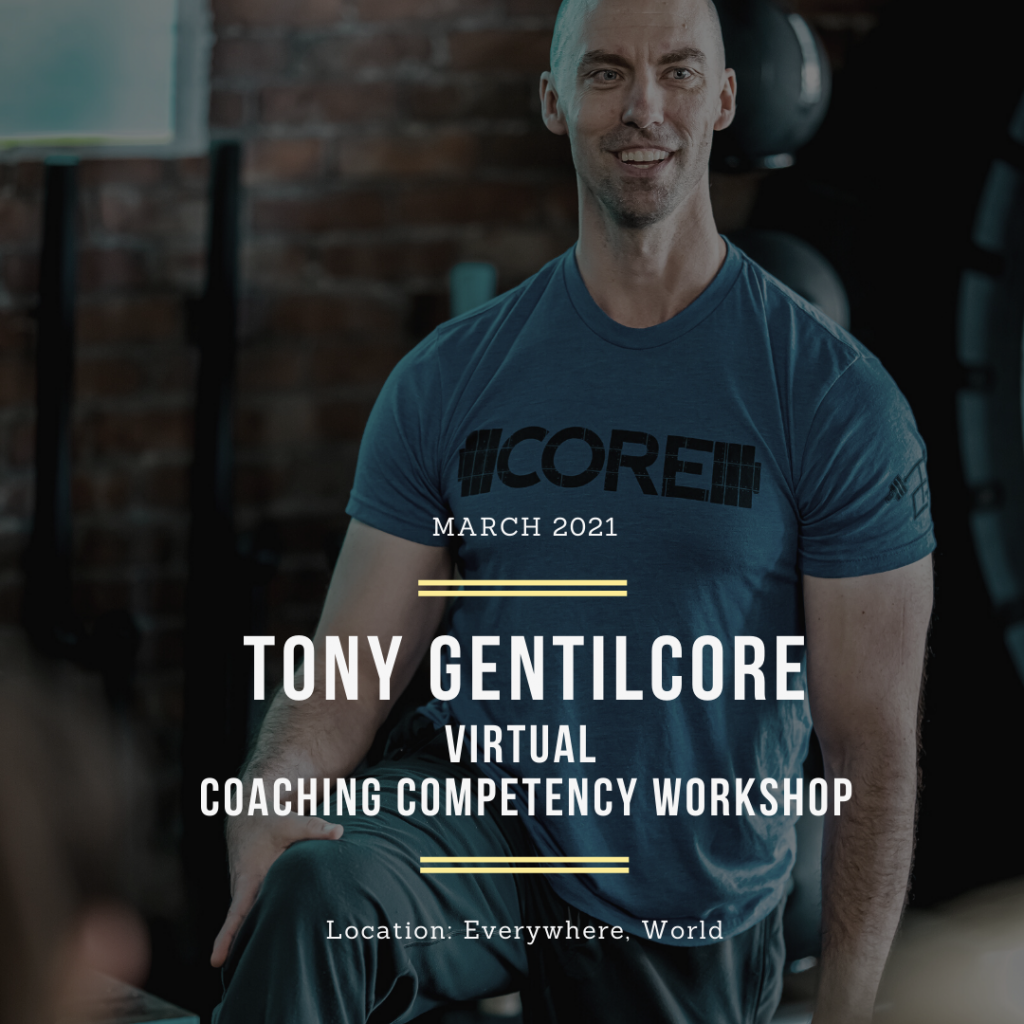
It’s coming up on a full year since I’ve done a live event. I miss it terribly and can’t wait for the day to hop on an airplane and travel somewhere that isn’t my dining room table.
Unfortunately, COVID-19 isn’t going anywhere anytime soon and I’ve mentally prepared myself to put off any notions of travel until at least the Fall of 2021.
(🤞🤞🤞)
To that end if there’s anything this past year has taught me, it’s that not touching my face is impossible technology works. Specifically, if I can’t travel to your neck of the woods to put on a workshop, I can bring MY neck of woods to you.
Via a WiFi connection.
I’m elated to announce that I will be hosting my popular COACHING COMPETENCY workshop virtually this March, and in an effort to make things more accessible I will be doing so over the course of three consecutive weekends in bite-sized modules:
3 Hours on 3/7/21
2 Hours on 3/14/21
2 Hours on 3/21/21
Let’s Be Real: No One Wants to Look at My Grill On a Computer Screen For Seven Hours Straight
Attending a live event in person for an entire day is one thing.
For starters nothing beats seeing & listening to a presentation in person; information is seemingly absorbed a little easier that way. Too, between break out sessions, Q&A, and the intermingling of attendees, live events just seem to be less of a grind.
The “fatigue” factors seems a little less exorbitant.
Conversely, to ask people to stare at their computer screens for seven hours – especially considering that’s pretty much everyone’s life right now anyway – is whole other thing entirely.
Speaking personally I’d rather jump into a shark’s mouth. I mean, unless you have Jennifer Lopez & Shakira lined up to provide entertainment sporadically I’m likely out after 45-60 minutes.
That being said I figured 1) people still want to learn and 2) why not spread it out a bit?
The Virtual Coaching Competency Workshop is an opportunity for fitness professionals (or those who just like to lift heavy things) to gain better understanding and insight into how I structure assessments and program design, how I coach, tweak, and progress common strength exercises, as well as how I build and maintain motivation/rapport with my clients and athletes.
Topics Covered Include:
1) Using the Self-Determination Theory – Autonomy, Competency, and Relatedness – to foster and enhance motivation and long-term success with clients.
2) Upper & Lower Extremity Assessment: “Big Rock” things to look at and the importance of demonstrating success to your clients on Day 1.
3) Coaching up common strength exercises and how to individualize them to fit the goal(s), injury history, ability level, and maybe most important of all, anatomy, of each client.
4) Top 5 Netflix shows I’ve watched during quarantine.
Date: Sunday, March 7th, 14th, & 21st, 2021
Time:
2:30-5:30 pm, EST on 3/7
2:30-4:30 pm, EST on 3/14
2:30-4:30 pm, EST on 3/21
(NOTE: Everyone who registers will also receive a recording of everything, so you don’t technically have to attend each “live” presentation. Although it’s encouraged if you want to ask questions. Or witness my awesomeness as it happens).
Location: Everywhere (Except Minas Tirith. They know why).
Register: You can go HERE to sign-up and take advantage of the Early Bird rate.
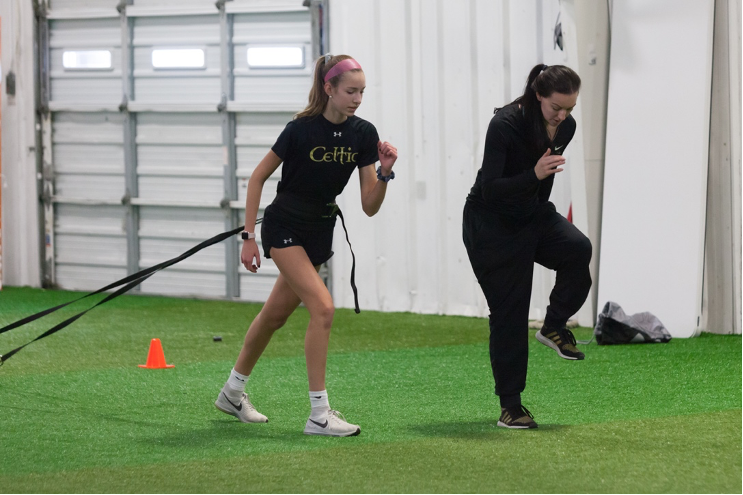
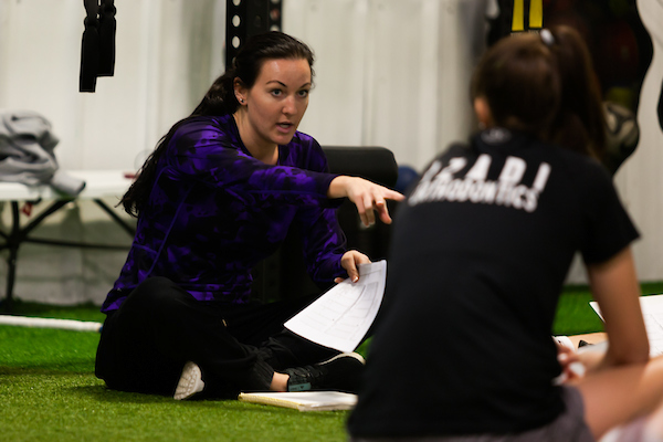
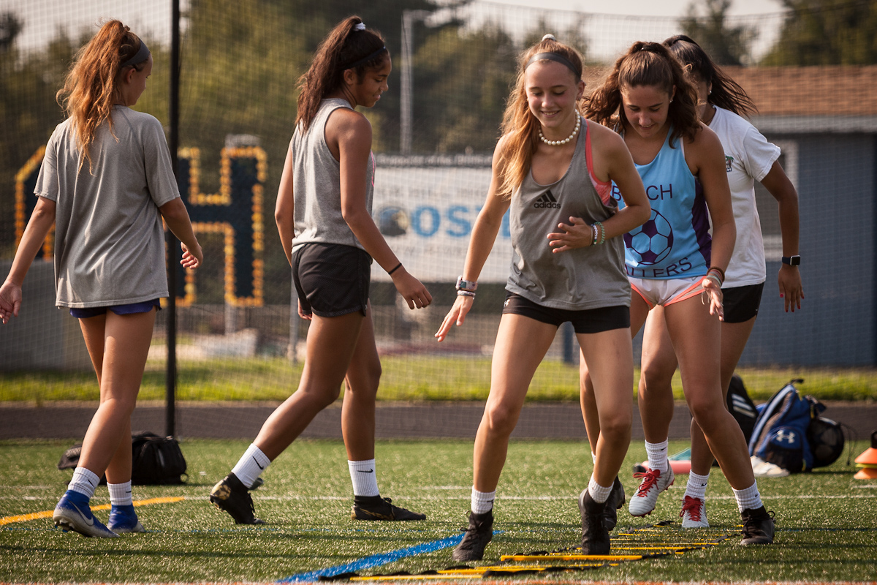
Today’s EPIC guest post comes courtesy of TG.com regular (and fav), Erica Suter. Working with young female athletes isn’t solely about Q-angles and the x’s and o’s of a proper depth jump landing.
It’s also about recognizing that they’re not delicate snowflakes and that they very much can train just like the boys (and oftentimes excel exponentially). Too, coaching young, impressionable female athletes is about recognizing our own biases and being more in-tune with the words & phrases we use around them.
This is a stellar piece from Erica and I encourage every coach to read it in its entirety.
It’s a 15 module video course on training the young female athlete to perform at her best, as well as be resilient to injury.
The video modules include proper warm-up, nutrition and the menstrual cycle, growth and maturation considerations, and LIVE training sessions on movement quality, plyometrics, total body strength, speed, and agility with coaching cues and break down of technique.
To get it on sale for $100 off regular price, go HERE.
If You Are a Coach to Female Athletes, You Need to be Walking the Walk Right Now
No one cares how many wins you have, trophies you’ve stacked, Twitter followers you’ve acquired, coaching licenses you’ve gotten, and acronyms you laid out like the alphabet behind your name.
What young female athletes need is coaching.
This encompasses more than the x’s and o’s, the tactics and the formations, the wins and the rankings, the certifications, the strength and conditioning programs, and the ACL reduction training.
Speaking of ACL, I don’t want to write a dissertation on it in this article.
Of course, ACL reduction is a serious issue that you need to understand and be able to execute in a practical setting.
But what you need to know is coaching the female athlete extends far beyond the ‘oh, well females just have wider hips’ comment.
Yes, anatomy and physiology play a role when customizing strength and conditioning and programming, there are multiple layers, mental and emotional, when working with girls.
With that said, I’m going to gloss over the tip of the iceberg, so here is what you need to know as far as physical training for the female athlete:
1. Menstrual Cycle
The menstrual cycle is something to be aware of in terms of oscillations in sleep quality and energy levels. An excellent tracking app to use is FitrWomanthat helps you to understand what phase of the cycle they are in, and if they need an extra push to recover harder and dial in on nutrition, as well as sprinkle in any extra supplementation.
To that end, training won’t necessarily have to change, but I recommend finding ways to optimize their physical and mental recovery during the pinnacle times of fatigue, depletion of iron, and oscillation of hormone levels.
Meditation is just one way to navigate the hormonal storm, and ensure there is physical recovery as well as mental clarity.
What is so cool about this app, is individual athletes can track their cycle and take notes on consistent symptoms they experience during each phase.
It bodes well to help girls be more aware of how their bodies are feeling, and provide guidance as far as recovery strategies, whether it’s through better sleep, or recovery methods like extra meditation or nourishing with more calories during times of fatigue and depleted focus.
The menstrual cycle is something you shouldn’t shy away from, but rather, a conversation we should be open about to better serve your female athletes.
Period. See what I did there? ;-O
2. Girls Grow Too
Studies say the growth spurt can happen as early as age 10, so female athletes can begin to learn movement patterns and progress with strength training monitored by a professional.
According to Stracciolini et al, such programs will enhance muscular fitness, improve sport performance and reduce the chance of sports-related injuries.
Ensure to expose young female athletes to a variety of movement during this time to develop basic motor skills, such as balance, coordination, and stability. Executing a program with a diverse template also inspires development of the neo-cortex, tapping into the left and right hemispheres of the brain.
Since I work with mainly soccer players, the more I can get them to use their upper bodies so they aren’t over-training their lower extremities, the better.
Strength of the upper body, from the back, to the shoulders, to the torso, creates a chain reaction to how the lower body operates. If the shoulders and back are weak, the glutes are inhibited, thus making the knee joint more unstable. If the chest is tight, the hip flexors are tight, causing more anterior loading the patella tendon.
Growing pains, anyone?
Remember: During the growth spurt, female athletes need their entire muscular system to be built.
3. Growth Spurt Continued
The time when females are growing the most rapidly in terms of height can cause disturbances in coordination. The growth spurt can be a tough time for young athletes, as accelerated growth leads to disturbances in coordination and overall movement, and can impact performance negatively (Quatman-Yates, Quatman, Meszaros, Paterono, et al. 2012).
You as the coach must be patient when this happens, and be careful not to program a practice with full field squat jumps and suicides, or worse yet, endless high impact runs on the concrete stadium steps.5
Joint kinematics tend to be more precarious during the growth spurt, so when it comes to more technical movements like single leg training and plyometrics, be sure to not get wild.
Focus on technique and quality reps.
Then add speed as they get more advanced
4. Growth Spurt & Body Image
After the growth spurt (PHV), female athletes experience more weight gain and an increase in fat mass (Peak Weight Velocity). It is critical coaches understand this as it can hinder speed and other factors of performance.
A study done by Tønnessen et al. states it may be beneficial for female athletes to have a greater focus on neuromuscular training during this period. Things like movement patterns (i.e. Squat), balance, mobility and stability are nice to revisit during each session.
Increases in fat mass and reductions in relative strength often occur alongside reductions in coordination and neuromuscular control (Tønnessen 2015).
So here’s a hint: Be patient and meet them where they are, focus on the controllables, and fill them with empowering phrases that don’t allude to body image. (i.e. “you’re not fit and need to drop weight” can be turned into “let’s make you even faster and stronger!”)
Check out this article on female athlete body image HERE, and how you can encourage them to chase performance and not the number on the scale.
Girls are just as competitive as boys, so reinforcing things like change of direction ability, speed development, and acceleration empower them to be their most explosive selves on the field.
5. Girls Won’t Break
Generally speaking, female athletes have similar strength and conditioning programs to boys. Yes, you want to consider differences in physiology and look at athlete assessments before writing their programs, and tweak with accessory movements accordingly.
But I will say this: Just because they are females doesn’t mean you tip-toe around their fitness programming and treat them like fragile little snowflakes.
Female athletes will also lift weights like the boys.
They will strengthen their bodies.
They will do explosive work.
They will do push-ups.
They will do pull-ups.
6. Focus On What You Can Control
Telling young girls, “yeah, you have wider hips, so you’re more susceptible to ACL” is defeatist, and doesn’t present a solution.
Since anatomy is out of a girl’s control, it’s best to empower her and focus on what she can control to reduce chance of knee injury.
You can mention things like working on core stability to handle high forces in the game, the ability to pump the brakes for better deceleration and rapid change of direction, building powerful hamstrings and gluteals for speed production, or bolstering explosiveness through the hips with Olympic lifts.
Let’s Talk Emotions
Now that the physical training is out of the way 1,000 words later, let’s dive into the meat and potatoes of this article.
Here’s the thing: I love teaching physical training, writing strength and conditioning programs, understanding the impact of physiology on performance, and solving the ACL injury puzzle.
Truthfully, though, these all should be a bare minimum requirement for anyone working with female athletes – strength coaches and team coaches alike.
If you’re a team coach, you don’t need to have a Certified Strength and Conditioning Specialist slapped behind your job title…you just need a passion for executing the basics of injury reduction. Too, you need to show great care for putting your girls’ health first.
After all, being an athlete is truly a lifetime pursuit. We want these girls to put their bodies in the best position possible so they can go through their career unscathed.
Even when the final whistle blows, these girls are athletes for life who will want to be resilient for new, adventurous hobbies down the road.
You have the opportunity to inspire the power of movement and health with your words, your actions and example.
Here are some skills that are non-negotiable:
– Active listening
– Empathy
– Relationship building
– Respect
– Trust
– Encouragement
– Human and character development
Let me say this: It’s a blessing to be a coach to female athletes – to be able to inspire the next generation of girls, and turn them into women as confident as Beyonce, as fearless as Sansa Stark, and as strong as Serena Williams.
You have the opportunity to empower, Coach.
I’d be remiss not to mention what I’ve found over the past eight years of being a strength and conditioning coach to female athletes is, I play a pivotal role in their lives mentally and emotionally.
The girls who have been with me the longest, who fell in love with the process, and who still, are hungry to be better women today physically, mentally and spiritually, are the ones who I connected with beyond the pitch and weight room.
Truthfully, I don’t believe sports teach life lessons.
Coaches do.
With that said, here’s a friendly reminder:
You are in the human business.
How Well Do you Know Your Female Athletes?
Do you know how their grades are in school? Do you know what other talents they have? Do you know if they have siblings? Do you know if they had a solo at the band concert? Do you know if they are president of the student government at school? Do you know if they love baking? Do you know if they have good or bad sleep habits? Do you know what their stress level is before training begins?
This stuff matters.
Things like stress, sleep, hormonal oscillations from the menstrual cycle, relationships, family life and so forth impact how they show up for you at practice and in games.
Whether this is on the pitch, in the weight room, or outside of sports, are you amplifying their talents? Let alone, are you encouraging them to dig out the gems inside of them and believe in themselves? Are you showing them the light of lifetime health and fitness? Are you allowing them to vent about school stress so they have more focus at training?
I’m passionate about the soft skills of coaching, to say the least.
My cat, Sergio, is too.
So soften up.
It pains me to still see abusive coaching run rampant today. Worse yet, it’s terrifying to know girls are in the hands of leaders who are narcissistic and downright un-empathetic, who say “f this!” and “f that” and “you suck” and “you’re messing up!”
To add, these same people claim they love coaching girls because “girls are easier to coach!” or “girls do whatever you say!”
Let’s unpack these dangerous quotes for a second.
For one, be careful when you utter that girls are easier to coach and will listen to everything you demand of them.
As Krista Stoker from S2 Breakthrough Performance alludes to in this webinar, your words matter, given the woman you’re trying to build.
This brings me to a profound question: Do you want to build strong, empowered women?
Because if so, the last thing you want to say out loud is “girls do whatever you say!” which implies you’re creating doormats who don’t stand up for themselves, who don’t set boundaries, and who say “yes” to everything.
As these girls blossom into professional women, it’s critically important they know to stand up for themselves in the work place, set boundaries with colleagues, and stand confident in their crafts.
Your words, your actions, your habits must be in alignment with the type of women you want to build.
Even when you speak to other women, especially a female colleague or coach, are you treating them in a way that comes from love and respect?
Your young female athletes are watching.
Are you undermining her, or uplifting her as a professional?
Your young female athletes are observing.
Are you berating here, or encouraging her?
Your young female athletes are analyzing.
Taking the conversation back to the opening line, if you’re a coach to female athletes, you need to be walking the walk right now.
And this doesn’t just go for male coaches. It goes for everyone across the board.
Women must build other women up, too.
I’m a female coach and in no way am I exempt from this discussion.
I, too, have to uplift my female colleagues and share their work not just because they’re women, but because they are excellent at what they do.
I, too, have to re-evaluate the way I behave, talk and listen to young girls.
I’m not perfect, in fact far, far from it.
Being a coach to hundreds of female athletes is a job as hard as destroying the Ring of Power. It’s a burden you definitely don’t want to screw up, but there’s bound to be battles along the way.
With that said, the art of coaching female athletes is a journey that lasts a lifetime – to deeply understand what ignites them, what inspires them to fall in love with the process, and more importantly, what they need from you to become the best human they can be.
Maybe it’s an ear.
Maybe it’s encouragement.
Maybe it’s telling them you believe in them.
Maybe it’s discussing the Hayley and Justin Bieber wedding.
Admittedly, I remain critical of myself, which is why I have an insatiable desire to study human psychology, behavior change, leadership theory and motivation. (Motivational Interviewing and Inside Out Coaching are my favorite books I recommend for all coaches).
Becoming deeply self aware of my actions and words isn’t an easy pursuit, but it makes me a more authentic, inspiring leader with a growth mindset.
Expounding further, taking inventory of my actions off the pitch, and ensuring I build other women up in my respected field is a behavior that translates onto the field in a leadership role.
Who Are You When No One is Watching?
Though it can be a punch to the gut when you examine yourself and how you’ve fallen short, your young female athletes need you to grow, too.
If you aren’t a good listener and offer unwanted advice when a girl is crying, can you listen and make sure she feels heard without saying a word?
If you are treating other women in your life with disrespect and asking them for favors in return, can you treat them like professionals and promote them as talented at their crafts regardless of if they give something in return or not?
If you show other women in your life jealousy, can you show them support and come from a place of love?
If you are scared of other women becoming too powerful and successful at what they do, can you stop operating out of a place of fear, and work on pouring love into yourself and mastering your craft first?
If you aren’t empathetic and are quick to dismiss others’ feelings, can you hold space for your young female athletes to express their worries and frustrations?
If you are shouting profanity and talking down to adolescent girls at 120 decibels, can you act like a professional who can speak eloquently and calmly?
If you are only focused on the wins and rankings and the numbers, can you find a way to develop the character of your girls who will blossom to be driven, confident and empowered professionals one day?
What is your end goal as a coach to female athletes?
Last I looked, no one remembered a coach only for their rolling list of wins and championships.
They also remembered them for their impact and life lessons beyond the game.
The memories infused with laughter and joy.
The training sessions that were competitive and taught grit.
The drills that were fun and taught levity and inspired creativity.
The workouts that allowed them to battle and push each other into becoming strong women.
Female athletes need human-centered coaching.
They need you to set the example, be a leader, and have your actions speak louder than words.
As I alluded to earlier, it’s a blessing to be able to bring out the jewels of the next generation of young girls – to show them that they are multi-dimensional, amazing humans with beauty and strength.
And too, to show them that they are capable of so much magic in sports, school, and career.
I urge you, let your female athletes shine, as you cheer them on in the shadows. Sure, you won’t get the limelight, but you’ll allow them to sparkle.
So continue to learn.
Master your craft of coaching girls, both physically and mentally.
Be a constant student.
Admit your faults.
And do better.
Most critically, though, leave your ego at the door because building strong women starts with you, Coach.
About the Author
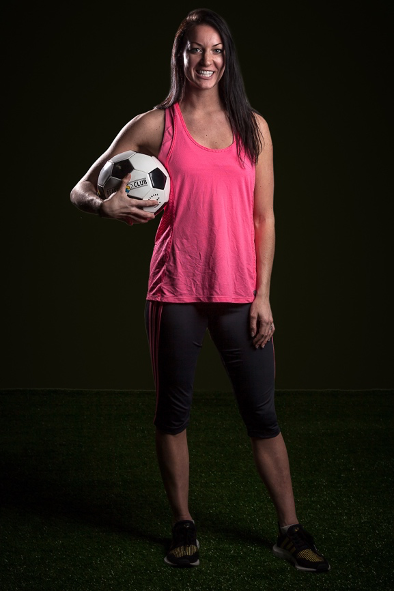
Erica Suter is a certified strength and conditioning coach in Baltimore, Maryland, as well as online for thousands of youth soccer players. She works with kids starting at the elementary level and going all the way up to the college level.
She believes in long-term athletic development and the gradual progression of physical training for safe and effective results. She helps youth master the basic skills of balance, coordination, and stability, and ensures they blossom into powerful, fast and strong athlete when they’re older. She has written two books on youth strength and conditioning, Total Youth Soccer Fitness, and Total Youth Soccer Fitness 365, a year-round program for young soccer players to develop their speed, strength and conditioning.
She also just launched a coaching education course on training the young female athlete, Total Youth Female Athlete Fitness, a video course on performance and injury reduction in a practical setting
I’m excited to announce that I’ll be one of 55+ industry leaders taking part in Kabuki Education Week that’ll be taking place February 1-7, 2021.
Kabuki Education Week – Hosted by Kabuki Strength – is a unique opportunity to attend 40+ live hour-long lectures (with Q&A) presented by the most respected and well established educators, coaches, clinicians, and athletes in the strength & fitness industry. This event brings together a wealth of knowledge across multiple domains; all condensed into week-long virtual format that allows you to attend as many courses as you choose with the added opportunity to purchase recordings.
You can register for my presentation (and save 50% through the end of the year) – The Hip: From Assessment to Badass – HERE.
Alternatively you can register for the ENTIRE event at the Early Bird rate – HERE.
This will undoubtedly be an event you won’t want to miss as the line-up, speaking as a fan boy myself, is one of the most impressive I have ever seen.
You can now purchase CORE @ Home for whatever you want to pay.
During the first quarantine I started a platform where I’d deliver 20-40 minute workouts that could be performed in everyone’s living room using minimal equipment.
In all I filmed 36 workouts using nothing but bodyweight, bands, and kettlebells and/or dumbbells. With many people still reticent to head back to their regular gyms (not to mention the scarcity of gym equipment out there to purchase) I figured this would be a nice opportunity to help.
Now that many parts of the US (and world) have started to implement a second wave of shut-downs, this resource is timely.
Whether you want to spend $1 or $99 (FYI: the latter enters you to win a 5×7 shirtless pic of me), the workouts are ready and available to start.
Also, it’s less about the destination and more about the process.
Oh, and also again: I was Eric’s personal bench press hander-offer guy for two full years, arguably when his bench was the best it ever was. Just sayin…;o)


 Erica Suter is a certified strength and conditioning coach in Baltimore, Maryland, as well as online for thousands of youth soccer players. She works with kids starting at the elementary level and going all the way up to the college level.