Categoriescoaching Corrective Exercise Program Design

The Post Where I Prove It’s Not Always Tight Hamstrings

You would think, based off all the alarmist articles I come across on the internet extolling the sentiment, that everyone walking around – you, me, leprechauns1, everyone – has tight hamstrings.

And as a result, if you do a search on Google, you’ll come across roughly 8, 089, 741 (+/- 41, 903) articles telling you why, how, and when to stretch them.

Copyright: vladansrs / 123RF Stock Photo


Tight hamstrings have been to blame for a lot of things, including but not limited to:

  • Back pain.
  • Knee pain.
  • Shoulder pain.
  • Any sort of pain.
  • Male pattern baldness.
  • Global warming.
  • The “death” of Jon Snow.

And while tight hamstring can be the root cause of some of those things, to always put the blame on them is a bit reductionist and narrow-minded to say the least.

In short: It’s the default culprit for lazy coaches and personal trainers to gravitate towards.

To steal a quote from Dr. John Rusin from THIS recent T-Nation article:

“If you’re stretching your hamstrings every day for months (or years) on end without improved flexibility, mobility, movement patterning, or pain relief, it’s not working. And it’s time to get out of this rehab purgatory.

If you aren’t seeing results from stretching, then it’s not only a waste of time, but it may be working against you. The thing is, muscles don’t get longer; they maintain a certain tone or tightness based on neurological impulse. So yes, strategic stretching DOES work in terms of reducing tone and tightness (in the short and long term), but if it hasn’t worked for you by now, it’s probably not going to.”

To steal a quote from myself:

“In order to increase the length of a muscle you need to either 1) lengthen bone (um, ouch!) or 2) in the case of someone who truly presents as short or stiff, increase the total number of sarcomeres in series (which takes a metric shit-ton of stretching).

Ask physical therapist Bill Hartman how long someone really needs to stretch in order to have a significant affect and/or to add sarcomeres, and he’ll tell you the starting point is 2-3, 10 minute holds per day. Working up to 20 minute holds.

That cute 30-second “stretch” you’re doing (most likely incorrectly) isn’t really doing anything.”

Are You “Tight” or Just Out of Whack?

You’d be surprised how often it’s the latter.

Simply put: most people aren’t so much tight as they are “stuck” in a poor position.

It goes back to something physical therapist and strength coach, Mike Reinold, brought up in casual conversation not long ago:

Which is more important to hammer first: stability or mobility?

Those trainers and coaches who swing on the stability side of the pendulum tend to be the overly cautious type who have their clients stand on BOSU balls for 45 minutes.

Those who swing on the the mobility side of things sleep with their copy of Supple Leopard every night.

Neither approach is inherently wrong so much as they’re flawed (if haphazardly assumed as “correct” for every person, in every situation).

If you strengthen (stabilize) in misalignment you develop an imbalance. If you stretch (mobilize) in misalignment you develop instability.

Take someone who presents with excessive anterior pelvic tilt. It’s not uncommon for said person to complain about constantly “tight” hamstrings, and no matter how often they stretch them, they stay tight.

You would think that after weeks, months, or sometimes even years of non-stop “stretching” they’d see some improvement, right?

Wrong.

The reason why they feel tight all the time has little to do with their hamstrings, but rather pelvic positioning.

Unless you address the position of the pelvis – in this case, excessive anterior pelvic tilt – you can stretch the hamstrings until they stop making those shitty Transformers movies (when will it end?) and you’ll never see an improvement.2

Think about it this way: in this scenario the reason why the hamstrings feel tight is because they’re lengthened and firing on all cylinders. By stretching them you’re just feeding into the problem in the first place!

We could easily chalk this up to the classic Lower Cross Syndrome as popularized by Dr. Vladomir Janda and stretch what’s tight (hip flexors, erectors), and that would be a step in the right direction.

Cool.

But I feel for most people, most of the time, that’s not going to solve the problem.

Instead, for the bulk of people, addressing things like anterior core strength (deadbugs, anyone?) in addition to active hip flexion and extension drills, like the Core Engaged Active Straight Leg Raise, is going to be money.


Real Life Example Of Not (Really) Tight Hamstrings

Take one of my clients, Dima. For all intents and purposes he’s someone who presents as “tight” AF in the hamstring department.

To throw him under the bus a teeny-tiny bit, if we tested his Active Straight Leg Raise this very minute anyone who’s taken the FMS would grade him the following way:

via GIPHY

Note to Dima: You’re my boy, Blue!

The thing is, as poor as his ASLR appears, I can get more range of motion passively. Meaning, if I were to manually “stretch” his hamstrings I can nudge a bit more ROM.

Since this is the case, wouldn’t it make sense to have him stretch his hamstrings?

Meh, not really.

Now, in Dima’s case, I’m not saying we avoid stretching his hamstrings. He is someone who’s a candidate for doing so (and we do), albeit I don’t prioritize it nearly as much as some coaches/trainers may do.

Instead I have perform stuff like this:

Whaaaaaaaaaaaaaaaaaaaaaaaat


That’s some Gandalf type shit right there.

NOTE: Yes, I recognize he’s still unable to get full knee extension, but you can clearly see his ROM improved and the ease at which he got the additional ROM is night and day compared to the start.

All without stretching.

My boy Dean Somerset does a better job than myself explaining the mechanism at play here:

“Part of it is matching the active ability to achieve the position with the passive range of motion that’s available. If they can passively get there, they’re not “tight” or “restricted,” they just may not have the strength or motor control in that specific position, so doing some hip flexion movements can help build context of how to get there so that on their follow up test, they have a better knowledge base of active hip flexion capability to get into.”

In the end, don’t always assume everyone needs to stretch. A little active range of motion in conjunction with TENSION can go a long ways at building context and improving ROM.

CategoriesAssessment coaching Program Design

How to Fix Scapular Winging

Scapular winging. It’s a thing.

I guess.

Copyright: olegdudko / 123RF Stock Photo


Forgive the aloof and standoffish tone. I recognize the term “scapular winging” is a thing and that it can be an actual, real-live, medical diagnosis with dastardly consequences.3

But more on that in a minute.

It’s just that, in some ways, I find a lot of fitness pros – personal trainers, strength coaches, and even physical therapists – can often be a little too liberal with use of the term. They toss it around with little understanding of what it actually means and with little “feel” on how it’s interpreted by their clients and athletes.

I’ve long championed the sentiment that most (not all) fitness pros use the initial assessment as an opportunity to showcase how much people suck at doing things and how broken they are, and that, for the mere cost of a 215 pack of training sessions (the equivalent of a really, really nice Audi), they’ll fix you.

Pffffft, who wants an Audi anyways?

Here’s how a typical conversation goes:

Client: “Hey, I’m thinking about hiring someone to train me.”

Douchy Trainer: “Great, I’d be glad to help. We need to start with an assessment so I have ample opportunity to showcase how much of walking ball of fail you are and how I alone can fix you.”

Client: “Uh, okay. When do we start?

Douchy Trainer: “Right now, take off your shirt.”

Client: “Not going to buy me dinner first, huh? Kidding, okay, BAM.”

[takes off shirt]

Douchy Trainer:Oh……….MY………..GOD.”

Client: “What? What’s wrong?”

Douchy Trainer: “I’m sorry to have to tell you this, but, you may want to sit down for this.”

Client: “Okay. What is it?

Douchy Trainer: “I’m sorry to have to tell you, but, but…..you have scapular winging.”

Client: “Is….that bad?”

Douchy Trainer: “I honestly have no idea how you’re able to walk, let alone speak complete sentences. We need to fix this ASAP.”

And this is where the trainer turns into that a-hole nun from Game of Thrones walking the client, Cersei style, down to the training floor to take them through a bevy of corrective exercise drills.

via GIPHY


Lets pump the brakes, mmmkay?

Scapular Winging: What It Is

It’s this:

Now, admittedly, the key words used to find this picture were “most fucked up, dumpster fire of a case of scapular winging on the internet,” so don’t get too alarmed.

This is a legit, medically diagnosed case, and not at all normal.


Pretty cool, right? That’s some Gandalf shit right there.

Quadruped Rockback w/ Floor Press


Typically the Quadruped Rockback is a a screen used to gauge active hip flexion ROM and to ascertain someone’s appropriate squat depth based of his or her’s anatomy. However, after listening to Mike Reinold speak on the topic it’s also a great drill to cue people into more protraction and upward rotation

Floor Press w/ Upward Rotation


Taking the floor press a step further, we can take away a base of support (and force the stabilizing arm to work that much harder in order to maintain position) and then incorporate some upward rotation.

Wrap Up

The umbrella theme here is not to dismiss scapular winging as an actual diagnosis. It is a diagnosis. It’s just not as common as people think, and I wish more fitness pros would stop jumping to conclusions so fast.

Oftentimes the fix is just to coach people up, introduce some load, and get them into better positions.

Last Chance to Save $100 off Complete Shoulder & Hip Blueprint

TODAY (7/6) is, for real this time, the last day you can purchase Complete Shoulder & Hip Blueprint at 50% off the regular price.

Because of the 4th and everyone’s travel plans, Dean Somerset and I extended our sale by one day so more people could take advantage.

That’s $100 you’re saving. Take that money you’ll save and go to a nice steak dinner instead.

—> LAST CHANCE. GO HERE. <—

CategoriesCorrective Exercise mobility

A Better Lower Body Warm-Up: Hybrid Drills for the Win

I don’t know about you, but whenever I have squats or deadlifts on the itinerary it always takes me just a liiiiiitle longer to warm-up.

Copyright: spotpoint74 / 123RF Stock Photo


There are a lot of moving parts to performing each lift safely and at a high level; much more so than compared to upper body counterparts such as the bench press or chin-up/pull-up.

This is not to say upper body movements don’t require warming up or attention to detail, they do. However, when all else is equal I find upper body movements lend themselves to a little more of a lackadaisical approach compared to lower body movements. Admittedly, it’s 100% anecdotal on my end, but it’s more common to see people walk into a gym, mosey on over to the bench press area without much of a song and dance with a warm-up, and pretty much get right into the nuts and bolts of their workout than it is to see the same person walk in, start deadlifting, and not be leaving five minutes later because their spine just flipped them the middle finger.

Plus, lets be honest: if there’s ONE thing you’re going to omit from your training session for the day when you’re in a rush (or because it’s a Wednesday) it’s your warm-up. You skip it, I skip it, your friends skip it, there’s no point in pretending we’re all warming up 100% of the time. Heck, I’d be surprised if most people did it 50% of the time.

As a fitness professional the warm-up is a bit of a catch-22. On one hand I can’t deny it’s importance. People are too tight, too stiff, too loose, or 2 legit 2 quit.4 The warm-up serves as a fantastic way to hone in on any “correctives” that any one person may need to address whether it’s any of the above or inhibited glutes, immobile hips and t-spine, and/or general movement malaise. Moreover, the warm-up serves as a way to increase body temperature, joint lubrication, and CNS up-regulation.

It’s here, during the warm-up, we can attack movement dysfunction and better set people up for a productive training session.

On the other hand, people can be handicapped by the warm-up. As in…the warm-up becomes this drawn out, overly dramatic “thing” to the point where some people spend 45 minutes on a foam roller hitting every inch of their body and/or performing an inordinate amount of mundane correctives before they even touch a dumbbell or barbell. To which I am always quick to say:

“Get off the f***ing foam roller. That’s why you’re always hurt.”

Nevertheless, I tend to fall on the “better to do it than skip it” side of the fence. Albeit something I have been toying with of late with my own training and that of my clients is using more combo or “hybrid” drills to help expedite the process.

Take a lower body day for example where squats or deadlifts are on the agenda.

Glute Bridge w/ Rotation


Key Notes

  • Addresses both glute activation and t-spine rotation/mobility
  • Careful not to go into excessive lumbar extension at the top. “Feel” your glutes fire and then make sure when you rotate to one side you move everything as one unit.
  • You should feel a nice anterior hip stretch on the contralateral side (if you rotate towards the right, you’ll feel a slight stretch on the front side of the left hip).

1-Legged RDL to Cossack Squat


This is climbing the ladder as one of my “go to” hybrid drills as it accomplishes a lot.

Key Notes

  • Try to get the backside as long as you can – reach both forward with your arms and back with the moving leg.
  • Try to prevent any hip rotation – toe of moving leg should point towards the floor and to the midline.
  • “Soft” knee on standing/supporting leg.
  • Idea of Cossack squat is to sit BACK into the hips. ROM will be limited in some people, so don’t worry if you cannot get to the ground at first; use what ROM you do have available.
  • Heel should be down and it’s okay to point the toes of the straightened leg up towards the ceiling.
  • If you have to use your hands as support for the first rep or two or for the entire set, that’s fine. Eventually, the idea is to be able to perform with using your hands.

Bear Squat


Key Notes

  • Start in a “deep squat” position. Push knees out with elbows to help get more hip abduction and make sure chest is UP or “tall.” T-spine extension is important.
  • Walk out making sure not to “collapse” the shoulder blades. Try to push away from the floor. This will help with a little serratus activation.
  • The walk out also helps with anterior core engagement (never a bad thing), and at the same time you’re also getting a fair bit of ankle (and big toe) dorsiflexion into the mix as well.
  • Try not to allow your lower back to sag or torso to teeter-totter. Pretend as if there’s a bottle of water (or battery acid) on your back and you don’t want it to spill. Ouch.
  • You can also up the ante by adding an overhead reach component before you “bear crawl” out, like so:

Just a Taste

There’s obviously an endless parade of exercises I could showcase here. But hopefully these give you a little taste of a few you can implement prior to a lower body session that’ll help speed up your warm-up yet target many of the problematic areas most people need to hit prior to hitting squats or deadlifts hard.

Give them a try and let me know what you think.

CategoriesAssessment coaching Corrective Exercise Exercise Technique Program Design

A Peek Inside Complete Shoulder and Hip Blueprint

WHEW – talk about a whirlwind day yesterday. I spent the bulk of it glued to my laptop5 making sure things ran smoothly with the launch, answering questions and emails, and trying to stay on top of social media engagement.

1) THANK YOU to everyone who has gone of their way to mention and/or plug Complete Shoulder and Hip Blueprint. Your support means a lot.

2) To those who may be on the fence, how about a sneak peek?

Copyright: eenevski / 123RF Stock Photo


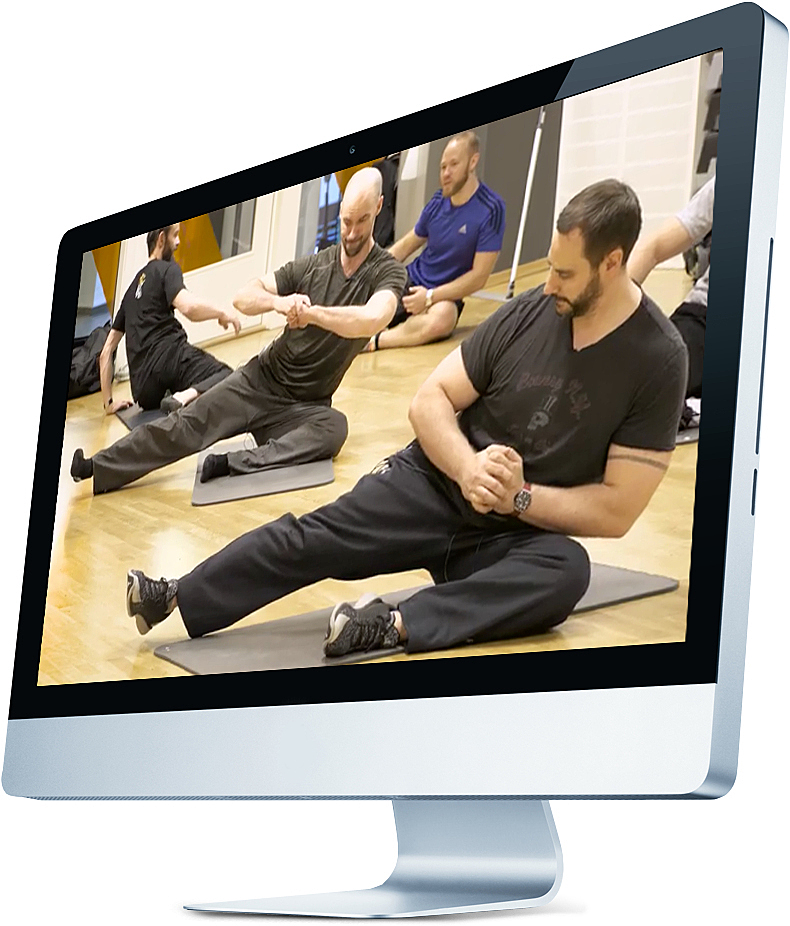
This sucker contains 11+ hours of content covering everything from upper and lower extremity assessment, corrective exercise strategies, numerous hands-on breakouts, as well as program design and exercise technique troubleshooting (with maybe, 37 seconds worth of Star Wars references).

Here are two sneak peak segment from both Dean and I.

The One Where Tony Discusses Scapular Motion


The One Where Dean Talks Hip Integration (and makes a bunch of fitness pros groan)


And there is tooooooons more where that came from.

If you’re a fitness professional I can almost guarantee you’ll pick up something valuable (hopefully several) that will help your clients or athletes. And even if you’re not a fitness pro, and just like listening to two dudes talk shop about training or you’re just looking to pick up some cool new exercise variations to keep your shoulders and hips healthy this resource would be a home run.

cshb-screen

Complete Shoulder and Hip Blueprint is on SALE all this week (until midnight on Saturday, November 5th) at $60 off the regular price.

CategoriesAssessment Corrective Exercise Exercise Technique personal training Program Design

Complete Shoulder and Hip Blueprint Now Available

I gotta say, I could barely sleep last night.

Dean Somerset and I have spent the better part of the past two years traveling all across North America and parts of Europe presenting our Complete Shoulder & Hip Workshop. All told, we’ve presented it 10-15 times6.

hipshoulder-landscape

I’m not kidding, either: I…could…not…sleep last night.

I kept waking up every few hours as if I were 11 years old again waiting for Christmas morning to arrive. To say I am excited for this would be an understatement. There’s also a small fraction of me doing the best I can not to destroy the back of my pants out of shear terror.

As of this moment it’s 99.2% excitement, and 0.8% “hoooooooly shit this is happening.”7

I mean, there’s always a degree of vulnerability anytime you put something out there for the masses. However I KNOW this is going to be a resource that will help tons of people.


What Is It

The Complete Shoulder and Hip Blueprint is an 11+ hour digital product that takes you through the systems that both Dean and I use with our athletes and clients to improve upper and lower body function, strength, endurance, and resiliency.

We show you how to connect the dots between a thorough assessment, understanding what corrective strategies (if any) will work best, and how to build a training program to help you and your clients in the most direct way possible.

And there’s a few cat memes and light saber jokes tossed in for good measure.

dean-tony-cshb

Why This Matters to You

Are you a fitness professional? Do you work with people with shoulders? What about hips?

Well then, this sucker is right up your alley.

More specifically here’s what you can expect:

  • Help your clients get through common shoulder issues more effectively.
  • Streamline your assessment and program design, helping you get faster results and more efficient use of your time, and that of your clients’
  • Help you see the details of shoulder motion you didn’t notice before, and whether something you’re using in your exercise program is working or not.
  • Upgrade your exercise toolbox to address commonly overlooked movement issues.
  • You can help clients see IMMEDIATE improvements, sometimes in as little as a minute or two, which will help them buy in to your abilities.
  • Help you target in on what will work best for the person in front of you, saving you both the time spent on useless exercises or drills.
  • Connect the dots between assessments, mobility, strength, and conditioning program considerations
  • Break down a system you can use today with yourself or your clients to see instant benefit while removing the guess work.

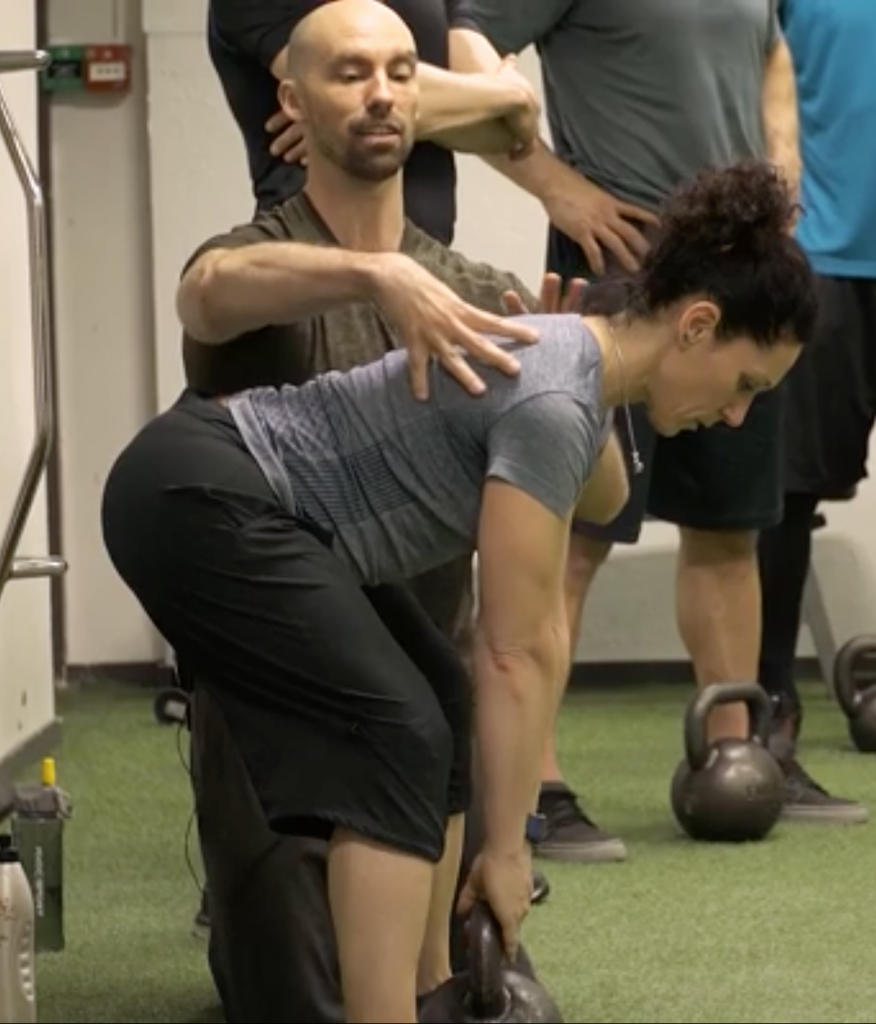
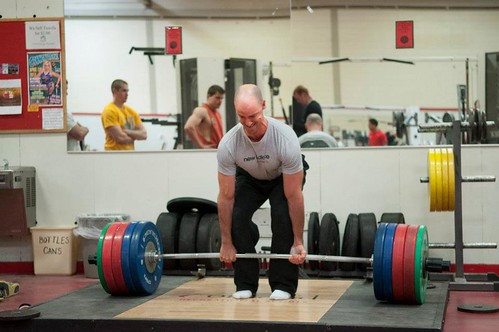
And you don’t necessarily have to be a fitness professional in order to reap the benefits of this resource. Dean and I offer tons of practical information in the form of hands-on applications in addition to breaking down many common exercises such as the deadlift, squat, chin-up, and Landmine variations.

tony-dl-technique

The Part Where I Entice You More (or Guilt You) Into Buying

Choose any of the following that resonates with you:

1. “What is this, Napster? Pay for something once, would you?”

2. “Pretty please?”

3. “I got kids! Well, I’ll have one soon, in January, and that shit’s expensive.”

4. “I’ve written tons of free content over the years. Each time I’ve written an article or blog post that’s helped you out, I put a dollar on your tab. It’s collection time, you son of a bitch.”

Okay, for real: I think it’s a great resource, I feel it’s going to help a lot of people, and I’d be honored if you’d consider checking it out.

We’ve put Complete Shoulder & Hip Blueprint on sale this week. From today through Saturday, November 5th you can purchase it at $60 off the regular price. What’s more there are Continuing Education Credits (CEUs) available through the NSCA, which makes this a solid professional development investment.

—> Complete Shoulder & Hip Blueprint <—

CategoriesAssessment Corrective Exercise mobility

Stop Cranking on Your Shoulders for More Mobility

Seriously, stop it.

For many people the first choice when their shoulder begins to hurt or if they lack mobility is to start cranking and yanking on it. This is rarely the right approach, and as Andrew Millett (my good friend and Boston based physical therapist) points out in today’s post…there a far better and far more effective approaches.

Enjoy.

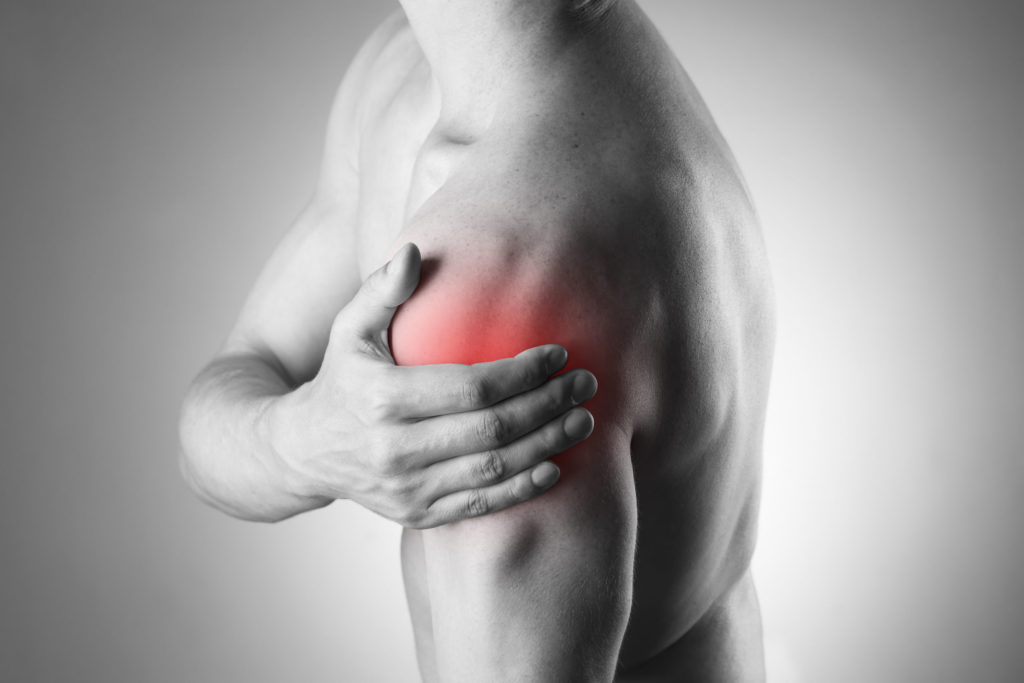
45885490 - man with pain in shoulder. pain in the human body. black and white photo with red dot

Copyright: staras / 123RF Stock Photo

The shoulders, specifically, the glenohumeral joints, are typically very mobile joints. They need to flex, extend, abduct, adduct, horizontally abduct and adduct and internally and externally rotate in multiple planes and positions in relation to the body. Even though the shoulders are a common area of mobility, many people will present with limitations in at least one aspect of glenohumeral motion.

There are various reasons why someone may have limited shoulder mobility.

Bony Limitations

bone

photo credit: pediatric-orthopedics.com

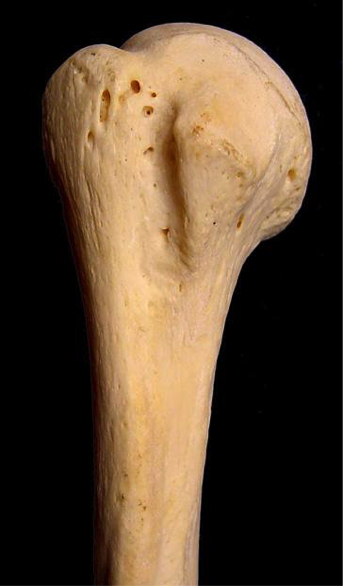
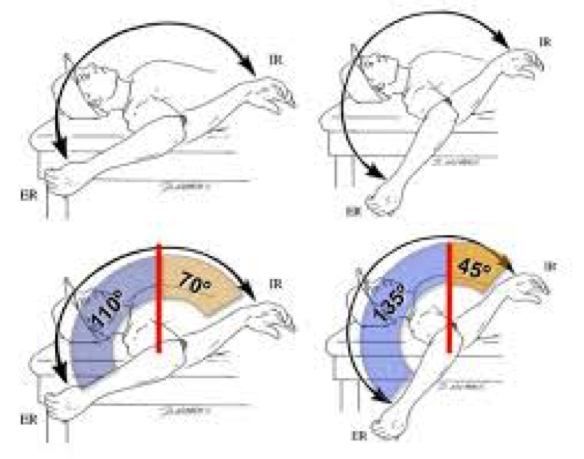
People who engaged in various overhead sports such as baseball, softball, etc. have been shown on multiple studies to have changes to the glenoid and humeral head. In baseball players specifically, they can appear to have a loss of internal rotation range of motion as compared to their non-throwing shoulder and an increase in external rotation range of motion as compared to their non-throwing shoulder.

This change in range of motion is commonly due to humeral retroversion. Humeral retroversion is the alternation of the humerus and humeral head in relation to the glenoid fossa from years of repetitive overhead activity, specifically throwing.

gird

Photo credit: opensiuc.lib.siu.edu

This is typically only seen in overhead athletes. This differentiation in range of motion side to side in external and internal rotation is considered “normal” for this population. As long as External + Internal Rotation aka Total Motion is within 5 degrees of the non-involved shoulder, then that is considered normal.

Note from TG: In other words, loss of IR in a throwing shoulder is an adaptive response and is normal! It doesn’t necessarily have to be fixed.

With that said, we do not want to crank on someone who has “normal” total motion, but may lack internal rotation on one side versus the other. Asking your patient or client if they engaged in overhead sports as a child is a good clue to this. Then measuring their motion will give more information.

We will get into more detail later on how to improve their motion if their is more than a 5 degree difference in total motion.

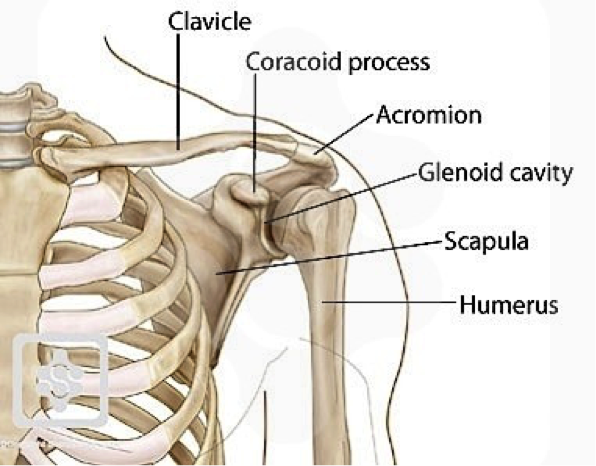
Another bony limitation at the shoulder can be acromion type. The acromion is a bony structure that is present in all people that is part of the scapula.

acromion

Photo credit: ipushweight.com

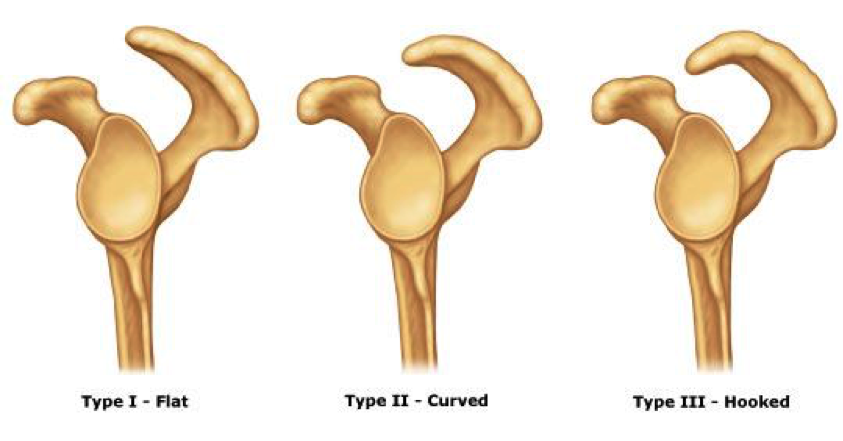
All acromions are not created equal though. There can be 3 varying types of acromions.

acromion-type

Photo credit: cursoenarm.net

As you can see in the picture above, a type I acromion is relatively normal in appearance. In type II and III, there is more of a curved/hooked appearance to it. This alteration in can cause pain and limited motion when reaching overhead.

The only way to definitively know if someone has a type II or III acromion is through radiographic imaging. Programming may need to be altered to more horizontal pulling/pushing variations instead of overhead work if someone doesn’t have full overhead mobility due to a type III acromion.

For most people with a type II acromion, physical therapy can help to improve range of motion and decrease the effect of the acromion on shoulder motion and pain. For most people with a type III acromion, more often than not, surgical intervention is what will help.

Capsular Limitations

In the majority of the joints in the body, there is something called a “capsule” surrounding the joint. A capsule is synonymous to a ziploc bag encompassing the joint.

In this capsule, there are “folds” in certain aspects depending on where the arm is positioned. Due to an old injury, surgery, etc., this capsule can become “tight or stiff.” Now, without getting into too much detail about why it is tight/stiff or why there are capsular limitations, the only way to determine if there is capsular limitations, is by a licensed healthcare practitioner, ie. PT, chiropractor, etc.

Typically, older populations may have more capsular limitations OR if someone has had a long standing injury or prior surgery to the shoulder, they may present with decreased ranges of motion because of the capsule.

The only other area that can be attributed to decreased ranges of motion due to the joint capsule itself that affects the shoulder, would be the thoracic spine. Lack of thoracic spine extension and/or rotation can limit shoulder flexion, external rotation, etc.

To test for limited thoracic spine mobility, try Quadruped Passive Thoracic Rotation:


Normally, passive rotation should be 50 degrees in the general population. If it is less than that, that can significantly limit shoulder range of motion.

Soft Tissue Restrictions

Now, this is the more common of all three of the factors that can limit shoulder mobility. Excluding clients who are hyper-mobile, the majority of clients and patients have some form of increased soft tissue tone in one if not more areas of their body.

At the glenohumeral joint, there are a few “big” than can contribute to limited shoulder mobility.

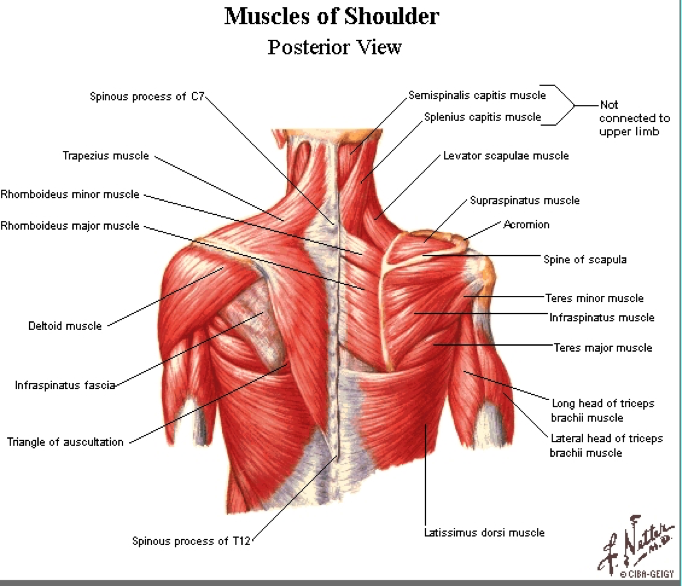
muscles-of-shoulder

Photo credit: www.smogshoulder.com

Muscles that can limit shoulder flexion are:

  • Pectoralis Major/Minor
  • Teres Major
  • Latissimus Dorsi
  • Subscapularis

Muscles that can limit shoulder abduction are:

  • Pec Major/Minor
  • Teres Major
  • Latissimus Dorsi
  • Subscapularis

Muscles that can limit shoulder external rotation are:

  • Pec Minor
  • Teres Major
  • Latissimus Dorsi
  • Subscapularis

Muscles that can limit shoulder internal rotation are:

  • Infraspinatus
  • Teres Minor

Now, you’re probably thinking that I just “copied and pasted” most of those muscles from one section to the other. The latissimus dorsi is a huge contributor to limited overhead shoulder mobility due to its attachment on the trunk into abduction and flexion. It can also limit external rotation as it is a shoulder internal rotator.

Pectoralis minor can limit overhead motion because of its attachment on the coracoid process of the scapula and the rib. Decreased pectoralis minor tissue extensibility can cause an anterior tilt of the scapula limiting humeral motion on the glenoid.

Subscapularis can limit overhead motion due to its attachment on anterior side of the scapula and on the humerus. Teres major attaches on the scapula as well as on the humerus and can limit overhead mobility as well.

Infraspinatus and Teres Minor limit internal rotation of the shoulder due to its attachment points on the humerus and scapula.

Typically, one if not more than one of the aforementioned muscles can limit overhead mobility. Instead of performing intense stretches and forcing the glenohumeral joint into motions it just does not have, we need to ASSESS and then ADDRESS any limitations that are present.

Assessment

Active Motion

To assess someone’s active ranges of motion, ask them to move.

Have them perform:

Shoulder Flexion

active-shoulde-flexion

Shoulder Abduction

active-shoulder-abduction

Shoulder Medial Rotation

active-shoulder-medial-rotation

Shoulder Lateral Rotation

active-shoulder-external-rotation

“Normal” ranges of motion for general population clients would be:

Shoulder Flexion: 180 degrees OR humerus in line with the client’s ear.

Shoulder Abduction: 180 degrees OR humerus in line with side of body

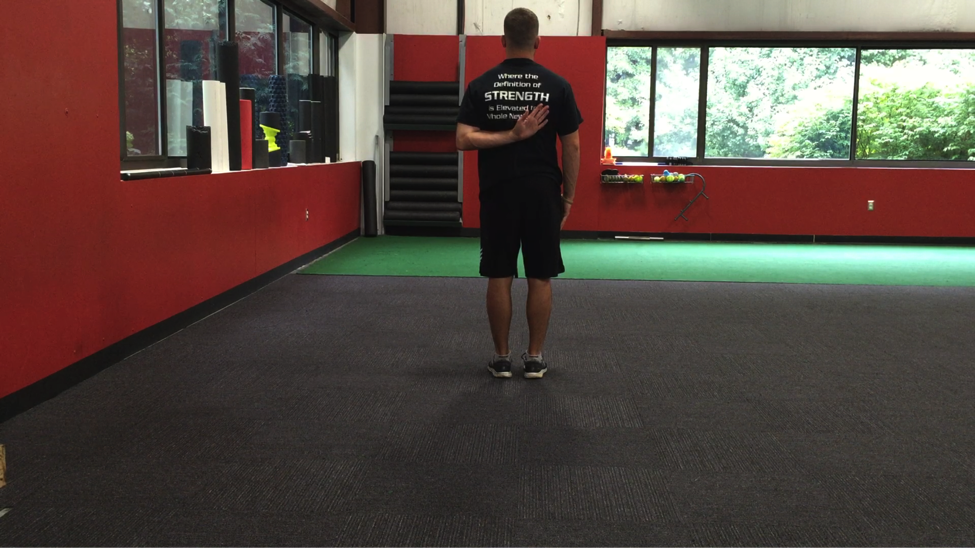
MRE: 3rd digit finger tip to contralateral inferior angle of scapula

 LRF: 3rd digit finger tip to superomedial border of contralateral scapula.

Now that you have assessed someone’s active motion, we need to assess it passively to fully determine if someone has a true mobility limitation.

Passive Motion

Perform the same motions passively into flexion, abduction, MRE, and LRF. Do not force these motions or push through tightness or pain. If you cannot passively bring the client’s arm to the aforementioned areas mentioned in the Active Motion section, then we know the client has a true mobility limitation.

Addressing the Issue

If someone presents with limitations in passive shoulder flexion, abduction, MRE, or LRF, performing some form of Self-Myofascial Release (SMR) can be beneficial.


Then, re-test passive motion to see if there has been an improvement in mobility. If there has, then you know you have worked on the appropriate areas.

If there has NOT been an improvement in mobility, refer out to a manual therapist (PT, sports chiropractor, massage therapist, etc.)

If the mobility has improved, then we want to use appropriate mobility drills to help groove the patterns that were just improved.

Horizontal Adduction/Posterior Rotator Cuff Stretch


Key Points:

  • Make sure to keep scapulae retracted by using wall or door jam.
  • Once scapulae is fixed, gently bring arm across body.
  • Hold 5-8 seconds pre-training or 30 seconds post-training.
  • By fixating scapulae, it will provide a more focused stretch to the posterior aspect of the shoulder.

Latissimus Dorsi Stretch


Key Points:

  • Use opposite side hand to fix scapulae to rib cage.
  • Once scapulae is fixed, hold onto a stationary object and sit back.
  • Gentle stretch should be felt in the lat.
  • By fixating the scapulae to the rib cage using the opposite hand, it provides a truer stretch to the lat vs tractioning the glenohumeral joint.

 Motor Control

Once there has been an improvement in mobility, we want to make sure that the brain and the body knows how to access that “new” mobility. We need to make sure to re-pattern the proper movement patterns to avoid falling back into an poor compensations.

For shoulder re-patterning, various movements that help to promote proper movement patterns such as:

Forearm Wall Slides


Back to Wall Shoulder Flexion


Quadruped Assisted Reach, Roll, and Lift


Now that we have improved the mobility by addressing increased soft tissue tone, re-patterned those movement patterns, now we want to incorporate them all together.

Movements such as:

Turkish Get-Up


Kettlebell Bottoms Up Baby Get-Up


There you have it! Instead of mindlessly stretching your shoulder, address any potential limitations and get back to training effectively!

About the Author

Andrew Millett is a Metro-West (Boston) based physical therapist

Facebook: From The Ground Up

Twitter: @andrewmillettpt

Instagram: andrewmillettpt
CategoriesCorrective Exercise personal training Rehab/Prehab Strength Training

Bridging the Gap Between Physical Therapy and Strength and Conditioning. How Much of a Gap Is There?

Today’s guest post comes courtesy of Andrew Millett – a good friend of mine and brilliant physical therapist outside of Boston.

The term “bridging the gap” is always brought up when the discussion of physical therapy and strength and conditioning comes up. There’s no doubt a melding of the two when discussing the most successful outcomes for patients and athletes. However, in a day and age where more and more personal trainers are taking it upon themselves to play the role of “therapist” (and vice versa), it’s important to note that, while it behooves us to dip our toes in both ponds, there IS a distinction between the two.

And we need to respect that.

Enjoy.

Bridging the Gap Between Physical Therapy and Strength and Conditioning

In the fields of strength and conditioning, human performance, physical therapy, etc., we interact with people on a daily basis.  We learn about their family, their job, their goals, and what they want to get out of their training or rehab.  The majority of the people in this field did not get into their respective field for the money.

I am not saying that any of these fields can’t be lucrative.  The majority of us share a common bond:  the desire to help people.

Whether you are a physical therapist trying to help someone get rid of their pain and get back to doing what they want to be doing or a personal trainer trying to help someone lose some weight, most of us want to help people.

When we see a client who is in pain or has some type of movement dysfunction, most of us want to help them get out of pain, whether or not we are a healthcare practitioner.  Personal trainers, strength and conditioning coaches, etc. are well-qualified to assess and correct movement.

There are many schools of thought such as the Functional Movement Screen (FMS), Selective Functional Movement Assessment (SFMA), and Functional Range Conditioning (FRC) – to name a few – that teach trainers and coaches how to assess movement so that they can make their programming more effective based off of how their client presents on their assessment.


More often than not, a strength coach or trainer will see a movement fault they would like to fix in order to optimize their client’s training in order for their client’s to succeed.  There is nothing wrong with wanting more for your client and for your client to achieve their goals.  When assessing a client, if some type of movement limitation is present (I.e., decreased joint mobility and range of motion), then by all means, use the tools in your toolbox to attempt to correct it.

Tools such as a foam roller, lacrosse ball, or other self-myofascial release device, can be beneficial in attempting to increase soft tissue flexibility that could be limiting a client’s movement pattern.


Self-myofascial release can be very effective for improving movement quality and at reducing pain.  By doing something such as this, you are doing your due diligence in trying to help your client to the best of your abilities.

If you use an implement suggested above and someone moves or feels better, GREAT!

If someone doesn’t move or feel any better after something like that, then as Charlie Weingroff has said,

“4th and 10, you have to punt.”

As he described in his DVD, Training = Rehab, if you have a client who has some type of mobility limitation and they aren’t improving, “punt” them, not literally, to another provider…I.e., physical therapist, sports chiropractor, or a massage therapist.

If someone has pain, punt!  Per the Functional Movement Screen (FMS), if someone presents with pain, the test is over and they should be referred to a healthcare practitioner.

Now, if you referred all of your clients who are in pain to another healthcare practitioner, you would probably have a lot of free time on your hands.

Most clients have some type of ache or pain they are dealing with.

By “punting” them, this does not mean you have to get rid of them.  You can use a multi-disciplinary approach and continue to train them without worsening their pain or dysfunction while they are treated for whatever ails them.

Don’t try to be a jack of all trades and a master of none.  Don’t try to be the strength coach or personal trainer who trains their clients, but also attempts to treat their pain or soft tissue dysfunction by performing some form of manual therapy.

This is where you need to know what you are good at and what someone else may be able to do better.  If a patient or client presents to me and I know another practitioner that is better at it than me, they are definitely going to continue their care with that better clinician.

Keep the manual therapy to the physical therapists, sports chiropractors, etc.  These clinicians have hours upon hours of training on various manual therapy techniques to assist in improving movement, pain, and dysfunction.

By meeting with local PTs and chiropractors in your area and developing a network of providers you can refer to, you should have no problem sending a client to a colleague who can help improve their current state.  Your client will think the world of you for having the humility to refer them out to someone who can help them properly.

Even if the physical therapist helps decrease their pain, that client will always remember that you had their best interests at heart and you were thinking of them first.

Think of your client’s needs first, not your ego!

Now, just because I am a physical therapist, doesn’t mean I am not going to “bash” on personal trainers and strength coaches.  I have a background in physical therapy and strength and conditioning.  I consider myself a hybrid physical therapist, bridging the gap between rehab and strength training.

I know that I am not the smartest trainer or coach out there.  I have the confidence in my skill-set to start the programming process and teach and help clients squat, deadlift, lunge, carry, push/pull, etc.

There eventually comes a time where I can have a personal trainer or strength coach take over and continue the process.  My goal for my clients when they leave me is that they have some type of basic foundation of the various movements just mentioned so they can effectively and safely progress towards their health and fitness goals.

If you are a physical therapist, sports chiropractor, etc. and you either do not have the confidence in how to teach basic movements and program them OR you have not educated yourself on how to program and teach basic movements, then leave that to the strength and conditioning or personal training professionals.

The message goes both ways: as much as we encourage personal trainers not to be too “bridge gappy,” the same goes for physical therapists.

The major point of this post is not to bash either side of the health and performance spectrum.  The point is that we need to coexist and develop connections with various healthcare and performance disciplines so that we are in the position to help the most important person in this process:  the client or patient.

About the Author


Andrew Millett is a Metro-West (Boston) based physical therapist

Facebook: From The Ground Up

Twitter: @andrewmillettpt

Instagram: andrewmillettpt
CategoriesAssessment Corrective Exercise

The Power of Test, Re-Test: How to Supercharge and Add Value to Your Assessment

During the Complete Hip & Shoulder Workshop in Seattle last weekend I spoke on the importance of the test/re-test concept with regards to assessment.

It’s nothing fancy or elaborate.

You test something – whether it be range of motion or maybe a strength discrepancy – implement a “corrective” modality if something’s deemed out of whack, and then re-rest that shit to see if it worked.

If it did….you’re Gandalf.8

If not…#awwwwwkward.

The test/re-test approach helps set the tone for any future “corrective” strategies or programming considerations you’ll do as a coach or trainer.

In addition, and something I’d argue is equally as important, it also provides an added layer of value to the assessment.

If you’re able to demonstrate to someone a significant change or improvement in ROM or reduction in pain/discomfort by implementing a drill or two, and it’s something they’ve been struggling with despite countless interactions with other fitness professionals, what’s the likelihood they’ll bust out their checkbook or Bitcoin wallets (<—depending on their level of geekery)?

I suspect highly likely.

It demonstrates a perceived level of “mastery” and knowledge-base towards the assesser (you) and, in a roundabout, reverse psychology kind-of-way, delves into the “pain center” of the assessee (athlete/client).

In this example it can refer to literal pain such as a banged up shoulder, knee, or lower back. But it can also speak to pain in the figurative sense too. Someone who’s frustrated and “had it up to here!” that they can’t lose weight, or maybe an athlete who was cut from their high-school team would have a degree of “pain” that would incentivize them to take action.

Show someone success or a clear path of action, however little, and they’re putty in your hands.

Of course this assumes you’re not some shady shyster who tries to up-sell the benefits of some super-secret concurrent, 47-week, Easter-Bloc training program you copied from Muscle & Fitness or, I don’t know, organic raspberry ketones laced with mermaid placenta.

People who promote and use smoke-and-mirror tactics are the worst.

But lets get back to the topic at hand.

Test/Re-Test

One of the main screens I use with my athletes and clients is their ability to lift or elevate their arms above their heads.

Shoulder flexion is important for everyone, not just overhead athletes and CrossFitters.

If someone lacks shoulder flexion, and they’re an athlete, it’s going to affect their performance. A baseball pitcher may be “stuck” in gross shoulder depression, which in turn will have ramifications on scapular positioning and kinematics, which in turn will result in faulty mechanics and compensatory issues up and down the kinetic chain.

Conversely, regular ol’ Hank from accounting, who likes to hit the gym hard after work, if he lacks shoulder flexion, he too could have numerous issues arise ranging from shoulder and elbow pain to lower back shenanigans.

Shoulder flexion – and the ability to do it – is a big deal in my opinion. And it’s a screen that should be a high-priority in any fitness professionals assessment protocol.

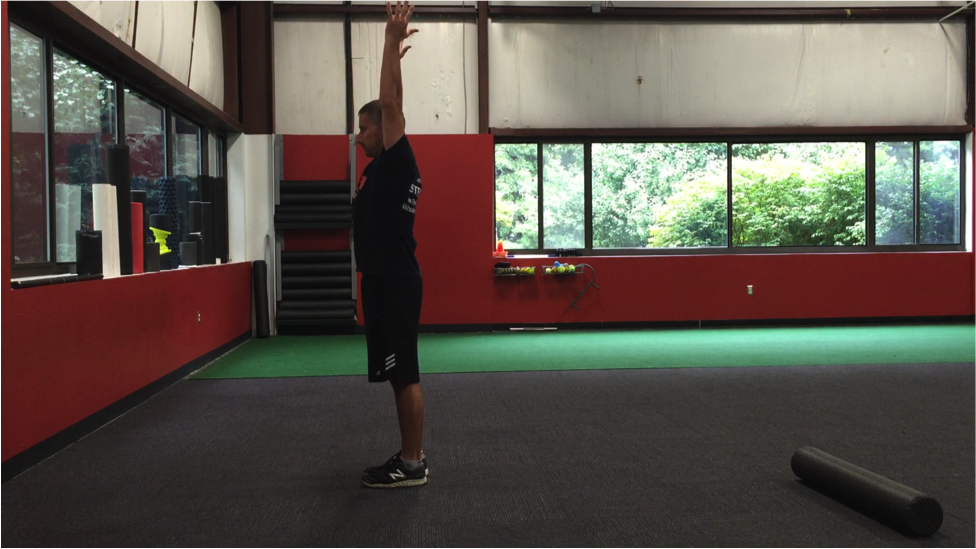
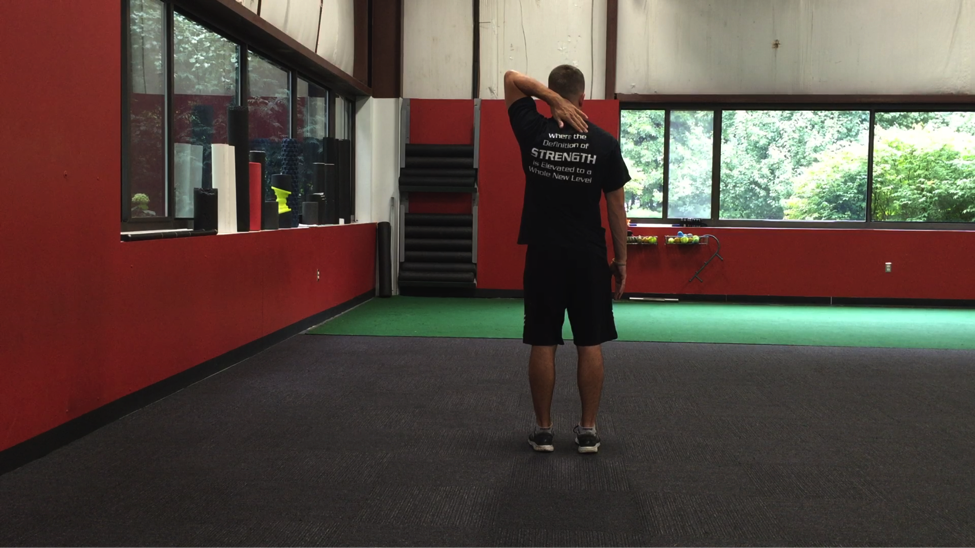
So lets say I’m working with someone who lacks shoulder flexion. I test it both actively (standing, picture above) and passively (on a training table).

I surmise that it’s limited and that it may be feeding into why a particular person’s shoulder has been bothering him or her.

I can use the test/re-test approach to see if I can nudge an improvement.

Now, as I’ve learned from many people much smarter than myself – Mike Reinold, Sue Falsone, Dr. Evan Osar, Dr. Stuart McGill, Papa Smurf, etc – you shouldn’t rely on any ONE screen/corrective.

Everyone is different, and what works for one person might not even scratch the surface for another.

With regards to addressing (lack of) shoulder flexion9, there are a handful of “go to” strategies I like to use.

And then it’s just a matter of seeing which one sticks.

1) Encouraging a Better Position

In order to elevate the humerus (arm) above your head, the scapulae (shoulder blade) needs to do three things:

  • Upwardly rotate
  • Posteriorly tilt
  • Protract

The ability to do so is vastly correlated with the thorax. Those who are super kyphotic (ultra rounded upper back) will have a hard time elevating their arms overhead. Often, the simple “fix” here is to foam roll the upper back and work on more t-spine extension and you’ll almost always see an improvement.

Bench T-Spine Extension


Side Lying Windmill


But what about the opposite? Those who are stuck in more “gross” extension and downward rotation?

I.e., the bulk of athletes and meatheads.

Here the shoulder blades can be seemingly “glued” down.

In that case some positional breathing drills to “un-glue” the shoulder blades (and to encourage more 3D or 360 degree expansion of the ribcage/thorax) would be highly advantageous.

All 4s Belly-Breathing


It’s amazing what a few minutes of this drill can do with improving shoulder flexion ROM, without having to yank or pull or “smash” anything.

2) Allow the Shoulder Blades to Move

Some people simply don’t know how to allow their shoulder blades to move. A prime example is this past weekend.

An attendee who’s a personal trainer – but also competes in figure – mentioned how her shoulders (especially her left) had been bothering her for eons, and she couldn’t figure out why.

We had her perform this drill.

1-Arm Quadruped Protraction


In reality, both protraction and retraction are occurring, but many people have a hard time with the former.

The idea here is to learn to gain movement from the shoulder blade itself and not via the t-spine.

Here’s another angle (because, triceps):

https://www.youtube.com/watch?v=eyNFNxqFlSc


After a few “passes” with this drill, she saw an immediate improvement in her ROM. What’s more, the following day when she showed up for Day #2, the first thing out of her mouth was “my shoulder feels amazing today.”

That’s a win.

3) Pin and Go

Another route to take is to have the person foam roll their lats. Not many people do this, and there’s a reason why: It’s un-pleasant.

I’ll have the person spend a good 30 seconds or so on each side and then have them stand up and perform a simple SMR drill using a lacrosse ball against a wall.

They’ll “pin” the teres minor down (basically, find the tender spot behind their shoulder and hold it there) and then work into upward rotation.

https://www.youtube.com/watch?v=9OiGt_O1FvY


Another five or so passes here, and I’ll re-test.

Many times I’ll see a marked improvement in their shoulder flexion.

Caveat

NONE of this is to insinuate that anything mentioned above will work for everyone. The idea is to understand that it’s important to “test” a number of modalities and then re-test to see if you find an improvement.

If you do, you’re likely barking up the right tree which will make your corrective approach and subsequent strength training more successful.

If you don’t, well, my bad…..;o)

Categoriescoaching Corrective Exercise

6 Unconventionally Simple Exercises

Note From TG: Today’s guest post comes courtesy of Long Island based personal trainer and coach, Chris Cooper. I had the pleasure of meeting Chris in person a few weeks ago in NYC during the Motivate & Movement LAB hosted by Mark Fisher Fitness.

We discussed training, programming, and, of course, unicorns.10

Enjoy. I think you’ll like this one a lot.

6 Unconventionally Simple Exercises

Simple equals easy, right?

Wrong.

Simple almost rarely means easy. When it comes to exercises, simple just means there is a lot less that can go wrong. Which in most cases leads to a surprisingly difficult yet effective exercise.

One look at the exercises below without experiencing them may lead you to believe they are easy. Test them out for yourself – with proper form and focus – and you will change you opinion instantly.

Last year, while presenting at a personal training conference, I discussed with the attendees the subject of simple exercise selection for their clients. The Pallof press was given as an example as the exercise that appears “simple” however not necessarily easy.

I further explained how countless clients have given me odd looks as I demonstrated and explained it, thinking there is no way it has any effect on their bodies.

Low and behold, they end up shocked by it, exasperated, and boasting about how much they felt it.

Fortunately, there were trainers present who had not been familiar with the Pallof press and thus proved my point, exercises that are “simple” may not be easy to perform. Especially, with the ever changing variations that the Pallof press holds.

Notorious BIG

My programming and exercise selection are notorious for having such exercises…the ones that look clearly simple or as though the client has to do absolutely nothing to complete the task.

That is until the client performs the exercise for themselves.

After finishing the exercise correctly, they are then amazed by the intensity and express that it was the hardest thing they have ever done. Such as the Pallof Press above. Those are incredible moments because you have just taught the client something important about their training:

Not all exercises have to be elaborate or complex.

Simple can get the job done.

Circus Tricks Gone Wild

Many of the exercises that you see being performed in the gym or in workout videos are so complicated and involve many moving parts that it’s hard to know what to concentrate on, let alone the benefit.

Take a look at any ‘Gym fail’ type video, you see people attempting to squat and deadlift on Swiss balls.

It looks as though they were taping a submission for the circus.

Now stop and think, Why?

What training effect are you going to achieve from that? How long did it take to setup that exercise and how many sets did he do that for?

That time and energy could have been used more efficiently and safer by taking a simpler approach to their training, even if it didn’t look as impressive for the internet.

Remember: Simple.

Simple is usually more effective and potentially jaw dropping. A deadlift isn’t complex. It’s simple.

Pick the bar off the floor.

Sure there are subtle nuances to a deadlift that will increase your lift and make it efficient. It boils down to the simple act of picking a bar off the ground.

Listen to Yoda

“Control, control, you must learn control” – Yoda

Maintaining core control in simple movements will carry over into core control in other exercises.

Here are some simple exercises to use in your programming that will leave your clients scratching their heads, wondering what just happened:

1) Elevated Quadruped Hip Extension


  • Take the quadruped position, elevate one of the knees off the ground as though you’re going to crawl with the other on a yoga block.
  • Then throw in a hip extension drill on the non-supported leg.
  • Now you have a great core exercise that forces you to control any side to side hip shift.
  • Want an even bigger test? Put a ball on your back and don’t let the ball fall.

2) Yoga Block Hip Extension


  • Lay prone with the knees bent at 90°, place a yoga block between your feet.
  • Squeeze the block with your feet, then lift towards the ceiling. You should feel your glutes all the way.
  • This is almost like a reverse hyper extension, with limited range of motion.

3) Ring Hold & Tap


  • A great drill that teaches how to keep the upper back tight, which will carry over into multiple exercises, like the deadlift, pullups, or front/back levers.
  • The key to this exercise, besides keeping tension through the lats and upper back, is to actively maintain core stability.
  • When you release your hand from the ring unilaterally, there will be a shift in your weight, core and glute tension will prevent this.

4) Single Leg Foam Roller Bridges


  • Similar to a single leg glute bridge, which is another simple option, the glutes need activation for many people.
  • With one leg bent at 90° and the other extended with the calf on the roller, brace your core and press into the roller to elevate the hips off the ground.
  • Concentrate on the glute firing, and keep the hips from shifting.

5) Rolling Bug


Credit for this one goes to Perry Nickelston. How often are you rolling on the ground? Or better yet, when was the last time you rolled around on the ground? A long time? I thought so. Give these ago, they are harder than they look. Once again, focus on control throughout the exercise.

6) Torsional Buttressing


This a is (Dr. Stuart) McGill exercise through and through.

It is the epitome of simple, yet such a struggle.

The key, much like the other exercises in this list is maintaining core control and not letting the hips shift.

Notice a trend?

Keep the hips from shifting as most of these are unilateral exercises.

Remember, don’t judge a book by its cover. When it comes to simple exercises, looks can truly be deceiving. Just give any of theses a try and you’ll learn firsthand. Complicated exercises leave room for complications. Keeping things effective and simple.

About the Author

Chris Cooper, NSCA-CPT, LMT is a personal trainer with over 9 years of experience in the fitness profession. He is co-owner of Active Movement & Performance, a training facility on Long Island. In addition to being a trainer, he is also a New York State Licensed Massage Therapist, which has allowed him to blend the two worlds to not only get his clients stronger and in better shape, but to also fix dysfunctions to make them better movers overall. His firm belief in education is manifested as an educator for Fitness Education Institute, presenting at their yearly convention, as well as participating as an expert contributor for watchfit.com.

Website — www.amp-training.com
Facebook — AMP Training
Instagram — @amptraining
Twitter — @chriscoopercpt


CategoriesAssessment Corrective Exercise Exercise Technique

Common Mistakes With Shoulder Assessment

Assessment in the health and fitness setting can be tricky, and rife with numerous (common) mistakes some fitness professionals make.

This is especially true when we start talking shoulders.

Mistake #1: the shoulder isn’t just the shoulder. 

As in: it’s not just one “thing.” We’re actually referring to a shoulder “complex” that’s, well, complex.

The “shoulder” is comprised of four separate articulations (glenohumeral joint, sternoclavicular joint, acromioclavicular joint, as well as the scapulothoracic joint), all playing nicey-nice together in order to perform a wide array of movement(s).

All deserve their time under the assessment microscope.

Mistake #2: However, while all areas are important, I do find that assessing and addressing scapular function/positioning is often the key to unlocking answers. Unfortunately, it’s often the area that’s least looked at with regards to shoulder pain/dysfunction.

Mistake #3: shoulder assessment can – and should be – attacked from a few different perspectives.

Far too often, I find, fitness professionals take a static view of what’s going on and that’s it. They’ll have an individual stand there in the middle of a room, utter a few “mmm’s and ahhh’s,” write a few fancy schmancy words like “internally rotated,” “kyphotic,” or “I have my work cut out for me,” and that’s that.

Assessment complete.

Lets go squat!

When in fact, shoulder assessment should be broken down into a few disparate – but not altogether separate – components: Static Assessment, Integrative Assessment, and Dynamic Assessment.

Not to mention one’s ability to fill in a smedium t-shirt. Very important.

All three provide pertinent information that will help better ascertain the appropriate plan of attack when it comes to movement dysfunction, pain, and/or improved performance within the shoulder complex.

I Got 99 (Shoulder) Problems and….

…..My scapulae are the reason for all of them.

Sorry, I’m no Jay-Z. And I know I just butchered one of his classic hits.

But it was the only way I could think of to best articulate my point.

The scapulae (shoulder blades) are kind of a big deal when we begin to discuss shoulder health. It’s an arbitrary number I’m throwing out there with no research to back it up – so please, don’t quote me11  – but 90-95% of the “shoulder” issues I’ve helped address in the past when I was a coach at Cressey Sports Performance as well as the present (now that I am on my own), can be correlated back to scapular positioning and function.

Static Assessment

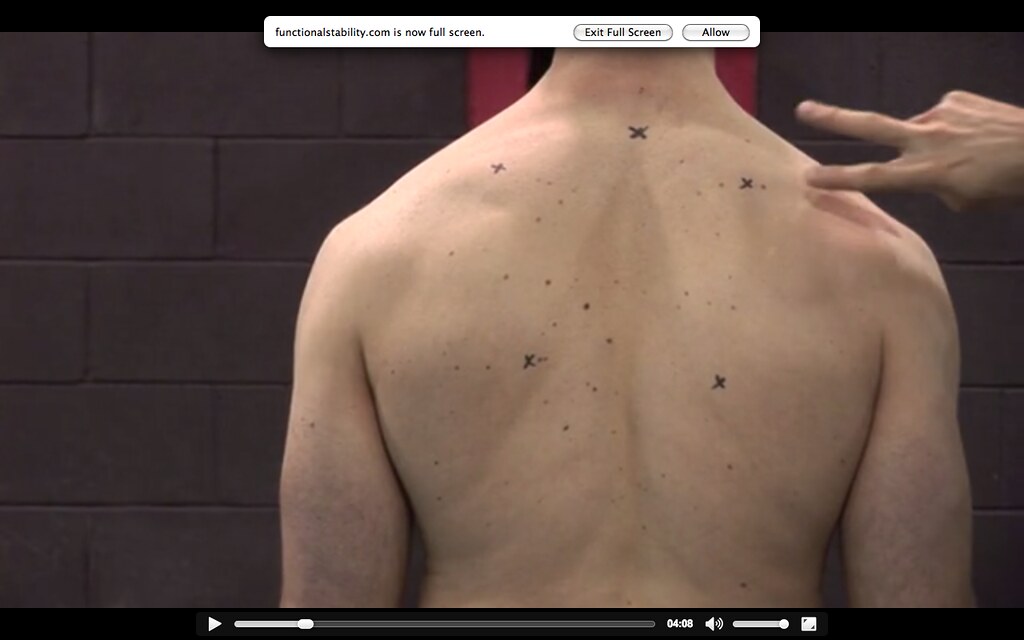
  • The scapulae should be in slight upward rotation. As you can see in the picture above, this individual is in slight downward rotation statically (both inferior medial borders (the two bottom x’s) of the scapulae are inside the superior medial borders.
  • Both scapulae should rest between T2-T7. The top middle “x” is T2 and you can see this person is below that point and in slight shoulder depression.
  • The medial borders themselves should rest between 1-3 inches from the spine.

If we only used static assessment it would be easy to assume this person is f****d. Many fitness pros would see this, hyperventilate into a brown paper bag, and immediately go into corrective mode.

But as Mike Reinold has poignantly noted time and time again:

“Statically, everyone’s shoulder blades start in a different position (elevated vs. depressed, internally rotated vs. externally rotated, abducted vs. adducted, anteriorly titled vs. posteriorly tilted, Autobots vs. Decepticons), and it’s moot to take static posture at face value.”

Besides, the above picture is of me, and when this was filmed/taken I presented with zero shoulder pain. This isn’t to imply I don’t have anything to work on, but it does showcase that static posture alone isn’t going to tell you all you need to know.

Integrative Assessment

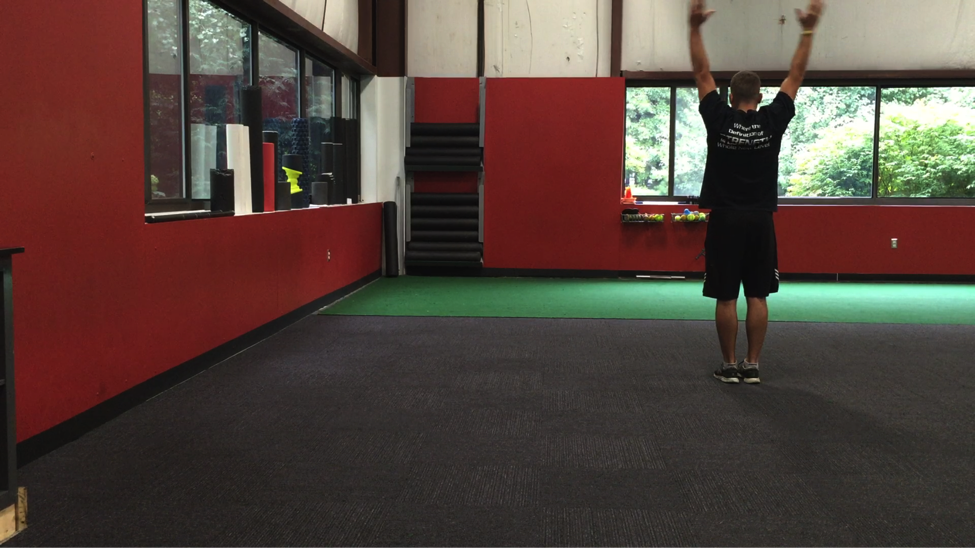
Once we start adding movement – looking at scapulohumeral rhythm (the interplay between humerus and shoulder blade) or one’s ability to elevate arms above their head – sometimes, people self-correct really well.

What presents as “bad, “faulty,” or “shitty (<— depending on your rating system) statically, may very well be passable or very good once you add movement.

When looking at shoulder elevation/flexion, for example, does the scapula posteriorly tilt, upwardly rotate sufficiently (generally looking at 55-60 degrees of upward rotation), and does the inferior angle wrap around the thorax to the midline of the body?

This is something that can’t be determined if you’re only looking at static posture.

Dynamic Assessment

This is basically the part of the assessment where I ask the person to do stuff. Rather than boring someone to tears poking and prodding for an hour and making him or her feel like a patient, I prefer to get them moving and have them demonstrate certain exercises.

The push-up tells me a lot. Not only does it give me insight on their ability to move their scapulae (many times they’re “stuck” in adduction), but it also provides details on their lumbo-pelvic-hip control.

Because, something like this makes my corneas want to jump into a pool of acid:


Note: I understand the point of the video above was to purposely showcase a bad push-up. Mission accomplished.

More importantly, if someone comes to me with pain present, having them demonstrate how they perform certain exercises provides unparalleled understanding of what needs to be fixed.

A common theme I see amongst many trainees is allowing their shoulders to roll forward during execution of given exercises.

A Brief Review: when we elevate our arms above our heads the shoulder blades posteriorly tilt (hug the rib cage) and upwardly rotate. Reversing the action calls for scapular anterior tilt and downward rotation.

Many people “feed” into excessive downward rotation/anterior tilt by allowing the shoulders roll forward during common exercises like rows, push-ups, curls, and tricep press downs.

Stop It

https://www.youtube.com/watch?v=A9ytqrIf-dc


I Said, Stop It!

https://www.youtube.com/watch?v=47xXBhD7SuI


The “fix” here is easy:

Me to Client: “Okay, show me how you’d perform a standing cable row and tricep press down.”

Client: “Um, okay.”

[Then proceeds to emulate technique from the videos above.]

“Yeah, that hurts.”

Me to Client: “Stop doing them that way.”

[Puts client in a better position…shoulders rolled back with posterior tilt.]

Client to Me: “Wow, that feels so much better. You’re so smart and attractive.”

That’s Not All

What’s described above is in no way an exhaustive approach to shoulder assessment, but I hope it at least opened your eyes to the notion that it’s more multi-faceted than many give it credit for.

And on that note, I’d be remiss not to point people in the direction of guys like Eric Cressey, Mike Reinold, and Dr. Evan Osar.

Functional Stability Training – Upper Body is an excellent resource for more insight on shoulder assessment and corrective exercise.

Likewise, Dr. Osar’s Integrative Corrective Exercise Approach is an excellent resource.

And, pimping myself up a little bit, I cover the above and many other shoulder related topics in mine and Dean Somerset’s Complete Hip & Shoulder Workshop coming to the Toronto area in a few weeks (1 week left to take advantage of the Early Bird Special), Seattle, and two stops in Europe in May.

Go HERE for dates and to register.