Categoriespersonal training Program Design

4 Keys to Staying Athletic As You Get Older

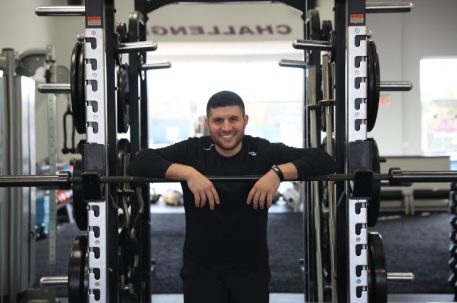
Today’s guest post comes courtesy of Boston-based personal trainer and S&C coach, Matthew Ibrahim, who’s latest (online) resource, Forever Athlete, is available for purchase.

Matt’s a phenomenal coach and I always gravitate toward his content because it’s so accessible and realistic. If you’re at all interested in “holding on” to your athleticism give this article a read and definitely considering checking out Forever Athlete program.
4 Keys to Staying Athletic As You Get Older

What’s one common theme with every single person below?

  • Female high school volleyball player with a 20” vertical jump
  • Adult male being able to perform hurdle hops with pristine technique
  • Middle-aged mom performing a heavy set of goblet squats
  • NFL running back with a 118” broad jump

Although this sample list above demonstrates people within varying populations, they all represent examples of athleticism.
The point? All humans are athletes, regardless of age or ability level.

Not only can we remain athletic as we age, we should do everything in our power to push the athletic envelope as the years pass. Ultimately, age should never be something that holds you back from feeling and being athletic.

Everyone is an athlete and everyone has the right to train like one, too.

Let’s break down 4 keys to focus on for the purpose of staying athletic as you get older:

  1. Jumping and landing for power development
  2. Lifting heavy weights to improve strength and reduce the risk of injury
  3. Building muscle to feel good and look good
  4. Conditioning for heart health gains (even though you hate it)
  5. Beating a pack of ninjas in a street fight (BONUS added by Tony. Sorry, couldn’t resist)

You do these 4 things on a weekly basis and I promise that your path toward long-term athleticism will be that much easier for you.

Jumping & Landing for Power Development

I just turned 33 last month – and let me tell you – I’m no spring chicken anymore.

Does this mean I should give in, create a lifelong indentation on my couch, bury my head under the pillow and binge as many Netflix series as possible until the rest of season 4 from Ozark officially drops?

Of course not.

Although, Ozark is awesome. (Tell me Ruth isn’t THE most bad-ass character ever!)

Anyways, my focus should be on continuing to do the things that I love while being strategic in the process.

Part of that includes playing pick-up basketball, feeling athletic in the gym and sprinting (when the weather permits). Jumping and landing become super important for me in this area if my goal is to continue hooping, sprinting and feeling athletic.

Jumping comes in a variety of forms, positions, angles and planes of motion. The simplest way to understand jumping is to break it down into extensive plyometrics and intensive plyometrics.

Here’s an example of an extensive plyometric exercise:


You see how there’s fluidity and rhythm involved? That’s because extensive plyometrics helps you focus on coordination at lower intensities so that you can get the hang of it. Think of extensive plyometrics as keeping the training wheels on.

In the opposite light, you can think of intensive plyometrics as removing the training wheels and letting it rip at higher intensities. The goal here is to be as explosive and powerful as possible.

Here’s an example of an intensive plyometric exercise:


The exercise examples above aren’t as important as the intent behind them. Use extensive plyometrics in the beginning stages as you’re learning and getting the hang of jumping. Then, start incorporating intensive (explosive) plyometrics once you’re ready to take on more force.

Just remember, the more force you produce in jumping, the more force that you’ll need to control when getting back down to the ground. This takes me to my next point: landing.

Controlling your body is pivotal for staying athletic. A simple way to do this is to build the ability to land with body control and organization. Basically, you want to look like Michael Jordan (OK, maybe one-tenth of that) every time he would land after throwing down a monster dunk.

Body control? Check. Smooth and fluid? Check. Organized? Check.

Power development is also important for people as they age due to the positive impacts it has on the nervous system, coordination and overall function when it comes to physical activity.

Planning to join your local adult club soccer team? Interested in being able to play pick-up basketball in summer rec league on a weekly basis? Or, maybe you just want to be able to play tennis with your friends soon since the warm weather is around the corner?

Either way, developing and harnessing power through jumping and landing is a pivotal step toward staying powerful, explosive and athletic.

Lifting Heavy Weights for Strength Gains & Injury Risk Management

I think this is the easiest “sell” on this list.

Honestly, unless you’ve been hiding under a rock for the past 20 years or living somewhere underwater as you begin the evolutionary process of turning into a mermaid, it’s become quite clear both in practice and evidence that lifting heavy weights (safely) is a no-brainer for building strength.

Of course, we always need to mention the importance of using good form and technique especially when it comes to lifting heavy weights. That should also be a no-brainer.
The other important part of lifting heavy weights, in addition to getting yolked (strong), is that you’re helping to reduce the risk of injury to your body.

How, you ask?

Well, every time you lift heavy weights, your entire body gets stronger. No, this doesn’t happen instantaneously like heating up a hot pocket in a microwave. It takes quality time to develop strength. On the shorter end of things, strength gains likely take a month or two to truly start seeing and feeling the gains. For more noticeable strength gains, it takes a year or two of hard work and consistency to really see things pay off strength wise.

When it comes to gaining strength, not only are your muscles becoming stronger, the rest of your body is as well. Muscular strength is important for the purpose of being able to produce more force, and in some cases, at faster speeds. Think about what we talked about in the previous section as it relates to power development. Pretty cool that strength and power go hand in hand, right? Science can be cool, sometimes.

More importantly, think about the importance of bone mineral density as we age. Think about having strong support structures in our body like joint strength, ligament strength and tendon strength. Remember: bones, ligaments and tendons all have an interplay (to some extent) with the muscles in our body.

Suffice to say that, when all is said and done, managing the risk of injuries becomes a heck of a lot easier when you’re stronger. Lifting heavy weights, relatively speaking, is also never a bad idea if your plan is to stay as athletic as possible as you age.

Building Muscle to Feel Good & Look Good

Arm farm is soon to be a national holiday. I swear, it’ll be on all calendars at some point soon.
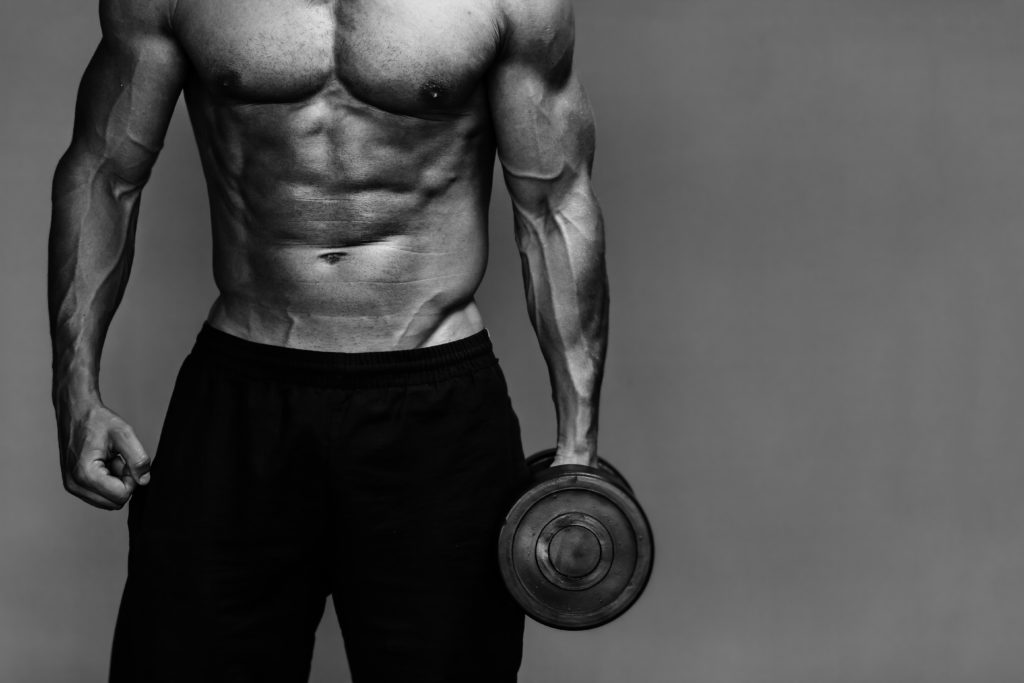
Until then, why can’t we give in and just be more open about wanting to build muscle to feel good and look good?

Oh, so you’re not trying to build a sweet pair of biceps to flash at the beach this summer? So, what you’re saying is that, even though you just ripped off 50 reps of tricep extensions, that arm training isn’t important to you?

Sure, keep telling yourself that.

Or, let’s just all be cool about it. Look, I like building muscle, feeling good about how I look and chasing a pump just as much as anyone else. Admittedly, my calf muscles are often the target for when I’m trying to chase a pump, but that’s neither here nor there.

The point is that building muscle is actually a great thing if your goal is to stay athletic as you get older. Think of muscle as your body armor. This ultimately coincides with what we just talked about in the previous section.

(Side note: have you noticed a trend so far with how each section piggy-backs off of the previous one? Go figure.)

Lean body mass (LBM), otherwise known as muscle tissue, is a great thing to develop in the human body. Not only does having more muscle help you from a body composition standpoint, it also enables you with the ability to develop power and strength with more ease.

Building muscle and being athletic can both exist together in your weekly training. Looking good, feeling good about how you look and performing well are all achievable qualities with the right approach.

Conditioning for Heart Health Gains (Even Though You Hate It)

OK, OK. I get it. Nobody likes doing cardio or conditioning.

But, everyone wants to jump right into playing rec league sports, pick-up basketball games and flag football, right?

Stop for a moment and think about that.

(Crickets.)

Yup, exactly what I thought.

Doing the first thing makes doing the second thing much easier.

I’m not saying that you need to spend countless hours on the treadmill trying to morph into a hamster wheel. Nope, not at all. Instead, incorporate anaerobic (high intensity) conditioning intervals and aerobic (low intensity) conditioning intervals on a weekly basis.

Let’s simplify even more by having you consider adding in the following each week:

  • Anaerobic example = 1-2 days each week of sprints: keep the distance (15-20 yards) and volume (6-8 reps) short while the intensity (85-90% effort) and rest periods (60-90 seconds) are high.
  • Aerobic example = 1-2 days each week of tempo running: now, focus on longer distances (1 lap around the track) at lower intensities (70-75% effort) with a recovery walking lap in between and a higher total volume of work (1.5-2 miles).

These are simply a couple of examples you could use, but quite frankly, the options are endless. You could easily do sprint intervals on the bike instead for your anaerobic conditioning and 30-minute weight vest walking for your aerobic conditioning.

The primary goal is to hit some high intensity and some low intensity conditioning on a weekly basis. Think of high intensity conditioning as building your ability to be powerful for short periods of time and low intensity conditioning as building your ability to last for a long duration of time with more of a sustained output.

When performed together consistently, this type of weekly conditioning routine gets you fit enough to play all the pick-up games and rec league sports you want without ever batting an eye or stopping to consider whether or not you feel conditioned enough to play. Cardiovascular endurance and stamina are real game-changers and they’re super important in the process of maintaining your athleticism as you get older.

The best part is that being well-conditioned also positively impacts your ability to build strength, power and muscle. Overall, athleticism leans heavily on these 4 physical qualities.

Closing

Let’s face it: we all want to stay athletic and powerful as we get older. We all want to stay strong, durable and muscular, too. And, even if we hate to admit it, we know that conditioning is key for staying fit and healthy. Unlock your true athletic potential by focusing on these 4 key areas for staying athletic as you get older.
My online training program – Forever Athlete – places a strong emphasis on these 4 areas so that you can remove the guesswork and become the most athletic version of yourself.

About the Author

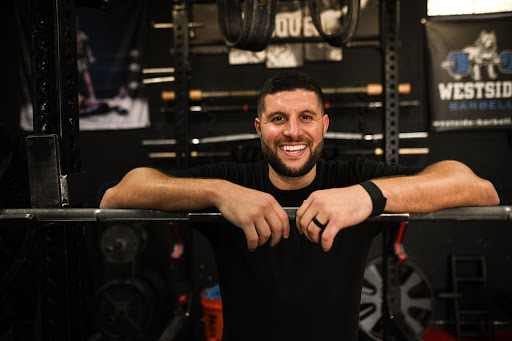
Matthew Ibrahim has been a Strength & Conditioning Coach since 2007 while working with athletes looking to build strength, improve performance and maintain healthy lifestyles. He is also a College Professor of Exercise Science and a Ph.D. student in Human & Sport Performance.

As a public speaker, Matthew has presented at EXOS inside Google Headquarters, Sports Academy (formerly Mamba Sports Academy), Perform Better, Equinox, Stanford University and for the National Strength & Conditioning Association (NSCA) on several occasions. His work has been featured in Men’s Health, Men’s Journal, T-Nation, Science for Sport, StrengthCoach.com, Exxentric, TrueCoach and TrainHeroic.

Connect with him on Instagram – HERE
 

CategoriesProgram Design sport training

Deceleration Training and Landing For the Everyday Athlete

You don’t have to be LeBron James or Megan Rapinoe in order to train more like an athlete. You just need to be realistic (and smart) about it.

What’s more, being athletic isn’t only about accelerating. You also have to be able to apply the brakes – quickly – too!

(and beat Rambo in arm wrestling match. it’s science)

Today my good friend and colleague, Matt Ibrahim, showcases some simple drills that emphasize the latter.

Copyright: innaskal / 123RF Stock Photo

Deceleration Training & Landing For the Everyday Athlete

Everyone pays close attention to how powerful and explosive an athlete can be, and how quickly he or she can speed up and take off. However, everyone ignores the foundational components that precede acceleration and force production, which are deceleration and force absorption.

All athletes, regardless of sport or athletic endeavor, need to develop the skills necessary to slow down, absorb force, and land in an organized manner.

Decelerate & Land on Two Feet

Drop Squat to Stick:


Grabbing a rebound or spiking a volleyball comes easy to most since the task is clear: jump up into the air as high as possible and either gather the basketball or launch the volleyball. But, you’d be hard-pressed to find someone as concerned with their jump height as their jump landing.

Put the squat jumps on pause for a moment and dial in your technique here first.

This is a good place to start if you’re new to deceleration training and landing skills. Here’s a drill that requires much more focus than what you see in the video. The entire emphasis should be on creating as much speed as possible when dropping down to the floor.

Your goal is simple: slow down fast.

Yes, that’s correct. The same way that you’d want to speed up fast during acceleration, you’d also want to slow down fast during deceleration.

Coaching Keys:

  • Stand with both feet hip-width apart and your hands down by your pockets
  • Now, reach both hands up high toward the ceiling above you
  • Raise both heels off the floor, but keep the toes glued down for a moment
  • Quickly snap down as fast as humanly possible while allowing the toes to leave the floor ever so slightly
  • Finish in the bottom of a squat with your arms long and behind you

Learn How to Land in a Split Stance

Drop Reverse Lunge to Stick:


The same rules apply here as in the above exercise.

Don’t be fooled though; this variation is much more difficult.

Whether you’re doing split squats in the gym or sprinting in your sport, the split stance is a highly-coveted position to become strong and durable in. Quit doing split squats for one block of training and replace them with these for faster performance results.

On paper, the goal here is pretty simple: reach up and drop down fast into the reverse lunge position. However, performing this deceleration exercise is much harder than just that. The front leg will take most of the load while the back leg works in an assisting manner.

Think: jab that foot back and slightly lean your trunk forward. That’s the key to results here.

Coaching Keys:

  • Stand with your feet hip-width apart and your hands down by your sides
  • Reach your fingertips high and up toward the ceiling
  • Raise both heels up off the floor
  • Snap down quickly while simultaneously jabbing one foot back behind you
  • Make sure to finish in the bottom of a reverse lunge with your arms reaching back

Pump The Brakes & Land on One Foot

Drop Squat to 1-Leg Stick:


Watch an athlete in any sport perform a cutting action, a change of direction, or even turn the corner. It’s likely that you’ll see the athlete, at one point or another, land on one foot. Even when athletes land on both feet they tend to favor one side over the other. The point is that all athletes will find value in developing the skills in the weight room necessary to be strong and durable on one foot.

Deceleration training and landing is no different.

Single leg strength starts at the foot and lower leg.

Building legs and feet that are resilient to loading, whether from the speed emphasis in deceleration training or from the weight on the bar, is the pivotal first-step to longevity in the iron game. Drop quickly here and stick your landing on one foot.

You’ll be surprised at how many reps it takes until you get it right.

Coaching Keys:

  • Stand with both feet hip-width apart and both hands down by the pockets
  • Reach your hands up toward the ceiling
  • Raise both heels off the floor, but keep the toes glued down for a moment
  • Quickly snap down as fast as possible while allowing the toes to leave the floor slightly
  • Finish the landing on one foot with both arms behind you

Stick Your Landing Off An Elevated Surface

Depth Drop to Stick:


At some point, performing all of these drills from the floor will become too easy. This is why it’s important to provide some sort of overload stimulus to continue making progress in your deceleration training. Starting from an elevated surface from a box or a bench will do the trick.

The key here is to avoid jumping off the elevated surface, and instead, dropping down as fast as possible. This goes back to the whole notion of slowing down fast. The faster you come down off the box, the more challenging it will be to land in an organized manner. Step up to a box or bench height that will challenge you if your ultimate goal is to build quality deceleration and landing skills.

Coaching Keys:

  • Stand on a plyo box in the range of 12 to 24 inches
  • Lead one foot off the box out in front of you
  • Reach your fingertips up high above you
  • Drop down off the box and stick the landing on both feet with your arms behind you

Now, Do it On One Foot

Depth Drop to 1-Leg Stick:


Not much different here than the previous exercise aside from the fact that now you’ll be forced to land on one foot. There’s a reason this is the last stop on the train in this series of exercise progressions since it challenges you the most, both from a speed overload and stability standpoint.

The challenge here is to demonstrate body control during landing by sinking into your hips and letting your chest dip forward a bit. Again, your arms play a big role in this drill due to the amount of speed they can create based on how hard and fast you swing them down from the top position.

Ease into this one, but once you master it, let it rip.

Coaching Keys:

  • Stand on a 12 to 24-inch plyo box
  • Lead one foot off of the box out in front
  • Reach both hands up high toward the ceiling above you
  • Drop off the box and stick the landing on the lead feet with both arms long and by your pockets

Closing

Deceleration training and landing skills are where it all begins in plyometrics. It doesn’t matter if you’re a sport-based athlete or an iron athlete in the weight room, landing skills are important for everyone. Build the brakes before you slam down on the pedal.

About the Author

Matthew Ibrahim serves as Co-Owner, Director of Strength & Conditioning and Internship Coordinator at TD Athletes Edge in Boston, MA.

He is also an Adjunct Professor at Maryville University and Endicott College, in addition to being a Ph.D. student at Rocky Mountain University in the Human and Sport Performance program.

As a public speaker, he has provided presentations at Google Headquarters, Stanford University, and Equinox, in addition to speaking at several NSCA conferences and clinics.

As a writer, his articles have been featured in some of the world’s largest publications, such as Men’s Health, Men’s Fitness, Men’s Journal, and T-Nation.

Connect with him on Instagram – HERE.

CategoriesStuff to Read While You're Pretending to Work

Stuff to Read While You’re Pretending to Work: 8/21/20

Copyright: neirfy / 123RF Stock Photo

THE WEEKLY BRIEF UPDATE

1. #Achillesgate2020 Update

Nothing too too new to brag about this week other than I WAS CLEARED TO DRIVE MOTHERFUCKAS.

Up until this past Tuesday I hadn’t been behind the wheel of a car since May 23rd. My wife has been carting me everywhere.

  • Babe, I need to go to work!
  • Babe, I need to meet my realtor to check out a new potential gym space!
  • Babe, I need eggs.
  • Babe, why are you walking toward me with a knife. Babe, BABE, noooooooooooo.

On top of that I’m pretty sure Lyft is still operating in Boston because of me.

So it was a nice reprieve and welcome change of pace to be able to drive this week.

Onward!

2. You can now purchase CORE @ Home for whatever it is you want to pay.

During quarantine I started a platform where I’d deliver 20-40 minute workouts that could be performed in everyone’s living room using minimal equipment.

In all I curated 36 workouts using nothing but bodyweight, bands, and kettlebells and/or dumbbells. With many people still reticent to head back to their regular gyms (not to mention the scarcity of gym equipment out there to purchase) I figured this would be a nice opportunity to help.

Whether you want to spend $1 or $100, the workouts are ready and available to start.

For more information go HERE.

SOCIAL MEDIA SHENANIGANS

Twitter

Instagram


View this post on Instagram


This week the delightful @meghancallaway and I are collaborating on a series we think you’ll enjoy. . This is DAY TWO where we’re highlighting four innovative exercises for both the adductors and hip flexors. . 2️⃣ Seated Core Engaged Hip Flexor Lift Offs. . This exercise strengthens the hip flexors and abdominals and more or less “locks” you into place so you can’t cheat with your lower back (ya big jerk). . Coaching Tips (follow @meghancallaway to see tips for her exercise). 👇 To give credit where it’s due: I stole my exercise from friend and colleague @dougivsc . . The hip flexors can simultaneously be both tight and weak, and endless stretching is NOT the answer. . In fact it (may) be feeding one’s symptoms. . If you have back pain and have been stretching your hip flexors relentlessly since 2012 try this doozy instead. . Grab a foam roller, a light or average band, and a tennis ball. Wrap the band around a pair of J-hooks in a squat rack so that they match the length of the foam roller from the ground. . Sit down underneath the band with your legs in a V-shape and your torso as upright as possible; place a tennis balls to the side of your ankle. . With the foam roller upright and just in front of you press it UP into the band. . Oh shit, that’s a lot of tension! . That’s good – it’s the point and will make it harder for you to cheat. The added tension locks you in – abs on, ribs down. . From there you’ll “lift off” moving your foot over the tennis ball and back using ONLY your hip flexors to do so. . Perform 8-10 repetitions per direction. . . ⁣⁣⁣⁣⁣ #hipflexors #hipflexorstrength #hipstrength ⁣⁣ ⁣⁣⁣⁣ ⁣⁣ ⁣⁣⁣⁣#corestrengthening #coretraining #coreexercises #coreworkouts #abexercises #abworkouts #resistancebandsworkout

A post shared by Tony Gentilcore (@tonygentilcore) on

STUFF TO READ WHILE YOU’RE PRETENDING TO WORK

Niched: Demystifying the World of Finance – Pete Dupuis/Sahil Bloom

Full Disclosure: Pete’s a good friend and former business partner of mine. His Niched podcast is excellent either way you slice it.

Sahil is also a good friend (and one of the first athletes I trained at Cressey Sports Performance). He’s now doing some pretty cool things in the world of finance, telling stories, and making it more palatable for us minions.

He’s been CRUSHING Twitter of late with his “Allegory of Finance” series. So much so that Sahil picked up a follow from Tim Cook. He’s now one of 69 people the CEO of Apple follows.

However, I’M only one of 48 people Sahil follows…;o)

A Step by Step Push-Up Progression List – Matthew Ibrahim

I’ve always stated that if one improves his or her’s ability to perform a GOOD push-up, pretty much every other lift will benefit from it as well.

Unfortunately, as much as push-ups are slept on because they’re deemed “too easy” or not worth our time, many, MANY people cannot perform them well.

This article will help.

Best Habit Advice Ever: Never Miss Twice – Mike T. Nelson

Loved this short and to the point blog post from Mike.

CategoriesUncategorized

Stuff to Read While You’re Stuck at Home Not Wearing Pants: 5/8/20

Copyright: maglara / 123RF Stock Photo

THE WEEKLY BRIEF UPDATE

We fucking did it!

My wife and I packed our shit (and Julian) into our car last Saturday night and took off for Florida early Sunday morning. It took us three hours on the dot to get from Boston to NYC.

And then we went 55 MPH across the GW Bridge (when normally a Hobbit walking to Mordor is faster)

In all we drove eleven hours on the first leg with a pitstop in Fayetteville, NC for a sleep break. We were up early again Monday morning and on the road by 7 AM to complete the last nine hour leg to Jensen Beach.

We arrived at 4:15 PM and Lisa was in the hot tub by 4:45 (not exaggerating).

Not to downplay anything, but if (and this is a BIG if) there’s a silver lining to any part of this pandemic it’s that traveling on the highways has never been more pleasant.

As I type these words I’m sitting poolside with my chill, deep house mix playing and Julian out cold taking his nap. We’re still doing the respectful thing and practicing good social distancing hygiene, but damn it’s waaaaaay easier to do with a pool (and a Grandma) in the mix.

SOCIAL MEDIA SHENANIGANS

Twitter

Instagram


View this post on Instagram


Two weeks ago my wife (@drlewisconsulting ) was like, and I’m paraphrasing here (but not really): . “Fuck this shit, why don’t we drive down to my mom’s place instead of being packed in our city apartment for the foreseeable future?” . The prospect of a yard, swimming pool, and a GRANDMA was just too enticing. . We’d been quarantining aggressively for several weeks (outside of some grocery store pit stops) and after talking through everyone’s comfort level we packed the car and drove from Boston to Jensen Beach, Florida this past Sunday and Monday. . The sole drawback was leaving a well equipped gym in lieu of performing poolside workouts for the next several weeks. . Okay, poolside workouts aren’t THAT much of a drawback. . We raided CORE prior to leaving to bring some bands, KBs, and other portable miscellany with us.. . (You can catch a glimpse of the full arsenal in my stories). . This morning marked Day #1. Lisa and I set up shop and away we went. . Here’s a nifty single leg hybrid movement I had us perform. It’s sorta a cross between a split squat and a RDL. . I don’t know what to call it, but it torches your glutes and hamstrings. . KEY COACHING CUES: . 1️⃣ Keep the KB close to the body and start with a forward lean. . 2️⃣ Stay low on the transition; the idea is to hinge back on the working leg. Another way to think of it is a “rocking” motion back, not a (full) squat up. . 3️⃣ Maintain aggressive brace with abdominals throughout (the anterior placement of the KB will help with that…😉). . Give it a try and let me know what you think.

A post shared by Tony Gentilcore (@tonygentilcore) on

STUFF TO READ WHILE YOU’RE AT HOME NOT WEARING PANTS

Dynamic Lifestyle Podcast w/ Chris & Eric Martinez

Here’s a quick 15-20 minute episode I did with Chris & Eric Martinez of the Dynamic Lifestyle Podcast


Four Challenges Boston Fitness Businesses Face in Surviving COVID-19 – Tessa Yannone

This isn’t just a Boston thing.

I’m sure all of my colleagues across the USA (and world) can commiserate with this article. Shout-out to my good friends Steve & Lindsay Bergeron of AMP Fitness who helped contribute to this article.

The Positive Impact of Strength Training for High-School & College Athletes – Matthew Ibrahim

Speaking personally, I started lifting weights because I wanted Nicole Kot to notice me in 8th grade.

She never did.

Thankfully, as this article more poignantly points out: I got much, much more out of the process.

CategoriesStuff to Read While You're Pretending to Work

Stuff to Read While You’re Pretending to Work: 9/14/19

Copyright: wamsler / 123RF Stock Photo

BUT FIRST…CHECK THIS STUFF OUT

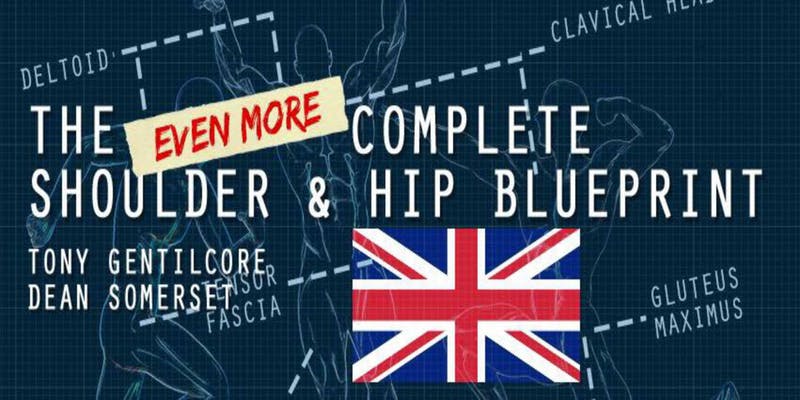
1. (Even More) Complete Shoulder & Hip Blueprint – Athens, Greece: Saturday, Feb 29th & Sunday, March 1st, 2020

This will be the first leg of mine and Dean Somerset’s European extravaganza in early 2020. The second leg will take place in…

2. (Even More) Complete Shoulder & Hip Blueprint – Maidenhead, U.K: March 7th & 8th, 2020

There’s an Early Bird rate for both of these events, so keep that in mind before you decide to hold off. Dean and I are really excited for this and hope to see you there!

SOCIAL MEDIA SHENANIGANS

Twitter

Instagram


View this post on Instagram


The Rack Pull-Up. . This is a variation I picked up from @liftrunbang and it’s grown to be one of my favorites. . It’s sorta a “hybrid” between an Inverted Row and a Pull-Up, which, not coincidentally, makes it one of my go to exercises when working with someone who’s goal it is to perform their first pull-up. . It’s not quite a pull-up, but it’s close. Sorta like Spam. It’s not quite meat but it’s close. . Anyway…this is also a fantastic accessory pulling/upper back exercise. What makes it really worthwhile is how we can accentuate the lat stretch in the bottom due to the increased ROM. . I like to aim for 6-15 reps per set with these. Pants optional. . Oh, also, props to @ampathletic who’s been allowing me to drop in everyday while in London (and for playing siiiiick EDM).

A post shared by Tony Gentilcore (@tonygentilcore) on

STUFF TO READ WHILE YOU’RE PRETENDING TO WORK

Build Strong Glutes – Meghan Callaway & Matthew Ibrahim

Gluuuuuuuuuuuuuuuuutes.

The Dangers of Poor Sleep and How You Can Fix It – Andrew Coates

I’m an unabashed fan of going the fuck to bed.

This was an EXCELLENT post by Andrew on the pitfalls of lack of sleep and some strategies to help improve it.

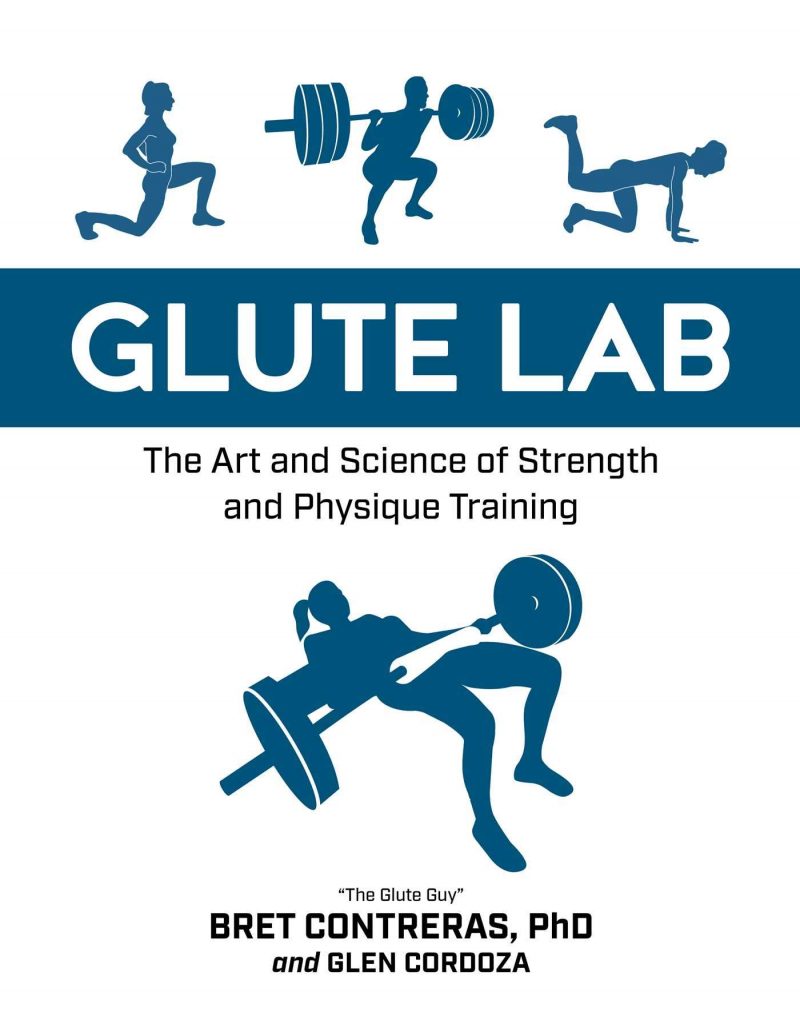
Glute Lab – Bret Contreras

More glutes from the President of Glute O’Clock…Bret Contreras.

I actually pre-ordered my copy (but it’s NOW available to purchase). I can’t wait to  dive in.

CategoriesProgram Design Strength Training

Safety Squat Yoke Bar: Training Application

This is a Tony Gentilcore & Matthew Ibrahim collaborative post.

Or, as I like to call it: A Gentilhim (or Ibracore?) production.

The Safety Squat Yoke Bar (also referred to as “SSB”) is a popular speciality bar that’s most often affiliated with collegiate strength & conditioning facilities, powerlifting gyms, or gyms that are a bit more “serious.”1

However, the Safety Squat bar has grown in popularity in recent years and it’s popping up in more commercial and boutique style gyms as well.

This is great because Matt and I both feel the Yoke Bar is a valuable piece of equipment, one that should be in every gym, with a variety of training applications.

Read on to see what they are.

Copyright: 60dudek / 123RF Stock Photo

Safety Squat Yoke Bar in Your Face, Son

Before I proceed it would make sense to show you a picture of the bar so you know what we’re talking about.

Advantages

1. The SSB is a more “shoulder friendly” way of squatting. Because you grab the bar by the handles which, when the bar is on your back, are located below your shoulders and a smidge in front of the body, it doesn’t require as aggressive of a set-up as a traditional back squat.

Traditional Back Squat (Straight Bar) = Shoulders maximally abducted and external rotated. Many lifters don’t have access to this range of motion and as a result their shoulders are like…


SSB/Yoke Squat = Not the above.

2. The SSB is more of a “hybrid” squat. As Matt notes:

Since the SSB has a longer bar camber from side to side (as opposed to a traditional barbell) plus a unique loading position for weight plates, it offers the lifter a fine balance between what they would expect from a barbell back squat and from a barbell front squat.

3. The SSB “fixes” your squat. Mirroring what Matt mentioned above, because of how the bar is designed, you have to fight like hell to stay upright (which, not coincidentally, makes it a great option to strengthen the upper back AND help work on thoracic extension; two things most people need more of).

As you get stronger with the SSB/Yoke Bar it’ll make things infinitely easier to stay upright if or when you revert back  to a straight bar.

4. The SSB = 110 Power Boost in World of Warcraft (but only with a +1 Shield and Infinity Cloak).

Nerd.

5. The SSB helps with depth. Because the bar is situated higher up on the back it promotes more of a “squat down” pattern rather that “squat back.”

This, in turn, will often help a lot of people squat deeper (if that’s something they’re interested in).

Here’s an SSB Squat in action.


The SSB Squat exercise is quite common and frequently used.

We wanted to delve a bit deeper to provide several other lower body training exercises you could perform with the SSB that you may not be using already in your overall strength and conditioning program.

1. SSB Hatfield RFE Split Squat (Matt)

Description: This exercise targets lower body strength and power, primarily in the quadriceps, hamstrings and glutes.

The trunk stability challenge here is the real deal as well, since you’re holding on to each side of the squat rack with your hands while the SSB rests on your shoulders. Be sure to press the entire surface of the working foot down through the ground as you power up from the bottom position to the top during each rep.

I’m a monster fan of this exercise due to the strength and power development components.


2. SSB Reverse Lunge (Tony)

Description: This was a staple exercise we utilized when I was coaching at Cressey Sports Performance due to it’s shoulder friendliness in addition to the fact we could be more aggressive with loading compared to dumbbells (grip becomes  less of a limiting factor).

As with any single leg exercise there’s also a hefty balance and coordination component as well. I prefer a bit of a forward lean when executing this exercise as it places less stress on the lower back and also allows for more emphasis to be placed on the hips.


3. SSB 1-Leg RDL (Matt)

Description: This exercise targets lower body strength, primarily in the posterior chain muscle group (hamstrings and glutes). As the SSB rests on your shoulders, be sure to hold the handle grips tight with each hand to ensure trunk stability.

It’s important to also mention the relevance of keeping a neutral-ish spine as you descend down into the bottom position due to the orientation of the load on your shoulders. I like this exercise due to the single leg strength and stability demand it poses to the athlete.


4. SSB Front Squat (Tony)

Description: This is a variation I first witnessed my man Jim Smith – of Diesel Strength – recommend a few years. ago.  I won’t go into the weeds on the benefits of a front squat

– you can read more HERE – but what I will say is that this variation is a wonderful way to counterpoint any client/athlete who insists that barbell front squats are too uncomfortable for him or her to perform,

I get it.

They suck.

They’re uncomfortable.

I don’t care, do this instead.


5. SSB Good Morning (Matt)

Description: Talking about posterior chain development without mentioning the Good Morning exercise is like eating eggs without the bacon; you just don’t do it.

The Barbell Good Morning has been a staple training tool for years when attempting to develop the glutes and hamstrings of the posterior chain muscle group. The SSB offers a slightly anterior loaded position when compared to the traditional barbell loaded version, which forces you to hinge your hips back even more than usual. I enjoy using this exercise as a way to really “feel” the hamstrings under load.


6. SSB Pin Squat (Tony)

Description: I loooooooooove2 this variation as an accessory movement to the deadlift.

The key is to try to approximate the pin height to one’s hips height so that it “matches” their deadlift setup. In other words: the starting position of the Pin Squat should mirror their deadlift setup.

Factor in the increased demand to maintain an upright torso (t-spine extension) and your entire posterior chain is going to be challenged with this exercise.

CategoriesProgram Design

Complete Overhead Press Warmup

My good friend and fellow Massachusetts based strength & conditioning coach, Matthew Ibrahim, comes through today with the final installment is in “Complete Warm-Up” series.

Previously he covered:

Complete Squat Warm-Up – HERE.

Complete Bench Press Warm-Up – HERE.

Complete Deadlift Warm-UpHERE.

He completes the quadrilogy (<– new term?) today with the overhead press.

Copyright: dolgachov / 123RF Stock Photo


The shoulder is a complex area that deserves the finest attention to detail when it comes down to a proper warm-up, especially when discussing the overhead shoulder press. The goal here is to prepare the shoulders to perform well in the overhead press pattern for long-term health, function and durability.

One of the key areas to focus on first will be to spend quality time training trunk stability, which acts as a STRONG base of support from which to press upon. Consider the trunk and associated core musculature as your anchor. You need a STRONG anchor for a STRONG overhead press.

Next up will be to work on shoulder mobility and overhead range of motion. The way to achieve this will be through tackling shoulder joint mobility, thoracic (t-spine) extension and flexibility in your lat muscles.

Once all of that is taken care of, be sure to then focus on rotator cuff activation for general shoulder health and robustness, in addition to stability and motor control in your shoulders during the overhead press pattern.

Check out the list of eight overhead shoulder press warm-up exercises below, which have been delicately organized in a progressive manner to help your shoulders feel healthy and strong.

1) Mini-Band Tall Plank w/ Alternating Lateral Tap – x8 each side


2) Yoga Pike w/ Alternating Toe Tap – x3


3) PVC Bench Tall Kneel Rockback – x8

4) Mini-Band Standing Long Pull-Apart – x8


5) Mini-Band Standing Front Lift – x8


6) Mini-Band Standing Overhead Press – x8


7) KB Half Kneel Bottoms-Up 1-Arm Press – x5 each side


8) DB Z-Press – x8


About the Author

Matthew Ibrahim is the Co-Owner & Lead Performance Coach of TD Athletes Edge in Salem, MA.
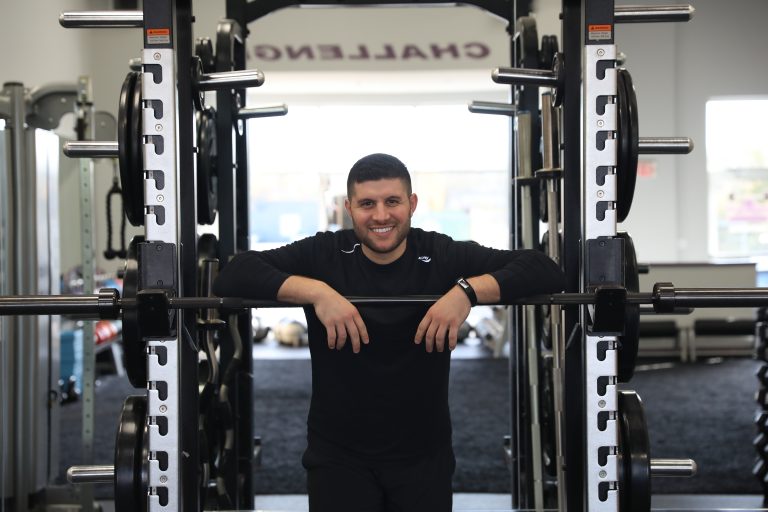
He has been an invited guest speaker nationally in over 10 U.S. states, which was highlighted by his presentations at Google Headquarters and Stanford University, in addition to guest speaking internationally in Milan, Italy.
His work has been featured in Men’s Fitness, STACK Media and The PTDC.

Currently, he is completing his masters degree at Rocky Mountain University with a direct track into their PhD program. He is a big fan of interacting on Instagram and regularly posts about training, performance and recovery.

Follow along HERE.

CategoriesProgram Design

Complete Deadlift Warm-Up

If you missed the previous installments of this series from Massachusetts based strength & conditioning coach, Matthew Ibrahim, you can check them out in the links below:

Complete Squat Warm-UpHERE.

Complete Bench Press Warm-UpHERE.

Lets  dive into the deadlift.

Copyright: langstrup / 123RF Stock Photo

Complete Deadlift Warm-Up

One of the top priorities to focus on when warming up prior to performing your deadlift in training is to spend time in the ACTUAL hip hinge (deadlift) position itself.

Most folks tend to skip out on this and lose out on the benefits. It becomes super important to groove the hip hinge pattern with repetition in the warm-up if you plan to load it in training with your deadlift.

In addition to grooving the hip hinge pattern, here are some other key areas to target in your warm-up when preparing to deadlift: trunk stability, lat activation, hamstring tissue flexibility and hip joint mobility.

All eight exercises below provide your body with the opportunity to warm-up everything labeled above in an efficient and cohesive format:

1) Yoga Pike – x5

2) Walking Inchworm – x5


3) Alternating Bird Dog – x5 each side


4) KB Dead Bug – x8 each side


5) Band 1-Leg Hamstring Pull-Down – x10


6) Band Standing Straight Arm Pull-Down – x10


7) MB Hug Good Morning – x10


8) Cable Pull Through – x10


About the Author

Matthew Ibrahim is the Co-Owner & Lead Performance Coach of TD Athletes Edge in Salem, MA. He has been an invited guest speaker nationally in over 10 U.S. states, which was highlighted by his presentations at Google Headquarters and Stanford University, in addition to guest speaking internationally in Milan, Italy.
His work has been featured in Men’s Fitness, STACK Media and The PTDC. Currently, he is completing his masters degree at Rocky Mountain University with a direct track into their PhD program.

He is a big fan of interacting on Instagram and regularly posts about training, performance and recovery.

Follow along: HERE.

CategoriesProgram Design

Complete Squat Warm Up

Last week I shared an article from strength & conditioning coach, Matthew Ibrahim, appropriately titled Complete Bench Press Warm Up.

You can check it out HERE.

Today Matthew is back covering the squat.

Copyright: ozimician / 123RF Stock Photo

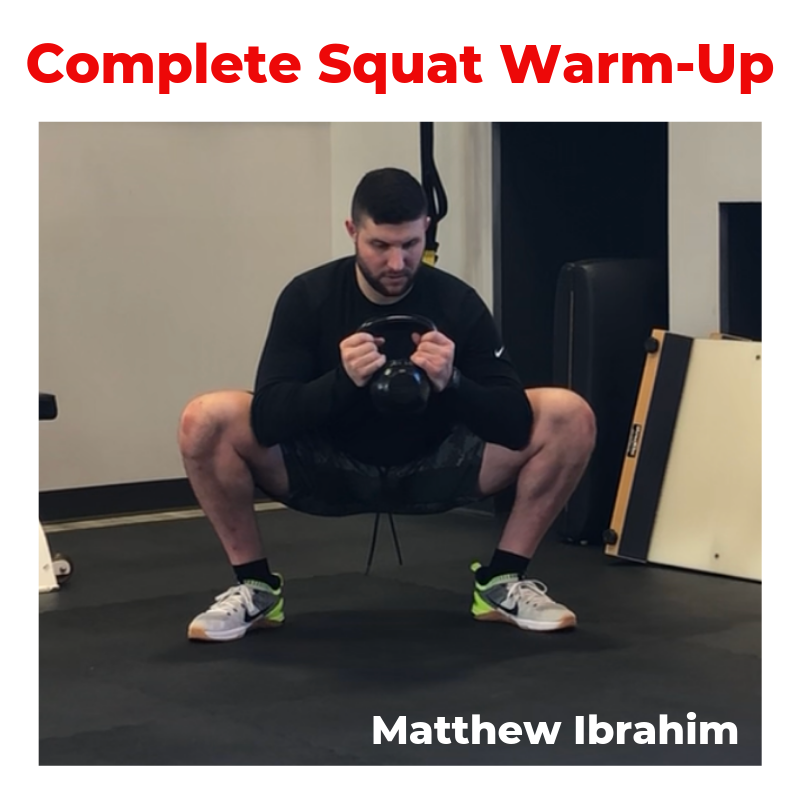
Complete Squat Warm-Up

One of the top priorities to focus on when warming up prior to performing your squat in training is to spend time in the ACTUAL squat position itself.

Most people miss the boat here.

Why?

Well, it’s important to actually groove the pattern with repetition in the warm-up that you plan to load in your training.

Crazy talk, I know.

A handful of other components to address in your warm-up when preparing to squat will be to work on trunk stability, hip mobility, groin flexibility, ankle mobility and upper back (thoracic) extension.

The cool thing about this is that you can work on ALL of those things in the ACTUAL squat position itself in your warm-up, too!

All 8 exercises below provide your body with the opportunity.

1) All Fours Rockback – x10


2) Catcher Rockback w/ Toe Turn – x8 each side


3) Alternating Spiderman – x5 each side


4) Windowpane Squat – x8


5) Squat-to-Stand – x5


6) Alternating Cossack Squat – x8 each side


7) KB Horns-Grip Prying Squat – x30 seconds


8) KB Horns-Grip Squat w/ Press – x8

About the Author

Matthew Ibrahim is the Co-Owner & Lead Performance Coach of TD Athletes Edge in Salem, MA.
He has been an invited guest speaker nationally in over 10 U.S. states, which was highlighted by his presentations at Google Headquarters and Stanford University, in addition to guest speaking internationally in Milan, Italy.

His work has been featured in Men’s Fitness, STACK Media and The PTDC. Currently, he is completing his masters degree at Rocky Mountain University with a direct track into their PhD program. He is a big fan of interacting on Instagram and regularly posts about training, performance and recovery.

Follow along HERE

CategoriesProgram Design

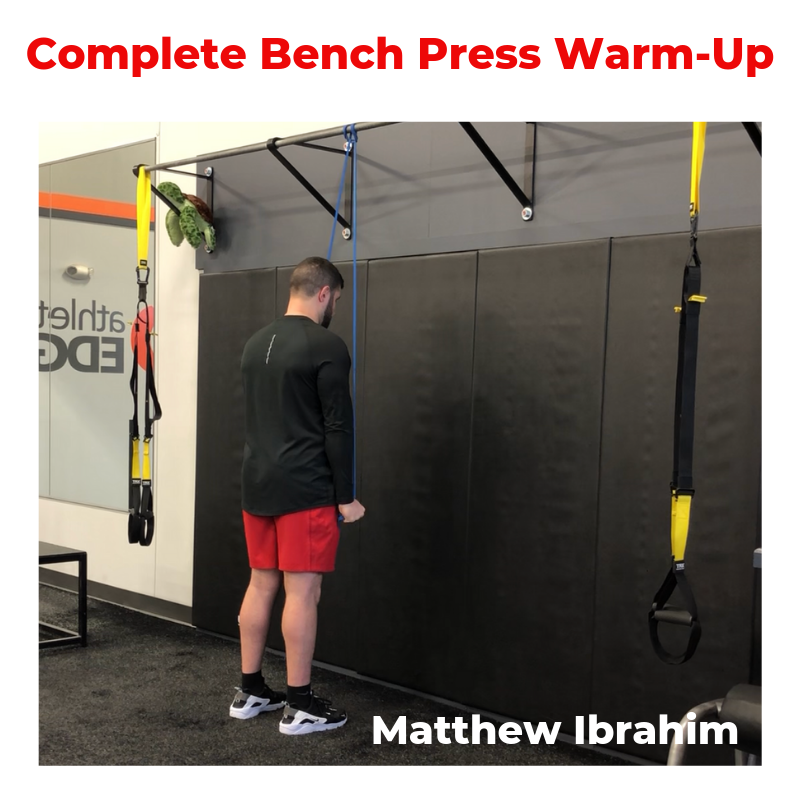
Complete Bench Press Warm-Up

Copyright: luckybusiness / 123RF Stock Photo


I think one main reason most (not all3) people skip their warm-up is because there’s no rhyme or reason to what they do.

They’ll perform some arm circles here, some thingamabobbers there, do the hokey pokey, turn themselves around, and they’re miraculously “warmed up.”

While something is better than nothing, I do feel the more specific your warm-up is to the task at and you’re about to do – bench press, squat, deadlift, overhead press a centaur – the more “palatable” (not to mention efficient) it’s going to be.

To that end, my good friend and fellow Boston-based coach, Matthew Ibrahim, submitted the first of what will be a 4-part series on how to dial in your warm-up based on the main lift of the day.

Today, it’s the bench press.

Enjoy!

Your bench press warm-up should be short and to the point.

It’s important to spend time priming these main areas: chest, shoulders, rotator cuff, triceps, lats and hips. Remember: the bench press is much MORE than just an upper body exercise.

Most people miss the boat when it comes to working on hip extension (think: bridges, hip thrusts, etc.) in their warm-up prior to bench pressing. Why is this important? Well, it’s important to use stability and tension in both the legs and trunk to your advantage.

You achieve this through maintaining hip extension in your bench press.

Furthermore, if you can successfully anchor the feet down into the ground, use some strong leg drive and stabilize the trunk, you will be able to bench press from a much STRONGER base of support.

Big leg drive = big bench press.

The next step is to target all of those key upper body muscles for a healthy and strong bench press: rotator cuff, triceps and lats. We want to make sure the rotator cuff muscles are ready for overall shoulder health and that the triceps are prepared to assist in arm drive. The lats are crucial in terms of being able to successfully anchor and pin down the upper back area, which forms another STRONG base to drive up from.

Lastly, let’s discuss thoracic extension.

Pure biomechanics folks – please take a DEEP breath and realize that there are ZERO shearing forces going down vertically through the spine here, since the body is positioned in a horizontal set-up on the bench.

Let that sink in.

via GIPHY

Is the upper back “arch” slightly uncomfortable for some folks?

Maybe.

However, I would suggest that only a visibly excessive arch is typically one that might not feel great. A strategic arch that helps the lifter gain leverage is always welcomed for a bigger and healthier bench press, especially from a pure physics and biomechanics standpoint.

All eight exercises below provide your body with the opportunity to warm-up everything labeled above in an efficient and cohesive format.

1) Bridge w/ Alternating Reach – x5 each side


2) Yoga Push-Up – x5


3) Mini-Band Standing Short Pull-Apart – x8


4) Mini-Band Standing Chest Press – x8


5) Band Standing Pull-Apart – x10


6) Band Standing Tricep Extension – x10

7) Band Standing Straight Arm Pull-Down – x10


8) Hands Supported Tall Kneel Rockback – x8


About the Author

Matthew Ibrahim is the Co-Owner & Lead Performance Coach of TD Athletes Edge in Salem, MA. He has been an invited guest speaker nationally in over 10 U.S. states, which was highlighted by his presentations at Google Headquarters and Stanford University, in addition to guest speaking internationally in Milan, Italy. His work has been featured in Men’s Fitness, STACK Media and The PTDC. Currently, he is completing his masters degree at Rocky Mountain University with a direct track into their PhD program. He is a big fan of interacting on Instagram and regularly posts about training, performance and recovery.


Follow along HERE: