If you live in Australia and you like to geek out about deadlifts, scapular upward rotation, and/or Jason Bourne then you might consider coming to hang out with us.
Melbourne, Australia: July 19-21st and Melbourne Strength & Conditioning. (<— Includes bonus “Psych Skills for Fitness Pros” pre-workshop with Dr. Lisa Lewis).
This will be the only time Dr. Lisa Lewis and I will be presenting this workshop together in 2019. In previous years we’ve presented it in Boston, London, Toronto, Bonn (Germany), and Austin, TX.
This 1-day workshop is targeted towards fitness professionals and digs a little deeper into what really “bogs” them down and stresses them out….
…their clients!
Click THIS link for more details on topics covered as well as date/cost/location.
3. All About Fitness Podcast w/ Pete McCall
This was my second appearance on Pete’s show and this time around we discussed things like:
Training over 40 (you’re not over the hill, you can still get after it).
Biohacking and what the hell does that even mean?
Learning to lean in with societal norms and how both Pete and I have had to learn the hard way that our words matter.
Of all the things people get all up in arms about when it comes to nutrition, it’s always perplexed me that DIET FUCKING SODA ranks as one of the highest.
TODAY (6/28) is your LAST day to take advantage of the Early Bird rate for Mike Boyle’s latest resource. It’s a fair assertion that no one has been more influential to more coaches in this industry than Mike.
You’re doing yourself a disservice if you’re a coach/personal trainer and NOT taking the time to learn from him.
It’s also the LAST DAY to purchase Meghan’s latest resource at a hefty discount as well. I’m a big fan of the Landmine and Meghan does a superb job outlining a bevy of exercises you can perform in addition to a well-written program to follow.
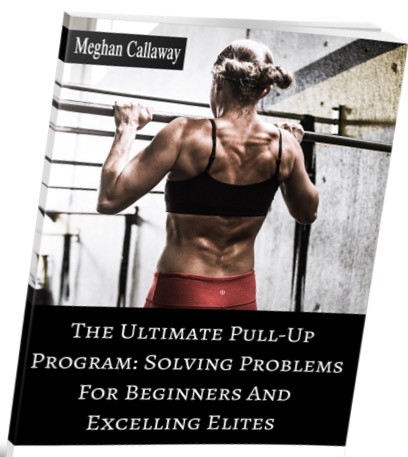
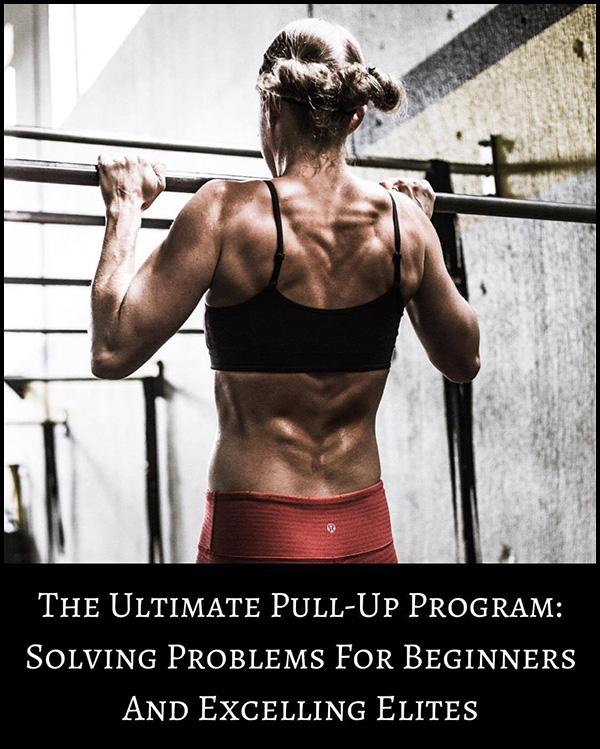
I thoroughly enjoyed her previous resource, The Ultimate Pull-Up Program, and used it with several of my own clients with great success.
I envy Meghan’s brain. She thinks of stuff I never would have thought of, and this latest program of her’s exploits that to the umpteenth degree.
Check it out HERE (it’s on SALE this week only), and also check out her article below showcasing some not-so-common core exercises utilizing the Landmine.
3 Landmine Core Exercises You May Have Not Seen Before
Landmine training and the countless exercises you can perform are badass, empowering, and extremely beneficial, and can be a key component in your training program. I am a huge fan of landmine training, and have been for a long time.
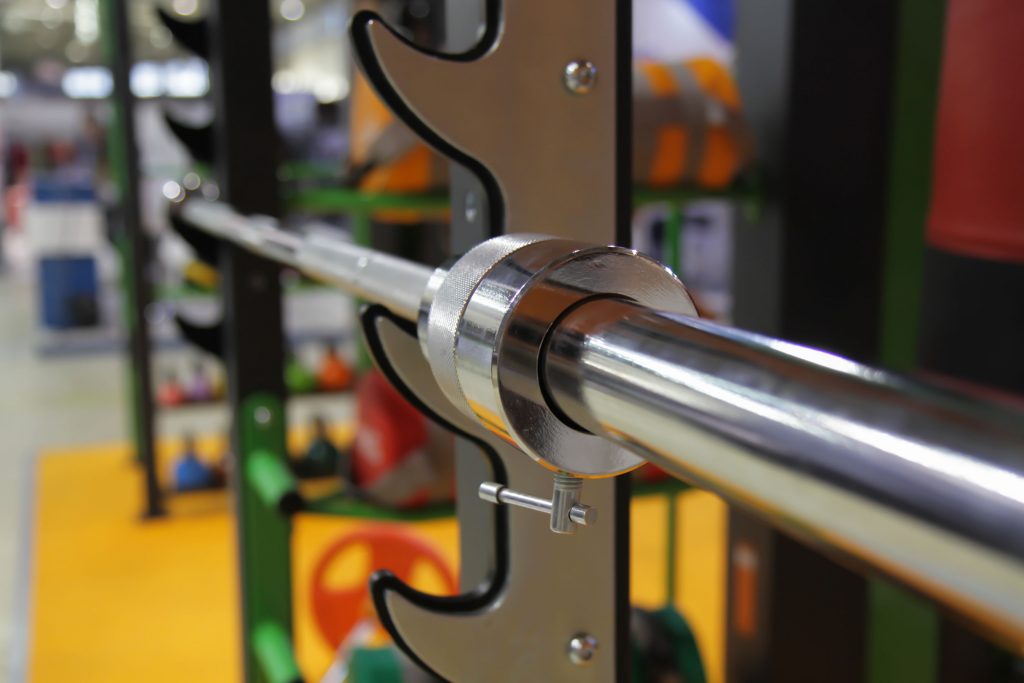
To be clear, while using a landmine attachment is great, it is not mandatory.
You can rest the barbell against a secure surface like a wall, box/other object, or on a no-slip surface. So really, all that is required to perform landmine exercises is a barbell and perhaps several weight plates.
Here are three landmine core exercises you might not have seen or tried before.
While these landmine exercises absolutely involve the upper body as well, and provide many benefits, these unique variations especially work wonders for improving lumbo-pelvic stability.
#1) Landmine Tall Kneeling Presses + Band Resistance
This exercise strengthens the chest, shoulders, and triceps, improves shoulder and scapular controlled mobility, and lumbo-pelvic stability. This exercise (and many other landmine pressing exercises) can be a great option if you struggle to perform overhead pressing movements.
Coaching Tips:
Set up a barbell so it is lengthwise, and is in line with the center of your body. You may anchor the barbell against a stable surface like a wall, weight plate, or box, or on a no slip surface. You may also use a Landmine attachment.
Loop a resistance band over the top of the barbell, and rest the band underneath your knees. There should be tension in the band for 100% of the movement.
Grab onto the top portion of the barbell. As for your grip, I like to interlock my fingers and place my hands on top of each other as this makes the body more symmetrical.
Get into a tall kneeling stance. Place your knees so they are approximately hip to shoulder width apart, and have a very slight forward lean in your torso. Your head, torso and hips should be in a stacked position.
Before each rep, take a deep breath in (360 degrees of air around your spine), brace your core (360 degree brace around your spine), tuck your ribs towards your hips (close the space in your midsection), and squeeze your glutes.
Now extend your elbows and press the barbell to a range where you are able to maintain proper form, then “row” the barbell back in to your body. In fact, your ability to control the movement of your shoulder blades plays a big role in your ability to perform this exercise. Do not keep your shoulder blades pinned. They are meant to move.
As you bring the barbell back in towards your body, stop just before your elbows touch your sides.
For the duration of the exercise, your head, torso and hips should remain in a stacked position. Do not allow your lower back to hyperextend, ribcage to flare, or your torso, spine or hips to rotate.
Exhale after you have initiated the press and as the barbell is traveling away from your body. Inhale and reset as the barbell is returning towards your body, or pause in the starting position, and inhale/reset there before the next rep. Do what works and feels best for you.
Regression:
Make this exercise easier by using less weight, or by using a band with less resistance.
Progression:
Make this exercise more challenging by using more weight, by using a band with more resistance, or by performing negative reps and taking 3-5 seconds to “row” the barbell back down to the starting position.
#2) Contralateral Bird Dog Hold + Landmine Single Arm Rows
This deceptively challenging exercise strengthens the mid and upper back, improves grip strength, shoulder and scapular controlled mobility (and stability on the planted side), and lumbo-pelvic stability.
This exercise requires a significant amount of lumbo-pelvic stability and is arguably more of a core exercise than an upper body movement. Be conservative when you are selecting your weight, and opt for 25-50% of what you’d use to perform single arm rows.
If you are performing this exercise correctly, aside from the arm that is performing the rowing movement, the rest of your body should remain in a fixed position.
Coaching Tips:
Set up a barbell so it is lengthwise, and is behind your body. You may anchor the barbell against a stable surface like a wall, weight plate, or box, or on a no slip surface. You may also use a Landmine attachment.
Kneel with one leg on a bench, and place the hand that is on the opposite side of your body on the bench. Make sure that your shoulder is directly above your hand. Spread your fingers, and pretend you are suctioning your hand to the bench.
Extend your leg that is on the opposite side of your body as the rowing arm, and so it is parallel to the ground.
Set your body so it is in a straight line from your head to heel, and maintain this position for the duration of the exercise. Make sure that your torso and hips are square to the bench. Also, do not allow your leg to drop, or conversely, lift too high (avoid hyperextending your lower back).
Before each rep, take a deep breath in (360 degrees of air around your spine), brace your core (360 degree brace around your spine), tuck your ribs towards your hips (close the space in your midsection), and squeeze your glutes.
Initiate the movement by using the muscles in your mid and upper back and draw your shoulder blade in towards the spine (retract). Do not initiate the movement with your arm, and do not use excessive momentum.
In the top position, do not allow your elbow to flare out; instead keep it close to your side.
Lower the barbell with control, and make sure you keep your shoulder from collapsing. During the lowering/eccentric component, do not keep your shoulder blade pinned. It is meant to move, and should perform the reverse movement (protraction) as it did during the rowing/concentric component.
Pay attention to your non-working/supporting side. Push away from the bench and protract your shoulder blade (move it away from the spine). Do not mindlessly hang out.
For the duration of the exercise, your head, torso and hips should remain in a stacked position. Do not allow your lower back to hyperextend or round, ribcage to flare, or your torso, spine or hips to rotate. Your torso and hips should remain square to the bench.
Exhale right after you have initiated the rowing movement; you may inhale/”reset” as the barbell is returning to the starting position, or hold your breath for the duration of the rep, exhaling, inhaling, and re-setting between reps. Do what works and feels best for you.
Regression:
Make this exercise easier by using less weight.
Progression:
Make this exercise more challenging by using more weight.
#3) Dead Bug + Single Arm Landmine Presses (Weight Behind)
I am a huge fan of dead bugs, and use many different variations in my training, and in the programs of the many people I work with. This innovative dead bug variation improves lumbo-pelvic stability, and shoulder and scapular controlled mobility.
Coaching Tips:
Set up a barbell so it is lengthwise and behind you, and is in line with your armpit. You may anchor the barbell against a stable surface like a wall, weight plate, or box, or on a no slip surface. You may also use a Landmine attachment.
Lie on the floor. Lift up your legs so they are in a vertical position, straighten your knees, and point your feet towards you (dorsiflex). If you cannot fully extend your knees, or if you are unable to maintain proper form, you can keep your knees bent at a 90 degree angle. Make sure they remain at a 90 degree angle for the duration of the exercise.
Keep your chin tucked and neck in a neutral position, extend your arms so they are above your chest, and tuck your ribs towards your hips (close the space in your midsection).
Pay attention that you are not “cheating” by using the muscles in your neck and/or upper body in place of the muscles of the anterior core.
Before each rep, take a deep breath in (360 degrees of air around your spine). Now steadily exhale through your mouth, contract your anterior core muscles as hard as you can, slowly “row” the barbell down towards the floor and simultaneously lower the leg that is on the same side of the body, and to a range where you are able to maintain proper form. Once you reach your full range, simultaneously press the barbell up and return your leg to the starting position.
You have the option of keeping the non-working arm in a vertical line over the armpit, or you can reach back with your arm as you lower the weight and your leg.
As for the shoulder blade of the side that is performing the pressing movement, do not keep it pinned. It is supposed to move.
For the duration of the exercise, do not allow your lower back to hyperextend, ribcage to flare, torso, spine or hips to rotate, or your hips to leave the floor.
Keep your legs relaxed so they do not dominate.
Make sure that your knee remains in a fixed position and that the movement occurs from your hip.
Regression:
Make this exercise easier by using less weight, by decreasing the range of the leg lowering, or by bending your knees to 90 degrees.
Progression:
Make this exercise more challenging by using more weight, by increasing the range of the leg lowering, or by adding in band or kettlebell resistance (on the hand that is not holding the barbell).
Ultimate Landmine Program
The Landmine has grown to be one of the most versatile pieces of equipment on the gym floor. You can train the entire body and if you’re someone pressed for time, prefers a more minimalist approach to training, or just likes trying new stuff, this resource will be a great fit.
It’s on sale TODAY (6/25) for $67 through Friday, June 29th so you only have a few days to take advantage. If you’re already familiar with Meghan’s work you know this is a no-brainer. If you’re unfamiliar with her work, trust me: you won’t be disappointed.
If I want to learn more about astrophysics I listen to Neil deGrasse Tyson.
If I want to learn more about how to to be jacked while rocking a bowl cut I listen to He-Man.
Moreover, if I want to learn about or become a legit badass at pull-ups, my go to expert is Meghan Callaway. She’s a straight-up gangster when it comes to pull-ups and pull-up programming.
With the release of The Complete Trainers’ Toolbox this week, of which Meghan and myself are a part of (along with seven other health/fitness professionals), we felt it important to give people a bit of insight as to what kind of information they can learn from this resource.
Meghan goes into the weeds on anything and everything regarding programming for the pull-up and today she offers a little insight on some commonly made mistakes people make.
Countless people of all genders have the goal of being able to perform one or many pull-ups. Yet it is no secret that most people struggle to execute a single strict pull-up, and this includes many elite athletes.
Sam Bennett, the number one draft pick in the 2014 NHL draft, made the news when he failed to perform a single pull-up at the NHL draft combine.
So the inability to excel at pull-ups definitely isn’t limited to the general population, or purely beginners. Most people fail to conquer pull-ups, not because they are physically incapable, but because they are making some key mistakes.
I have great news for you.
This can be rectified.
Case in point, shortly after Sam Bennett bombed his pull-ups in the NHL draft combine, with some proper training, he banged out 11 reps.
Note From TG:I actually wrote an article a few years ago on the reaction to people giving Sam Bennett grief about not being able to perform a pull-up initially. You can read it HERE.
In this article I am going to discuss FIVE key mistakes that are preventing an abundance of people from excelling at pull-ups.
Mistake #1: Relying on the Arms to Perform the Movement
When pull-ups are being executed correctly, the shoulder blades, not the arms, should be initiating the movement. Instead of using the muscles in the mid and upper back to perform the bulk of the movement, a myriad of people rely on their arms.
To be clear, while the muscles in the arms will play a role, they should only be assisting the muscles in the back, not performing the majority of the work.
During the initial phase of the movement, and as your body is traveling towards the bar, you want to draw each shoulder blade in towards your spine and down towards your opposite hip (depression, retraction, downward rotation), not pull with your arms.
During the eccentric phase of the movement, rather than keeping your shoulder blades pinned, a mistake that plagues many individuals and can again cause them to rely on their arms to execute the movement, your shoulder blades should perform the reverse movements and should move away from your spine and away from your opposite hip (elevation, protraction, upward rotation).
As you can see, the ability to control the movement of your shoulder blades is a key component of being able to perform pull-ups.
Solution
The scapula pull-up is a really useful pull-up specific regression as it teaches you how to initiate the movement with your shoulder blades instead of pulling with your arms. This exercise is also specific to pull-ups as it requires you use the same body positioning, and it helps improve grip strength.
A few key points:
Initiate the movement by drawing your shoulder blades in towards your spine and down towards your opposite hip (retraction, depression, downward rotation).
In the top position, pause for a brief count.
Perform the eccentric component with complete control.
During the lowering/eccentric portion of the movement, your shoulder blades should perform the reverse movements as they did during the concentric component, and should move away from your spine and away from your opposite hip (protraction, elevation, upward rotation).
For the duration of the movement, your elbows should remain in a fixed position and should not bend at all. All of the movement should occur via the shoulder blades.
Mistake #2: Inability to Maintain the Proper Body Positioning
This might surprise you, but if you hope to perform pull-ups as efficiently as possible, your entire body must function as a synchronized unit.
Pull-ups are not just an upper body movement.
If you are not able to maintain the proper body positioning, and in order to do so your lumbo-pelvic region and lower body must remain in a relatively fixed position for the duration of the movement, you will struggle.
Your path to the bar will likely be longer and less efficient as you will be more prone to swinging, and you will likely be forced to move unnecessary deadweight to and from the bar. This is not conducive to optimal pull-up performance. Keeping your head, torso, and hips in a stacked position, something I often liken to a canister, is extremely important. Proper breathing, bracing, rib positioning, and glute engagement are crucial. In terms of your lower body, you want to fully extend your knees and contract your quadriceps, cross one foot over the other, and dorsiflex your feet.
Solution
The dead bug, and its many variations, is one of my go-to exercises for improving lumbo-pelvic stability.
This exercise, which can accommodate people of most fitness levels and abilities, trains your anterior core muscles to generate the requisite levels of tension needed to perform pull-ups efficiently. This versatile exercise also trains your muscles to resist the extension of the spine, and this is an area where many people labour. When heaps of people perform pull-ups, it is extremely common to see their ribcage flaring and lower back hyperextending. Dead bugs will help resolve these issues.
A few key points:
For the duration of the exercise, keep your head, torso and hips in a stacked position. Keep your ribcage down, and do not allow your lower back to hyperextend. In other words, maintain the canister position.
As you initiate each rep and lower the opposite arm and leg towards the floor, steadily exhale, and brace your anterior core muscles as hard as you can.
Start out with your knees bent at a 90 degree angle and maintain this position for the duration of the movement. Only extend your knees (and perform more advanced variations) once you’ve mastered the movement with your knees bent, not before.
Here is an innovative and extremely effective dead bug variation you can try.
Mistake #3: Lack of Specificity
Are you spending endless hours training yet are still unable to execute one or more pull-ups?
The exercises you are performing might not be specific enough to pull-ups.
With your pull-up training, you need to perform exercises that develop pull-up specific mechanics and pull-up specific body positioning. Pull-up regressions develop these key components, and serve as great stepping stones towards being able to bang out one or many unassisted pull-ups. In terms of body positioning, exercises like hollow body holds, dead bugs, and hanging leg raises help you learn how to develop and also maintain proper pull-up specific body positioning.
Some common culprit exercises that many people believe will help their pull-up performance, yet have a relatively low carryover as they are not specific enough to pull-ups, include lat pull-downs, biceps curls, and machine assisted pull-ups.
These are just a few of many exercises I could list. The fact I named machine assisted pull-ups as one of these exercises might surprise you, so I will discuss this in my next point.
Mistake #4: Relying on Machine Assisted Pull-ups and Band Assisted Pull-ups
In most cases, I am not a fan of machine assisted pull-ups.
At least, I strongly believe there are many better options.
While machine assisted pull-ups do allow you to focus on scapular movement, so this is one benefit of the exercise, due to the fact you are kneeling on a pad, your body is in a completely different position to when you are performing regular pull-ups, and you don’t need to generate and maintain full body tension.
In essence, the need for pull-up specific body positioning and lumbo-pelvic stability are almost entirely removed from the overall equation. When it comes to training for actual pull-ups, there are plenty of other pull-up regressions and accessory exercises that are much more specific to actual pull-ups, and will have a vastly greater carryover to your pull-up performance.
Now when it comes to band assisted pull-ups, if they are implemented and execute correctly, and at an appropriate time in your training program, they can have a positive impact.
However, an abundance of people make the mistake of training for pull-ups by relying purely on band assistance, and they omit performing all of the other extremely important pull-up specific regressions.
With band-assisted pull-ups, the band provides the help in the bottom position of the movement, and this is when most people do not need the most assistance. Another key issue with band assisted pull-ups, the band makes it easy to disregard proper body positioning, and generating the requisite levels of tension around the spine, hips, and lower body.
Due to all of the above, when many people eliminate the band and attempt to perform regular pull-ups, they flounder.
Before you introduce band assisted pull-ups to your training program, you should have already developed the proper pull-up specific technique, the ability to control the movement of your shoulder blades and shoulders, and the ability to generate the requisite levels of tension and pull-up specific body positioning.
In short, when you are utilizing band assistance, it is imperative that your form is identical to when you are performing regular unassisted pull-ups. Also, you want to use as little assistance as needed, but as much as necessary so you can perform 100% of your reps with impeccable form.
Mistake #5: Insufficient Grip Strength
While this kind of goes without saying, if you cannot support your bodyweight from a hanging position, your ability to perform pull-ups will suffer. An insufficient grip plagues many people of all fitness levels and abilities, not just beginners.
Adding some grip specific exercises to your training program will positively impact your overall ability to perform pull-ups.
A few of my favorite exercises for improving grip strength include loaded carries, and bottoms-up kettlebell presses.
Loaded Carries
Key Points:(describing loaded carries with dumbbells by sides)
For the duration of the exercise, maintain the canister position. Your head, torso and hips should remain in a stacked position. Do not allow your lower back to hyperextend or ribcage to flare.
Keep your arms rigid (all the way down to your hands), and pretend you are trying to crush something in your armpits.
For the duration of the exercise, maintain your 360 degree brace, and maintain regular breathing (360 degrees of air around your spine).
Bottoms-Up Kettlebell Presses
Key Points:
For the duration of the exercise, maintain the canister position. Your head, torso and hips should remain in a stacked position. Do not allow your lower back to hyperextend or ribcage to flare.
Keep the muscles in your forearm engaged, and wrist in a vertical position.
Do not keep your shoulder blades pinned. They are supposed to move. This applies to both the concentric and eccentric components of the movement.
Before you initiate each press, take a deep breath in, (360 degrees of air around your spine), brace your core (360 degree brace around your spine), tuck your ribs towards your hips, and squeeze your glutes. This will help stabilize your hips and spine.
Nine fitness professionals tackle a bevy of topics ranging from assessment and program design to differentiating flexion & extension based back pain and battling negative self talk.
We all have encountered the same problems you have as a fitness professional; so here’s how we handled them.
I’m very fortunate that number of quality coaches reach out and offer to submit articles for this site. Granted they have to promise to name their first born after me AND send me a bowl of yellow only M&Ms, but that’s a small price to pay for internet fame.
Thanks to everyone who pinch-wrote for me in 2018 and gave my fingers a brief reprieve.
I’m looking forward to seeing what’s sent my way in 2019….
I listened to Noah speak in person on this topic and was transfixed by what he had to say. A conversation we had after the fact led to him writing this post for my site.
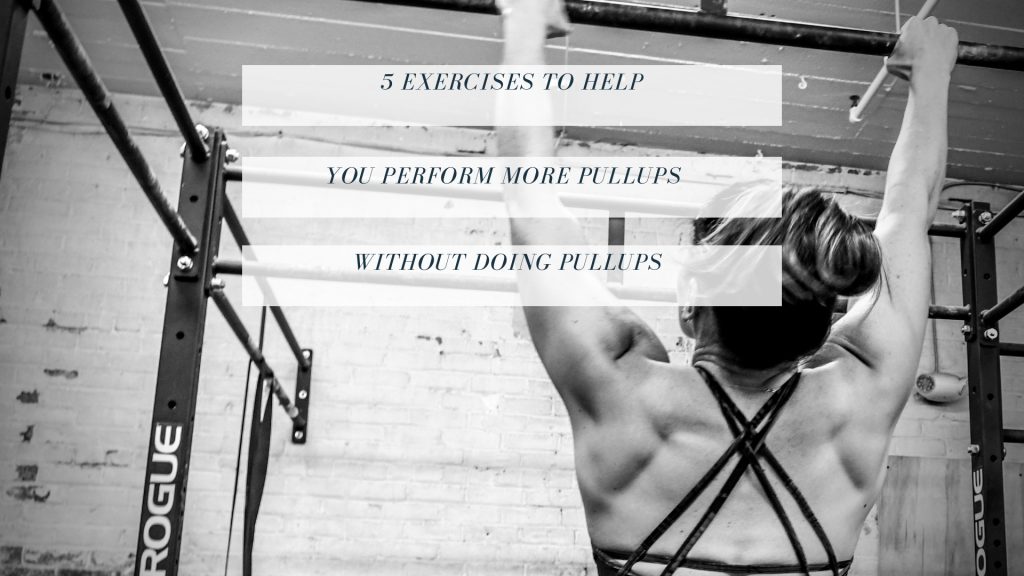
It’s common practice to think the only way to get better at performing pull-ups (especially more of them) is to only do pull-ups.
While specificity is important, there’s more than one way to Rome.
It’s today’s guest post by The Ultimate Pull-Up Program creator, Meghan Callaway, dives deep into some alternative exercises to add to your exercise repertoire.
If you’re looking for a baller (<— who isn’t?) program to help turn you into a pull-up Terminator than Meghan’s your coach. It’s incredibly thorough and has already helped thousands of people. It’s on SALE at a heavily discounted price this week and now includes 40+ pages of new content and material.
When it comes to excelling at pull-ups, many people have fallen prey to the mindset that in order for them to get better at pull-ups, they have to do pull-ups, and literally nothing but pull-ups. A lot of coaches even dole out this unhelpful advice.
Unfortunately, this shortsightedness has led countless people down a path of endless frustration, and has definitely driven a lot of extremely capable individuals to abort their pull-up mission before they have achieved their goal.
Make no mistake, pull-ups are an extremely technically demanding full body exercise that involve so much more than simply propelling the body to and from the bar.
In order to excel at pull-ups, you need to possess a strong upper body, be able to control the movement of your shoulders and shoulder blades, and generate enough tension and stability in your lumbo-pelvic region and lower body so you can maintain a body positioning that will help you travel to and from the bar as easily as possible.
Even if you aren’t able to perform a regular pull-up just yet, do not despair. There are many other components of the pull-up that can be trained.
The exercises I am about to describe are absolutely beneficial for individuals who can already perform one or many pull-ups. Without further ado, here are 5 of my favorite exercises for improving pull-up performance that don’t involve performing actual pull-ups.
While some of these exercises are unique, they are very effective.
#1) Inverted TRX/Ring Rows With Feet Elevated On Wall
Key Points:
Set your grip so your palms are facing away from you (pronated), and are slightly greater than shoulder width apart. You can also use a neutral grip where your palms are facing each other.
Place your feet up a wall. Make sure the TRX/rings is stable so it does not slide on you.
Set your body so your head, torso and hips are in a stacked position. Aim to keep your knees as straight as possible, but due to your feet being up the wall, you might need to keep your knees slightly bent.
Before you go, take a deep breath in (360 degrees of air around your spine), brace your core (360 degree brace around your spine), tuck your ribs towards your hips (close the space in your midsection), and squeeze your glutes. This will help stabilize your pelvis and spine.
Initiate the movement by using the muscles in your mid and upper back and bring each shoulder blade in towards the spine (retract). Do not initiate the movement with your arms. The main focus here is scapular retraction.
In the top position, do not allow your elbows to flare. If you are using a neutral grip, your elbows will be closer to your sides.
Lower yourself to the bottom position with control. During the lowering/eccentric component, do not keep your shoulder blades pinned. They are meant to move, and should perform the reverse movement (protraction) as they did during the ascending/concentric component.
In the bottom position, your elbows should be close to fully extended, but not hyperextended.
For the duration of the exercise, your head, torso and hips should remain in a stacked position. Do not allow your lower back to hyperextend, or ribcage to flare.
Exhale just after you have initiated the scapular movement and as your body is traveling towards the top position; you may inhale and “reset” as you are descending, or do a full reset when you are in the bottom position. Figure out what works and feels best for you.
Do not use momentum.
This innovative horizontal rowing exercise is more challenging than your traditional TRX/ring rows, including when the feet are elevated on a bench, box, or other surface. Like all inverted rowing variations, this exercise develops upper body strength, shoulder and scapular controlled mobility, and lumbo-pelvic stability.
Regression:
Make this exercise easier by walking your feet lower down the wall so your body is in more of a horizontal position, or by performing regular feet elevated rows, or rows where your feet are on the floor.
Progression:
Make this exercise more challenging by walking your feet higher up the wall so your body is in more of a decline position, or by performing negative reps and taking 3-5 seconds to lower yourself.
#2) Dead Bug With Single Arm Landmine Presses
This exercise combines dead bugs with single arm landmine presses, and develops lumbo-pelvic stability, shoulder and scapular controlled mobility, and to some extent, upper body strength. With the landmine presses, I was using a negative speed so I could maintain the slow tempo of the leg lowering.
Key Points:
Set up a barbell so it’s lengthwise and is in line with your armpit.
Lie on the floor. Lift up your legs so they are in a vertical position, straighten your knees, and point your feet towards you (dorsiflex). If you cannot fully extend your knees, or if you are unable to maintain proper form, you can keep your knees bent at a 90 degree angle. Make sure they remain at a 90 degree angle for the duration of the exercise.
Keep your chin tucked and neck in a neutral position, extend your arms so they are above your chest, and tuck your ribs towards your hips (close the space in your midsection).
Before you go, take a deep breath in (360 degrees of air around your spine). Now contract your anterior core muscles as hard as you can, and slowly ‘’row’’ the barbell down towards your body and simultaneously lower the leg that is on the same side of the body as the barbell, and to a range where you are able to maintain proper form. Return to the starting position.
As you are lowering your leg towards the floor and are lowering the barbell, I like to steadily exhale through the mouth. That being said, figure out what breathing works and feels best for you.
For the duration of the exercise, make sure the barbell stays in line with your armpit.
For the duration of the exercise, your head, torso and hips should remain in a stacked position. Do not allow your lower back to hyperextend, ribcage to flare, or pelvis to move.
Keep your legs relaxed so they do not dominate.
Make sure that your knee remains in a fixed position and that the movement occurs from your hip.
Pay attention that you are not “cheating” by using the muscles in your neck and/or upper body in place of the muscles of the anterior core.
You may also perform this movement by lowering the leg that is on the opposite side of your body as the barbell. While I chose to keep my non-working arm in a fixed vertical position, you may also lower your arm towards the floor while you simultaneously lower your leg and the barbell. This will be even more advanced.
Regression:
Make this exercise easier by using less resistance, by decreasing the range of the leg lowering, or by bending your knees.
Progression:
Make this exercise more challenging by using more resistance, by increasing the range of the leg lowering, or by lowering the non-working arm towards the floor versus keeping it in a fixed vertical position.
#3) Dumbbell Overhead Loaded Carries + Band Resisted Scapula Retraction
This unique loaded carry variation develops shoulder and scapular stability (both remain in a fixed position for the duration of the exercise), lumbo-pelvic stability, and to some extent, grip strength. With the addition of the band and the scapular retraction, you should really feel the muscles around your shoulder blades more than during traditional overhead loaded carries.
Key Points:
Place a resistance band around your wrists.
Grab a pair of dumbbells and press them into an overhead position. Once the dumbbells are in an overhead position, lightly press your wrists out against the band and draw your shoulder blades in towards your spine (retract). Maintain this position for the duration of the exercise.
Now perform a loaded carry and walk 25-50 meters.You can either walk in a straight line, or walk halfway and turn around.
For the duration of the exercise, your head, torso and hips should remain in a stacked position, and your hips should remain level. Do not allow your lower back to hyperextend, ribcage to flare, or body to lean to the side.
Make sure that you press evenly through all of your toes on the side that is pushing off, and maintain a tripod base on the side that is planted (weight on the mid to back of the foot and toes in contact with the floor, especially the big and baby toes).
Figure out what breathing works and feels best for you.
Regression:
Make this exercise easier by using lighter weights, or by using a band with less tension.
Progression:
Make this exercise more challenging by using heavier weights, or by using a band with more tension.
#4) Band Resisted Scapula Pull-Ups
Scapula pull-ups are a great pull-up specific regression that develop shoulder and scapular controlled mobility, lumbo-pelvic stability, and grip strength. Adding in the band resistance challenges the muscles that control the movement of the shoulder blades even more.
Key Points:
Place a resistance band around your wrists.
Grab onto the bar and adopt your preferred hand width. While I prefer going just outside of shoulder width apart, figure out what works and feels best for you.
Adopt a slight hollow body position. Your head, torso and hips should be in a stacked position, your knees fully extended, and feet crossed one over the other and dorsiflexed. If you don’t have the space to fully extend your legs, keep your knees bent, and feet behind you.
Now lightly press your wrists out against the band and maintain this tension for the duration of the exercise.
Before each rep, take a deep breath in (360 degrees of air around the spine), brace the core (360 degree brace around the spine), tuck your ribs towards the hips, squeeze your glutes, and contract your quads.
Now initiate the movement by using the muscles in your mid and upper back and draw each shoulder blade in towards the spine and down towards the opposite hip. Do not perform the movement by pulling with your arms. As you do so, your body should elevate a slight amount. Once you reach the top position, pause for a count and return to the starting position.
During the lowering component, do not keep your shoulder blades pinned. They are meant to move, and should perform the reverse movements as they did during the ascending portion of the movement.
In the bottom position, your elbows should be close to fully extended (but not hyperextended).
For the duration of the exercise, your head, torso and hips should remain in a stacked position. Do not allow your lower back to hyperextend, or ribcage to flare. Also, do not allow your elbows to move. This is a telltale sign that you’ve performed the movement by pulling with your arms.
Do not use any momentum.
I prefer to exhale immediately after I have initiated the scapular movement and as my body is elevating, and I will inhale as my body is returning to the starting position. Figure out what breathing works and feels best for you.
For the duration of the exercise, do not allow the band to lose tension.
Regression:
Make this exercise easier by using a band with less tension, or by using no band.
Progression:
Make this exercise more challenging by using a band with more tension, or by performing negative reps and taking 3-5 seconds to perform the lowering component of the movement.
#5) Scapula Push-Ups From A Bear Crawl Position
This extremely challenging exercise develops shoulder and scapular controlled mobility, and lumbo-pelvic stability.
Key Points:
Get into a bear crawl position. Your head, torso and hips should be in a stacked position, your thighs in a vertical position, knees several inches above the floor, and hands directly below your shoulders. Spread your fingers and pretend to suction or screw them to the floor.
Before each rep, take a deep breath in (360 degrees of air around the spine), brace the core (360 degree brace around the spine), tuck your ribs towards the hips, and squeeze your glutes.
Now perform the movement by drawing your shoulder blades in towards your spine (retract). As you do so, your body will lower towards the floor. After you hit a range where you are able to maintain proper form, perform the reverse movement with your shoulder blades and move them away from your spine (protract) and press your body away from the floor.
For the duration of the exercise, your head, torso and hips should remain in a stacked position. Do not allow your lower back to hyperextend, ribcage to flare, torso or hips to rotate, weight to shift from foot to foot, or hips to collapse or pike.
Regression:
Make this exercise easier by performing the exercise in a regular plank position, or by performing the modified variation where the body is in a regular plank position and the hands are elevated on a box, bench, or other surface.
Progression:
Make this exercise more challenging by adding band resistance, by performing negative reps and taking 3-5 seconds to perform the lowering component of the movement, or by performing the single arm variation.
If you want to become an OG of pull-up badassery you’d be hard pressed to find another coach more knowledgable on the topic than Meghan Callaway.
In short: she’s the shit.
Plus, you know, she’s a little bit obsessed with pull-ups. My brain doesn’t operate like hers and another reason why I appreciate her so much is because she’s willing to challenge conventional wisdom and think outside the box.
Her Ultimate Pull-Up Program is excellent and a great fit for anyone – XX chromosome or not – looking to either perform their first pull-up or many.
I’ve used the program with several of my own clients and have seen excellent results. This is an UPDATED version of the program and Meghan’s added 40+ pages of additional content and upgrades.
It’s currently on SALE and you’re silly if you pass on this; especially if you’re a coach interested in getting your clients results.
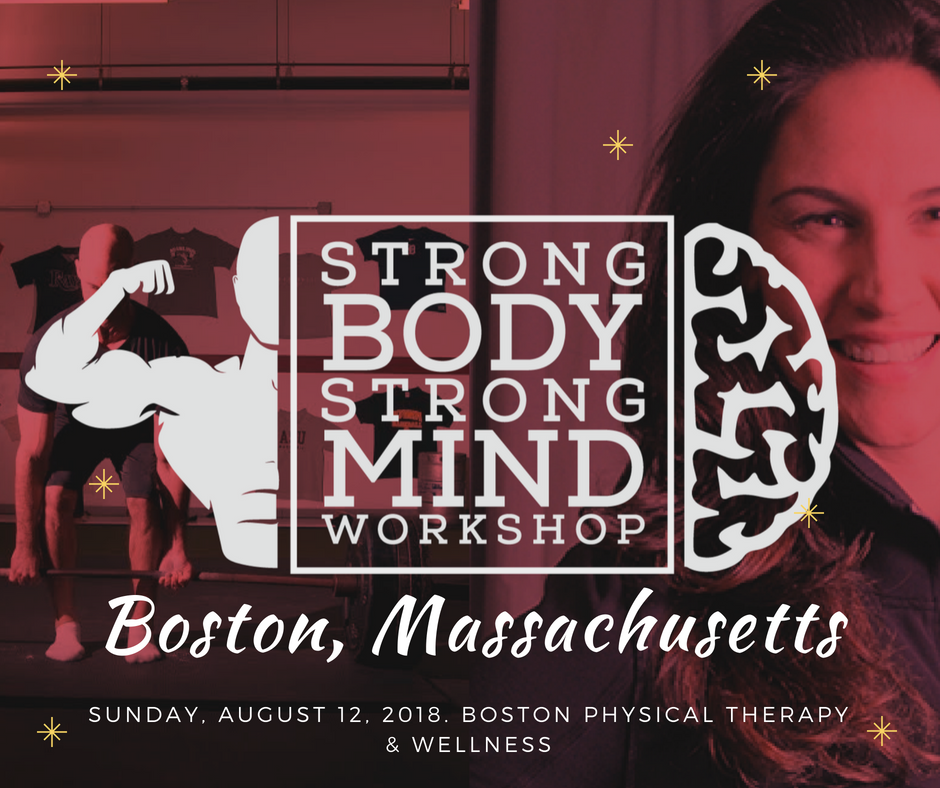
We had such a great response when Lisa and I hosted a SBSM Workshop in Boston last year that we decided to do it again this summer.
I’ll be speaking to assessment, coaching up common strength exercises (squats, deadlifts), and how to better “match” your programs to your client’s abilities and goals.
Lisa will be discussing how to better manage client expectations, motivation, and how to adopt better mindset strategies for success.
The umbrella theme of this workshop is to enhance the SOFTskills of coaching, how to garner a connection, and build rapport with your athletes/clients.
Spots are limited
Early Bird rates apply for both students ($99) and professionals ($129)
CEUs will be available (NSCA)
For more details (including itinerary and registration) go HERE.
Dean Somerset and I are currently in the throes of drumming up new content for our staple workshop series.
We’ve presented this workshop all over the world – London, Vancouver, Oslo, Prague, Boston, LA, Hoth – and even turned it into a popular digital product HERE so everyone can enjoy it.
We’ve already nailed down dates in Slovenia, Houston, and LA this fall (2018) and are also in talks to bring it to Detroit, Philadelphia, Edmonton, Australia, and Singapore in 2019.
If you’re someone who’d like to host this event/participate in a tickle fight please reach out to either Dean or myself.
Worked with a new client today who was equally dumbfounded (and relieved) when I told him he didn’t HAVE to squat with “x” stance with toes pointing “y” way. It looked like shit and it felt like shit. Textbook technique rarely applies to anyone.
Fear not. I’ve still managed to queue up some stellar content for you in my absence.
Today Dr. Sarah Duvall is pinch-writing for me talking about a topic that’s relevant to anyone who likes to lift heavy things: Squats (and how to make them feel better).
Her new resource, which she developed alongside fellow coaching superstars Kellie Hart and Meghan Callaway – Glutes, Core, and Pelvic Floor Workout System – is on sale starting today (6/28) and runs through 7/2.
Are You Engaging the Right Muscles When You Squat?
Several months ago Tony and I met at Caffe Nero to talk shop.
After a combined 30 + years of working with people, we have both come to the conclusion that strength is your friend!
It’s your friend for rehab, for life and for aging.
In other words,
“You need to lift shit to fix shit.”
It can get a little tricky, because I’ve often found for patients with tightness or pain that we have to first make sure the right muscle is doing the work before overloading.
A great example of this is doing squats but primarily loading quads and low back instead of balancing the lift with glutes and abdominals. Or doing deadlifts but primarily feeling them in your back, never your glutes or hamstrings.
So you’re lifting and trying to get stronger, but in reality if you’re experiencing the above you’re overworking a subset of muscles instead of the intended target.
That’s why you should always know what muscles you want to work and where you should feel it.
Educated lifting!
Let’s take a second to break down the ever-elusive squat a little further. There are so many varieties from goblet to back to front squats and everything in between.
You’ll want to pick a variety that feels best for you, but I’d like to share a couple tricks for squatting in a way that targets your glutes and abs. This will be especially helpful if you primarily feel squats in your quads and low back.
Let’s work from the ground up at 4 key areas of the body.
#1. Keep Your Toes Firmly on the Ground
Somewhere along the way the cue to lift the toes got popular.
This is an easy way to shift your weight back to help get the squat more into your hips instead of your knees.
When we make cues too easy they often miss the mark. It’s true that you want to sit back into your hips, but the body follows patterns and when you pick up your toes you set off a flexion chain in your body that can increase hip flexor activation and decrease abdominals.
Give it a try now.
Pick up your toes for a squat and focus on how much you feel your abdominals. Now, give me a nice short foot (big toe down, arch engaged, weight spread evenly between the ball and heel) and see if this grounded foot turns your abs on more.
Those hardwired neuro patterns are hard to break, and having great foot placement sets the tone for the rest of the body.
So how do you sit back instead of coming forward onto your knees? Try practicing your squat by sitting back to a box or chair.
This will help train the pattern without picking up your toes.
#2. Sit Into Your Glutes
You want to feel your glutes lengthening for your squat.
It’s not a deadlift, your knees will bend, but it shouldn’t be all knees.
Two signs you’re not lengthening and sitting into your glutes:
You have to fold in half to sit back. (Now, if you have really long femurs or a narrow stance, you’ll need to lean forward a bit more. But if you widen your stance and you still find yourself bending over at the waist, it might be a good idea to check your rockbacks.)
You start with a neutral spine but then overarch your back to sit into the squat. Overarching the back and lengthening the hamstrings is a great way to look like you’re sitting back into your glutes when in reality you’re just going into a big anterior pelvic tilt. If this is the case, your low back will often feel tight after your squat.
To fix the folding in half, try holding on to something when you squat, like suspension straps. Then you can practice sitting back and down into those glutes.
#3. Neglecting to Keep a Neutral Spine
How we initiate a motion sets the tone for that exercise.
So if you arch your back to start, then your brain gets the signal, “this is a back exercise.” If you lengthen your glutes to start, then your brain gets the signal, “this is a glute exercise.”
Sitting the tone is important!
It’s much easier to do something right from the start than it is to play catch up. Wait, are we talking about life or squats?
See if you can spot the difference between initiating for the glutes lengthening vs the low back overarch?
#4. Head Alignment
Let’s do a test.
Look up at the ceiling and squat.
Did you feel how you wanted to overarch your back?
Now, put your chin to your chest and squat.
See how you wanted to tuck your bottom?
Our body follows our head. You’ll never see a gymnast look the opposite way for a flip.
Playing around with head positioning and where the eyes are looking can dramatically change a squat. If someone is having lots of trouble keeping their abs engaged, I might have them look down just a pinch more. If they are really having trouble sitting into their glutes, I might have them look up a pinch.
The real takeaway from this is to know where you should feel an exercise and make sure that is what’s working. When you’re doing squats, you should feel both your glutes and quads working, as well as your abs and low back. A balanced squat works everything, and working everything means you’ll be able to do more and get stronger without getting hurt because the effort is shared.
Want to learn more about where you should be feeling an exercise and which muscles should be working?
Three expert coaches in the fitness and rehab industry came together to build an incredible 12 week workout program to help you reach your fitness goals.
Everyone – women AND men, powerlifters AND CrossFitters, Batman AND Care Bears – can spend more time developing their glute, core and pelvic floor strength and integrity.
Sarah, Kellie, and Megan are phenomenal coaches and have put in a ton of work to make this a resource that can equally help (and be applied) fitness professionals and general population alike.
Fitness Professionals: to be able to assess and write effective corrective and training programs to address things like pelvic floor dysfunction, rectus diastasis (which effects males too), incontinence, and many other “intricate” issues that aren’t easy to train around (much less talk about).
General Population: to show you the basics needed to feel great and to set yourself up for as much success as possible if or when you choose to attack the iron.
Batman (in case you’re reading this): to fight crime in a more efficient and timely manner.
This program is thorough AF and the beauty is that it requires minimal equipment and can be done at home or in a gym.
I’ve performed a few of the workouts & movements myself and lets just say its highlighted a few glaring weaknesses on my end. What’s more, I’m learning a lot. This WILL make me a better coach.
The price is heavily discounted – $200 OFF – for two days only (6/28 and 6/29).
It increases $100 on June 30th – July 1st.
And then increases to full price on Monday, July 2nd.
You don’t have much time to take advantage, so I encourage you to do NOW.
I’m in Vancouver for the weekend doing a pair of workshops. One at Equinox for a crew of trainers and one in nearby Victoria for a two-day assessment, program design, deadlifting, cat meme extravaganza
It’s lovely here. And the people are lovely too.
I was at Equinox yesterday to get a quick lift in after a long travel day and saw this exchange happen with my own two eyes:
Meathead #1: “Hey dude, I was still using that (bench).”
Meathead #2: “Oh, sorry.”
Meathead #1: “No worries. You can jump in. My name is Mike by the way.”
Meathead #2: “Thanks, I’m Nate. Nice to meet you.”
I was F.L.A.B.B.E.R.G.A.S.T.E.D
That same scenario goes down in Boston? Where another dude jacks another dude’s bench press during prime bro hours?
^^^ It’s so good we didn’t even feel the need to come up with a witty title for it.
After my workshop in Germany I head over to London to take part in a 2-day event (the weekend of July 7th) with my friend and colleague (and handsomest man alive) Luke Worthington.
This one is filling up fast…..go HERE for more info.
We had such a great response when Lisa and I hosted a SBSM Workshop in our hometown last year that we decided to do it again this summer.
I’ll be speaking to assessment, coaching up common strength exercises (squats, deadlifts), and how to better “match” your programs to your client’s abilities and goals.
Lisa will be discussing how to better manage client expectations, motivation, and how to adopt better mindset strategies for success.
The umbrella theme of this workshop is to enhance the SOFTskills of coaching, how to garner a connection, and build rapport with your athletes/clients.
Spots are limited
Early Bird rates apply for both students ($99) and professionals ($129)
CEUs will be available (NSCA)
For more details (including itinerary and registration) go HERE.
Dean Somerset and I are currently in the throes of drumming up new content for our staple workshop series.
We’ve presented this workshop all over the world – London, Vancouver, Oslo, Prague, Boston, LA, Hoth – and even turned it into a popular digital product HERE so everyone can enjoy it.
We’ve already nailed down dates in Slovenia, Houston, and LA this fall (2018) and are also in talks to bring it to Detroit, Philadelphia, Edmonton, Australia, and Singapore in 2019.
If you’re someone who’d like to host this event/participate in a tickle fight please reach out to either Dean or myself.
Georgie is a Vancouver based Registered Dietician and one of my “go to” sources when it comes to anything nutrition.
I really respect her approach and how practical and accessible she makes things. In the world of nutrition this is rare (and a gift on her part).
Social Media Shenanigans
Twitter
Things I’d like to see more of in training programs (for most people): rows, push-ups, single leg work, squats that look like squats, actually writing down what you do. Less of: pretty much anything on a BOSU ball, training to failure incessantly,
I’m excited to be presenting alongside some other prominent coaches at this year’s Mid-Atlantic NSCA Conference in Philadelphia, PA this coming December.
Hope to see you there.
2) Strength House Podcast – The One Where They Dissect My 600 lb Deadlift
I’ve had a lot of people ask me about my 600 lb deadlift that I hit a few weeks ago: How did I prepare? What did my programming look like? Did I destroy the back of my pants? You know, all the important stuff.
My coach, Greg Robins, and his partner in crime, Tony Bonvechio, go into great detail on my technique and programming in their latest episode of The Strength House.
There are few things I’m steadfast on:
1. No one has to back squat.
2. Bacon is delicious.
3. Attack of the Clones is the worst of the Star Wars movies. It just is.
Oh, and there’s one more thing: I think any trainer who is serious about pursuing online training should FIRST spend 2+ years training people in person.
There are so many variables and nuances one learns from coaching people in person that it’s pretty much impossible to appreciate them if you end up bull-charging into online coaching out of the gate.
That being said, in this day and age, online coaching is kinda-sorta a thing. Actually, it’s more than that. For many it’s a viable and extraordinary way to add an additional revenue stream to compliment your income, or in some cases to make into your livelihood.
My good friend, Jon Goodman, author of the world’s only textbook on online training, has a free 4-day course on building a successful online business. I checked it out and it’s awesome, but free registration ends on October 29. Grab it while you can, and you’ll learn…
* Lesson 1: How to properly offer support to online clientele (and why most online trainers do this really, REALLY badly).
* Lesson 2: How online trainers should approach assessments (and the key mindset shift you MUST make).
* Lesson 3: How to sell online training over the phone in 11 steps (without being SLEAZY).
* BONUS: You’ll also get a free copy of Jon’s ebook, “The 16 Lasting Laws of Online Training”
The LAST day to download this FREE 4-day course is October 29th. Don’t miss out.
This is one of the best resources I’ve ever come across on the topic of how to make pull-ups/chin-ups your bitch.
Meghan is a fantastic coach and I know of zero people who are more passionate about the topic than her.
She looooooooves pull-ups. And, honestly, there aren’t many people who can do what she can do. It’s pretty impressive.
If you’re looking to conquer your first pull-up (and then some), look no further. Last day to save $50 off the regular price is today (hint, hint, nudge, nudge).
When you see the name Elon Musk it’s a safe bet adjectives like “smart,” “intelligent,” and “revolutionary” come to mind. Jason Bourne? “Badass,” or maybe “guy I wouldn’t want to pick a fight with.”
Meghan Callaway?
Well, if you ask me, when I see the name Meghan Callaway I think “amazing coach and the World’s #1 ranked pull-up connoisseur.”
And, to speak truthfully, there aren’t many coaches I’d tip the hat to when it comes to pull-up mastery and programming than Meghan. She consistently impresses me with her content and knowledge on the topic, and as it happens she just released her latest resource, The Ultimate Pull-Up Program, today.
If you struggle with the pull-up and/or are looking for a little direction on how to become more proficient with them (not to mention learning a TON of awesome variations) than I can’t recommend this resource enough. It’s on sale this week at $50 off the regular price for this week only.
3 Unique Drills to Help You Conquer Your First Pullup
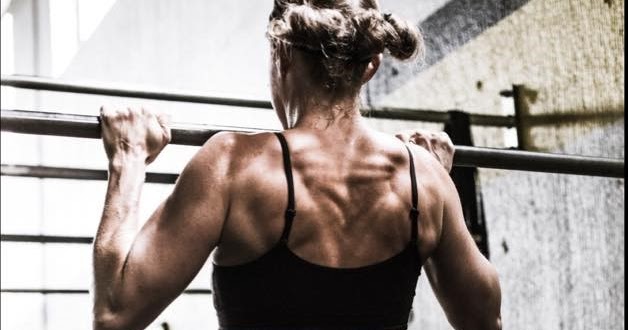
Performing your first pull-up is a unique experience.
In fact, when many people conquer their first pull-up and get their chin over the bar (of course without straining their neck to do so), they often experience far greater feelings of empowerment, accomplishment, and downright badassery than when they hit PR’s on max deadlifts, squats, and other heavy meat and potatoes exercises.
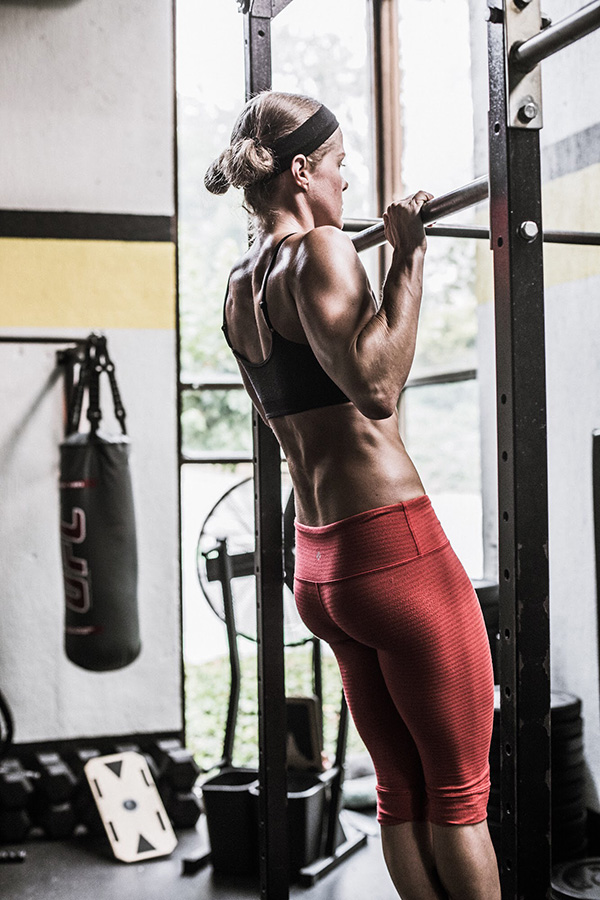
Meghan showing off.
Maybe I’m a little biased, but with pull-ups it is just different.
When it comes to tackling pull-ups, many people quit long before they’ve achieved their first rep. Others hit their first rep but are never able to string together multiple reps and become frustrated.
Let me tell you, it does not have to be this way.
In most cases, people fail to reach their pull-up goals not because they are weak, but because they are not training for the exercise the right way.
Many people possess enough upper body strength that they should be able to do pull-ups, but they often suffer from technical deficiencies. Other people know what to do but they do not possess the requisite levels of lumbo-pelvic stability or the ability to control the movement of their shoulder blades.
So essentially, instead of moving a stable object to and from the bar in a shorter and more efficient straight line, they are forced to move a heavy, floppy and limp body to and from the bar and in a longer and inefficient arc. Kind of like Erick here. Tony likes cats so I know he understands.
In this article I will provide some of my favorite exercises that address various areas that are holding many people back from performing their first pull-up ever, or from performing multiple reps and feeling like a total badass, or perhaps Wonder Woman.
Without further ado, here are some of my go-to exercises for conquering the pull-up.
1) Scapula Pull-Ups
If you cannot hang from the bar or control the movement of your shoulder blades, you will not be able to perform a pull-up.
This exercise will help lead you to your first pull-up as it develops grip strength, scapular and shoulder controlled mobility, and lumbo-pelvic stability.
While this is a pull-up regression, it is a definite stepping stone towards doing your first pull-up. If you are performing this exercise correctly, the muscles in your mid and upper back, not your arms, should be doing the majority of the work.
Key Coaching Cues:
Grab onto the bar so your palms are facing away from you and are slightly greater than shoulder width apart.
Before you perform your first rep, make your body as stable as possible by bracing your core, tucking your ribs towards your hips (closing the space in your midsection), squeezing your glutes, straightening your knees/flexing your quads and hamstrings, and dorsiflexing your feet. This will stabilize your pelvis, spine, and legs, and will prevent your body from swinging.
In terms of the pull-up, without bending your elbows or initiating the movement with your arms, use the muscles in your shoulder blade area and draw your shoulder blades together and down (bring each shoulder blade in towards your spine and down towards your opposite hip), and lift your body a few inches. Pause in the top position, really contract these muscles, and lower yourself to the starting position in a controlled manner. Fully extend, but do not hyperextend your elbows.
On the lowering portion of this movement, your shoulder blades will perform the reverse movements as they did on the way up.
Do not allow your lower back to hyperextend or ribcage to flare. Keep your chin tucked and neck in a neutral position.
As for your breathing, exhale just after you have initiated the scapular movement and have drawn your shoulder blades together and down; inhale and “reset” as you are descending, or do a full reset when you are in the bottom position.
2) Pull-Up Regression: Eccentric Pull-Ups (from a bench)
Many people falsely assume that when they have accomplished the awesome task of “pulling” their body to the bar their job is done, and they allow their body to free-fall to the bottom position with reckless abandon.
This exercise will help you improve your pull-up technique (lowering component), and develops upper body strength, grip strength, scapular and shoulder controlled mobility, and lumbo-pelvic stability.
Owning the ability to lower your body with control and ease will make your transition into the next rep much more seamless, and will thus improve your ability to perform multiple reps.
Key Coaching Cues:
Grab onto the bar so your palms are facing away from you and are slightly greater than shoulder width apart.
Stand on a bench or box so your chin is already at (or close to) the height of the bar. Or if you are already able to, jump from the floor and pull yourself up the rest of the way by using the muscles in your mid and upper back and drawing your shoulder blades together and down (bring each shoulder blade in towards your spine and down towards your opposite hip). Do not initiate the movement with your arms.
When your reach the top position, it is important that you stabilize your body as quickly as possible as this will prevent your body from swinging back and forth and will allow you to focus on the lowering portion of the exercise. You will achieve this full body stability by taking a deep breath in through your nose (360 degrees of air around your spine), bracing your core, tucking your ribs towards your hips, squeezing your glutes, straightening your knees/flexing your quads and hamstrings, and dorsiflexing your feet.
Repeat the breathing, bracing, and rib tuck that I described above; now perform the eccentric movement and slowly lower yourself down to the bottom position in 3-5 seconds. Use the muscles in your mid and upper back, anterior core, glutes, and legs to control the movement. Your shoulder blades should move in a controlled manner. Do not allow your lower back to hyperextend or ribcage to flare. Keep your chin tucked and neck in a neutral position.
Let me reiterate that this exercise is not for the arms. The muscles in your mid and upper back should be performing the vast majority of the work, and the muscles of your anterior core, glutes and legs will help keep your body in a stable position.
3) Dead Bugs With Double Kettlebell Resistance
A huge number of people fail to excel at the pull-up because they treat it like an upper body exercise when in fact it is a full body exercise that demands a lot of lumbo-pelvic stability.
This bang for your buck dead bug variation accomplishes just that, and helps you develop the necessary level of tension that is requisite to optimal pull-up performance. This exercise also develops scapular and shoulder controlled mobility.
Key Coaching Tips:
Lie on the floor. Grab onto two kettlebells or dumbbells, and extend your arms so they are in a vertical position, and so your hands are above your chest.
Lift up your legs so they are in a vertical position, straighten your knees, and point your feet toward you (dorsiflex). Keep your chin tucked and neck in a neutral position.
Before you go, take a deep breath in through your nose (360 degrees of air around your spine), and tuck your ribs towards your hips. Now forcefully exhale through your teeth, contract your anterior core muscles as hard as you can (10), and slowly lower the kettlebells and one leg towards the floor and to a range where you can maintain proper form. Return to the starting position. Reset and repeat with the opposite leg.
Make sure you don’t allow your ribcage to flare or lower back to hyperextend.
Keep your legs relaxed so they do not dominate.
Make sure that your knee remains in a fixed position and that the movement occurs from your hip.
One key I like to look for is that if your shirt is wrinkled it likely means your ribs are in the right position. If your shirt suddenly becomes smooth, you have likely disengaged the muscles in your anterior core and have flared your ribcage. This defeats the purpose of the exercise.
Now that I have given you some extremely useful exercises that will help you accomplish your first pull-up ever, or several consecutive reps, it’s time to let the cat out of the bag and get started on achieving this amazing goal. Apologies for the cat references, but my cat is snoring while I’m trying to write this.
Whether you’re male, female, Klingon, whatever….getter better at pull-ups is never a bad option and will almost always carryover to other endeavors you pursue inside the weight room (and out).
Improved ability to squat and deadlift a metric shit-ton of weight? Check.
Improved body composition? Check.
Harder to kill as a whole, especially during the impending zombie apocalypse? Check.
This is undoubtedly one of the best resources on the topic I have ever come across. If you’re looking to up your pull-up game you’d be hard pressed to find a more thorough resource.