People will perform stupid antics on social media (the latest being the Milk Crate Challenge)
Additionally, if you’re an active person, particularly if you lift weights, unless you’re name is Wolverine, it’s inevitable you’ll (probably) experience pain during exercise.
Maybe your knees will feel a little cranky after a serious squat session or your shoulders will be mad after prioritizing the bench press for several weeks.
What’s more, many people after a hiatus due to injury have to navigate the rehab process, which can be a painful experience and about as fun as sitting on a cactus.
However, if we’re discussing any of the aforementioned scenarios highlighted in the introduction my response is an emphatic “YES!”
Albeit, with some caveats.
If you want to elicit change, you need to move. When we move, we induce something called mechanotransduction, which is just nerd speak for “tissue begins to heal.”
Pain, when DOSED ACCORDINGLY, can be beneficial during exercise. When we push into a little pain there’s generally better short-term results than if not.
Whenever I’m working with a client/athlete experiencing pain during exercise (especially in a rehab setting) I like to use a “pain threshold” scale.
On a scale of 1-10 (1 = no biggie, I got this and a 10 = holy shit, a panther just latched onto my carotid), exercise should hover in the 2-3 realm.
Elaborating further, my friend and colleague, Tim Latham of Back Bay Health in Boston, uses a stoplight analogy when it comes to pain during exercise:
0-3 on the pain scale = green light. GO.
4-5 = yellow light. Proceed with caution and modify ROM, technique, sets/reps, etc
6-10 = red light – stop and revisit at a later time.
Let’s Put This Into Action
Let’s say I have a client who had ACL surgery a few months ago and has been cleared by their doctor and physical therapist to begin more aggressive strength training.
My expectation isn’t that (s)he is going to walk in on Day #1 and feel like a million bucks; there’s going to be some degree of discomfort. However, I am not going to shy away from it and attempt to avoid it at all costs.
Remember: A little pain is okay, if not preferred. It’s imperative to challenge the body. I’d make the argument that a lot of what inhibits or slows down the rehabbing process for many is the threat of UNDERloading.
I.e., doing so little that the body is never forced to adapt to anything.
Tendons, muscles, and bones NEED (appropriate) load in order to heal and come back stronger.
Taking my ACL client through the process I may have them start with a deadlift. So long as their pain stays within the 0-3 range, it’s all systems a go.
If that number jumps to a 4-5 it doesn’t mean we have to omit the exercise altogether. Instead we do the following:
Modify ROM – Elevate the barbell off the ground (less knee flexion)
Modify Tempo – When in doubt, slow down. It’s actually quite profound how effective this simple tweak can be.
Adjust Technique – Play around with foot position or stance to see if something feels more comfortable.
Adjust Volume – Sometimes we’re too overzealous with volume and need to ramp up more slowly.
If the pain threshold at any point falls in the 6-10 range then we know we’ve overstepped our coverage and we need to stop that exercise immediately and regress.
It’s not a perfect system and there’s no doubt an aspect of subjectivity to things, but I hope this helps encourage people to not be deterred if pain is present during exercise.
It can be an important cog in the healing process.
“I haven’t come across anything yet that can’t be cured by getting stronger.”
I heard this quote several years ago. I can’t recall who said it, but whomever it was was assuredly someone who’d make my top 10 list of people I’d want to hang out with.1
It stuck with me, and save for male pattern baldness I agree with it 100%.
3 Reasons Why You’re Not Getting Better at Lifting Heavy Things
Outside of the minor nuisance of being the default person your friends & family rely on when furniture needs to be moved, there’s very little that can go wrong with getting stronger.
Athletes will typically jump higher, run faster, be able to change direction on a dime, and otherwise dominate the competition in their respective sport.
And they’re not the only ones who reap its benefits.
Getting stronger works wonders for regular gym folk (both male and female) as well. While many have a goal to perform better in their recreational basketball, flag football, softball, or Laser Tag league…
…building a solid foundation of strength bodes well for the more aesthetically minded individual too.
BTW: If you’re actually in a Laser Tag league, congratulations. You’re awesome.
For the most part strength = muscle.
Guys who can deadlift 2.5x bodyweight aren’t small.
To steal a train of thought from the great Dan John, women who can perform 5+ chin-ups (I’d even make the case for ONE chin-up) typically don’t need to fret over eating an extra slice of carrot cake.
And to that point, even if someone’s goal is fat loss, the more muscle they have the less “aggressive” they’ll have to be on the dietary side of the equation. This isn’t to imply the process is any easier and that you’re less likely to want to stab someone in the throat whenever you’re hangry. But, for all intents and purposes, those who have more muscle (and therefore probably a solid base of strength) generally don’t need to go into “I hate my life mode” when it comes to dieting.
Stronger people tend to be more resilient and don’t get hurt as much either. The saying “getting strong(er) is corrective“ can’t be stated enough.
Above all, those who are stronger are generally harder to kill once the zombies eventually take over.
So what are some factors that prevent or deter people from getting stronger?
Omitting the obvious culprits like not using progressive overload, listening to one syllable that comes out of Tracy Anderson’s mouth, or, you know, dying, below are a few less common talked about factors.
1. Recovery
I put this first because:
1. It’s that important.
2. Admittedly, it’s the most boring and most likely to be glossed over.
HINT: DON’T SKIP THIS.
“You’re only as strong as how well you allow yourself to recover.”
Physiologically speaking you don’t get stronger (or bigger) during a workout. You break down muscle tissue and accumulate fatigue.
Both are necessary and it’s what causes the body to adapt, grow, and become stronger and stuff.
However, it’s how well you allow yourself to recover in between bouts of training which dictates consistent and long-term progress.
This can mean any number of things.
It’s hydration, it’s ensuring ample total calories in a 24 hour period (peri and post-workout nutrition isn’t nearly as life-and-death as we’ve made it out to be in the past), it’s keeping up with soft tissue quality (foam rolling, occasional massages), and most importantly it’s making sure you go the fuck to bed.
Nothing kills all the hard work you put in the gym then not getting ample sleep at night.
I can’t tell you how many conversations I’ve had with high-school, collegiate, and professional athletes throughout the years where they’re scratching their heads as to why they’re not getting stronger and why they always feel as if a mack truck ran them over:
Are they not doing enough sets/reps?
Maybe it’s because they’re not taking “x” supplement?
Only to find out they’re up until 2-3AM every night playing Halo or flipping left/right on Tinder.
It’s a drastic example, and most reading right now aren’t quite as oblivious.
But this does speak to those of you who stare at a television, computer screen, or iPad for hours leading up to bedtime (or what I like to call nighty nights sleepy time) which then results in less quality rest.
I’m a huge proponent of setting a ritual for bed.
My wife and I bought room darkening curtains to block out as much outside light as possible, and I always sleep with a fan on at night to serve as “white noise.”
In addition I’ll always read in bed.
It’s more or less a signal to my body to “shut up.” And, to be honest, it’s rare that I can get through five pages before I’m nodding off.
So, long story short: GO TO BED.
Also, to the CrossFitters reading: it’s okay to take a day off occasionally. It works wonders for recovery. And no, going into your box on “free days” to perform a front squat Tabata or, I don’t know, ‘Alejandro’2 doesn’t count.
If you want to do something go for a walk.
2. You’re Lifting Heavy Things Too Much
I know many of you reading are thinking I’m off my rocker with this one, but hear me out.
There’s a popular line many strength coaches have used throughout the years:
“Far too many people are concerned with constantly testing their strength (1RM) rather than building it.”
I couldn’t agree more.
For the fun of it, audit yourself.
When was the last time you tested your 1RM in something?
If you’re like most people it was yesterday. And prior to that it was last week. And prior to that it was the week before that.
Don’t get me wrong: Training in the 85-95% 1RM range IS important from a strength development standpoint. Here we see many positive adaptations, like:
1. Maximal number of motor units are recruited.
2. Fastest MU’s are activated (high-threshold motor units).
3. The discharge frequency (rate coding) is increased.
4. Activity – inter and intra muscular coordination – is synchronous.
5. Potential for future hypertrophy gains (especially when you revert back to a “hypertrophy” specific training phase).
6. At least 37 IQ points (<=== it’s science).
Photo Credit: Elitefts.com
However, it’s important to understand that most of the popular strength-based programs out there – 5/3/1, Cube Method, Juggernaut, etc – the bulk of the volume hovers in the 60-80% (1RM) range.
That’s in stark contrast to what many people perceive as the right approach when strength is the goal.
To reiterate: It’s still very important to train heavier than that – and the above programs do include work in the 90% + range – but it doesn’t have to be as frequent as one might think.
Training heavy all the time is going to wear you down. Not only will your joints take a beating, but it’s neurally taxing as well.
In the end, for most people most of the timer, it’s SUB-MAXIMAL work that needs to be prioritized more frequently.
Not only does it ensure immaculate technique – which allows people to “express” their strength more effectively – but it helps in building a much larger base so you can attain a higher peak (in strength).
3. Making Stuff Harder For the Sake of Making It Harder
Some people just want to be crushed in the gym, and that’s cool. I appreciate and respect whenever someone likes to work hard and get after it.
Here is where I have a TON of respect for CrossFit.
But making an exercise “hard” for the sake of making it hard (or to make yourself feel tired) won’t necessarily equate to better results.
When I write a program I need to be able to back up my rationale for every exercise I have someone perform. It’s easy to make someone tired.
Push a Prowler for 30 minutes.
It’s a whole nother ball game to enhance someone’s performance; to get them better. I need to be very particular with what movements and exercises I include given someone’s goals, injury history, and current ability level.
You know the saying “you’re only as strong as your weakest link?” Well, if getting stronger is someone’s goal that’s pretty important.
When most people think “get strong” they look to the big 3: squat, bench press, and deadlift.
In terms of any accessory movements I include in a program, 95% of them are going to be aimed at addressing some form of weakness or technique flaw in the aforementioned big 3 lifts.
The other 5% is dedicated to bicep curls.
Because, biceps.
A Few Examples
Someone is falling forward or having a hard time out of the hole in the squat – An easy fix would be to have them spend more time within the ROM they’re having the most trouble in. Pause squats for 2-5s (with 50-70% of 1RM) is an excellent choice. Another option here is to perform more Safety Squat Bar squats
Someone is weak off their chest in the bench press – Again, more time spent where they’re weakest would be ideal. Pause bench press or maybe high(er) rep sets with the Spoto Press.
Someone is weak at lockout with the deadlift – Dedicated speed/technique work with a lower % load would work, as would adding chains to the lift, or maybe some RDLs.
The theme to hammer home is to use your accessory work to address something useful, rather than making exercise hard for the sake of making it hard.
This article is not going to dive into the x’s and o’s of program design.
For that you can peruse my Resources Page and find plenty of options to fit your fancy. Instead, today, I wanted to peel the onion (so-to-speak) and discuss the layers of program design that rarely get discussed.
How to Make Your Programs Programs Your Clients Will Actually Follow
This post is going to hit on the more nitty-gritty and nuanced stuff.
The stuff that is the culmination of equal parts time under the bar, experience, and not sucking. The stuff that, while I feel are very important and what helps to separate the great coaches from the sub-par ones, might come across as trivial or inane to some, and certainly won’t win me any additional Instagram followers.
Wow, I’m really selling it here aren’t I?
Lets dive in.
1. It’s Not About You
No, really, the programs you write have nothing to do with you.
Sure, you’re writing them and it’s your expertise and coaching people are paying for. However, the program should be about your client/athlete and reflect their needs and goals.
I think it was Alwyn Cosgrove who first coined the phrase
“You should write programs, not workouts.”
On top of that, and equally Earth shattering, is a common quote I often defer to from the great Dan John:
“The goal is to keep the goal, the goal.”
Any Joe Schmo with biceps and a weekend personal training certification can write a hard workout that will make someone hate life.3
Writing a program – one that’s individualized – serves a purpose, addresses one’s unique injury history, caters to his or her’s goals, takes into account ability level, and on top of all that, is flexible, takes some thought, professionalism, skill, and attention to detail.
Listen, I am all for getting people strong (which, granted, is subjective) and I can appreciate anyone who places a premium on having their clients squat, deadlift, bench press, and deadlift.
Deadlift is listed twice….because, deadlift.
However, if your client is a newbie or is just looking to lose 10-20 lbs, or could care less about benching 2x bodyweight, the program should reflect that.
There’s two extremes that generally end up happening:
1. Trainer/coach doesn’t give a shit. Client shows up, trainer is ill-prepared, and what follows is some smorgasbord of laziness, complacency, and fitness industry cliches. I.e., client is paying for a babysitter who just so happens to show them how perform a shitty looking lunge.
2. Trainer/coach does give a shit. Albeit is too much of a narcissist to recognize that because he or she prefers to train like a powerlifter, Olympic lifter, bodybuilder, or CrossFitter, doesn’t mean ALL of their clients need to train the same way too.
Before you know it you have:
14 year old’s who have never mastered a squat performing Tri-Phasic 1-Legged Pistol Squats vs. Bands while dragging a sled
35 year old house wives working on their quad sweep
55 year old CEOs with poor shoulder flexion performing kipping pull-ups for AMRAP.
Makes sense.
At the end of the day people are more apt to follow and stay invested in a program – long-term – if they know it’s catered to them and has their best interests in mind.
Like it or not, this is a SERVICE industry….and while I recognize there’s a bit of head-butting between what people need to be doing and what they want to do, it’s your job as the fitness professional to find and include that balance.
2. Avoid Fitting Square Pegs Into Round Holes
Yo, check it.
1️⃣ No one HAS to back squat. And if they do, no one HAS to use the low-bar position.
2️⃣ No one HAS to pull from the floor. And if they do, no one HAS to use a straight bar.
3️⃣ No one HAS to bench press. And if they do, no one HAS to use a crazy excessive arch. Or use a barbell for that matter.
4️⃣ No one HAS to listen to A Tribe Called Quest radio on Pandora. But you kinda do. Trust me.
Another “trap” I see a lot of fitness professionals fall into is marrying themselves to any ONE way to do or perform anything.
For lack of a better way of putting it: I fucking hate this way of thinking.
I lose a lot of respect for coaches who are that narrow-minded and unwilling to understand that there are other coaches out there getting just as good (sometimes better) results not doing what they’re doing.
Piggy backing on what was mentioned above (on individualization) – everything kinda falls under this umbrella…from exercise selection, order, and even the variation.
I mean, if someone has the shoulder mobility of a pregnant rhinoceros it makes zero sense to force them into back squatting, let alone using a low-bar position.
Photo Credit: Menno Henselmans
It won’t do them any favors and will likely frustrate them as it will feel weird (possibly even hurt) and will do little in building a greater degree of competency.
If I felt squatting was still important for them and it fit into their goals, a better way to build success (and competency) would be to use a SSB (Safety Squat Bar) variation or maybe even Anterior Loaded KB Front Squats:
Here I can still groove a sexy squat pattern but take the upper body restrictions out of the equation.
Likewise, with deadlifts, no one outside of a powerlifter or weightlifter must pull from the floor. It’s a rare instance – kinda like a Centaur or a vegan dish that doesn’t taste like wallpaper – when someone walks into my gym on day one and can demonstrate the mobility (and stability) requirements to do so safely.
Honestly, my first order of business with many people is to help them find their hip-hinge before I worry about lifting anything heavy off the floor.
To that end, if someone lacks the ankle dorsiflexion, hip flexion, or t-spine extension to get into proper position, maybe a trap bar would be a better option?
I find it’s a more “user-friendly” way of introducing the deadlift.
What’s more, in terms of stress and sheer loading on the spine, the trap bar will be a better option for most people anyways. With a straight bar the center of rotation is further away from the bar, whereas with a trap bar it’s right smack dab INSIDE.
https://www.youtube.com/watch?v=p-sA3PG1kGY
Want to make your programs programs your clients will actually follow?
One of the best strategies is to include exercises and movements that best fit their ability level, shows them success, and helps to build competency.
Everyone is different. Respect that.
3. Other Stuff I Was Going to Elaborate On But This Post is Already Long Enough
As in, write down and keep track of what your clients are doing per session (and encourage them to take ownership and do it themselves).
A funny thing happens when people start to keep track of what they do session to session. This little thing called progressive overload manifests and people start seeing results.
It motivates them.
Soon they’re lifting weights (for reps) they couldn’t sniff three months prior.
And it’s a beautiful thing.
2. Experiment with Semi-Private Training
My good friend and former business partner, Pete Dupuis, wrote a fantastic article on this topic that you can read HERE.
It’s not for everyone, but I find the semi-private training model works like a charm to help motivate people. There’s a lot to be said about being surrounded by like-minded individuals and training amongst a group of people who will push you, encourage you, and call you out when you skip sessions.
3. Know When To Back Off
This coincides with what I mentioned above when I said a program should be flexible.
You may have programmed for a client to work up to a few heavy sets of triples on their deadlift on a particular day, but they show up and it’s readily apparent they had a horrible night’s sleep, or maybe they’re just mentally exhausted from resisting the urge all day to Sparta kick their boss in the throat.
Regardless, whatever was planned is…just…not…going…to…happen.
You better have a plan B in your back pocket.
4. Don’t Forget To Put In Stuff They WANT To Do
It bears repeating, this is important: I’m all for playing the “there’s a reason why you’re paying me, I’m the expert” card.
But it’s only going to work in your favor to toss your clients a bone and not take yourself so seriously sometimes.
My female clients love it when I put in some extra glute specific work at the end of their training sessions. My male clients are 100% down for a quick 5-minute “Sun’s Out, Guns Out” arm finisher.
Pants optional.
5. Sprinkle in Some Markers
As in, don’t be afraid to write in prescribed loads you want your clients to hit.
I find many people are notorious for underestimating their ability (or maybe hesitant to push the envelop) and need a little nudge from their meanie head strength coach.
Here’s an example of what I mean, a snidbit of a program I wrote for one of my female clients last month:
Week 1: Trap Bar Deadlift
3 sets of 5 reps @ 155 lbs
Week 2: Modified Sumo Stance Deadlift
Warm-up
Hit 200×1
Then 3 sets of 4 reps @ 180 lbs.
Week 3: Modified Sumo Stance Deadlift
Warm-up
Hit 205×1
Then 3 sets of 2 reps @ 190 lbs
Week 4: Modified Sumo Stance Deadlift
Warm-up
Hit 215-220×1
Fist pump x infinity
Then 3 sets of 5 reps @ 160 lbs
One of her goals, before the end of the year, was to hit a 200 lb (straight bar) deadlift. She crushedthat goal, a few months early mind you, because I didn’t baby her and gave her some markers to hit.
Uttering the phrase “looks like someone has a case of the Mondays.”
Cocaine
Partaking in social media drama, buffoonery, and general hijinks.
For me there’s a cost/benefit to all of the above. Take my cat, Dagny, for example. I love her to pieces. But I still get the feeling, whenever she looks at me for more than three seconds, she’d murder me in a nanosecond with a machete if only she had opposable thumbs.
I have my reasons for the other stuff too.
With regards to the latter, however, I was recently lured in like a moth to a flame when I saw a Tweet from a well regarded and highly respected fitness professional commenting on “lifting heavy” and playing sports…
…and how people should avoid the former if participating in the latter.
I have to say, before I dive into my own thoughts on Dan’s thoughts, reading the subsequent comments was quite entertaining.
They ranged from people agreeing to the statement4 to what can only be described as a few peacocks spreading their feathers.
I.e., Triggered!
A few coaches read the comment and reacted as if someone informed them creatine was the same as steroids or, I don’t know, one of their athletes didn’t squat to depth.
I could just smell the inflated lat syndrome emanating from my screen.
Admittedly, I too rolled my eyes a bit.
That said, I felt the initial statement was a bit too ambiguous. To me, it was more about garnering eyeballs & drawing attention to his funnel link than providing anything of real substance.5
What sports are we referring to? MMA? Lacrosse? Backyard wiffleball?
What level of sports are we referring to?
What’s the ability level & experience level of the athletes in question as it relates to the weight-room?
What’s considered “heavy.”
Is there no such thing as in-season and off-season training modifications in this mysterious world where athletes shouldn’t lift heavy things?
To Dan’s credit, he did elaborate further:
“The reason is because both are taxing to the nervous system. Mind you when I talk “sport” I mean one played at a high intensity (ie. basketball, soccer, surfing). Trying to play your best while chasing PR’s will likely cause injury.”
I didn’t quite understand where he was going with his sport examples. I’d make the argument that any athlete of any sport – particularly if it’s being performed at a high level – needs to be prepared for that sport. I don’t care if we’re talking about soccer or bowling.
Okay, maybe bowling is a stretch…;o)
Much of that preparedness comes from a well-rounded, properly progressed IN-SEASON and OFF-SEASON strength & conditioning program.
Off-Season Training = Initially focuses on recovery to combat a long competitive season as well as to address any deficits/weaknesses that accumulated along the way. That then transitions to a more traditional strength & conditioning program catered to helping the athlete improve strength, speed, movement capacity, ROM, ability to run through a brick wall, etc.
In-Season Training = Reducing training frequency/volume – depending on playing time (starter vs. 10th-11th man off the bench in basketball), position (everyday player vs. pitcher in baseball), game schedule (football vs. softball) – albeit under the guise that the objective is to LIMIT as much drop off as possible of the gains made in strength, speed, etc during the off-season.
Not to mention, in-season strength training is a splendid way to help reduce the incidence of injury as a season progresses and fatigue and wear-n-tear on the body accumulates.
KEY POINT: Reduction in frequency (volume), not intensity.
It’s my experience – and that of many other coaches – that intensity (as a percentage of one’s 1-rep max) is far less taxing on the CNS than volume (sets x reps x frequency). In fact, it behooves most athletes to keep intensity somewhat high during SOME of their in-season training.
As Vladimir Zatsiorsky states in his seminal book, Science and Practice of Strength Training:
“Training with weights ~90% of one’s 1-rep max (I.e., heavy, but no anywhere near PR heavy):
Recruits the maximum number of motor units.
Ensures the fastest MU’s are activated.
Discharge frequency (rate coding) is increased.
Activity is synchronous.
Improves coordination between synergistic muscles.
Increases potential for future hypertrophy gains.”
Moreover, Zatsiorsky notes that from a velocity standpoint, it’s been shown that power output increases as the weight lifted decreases from 100% of 1RM to 90% of 1RM. In fact, for the back squat and deadlift, power output for a load at 90% 1RM may be twice as high as the 1RM load due to the large decrease in the time required to complete the exercise with the lighter load.
In other words: Lifting light(er) loads faster = best of both worlds?
Additionally, strength “lingers.”
You don’t have to do a lot of it in order to maintain it.
In his book, Block Periodization, Dr. Issurin notes that maximal strength has a “residual duration” of 30 +/- 5 days.
In non-Klingon all this means is that, in order to maintain strength, you only really need to remind the body every 2-3 weeks (or so) of what it takes to keep it. This is splendid news for in-season athletes.
This means that 2-3 heavy(ish) sets of 2-5 reps (in the 85-95% range) every few weeks is enough to maintain most of their strength levels.
Australian strength coach, Nathan Kiely, sums things up nicely:
“Maintaining neuromuscular strength in-season is critical. And a load that wouldn’t have developed it in the first place, won’t do enough to retain it either.”
To that end, NO COMPETENT COACH is chasing PR’s in-season. I just wish Dan would have said THAT initially instead of the blanket statement of “if you play sports you shouldn’t lift heavy.”
Because, I agree – it makes zero sense to max out or chase PR’s during a competitive season.
As one commenter commented:
“Chasing PRs and 1 RM in season are pointless. But if you program correctly and tailor workouts to your athletes sport intensity, schedule and allow recovery time. PRs are just going to happen organically.”
The statement reminded me of something I heard renowned strength & conditioning coach, Buddy Morris, say during a presentation years ago:
“Tony, can we be BFFs? Whenever an athlete of mine hits a PR – especially in-season – I shut em down for the day.”
Word.
In Short: When dosed intelligently you can do both.
I’ve always been painfully slow off the floor when I deadlift.
Like, you could be watching the movie Titanic and I’d juuuuust be getting the barbell off the floor by the time you got to the part where Rose lets go of Jack.
If this sounds like you, you may need some more squats in your life.
A few years ago I made a concerted effort to prioritize my front squats (and upping my squatting volume in general) and was finally able to conquer a 600 lb pull.
The additional squatting undoubtedly helped improve my quad strength and ability to push away from the floor when I initiated my pull.
Heed my warning, though. If your deadlift volume is up it’ll behoove you to opt for more front squats or high-bar back squats since both will allow you to maintain a more upright torso (less shearing on spine). If your deadlift volume is on the low end, feel free to implement more low-bar back squatting.
👇👇👇 Check out a sample training split below (after the video) 👇👇👇
Here’s a quick example of how I’d structure the deadlift to squat ratio based off deadlift frequency:
Deadlift 1x Per Week (2 Lower Body Sessions)
Day 1:
A. Back Squat: 5×2 @ 60%, 60s rest
B. Deadlift: 2×2 @ 85%
C1. Deadlift – For Gainz: 4×4 @ 70-75%
C2. Deadbug Variation 4×5/side
C3. Stab Someone in the Face 4×3
Granted I’m biased, but I truly feel making a concerted effort to get strong(er) in the gym is the way to go for most people.
Strength is the base for pretty much everything; it’s the “thing” that most all other attributes we strive to improve upon is tethered to
Speed, power, endurance, Laser Tag world dominance, literally, pretty much everything performance based has its “roots” in improved strength. What’s more, there’s also a significant interplay between strength and improved body composition (strong people typically have more muscle), not to mention a high correlation of less risk of getting injured.6
I’m not saying strength is the end-all-be-all-answer-to-everything-and-you’re-totally-going-to-be-the-hero-of-your-recreational-slowpitch-softball-team-and-have-the-stamina-of-37-Spartan-Warriors-in-bed…
But How Can You Tell If You’re Getting Strong(er)?
There’s a lot of nuance as to HOW to get stronger (HINT: lift heavy things consistently) in addition to HOW to measure it.
However, for the sake of brevity I made this handy Cliff Notes graphic to hammer home the key components at play:
The left-side of the graphic is fairly self-explanatory, but in case some people reading are looking at this as if it were written in Elvish let me elaborate.
If you make a consciouses effort to perform either more reps, sets (or both) at a given load…you’re winning.
Example
Front Squat (225 lb)
Week 1: 3 sets of 5 reps = 15 total reps at a total tonnage (volume) of 3,375 lb lifted.
You know you’re getting stronger if you stay at the same weight and you perform either an additional set or more repetition(s).
This is also called PROGRESSIVE OVERLOAD.
So, Week #2 could go as follows:
3 sets of 6 reps = 18 reps completed at a total tonnage (volume) of 4,050 lb lifted.
4 sets of 5 reps = 20 reps completed at a total tonnage (volume) of 4,500 lb lifted.
Likewise, if you add more weight to the bar and lift that once, twice, eleven times, well, the secret’s out…you’re stronger.
Hell, I may as well just hand you the Sword of Grayskull and give you a killer bowl cut at this point.
To simplify things further: You’re going to get stronger if you DO MORE WORK over the course of several weeks, months, years.
To Note: Beginners will have a much easier time with this than advanced lifters. Most beginners can just gaze at a dumbbell and they’re going to get stronger.7 The first year or two of training can easily be boiled down to what’s described above; linear periodization at its core.
The more time under the bar someone has, however, and the stronger they are, the more “fluctuations” in training parameters have to be taken into consideration.
There’s going to be more peaks and valleys in training stress/load throughout the year in order to improve strength, as well as more meticulous attention to things like bar speed, ability to recover, and what accessory work needs to be done to address weak points in technique.
Lets just say more things need to be taken into consideration to take someone from a 400 lbs. deadlift to 500 compared to someone going from 200 to 300 lbs.
The cool thing, though…once you ARE strong (whatever that means to you), while the work to get there is no walk in the park, it doesn’t require nearly as much effort to maintain it. Maximal strength, for example, has a “residual” duration of 30 (+/- 5) days.
Meaning, so long as you remind the body (to be more specific, the central nervous system) that it can do something, you don’t have to do a lot of that something to maintain it.
To summarize the left side of my handy graphic above:
“What gets measured gets managed.”
That being said, where many people seem to miss the mark is that, where strength is the main goal, it isn’t just about always doing more reps, sets, and/or adding more weight to the barbell.
1. Do More Work in Less Time
This is density training 101.
Not only is this indicative of improved strength, but work capacity as well.
2. Get Submax Rep PRs
Dan John is known for a bevy of remarkable quotes.
“The goal, is to keep the goal the goal,” is a popular one.
One of my favorite of his, though, is this:
“Easy training is good training.”
There’s a time a place for training to suck and to make you come close to shitting your spleen.
Here’s a hint: That time is not every…single…workout.
It’s music to my ears when I client says “your pecs are looking awfully pecy today, Tony.” But it’s a goddamn symphonic masterpiece when a clients says “I could have done more” at the end of a session.
This doesn’t imply that they didn’t work hard or that the training session wasn’t challenging (trust me, it was). Rather, what it implies is that they got their work in and will likely show up for their next session feeling refreshed and ready to go.
It’s hard to make strides in strength when you constantly feel like you got run over by a Mack truck.
In short: Make your 3-rep Max your 5-rep Max. Chances are your 1-rep max will improve too. You don’t always have to pursue ABSOLUTE strength in order to get stronger.
3. “Feel” of a Set
I find a lot of people are too quick to add weight to the bar at the expense of their technique.
Sure, you may complete all desired repetitions of a given exercise, but if my eyes start bleeding watching it or I could watch an entire episode of The Mandalorian before you complete five repetitions…
With Avengers: End Game right around the corner it’s inevitable we’re going to be inundated with articles, interviews, and videos on how to get a Thor or Black Widow bod.
Follow “x” routine, and you too can look like a superhero.
To be fair: I have nothing against said routines. Pretty much anything will get someone lean(er) if they stay consistent and not eat like an asshole.
That said, I think one of the biggest mistakes people make when their goal is getting lean, is not placing a premium on strength.
What inevitably ends up happening is someone will crank up their training volume (lots of high-rep sets compounded with endless amounts of cardio) in addition to hopping onto the Keto train.
And while I’m not here to say that that approach is fruitless (<— ha, pun intended9, dumb, or won’t work – it probably will, for a stretch – I’m also a realist, and have seen with my own eyes the same thing happen time and time and time again.
Which is…(?)
A week, or two, or three (hell, maybe several) go by and you feel great. Your body fat is melting off, you can see some abs, and you can sense the inevitable influx of Tinder matches.
And then, you know, you don’t feel so hot.
You’re lethargic, you’re cold, you’re achy, and your motivation to train wanes.
The high volume of training tethered with a low-calorie/low carb diet begins to take its toll. You’re starting to think that the reason Wolverine is so angry all the time isn’t because he discovered some nefarious government conspiracy to turn him into a mutant and control his life.
No, rather, the reason he’s so angry all the time is – despite being ripped and the envy of fanboys everywhere – he’s sick and tired of all the EMOM sets of burpees and he just WANTS…SOME…FUCKING…CARBS.
Again, to reiterate, this is NOT to insinuate that all the popular programs people follow to lose fat and get lean are a waste of time.
However, what I am suggesting is a slight re-frame or paradigm shift.
What Makes Muscle, Keeps Muscle
Even if fat loss and getting lean is someone’s goal, if they hire me as their coach I’m still going to have them strength train.
Maybe it’s the dumb meathead strength coach in me talking, but I strongly feel the bulk of anyone’s fat loss is going to stem from making dietary/nutritional adjustments.
Namely: Figuring out what strategy or approach will elicit a caloric deficit.
This, of course, can be highly individual. Some people do well with Keto (although, I’d argue most people who think they’re doing Keto are really just following a low-carb diet), some do well with Paleo, some do well with Intermittent Fasting, some do well, with, I don’t know, pick something.
The point is, the main determining factor of whether or not a diet will actually “stick” is whether or not someone will follow through and stay consistent with it.
Not to mention it should fit their lifestyle and goal(s).
But I don’t want to go down that rabbit hole of clusterfuckery. Too many mental gymnastics for me to deal with at this stage in the day.
I do, however, want to pontificate and persuade you on the merits of STRENGTH TRAINING with regards to getting lean.
While dieting the idea of strength training isn’t so much to build strength as it is to MAINTAIN as much muscle as possible while in a caloric deficit. It’s important to give the body the stimulus it needs to hold onto as much of it as possible during this time.
What makes muscle, keeps muscle.
And what accomplishes that is low(er)-rep, strength training.
Again (again), I’m not saying incorporating things like density sets, finishers, circuits, HIIT style training, or anything in between doesn’t have its place or serve a purpose; they all, indeed, can help expedite the process.
[But this is also why I feel one’s nutrition is going to be the main determinant when it comes to fat loss].
All I’m saying is, from my vantage point, people tend to place too much emphasis on all of the above protocols and unwittingly end up losingmuscle rather than keeping it.
Many people (not all) end up becoming a smaller, weaker version of their original selves.
I do not want this to happen, and I feel there’s a simple way to prevent it.
It doesn’t have to be a complicated “thing” either. The obvious question, then, is how would I go about writing a program for someone in this situation?
Easy.
Have him or her hit a challenging set of 3-5 reps (maybe the occasional heavy single for more advanced lifters) a few times per week using the obvious exercises – think: deadlift, squat, bench press – and carry on with your traditional fat-loss programming self.
Example Muscle Maintaining Program (Not Fat Loss Program)
Day 1
A. Work up to a challenging set of FIVE on a Squat Variation (Front, Back, Zercher, Anderson, Safety Bar Squat)
B1. Same Squat Variation (same load you hit for 5 reps): 3×3
B2. DB Bench Press: 3×8
C1. DB Romanian Deadlift
C2. Push-Ups
C3. Gripless FacePulls
8-10 reps each, 10 Minute Density Circuit
D1. 1-Legged Hip Thrust
D2. DB Curls
10-15 reps each. 8 Minute Density Circuit
Day 2
A. Work up to a challenging set of FIVE on a Bench Variation (Regular, Close Grip, Decline, Incline, Larsen)
B1. Same Bench Variation (same load you hit for 5 reps): 3×3
B2. 1-Arm DB Row: 3×10/arm
C1. 2-Arm Landmine Press OR DB Push Press
C2. Bodyweight Step-Ups
10-15 reps each, 8 Minute Density Set
See?
Nothing crazy.
This doesn’t need to be more complicated than it has to be. We’re not doing long-division here.
Keep….it….simple.
Work your ass off. But keep it simple.
All these workouts can be completed in less than 60 minutes (including a warm-up).
It’s likely this approach is in stark contrast to what many are used to seeing when it comes to a fat-loss program; no tantric length, more is better, workout palooza.
Assuming one’s diet is in check, this approach is all that’s needed to help keep muscle…which should be the goal in the long-run anyway.
If you’re a personal trainer or strength coach you likely work with clients and athletes who 1) have glutes10and 2) are looking to up their glute game.
Today’s guest post by strength coach, Menachem Brodie, goes a bit further down the rabbit hole than just giving you a bunch of glute-centric exercises to consider. There are a plethora of factors to consider when trying to ascertain what exercise will be the best fit for any one individual’s derriere.
What is it about glutes that has made them the “back to the future” of strength and performance training?
Was it Bret Contreras creating the Barbell Hip Thrust and spreading the Gospel of Glutes?
Was it the invention of Yoga Pants?
Or maybe it was Mike Jureller going on his “International Tour of CrossFit gyms” that made them popular… The world may never know.
What is undisputed, is that glutes (and mid & lower traps) are signs that someone is an athlete, or at least training like an athlete.
Today we’ll grab our Glute Dolorean’s and head back to the past, to help us understand why glutes are so important, why squats are not enough, and what you need to consider when programming glutes for your athletes and clients.
The glutes, all three of them: Glute medius, Glute minimus, and Glute maximus, need to be developed in proper proportion to allow the hip joint to sit more properly. As the glutes lose strength they tend, like every muscle, to lose their optimal resting length.
This in turn affects performance, and in the case of the hip joint, can lead to the head of the femur sitting at a poor angle in the acetabulum, which as I found out, over time can lend to bone growth in paces we don’t want it, leading to impingement, or other mechanical issues.
One such issue that can arise, is what has been called “gluteal amnesia,” which simply put is the glutes losing the ability to execute hip extension, leaving the hamstrings to do all the work and can cause the head of the femur to clunk around in the acetabulum like a drunkard in a demolition derby.
Putting Down a Great Base
In order for us to have the best chance of fully expressing our athleticism, we have to have a solid base.
Now while (especially) the average client, cyclists, and triathletes tend to think of “core” as being the base, this is not the full truth.
The base involves the Axial Skeleton (Spine & rib cage) + the Pelvis. This is of critical importance, as failure to stabilize these two together can sap power and strength. There are of course sports that are exceptions to this, such as rowing, but it’s this author’s opinion that this is why we tend to see disc injuries in that population.
Butt, developing your glutes REQUIRES that you have a stable and strong midsection: the rectus abdominus, internal and external obliques, the pelvic floor, and quadratus lumborum all work together to stabilize the pelvis from the top & middle. I won’t go into these items in this post, but you can read more and learn a few exercises to help address your midsection in this great post from Sarah Duvall, DPT.
It’s often necessary to break down movement(s) into their respective parts to make certain we’re getting motion from the right areas and that we’re using/engaging the areas we want to use/engage to perform exercises well, which is what we’ll dial in on next.
Cycling and Sitting: The Bane of Gluteal Existence
When glutes are strong and full and the diaphragm, ribs, and pelvic floor all move properly for breathing, EVERYTHING works better: Squats are more full range, your back feels like a titanium beam, and jumping and sprinting tend to be out of this world (for a 6th grader).
Butt (<– haha, I see what you’re doing there Menachem) when one starts spending more time in a seated position where the glutes are partially stretched, but not used, and the diaphragm is out of alignment with the pelvic floor, these muscles tend to lose some of their abilities, as they are essentially being told to shut off in those static positions: We don’t need them to work because we are slouching and hanging off the ligaments/connective tissues instead.
Cyclists and triathletes also suffer this problem due to the inherent position of their sport.
You lose power potential in a muscle that cannot stretch, or is in a stretched position for so long. This is an issue many cyclists, triathletes AND our clients/ athletes face, due to the long periods of time that we spend sitting with our glutes in an elongated position, and “the rings” (pelvic floor + diaphragm) out of alignment.
Glutes Are a Keystone to Performance Oft Neglected
While the running joke is that “I got glutes cuz I squat a lot,” Squats actually are NOT enough to fully and properly develop the glutes. There is far more that goes into developing glutes than being able to perform the 30+ something squat variations.
I know what you’re thinking:
But this is important, as it relates to an oft-missed portion to training the glutes: PELVIC CONTROL.
Pelvic stabilization and control is extremely important if we are to get true hip extension, and not extension from places not intended to work “like that”, such as the lumbar spine.
If I had a dollar for every time I saw a trainer or coach working on “Hip extension” with a client/ athlete who was getting movement from the lumbar spine, I’d be a very rich person.
In order for us to build up the glutes properly, we have to begin by thinking about giving stabilization to the pelvis through teaching the hamstrings, internal obliques, the deep hip rotators (pelvic floor), rectus & transverse abdominus, and Quadratus lumborum to all fire in good sequence and with great strength.
This is a challenge for many, as we tend to perform our front planks by hanging off the hip flexors, we work our hamstrings by laying down on the machine, and often don’t include many anti-rotation exercises (although, you ARE reading Tony’s blog, so you’re officially “one of the smart ones” who does in fact train rotary stability).
Getting to Work
Glute work isn’t simply throwing a few exercises into your dynamic warmup and main routine, there is much more that needs to be done to maximize your athletes results.
We MUST think about the different positions the athlete will be required to perform in their sport:
Do they include deceleration and change of direction?
Is it a fixed motion similar to cycling or rowing, or is their sport more dynamic, such as basketball and rugby?
Is the athlete in anterior pelvic tilt for their sport, such as hockey, bowling, or cycling?
Each of these questions must be answered, as they help us understand the joint positioning of the hip….and as we all know:
JOINT POSITION DICTATES MUSCLE FUNCTION
If we’re actually to train the athlete and their glutes to perform in their sport, we MUST know how the muscles will be asked to work in the “real world”- that of dynamic movement and uncertainty required by their sport.
This is one of the things many of us forget as we write programming: What positions are the joints going to be in, and due to these changes in joint position, how will the muscles ACTUALLY be responding/used for movement?
Stabilizer?
Prime mover?
Prime mover through full range of motion?
Next we need to answer:
What kind of lever arm should you use for the athlete when training the glutes?
Weighted at the lower leg? (Reverse Hypers)
Weighted at the shoulders? (Barbell good mornings)
Weighted at the hip? (Barbell Hip Thrust)
Weighted long fulcrum? (Deadlifts)
Weighted medium fulcrum? (Sumo Deadlifts)
Resistance bands at the knees?
Resistance bands at the shins?
Resistance bands at the feet?
Resistance band at the crotch? (Band Pull throughs)
The answer to this can and should vary throughout the training year, but there should always be one or two lever arms which are staples to that athletes program, to help combat the movement deficiencies that their specific sport, AND POSITION in that sport, entail.
After all, you wouldn’t train a pitcher as you would train a shortstop.
Programming Glutes for Your Clients & Athletes
Every single warmup we do here at Human Vortex Training starts with some form of the hip series, depending on the athletes ability to recruit the glutes & stabilize their midsection. This doesn’t mean that these exercises are the only warmup, that would be poor planning. Rather, we should be looking to include at least 1-2 of these moves in our dynamic warm up to help the athlete/client connect with, and utilize their glutes.
Here are the foundational warm-up exercises which I’ve used a mix of over the years:
1) Side Lying Straight Leg Lift
1 @ 8-15 each
2) Hip Lifts
1 @ 15-30
3) Clamshell Variation
Side Lying Clamshells (beginners)
1 @ 8-15 each
Side Lying Half Clamshells (intermediate/advanced)
1 @ 8-15 each
4) Side Lying Straight Leg Adduction
1 @ 8-15 ea
5) Birddog Variation or Regression
1 @ 5-8 each
PLEASE Don’t butcher the Birddog exercise! Our affable, giant-triceped host, Tony Gentilcore, has a great video about this and how to better teach it here:
6) Single Leg Hips Lift
1 @ 8-15 each
7) Banded Lateral Walks
8) Banded Monster Walks Forward/ Backward
Along with 2-4 of the above exercises, we would get 1-2 breathing exercises, and 2-4 other dynamic warm-up exercises to prepare for that specific days session.
Burnout Session at the End of Your Lift for Glutes? No Problem!
At the end of a session is a great place to add in some more sport-related fatigued state specific glute training. These are usually done bodyweight only, as we’re looking to help improve the athletes resilience and strength-endurance in sport-specific positions, although it’s best to find what works for YOUR athlete….Some respond better, or actually need weighted or resisted variations.
Use your best judgement to find what’s best for your athlete at that time.
1) Back on Bench Single Leg Hip lifts (Rotary Stability) (Sprinters, Track and Field, Triathletes)
3) Frog Hip Lifts (Weighted or Unweighted) (BJJ, Hockey)
But It’s Not All Strengthening
As we all know, simply making a muscle stronger and better able to work in chorus with other muscles, doesn’t make it a rock star. We still need to ensure it’s able to work through it’s full intended range of motion, as well as to rest at its ideal resting length.
For this, we can do a few different exercises:
1) Brettzel
2) Half-Pigeon Stretch
3) Dynamic LAX Ball Glute Release with Mid-Trap Activation
I like all of these as they also help the athlete learn where the rest of his or her body is & what it’s doing as they get into the proper positions… a big win for Proprioception!
Give these a shot, and let the glute gains begin!
About the Author
Menachem Brodie, NSCA-CSCS, PCES, is a leading Strength Coach for Cyclists & Triathletes. In the health, fitness, & wellness fields for nearly 20 years, he has worked with professional & amature atheltes from around the world. He has authored 2 courses: Strength Training for Cycling Successand Strength Training for Triathlon Success, and has presented internationally on Strength Training for Endurance Athletes, including at the 2018 USA Cycling Coaching Summit.
I’m always asked what’s the main difference between training professional athletes and those who think they’re still an athlete.
Not much, really.
I still very much prefer to treat my general population clients like athletes – encouraging them to lift, hoist, push, toss, and drag things every which way – if for no other reason than they can.
However, part of my job as their coach is to know when to pump the brakes and to keep their ego in check. In today’s guest post, California based strength coach Scott Hansen discusses some subtle nuances and tweaks that can be made to a strength & conditioning program catered to the more “mature”” crowd.
Favorite Movements For Athletes and Modifications For Adult Athletes
When I was 20 years old, I could do just about anything.
Squat 10×10, sure.
Hell, we did that a for a few months out of each year back then.
Deadlifts so heavy you could feel your soul cracking?
Check.
And with ugly technique that would make the Diesel Weasel blush.
Note From TG: 10 points to Gryffindor for the Diesel Weasel reference.
With time, experience, injuries, and spending a solid percentage of my yearly income over the last decade plus on learning from people smarter than me, I’ve come to realize a few things:
1) Young athletes need load and stress to build strength and physical resiliency.
I.e., Full ranges of motion and big lifts that require a lot of work. Cleans, snatches, barbell bench presses, chin ups, front squats, deadlifts, etc.
Planet Earth is trying to make you small, frail, and weak from the time you turn about 20 years old onward
Unfortunately, after you’ve spent a couple of decades on the planet, you’ve accumulated some wear and tear.
It’s kind of like an apartment: You might take pretty good care of it for the most part, but every now and then you throw a ripper and the carpet gets stained. Over 20 or more years, there are lots of little stains and dings on the walls.
The stains and dings aren’t necessarily bad enough to knock the building down, but it’s certainly not in the kind of shape it was in when you first moved in.
Well, that beat up apartment is more or less your body.
The way we trained when we were young might have been the best possible way to train then, but we probably need to make some modifications to it as we get a bit older. I’m not saying to train solely with resistance bands and shake weights in group exercise classes. I’m just saying that we can train hard and more intelligently to respect how our bodies have changed over time.
The same qualities still have to be trained, mind you. We still need to get strong and train to build and maintain muscle. We need to be mobile, athletic, and not gas out walking down to the mailbox. As a matter of fact, we can still thrive and be better than we were in our younger years, as long as we’re smart.
Here are my favorite lifts for each movement pattern/quality for those under 25 years old, and how things should be modified for the slightly more, uh, mature crowd.
Power
Athlete: Hang Clean
Adult Athlete: Box Jump
https://www.youtube.com/watch?v=Xbg7sxs_Auc
I love Olympic lift variations.
From creating power to absorbing force on the catch, hang cleans can be a great tool for a younger athlete. They also require a ton of wrist and thoracic mobility, and an awkward catch might just make you have to call out of work the next day.
Replacing cleans with box jumps means you get a huge percentage of the pros, and none of the cons, so I use it as a main power exercise in my adult athlete programs.
Just make sure to do them right!
Squat
Athlete: Front Squat
https://www.youtube.com/watch?v=9xzNc–18as
Adult Athlete: Double Kettlebell Front Squat
https://www.youtube.com/watch?v=8bx9IP49B-w
I’m a big front squat fan.
You really can’t do them wrong, you have less shear stress on the spine, and you get a ton of good stuff expressed: thoracic spine mobility, upper back and core strength, hip mobility, and of course lower body strength.
Similarly to cleans, you need solid wrist mobility, and since the majority of adults have spines that look like question marks, I don’t love front squatting for most adult athletes, most of the time.
Rather, I like hammering double kettlebell front squats.
Similarly to box jumps and cleans, I feel like you get a huge chunk of the benefits of front squatting without the learning curve or discomfort on the wrists, and you can keep the spinal loading down.
Deadlift
Athlete: Trap Bar Deadlift
https://www.youtube.com/watch?v=T_1CdItspHk
Adult Athlete: Trap Bar Deadlift/Kettlebell Deadlift
Note From TG: That time when I thought it would be cool to grow a beard.
Trap bar deadlifts are a great full body lift, and I tend to prefer them over conventional pulls. With the weight evenly distributed around you, you can load these up pretty heavy and get a huge training stimulus without having such high prerequisites as barbell deads.
I certainly employ these for my adult athletes, and heavy, but I’m even more diligent on technique than I am with any other exercise, which means I tend to progress it a little more slowly. Wendler’s 5/3/1 works great here, just stop on the top set at 10 at the most.
Otherwise, you’re liable to take a nap for 3 days.
For the much older athlete, I just go back to the question “how strong is strong enough?” If I can get that with a kettlebell instead of a trap bar, then I’ll go with that, but that might come down to how heavy your bells go.
Split Stance
Athlete: Rear Foot Elevated Split Squat with Front Foot Elevated
https://www.youtube.com/watch?v=6_4AoHwncBI
Adult: Rear Foot Elevated Split Squat OR Double KB Front Rack Split Squat
https://www.youtube.com/watch?v=WJxBWyfc1Iw
RFESS have a special place in my heart after coaching them at Mike Boyle Strength and Conditioning for so long, and because getting brutally strong on these is vital to being able to perform on the court, field, ice, or mat.
By elevating the front foot as well, you get an even bigger range of motion, and moving big weight through big ranges of motion is how you get strong.
Adult athletes can certainly do these as well, but sometimes are a bit limited with ROM for the front foot elevated version. I also like to keep them with split squats to allow for some extra big toe mobility work built into the lift, as so many people tend to get stiff there over time, and stiff toes lead to balance issues and falls.
By front loading it, we can get more core work in and reinforce thoracic extension as well.
Horizontal Press
Athlete: Close Grip Bench
Adult Athlete: Low Incline 1-Arm DB Bench
I’m a big advocate on narrower grips on presses for most people, so naturally I love close grip benches. They’re a little easier on the shoulders and you still build the same upper body strength as with a wider grip.
I like index fingers on the edge of the smooth part of the bar, so not crazy close.
The wrist and shoulder issues with the aging athlete play a role here, and I prefer to see them doing more one-arm pressing, and on a low incline. This is more shoulder friendly, brings a bigger core component into the mix, and allows for asymmetries to be worked through, rather than around.
I know, I kind of copped out here and picked two.
Sue me.
Vertical Press
Athlete: Standing DB Press
Adult Athlete: Landmine Press OR Half Kneeling 1-Arm Bottoms Up Kettlebell Press
https://www.youtube.com/watch?v=ev9yVuAfeiY
I know a lot of people love the press done traditionally with a barbell, and I do too. If you put a gun to my head and ask me what my favorite vertical press for athletes is, I’m going with the dumbbell version, though.
Again, I don’t have any problems with barbell pressing, I just like the more natural rotation in the shoulders with dumbbells, and as we see more and more young athletes developing nasty forward head postures and stiff thoracic spines from all the phone and video game time, the dumbbells just seem to be a better fit.
Most adult athletes would benefit from spending the majority of their “overhead” work in a more “high incline” space, which the landmine allows. It all comes back to shoulder and thoracic spine health, and life just tends to cause us issues over time.
One caveat to this is the half kneeling bottoms up kettlebell press. The bottoms up bell triggers the rotator cuff to work to a greater degree, and the half kneeling position keeps from being able to use lower back extension as a replacement for the arm to move overhead.
I’ve seen a lot of people who couldn’t go overhead without pain, but the bottoms up press felt great, so it’ll depend on the individual here.
Chalk this up to cop out number two.
Horizontal Pull
Athlete: 1-Arm DB Row
Adult: TRX Inverted Row
DB rows should be a staple in every program, and especially so in those of our athletes. Building a big, strong back helps us obviously in sports, and helps to keep our shoulders strong and healthy as well.
I have no problem with doing these with adult athletes at all, I just like to slow down the tempo and try to get more out of less load. Body English tends to be a factor in these as the weight goes up, and even a little bit with someone who’s got a history of lower back crankiness can cause issues.
This is why I love TRX inverted rows for this population. They allow for a natural rotation on the shoulders, you can load them up with vests or elevate the feet, and people can generally do them more frequently than more traditional heavy rows.
Vertical Pull
Athlete: Heavy Chin Up
Adult Athlete: Ring Chins
Mike Boyle has talked in the past about how he likes athletes to have at least a 1-1 strength ratio of chin up strength to bench press strength to mitigate shoulder injuries, and I concur on that wholeheartedly.
When we start getting older, though, shoulder issues can lead to elbow soreness on chins, so if people have the ability to go overhead, I prefer they do their chins on rings for better shoulder mechanics, and if that’s still too much, X pulldowns are a great solution.
Much like landmine presses, they aren’t 100% overhead, but still get a lot of the benefits.
Core Anti Extension
Athlete: Medicine Ball Rollouts
https://www.youtube.com/watch?v=iYslVkCzvUk
Adult Athlete: Bodysaw
https://www.youtube.com/watch?v=ON54UuYBycc
Loading rollouts takes some creativity.
Sure you can use a vest, but eventually, when you’re wearing 2 or 3, they can get cumbersome and they’re a pain in the ass to take on and off between sets. I’ve found that using a heavy slam ball is a great way to continue challenging rollouts and it’s become my favorite variation.
Much like a lot of the other modifications, the overhead movement for the aging athlete can be problematic, so hammering bodysaws is my preference.
Locomotion
Carries are great, and there are a ton of variations on these, all of which are great. Farmer’s walks, suitcase carries, overhead walks, and the like all have their benefits, but I don’t think any of them quite give the same bang for the buck as heavy ass sled pushes.
There’s no eccentric component, so they’re great for people with knee issues, and give a huge single leg strength benefit. And since there’s no eccentric, they don’t need a ton of recovery, and can be used more frequently.
I’ve found that farmer’s walks, when done really heavy, can kind of fry people’s nervous systems more, so, while I use them frequently, if I had to choose, I’d go sleds.
Obviously, the issues that tend to limit our adult athletes are things that we want to address in our programming and improve upon, but we can still be safe and train hard given the circumstances, and not be relegated to endless hours of correctives and foo foo exercises.
Don’t stop challenging yourself or your clients, but keep them challenging in ways that make sense so they can keep excelling for many years to come.
About the Author
Scott Hansen is a Bostonian transplanted in Southern California, a strength/fitness/wrestling coach, educator, sub par surfer, and die hard New England sports fan.
He works with adult athletes, as well as an assistance wrestling coach and strength and conditioning coach for La Costa Canyon high school wrestling in Carlsbad, CA.
I’m currently in the throes of jet-lag sucktitude.
I’ll be back on my writing content horse next week, but I’ve got a treat for you today. TG.com regular contributor, Dr. Nicholas Licameli, is subbing in for me today and he went to TOWN in today’s guest post.
This is one of the most thorough articles I’ve read in a while on the topic with a metric shit ton11 of information with many additional links to help you nerd out a bit more if you so choose.
The squat is a topic that has gotten a great deal of attention among many fitness and medical professionals since mankind first started lifting heavy things against gravity. Since then, much of the conversation has changed (with the advent of civilizations, roads, running water, Instagram.
However much has stayed the same.
I understand this isn’t the first article written about the squat.
Some of the greatest minds in fitness and strength and conditioning have written on the topic, and I encourage you to dive into the multitude of references that I’ve provided.
My goals for this article are to help make your squat look and feel better, improve performance and effectiveness, un-complicate the complicated, and give you the confidence to perform this foundational movement without fear.
Unfortunately, there are those that say to avoid squatting.
As a physical therapist, I have to apologize because much of that flawed thinking stems from misinformed and unqualified professionals in the medical field that are pleasantly ignorant to current practices.
The squat and hip hinge are foundational to basically all movements in and out of the gym.
Whether you’re hitting a PR on the platform or sitting down on the toilet, you are squatting and you better be using proper technique. I’ve treated injuries as a result of poor squatting in both of those previously mentioned instances. Why avoid the squat in the gym if we’re going to do it constantly throughout our day anyway?
I say train it rather than avoid it.
Why not be prepared and do it right?
The squat and hip hinge require total control of the deep abdominals as well as the hips, pelvis, and entire spinal column. We can all agree that teaching proper abdominal bracing, pelvic positioning, and proper lifting mechanics are of utmost importance for the treatment of musculoskeletal injuries including knee, hip, and low back pain. For some reason however, we don’t all agree that squatting is necessary.
Newsflash…when done correctly, THEY’RE THE SAME THING!
As both a doctor of physical therapy and professional natural bodybuilder, it should come as no surprise that in my opinion, people of all ages and from all walks of life should be squatting. This includes the young athlete just starting his/her training career, those recovering from injury, those trying to prevent injury, and even (and especially) the elderly.
No matter if you are an athlete or a great grandparent, we are all essentially “squatting” multiple times throughout our day, so why not train it, strengthen it, and perfect it?
You can release this muscle or stretch that muscle but if patients and clients don’t know how to squat and hip hinge, we are spinning our wheels and wasting valuable time.
How to Squat
While this isn’t a step by step “how to squat” article, here is a quick and dirty rundown of some things to keep in mind.
There is a plethora of information out there about thoracic spines, knees, ankles, spinal positioning, foot placement, etc., and sometimes it can complicate things, make people fearful, and mystify the movement.
Basically, a proper squat and hip hinge starts (obviously) at the hips with the spine in a neutral position (more on this later). After a breath in, tension should be kept throughout the body and throughout the movement. The entire spine, including the neck, mid back, and lower back, should be kept in a relatively stable and neutral position. The feet should remain actively planted on the floor with the weight evenly distributed.
More on all of this to come.
In the beginning of my lifting career, I struggled with finding the “groove” of the squat. This is partially due to improper mental cueing during the movement. Some of my mental cues during the squat were:
“Arch the back hard to avoid spinal flexion.”
“Keep the head and chest up so they remain in line with the horizon.”
“Sit back and push through the heels.”
“Always squat below parallel.”
While there could be worse things, especially considering that, like most beginners, my sources of information were muscle magazines and of course the biggest guy(s) at the gym, I think these cues can be quite misleading and detrimental to squat technique.
Here’s why.
“Arch the Back Hard to Avoid Spinal Flexion.”
Avoid a hard arch in the lower back.
Don’t let the lower back round of course, but rather maintain the natural arch of the lumbar spine.
Hard lumbar extension will crunch down on the delicate structures of the spine, put the glutes in a less than optimal position to stabilize the pelvis, and place the hip in slight flexion before the movement even starts.
Starting in hip flexion will cause the femur to run out of room in the acetabulum for hip flexion when you want it most…at the bottom range of the squat. This could result in femoral acetabular impingement (FAI) and labrum pathology.
Get out of that hard arch and find your neutral.
“Keep the Head and Chest Up So They Remain in Line With the Horizon.”
Keeping the head and chest up isn’t necessarily a bad thing, however if we achieve that position by hyperextending our backs and flaring our ribs forward, it becomes problematic and essentially unstable.
Cueing a slight posterior pelvic tilt prior to un-racking the weight and maintaining that position throughout should do the trick. This will place the spine and ribcage in more of a neutral position.
We maintain the position by taking a breath, contracting the upper back, lats, mid section (as if putting on a tight belt or walking into cold water up to your navel), pelvic floor (as if holding in gas or urine), and even the feet (more on this to come).
Check out my explanation of what it means to “contract your core” right here. Tony does an awesome job of explaining this here, as does John Rusin here. Quinn Henoch and Ryan Brown also hit the point home here. Eric Cressey nails the upper body and lat set up here.
“Sit Back and Push Through the Heels.”
It’s true that we don’t want to push through our toes and allow our heels to rise off the floor, however it is also true that we don’t want to shift our weight so far backward that the toes lose contact with the floor and most of the force goes through our heels.
Yes, we want to descend slightly backward, but the focus should really be on descending down between our hips.
When we say we put an adversary on “his/her heels,” we are saying that we put them in a vulnerable position and on the defense, which will likely lead to a step backward. Why would we want to put ourselves on our own heels while squatting?
A better cue is to have an “active foot,” evenly maintaining 3 points of contact with the floor: base of big toe, base of little toe, and heel. Tony explains this really well here. This foot position will help stabilize the hips and knees, as well.
Mastering the “active foot” takes practice, but once you feel it, there’s no going back.
For everything you (and your children and their children’s children) will ever need to know about squatting, check out this bad boy by Greg Nuckols.
Find Your Squat
Hey fellow millennials!
Remember what our mothers taught us…we are all special, we are all unique, everyone is a winner, Mufasa died of natural causes, and most importantly, we are all different!
When it comes to the squat, this last point is key.
We are all structured differently, which is why there is no particular squat that is perfect for everyone. Things like foot position, stance width, and squat depth will all be impacted by things like the size of our torsos, length of our femurs, and the structure of our hips and pelvis. We need to find the squat variation that best “speaks” to us.
The classic example of this is hip flexion range of motion and lumbar compensatory spinal flexion.
Much has been written about this topic, and to avoid making this more like a Harry Potter book rather than a guest post, I’m going to refer you to some excellent articles down below.
Keep in mind that a range of motion measurement taken while lying on a treatment table DOES NOT always necessarily correlate to what we observe during an actual movement pattern like a squat and vice versa.
That being said, a 2008 study (stolen by me from afantastic articleby Bret Contreras) showed a 60 degree difference in hip flexion range of motion between the least flexible (80 degrees) and most flexible (140 degrees) subjects out of a total of 200 hips.
That’s quite a large difference, considering exercises like a deep squat require about 120 degrees of hip flexion. Differences in femoral anteversion/retroversion (how much the head of the femur faces forward or backward), acetabular anteversion/retroversion (how much the the hip socket faces forward or backward), and inclination angle of the femoral neck (angle of the neck and shaft) are seen from individual to individual as well as from hip to hip within the same person.
These genetic structural differences all change an individual’s ability to squat.
Thanks Mom and Dad…
Pushing past end range hip flexion in the descent of a squat for the sake of going deep will cause compensations up and down the chain, particularly flexion of the lumbar spine, AKA the dreaded “butt wink” (cue the tire screech and screams).
While some amount of lumbar flexion and “butt wink” is acceptable (we’ll get to that in a minute), too much, too often, in an uncontrolled manner, can be problematic.
So you can see why being married to a certain squat variation can be inappropriate.
If you are an individual that is unable to squat deeply but force yourself to perform deep barbell squats because your lifting partner says so, you’re setting yourself up for injury and a faulty and uncomfortable squat.
When it comes to varying your squat type, be sure to know your goal.
Why are you squatting?
To improve overall strength?
Hypertrophy?
To get a stronger squat?
To impress a member of the opposite sex (spoiler alert, they don’t care)?
To be able to pick up your child without pain?
There are many variations of the squat.
The conventional barbell back squat is just one option and unless you are training for a powerlifting meet, where you will be required to perform the conventional barbell back squat, there is no reason to lock yourself into only one type of squat.
Why not try a goblet squat? Or a sumo squat? Or a front squat? Why not use dumbbells or kettlebells instead of a barbell? If structured correctly, any variation of the squat will improve strength and hypertrophy as well as train the hip hinge and proper bending/lifting mechanics.
What’s the take home? We are all structurally different and it is important to find the squat pattern that works best of us.
Here are some great resources that will help you find the squat pattern that works best for you and your anatomy:
Note From TG: Nicholas is kind to include me amongst such elite company (Note to Self: you owe Nick 1000 Predator handshakes), but mine is easily the least pithy of the bunch.
Neutral Spine…Does It Exist?
Yes and no.
Research has shown that lumbar flexion, particularly at the bottom of a squat (the previously mentioned butt wink), is quite natural in a squatting pattern, particularly at the point in the movement where the hips start to run out of space for further flexion.
I agree with Quinn Henoch that neutral spine is more of a range rather than a set position, so don’t lose sleep over a little spinal flexion.
How much excursion is too much?
You knew the answer before you asked it.
It depends!
That being said, you definitely want to avoid movement at the spine and pelvis as much as possible. A moving base causes leaked energy and therefore less stability and built up tension. This means less force produced, less strength, and less Instagram pictures with a bumper-plate loaded bar on your back.
Don’t Stop Squatting Because You Have Pain Or Feel Restricted
If you experience pain during a squat, SEE A QUALIFIED HEALTHCARE PRACTITIONER.
You want someone that will question the type of squat that hurts, ask when in the range of motion the pain occurs, analyze your squat pattern, ask about weekly volume and load, inquire about recovery and sleep, and do everything in his/her power to keep you squatting.
There are always ways to modify the squat in order to keep training this key movement pattern while training with an injury.
Sharp pain at the bottom of a squat?
Try using a more neutral spine with slight flexion using a goblet squat to free up some space in that acetabulum.
No good?
Try adding a band around the knees during a few warm up sets.
Still no good?
Add a box to squat to at a level just above where the pain is felt.
The point is, you deserve better than a rushed, “Stop squatting for 4 weeks, take these anti-inflammatories, and see me in a month.
Oh, and if that doesn’t work, try foam rolling, cupping, turmeric, an oxygen deprivation mask, and VooDoo floss bands in a bath of apple cider vinegar and creatine.”
Fixing the symptoms with things like medication and surgery without considering the cause is an all too common theme.
These things have their place, of course, however they must be used appropriately. For example, surgery to repair a labrum that was damaged after repetitive impingement due to faulty lumbo-pelvic mechanics would be like fixing ceiling tiles in your living room instead of fixing the leaky roof.
After the surgery, if the individual returns to squatting with the same mechanics that got him/her under the knife in the first place, what good has been accomplished? Doesn’t make sense to repair, install, and paint shiny new ceiling tiles without fixing the roof first. Check out a video I made on this a while back right here.
So What Can We Do To Improve How The Squat Looks And Feels?
This is a tough question, because, as you probably guessed, everyone is different and it depends.
I recommend seeking out a qualified healthcare practitioner that will assess, reassess, and give you the tools to improve your individual squat.
Gone are the days of performing long, drawn out warm ups in the name of injury prevention, mobility, and movement optimization. A warm up should increase your heart rate and mentally and physically prepare you for the specific movements of the day.
The warm up should be active, specific and purposeful, not a cookie cutter series of activities like flailing around on the dirty gym floor or jamming a lacrosse ball into your sciatic nerve in hopes to break up adhesions in your piriformis.
Things like static stretching and foam rolling are passive activities.
In contrast, light cardio, dynamic stretching, loaded eccentrics, and actually getting under the bar and grooving the squat movement with sub-max loads are all active.
Passive activities like foam rolling do have their place, but they should be used appropriately. The benefits of foam rolling are short-lived, so if you’re going to foam roll, I’ve found it best to do it in between warm up sets. Of course, the specific muscles you target will be individual to you, your body, and your squat. For more on this, check out my article and videoas well as this fantastic episode of Mobility Mythsby Quinn Henoch.
Don’t feel obligated to use cardio as the only way to increase heart rate.
A dynamic series/circuit of exercises, combined with specific mobility work using active techniques such as loaded eccentricsand reciprocal inhibition (here and here), followed by some squatting with bodyweight or just the bar, will increase your heart rate just fine, not to mention both physically and mentally prime your system.
You get more bang for your buck.
For more on a proper warm up, including explanations of how to put it all together, check out my current lower body warm up right here as well as a great hip mobility exercisenot in included in my warm up video.
Also, Quinn Henoch (<— can you tell I have a little man-crush on him?) nails it in this episode of Mobility Myths about stretching.
And That’s That
I hope this helps in your journey to finding and perfecting your individual squat.
Remember, there is nothing to fear about the squat and there is no need to overcomplicate this foundational movement. Don’t forget to take advantage of all the resources provided in this article, as they are from some of the greatest minds this field has ever seen. Happy squatting!
Oh, and one more thing…knees drifting over toes is OK.
About the Author
Nicholas M. Licameli
Doctor of Physical Therapy / Pro Natural Bodybuilder
Every single thing he does, Nick believes in giving himself to others in an attempt to make the world a happier, healthier, and more loving place.
He wants to give people the power to change their lives. Bodybuilding and physical therapy serve as ways to carry out that cause. Nick graduated summa cum laude from Ramapo College of New Jersey with his bachelor’s degree in biology, furthered his education by completing his doctoral degree in physical therapy from Rutgers School of Biomedical and Health Sciences (previously the University of Medicine and Dentistry of New Jersey) at the age of 24, and has earned professional status in natural bodybuilding.
His knowledge of sport and exercise biomechanics, movement quality, and the practical application of research combined with personal experience in bodybuilding and nutrition allows him to help people in truly unique ways. Love. Passion. Respect. Humility. Never an expert. Always a student. Love your journey.


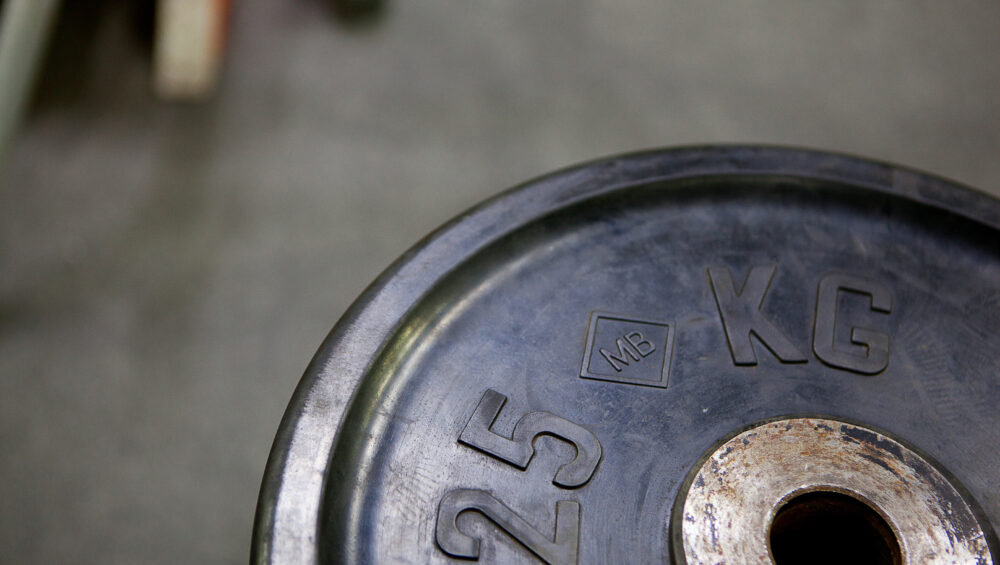


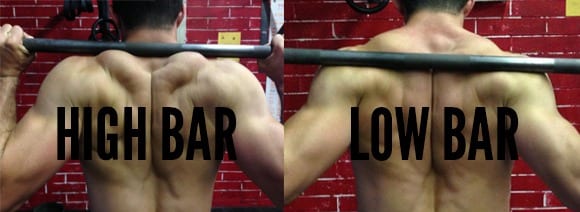


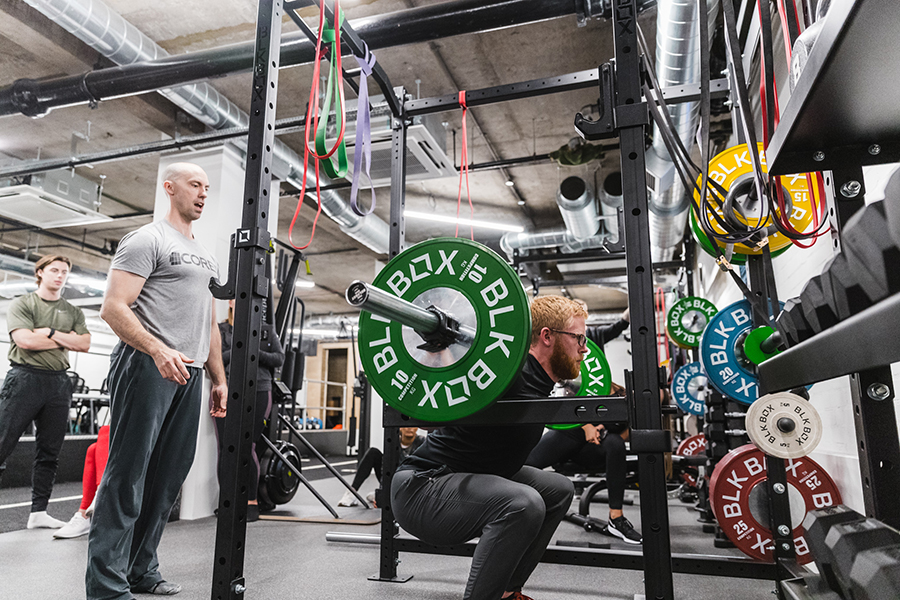
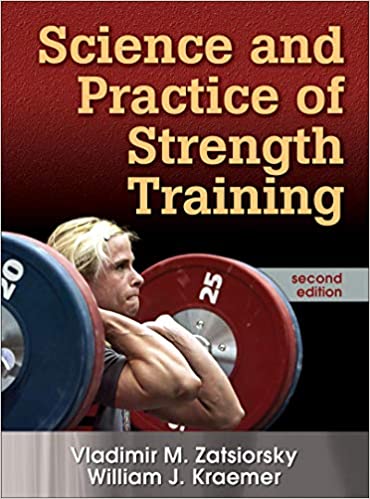
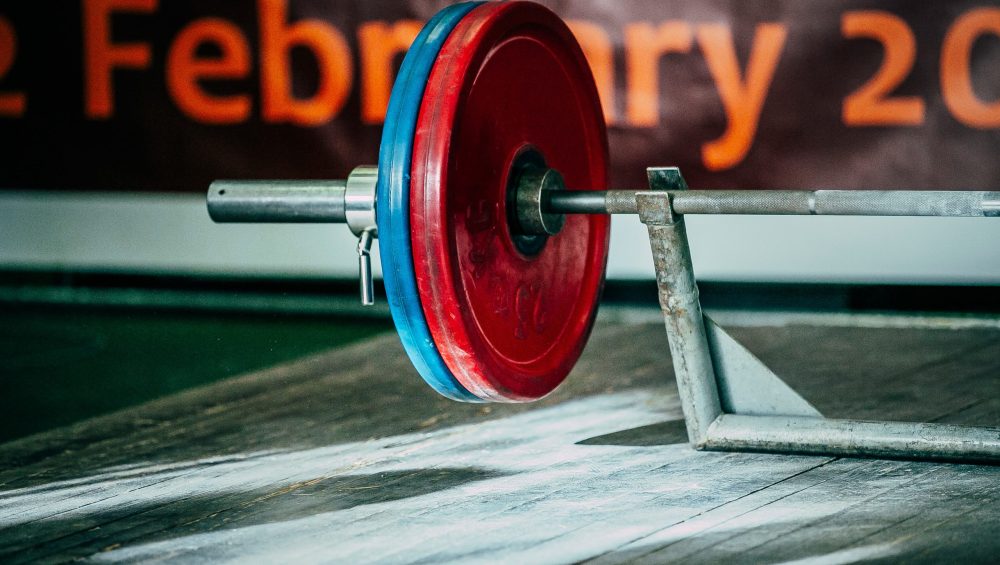


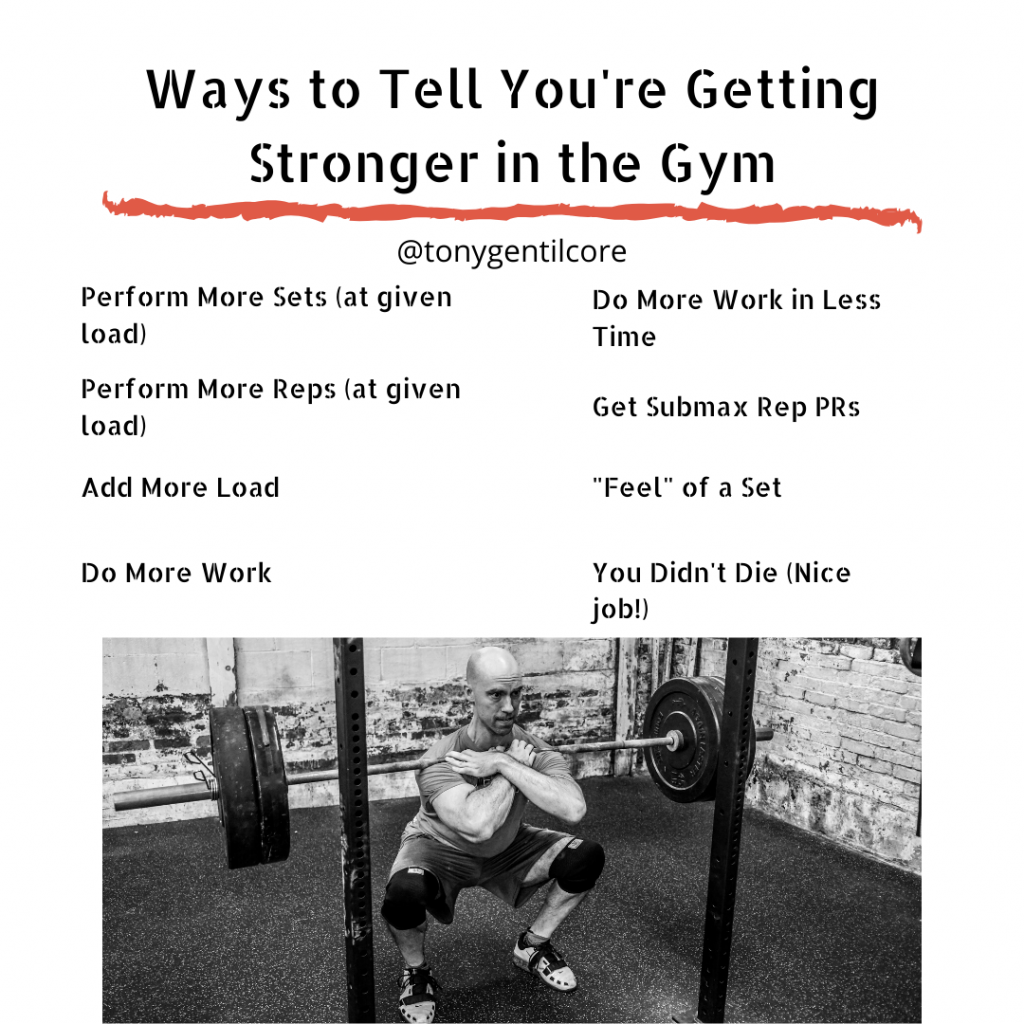


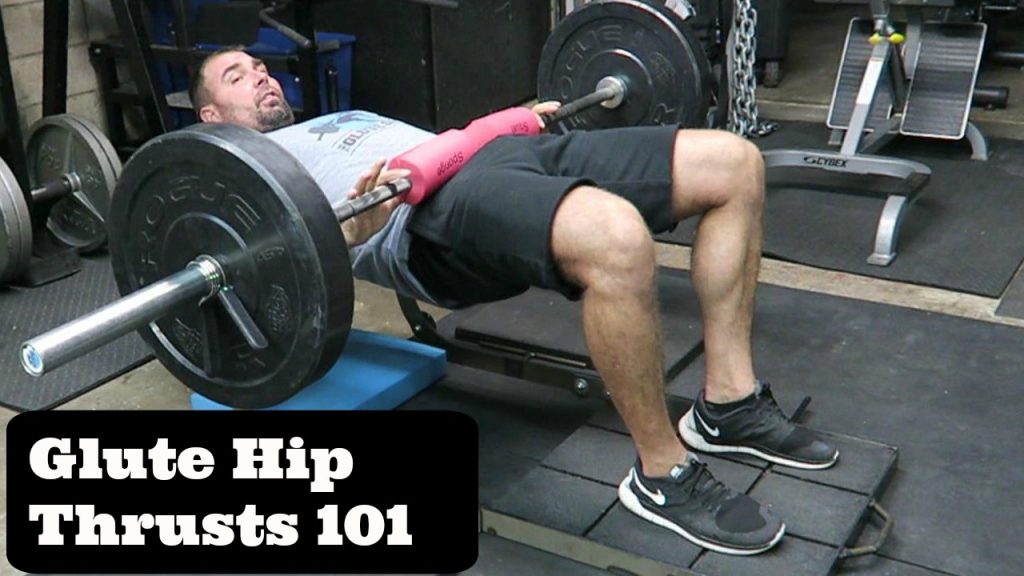
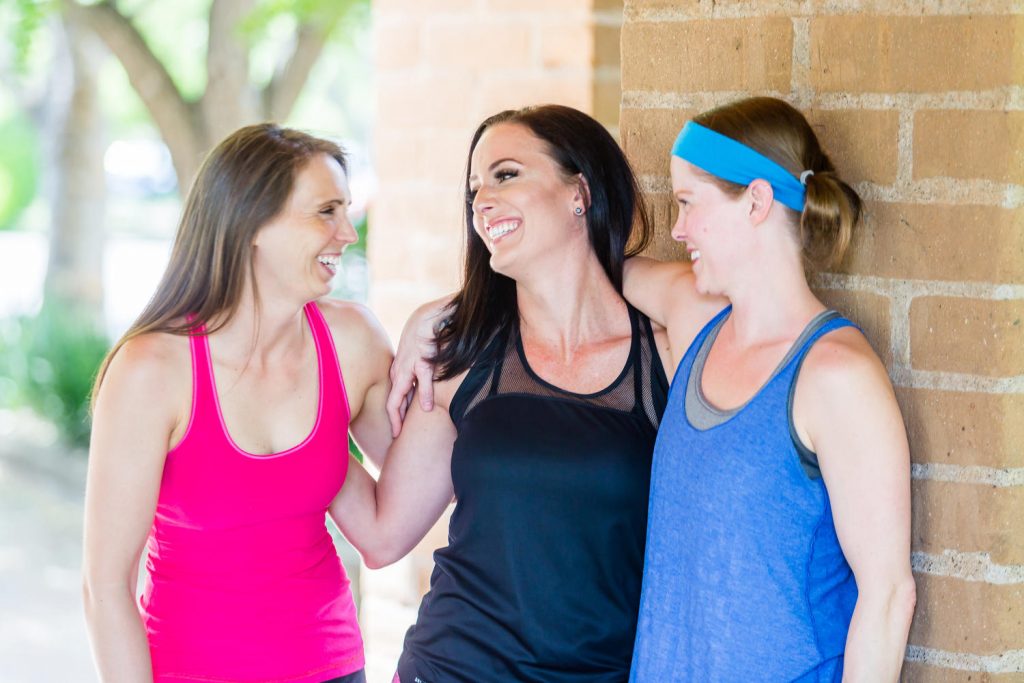
 Scott Hansen is a Bostonian transplanted in Southern California, a strength/fitness/wrestling coach, educator, sub par surfer, and die hard New England sports fan.
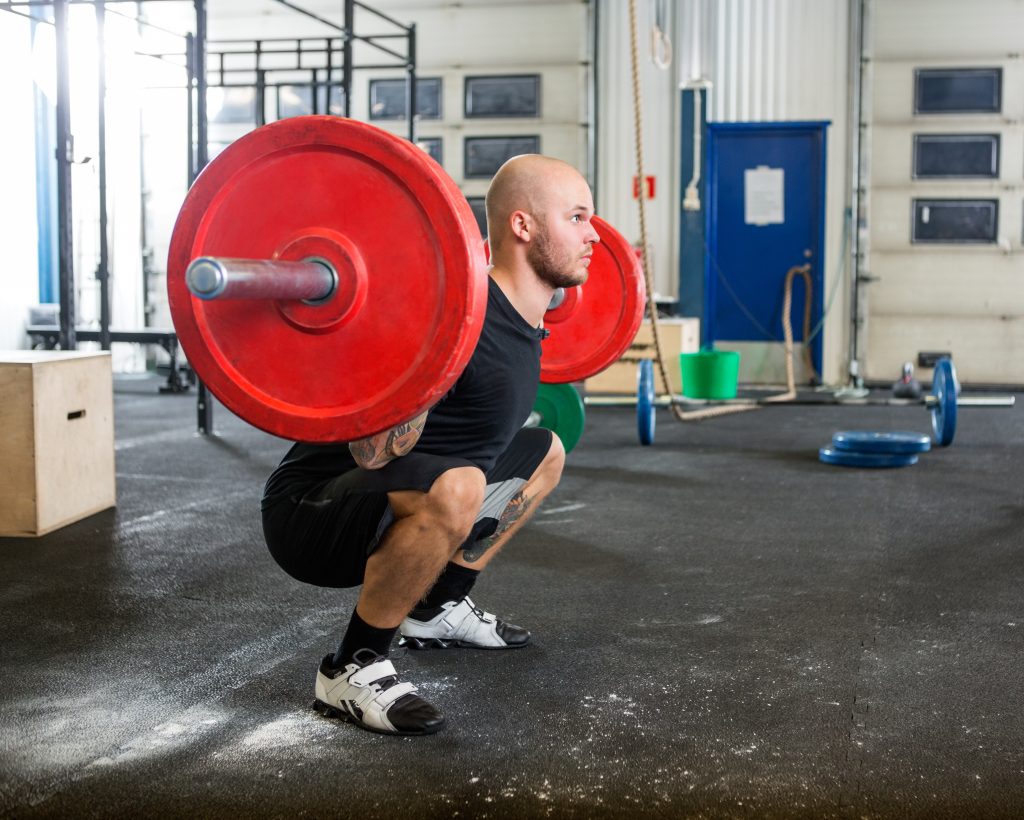
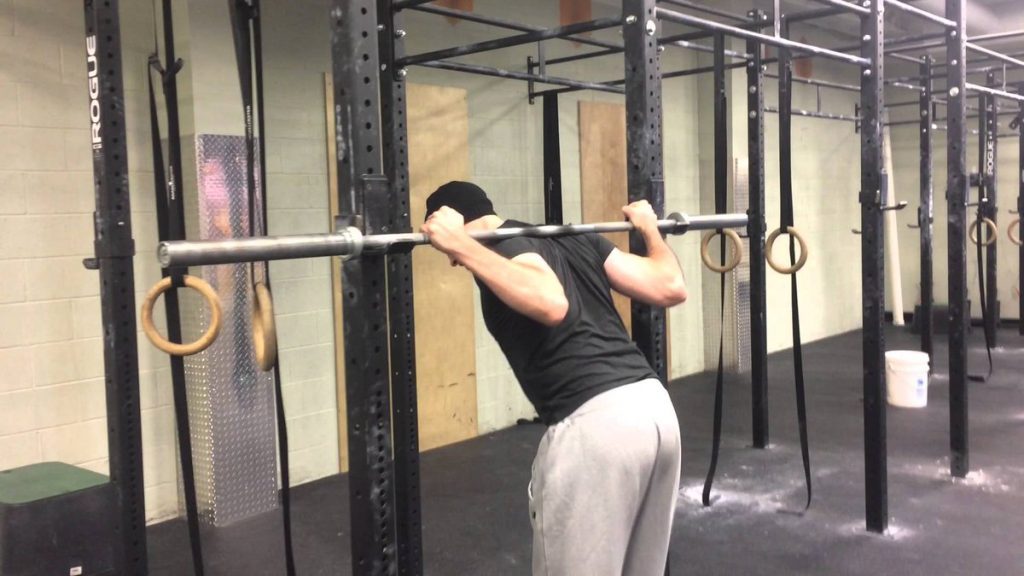
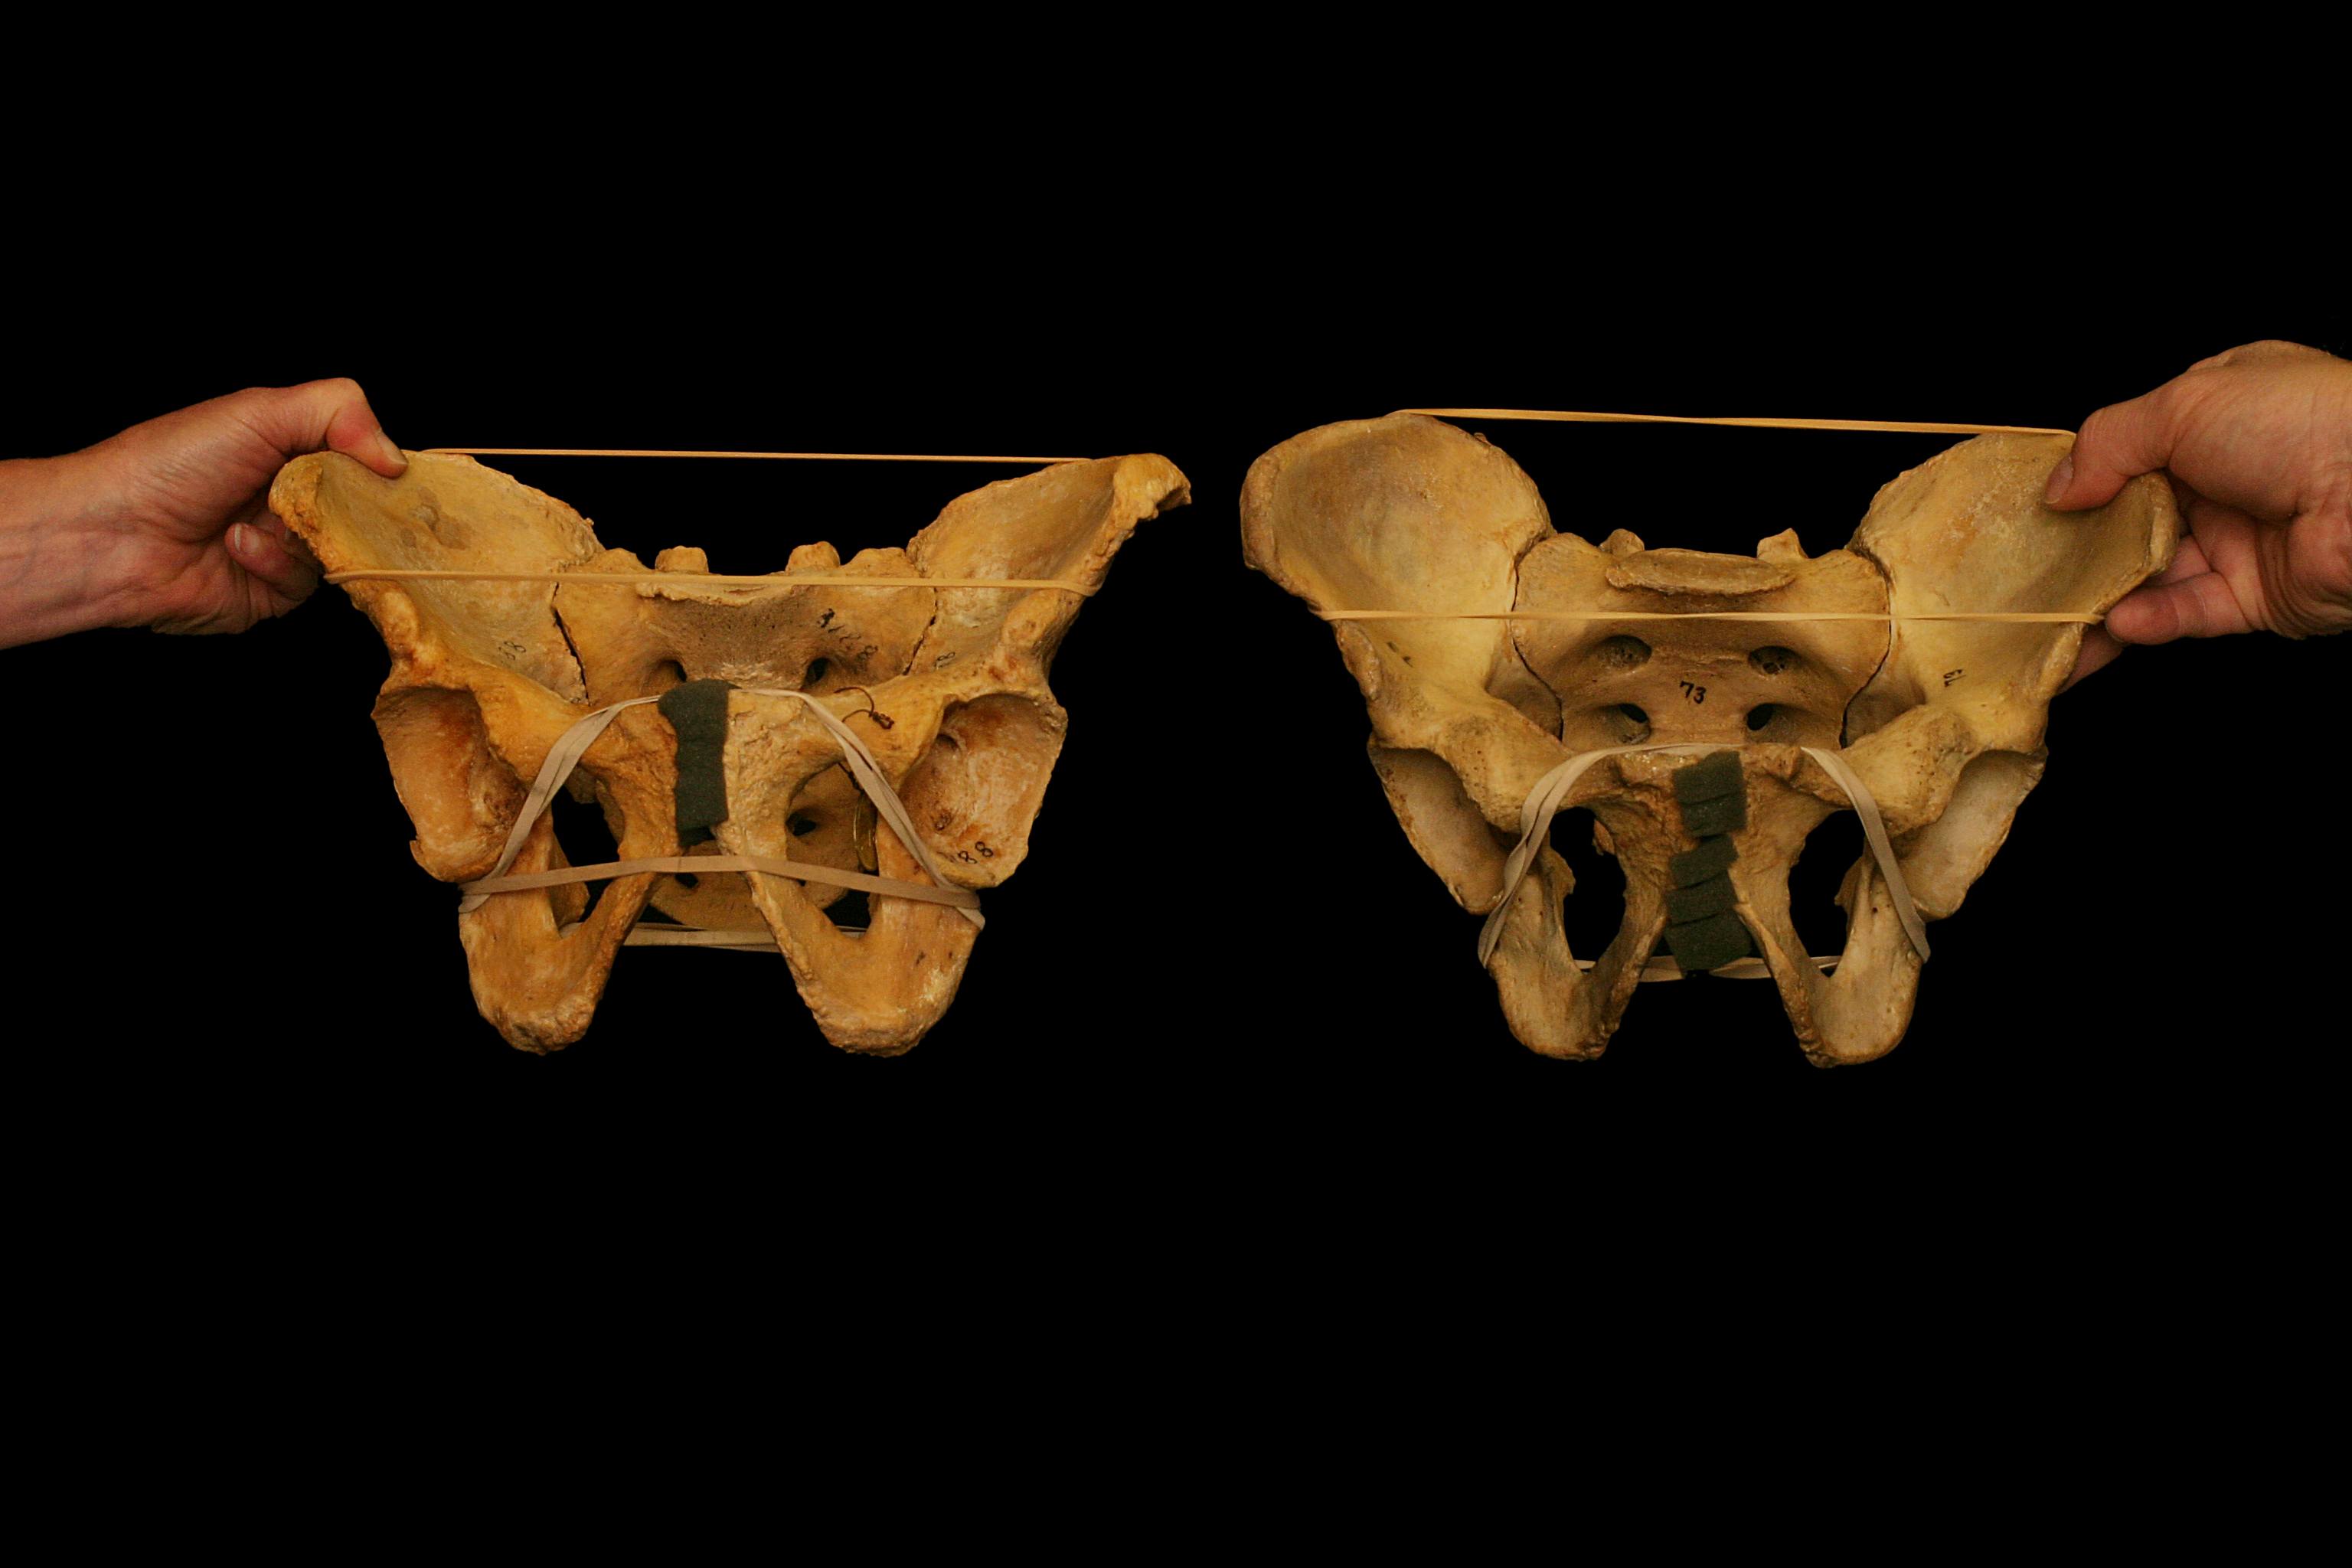
 Nicholas M. Licameli

