In case you missed it last week, you can check out Part I of my appearance on the Push Pull Legs PodcastHERE.
Part II was released yesterday. Here the guys (Tom Hall and Daniel Meek) and I discuss the business of personal training, whether or not to offer freebies or discounts, and Star Wars. Because, Star Wars.
All in all, that’s about 90 minutes of my smooth, silky voice. Or the equivalent of two Game of Thrones episodes. Totally worth it.
Peruse pretty much any fitness magazine targeted to women and you’ll inevitably see words like, “lose, fat-loss, tight, drop a size, tiny, hot, and lean” plastered all over its pages. This is unfortunate.
Women are programmed, often at an early age, to be less, that in order to be attractive and have self-worth, the smaller you are the better.
I say: Bull to the shit.
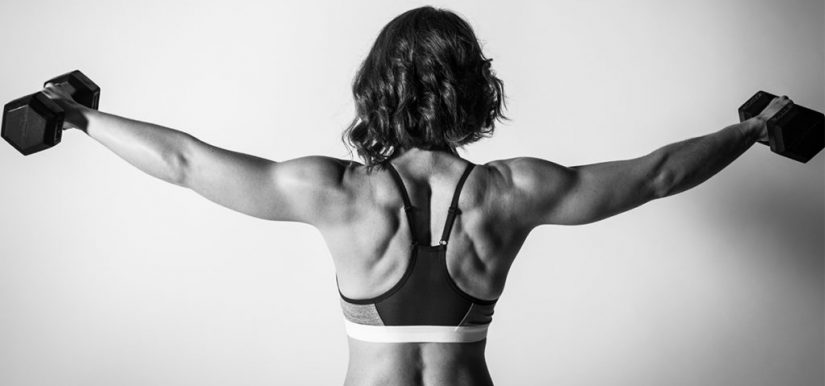
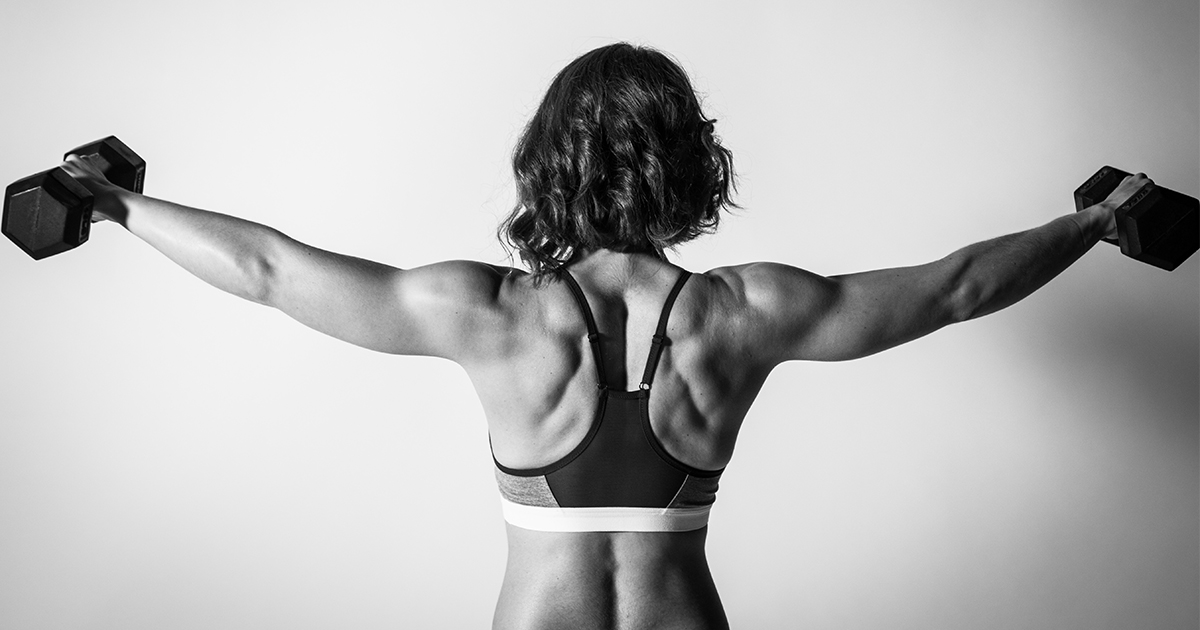
It’s no secret I’m a firm advocate for women to strength train. Time and time and time again I witness women transform their bodies (and mindsets) when they choose to nix the endless elliptical sessions in lieu of picking up some barbells.1
There is nothing wrong with choosing to be more.
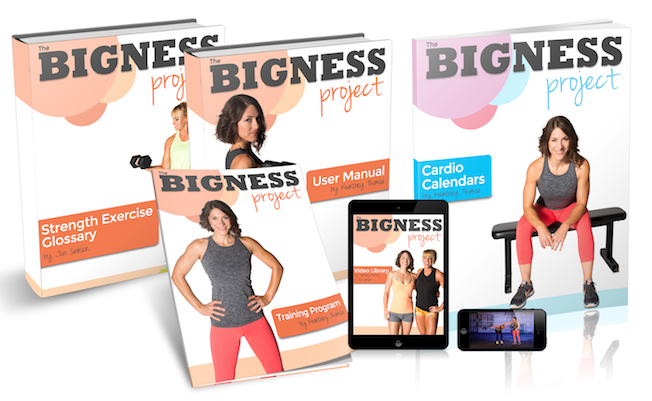
I am pumped to help promote The Bigness Project from Kourtney Thomas and Jen Sinkler. It’s everything I’m a fan of when it comes to directing women to the right kind of information.
Please enjoy the guest post Kourtney was kind enough to write below.
Maybe Less Isn’t More
I used to be one of those women who made a point to talk about how little space I took up. I’d brag about taking the first middle seat I came to on a Southwest flight because, “I’m just a little girl!” On top of that, I made a point of keeping everything about my already small body as tiny as possible. Because, after all, being less is more when it comes to women’s bodies, right?
More like “Yeah right!”
Over the years, I eventually began to see that there was another way to go. And while, yes, I do walk around in a petite frame, I’ve come to see that what I do with it and how I carry myself can convey a whole different message.
When I first got into fitness, though, it was pretty much cardio only for me. I loved group cycling and endurance running. I enjoyed sweating all over the floor teaching a high-energy cycling class, and I loved running out to the middle of nowhere and melting into nature and myself.
At the time, I didn’t yet grasp that my participation in each of these sports tended to reinforce that same, constant message for me: that less is more. Endurance runners have to be rail-thin so they can be fast. Group cycling classes will claim to burn a gazillion or so calories. The rest, if not explicitly stated, is often implied in skewed marketing messages: stay little.
In time, I experimented and found my way to some weight training. But I started with methods I thought wouldn’t make me too big or bulky. And obviously, to burn more calories, because I still believed that less was more. Along the way, I began to see glimpses of a different way though. Who is this Jen Sinkler person, and what is this Lift Weights Faster stuff I see? Oh my goodness, Girls Gone Strong?
Strong? What a novel concept!
And women were using…what was that called again? A barbell? I was clueless and petrified to touch the thing for the first time, but I eventually gave myself a dose of my own tough love, sucked it up, and walked into the weight room one day. As it turned out, it wasn’t so bad, and I felt capable of being there! (I also realized not everyone knew what they were doing in there.)
And, so, I started with strong, and I believe in that wholeheartedly. I completely agree with Tony when he says that training for performance in lifting is a great place to start. I not only saw my strength come up substantially, but as Tony has also mentioned many times before, I began to see significant physical changes in my body shape and composition.
I was getting bigger. Bigger! Everywhere. And I liked it.
I liked it so much, in fact, that it became my primary goal. I’ll never forget writing my initial email to my first coach and my No. 1 goal as “Gain some size. As much hypertrophy as possible.” Oh, how different that was from the last 30 or so years of my life — that a woman should actively say to herself, I don’t want to shrink. I want to grow! I don’t want to lose weight. I want to gain! And then deliberately work toward getting bigger?
It took a little time to get behind fully, I’ll admit. Just like so many other women, I’ve been conditioned by the mainstream messaging to know nothing other than slender, slim, and thin-is-in. Not to mention, quiet, polite, and ladylike. Flipping the script on all of that doesn’t happen overnight. But changing my training focus to hypertrophy not only helped me to discover the most fun kind of training ever (seriously!), but it helped me to embrace my own body, more than I ever thought possible.
I used to hate my “linebacker shoulders” and big arms. Now? Are you kidding me? Let’s beef ’em up so I can bust out of my sleeves! I used to cringe at my outer thighs and cover them up with my hands so they’d look like the ones I saw in the magazines. Now? I cannot stop leg pressing because I want to see my muscles through my pants.
Letting go of less is more was freeing. It was empowering. It was a gift, an open door to start exploring what other mainstream misconceptions might be out there. I’ve always been one to go a bit against the grain and question the norm, and while it took me a little while longer to do it when it came to what I wanted for my body, when I got there? Everything changed.
Loving my big arms (and doing 10,000 biceps curls) enriched my life exponentially and boosted my confidence about everything through the stratosphere. Who would have thought that working deliberately to bulk up would have that effect? Oh, and it also happened to have the effect of creating a physique that I, personally, consider totally rockin’.
More muscles has meant more everything for me. More quality relationships, more fun, more business, more love. All of it — seriously — because I made a choice to defy that less is more rhetoric and train specifically to be bigger.
Because, sometimes? More is more.
Are You Ready for the Bigtime?
The Bigness Project is a brand-new hypertrophy-training program built to get you built. Written by Kourtney Thomas, a strength and conditioning coach who has spent the last few years focused on the small details that will get you big, this program—or “brogram,” as she refers to it in the most gender-neutral of ways—delivers on the promise of bigger arms and a bigger life.
Consisting of tried-and-true muscle-building techniques, The Bigness Project will guide you through 14 weeks of training that will support your overall strength, develop a stronger mind-muscle connection, and give you a look that leaves no doubt that you lift weights.
A comprehensive User Manual that explains the philosophy behind the program and walks you step-by-step through every aspect of Bigness training and lifestyle.
14-week hypertrophy training program.
A complete exercise glossary including 95 written and photo demonstrations of every movement in the program.
A video library containing 20 in-depth explanations of the most detailed movements and components of the program.
Now available—all aboard the gainz train! To celebrate the kickoff of the Bigness Project, the program is on sale now. Get your copy HERE and join us in the gym this week!
About Kourtney Thomas
Kourtney Thomas is a personal trainer and Certified Strength and Conditioning Specialist with a passion for empowerment and hypertrophy training for women, which she coaches virtually with Kourtney Thomas Fitness. When she’s not at the gym doing some variation of biceps curls, Kourtney loves to ride her Harley-Davidson Softail Deluxe anytime the weather is above 50 degrees, travel to national parks, stay up too late reading copious amounts of science fiction and fantasy, and bake elaborate cakes and cookies—because something has to fuel those gains. Drawing on the above, her personal motto is “Big Arms, Big Life,” and she lives by that daily.
First things first: We’re in the final countdown for baby Gentilewis2 to arrive. Lisa entered week #40 this week and we’re gearing up for the due date which is technically this Friday, January 27th.
We think we’re ready, but we’re both pretty realistic about the shit-show (literally and figuratively) that’s about to be dropped into our laps. Don’t get me wrong: we’re both super excited and pumped. However, all of that is met with equal parts trying not to destroy the back of our pants too.
If for some reason I happen to not update this blog this week, you will know why.
Wish us luck….;o)
1. It’s still surreal to think that by this time next week I’ll be someone’s daddy. I have zero confidence I’ll be able to keep my bearings and I know it’s going to be one of the most emotional and spectacular events of my life.
My emotions came to the forefront even more this past weekend when I finally sat down to watch the documentary, Gleason.
It’s hard to explain in words how this film made me feel. As a relatively newlywed (1.5 years) and a dad-to-be, it definitely brought to light the unparalleled beauty, complexity, and tragedy that life can deal us sometimes. We can either bow down or do something about it.
Do yourself a favor and watch this film. Keep a box of Kleenex handy too.
2. My wife is a rock star. Throughout her entire pregnancy she’s been hitting the gym pretty hard. She’s kept up with her strength training 3-4x per week in addition to teaching three spin classes per week.
A video posted by Tony Gentilcore (@tonygentilcore) on
Although, she did stop teaching her classes three weeks ago and has only been attending them since. Slacker.
I feel there’s a lot of stigma with regards to strength training and pregnancy, which I find dumbfounding. Everyone is different and the answer as to whether or not a woman can (or should) do it is dependent on her previous experiences (and preferences). That said, women have been giving birth for thousands & thousands of years in much more complicated scenarios, and the body is more resilient than we give it credit for sometimes.
There’s a degree of bias in me saying this but, I don’t feel strength training is in any way deleterious during pregnancy. In my eyes strength training during this time is helping to prepare the body for something a helluva lot more taxing than a few sets of deadlifts.
#makinglaborlesslaborious
I wrote a much more thorough article on the topic a few years ago HERE when I was working with a few female clients through their first pregnancy.
3. I’ll be the first to admit my wife is a bit of an outlier. As an example throughout her pregnancy she’s still been hammering her chin-ups (and having weird taco cravings). Even with 25-30 lbs of natural progressive overload she’s been crushing them. Beast mode.
I think she made it to week #34 or 35 before she started giving me the “dude, really? look” and we stopped performing bodyweight chins and started using band assistance. She’s already planning her “come back” and is excited to give Kourtney Thomas and Jen Sinkler’s The Bigness Project a go once she’s cleared to resume normal physical activity.
I happened to get an advance copy of it last week, and am really impressed. What I love is the message: it’s okay, nay, more than okay, for women to want to put on muscle.
All this past week Kourtney and Jen have been putting out killer content in anticipation of it’s release this week:
Keep your eyes peeled because this program is going to change a lot of women’s lives.
4. The topic of program design is an abyss of dichotomies, paradoxes, and juxtapositions. What works for one person may have the polar opposite effect on someone else. I never like to marry myself to any ONE way of doing anything and wholeheartedly believe that it’s important to cater each program to the individual.
What’s more, each program is going to be contingent on several factors:
Past/current injury history.
Goals.
Training frequency.
Ability/Experience level.
Equipment availability.
Expectation management. I had someone ask me to write them a program to bring their deadlift from 300 to 400 lbs in four weeks. Um, yeah, what’s next? Beating The Mountain in being a ginormous human being?
This will likely be a topic of a more thorough blog post down the road, but there are some “rules” I have to program design to carry over to most everyone.
I LOVE using fillers. In short, there are various l0w-grade mobility, activation, stretching drills that are paired with a strength exercise. So, rather than make someone feel like a patient and bore them to tears with a litany of “correctives,” I can include fillers to take on that role and still ensure a training effect. For example, if someone lacks hip flexor length and t-spine mobility a good pairing may be:
Trap Bar Deadlift: 3×5
Stationary Spiderman w/ Reach 3×4/side
Volume is an under-appreciated component of muscle growth. However, it’s important to understand that training to failure all…the…time isn’t the same thing as volume.
Volume aids muscle growth. Training to failure all the time impedes your ability to do more volume due to fatigue. Leave 1-2 reps in tank.
I’ve been trying to do a better job at making sure my clients leave a rep or two in the tank in their earlier sets. The idea is that if they putter out too quickly, it’s going to impede their ability to hit all their prescribed reps in the first place.
Along the same lines, and a bit counterintuitive given what I said above, one easy way to get your bench up is to include more rest/pause AMRAP sets. This is something I “stole” from strength coach Greg Robins. After you hit your top set on your bench do this:
80% of 1RM for AMRAP, rest 20s, AMRAP, rest 20s, AMRAP
Rest 3 Minutes
75% of 1RM for AMRAP, rest 20s, AMRAP, rest 20s, AMRAP
Try not to die.
5. Two coaches who are putting out amazing content of late are:
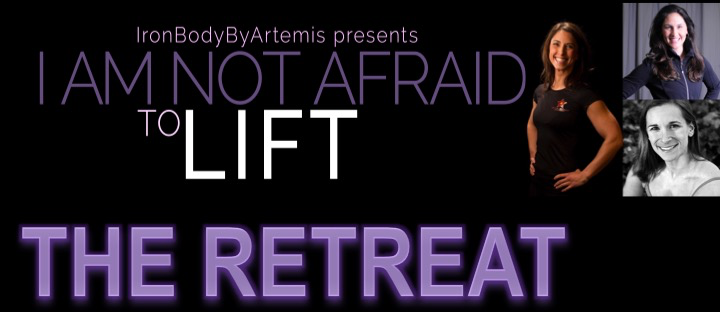
Save over $300 off registration with the Early Bird rate for I Am Not Afraid To Lift® – THE RETREAT with Artemis Scantalides, Julia Ladewski, and (my wife) Dr. Lisa Lewis on May 5-7, 2017 at the Arizona Grand Resort & Spa in Phoenix, Arizona.
Designed BY women FOR women this weekend retreat is sure to be a treat (<– HA, get it?) covering anything and everything with regards to lifting things (bodyweight, kettlebells, barbells), nutrition, and mindset training.
I’ll be there too, albeit on Daddy Day Care duty with a then 4-month old. Any dudes wanna hang out? Anyways, it’s going to be an amazing weekend and a lovely opportunity to surround yourself with other positive, powerful, intelligent, and unabashedly strong women.
Dean Somerset and I will be in Vancouver, BC, Canada the weekend of April 1-2nd, 2017 putting on your flagship workshop.
It may be the only time we’re on the west coast of North America all year so whether you have to hop on a plane, drive a few hours, or take a hovercraft….get there.
Go HERE for more info and to take advantage of the EARLY BIRD rate.
3. Push, Pull, Legs Podcast
In case you missed it earlier this week I made a cameo appearance on the Push Pull Legs Podcast.
I had the pleasure of being asked to contribute to this article that was featured on T-Nation earlier this week. Having a little trouble motivating yourself to get to the gym? Know someone who feels the same way? Slide this article on their desk or pin it to their door. They’ll get the message.
Don’t worry: this won’t be your typical slap on the wrist article reminding you to do your warm-ups. And it won’t cause you to toss your face into a brick wall from sheer boredom (you know, cause most articles on the topic are boring as shit).
Tony’s a legit coach. Listen to him.
Social Media Highlights
Twitter
An underrated component of being a good coach? Greeting your client/athlete when they walk in the door. Acknowledgement for the win.
There’s a lack of resources out there informing new(ish) fitness pros what it takes to be successful in this industry. I thought I’d take some time to offer my two cents.
I’m not even going to swear, that’s how professional I want this post to be.
I’d be remiss not to give credit to Alwyn Cosgrove who wrote one of the best fucking3 fat-loss articles I’ve ever read way back in 2007: The Hierarchy of Fat Loss. It’s an article I still refer to to this day and obviously served as inspiration for this one.
As with fat loss, when it comes to not sucking in this industry and being successful (whatever that may mean to you4), there’s a hierarchy of things that should be met and/or prioritized.
Just to be clear, having the cutest cat in existence isn’t one of them.
A photo posted by Tony Gentilcore (@tonygentilcore) on
But it doesn’t hurt either.
Based on current trends you’d think all you need to become successful in the fitness industry is a YouTube channel, an endless collage of Yoga pants, or some kind of witty self-promotional title like, I don’t know, “Paleo Pirate” or “Han Swolo.”
[Not sure if those are already taken, but if not, you’re welcome]
I understand it’s popular and altogether easy to rag on “fitness celebrities.” I do it too and it’s often warranted. By the way, THIS article is one of the better ones in recent memory.
However:
I don’t have a million followers. You don’t have a million followers. Let be real: We both want a million followers. They must be doing something right.
Writing a snarky Facebook status or Tweet isn’t going to help anyone or solve the divide, so I decided to do something productive about it.
Hierarchy of Skillz
The roots of this post can go back several years, when we started our intern program at Cressey Sports Performance. Almost inevitably, when asked what they wanted us to cover, every new intern class wanted to go over more nuanced topics right away like assessment, PRI, or why my music playlist was way better than Eric’s
Yet, many couldn’t tell what muscles upwardly rotate the scapulae or coach a proper squat if their life depended on it. Or, on occasion, some weren’t socially comfortable enough to take the reigns on coaching someone in the first place: whether it was breaking down someone’s squat or demonstrating a proper deadbug.
It flies in the face of what many young coaches today are programmed to think, but, no, Instagramming your deadlift won’t get you into Men’s Health.
You’re going to have to build some career capital and experience the old fashioned way.
I’ll break down my hierarchy in more detail in a minute. Before that, however, I want to have a real, un-censored conversation. Here’s the umbrella theme I want you to consider the rest of the way:
“Work ethic. Cliched but true. Not many are willing to get out of bed at 4:30, get home at 8, and turn around and do it again and again, for YEARS. You work when other people don’t-early mornings, late nights, holidays.
And you have to combine that with the wherewithal to over deliver, all the time. I used to show interns a picture of a BMW or Mercedes and tell them “This is what your future clients could choose to spend their money on each month for what they will pay you. You better bring it, because this car is a helluva lot more attractive than doing lunges and rows.” This is where the people skills come in.
I’m not going to millennial bash, but most young trainers just ask me how to get in magazines, get book deals, etc. The thought of spending 17 years, much of which was spent doing one-on-one training over 14 hours a day, isn’t really appealing. God I sound like my late father.”
I could just say wear deodorant and”don’t be weird,” but that wouldn’t be helpful.
It’s fashionable to think the way to go is online coaching nowadays. It’s easy and THAT’s where the money’s at, right?
Where are your clients coming from? Do you have all your systems in place to collect payment and stay on point with your book-keeping and scheduling? What about programming? What software are you using? Are you scheduling weekly or bi-weekly check-ins? How much access will your clients have to you? Are you prepared to introduce your face to your keyboard from all the emails you’re going to receive 24/7?
Sure you have the luxury of working from home or your local coffee shop, can travel when you want, and pants are always optional5, but online coaching can be more of a pain in the ass than people think.
There are plenty of people who do very well with it. I’d argue, though, that the ones who do really well are also the ones who spent years honing their craft coaching people in real-life.
A piece of advice I often give to new trainers who email me for career advice is this:
“In the beginning you should spend, minimum, two years working in a commercial gym.”
I did it for five. Eric Cressey did it for four. Mike Robertson did it for a while too. You’re not above it. You’re not that special, snowflake.
It’s the only way you can pretty much guarantee you’re going to gain access to as wide a variety of clientele as possible. Extroverts, introverts, Type A, Type B, athletes, non-athletes, injured, not injured, assholes, not assholes, so on and so forth.
Learning how to work with different people, from different backgrounds and experience levels is priceless experience. Experience that will make you a better coach in both real life and the virtual world.
2. Anatomy
You don’t need to be on par with Dean Somerset, Sue Falsone, or Dr. Frankenstein on the topic, but you should know your anatomy. It dumbfounds me how many fitness “professionals” can’t name all four rotator cuff muscles or explain the real function(s) of the rectus abdominus.
Likewise it’s not just knowing insertions, origins and regurgitating what your anatomy book tells you. Functional anatomy matters as well. Like, understanding that being stiff and “tight” isn’t always bad, or that if you spot a DB press like this (from the elbows) bad things will happen.
At the end of the day it’s going to be hard to break down movement and to explain things to your clients/athletes if you have no idea what certain exercises work or do.
3. Movement/Exercise Technique/Cueing
You’re not going to be able to write effective programming if you’re unable to break down exercise technique.
THIS post from Tony Bonvechio is an excellent example of how creating context and breaking down movement in ways your athletes/clients can relate to is a powerful skill to learn. Likewise, THIS post I wrote a few years ago explains the difference between External vs. Internal Cueing and how the former kicks the latter’s ass.
THIS one is more recent and also goes into external cueing.
Another skill that falls under this heading is the ability to regress/progress exercise on the fly. I’m not an infallible coach, I make mistakes. Sometimes I’m overzealous and include an exercise that’s too aggressive for someone. Other times, too easy. The last thing you want to be is unprepared. As a coach or trainer nothing reeks of ineptitude more than this.
In short, you should be able to break down basic human movements:
As well as match all the above with the needs, goals, and ability level of each of your clients. Moreover, you should be able to do so simply. If you start explaining something to someone and they start looking at you as if you’re speaking Elvish you’re doing it wrong.
4. Nuts & Bolts
This gets right to the meat and potatoes of what many are often too quick to jump to: exercise selection, order, sets/reps, rest intervals, tempo, etc. Essentially, program design.
When it comes to program design you have Chefs, Sous Chefs, and Cooks.
Cooks – are those writing their first program or have very little experience writing programs. Most likely you’re better off following someone else’s lead.
Sous Chef – these are your coaches who have 3-4 years experience.
Chefs – 5 + years experience. These are your Mike Boyle’s, Dan John’s, Optimus Prime’s, etc.
Can you start to see why the previous categories help to pave the way for writing effective training programs?
5. Continuing Education
Some people get caught in the black hole of continuing education, interning, and certification grabbing. This isn’t necessarily a bad thing. Far be it from me to dis anyone who places a premium on educating themselves and trying to get better.6
Read. Go to seminars. Intern. Shadow. Observe. Watch.
Do what you gotta do.
At some point though, you need to get actual experience and start applying what you learn.
6. Sales/Building a Brand
If I had any talent with photo shop or making shapes on a computer this would be at the top of a pyramid, and the least important. Not to say it isn’t important. It’s just the least important.
Many people are quick to hop on the brand building wagon before there’s a brand to even build. To put things into context (and I am not implying this is way things should be done):
I didn’t have my first logo and t-shirt made until this past year. Yet, there are some trainers who are writing ebooks two months into their “career,” and wondering why they’re unable to generate sales.
I know someone may chime in with, “well, I work in a commercial gym and I’m supposed to hit sales quotas each month! Shouldn’t I focus on sales?”
I get it. It sucks. However, call me crazy, but if you focus on all of the above – in order – you’ll likely have all the clients you’ll need. Get people results, don’t be a dick, have an ounce of patience, and amazing things happen.
Jordan Syatt shared a cute story the other day:
Coach emails me asking how to get more people to read their content and get more engagement.
“I give clear, straight forward instructions that, admittedly, would require them to put more effort into their work.
Coach responds with all their reasons for *not* wanting to take my advice. Then asks for more ways to get people reading their content and engaging.
I outline exactly why my previous advice is what I’ve found to work best.
Coach responds with more reasons why my advice won’t work for their audience. And what else can they do to get more readers and audience engagement.
—-
Just like fitness coaches love to tell their clients, there is no magic pill. There is no quick fix. The process is simple — not easy — and the best results come from patience, consistency, and a metric f-ton of effort.”
I tell the same people: I’ve been writing on my site since 2006 and have upwards of 1,900 blog posts (not counting all the articles I’ve written for other sites). Want to get better at writing and producing more engaging content? Stop emailing me, or Jordan, or Santa Claus about how to write and produce more engaging content and start, you know, practicing.
“I figured if I wrote quality content people would, eventually, show up. Shit content, even with SEO, is still shit content.”
The only way you’re going to get better, and build a brand, is to….do the work.
Total Swear Words: 1 (not counting asshole, twice). So 3. Not too bad.
It’s always a great feeling to be in demand. I’ve been very fortunate to get to a point in my career where people will seek me out to listen to me talk. 7
Just last night my wife and I sat down at our dinner table to hash out a trip to Europe this summer. I’ve had several places reach out and ask if we’d be interested in doing our Strong Body-Strong Mind workshop over there. You may be seeing the Gentilewis clan in Ireland, London, Denmark, and/or Warsaw. That’s pretty cool.8
Also, mine and Dean Somerset’s ongoing globe-trotting shoulders & hips bromance continues in Vancouver this coming April. Stay tuned for more dates in the future. I.e., here’s looking at you Orlando, FL.
More to the point is that I continuously get invited onto different podcasts each month. This is great as it allows me an opportunity to expand my brand, reach different audiences, and not wear pants.
Recently I was invited onto the Push, Pull, Legs Podcast.
Dan Meek and Tom Hall are two chaps I’ve had the pleasure of meeting in person (they’ve both attended workshops I’ve done in London) and are also two very accomplished coaches over in the UK.
You can check out Part I of my appearance HERE on iTunes or listen below:
At the expense of sounding like an uber meathead, squats pretty much solve anything. You want to be stronger? Squat. You want more muscle? Squat. You want to lose fat? Squat. You want to beat Captain America in an arm-wrestling match? Squat.
About the only thing squats can’t do is help you grow hair, make you an omelet, and cure cancer9.
There’s a reason squats are a staple in most weight training routines, and today’s guest post by strength coach, George Kalantzis, breaks down the proper progressions most people should consider when starting for the first time.
Enjoy.
The Squatzzzz
“If you want bigger arms- squat. Squatting makes everything grow.”
Sergio Olivia, 3 time Mr. Olympia, on offering advice on how to get bigger.
Squatting has been around for centuries. It is one of the primary movements that Dan John says can impact your life, and also one of the best movements for mass strength and muscle development. Yet unfortunately squats are still one of the most neglected and butchered exercises in the gym.
But Why?
Squats are tough and working hard separates the strong from the weak. Squatting heavy stresses the entire body and it takes a lot of will power and strength to put something heavy on your back, drop down, and stand back up. Therefore most people neglect them altogether.
Then you have some people who claim squats are bad for your knees and stick to leg extensions and leg presses. While it is true that squats can place a lot of stress on the knees, it is typically the form and amount of volume that is the cause of knee pain.
In fact, from a exercise science point of view leg extensions can actually place more stress on the knees than squats because they are an open chained exercises. Open chained exercises like leg extensions cause the quadriceps to contract and pull on the knee ligaments and surrounding muscles without counteraction of the hamstrings. Squats actually recruit both the hamstrings and quadriceps.
Research (Escamilla, 98) supports that squats generate twice as much hamstring activity as leg presses and leg extensions. That same research suggests hamstring recruitment is advantageous to enhancing knee stability and functional capacity of the hips. Squatting does not sound that bad now does it?
Ok, I’m Ready Where Do I Start?
It is always important to start with an assessment to figure out where the you will stand in reference to squatting. Tony wrote an in depth post on that HERE.
Mobility Drills
After establishing a baseline, it is time to begin start preparing the body to squat. Starting with some light soft tissue work and warm-up drills will help prepare the body for full ranges of motion needed to squat and prime the nervous system.
Most people have a hard time reaching full depth in a squat and I have found that it is usually a lack of mobility in the areas of the hips and ankles often leads to compensations in the squat..
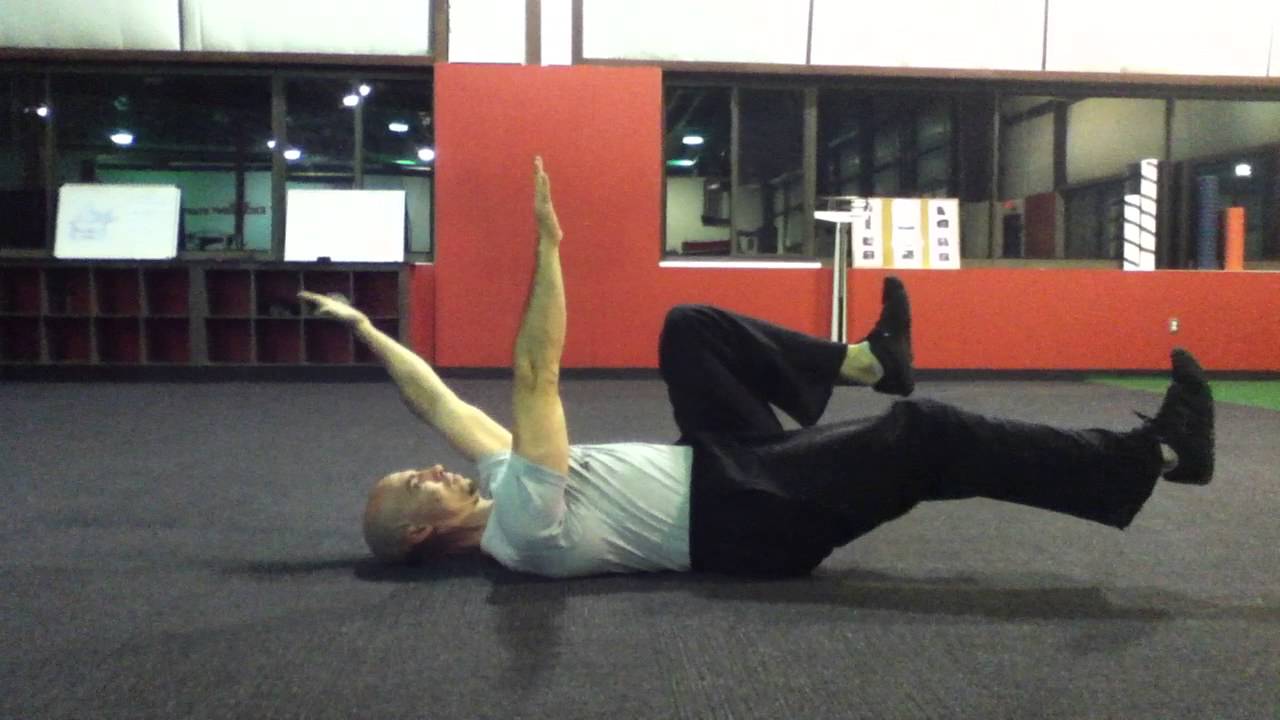
Core Engaged Deadbug
A deep squat requires proper pelvic position. If you arch your back to hard during a squat , your femur will have a hard time moving around in the hip socket. This is often the cause of the butt-wink.
A core engaged deadbug will help you learn how to keep the ribs down and control the pelvis which are needed for a good squat pattern.
Wall Hip Flexor Mobilization
This drill really teaches you how to keep your glutes tight, extend the hip and flex the knee at the same time to get a deep stretch in the quads. You should focus on getting the range of motion through your hips and not lower back.
Kneeling Glute Mobs
I love this mobilization drill because it really looses up the posterior chain and allows you to safely work on hip internal rotation without cranking on the knee.
Ankle Mobilizations Drill
An often-overlooked area of squatting tends to be the ankles. In order to squat to full depth the ankle needs around 4 inches of dorsiflexion. If the ankle is lacking the appropriate mobility, you may see yourself coming up n your toes, or not hitting appropriate depth.
Squat To Stand With Reach
By the time you have complete the other drills your body should be primed to squat. The squat to stand synchs the entire body and recruits all the muscles needed to perform a good squat. If you have a hard time getting into this position, you may no the ready to squat to full depth.
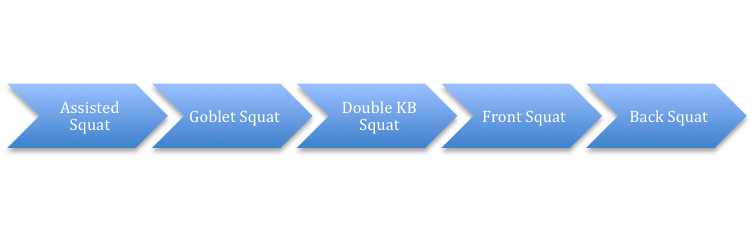
Assisted Squat
Assuming no pain or restrictions are present a great place to start is an assisted version of the squat. There are many ways you can do an assisted squat, but I like using a suspension trainer for assistance.
Holding a suspension trainer allows the trainee to work on static stability and groove a great pattern. Make sure the trainee maintains a neutral back position and uses as much assistance as needed in order to get to the bottom position.
Bodyweight Squat Versions
Once someone has mastered the assisted squat, it is time to move onto a bodyweight squat. Here you can really learn how to squat to full depth and drive up under control.
Sometimes people will have trouble with their heels coming up of the ground. If that is the case, you can create a little heel lift with plates or shoes to help the body recognize how to sit back onto the heels and reduce coming up off the floor.
Another common error for someone just learning to squat is a knee collapse. A great trick for that is to put a mini band around the knees. The bands feeds into the bad movement pattern by pulling their knees farther in and the body reacts by correcting the movement.
Goblet Squat
For most people, a goblet will be the basis of a squatting program. Legendary coach Dan John says that goblet squat is all a lot of people will need and there is a good reason behind that.
Grab a Kettlebell or dumbbell and hold it close to your chest. With your elbows pointing down, lower your body into a squat. Allow your elbows to be inside your knees and put pressure on the outside of your heels to help keep your knees out. Return to the starting position.
Many people are under the assumption that the Goblet Squat is just this plain ol’ vanilla squat variation that offer no variety. Au contraire! There are any number of ways to make it more challenging.
Goblet Squat Against Wall
Cannot seem to keep your back straight and knees from caving in? Try the goblet squat against the wall. Face a wall with your feet around 6-12 inches away from it and work to actively pull down into the squat.
Start further away and work closer to the wall, as you get more comfortable with the position.
Goblet Squat With Pause
Mastered the regular goblet squat? No problem, try a pause in the bottom of the squat. Pause reps will keep you honest, and really challenge your strength because you cannot rely on the momentum to pop back up from the bottom.
Goblet Squat With Heartbeat
This is one of my favorites to use with people, and it is one version that is not used that much. I first saw it from Mike Robertson when I was learning progressions for group training. It is great for people who have shoulder issues and really challenges the core.
Offset KB Squat
Holding a kettlebell on one side of the body will expose any asymmetries from side to side and really teach the body to own the position. Try to really focus on driving through the entire foot rather then shifting to the side of the kettlebell.
Double KB Front Squat
It only makes sense that once you have mastered the above it is time to load up. The double KB front squat is a great squat version because it really teaches you to sit down rather than back and down.
Essentially what you get is all abs and quads without demanding mobility requirements. It can be very humbling if you have never tried this before.
Front Squat
If you have become comfortable with the KB front squat and are ready for more of a challenge it is time to move on the barbell front squat.
Just like the KB, barbell front squats are all abs and quads. They are great because you have to really sit down into the squat rather than sit back or you’ll loose the bar. Due to the position of the bar your body must learn to stabilize the core instead of using back muscles to stand up. If you constantly get stuck hitting depth on a back squat this is a great exercise for you.
Back Squat
At this point, we have covered a lot of information on squatting. The back squat requires tremendous strength throughout the quads, hamstrings, glutes, hips, abs, and back. There is a reason why most people mess the exercise up or neglect it all together. If you have truly mastered the above exercises then it might be time to try a back squat out.
If you want to learn how to set-up, Tony wrote an awesome post HERE.
Conclusion
Squatting is a lot tougher then it seems. Consider hiring a coach for help on some of the barbell work, and if you are just starting out, goblet squat variations will surely get the job done. Try not to be a hero and start with something that is in between.
Quick things to consider before squatting:
If it hurts, you should hire a coach for an assessment and or see a qualified physical therapist.
Not everyone is made to squat to full depth or made to squat.
Squatting with a bar is not for everyone
When you first start out, you will not need that much weight, typically 45-55 % of your true max. Working on technique and conformability with the different squatting positions should be your first goal before trying more advanced versions.
References
1) Escamilla RF, Fleisig GS, Zheng N, Barrentine SW, Wilk KE, Andrews JR. Biomechanics of the knee during closed kinetic chain and open kinetic chain exercises. Med Sci Sports Exerc. 1998 Apr;30(4):556-69.
About the Author
George began his time at Cressey Sports Performance as an intern in the fall of 2013, and returned in 2014 as CSP’s Group Fitness Coordinator, overseeing all Strength Camp coaching and programming responsibilities.
George is a veteran of the United States Marine Corps and was awarded an honorary discharge after eight years of service. He possesses an MBA from Southern New Hampshire University and is currently attending massage school to become a licensed massage therapist.
Outside of CSP, George maintains a fitness-related blog that can be found at www.sgtkfitness.com.
Speaking of Fridays, guess what? Lisa got the “thumbs up” from her OB the other day and our little guy is good to go for his “launch” in two weeks. This time two Fridays from now I may be calling myself “Dad.”
Holy shitballs.
Stuff to Checkout Before You Read Stuff
1. I Am Not Afraid to Lift: The Retreat
Save over $300 off registration with the Early Bird rate for I Am Not Afraid To Lift® – THE RETREAT with Artemis Scantalides, Julia Ladewski, and (my wife) Dr. Lisa Lewis on May 5-7, 2017 at the Arizona Grand Resort & Spa in Phoenix, Arizona.
Designed BY women FOR women this weekend retreat is sure to be a treat (<– HA, get it?) covering anything and everything with regards to lifting things (bodyweight, kettlebells, barbells), nutrition, and mindset training.
I’ll be there too, albeit on Daddy Day Care duty with a then 4-month old. Or should I say doody? Anyways, it’s going to be an amazing weekend and a lovely opportunity to surround yourself with other positive, powerful, intelligent, and unabashedly strong women.
Dean Somerset and I will be in Vancouver, BC, Canada the weekend of April 1-2nd, 2017 putting on your flagship workshop.
It may be the only time we’re on the west coast of North America all year so whether you have to hop on a plane, drive a few hours, or take a hovercraft….get there.
Go HERE for more info and to take advantage of the EARLY BIRD rate.
3. I helped contribute to THIS article via BuzzFeed News on Surprising Weight Loss Tips. Lots of other smart coaches and trainers chimed in as well.
It’s the start of a new year, and with it comes an avalanche of information overload and hyperbole when it comes to what you should and shouldn’t be eating.
Kamal Patel of Examine.com sets the record straight on many of the more common myths circulating out there.
“Rules” are meant to be broken. You know, like that one my wife makes about cleaning my dishes when I’m done with them and to not leave them in the sink. Pffffffft, whatever.10
I had a gentleman reach out to ask me to read his article and to tell him what I thought. Well, I thought it was good enough to post on this week’s list.
Sha-ZAM.
In short: YOU are in charge of your own change.
Social Media Highlights
Twitter
A very UNDERrated accessory movement are pause lifts. No better way to get stronger in a ROM you’re weak in than by spending more time there
To be blunt: I don’t feel what I do is all that special or altogether revolutionary. But it’s a topic that came up a lot earlier this week when I asked the Twitterverse for some ideas on what they’d like to see me write about in the future.
@tonygentilcore1 Creating buy-in from your client, how much time you spend on an assessment in the first couple of sessions, break it down!
Much of the time the entire process starts with a swipe right an email. Someone reaches out and expresses an interest in coming to my studio in Brookline, MA so I can take a look at their bum shoulder or low back, or maybe to have me audit their deadlift or squatting technique.
They’ll be a few back and forths and I’ll try my best to articulate to them what my assessment will cover. I’ll ask for a little background information – training history, any current/past injuries I need to be aware of, or whether they’re Team Jacob or Team Edward?11 – and then I’ll break down the general flow of the assessment and what they can expect.
In short, I’ll inform them that I divide the session into two parts: The “poking and prodding part” and the “pseudo training session part.” The part where I incessantly blurt out movie quotes is just a given.
The goal, for the poking and prodding part, is to see if any red-flags pop up from a “is anything I’m doing causing any pain standpoint?” and a “do they have the mobility/flexibility of a rusty crowbar standpoint?”
Likewise, the goal of the pseudo training session part is to ascertain general movement quality and to not bore them to tears.
I explain this to them in a much more professional and succinct manner.
Once we’ve established a date/time to meet up I’ll send them the address of the studio (you would think this is obvious, but I can’t tell how many times I have forgotten to do so), pre-payment options if they so choose (PayPal Button), as well as my Health Questionnaire I’d like for them to fill out prior to coming in (to help save time).
An important point I’d like to note about my health questionnaire (I am not saying you have to do this) is that I consider this an opportune chance to start building a rapport with the client. Most people know what to expect from a standard health questionnaire. Questions regarding their family history, past/current injuries to note, allergies, and what (if any) medications they’re taking are all par for the course. Mine questionnaire is no different.
However, out of nowhere I’ll hit them with questions like:
What’s your favorite movie?
What’s your pet’s name?
Have you ever been bitten by zombie?
Such things help break the monotony and serve as conversation stimulators. Plus they demonstrate I don’t take myself too seriously and that I’m cool as balls.
The Face to Face
Now it’s go time. We finally meet face to face.
I’ve championed this sentiment in the past but it bears repeating:
“The main objective for me when starting with a new client is to not treat the assessment as an opportunity to showcase how much of a walking ball fail they are. It serves no purpose IMO to point out every…single…thing they suck at. Rather, my goal is to do anything and everything I can to demonstrate to them success.”
If they’re coming in with shoulder pain and they lack shoulder flexion, what can I do to 1) help them get out of pain? and 2) demonstrate movements that they can do (pain free)? Moreover, can I use the Test/Retest protocol to see an increase in ROM in shoulder flexion?
If I can accomplish one of those things within an hour, if not all three, it’s a safe bet I’ll likely achieve an easy “buy in” on their end. I’ll also kindly ask them to refer to me as Gandalf from that point on.
I’ll begin each assessment with a 5-10 minute window where we discuss our feelings. Normally I’d rather jump into a shark’s mouth than discuss my feelings with anyone, but it’s about them not me. The best thing I can do is shut up, ask questions, and listen and use the word “why?” a lot.
Example 1
Them:“I want to lose ten lbs?”
Me:That’s cool, why is that? What benefit do you think you’ll receive in attaining that goal?
Example 2
Them:“My goal is to compete in my first powerlifting meet.”
Me (after I high-five them):“Cool. why is that? What benefit do you think you’ll receive in attaining that goal?
Example 3
Them:“I’d like to get stronger.”
Me:“Yeah, that’s cool but it says here your favorite movie is The Matrix Revolutions, is that right?
Them:“Yep, I love it.”
Me:“Get the fuck out of my gym.”
Sometimes people talk for a few seconds, while others go on for several minutes (and then some). Either way, by getting THEM to talk – and asking why? – I’ll get a better idea of where their mindset is at in addition to having a better appreciate of where they’re coming from.
Something else to note here is that, often, coaches will use the interview process to ask about coaches and trainers the person may have worked with in the past and their experiences with them. I think it’s a good idea to ask. However, what I find is all too common is some coaches take it as an opportunity to lambast the other coach.
“Your previous trainer did whaaaaat? That’s so stupid!”
Don’t do that.
Just nod your head, say something to the affect of “huh, that’s interesting,” and move on. You’re not doing yourself any favors by talking smack about other fitness professionals. In fact I think it comes across as very unprofessional.
It’s Time to Poke and Prod
NOTE: Just realized this comes across as slightly creepy. Rest assured things stay 100% PG.
At this point I’ll take out my training table and start the formal assessment. To be honest: while I do have a checklist I work off of, no two assessments are the same. Having the checklist helps, but everyone’s different. While there is some overlap, what I look at and how I assess a 22-year old college baseball player can be quite different compared to a 47-year old accountant with limited exercise experience.
To that end, every fitness pro approaches assessment differently. I’ve taken the FMS and use portions of it all the time. However I’m going to try my best to cater the assessment to match the person standing in front of me. That’s the beauty of having my own spot. I can do whatever the heck I want.
If that means going off the beaten track so be it.
I’d be remiss not to mention it’s inevitable there’s going to be a degree of bias. One’s training philosophy and values will come into play. For example I’m a “strength” guy. I like getting people strong (while also helping them feel a little more athletic). Despite my assessment I’m still going to have people deadlift, squat, press, row, carry, lunge, and perform first pumps x infinity to Annie Mac radio.
Some may be like, “WTF Tony. What’s the point in doing the assessment, then, if all your going to have them do is the same stuff you have everyone else doing?”
Fair question.
The assessment helps me figure out someone’s starting point. More to the point, the assessment helps me figure out what variation of those lifts will be the best fit given their goals, ability level, and movement quality.
As an example, I use the table assessment to perform a hip scour and gauge hip (IR/ER) ROM. If someone has 45-50 degrees of ER and 20-40 degrees of IR (and appropriate hip flexion ROM) it’s a safe bet they’re okay with squatting below 90 degrees (or with most anything else I’d have them perform on the gym floor). If not, well, I’ll adjust.
I can also perform further “screens” to see if the lack of ROM is due to actual “tightness” or if all I have to do is work on someone’s REACTIVE stability:
I can also use the Shoulder Flexion Screen to see whether or not overhead pressing is a good idea.
In the end, I’m not going to sit here and say you MUST do “x, y and z” because I don’t know what you should or shouldn’t be doing. All I know is that there’s no one right way, but that getting people OFF the table is more valuable to me.
The Pseudo Training Session
The poking and prodding part takes, maybe, 15 minutes to complete. 20 minutes tops. Sometimes less.
I don’t want people feeling like a patient and I’d much rather get them on the gym floor doing stuff. I get more information this way anyways.
Here’s where I’ll take a look at their hip hinge, squat, and single leg (front plane) stability. If need be, I’ll regress or progress accordingly. For some a hip hinge is showing them a cable pull-through.
For others it’s an actual deadlift.
Remember: SHOWING THEM SUCCESS is crucial.
Show people what they can do, and don’t perseverate on what they can’t.
At this juncture I’ll also begin to showcase some of the “correctives” I may want them to do. Some may need to prioritize their T-spine mobility or maybe we need to spend some time activating their glutes. Or, maybe we need to show them a good movie, like The Royal Tenenbaums.
I’ll also break down why (and how) I want them to foam roll and do their soft-tissue work, and then I’ll basically take them through a quick training circuit. This may come down to a short-n-sweet A1-A2 circuit for a few sets. Or, I don’t know, maybe we’ll take our shirts off and perform bicep curls for ten minutes.
Either way I’ve done all I can to have (hopefully) given them a positive experience and a better idea of my coaching style, what a typical training session would look like, and how I’m going to help them increase their general level of badassery.
Buy in = they give me their credit card number….;o)
PS: If you’re really interested into diving into my assessment process check out mine (and Dean Somerset’s) resource Complete Shoulder and Hip Blueprint.
Today’s guest post comes courtesy of SUNY Cortland head strength coach and lecturer, Justin Kompf. And speaking of SUNY Cortland, the annual Health and Wellness Conference is this April 8th featuring myself, Dr. Lisa Lewis, Brian St. Pierre, Mark Fisher, and Dr. David Just. For more information go HERE.
It is the easiest thing in the world to sit down after work, turn on the television and eat whatever food is most convenient.
This convenience is inherently pleasurable; for most people, alternative behaviors such as exercise and cooking for 30 minutes are not. There is no immediate reward to experience from this type of behavior.
In fact, the exercise session may actually elicit what is perceived to be painful bodily experiences, especially when compared to sitting on the couch. The chicken and broccoli meal certainly isn’t going to excite your taste buds in the same way that burger, fries, and milkshake would. Thus, there is potential for painful experiences such as bodily discomfort and future soreness when a person exercises and they are also giving up the pleasure associated with unhealthy food.
Change Is Difficult
Due to the general difficulty of change, lifestyle modification to adopt healthier behaviors will certainly result in struggling with some intrinsically negative emotions. Struggling to suppress or avoid thoughts such as “I won’t eat the cookie” or “I won’t sit on the couch and watch television after work” might actually make these thoughts more accessible in the mind and ironically more likely to occur. Additionally, if you are trying to eat healthier and exercise more and happen to have a normal human mind, you will inevitably have negative self-thoughts.
“No matter how hard I work, I will never look like her”
“Exercising every day is challenging with my schedule, is it even worth it?”
“I can’t do it”
“I can’t change”
“I’ve failed at this before, why should now be any different?”
“Acceptance means opening up and making room for painful feelings, sensations, urges, and emotions. We drop the struggle with them, give them some breathing space, and allow them to be as they are. Instead of fighting them, resisting them, running from them, or getting overwhelmed by them, we open up to them and let them be. (Note: This doesn’t mean liking them or wanting them. It simply means making room for them!)”
When these negative thoughts appear in your head ask yourself the question, “Can I work with these thoughts?”. It is not a question of whether these thoughts are true or false since this is all a matter of perspective.
For example, “I didn’t lose weight this week, I’m a failure”. Whether or not your truly are a “failure” is irrelevant. What is relevant is how this thought will guide your behavior. If you let the thought of being a failure guide your behavior will it enable you to reach your goals and help you become the kind of person you want to be?
Acceptance and commitment based strategies may be useful in promoting physical activity. Pilot research on the topic demonstrated that after an acceptance and commitment based intervention college aged women visited the school athletic center to exercise significantly more than those in an education only condition (Butryn, et al., 2011).
Further, after a 10-week study designed to promote increased walking in sedentary individuals, Martin and colleagues found that when participants were taught skills to enable the acceptance of negative feelings and unpleasant sensations that come with physical activity there was a significant increase in cardiorespiratory fitness, estimated VO2max, and a decreased avoidance of the negative internal experiences related to physical activity (no control group for comparison).
One weight loss study showed that after a 12-week acceptance based intervention participants lost 6.6% of their body weight. More impressively, at a six month follow up participants had continued to lose weight (9.6% of body weight) (Forman, 2009).
Two of the most practical tips to practice acceptance and commitment are to identify higher order values and to examine if thoughts are workable.
Let behaviors be guided by values rather than ruminating on negative thoughts
Acceptance and commitment therapy is based on the understanding that people will only continue to engage in behaviors that bring about distressing internal experiences only if these experiences are occurring at the service of some higher order life goal or value.
In their 2009 Pilot study Forman and his colleagues had participants list out the top 10 reasons why they wanted to lose weight. They were then taught to recognize the connection between the values they listed and their eating and physical activity behavior (Forman, 2009). Once higher order values are identified, meaning is now attributed to daily behaviors that once lacked importance.
I believe that this connection between behaviors and values is best exemplified by Hall of Fame pitcher Tom Seaver:
“Pitching…determines what I eat, when I go to bed, what I do when I’m awake. It determines how I spend my life when I’m not pitching. If it means I have to come to Florida and can’t get tanned because I might get a burn that would keep me from throwing a few days, then I never go shirtless in the sun… If it means I have to remind myself not to pet dogs with my left hand or throw logs on the fire with my left hand, then I do that, too. If it means in the winter I eat cottage cheese instead of chocolate chip cookies in order to keep my weight down, then I eat cottage cheese.” (Duckworth)
A value system establishes that low order daily behaviors are in service of higher order long term goals. If you need more help finding strong values to strengthen your resolve for daily behaviors try asking yourself why each stated goal is important to you. For example:
Goal level 1: I want to start exercising more consistently. Why?
Goal level 2: Because I want to improve my health. Why?
Goal level 3: Because I have seen unhealthy relatives lose their independence with age and I want to be able to do all the activities I love for a long time.
Exercising consistently is thus linked to being able to maintain one’s independence throughout a lifetime.
Ask if your thoughts are workable
Whenever a negative thought or feeling comes into consciousness ask yourself if this thought is workable. Specifically, you can ask yourself the following:
“If you let this thought guide your behavior, will that help you create a richer, fuller, and more meaningful life? If you hold on to this thought tightly, does it help you to be the person you want to be and do the things you want to do?”
If this thought is not workable, try practicing an acceptance based skill called defusion. Defusion is the process of observing thoughts and feelings from a ‘distance’ without acting on them or trying to change them. Thoughts and feelings do not need to be believed, acted on, or even suppressed. A negative emotion is not something that will be solved analytically or with scrutiny.
For example, if you are hungry because you are trying to lose weight, that hunger is an inherently negative feeling. However, this negative feeling does not necessitate harmful action such as binge eating. You also do not need to pretend as if this feeling is not currently with you, accept that it is there and recognize that you are in control of how this feeling guides behavior.
Who can use acceptance and commitment strategies in their practice?
It is important to not overstep the boundaries of professional practice. I believe it would be important to consider acceptance and commitment as a paradigm shift in a person’s thinking process. In his book, Russ Harris states that:
“I hope to make ACT accessible to the broadest possible range of professionals- from coaches, counselors, and mental health nurses, to social workers, psychologist, psychiatrist, and all health professionals”
I would recommend that anyone who is trying to change their lifestyle start with working on identifying higher order goals and linking them to their daily behavior. Furthermore, attempt to practice defusion skills if negative thoughts or emotions well up as a result of lifestyle change. Ask if these thoughts are workable for long term goals. If they aren’t, recognize that they do not need to be accepted as truth and do not need to be acted on.
Author’s Bio
Justin is the head strength coach at SUNY Cortland. He is also a lecturer in the kinesiology department at the university. Cortland hosts a health and wellness conference each year, this year on April 8th. Speakers will include Tony Gentilcore, Dr. Lisa Lewis, Brian St. Pierre, David Just and Mark Fisher. For more information go HERE.
Note From TG: The conference linked to above is $60 to attend. That’s a steal considering the quality of presenters coming in and the information that will be shared. Students: you can’t use the excuse of “that’s too expensive” because I know full-well you’re spending that much (if not more) drinking on the weekends. Fitness Pros: this is Cortland, NY, in April, for $60. Shut up and get your butt there…;o)
References
Butryn, M.L., Forman, E.M., Hoffman, K.L., Shaw, J.A., & Juarascio, A.S. (2011). A pilot study of acceptance and commitment therapy for promotion of physical activity. Journal of Physical Activity and Health, 8(4), 516-522.
Duckworth, A. Grit: The power of passion and perseverance.
Forman, E.M., Butryn, M.L., Hoffman, K.L., Herbert, J.D. (2009). An open trial of an acceptance-based behavioral intervention for weight loss. Cognitive and Behavioral Practice, 16, 223-235.
Harris, R. ACT made simple: An easy-to-read primer on acceptance and commitment therapy.
Martin E.C., Galloway-Williams, N., Cox, M.G., & Winett, R.A. (2015). Pilot testing of a mindfulness- and acceptance- based intervention for increasing cardiorespiratory fitness in sedentary adults: A feasibility study. Journal of Contextual Behavioral Science, 4(4), 237-245.


 George began his time at Cressey Sports Performance as an intern in the fall of 2013, and returned in 2014 as CSP’s Group Fitness Coordinator, overseeing all Strength Camp coaching and programming responsibilities.


.jpg/290px-Annie_Mac_(2).jpg)