CategoriesAssessment coaching

A Peek Into My Assessment Process

I thought I’d do a solid and give my readers an inside peek into my assessment process today.
Copyright: sean824 / 123RF Stock Photo


To be blunt: I don’t feel what I do is all that special or altogether revolutionary. But it’s a topic that came up a lot earlier this week when I asked the Twitterverse for some ideas on what they’d like to see me write about in the future.

So, Here Goes

Much of the time the entire process starts with a swipe right an email. Someone reaches out and expresses an interest in coming to my studio in Brookline, MA so I can take a look at their bum shoulder or low back, or maybe to have me audit their deadlift or squatting technique.

They’ll be a few back and forths and I’ll try my best to articulate to them what my assessment will cover. I’ll ask for a little background information – training history, any current/past injuries I need to be aware of, or whether they’re Team Jacob or Team Edward?1 – and then I’ll break down the general flow of the assessment and what they can expect.

In short, I’ll inform them that I divide the session into two parts: The “poking and prodding part” and the “pseudo training session part.” The part where I incessantly blurt out movie quotes is just a given.
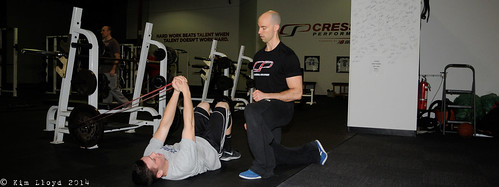
The goal, for the poking and prodding part, is to see if any red-flags pop up from a “is anything I’m doing causing any pain standpoint?” and a “do they have the mobility/flexibility of a rusty crowbar standpoint?”

Likewise, the goal of the pseudo training session part is to ascertain general movement quality and to not bore them to tears.

I explain this to them in a much more professional and succinct manner.

Once we’ve established a date/time to meet up I’ll send them the address of the studio (you would think this is obvious, but I can’t tell how many times I have forgotten to do so), pre-payment options if they so choose (PayPal Button), as well as my Health Questionnaire I’d like for them to fill out prior to coming in (to help save time).

Copyright: alexskopje / 123RF Stock Photo

An important point I’d like to note about my health questionnaire (I am not saying you have to do this) is that I consider this an opportune chance to start building a rapport with the client. Most people know what to expect from a standard health questionnaire. Questions regarding their family history, past/current injuries to note, allergies, and what (if any) medications they’re taking are all par for the course. Mine questionnaire is no different.

However, out of nowhere I’ll hit them with questions like:

  • What’s your favorite movie?
  • What’s your pet’s name?
  • Have you ever been bitten by zombie?

Such things help break the monotony and serve as conversation stimulators. Plus they demonstrate I don’t take myself too seriously and that I’m cool as balls.

The Face to Face

Now it’s go time. We finally meet face to face.

I’ve championed this sentiment in the past but it bears repeating:

“The main objective for me when starting with a new client is to not treat the assessment as an opportunity to showcase how much of a walking ball fail they are. It serves no purpose IMO to point out every…single…thing they suck at. Rather, my goal is to do anything and everything I can to demonstrate to them success.”

If they’re coming in with shoulder pain and they lack shoulder flexion, what can I do to 1) help them get out of pain? and 2) demonstrate movements that they can do (pain free)? Moreover, can I use the Test/Retest protocol to see an increase in ROM in shoulder flexion?

If I can accomplish one of those things within an hour, if not all three, it’s a safe bet I’ll likely achieve an easy “buy in” on their end. I’ll also kindly ask them to refer to me as Gandalf from that point on.

I’ll begin each assessment with a 5-10 minute window where we discuss our feelings. Normally I’d rather jump into a shark’s mouth than discuss my feelings with anyone, but it’s about them not me. The best thing I can do is shut up, ask questions, and listen and use the word “why?” a lot.

Example 1

Them: “I want to lose ten lbs?”

Me: That’s cool, why is that? What benefit do you think you’ll receive in attaining that goal?

Example 2

Them: “My goal is to compete in my first powerlifting meet.”

Me (after I high-five them): “Cool. why is that? What benefit do you think you’ll receive in attaining that goal?

Example 3

Them: “I’d like to get stronger.”

Me: “Yeah, that’s cool but it says here your favorite movie is The Matrix Revolutions, is that right? 

Them: “Yep, I love it.”

Me: “Get the fuck out of my gym.”

Sometimes people talk for a few seconds, while others go on for several minutes (and then some). Either way, by getting THEM to talk – and asking why? – I’ll get a better idea of where their mindset is at in addition to having a better appreciate of where they’re coming from.

Something else to note here is that, often, coaches will use the interview process to ask about coaches and trainers the person may have worked with in the past and their experiences with them. I think it’s a good idea to ask. However, what I find is all too common is some coaches take it as an opportunity to lambast the other coach.

“Your previous trainer did whaaaaat? That’s so stupid!”

Don’t do that.

Just nod your head, say something to the affect of “huh, that’s interesting,” and move on. You’re not doing yourself any favors by talking smack about other fitness professionals. In fact I think it comes across as very unprofessional.

It’s Time to Poke and Prod

NOTE: Just realized this comes across as slightly creepy. Rest assured things stay 100% PG.

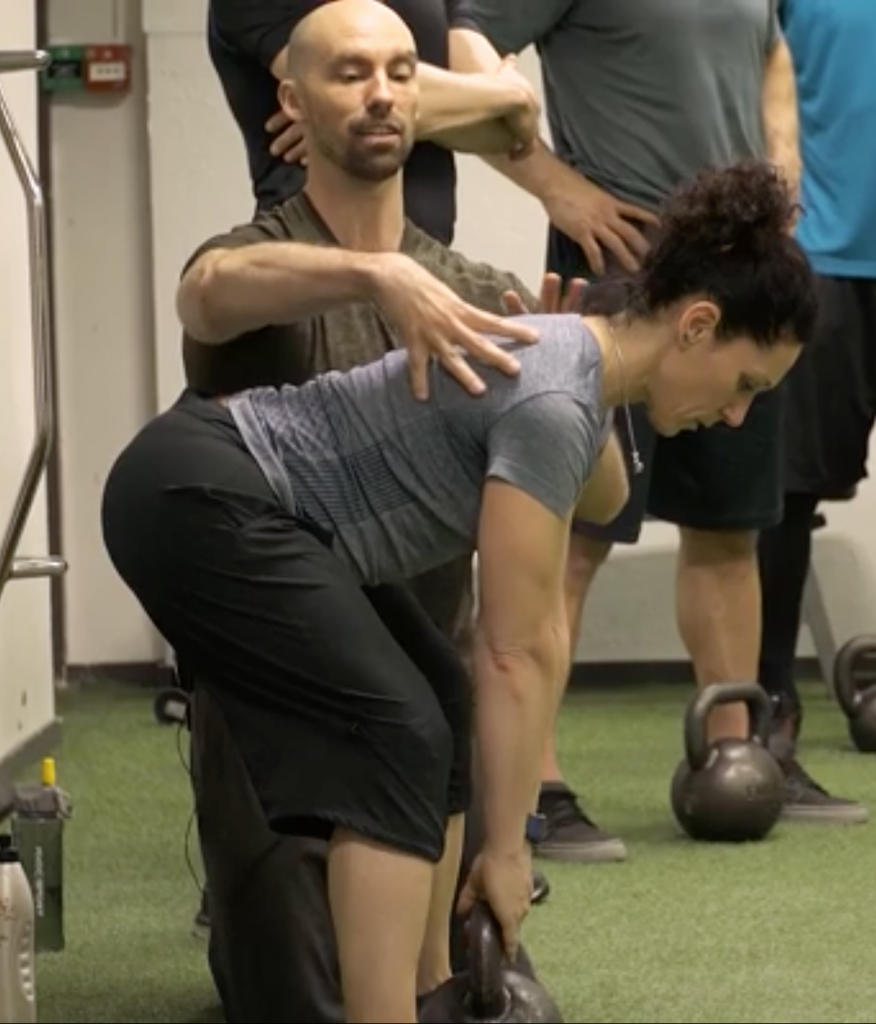
At this point I’ll take out my training table and start the formal assessment. To be honest: while I do have a checklist I work off of, no two assessments are the same. Having the checklist helps, but everyone’s different. While there is some overlap, what I look at and how I assess a 22-year old college baseball player can be quite different compared to a 47-year old accountant with limited exercise experience.

To that end, every fitness pro approaches assessment differently. I’ve taken the FMS and use portions of it all the time. However I’m going to try my best to cater the assessment to match the person standing in front of me. That’s the beauty of having my own spot. I can do whatever the heck I want.

If that means going off the beaten track so be it.

I’d be remiss not to mention it’s inevitable there’s going to be a degree of bias. One’s training philosophy and values will come into play. For example I’m a “strength” guy. I like getting people strong (while also helping them feel a little more athletic). Despite my assessment I’m still going to have people deadlift, squat, press, row, carry, lunge, and perform first pumps x infinity to Annie Mac radio.

Some may be like, “WTF Tony. What’s the point in doing the assessment, then, if all your going to have them do is the same stuff you have everyone else doing?”

Fair question.

The assessment helps me figure out someone’s starting point. More to the point, the assessment helps me figure out what variation of those lifts will be the best fit given their goals, ability level, and movement quality.

As an example, I use the table assessment to perform a hip scour and gauge hip (IR/ER) ROM. If someone has 45-50 degrees of ER and 20-40 degrees of IR (and appropriate hip flexion ROM) it’s a safe bet they’re okay with squatting below 90 degrees (or with most anything else I’d have them perform on the gym floor). If not, well, I’ll adjust.

I can also perform further “screens” to see if the lack of ROM is due to actual “tightness” or if all I have to do is work on someone’s REACTIVE stability:


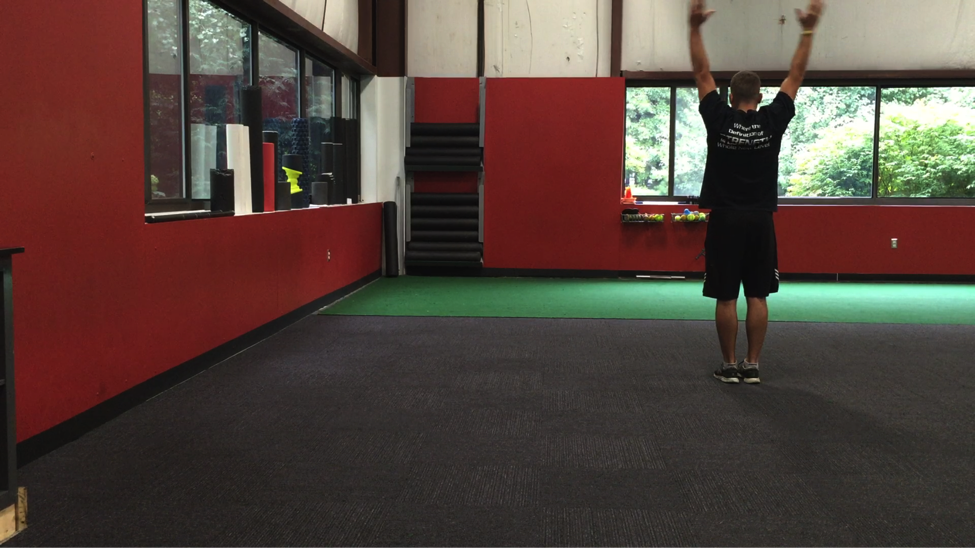
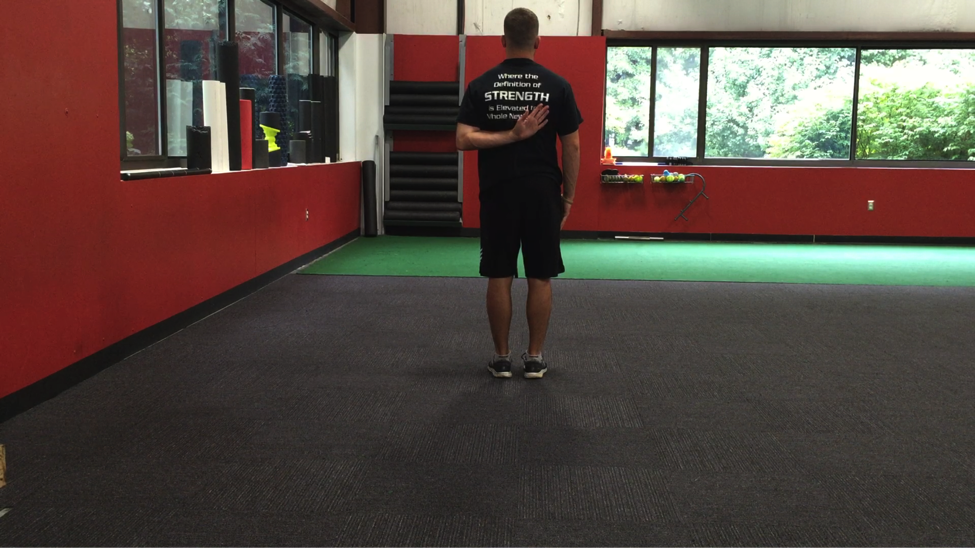
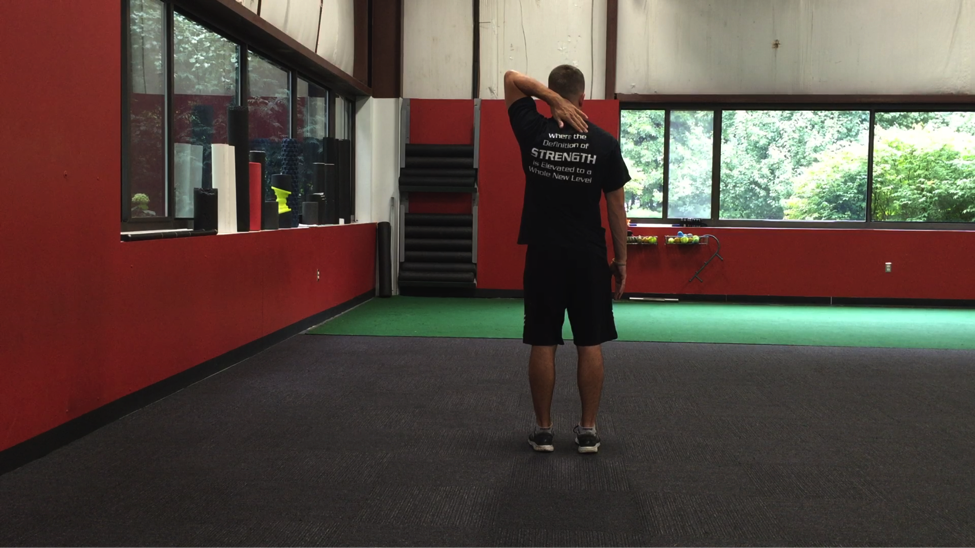
I can also use the Shoulder Flexion Screen to see whether or not overhead pressing is a good idea.

In the end, I’m not going to sit here and say you MUST do “x, y and z” because I don’t know what you should or shouldn’t be doing. All I know is that there’s no one right way, but that getting people OFF the table is more valuable to me.

The Pseudo Training Session

The poking and prodding part takes, maybe, 15 minutes to complete. 20 minutes tops. Sometimes less.

I don’t want people feeling like a patient and I’d much rather get them on the gym floor doing stuff. I get more information this way anyways.

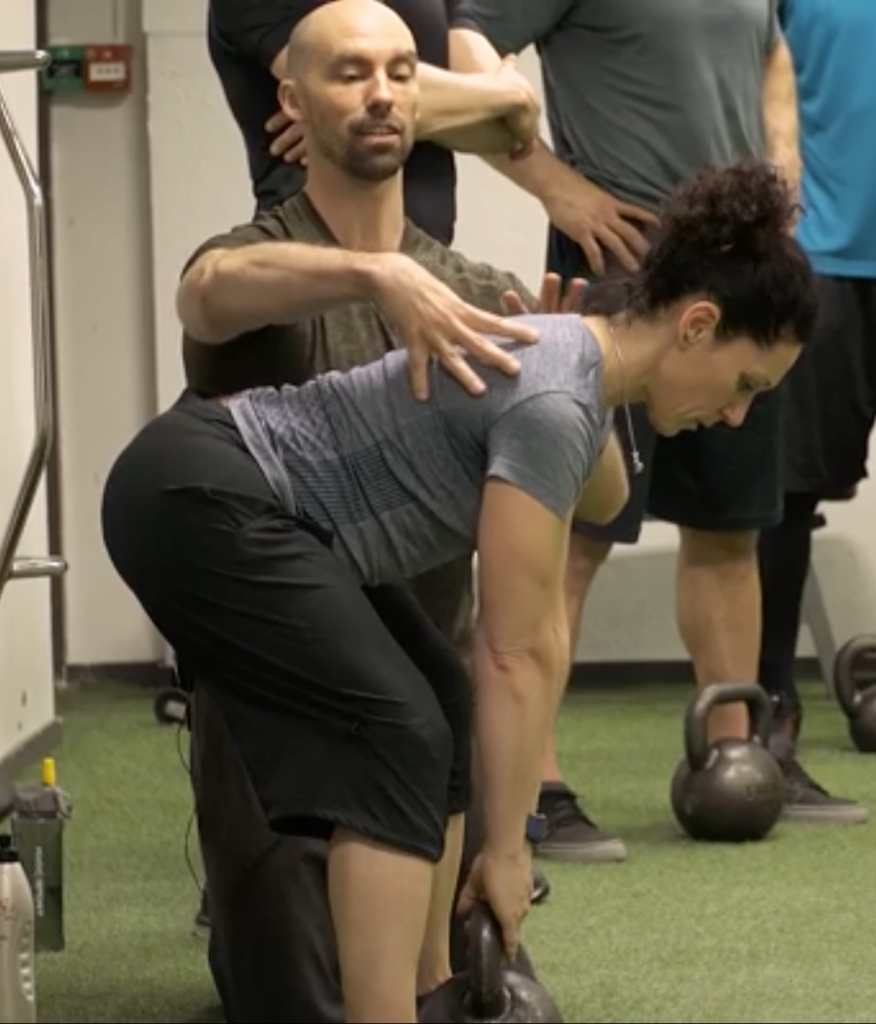
Here’s where I’ll take a look at their hip hinge, squat, and single leg (front plane) stability. If need be, I’ll regress or progress accordingly. For some a hip hinge is showing them a cable pull-through.


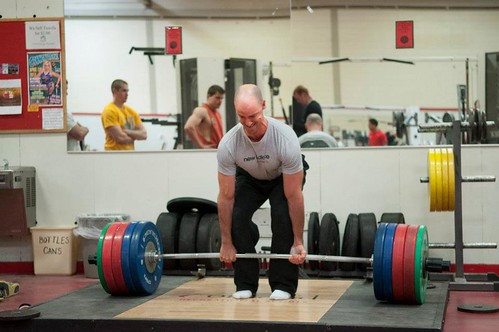
For others it’s an actual deadlift.


Remember: SHOWING THEM SUCCESS is crucial.

Show people what they can do, and don’t perseverate on what they can’t.

At this juncture I’ll also begin to showcase some of the “correctives” I may want them to do. Some may need to prioritize their T-spine mobility or maybe we need to spend some time activating their glutes. Or, maybe we need to show them a good movie, like The Royal Tenenbaums.

I’ll also break down why (and how) I want them to foam roll and do their soft-tissue work, and then I’ll basically take them through a quick training circuit. This may come down to a short-n-sweet A1-A2 circuit for a few sets. Or, I don’t know, maybe we’ll take our shirts off and perform bicep curls for ten minutes.

Either way I’ve done all I can to have (hopefully) given them a positive experience and a better idea of my coaching style, what a typical training session would look like, and how I’m going to help them increase their general level of badassery.

Buy in = they give me their credit card number….;o)

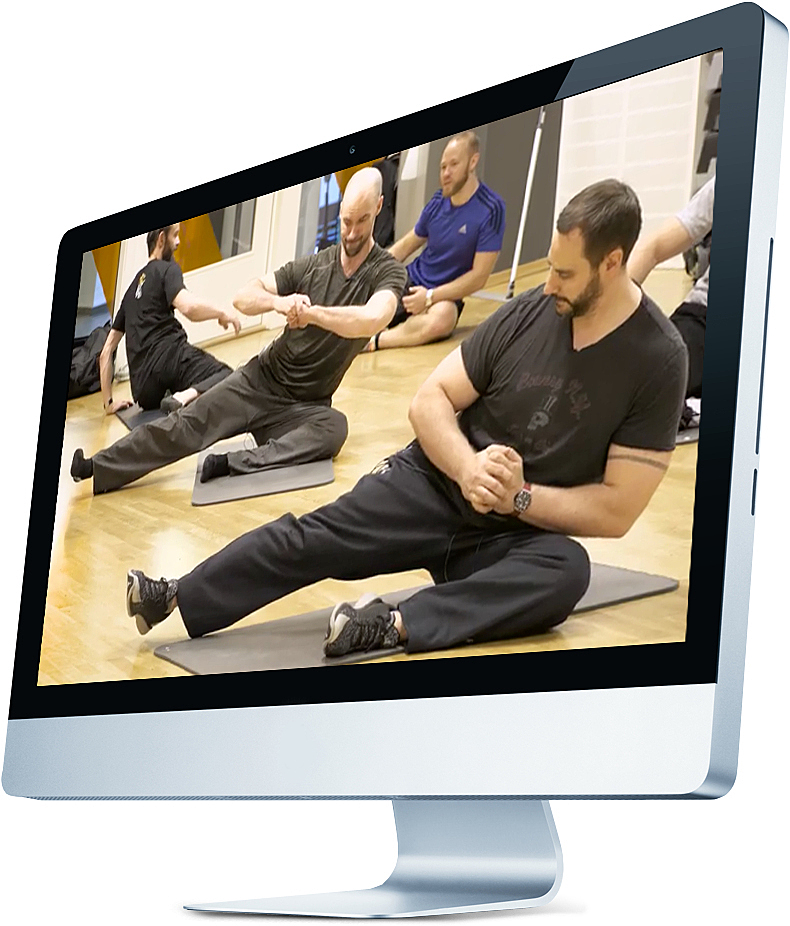
PS: If you’re really interested into diving into my assessment process check out mine (and Dean Somerset’s) resource Complete Shoulder and Hip Blueprint.

hipandshoulderfb-banner

CategoriesAssessment coaching Motivational psychology Strength Training

How to Make Your Clients Super F***ing Strong (While Also Keeping Them Healthy)

Today’s guest post comes courtesy of one of my favorite people in this world, Todd Bumgardner. Todd’s a straight-shooter (if you couldn’t tell from the title of this post) and a coach I respect a ton. He and Chris Merritt started The Strength Faction not too long and the premise is simple: it’s strength coaching for strength coaches.

As coaches we tend to put the health and well-being of our clients before our own. However, The Strength Faction helps to bring levity to the situation by fostering a unique environment where a support network is put in place coaches get coached by other coaches.

Basically, you’re amongst your people.

I’ve personally been involved with the Faction myself – I’ve been invited twice to speak and perform a Q&A with the group in an online forum – and it’s been wonderful to see its growth and how it’s helped a litany of coaches improve their assessment, program design, and coaching skills.

Todd and Chris just released their new resource The Strength Faction Super-Simple Guide to Writing Kick-Ass Training Programs so you could get a taste and closer look for the systems they’ve developed over the course of 10+ years in the industry which have allowed them to get to the point of writing hundreds of (individualized) programs monthly in an efficient manner without ever sacrificing quality.

I know every coach hits a boiling point where writing programs becomes a major chore and time-consuming endeavor. Wouldn’t it be great to learn a system to better streamline the process, make it less task-intensive, while at the same time allowing you to do what it is you do best?…coach.

Wouldn’t that be something?

How to Make Your Clients Super Fucking Strong (While Also Keeping Them Healthy)

Copyright: subbotina / 123RF Stock Photo


Something crazy began to happen at the end of the last decade—getting strong was dubbed cool. And, as we approach the end of 2016, the coolness has gained popularity. Clients are approaching their coaches with objective, measurable strength goals instead of the traditional, I wanna lose fat from right here (points to body part), ambiguity.

Sure, we still get the body comp goals—as we should—and there are still a plethora of odd requests, but it sure is rad that people want to sling iron and kick ass.

In the spirit of helping other folks help other folks to hoist and reap the benefits, here are some tips to help you write training programs that kick ass, and make people fucking strong, while also keeping them in one piece.

Lower the Strength Volume

Holy simmering cat shit! We’re talking about strength and the first thing I’m telling you to do is keep the strength volume down? Yeah, baby, I am.

It doesn’t take grandiose training volume to make people strong—in fact many times we over do it in the name of strength volume while mistakenly sacrificing other qualities. I know because I made that mistake for years—hitting my own training ceilings far too quickly while also creating same, low plateau points for my clients. Reality is most normal folks don’t need a great deal of strength volume to get stronger.

On a three-day, concurrent training program, two strength-focused lifts, with eight to twenty-four total reps for each, are usually plenty. (I say usually because there are sometimes extenuating circumstances.) Precede the strength work with core and mobility work, and follow it with some energy systems development and you’ve given a lady or gent plenty of stimulus for strength, health, and positive change.

Use Concurrent Splits

While they may not have the same sexy appeal as advanced techniques like German Volume Training, or High-Frequency Strength splits, concurrent splits are the way to go when programming for general pop clients. Sure, super-specific training blocks may get our folks faster results, but their narrow focus doesn’t do our folks any favors in the long run.

Concurrent programming is more reflective of real life and helps folks accommodate stressors because none are toweringly more intense than the others. Making it more sustainable than block periodization. We can accentuate some qualities slightly more than others during training phases—and I bid everyone to do so—but maintaining all qualities throughout the training year does best to make our folks strong while also keeping them healthy.

During one phase per year, get a little strength heavy. During another bump up the conditioning volume and sacrifice the other variables. Use one training phase to include more load-free movement. But all the while train all of the qualities.

Educate Clients on Rate of Perceived Exertion (RPE)

A lot of folks don’t have a good concept of how hard they’re working—and they’re often not sure how hard they should be working. RPE solves that problem.

The common interjection is, what about percentage based training? Well, percentage-based training hinges on a one-day snapshot of a person’s nervous system that is extrapolated to the entirety of their monthly program. That dog just won’t hunt. RPE gives the client, and the coach, the ability to auto-regulate programs on the daily to match current training status, feeling like a bag of smashed assholes, etc.

Have that smashed asshole feeling? That’s great, back the RPE down today, champ.

RPE is also more educating—it gives folks the opportunity to ascribe a number to their subjective feeling. But what if they aren’t in tune with how hard they’re really working? We have to give them something a little challenging for them to sharpen their perception. When we push them to that point, we draw attention to it so that they can comprehend and internalize that feeling so that future training efforts have context.

At our Strength Faction-sponsored gyms (BSP NOVA in Dulles, VA and Rebell Strength and Conditioning in Chicago), as well as with our Strength Faction members, we use a simple RPE system that we borrowed from powerlifting coach Mike Tuchscherer. Here it is:

@10: Maximal Effort. No reps left in the tank.

@9: Heavy Effort. Could have done one more rep.

@8: Could have done two or three more reps.

@7: Bar speed is “snappy” if maximal force is applied.

@6: Bar speed is “snappy” with moderate effort.

Most of our work is done in the @7 to @9 range, with most of the strength sets done around @8 and assistance training @7.

Progressions, Regressions, and the Best Positions Possible

Our first job as coaches is to use our best judgment to put a person in the best possible position to be successful. It’s our coaching motto at BSP NOVA, and it would a great oath if fitness coaches were sworn in as doctors and lawyers are. The best position possible is an ideal that encompasses programming variables, exercise selection, and coaching’s psychological positioning.

Let’s think in terms of exercise selection. Our job is to choose exercises that put people in the best position to display their strength. For many folks the strength is in there, they’ve simply never been put in the right position to demonstrate it. That’s why progression/regression systems are so important—and why the 4×4 matrix is such a useful tool in constructing them.

Courtesy of Dr. Greg Rose

The body must feel safe and stable in order to generate force. If it feels neither, it employs a heavy governor that seriously limits nervous system output. So, if we ask someone to generate force from a position that they don’t “own” we’re doing them a disservice—there’s no way that they can optimally demonstrate their ability. People are often stronger than they realize—they just have to be put in the right positions to display their strength.

How about a hypothetical? Let’s use the deadlift/hip hinge as an example.

You program deadlifting for a client only to find out that they can’t dissociate their hips from their spine and round the ever-living bejesus out of their spine just to grab the bar. So, you decide to cut the range and elevate the bar. Rack pulls are the answer! But you try rack pulls only to find a similar, yet less offensive, problem. So you’re like, ‘goddamn, what do I do now?’

Well, you realize that gravity and load each pose a threat to the nervous system, so you decide to reduce the effect of both—you put your client on their knees and have them perform a handcuffed hip hinge (they hold a kettlebell behind their back and hinge their butt into it). Voila! They’re successful.

Note from TG: Here’s a great video of the standing handcuffed hip hinge by CSP coach Tony Bonvechio


They’re able to hinge well—moving at the hips while maintaining a relatively still spine. You’ve found the move that allows them to demonstrate their strength. Will they keep this move forever? Hell no. But at this point in time it’s the best place for them to be—for them to learn how to strongly move. And with time, and your coaching, they’ll progress to a more challenging hinge that suits their frame.

This is drastic case, but it’s a useful illustration. Progression/regression systems give us a simple, efficient means to put people in the best positions to train safely and develop strength.

Coach Toward Mastery

I take every chance I get to quote Dan John. He’s a good man.

I hope throughout my life I can give the world a quarter of the value that he has. He makes the profound simple and never comes from a place of superiority—he only wishes to share his experience. As our first guest on the Strength Faction QnA, he did just that.

He told us a story about a client that he was working with whose results were diminishing. When they had a conversation about the problems, the client said to Dan that it seemed as though he was getting bored when he wrote his programs. He was making too many changes. The client remembered that when he was making the best progress, Dan was keeping things simple, not doing anything fancy. He was making the minor changes that need to be made to challenge the body without the façade of circus tricks.

Dan quickly righted the ship and got his client back on the bath to mastery. After telling the story Dan impressed upon us the importance of coaching toward mastery—of not getting bored as the coach. In fact, he said, “Don’t YOU get bored.”

If we want to make our people strong, we need to make them good at lifting. Rather than a constant rotation of exercises parading through their programs, keep the productive staples and figure out how to load them in novel ways. As your clients grow in skill, they’ll grow in strength.

Make People Fucking Strong

This advice is, of course, not all encompassing. It’s the best I could do with 1,500 words. But if you heed this advice, and use it to frame your programming mindset, you’ll be on the right track toward making your people super fucking strong.

Super-Simple Guide to Writing Kick-Ass Training Programs is available now. Check it.

—> HERE <—

CategoriesAssessment coaching Exercise Technique Program Design Strength Training

Deadlift Deep Dive: The Deficit Deadlift

First things first: Lets address the obvious. If there were a contest for best blog title of 11/22/16 featuring a kick-ass alliteration starring the letter “D,” I’d totally win it today.

I got the idea the other day after listening to a popular segment on EW Radio called Diva Deep Dive.2

It’s a killer idea and I am woefully unoriginal, so I took it upon myself to steal it and replace the word “Diva” with “Deadlift.” Because deadlift.

Copyright: spotpoint74 / 123RF Stock Photo


The Deficit Deadlift

The deficit deadlift is a variation where the trainee stands on an elevated surface – a plate or some form of platform such as an aerobic stepper or stacked rubber mats – and tries not to shit their spleen lifts a barbell off the ground.

Photo Courtesy of BodyBuilding.com

It’s viewed as more of an accessory movement to the deadlift and is often utilized to address issues with the initial pull off the ground. The idea being the increased ROM (Range of Motion) will make the lift harder and help those who are “slow” off the ground.

Some coaches love it and feel it’s a valuable asset to anyone’s training repertoire, while others hate it and view any of the following…

  • Jumping into a live volcano.
  • Swallowing a cyanide pill.
  • Juggling chainsaws.
  • Watching an episode of Downton Abbey.

…as a more valuable use of one’s time.

As with most debates in the health/fitness world the answer always lies somewhere in the middle. So lets break things down shall we?

Origins

I’m pretty sure this particular variation was invented by Ernest Hemingway, but I could be making that up.3 Unlike, say, the Jefferson Deadlift (named after old-time strongman Charles Jefferson) or the Romanian Deadlift (invented by someone from Romania?), no one really knows where the deficit deadlift came from. Besides, who cares, right? The name itself implies what it is.

Unless, and this will blow my effing mind if this is the case, the deficit deadlift IS actually named after someone with the last name Deficit. Man, how ironic would that be?

Addressing the Elephant in the Room

Most of the naysayers of the deficit deadlift will usually chime in with something like “it’s dangerous.” To which I counter…..

via GIPHY

There’s no better way for me to chime in on this matter than with this quote from strength coach Andrew Sacks taken from an article he wrote titled Defending the Deficit Deadlift:

“The main argument for dropping the deficit deadlift is that it’s dangerous, and by setting the bar at a height slightly below a traditional deadlift we’re turning a strength-training staple into a lower-back horror movie.

Consider that when we deadlift, the height of the bar is totally arbitrary. Nobody hired scientists to figure out the “ideal” diameter for 45-pound plates. Everybody just agreed that they all should be roughly 17.5 to 18 inches.

So if the diameter of the plates – and therefore the height of the bar – is arbitrary, does it matter where we pull from as long as we maintain form? The short answer is no.”

To that end, I don’t agree that the deficit deadlift is dangerous or that it should be contraindicated altogether. I do agree, however, there are contraindicated lifters, and that a lot of people – due to poor movement quality, anatomical factors, skill level, past or current injury history, and yes, their own stubborn stupidity – are unable to perform this variation with appropriate technique and therefore should avoid it.

^^^ That Stuff I Just Mentioned, Lets Talk About Em

Movement Quality: It’s a rare event when someone walks in on Day #1 and can perform a deficit deadlift flawlessly. I’d argue it’s rare someone can walk in on Day #1 and perform a conventional deadlift flawlessly. It’s human nature to think we’re all better than the average cat. Everyone thinks they’re a better driver than everyone else. It’s likely you’re just as horrendous at parallel parking as the next person.

This sentiment spills over into fitness too. Many people think they’re more advanced than they really are and like to skip over the seemingly “easy” stuff (Kettlebell Deadlift) and catapult themselves into expert level territory (Deficit Deadlift)…despite having the movement quality of a pregnant turtle.

By today’s standards, many people don’t move well and lack the mobility requirements to perform a standard deadlift, let alone one performed from a deficit. Getting down to the barbell requires a fair amount of hip flexion. And if someone lacks it (which is often), the end result is a compromised spinal position into lumbar flexion.

This is where good coaching comes into play. I’d caution people to jump to conclusions too quickly. It is possible to take someone in the picture above and cue them into a better position. However, taking that out of the equation, if it’s already a challenge for someone to bend over towards the bar and not look like their spine is going to break in half, why add more ROM?

Anatomical Factors: pigging back off the above, we can’t dismiss the idea that everyone is different. There are variations in torso lengths, femur lengths, arm lengths, not to mention bony structure considerations in the hip itself (hip width, acetabulum retroversion/anteversion, how the femoral head sits within the acetabulum (retroversion/anteversion), variations in femoral neck lengths, etc) that make the deficit deadlift a good fit for some people, and not so much for many, many others.

Respecting individual differences is key to long-term success and it’s something you can read more about HERE.

Some people simply won’t have access to the requisite hip flexion necessary to, you know, get into aggressive hip flexion. Unfortunately, none of us are Superman and have X-ray vision…but we can perform a simple Rock-back Screen to ascertain one’s available ROM.

Kneeling Rockback – WIN


Notice I am able to maintain a good spinal position throughout the full-ROM (there’s no “falling” into spinal flexion).

Kneeling Rockback – FAIL


Now we’re in trouble. For someone like this – where losing spinal position happens quickly – it’s likely that going into anything that requires deep(er) hip flexion will be a bad idea.

Again, this doesn’t mean we always have be a Johnny Raincloud. It may be a matter of cueing someone to adopt a better bracing strategy in order to maintain position. If they can do so passively (on the floor) and can then emulate the same ownership actively (standing)…then we know they can access the ROM, we just have to be really diligent with technique and progressing appropriately.

  • If they can access passively but not actively, it’s likely a motor control issue or the exercise itself is too much of a novelty.
  • If they can’t access it passively, nor can they perform it well actively…we’re likely looking at a structural issue and we need to be more judicious with exercise recommendations.

To the last point, again, adding in more ROM (deficit deadlift) won’t be a good idea.

Skill Level: Call me crazy, but the Deficit Deadlift is an advanced variation.

https://www.youtube.com/watch?v=-2kL-7IpYz0


I’d have to be very comfortable with someone’s skill-set and ability before I dumped it into their program. And while it can be viewed as a bit generalist, my “flow” of deadlift progressions are as follows.

Meaning, when starting with a new trainee, here’s how I progress them:

1) Understand that the deadlift = hip hinge. Deadlift doesn’t mean “heavy” or that it has to be loaded at all times or that it has to be done with a barbell.

To that end, we’re going to master the hip hinge.

2) Kettlebell Deadlift (and all it’s variations: Hover Deadlift, 2 KB Deadlift, 1-Arm KB Deadlift, Suitcase Deadlift).


3) Trap Bar Deadlift – first with high-setting, then with low setting. Center of Mass is INSIDE the barbell which makes this a much more lower back and user friendly variations

4) Rack Pulls or Block Pulls

5) Sumo or Modified Sumo Deadlift. 


6) Conventional Deadlift

7) Deadlift Whateverthefuck – Deficit Deadlift, Snatch-Grip Deadlift, etc.

Benefits of the Deficit Deadlift

Assuming this variation is “safe,” or a viable options what are the benefits?

1) I’ll concede that the increased ROM has merit, but it’s overplayed. More time under tension is rarely a bad thing, and considering many are weak in their posterior chain, the deficit deadlift is a good fit here.

BUILD THAT BOOTY!

2) I guess it can be argued that the deficit deadlift helps with the initial pull (with regards to the increased ROM). The idea being: make the lift harder and when one reverts back to “normal” ROM things will feel easier.

I’m not opposed to this train of thought. I get it. But to me, if I’m writing a program I want all accessory lifts to address a technique flaw or weakness in one of the big 3 (squat, deadlift, bench press). Making something harder for the sake of making harder won’t necessarily address anything.

Which leads to #3.

3) Being slow or weak off the floor with the deadlift is a thing. However, I find when this is indeed the culprit, utilizing the deficit deadlift here isn’t necessarily all about increasing the ROM as it is about better quadricep recruitment.

We’ve become so posterior chain-centric in the past decade or so that I find a lot of trainees have neglected their quads. And the quads DO play a role in the deadlift; especially with the initial pull (putting force into the ground). This, to me, is the main benefit.

Yes, smarty pants, squatting will help build the quadriceps. But the rule of specificity still reigns supreme. If I want someone to get better at deadlifitng, I’d rather they deadlift (and tweak it accordingly).

Some Closing Thoughts

  • As far as how much of a deficit to use: this can be individual, but I find 1-3 inches is more than enough for most trainees. So long as spinal position is maintained.
  • I’ll use sub-maximal weight on these (60-75%) for 4-8 reps.
  • Deficit deadlifts are aggressive – even for advanced lifters – so I’d caution anyone to use them for more than a few weeks or one training cycle (a month?)
  • If know someone with the last name Deficit, please tell me.
CategoriesAssessment personal training

What You Weren’t Taught About Assessments

As this post goes live I’m (hopefully) en route back to Boston after attending Mark Fisher’s wedding in NYC this past weekend. I decided it best to pre-schedule something on the off-chance some crazy shenanigans went down, like, I don’t know, an impromptu dance-off with a unicorn or a shot of Tequila somehow made it into my hands.

Nevertheless, better safe than sorry…I needed to plan a head.

Today’s guest post comes courtesy of Boston-based strength coach and massage therapist, Mike Sirani.

Enjoy!

Copyright: dolgachov / 123RF Stock Photo


Oh, the assessment.

The assessment is one of the most pivotal moments when working as a personal trainer or strength and conditioning coach. It’s often your first in-person interaction with a potential client.

Even though brand awareness, marketing, and your reputation can all help your chances of success before the assessment even starts, you still have 30 to 90 minutes to sell a client on why you or your gym is the best person/place to help them reach their goals.

This can be difficult, especially if:

  • You’re young and/or new to training people.
  • You feel like you’re not as busy as you should be.
  • You have thoughts like, “I’m so much smarter than this other trainer, but they’re making way more money than me.”
  • You often scratch your head thinking things like, “I’ve taken PRI, DNS, FMS, FRC, SFG, and eat KFC, and despite all of my continuing education, the number of clients I see still isn’t growing.

If any of the above rings a bell to you, I believe this article can help you.

All the knowledge in the world is as useless as the Cleveland Browns on a Sunday unless you understand a few key things.

1) Most People Are Seeking Your Services to Get Fit

Somewhere along the way, physical therapy blurred with strength and conditioning, and strength and conditioning blended with physical therapy. It’s great for the field, and both do work optimally together, along the same continuum, but it’s important to know your role.

Most clients looking to improve their fitness don’t give a shit about their pelvic inlet position or posterior mediastinum’s or the 10-degree difference in hip internal rotation from side to side. When you start throwing out those terms, you’re just a big weirdo. Here’s what I recommend instead:

Listen

  • Be an active listener.
  • Have good body language.
  • Ask the right questions. All of your questions should help you build rapport and lead towards making good clinical decisions in order to help the person in front of you.

Meet Them Where They’re At

  • Don’t put down or talk bad about someone’s previous exercise programs, especially if it’s something they enjoy doing.
  • Making them stop doing something they enjoy should be your last option and done only if you’re 100% sure it’s holding them back from reaching their goals.
  • People will have pre-conceived notions and it’s your job to educated them—but also respect their views and understand that not everyone will be a good fit to work with you.
  • I currently train clients who are yogis, cyclists, triathletes, Cross Fitters, Pilate’s enthusiasts, and runners. What do they all have in common? They see value in my service, enough to limit how much they’re doing of their other activities to make room for strength training because it will help them reach their goals and allow them to continue doing the activities they love

Actually Come Up with a Fitness Plan

  • Here’s an idea: Instead of throwing someone through the gamut of corrective exercises on Day 1, why don’t you bring them through a brief workout?
  • Show them what they’re good at, show them what they’re bad at, and actually coach them through different movements.
  • Then work with them to come up with the outline of a plan that you’ll use to guide them towards reaching their goals.

2) Context Matters!

It’s clear that above I poked fun at a few philosophies and anatomical terms. Please don’t get me wrong. I don’t condone being one of those trainers who is all about doing an exercise only because it looks cool and fun. The better you know your anatomy, physiology, biomechanics, and pain science, the more potential you’ll have to be a great coach.

But, as a coach, you must also take all of that knowledge and put it in CONTEXT for the client to UNDERSTAND, APPRECIATE, and VALUE what you are saying.

You see, we take these continuing education courses that are catered towards physical therapists, massage therapists, and chiropractors and think we can explain things the same way when bringing someone through a fitness evaluation. Often times in a course, you’re explaining that increasing this range of motion or decreasing tissue tension in this area will help alleviate pain.

What if your client isn’t in any pain and they just want to get fit? What do you do then?

Consider learning how to re-phrase things and put them into context that not only work for fitness and performance, but put value in what you can do to help them reach their goals. Here are a few examples:

  • A right-handed baseball player who lacks passive hip internal rotation – “When we increase your hip internal rotation, you’ll be able to load and explode much better with your lower body and generate a lot more power during your swing.”
  • A powerlifter who lacks ankle dorsiflexion – “When we increase your dorsiflexion, it’ll become much easier to hit depth on your squat and you won’t get red-lighted on weights you should be able to lift.”


  • A client who asks why you’re watching them perform certain movements during a FMS – “This will give us a better idea of what exercises will be best for you body at this time and tell us what you need to work on in order to progress the exercises you’ll be doing during your first program.”

With that being said, you also need to realize that you’ll run into situations where a client may have a Type A personality and want to know the details and the science. Now is the time when you can step up to the plate and impress the client with your knowledge of anatomy, physiology, and biomechanics.

3) Analogies

Science can get complicated. It can be overwhelming explaining tissue healing or specific training and rehab concepts to a client. This is where analogies can be huge for educating a client and getting them to buy in and be on the same page as you.

A good analogy is great for explaining an unfamiliar concept with a familiar one and can take complex explanations and make them simple.

Be creative with these and make sure you drive your point home with something your client really resonates with.

In Summary

If you’re good at your job and are able to get a client to train with you a couple times a week, you’ll likely have good adherence and get good results. But you have to first know how to put yourself in a situation where someone is willing to spend money on you or your gym each week. It’s easy to fail getting to this point when you get caught up in how much you think you know and are waiting for every opportunity to share what you learned over the weekend.

Instead of feeding into your own ego by showcasing your knowledge with a new client:

  • Be a good listener
  • Meet them where they’re at
  • Always come up with a plan
  • Know that context matters!
  • Use analogies.

I once heard Alwyn Cosgrove say, “If you can see John Smith through John Smith’s eyes, you can sell John Smith what John Smith buys.”

If you can remember to see John Smith through John Smith’s eyes and know that clients don’t care how much you know until they know how much you care, you’ll be a much better coach, and your busier schedule and increase in clients/members will surely reflect your improvements.

About the Author

mike-siraniMike Sirani is a strength and conditioning coach and massage therapist in Boston, MA. He works at Pure Performance Training where he helps client’s look, feel, move, and perform better.

Prior to building a successful personal training business in Boston, Mike graduated from one of the nation’s best exercise science programs at Springfield College and graduated from the Cortiva Institute in Boston for massage therapy shortly after.

He interned at Conca Sport and Fitness, one of Western Massachusetts’ top training facilities, and the nation’s best baseball strength and conditioning facility, Cressey Sports Performance. He is a certified strength and conditioning coach through the NSCA and has completed extensive continuing education in manual therapy, cardiovascular training, Functional Range Conditioning (FRC), Postural Restoration Institute (PRI), and Functional Movement Screen (FMS).

Mike played collegiate baseball at Springfield College and is an avid golfer. When not doing any of the above, Mike enjoys binging on good television shows and spending time with his fiancé. You can check out what Mike is up to on Facebook or check out some of his other articles at Rebel Performance.


CategoriesAssessment coaching Exercise Technique

Lets Pump the Brakes Internet: No, Deadlifts Won’t Make Your Spine Explode. And No, Not Everyone Has to Do Them

The internet is a funny place. Regardless of the topic – Presidential elections, Black Lives Matter vs. All Lives Matter, GMOs, or debating the original Star Wars trilogy vs. the prequels4 – people tend to marry themselves to extremes. They’re either way over on the left or way the eff over on the right.

There’s very little middle-ground, when it’s the “middle ground” where the answer almost always resides.

I think my fitness and strength & conditioning bubble personifies this sentiment and is very applicable…especially when the topic revolves around the deadlift.

Copyright: bialasiewicz / 123RF Stock Photo


Some people feel the deadlift is the exercise to perform and is a compliment to everything: improved strength, muscle mass, athletic performance, posture, movement quality (dissociating hip movement from lumbar movement), and a whole host of other benefits including the answer to global warming and erectile dysfunction.

Others feel the deadlift – any variation of it – is the worst exercise ever, that no one should perform it under any circumstance, and that it will cause the world markets to collapse (not to mention everyone’s spine).5

This frustrates me.

via GIPHY

I think it goes without saying I tend to err on the side that prefers not to make blanket statements and to demonize and proclaim an entire movement pattern as “dangerous” because, well, frankly, you either have very little experience with it (which is cool, you’re just naive and that can be remedied) or, more often than not, you’re probably just a really shitty coach.

Or you might not even be a coach and just someone who likes leaving angry, oblivious comments like this on my blog (a recent doozy I received in response to THIS article I wrote six years ago):

“Idiot. This is a poorly written article that will only appeal to the ignorant or existing proponents of this stupid exercise.

To begin with:
He never illustrates any health benefit from the outcome of a deadlift. And if he will, I challenge him to provide any scientific evidence, let alone anecdotal evidence, that supports his claim.
Moreover, the deadlift may have various effects of potential damage depending on a person’s anatomy and body-type. The only people i see doing DL’s are the short and squatty types with short legs and longer torsos. It’s easier for them to complete that range of motion due to their short legs bypassing the barbell as it ascends upward. This means that they can keep a more straight knee alignment without putting undue stress on the knee joint. If a person is tall and long-legged they run the immediate risk of knocking their shin on the barbell as it ascends upward in motion. Thus, forcing them to angle the thighs outward causing undue stress on the knee joints. The author fails to acknowledge this simple mechanical principle.
These articles that permeate the internet often have this ‘one size fits all’ modality that, if read by an uninformed or novice, will harm an unsuspecting person. These articles, whether, deliberately irresponsible or not, should be vetted and researched thoroughly and vigilantly.”

Um, how do you really feel?

In fairness: I didn’t address in the original article some of what he brought up in his rant. There was no talk about assessment, nor was there any commentary on anthropometry and individual differences in anatomy and how that would affect programming and what variations of the deadlift/hip hinge would be best suited for any one individual (based off goals, current/past injury history, and ability level).

So, yeah, he did bring up some valid points. For some people, deadlifts are a bad choice. And given their leverages and anatomy, certain deadlift variations may be more counterproductive than others. But that’s why we assess, progress accordingly, and cater the lift to the trainee (and not vice versa).

Then again:

1) The main point of the article was to point out that blanket comments suck – “all deadlifts are dangerous and no one should perform them” – and that, in the end, they do little service in helping the industry.

2) It wasn’t a fucking dissertation on everything and anything deadlifts. It was a blog post. Relax.

Ironically, I found it odd he commented “I challenge him (me) to provide scientific evidence that supports his claims” when, in the article, I not only direct people towards Dr. Stuart McGill’s work (the world’s most renowned spine researcher and mustache haver…and avid deadlift fan) but I also referenced seven studies within the text (admittedly through someone else’s quote).

But whatever. I guess I should just GFM.

What’s the deal with using “stress” as an argument against the deadlift?

  • Deadlifts place “stress” on the spine.
  • Deadlifts place undue “stress” on the knees.

Well, no shit. That’s the point of lifting weights. To STRESS the body.

We need to “stress” the body in order to elicit an adaptive response – whether it be corrective in nature or more on the performance side of things. We don’t live life in this “stress free” bubble. Lifting weights isn’t supposed to tickle.

Besides, stress is what makes the body more resilient to prevent injuries.

To steal a quote from the always blunt and to-the-point Alex Viada:

“The goal of exercise/training is adaptation. Adaptation is a result of applying a stimulus that is, either acutely or in the aggregate, more than the body can handle in its current state. Applying a stress that is more than the body can handle is almost by definition uncomfortable. It may hurt. It may cause a certain level of discomfort, or even suffering. In other words, it is anything BUT comfortable.

This process is not supposed to be easy or painless. Attempting to keep it so is quite possibly the number one reason many would-be athletes or trainees stagnate- they dislike discomfort, and tend to embrace the flawed notion that “training should be comfortable and enjoyable.”

And this, dear readers (and meanie head commenter), is why any competent fitness professional will use his or her’s assessment to guide their programming and to figure out what VARIATION of the deadlift will be the best fit.

(If they deem it a good fit).

tony-dl-technique

And Guess What?

The word “deadlift” doesn’t always have to equate to a barbell being placed on the ground loaded to 90% of someone’s 1RM.

Deadlift = Hip Hinge

Hip Hinge = Dissociating Hip Movement From Lumbar Movement

That can mean any number of glorious “deadlift” variations (that don’t involve a barbell):

KB to Sternum Hip Hinge


Foam Roller Assisted 1-Legged RDL


Pull-Through


KB Deadlift w/ Hover (and an epic beard)


However, more cogent to the discussion, when we DO incorporate a barbell, it doesn’t always mean we have to 1) perform it from the floor or 2) perform it using a conventional stance or 3) load it heavy each and every time so we shit a spleen.

The only people that have to deadlift from the floor are competitive powerlifters and weightlifters. That’s it.

And no one has to perform only conventional style.

So, of course it behooves any fitness professional to match the proper variation to the needs and ability of the trainee. Conventional, sumo, modified sumo, block pulls, rack pulls, Romanian, trap bar, and Jefferson deadlifts are just the tip of the iceberg.

https://www.youtube.com/watch?v=q6Xjb72gGTE


[NOTE: All of this assumes one is able to maintain a neutral spine and that appropriate progressions (and regressions) are being utilized.]

Furthermore, none of this takes into consideration that foot stance, stance width, and hip structure will vary person to person. To assume everyone has to perform the same variation let alone point their toes the same way or use a symmetrical stance disregards everything mentioned above.

You’re not going to lose demerit points or be sent to Slytherin if you have the audacity to choose trap bar deadlifts over conventional. If someone does lack ankle dorsiflexion, hip flexion, and t-spine extension, yeah, the trap bar is going to be a better choice. Likewise, lifters with longer femurs and T-rex arms will be better suited with sumo style deadlifts.

It’s all okay. The world won’t end.

No one has to deadlift. Yeah, that’s right: I said it.

However, to say it’s “dangerous” and that it should be avoided at all costs is myopic and juvenile, and, frankly, just as bad as someone who feels the opposite.

Lets pump the brakes internet: the answer is always somewhere in the middle. Except for bacon. It’s always delicious.

It’s a Good Thing I Have a Resource to Help You Figure This Stuff Out

Dean Somerset and I made the Complete Shoulder and Hip Blueprint in part, to do just that. Help fitness professionals figure stuff out, understand that everyone is different, and that “it depends” is a very powerful phrase to keep in your back pocket.6I mean, only Siths deal in absolutes. And you’re not a Sith. Or, are you? OMG can we hang out?[/footnote


Want to learn our systems and strategies we use to “connect the dots” from assessment to badassery on the weight room floor? I thought so…;o)

Complete Shoulder and Hip Blueprint is on SALE this week at $60 off the regular. It ends this weekend. Go HERE now. Now I tell you.

CategoriesAssessment coaching Corrective Exercise Exercise Technique Program Design

A Peek Inside Complete Shoulder and Hip Blueprint

WHEW – talk about a whirlwind day yesterday. I spent the bulk of it glued to my laptop7 making sure things ran smoothly with the launch, answering questions and emails, and trying to stay on top of social media engagement.

1) THANK YOU to everyone who has gone of their way to mention and/or plug Complete Shoulder and Hip Blueprint. Your support means a lot.

2) To those who may be on the fence, how about a sneak peek?

Copyright: eenevski / 123RF Stock Photo


This sucker contains 11+ hours of content covering everything from upper and lower extremity assessment, corrective exercise strategies, numerous hands-on breakouts, as well as program design and exercise technique troubleshooting (with maybe, 37 seconds worth of Star Wars references).

Here are two sneak peak segment from both Dean and I.

The One Where Tony Discusses Scapular Motion


The One Where Dean Talks Hip Integration (and makes a bunch of fitness pros groan)


And there is tooooooons more where that came from.

If you’re a fitness professional I can almost guarantee you’ll pick up something valuable (hopefully several) that will help your clients or athletes. And even if you’re not a fitness pro, and just like listening to two dudes talk shop about training or you’re just looking to pick up some cool new exercise variations to keep your shoulders and hips healthy this resource would be a home run.

cshb-screen

Complete Shoulder and Hip Blueprint is on SALE all this week (until midnight on Saturday, November 5th) at $60 off the regular price.

CategoriesAssessment Corrective Exercise Exercise Technique personal training Program Design

Complete Shoulder and Hip Blueprint Now Available

I gotta say, I could barely sleep last night.

Dean Somerset and I have spent the better part of the past two years traveling all across North America and parts of Europe presenting our Complete Shoulder & Hip Workshop. All told, we’ve presented it 10-15 times8.

hipshoulder-landscape

I’m not kidding, either: I…could…not…sleep last night.

I kept waking up every few hours as if I were 11 years old again waiting for Christmas morning to arrive. To say I am excited for this would be an understatement. There’s also a small fraction of me doing the best I can not to destroy the back of my pants out of shear terror.

As of this moment it’s 99.2% excitement, and 0.8% “hoooooooly shit this is happening.”9

I mean, there’s always a degree of vulnerability anytime you put something out there for the masses. However I KNOW this is going to be a resource that will help tons of people.


What Is It

The Complete Shoulder and Hip Blueprint is an 11+ hour digital product that takes you through the systems that both Dean and I use with our athletes and clients to improve upper and lower body function, strength, endurance, and resiliency.

We show you how to connect the dots between a thorough assessment, understanding what corrective strategies (if any) will work best, and how to build a training program to help you and your clients in the most direct way possible.

And there’s a few cat memes and light saber jokes tossed in for good measure.

dean-tony-cshb

Why This Matters to You

Are you a fitness professional? Do you work with people with shoulders? What about hips?

Well then, this sucker is right up your alley.

More specifically here’s what you can expect:

  • Help your clients get through common shoulder issues more effectively.
  • Streamline your assessment and program design, helping you get faster results and more efficient use of your time, and that of your clients’
  • Help you see the details of shoulder motion you didn’t notice before, and whether something you’re using in your exercise program is working or not.
  • Upgrade your exercise toolbox to address commonly overlooked movement issues.
  • You can help clients see IMMEDIATE improvements, sometimes in as little as a minute or two, which will help them buy in to your abilities.
  • Help you target in on what will work best for the person in front of you, saving you both the time spent on useless exercises or drills.
  • Connect the dots between assessments, mobility, strength, and conditioning program considerations
  • Break down a system you can use today with yourself or your clients to see instant benefit while removing the guess work.

And you don’t necessarily have to be a fitness professional in order to reap the benefits of this resource. Dean and I offer tons of practical information in the form of hands-on applications in addition to breaking down many common exercises such as the deadlift, squat, chin-up, and Landmine variations.

tony-dl-technique

The Part Where I Entice You More (or Guilt You) Into Buying

Choose any of the following that resonates with you:

1. “What is this, Napster? Pay for something once, would you?”

2. “Pretty please?”

3. “I got kids! Well, I’ll have one soon, in January, and that shit’s expensive.”

4. “I’ve written tons of free content over the years. Each time I’ve written an article or blog post that’s helped you out, I put a dollar on your tab. It’s collection time, you son of a bitch.”

Okay, for real: I think it’s a great resource, I feel it’s going to help a lot of people, and I’d be honored if you’d consider checking it out.

We’ve put Complete Shoulder & Hip Blueprint on sale this week. From today through Saturday, November 5th you can purchase it at $60 off the regular price. What’s more there are Continuing Education Credits (CEUs) available through the NSCA, which makes this a solid professional development investment.

—> Complete Shoulder & Hip Blueprint <—

CategoriesAssessment Corrective Exercise mobility Program Design

4 Ways to Fire Up Your Belly

Today’s guest post comes courtesy of Gavin McHale, a Certified Exercise Physiologist from Winnipeg, Canada (in his words, straight north of Fargo). Gavin attended a workshop I did with Dean Somerset in Minneapolis a few weeks ago and he wanted to write up some of the things he picked up from it.

Read on to find a breakdown of how you can clean up your shoulders and hips, lift more weight and allow yourself to relax, just by changing the way you breathe.

Copyright: sunlight19 / 123RF Stock Photo


4 Ways to Fire Up Your Belly

Let me paint you a picture.

A client or physical therapist refers someone to me and they walk in ready to get their ass handed to them. After our initial conversation, I tell them we’re going to start the session with some breathing drills.

They often glaze over and assume it means something else, until I tell them to lie down and take a deep breath.

“Wait, you just want me to breathe?”

“That is correct.”

Almost every time, I can provide a new client a take-home benefit with a couple of breathing cues, all inside the first 2 minutes on the gym floor.

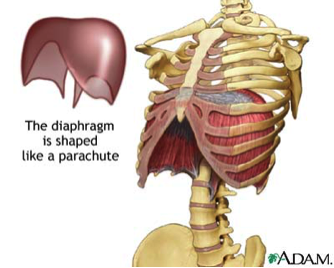
Image courtesy of Crossfit Southbay, via A.D.A.M

Why, you ask? Well there are lots of reasons why breathing is a good practice to get into, and I’m not talking about the breathing we do mindlessly, day-in day-out. I’m talking about mindful “diaphragmatic” or “belly” breathing.

We live in what I’d call a very sympathetic world. Our sympathetic nervous system, also known as fight-or-flight, is cranked up all the time. We have to drive to work in traffic, get a project done, feed the kids, manage the mortgage… you get the point.

All this stress kind of shuts down our parasympathetic nervous system, also known as rest-and-digest. You know, the one that fixes all our shit? Ya, that one.

The diaphragm is actually intended to be our body’s primary breathing muscle, but as a consequence of modern life, it’s been shunned like Tony and I are by all those cat haters (I see you). Instead, the much less efficient breathing muscles of the upper chest and neck then must take over, creating all sorts of issues.

Although it doesn’t look very sexy, diaphragamatic breathing allows us to create a better balance between fight-or-flight and rest-and-digest, and could be the key to fixing a lot of movement issues as well.

When we breathe, this dome-shaped muscle contracts, allowing the lungs to take in air. What we should see is the stomach rising as the dome compresses the abdominal cavity. This is why I tell my clients to try and “get fat” if they’re having trouble figuring it out. I often see the exact opposite, and while it may present a more pleasing side profile, it only allows the lungs to partially expand and results in weaker core stabilization.


So why do we do it?

Not only is it a good idea to get back to the muscles we should be using for an activity like breathing, but an under-active or dysfunctional diaphragm is going to lead to movement issues as well. Neck and shoulder issues are the bulk of what I see, but back and hip irritation have also been linked to breathing concerns.

Proximal stability leads to distal mobility.

If we can create more stability in the core and centre of the body, the limbs and other areas where we need to be more mobile are free to do their job as well.

Test/Re-Test

Below, I’m going to give you several tests to try based on areas that you may have trouble with or issues you want to clean up. The protocol here is to test the movement, correct with a breathing drill, the re-test to see if it got better.

If it did, great! If not, we may have to do some more digging. The breathing correctives are outlined at the end of the article.

1. Shoulder Issues

I found it very interesting how many people had shoulder pain and dysfunction when I first started training. I cleaned up their technique, had them pull way more than they pushed and focused on opening up their thoracic spine. Things got better, but never really got better, ya know?

Then I went further down the rabbit hole and recognized there was more to it. I realized that almost all shoulder problems are somehow tied to breathing mechanics, and a couple of simple drills can make a world of difference, especially when done consistently. Here are two (related) tests to see where problems may lie and outline the path to correcting them.

Shoulder Test/Re-Test #1: Active and Passive Shoulder Flexion

*Ideally, the shirt is off for all tests of shoulder function. Although it can be awkward, this allows someone to see exactly what the scapulae are doing during these movements.

You may have to stand against a wall to do this properly, but stand tall and proud and slowly brings your hands up over your head in front of you. Your ribcage should stay down (the back should stay against the wall) and the head should stay in a packed position (no poke-necks).

How high did your arms get? Was there any pain?

Here is Tony showing an example of a bad active shoulder flexion (left) and a good active shoulder flexion (right). If you’re not careful, you may think the “bad” test is better than the good one. A closer looks reveals that Tony is flaring his ribcage, overextending his lower back and poking his head forward. The test on the right is a true test of his active shoulder flexion. Not bad T, but why is your shirt still on?

The passive test is the same as the active test, only lying down on your back. The knees should be bent and feet flat on the floor or table. The ribcage should stay down and lower back flush to ensure a true test.

We will review correctives later in the article.

Shoulder Test/Re-Test #2: Scapulo-Humeral Rhythm (probably need a friend for this one)

Stand in the same position as your active shoulder flexion test, but this time we’re going to bring the arms overhead by your sides, trying to touch the backs of your hands together above your head.

As the arms move overhead, the scapula should rotate ½ as much as the humerus does. So, to get overhead (180 degrees total), the humerus should rotate upward 120 degrees and the scapula should rotate the remaining 60 degrees.

Image courtesy of BEST Performance Group

If there is any pain with this movement, you should see a registered healthcare professional (or refer to one, if you’re a trainer).

However, if you’re a trainer and you notice the scapula isn’t moving as it should (i.e. the medial border isn’t at 60 degrees) see if you just help it along by manually moving it to the desired position.

Better? Great, let’s get to breathing and fix that shit. Still painful? Refer.

2. Back Issues

Everyone who’s ever had or worked with people with back issues raise their hand! Ya, a lot of us have, myself included and it’s no fun. Whether it’s chronic back pain or a little tweak here and there, worrying about blowing your back out is a real concern for many people.

They’re scared to lift things around the house, scared to bend over the wrong way and especially scared to lift a shit-ton of weight off the floor in the gym (covered later). We can’t be having that… let’s fix it.

I said that lower back and shoulder issues can be related because their main structures are intimately connected via the thoracolumbar fascia. You can see the lats (major players in the shoulder) and the glutes (major players in the lower back) in the image below. If you have issues getting your arms overhead, you may very well have lower back problems as well, and vice versa.

Image courtesy of Neil Asher Healthcare

Back Test/Re-Test #1: Active Straight Leg Raise

This one is nice and simple. Lie on your back, legs straight. Lift one leg as high as you can before you stop or you feel pain. The knee should stay straight. Note how high you got. A good score is 90 degrees with no movement in the opposite leg.

Image courtesy of www.FunctionalMovement.com

Back Test-Re-Test #2: Passive Hip Rotation (bring that friend back, you’ll need em)

Lie flat on your back with legs straight and lift one leg. Bend the leg at the knee, coming up to 90 degrees hip flexion. Move the hip into external rotation (foot to opposite hip) and internal rotation (foot outside hip) while supporting the knee. Note the angle achieved with each movement. A good score is 90 degrees from midline for external rotation and 45 degrees for internal.

Photo courtesy of geekymedics.com.

LIFTING HEAVY A.F.

(if you have to ask what it means, you’re not ready for it)

There’s no question that if you’ve ever done a heavy squat or deadlift and not wrecked your back, you know that you need to be able to create massive amounts of tension through your core. If you can’t, you get hurt, pretty simple.

The diaphragm plays a massive role in stabilizing the core. It forms the lid on the “core box”, working with the obliques, QL, pelvic floor and transverse abdominus. Being able to take in air and maintain a high-pressure area in the abdominal cavity is crucial for lifting heavy (another reason I start with breathing drills).

RELAXATION

Remember that sympathetic world I spoke about earlier where most of us live that wreaks havoc on our breathing patterns? Needless to say, it can also create difficulty with relaxation and sleep.

I’m pretty sure most of us (and our clients) can agree we’d like to sleep better.

So, when you watch the videos below, don’t just put them in the “workout” box, but remember they can also have a positive impact on your ability to relax and even fall asleep.

Not only will these breathing drills assist in improving movement patterns, they’ll set up the context for creating tension before and during a heavy lift.

THE BREATHING CORRECTIVES

Prone Crocodile Breathing

If you’re new to the diaphragmatic breathing game, this is your place to start. Maybe you scored poorly on one of the above tests or you have an itch to throw more weight on the bar but aren’t yet comfortable doing so.

Either way, give this drill a shot before moving on.


Prone Lengthening

This one is particularly useful if you have trouble with your shoulder and/or struggled with the shoulder flexion and scapulo-humeral tests. Many people’s shoulder dysfunction comes from a number of factors, one of those being tight/ropey serratus anterior. This drill will help to release that muscle, allowing it to do it’s part in moving the scapula to get that arm overhead.

The serratus anterior (SA) works in concert with the upper traps (UT) and lower traps (LT) to allow the scapula to upwardly rotate.

Note From TG: props to Dr. Evan Osar for introducing me to this exercise a few years ago.


Crook Lying Belly Breathing

This is another great beginner drill as the lower back is supported and the table or floor can provide external feedback. This is also the best position for belly breathing, allowing the belly to fully expand. Along with the others, this one is great for those with back or hip issues.


Quadruped Breathing

This is another great drill for those with issues rotating that scap when going overhead. The serratus anterior is a massive player and if we can get it rotating properly (or at least better than it was), we may be able to provide relief and learn what it is we need to focus on moving forward.

So there you have it, a good, hard look at what we should be looking for and how to make it better, just by changing the way we breathe.

One final note for trainers, make sure you try these yourself as you may find that different cues work better. If you do, please tell me. I want to know all your secrets!

OBLIGATORY PROMOTIONAL PLUG FROM TG (sorry not sorry)

Pretty much everything discussed above is covered in more detail in mine and Dean Somerset’s Complete Shoulder & Hip Blueprint which is being released this week (Nov. 1st).

hipandshoulderfb-banner

In fact the site goes LIVE tonight. You can check back HERE at midnight to get in on the action. It’s totally going to be like a Harry Potter book release! Except, you know, without wizards and Sorting Hats and shit.

Author’s Bio

gavinGavin McHale is a Certified Exercise Physiologist from Winnipeg, Manitoba, Canada (straight North of Fargo).

He loves getting people to lift things they never imagined they would both in-person and online.

He also likes to lift said heavy things and, much like Tony, loves cats.

Check him out at www.gavinmchale.com.

CategoriesAssessment Corrective Exercise mobility

Stop Cranking on Your Shoulders for More Mobility

Seriously, stop it.

For many people the first choice when their shoulder begins to hurt or if they lack mobility is to start cranking and yanking on it. This is rarely the right approach, and as Andrew Millett (my good friend and Boston based physical therapist) points out in today’s post…there a far better and far more effective approaches.

Enjoy.

45885490 - man with pain in shoulder. pain in the human body. black and white photo with red dot

Copyright: staras / 123RF Stock Photo

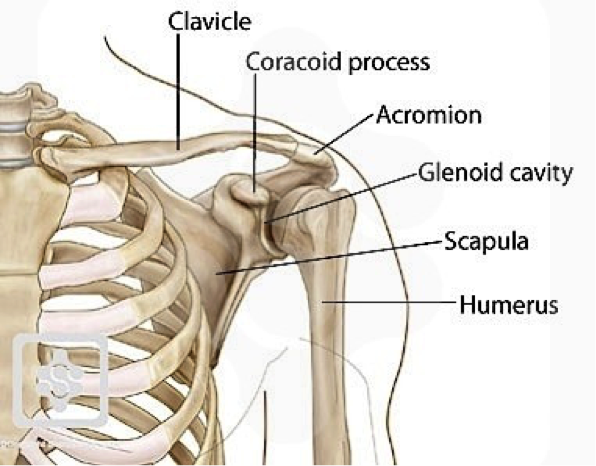
The shoulders, specifically, the glenohumeral joints, are typically very mobile joints. They need to flex, extend, abduct, adduct, horizontally abduct and adduct and internally and externally rotate in multiple planes and positions in relation to the body. Even though the shoulders are a common area of mobility, many people will present with limitations in at least one aspect of glenohumeral motion.

There are various reasons why someone may have limited shoulder mobility.

Bony Limitations

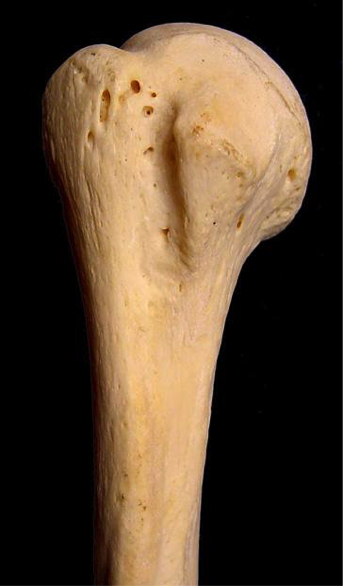
bone

photo credit: pediatric-orthopedics.com

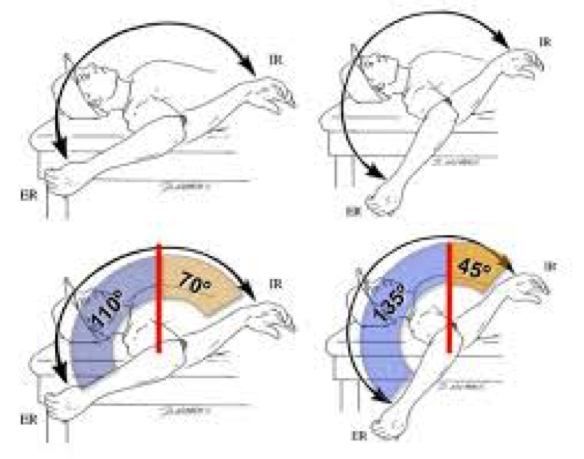
People who engaged in various overhead sports such as baseball, softball, etc. have been shown on multiple studies to have changes to the glenoid and humeral head. In baseball players specifically, they can appear to have a loss of internal rotation range of motion as compared to their non-throwing shoulder and an increase in external rotation range of motion as compared to their non-throwing shoulder.

This change in range of motion is commonly due to humeral retroversion. Humeral retroversion is the alternation of the humerus and humeral head in relation to the glenoid fossa from years of repetitive overhead activity, specifically throwing.

gird

Photo credit: opensiuc.lib.siu.edu

This is typically only seen in overhead athletes. This differentiation in range of motion side to side in external and internal rotation is considered “normal” for this population. As long as External + Internal Rotation aka Total Motion is within 5 degrees of the non-involved shoulder, then that is considered normal.

Note from TG: In other words, loss of IR in a throwing shoulder is an adaptive response and is normal! It doesn’t necessarily have to be fixed.

With that said, we do not want to crank on someone who has “normal” total motion, but may lack internal rotation on one side versus the other. Asking your patient or client if they engaged in overhead sports as a child is a good clue to this. Then measuring their motion will give more information.

We will get into more detail later on how to improve their motion if their is more than a 5 degree difference in total motion.

Another bony limitation at the shoulder can be acromion type. The acromion is a bony structure that is present in all people that is part of the scapula.

acromion

Photo credit: ipushweight.com

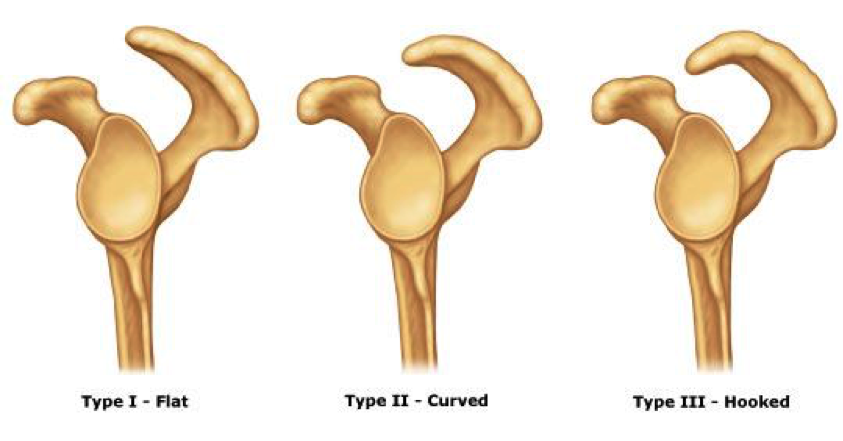
All acromions are not created equal though. There can be 3 varying types of acromions.

acromion-type

Photo credit: cursoenarm.net

As you can see in the picture above, a type I acromion is relatively normal in appearance. In type II and III, there is more of a curved/hooked appearance to it. This alteration in can cause pain and limited motion when reaching overhead.

The only way to definitively know if someone has a type II or III acromion is through radiographic imaging. Programming may need to be altered to more horizontal pulling/pushing variations instead of overhead work if someone doesn’t have full overhead mobility due to a type III acromion.

For most people with a type II acromion, physical therapy can help to improve range of motion and decrease the effect of the acromion on shoulder motion and pain. For most people with a type III acromion, more often than not, surgical intervention is what will help.

Capsular Limitations

In the majority of the joints in the body, there is something called a “capsule” surrounding the joint. A capsule is synonymous to a ziploc bag encompassing the joint.

In this capsule, there are “folds” in certain aspects depending on where the arm is positioned. Due to an old injury, surgery, etc., this capsule can become “tight or stiff.” Now, without getting into too much detail about why it is tight/stiff or why there are capsular limitations, the only way to determine if there is capsular limitations, is by a licensed healthcare practitioner, ie. PT, chiropractor, etc.

Typically, older populations may have more capsular limitations OR if someone has had a long standing injury or prior surgery to the shoulder, they may present with decreased ranges of motion because of the capsule.

The only other area that can be attributed to decreased ranges of motion due to the joint capsule itself that affects the shoulder, would be the thoracic spine. Lack of thoracic spine extension and/or rotation can limit shoulder flexion, external rotation, etc.

To test for limited thoracic spine mobility, try Quadruped Passive Thoracic Rotation:


Normally, passive rotation should be 50 degrees in the general population. If it is less than that, that can significantly limit shoulder range of motion.

Soft Tissue Restrictions

Now, this is the more common of all three of the factors that can limit shoulder mobility. Excluding clients who are hyper-mobile, the majority of clients and patients have some form of increased soft tissue tone in one if not more areas of their body.

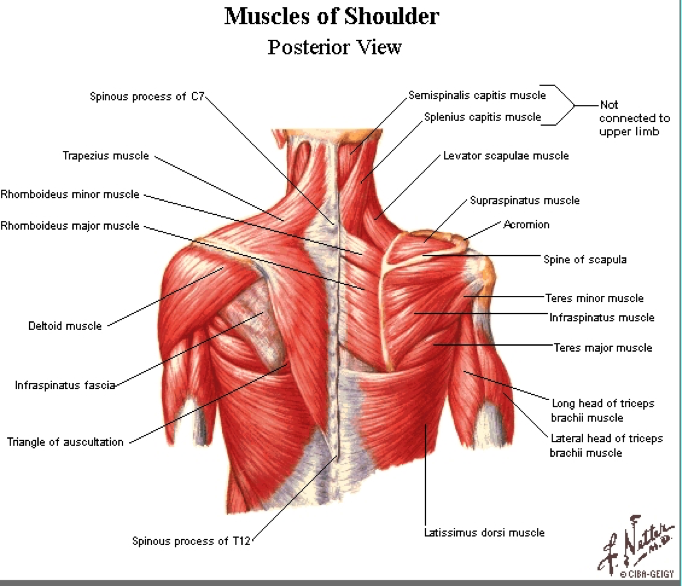
At the glenohumeral joint, there are a few “big” than can contribute to limited shoulder mobility.

muscles-of-shoulder

Photo credit: www.smogshoulder.com

Muscles that can limit shoulder flexion are:

  • Pectoralis Major/Minor
  • Teres Major
  • Latissimus Dorsi
  • Subscapularis

Muscles that can limit shoulder abduction are:

  • Pec Major/Minor
  • Teres Major
  • Latissimus Dorsi
  • Subscapularis

Muscles that can limit shoulder external rotation are:

  • Pec Minor
  • Teres Major
  • Latissimus Dorsi
  • Subscapularis

Muscles that can limit shoulder internal rotation are:

  • Infraspinatus
  • Teres Minor

Now, you’re probably thinking that I just “copied and pasted” most of those muscles from one section to the other. The latissimus dorsi is a huge contributor to limited overhead shoulder mobility due to its attachment on the trunk into abduction and flexion. It can also limit external rotation as it is a shoulder internal rotator.

Pectoralis minor can limit overhead motion because of its attachment on the coracoid process of the scapula and the rib. Decreased pectoralis minor tissue extensibility can cause an anterior tilt of the scapula limiting humeral motion on the glenoid.

Subscapularis can limit overhead motion due to its attachment on anterior side of the scapula and on the humerus. Teres major attaches on the scapula as well as on the humerus and can limit overhead mobility as well.

Infraspinatus and Teres Minor limit internal rotation of the shoulder due to its attachment points on the humerus and scapula.

Typically, one if not more than one of the aforementioned muscles can limit overhead mobility. Instead of performing intense stretches and forcing the glenohumeral joint into motions it just does not have, we need to ASSESS and then ADDRESS any limitations that are present.

Assessment

Active Motion

To assess someone’s active ranges of motion, ask them to move.

Have them perform:

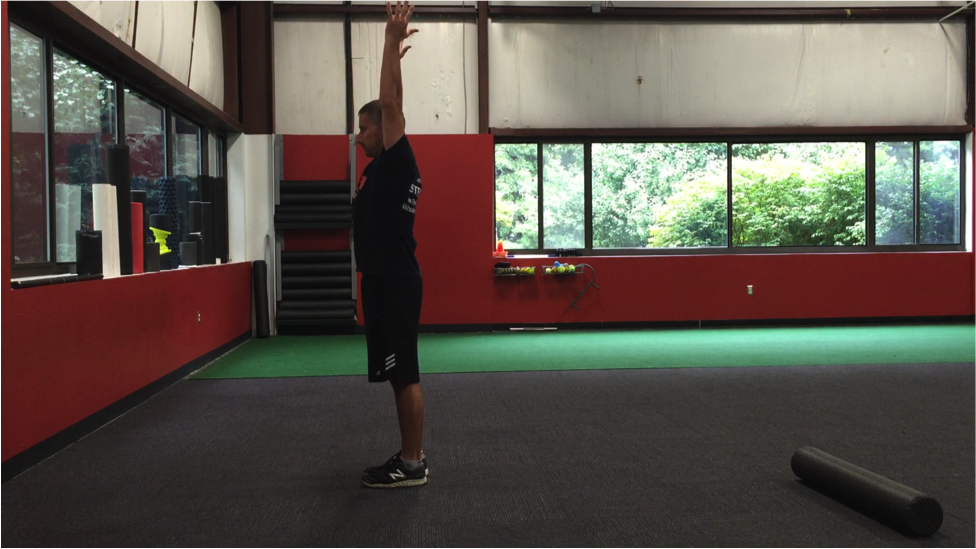
Shoulder Flexion

active-shoulde-flexion

Shoulder Abduction

active-shoulder-abduction

Shoulder Medial Rotation

active-shoulder-medial-rotation

Shoulder Lateral Rotation

active-shoulder-external-rotation

“Normal” ranges of motion for general population clients would be:

Shoulder Flexion: 180 degrees OR humerus in line with the client’s ear.

Shoulder Abduction: 180 degrees OR humerus in line with side of body

MRE: 3rd digit finger tip to contralateral inferior angle of scapula

 LRF: 3rd digit finger tip to superomedial border of contralateral scapula.

Now that you have assessed someone’s active motion, we need to assess it passively to fully determine if someone has a true mobility limitation.

Passive Motion

Perform the same motions passively into flexion, abduction, MRE, and LRF. Do not force these motions or push through tightness or pain. If you cannot passively bring the client’s arm to the aforementioned areas mentioned in the Active Motion section, then we know the client has a true mobility limitation.

Addressing the Issue

If someone presents with limitations in passive shoulder flexion, abduction, MRE, or LRF, performing some form of Self-Myofascial Release (SMR) can be beneficial.


Then, re-test passive motion to see if there has been an improvement in mobility. If there has, then you know you have worked on the appropriate areas.

If there has NOT been an improvement in mobility, refer out to a manual therapist (PT, sports chiropractor, massage therapist, etc.)

If the mobility has improved, then we want to use appropriate mobility drills to help groove the patterns that were just improved.

Horizontal Adduction/Posterior Rotator Cuff Stretch


Key Points:

  • Make sure to keep scapulae retracted by using wall or door jam.
  • Once scapulae is fixed, gently bring arm across body.
  • Hold 5-8 seconds pre-training or 30 seconds post-training.
  • By fixating scapulae, it will provide a more focused stretch to the posterior aspect of the shoulder.

Latissimus Dorsi Stretch


Key Points:

  • Use opposite side hand to fix scapulae to rib cage.
  • Once scapulae is fixed, hold onto a stationary object and sit back.
  • Gentle stretch should be felt in the lat.
  • By fixating the scapulae to the rib cage using the opposite hand, it provides a truer stretch to the lat vs tractioning the glenohumeral joint.

 Motor Control

Once there has been an improvement in mobility, we want to make sure that the brain and the body knows how to access that “new” mobility. We need to make sure to re-pattern the proper movement patterns to avoid falling back into an poor compensations.

For shoulder re-patterning, various movements that help to promote proper movement patterns such as:

Forearm Wall Slides


Back to Wall Shoulder Flexion


Quadruped Assisted Reach, Roll, and Lift


Now that we have improved the mobility by addressing increased soft tissue tone, re-patterned those movement patterns, now we want to incorporate them all together.

Movements such as:

Turkish Get-Up


Kettlebell Bottoms Up Baby Get-Up


There you have it! Instead of mindlessly stretching your shoulder, address any potential limitations and get back to training effectively!

About the Author

Andrew Millett is a Metro-West (Boston) based physical therapist

Facebook: From The Ground Up

Twitter: @andrewmillettpt

Instagram: andrewmillettpt
CategoriesAssessment coaching Corrective Exercise

Porcelain Post: Building a Wider Base to Reach a Higher Peak

NOTE: the term “Porcelain Post” was invented by Brian Patrick Murphy and Pete Dupuis. Without getting into the specifics, it describes a post that can be read in the same time it takes you to go #2.

Huh, I guess that was more specific than I thought.

Enjoy.

Building a Wider Base to Reach a Higher Peak

13460109 - himalaya mountains

Copyright: kapu / 123RF Stock Photo

I received a pretty cool email this morning from a college athlete of mine (Division I baseball) whom I worked with this past summer.

To give a little back story he had trained with me at Cressey Sports Performance a few years ago when he was in high-school, and had reached out to me this past May after completing his Junior season at school.

He walked into CORE and after going through the particulars – a thorough assessment, discussing his season, what he felt he needed to work on, his nagging back pain, his favorite GI Joe character, you know, the important stuff – he had this to say:

“The time I felt best was when you were writing my programs.”

With my chest sticking out a little further we broke things down and came up with a game plan for the summer, particularly with regards to how we were going to tackle his chronic back issue that had been hampering him for a few seasons:

  • As with any baseball player (and pretty much every athlete in the history of ever) we were going to hammer anterior core strength/stability to encourage more posterior pelvic tilt and implement drills to learn to dissociate hip movement from lumbar movement. Read: a metric SHIT-ton of deadbugs and birddogs. Not sexy, but whatever.
  • Work on regaining appropriate scapular upward rotation via actual scapular movement and not extending through lower back or shrugging.
  • Learn to control rib-position (limit rib flair and thus excessive extension) via positional breathing drills. There’s a lot of magic that happens when you teach someone the importance of a full exhale.
  • Also, teaching the importance of the reach and allowing the shoulder blades to move around the ribcage (again this whole extension thing rears its ugly head).


  • And, last but not least…still lift heavy things. Albeit doing my job as the coach to “pump the brakes” when needed and not fall into the trap of “lifting heavy at all costs because that’s what athletes do.” Truth be told: this mentality is probably why this athlete kept getting hurt in the first place.

To this last point (not lifting “heavy”), I wanted to showcase that it was more about the QUALITY of the movement and taking the time to 1) do stuff right and 2) understand how building a wider base (via more volume with SUB-MAXIMAL loads) will help with reaching a higher (strength) peak.10

Now, most guys at this point would roll their eyes and think I was going soft. However, this athlete was on board and willing to trust the process. So went to work for three months.

I received this email this morning:

“How’s it going? I wanted to tell you that yesterday we had our first testing day and I got 515 on a one rep max for trap bar deadlift! The best part is my back felt good after!”

He nailed a 515 lb deadlift despite having never gone above 405 all summer (on the last week we trained together).11

We still got after it all summer. He had his fair share of squatting (2 KB Front Squats), single leg work, carries, glute bridges, rows, Pallof presses, push-ups, and me making fun of him for having never watched The Usual Suspects. That’s sacrilege if you ask me.

However, the vast majority of his “strength” work was done in the 60-80% range and we were meticulous with making sure that every rep was pain free and that technique was solid.

I’d make the case that because we addressed alignment and stability issues along with movement quality, and got him into a better position, that he was then able to express his “true” strength more effectively when the time came.

The answer isn’t always to “lift heavy.”

Something to think about.