CategoriesExercise Technique Program Design

Struggling to Excel at Pull-ups? These Commonly Made Mistakes May Be Playing a Role.

If I want to learn more about astrophysics I listen to Neil deGrasse Tyson.

If I want to learn more about how to to be jacked while rocking a bowl cut I listen to He-Man.

Moreover, if I want to learn about or become a legit badass at pull-ups, my go to expert is Meghan Callaway. She’s a straight-up gangster when it comes to pull-ups and pull-up programming. 

With the release of The Complete Trainers’ Toolbox this week, of which Meghan and myself are a part of (along with seven other health/fitness professionals), we felt it important to give people a bit of insight as to what kind of information they can learn from this resource.

Meghan goes into the weeds on anything and everything regarding programming for the pull-up and today she offers a little insight on some commonly made mistakes people make.

Enjoy

ALSO: The Complete Trainers’ Toolbox is on sale this week at $100 off the regular price. 
Copyright: dolgachov / 123RF Stock Photo

Are You Committing These Mistakes?

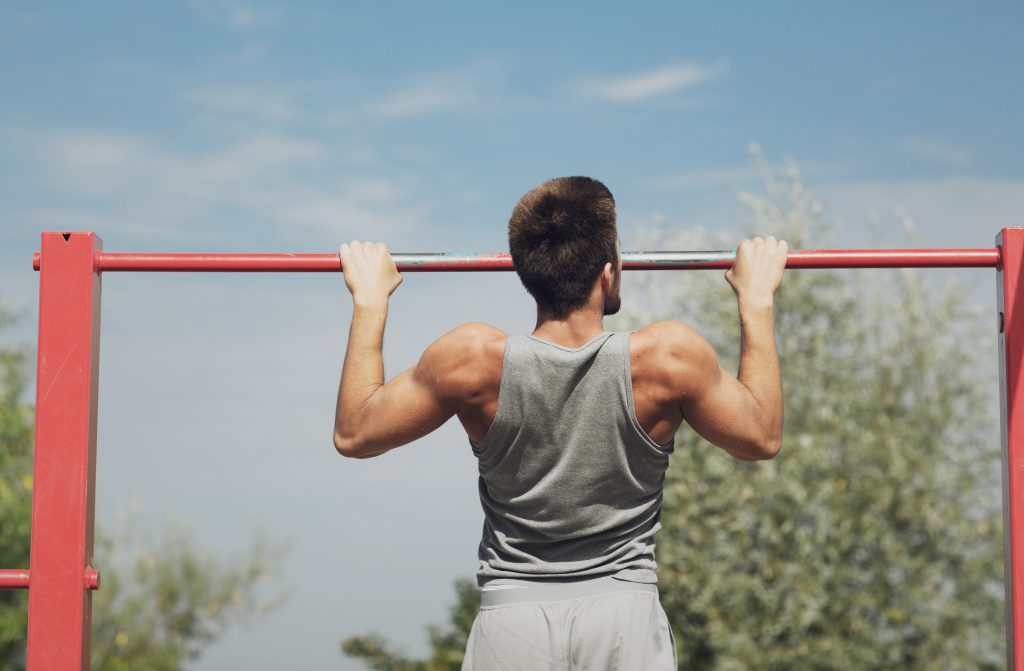
Countless people of all genders have the goal of being able to perform one or many pull-ups. Yet it is no secret that most people struggle to execute a single strict pull-up, and this includes many elite athletes.

Sam Bennett, the number one draft pick in the 2014 NHL draft, made the news when he failed to perform a single pull-up at the NHL draft combine.

So the inability to excel at pull-ups definitely isn’t limited to the general population, or purely beginners. Most people fail to conquer pull-ups, not because they are physically incapable, but because they are making some key mistakes.

I have great news for you.

This can be rectified.

Case in point, shortly after Sam Bennett bombed his pull-ups in the NHL draft combine, with some proper training, he banged out 11 reps.

Note From TG: I actually wrote an article a few years ago on the reaction to people giving Sam Bennett grief about not being able to perform a pull-up initially. You can read it HERE.

In this article I am going to discuss FIVE key mistakes that are preventing an abundance of people from excelling at pull-ups.

Mistake #1: Relying on the Arms to Perform the Movement

When pull-ups are being executed correctly, the shoulder blades, not the arms, should be initiating the movement. Instead of using the muscles in the mid and upper back to perform the bulk of the movement, a myriad of people rely on their arms.

To be clear, while the muscles in the arms will play a role, they should only be assisting the muscles in the back, not performing the majority of the work.

During the initial phase of the movement, and as your body is traveling towards the bar, you want to draw each shoulder blade in towards your spine and down towards your opposite hip (depression, retraction, downward rotation), not pull with your arms.

During the eccentric phase of the movement, rather than keeping your shoulder blades pinned, a mistake that plagues many individuals and can again cause them to rely on their arms to execute the movement, your shoulder blades should perform the reverse movements and should move away from your spine and away from your opposite hip (elevation, protraction, upward rotation).

As you can see, the ability to control the movement of your shoulder blades is a key component of being able to perform pull-ups.

Solution

The scapula pull-up is a really useful pull-up specific regression as it teaches you how to initiate the movement with your shoulder blades instead of pulling with your arms. This exercise is also specific to pull-ups as it requires you use the same body positioning, and it helps improve grip strength.

A few key points:

  • Initiate the movement by drawing your shoulder blades in towards your spine and down towards your opposite hip (retraction, depression, downward rotation).
  • In the top position, pause for a brief count.
  • Perform the eccentric component with complete control.
  • During the lowering/eccentric portion of the movement, your shoulder blades should perform the reverse movements as they did during the concentric component, and should move away from your spine and away from your opposite hip (protraction, elevation, upward rotation).
  • For the duration of the movement, your elbows should remain in a fixed position and should not bend at all. All of the movement should occur via the shoulder blades.


Mistake #2: Inability to Maintain the Proper Body Positioning

 This might surprise you, but if you hope to perform pull-ups as efficiently as possible, your entire body must function as a synchronized unit.

Pull-ups are not just an upper body movement.

If you are not able to maintain the proper body positioning, and in order to do so your lumbo-pelvic region and lower body must remain in a relatively fixed position for the duration of the movement, you will struggle.

Your path to the bar will likely be longer and less efficient as you will be more prone to swinging, and you will likely be forced to move unnecessary deadweight to and from the bar. This is not conducive to optimal pull-up performance. Keeping your head, torso, and hips in a stacked position, something I often liken to a canister, is extremely important. Proper breathing, bracing, rib positioning, and glute engagement are crucial. In terms of your lower body, you want to fully extend your knees and contract your quadriceps, cross one foot over the other, and dorsiflex your feet.

Solution

The dead bug, and its many variations, is one of my go-to exercises for improving lumbo-pelvic stability.

This exercise, which can accommodate people of most fitness levels and abilities, trains your anterior core muscles to generate the requisite levels of tension needed to perform pull-ups efficiently. This versatile exercise also trains your muscles to resist the extension of the spine, and this is an area where many people labour. When heaps of people perform pull-ups, it is extremely common to see their ribcage flaring and lower back hyperextending. Dead bugs will help resolve these issues.

A few key points:

  • For the duration of the exercise, keep your head, torso and hips in a stacked position. Keep your ribcage down, and do not allow your lower back to hyperextend. In other words, maintain the canister position.
  • As you initiate each rep and lower the opposite arm and leg towards the floor, steadily exhale, and brace your anterior core muscles as hard as you can.
  • Start out with your knees bent at a 90 degree angle and maintain this position for the duration of the movement. Only extend your knees (and perform more advanced variations) once you’ve mastered the movement with your knees bent, not before.

Here is an innovative and extremely effective dead bug variation you can try.


Mistake #3: Lack of Specificity

Are you spending endless hours training yet are still unable to execute one or more pull-ups?

The exercises you are performing might not be specific enough to pull-ups.

With your pull-up training, you need to perform exercises that develop pull-up specific mechanics and pull-up specific body positioning. Pull-up regressions develop these key components, and serve as great stepping stones towards being able to bang out one or many unassisted pull-ups. In terms of body positioning, exercises like hollow body holds, dead bugs, and hanging leg raises help you learn how to develop and also maintain proper pull-up specific body positioning.

Some common culprit exercises that many people believe will help their pull-up performance, yet have a relatively low carryover as they are not specific enough to pull-ups, include lat pull-downs, biceps curls, and machine assisted pull-ups.

These are just a few of many exercises I could list. The fact I named machine assisted pull-ups as one of these exercises might surprise you, so I will discuss this in my next point.

Mistake #4: Relying on Machine Assisted Pull-ups and Band Assisted Pull-ups

In most cases, I am not a fan of machine assisted pull-ups.

At least, I strongly believe there are many better options.

While machine assisted pull-ups do allow you to focus on scapular movement, so this is one benefit of the exercise, due to the fact you are kneeling on a pad, your body is in a completely different position to when you are performing regular pull-ups, and you don’t need to generate and maintain full body tension.

In essence, the need for pull-up specific body positioning and lumbo-pelvic stability are almost entirely removed from the overall equation. When it comes to training for actual pull-ups, there are plenty of other pull-up regressions and accessory exercises that are much more specific to actual pull-ups, and will have a vastly greater carryover to your pull-up performance.

Now when it comes to band assisted pull-ups, if they are implemented and execute correctly, and at an appropriate time in your training program, they can have a positive impact.

However, an abundance of people make the mistake of training for pull-ups by relying purely on band assistance, and they omit performing all of the other extremely important pull-up specific regressions.

With band-assisted pull-ups, the band provides the help in the bottom position of the movement, and this is when most people do not need the most assistance. Another key issue with band assisted pull-ups, the band makes it easy to disregard proper body positioning, and generating the requisite levels of tension around the spine, hips, and lower body.

Due to all of the above, when many people eliminate the band and attempt to perform regular pull-ups, they flounder.

Before you introduce band assisted pull-ups to your training program, you should have already developed the proper pull-up specific technique, the ability to control the movement of your shoulder blades and shoulders, and the ability to generate the requisite levels of tension and pull-up specific body positioning.

In short, when you are utilizing band assistance, it is imperative that your form is identical to when you are performing regular unassisted pull-ups. Also, you want to use as little assistance as needed, but as much as necessary so you can perform 100% of your reps with impeccable form.


Mistake #5: Insufficient Grip Strength

While this kind of goes without saying, if you cannot support your bodyweight from a hanging position, your ability to perform pull-ups will suffer. An insufficient grip plagues many people of all fitness levels and abilities, not just beginners.

Adding some grip specific exercises to your training program will positively impact your overall ability to perform pull-ups.

A few of my favorite exercises for improving grip strength include loaded carries, and bottoms-up kettlebell presses.

Loaded Carries

Key Points: (describing loaded carries with dumbbells by sides)

  • For the duration of the exercise, maintain the canister position. Your head, torso and hips should remain in a stacked position. Do not allow your lower back to hyperextend or ribcage to flare.
  • Keep your arms rigid (all the way down to your hands), and pretend you are trying to crush something in your armpits.
  • For the duration of the exercise, maintain your 360 degree brace, and maintain regular breathing (360 degrees of air around your spine).


Bottoms-Up Kettlebell Presses

Key Points:

  • For the duration of the exercise, maintain the canister position. Your head, torso and hips should remain in a stacked position. Do not allow your lower back to hyperextend or ribcage to flare.
  • Keep the muscles in your forearm engaged, and wrist in a vertical position.
  • Do not keep your shoulder blades pinned. They are supposed to move. This applies to both the concentric and eccentric components of the movement.
  • Before you initiate each press, take a deep breath in, (360 degrees of air around your spine), brace your core (360 degree brace around your spine), tuck your ribs towards your hips, and squeeze your glutes. This will help stabilize your hips and spine.

Want to Learn More Pull-Up Badassery?

You can (and then some) by checking out The Complete Trainers’ Toolbox.

Nine fitness professionals tackle a bevy of topics ranging from assessment and program design to differentiating flexion & extension based back pain and battling negative self talk.

We all have encountered the same problems you have as a fitness professional; so here’s how we handled them.

  • 17 total hours of content
  • Earn CEUs
  • Save $100 this week only.

—> GO HERE <—

CategoriesAssessment Corrective Exercise Exercise Technique

The Big Toe and the Squat

Two things with regards to the title of today’s post:

  1. I’m thinking it could pass for the title of the next big children’s book.1
  2. Searching stock images for “big toe” pretty much made me want to throw up a little in my mouth. I’d place it  somewhere between kipping pull-ups and gonorrhea in terms of stuff I’d rather not see with my eyes ever again.

There’s a lot to consider and that can go awry when discussing the squat. To say there’s a plethora of moving parts – not to mention positional considerations (hand position, stance, bar position, etc) – would be an understatement.

One of the last things you’d probably ever consider when it comes to your squat performance is your big toe. Well, I’m here to tell you that it’s a pretty damn important and something you should consider considering.

Also, this is about as non-pukey of a picture as I could find of a toe.

Copyright: alfredhofer / 123RF Stock Photo

The Big Toe & the Squat

What inspired this post was an interaction I had with a new client recently. During his initial evaluation I had him show me his squat because he had mentioned the movement has always bothered his lower back.

He’d worked with previous trainers in the past who had attempted to “fix” things, more often than not resulting in him stretching this, smashing that, performing a cornucopia of positional breathing drills while repeating the Elvish alphabet backwards, and otherwise being over corrective exercised to death

The next step was to bring in an exorcist.

I didn’t do any of those things.2

Instead I did something revelatory.

In fact, I’d be surprised if I’m not nominated for a Nobel Prize for how revelatory what I did was.

Are you ready?

Wait for it…

Wait for it…

I watched him squat.

https://www.youtube.com/watch?v=a1Y73sPHKxw


I’m flummoxed as to why this seemingly obvious “intervention” is often overlooked. I think a lot of it has to do with something John Rusin spoke about during his keynote talk at the SWIS 2018 Symposium:

“We’re in an industry that gets too distracted by bright, shiny objects.”

Watching someone squat is boring.

Having someone stand in a zero gravity chamber while a bunch of lasers attempt to release their psoas isn’t.

We’ve become infatuated with gadgets and gizmos so much so that it’s become much harder to galvanize the masses into trusting what it is they do best……

………..COACH.

To that point, I’m old school and I just wanted to watch my man squat.

I had him take off his shoes and pants, and it’s here where I noticed something.

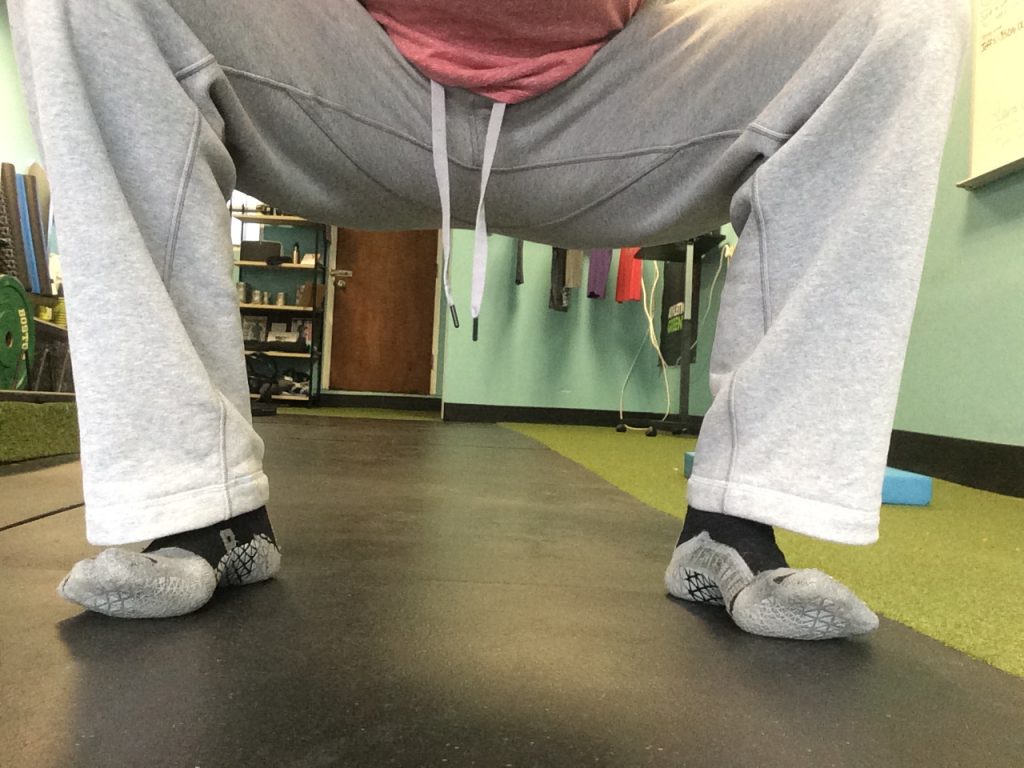
I watched his feet and saw that with every repetition his toes would come up off the ground, like so:

FYI: this is a picture of me doing a reenactment. See you in a few weeks at the Oscars.

Now, for the sake of brevity, it is a conversation to have as to whether or not he was cued into lifting his toes off the ground or not? I’ll nip this in the bud and say for the record that he wasn’t.

He was just never coached on how to squat properly.

As such, it became glaringly clear why his back had always been flipping him the middle finger whenever he attempted to squat (Goblet, front, back, all of them).

When your toes – most often the big toe – comes off the ground you lose your core.


Bullet Points (for those of you too lazy to watch):

  • When toes come up, you lose canister position (ribs stacked on pelvis) and thus lose your core and stability.
  • When toes comes up, you crank into lower back.
  • Think more about foot pressure (pushing into floor and even weight distribution on big toe/metatarsal, small toe, AND heel).
  • Cement toes to the floor.
  • Take your clients’ shoes off when they squat. It will tell you a lot.
  • My biceps looks amazing in salmon colored t-shirts.

But Wait Tony, Some Coaches Cue People to Squat With Big Toe Up on the Way Down, and Then to Push It Into the Ground on the Way Up. Are You Saying They’re Assholes?

No.

Coaches such as Mark Cheng and Cal Dietz  – who are both the shit – often advocate the big toe stays up on the way down during a squat (but the ball/metatarsal still stays glued to the floor) and then press the toe down on way up.

I find this to be okay – and far be it from me to say they’re wrong. They’re both developing outstanding athletes and making people better.

I just find that with all the other mental gymnastics that come along with the squat – big air, ribs down, sit down, not back, spread the floor, drive your chest into the bar, hips through, don’t poop your pants – that it gets a little crowded when you add in the “toes up on the descent, toes down on the ascent” cue.

As I note in the video above I like to cue the idea of foot pressure – with three points of contact – and to cement the toes down during the squat.

Moreover, the objective is not to grip or dig into the floor with your toes.

As Lexington, KY based coach, Drew Watts, notes:

I don’t like “digging” because you don’t want to press the tip of the toe to the ground, more the pad of the toe. Big toe, ball of the foot, 5th metatarsal, heel. Pressing big toe helps the windlass mechanism as well.

Here’s a nice demonstration of everything in action by Essex, Vermont based strength coach, Jess Voyer (who was kind enough to refer to me as a genius in her IG post. 4,000,000 points to Gryffindor):

https://www.instagram.com/p/Bs-xYyEHdmy/

All of This to Say

Don’t be shy to take people’s shoes off.3

Having a keener eye on what their toes are doing during their squat can give you a lot of information and insight.

Toes down = core on = sexier squat.

CategoriesExercise Technique Program Design

Deadbugs Are Gucci. However, Pump the Brakes a Little and Try These Regressions First

First off: Yeah, that’s right I just put the slang version of “Gucci” into the title of a blog post about deadbugs.

Second: I promise I won’t ever do that again

Third: I’ve been swamped with travel the past few weeks (and the subsequent catching up on emails, programs, projects, and life shit-show) and I apologize for my lack of writing prowess. Thankfully I’ve had a handful of regular contributors to the site help to pick up the slack in my absence.

Thanks to Boston based coach, Lana Sova, for today’s contribution.

Fourth: Maybe I should have used “lit?” No? Okay, I’ll GFM.

Copyright: ammentorp / 123RF Stock Photo

5 Deadbug Regressions You Need To Try

When it comes to core training, people often fight over which exercises are the best, but that’s kind of like arguing whether Cardi B or Nicki Minaj is a better rapper.

In my opinion (which no one really asked for, but Imma say it anyways because #internet) there is space for both, much like there is a time and a place for different core strengthening exercises.

When people ask me which is the best core strengthener, I give the most boring answer — it depends.

There are many things I take into consideration when I include core strengthening exercises in a client’s program.

Things like goals, training levels, level of lumbo-pelvic control, and mind-body awareness all matter.

Much like the aging process, things are never the same with core training — what could be the best core exercises for a client today will not be the same a year or two from now because they’ve gotten stronger and advanced their skills.

Which leads me to today’s article.

For some reason, when it comes to core training, we go from zero to a hundred in no time. And by “we,” I mean personal trainers. I get it, often we’re tempted to impress clients and show them what we’ve got under our sleeves.


And, often, our clients swear by the fact that they are so advanced they can hold a plank for ten minutes while multitasking and doing 20 other things.

Cue *major eye roll*.

While it’s a good thing to keep your clients happy and help them fall in love with training and working out, there is also a thing called common sense, not to mention the art of giving a client not only what she wants, but also what she needs.

Enter Deadbugs

The deadbug exercise is my all time favorite core strengthening exercise.

When done correctly, it’s one of those exercises that looks easy, but isn’t when you do it yourself.

Progressions to this exercise are diverse and can be lots of fun. And while progressions are great and we do need them to help a client succeed, we also need not forget about regressions.

Deadbugs are one of the exercises where attention to the details matter. It’s easy to spot bad form on a deadbug when you see a client arch her back from the get go. But it’s much more challenging to notice incorrect form when things are not so obvious.

For example, ideally we want a client show us that she can maintain a canister position while performing a deadbug. What’s a canister position? If you live under a rock and never heard Tony speak about this concept, here’s a video for you.


But often, clients will cheat.

Like when I see clients bring their knees closer to their chest to help them with a posterior pelvic tilt.

Or maybe the second they begin to extend their leg out, they lose any core tension; to help them reach the floor, they’ll shift into an anterior pelvic tilt.

It’s our job as coaches to help a client succeed with this exercise without cheating, because the key to their success is doing exercises with correct form.

Happy client AND successful client = Happy coach.

Here are FIVE of my favorite deadbug regressions.

1) Deadbug ISO Hold with a Dowel


Deadbugs are a core stability exercise. This is where I often introduce the concept of an open or closed canister in relationship to the hips and rib cage.

Pssst: (Watch the video earlier in the post.)

Before we start moving the legs and arms and begin to resist any movement in the hip region, it would be a good idea to learn to own the closed canister.

The reason I love this exercise is it helps the client learn how to keep tension in the whole body while also feeling the abdominals working. Adding a dowel to the equation, with the client holding it above her chest while keeping her legs up in a tabletop position, helps her to learn what it means to activate her lats, which can translate to more advanced exercises like bench pressing or deadlifting later on.

I often use the cue ‘’Try to bend the dowel with your pinkies.” Go ahead and give it a try. This should fire up your lats like crazy.

2) Core-Engaged Deadbug ISO Hold with Band


Much like the previous exercise, this variation teaches the client to keep the closed canister position while keeping the tension in the entire body. However, she’ll hold a resistance band above her chest, which acts as a multiplier in creating the tension in the upper body.

3) Core-Engaged Deadbug March


This is an exercises I stole from Florida-based coach William Richards in one of his guest post for Tony on this site.

Note From TG: You can check that post out HERE.

This is the exercises where, once your client learns how to control the canister position and knows how to create tension in the whole body, she can start moving her legs and making the exercise so much more advanced.

4) Deadbug w/ KB Overhead Hold


This exercise can teach your client how to maintain the canister position with her hands above her head. I like to use this exercise to build up the context for future exercises such as overhead presses.

5) Deadbug with a Pallof Press


This is probably more advanced than the previous exercises; nonetheless it’s still a great regression before you dive head first into all the glorious deadbug variations and completely destroy your client’s core.

It’s great to show your clients advanced movements and spice things up here and there. But before you do so, make sure your client is competent with the exercises and can perform them well. This will help your client show up at the gym more willingly and ultimately reach her goals.

About the Author

Lana Sova is a powerlifter and an in-person and online strength coach in Boston, MA. She helps women to change the way they look by making them strong.
Check out her website at Shameless Strength Academy.
CategoriesExercise Technique

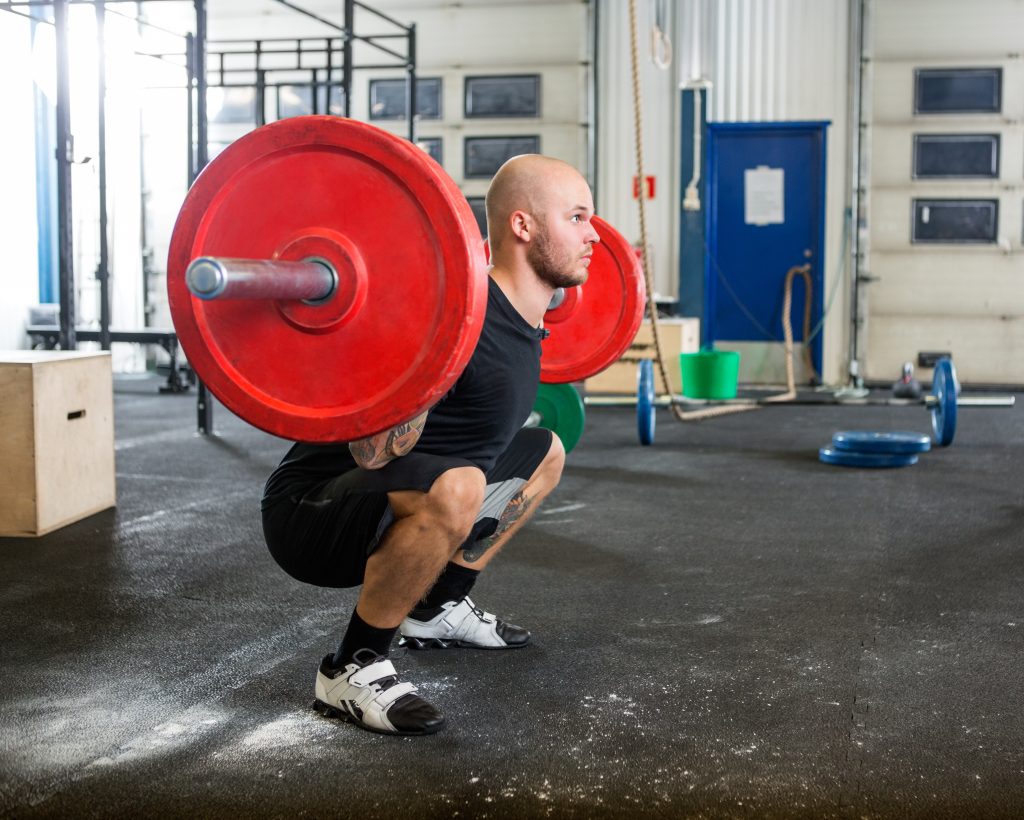
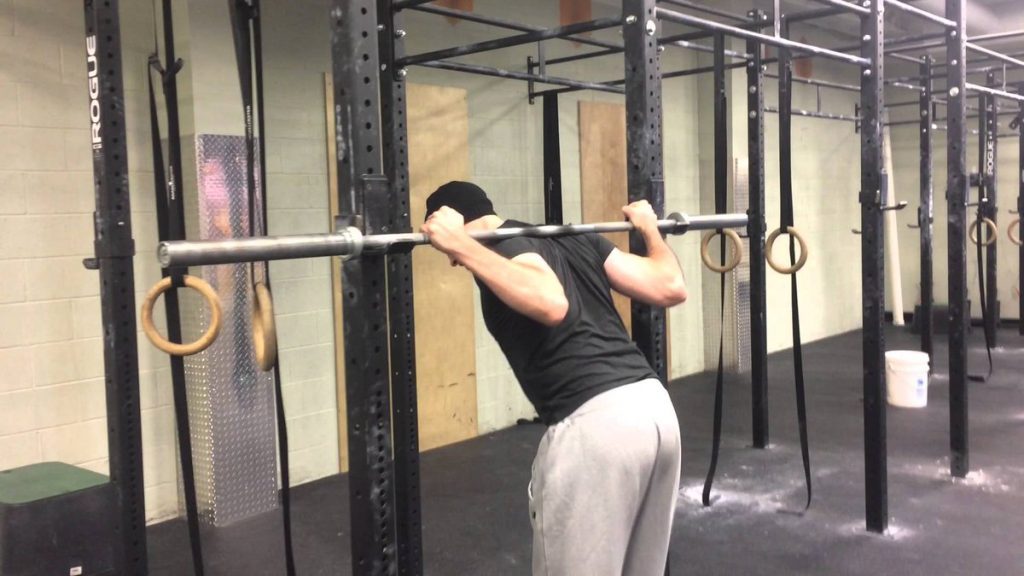
Squat Down, Not Back

vadymvdrobot@123rf.com

What follows is what works for ME and MY clients. This shouldn’t be taken as a personal attack against YOU, your favorite coach, or any methodology that’s seemingly at odds with my point of view.

By all accounts you’re still a decent human being, even if you happen to disagree with what I’m about to say.4

Here goes.

I prefer people to squat down rather than back.

I want the squat to look like a squat.

I Can Hear the Cacophony of Moans Now

But, “moment arms!

And, “hip extension torque!

“Biomechanics, Tony. WHAT ABOUT THE FUCKING BIOMECHANICS!?!U?!!!AHHHHH!??!JUMPSOFFCLIFF

via GIPHY

Relax: In no way, shape, or fashion am I discounting any those things, nor turning a blind eye to science or evidence-based approaches and modalities.

I’m on your side my fellow anthropometrical nerds.

What I AM discounting, however – but not necessarily turning a blind eye towards (maybe tossing some shade?) – is the fact that, while all those things mentioned above – moment arm lengths, hip extension torque, biomechanics – can be used to make a solid case for squatting the most amount of weight possible, as coaches we often forget two things:

1) Many people could give two shits about squatting the most amount of weight possible.

2) Most people aren’t powerlifters.

Don’t get me wrong: I am all for people training with intent, striving to get strong(er), and pushing some appreciable iron. The tagline for this site is “Because Heavy Things Won’t Lift Themselves” for crying out loud.

That said, I’m also very much interested in the long-game. I want to keep my clients/athletes healthy and set them up for the most long-term training success possible.

One such way I accomplish this is how I prefer to coach the squat. Again, what follows is what works for me and what I feel fits the needs/goals of the bulk of MY clients and athletes.

If you disagree you’re wrong hopefully we can hug it out if we ever meet in person.

Squat Down, Not Back


The video above demonstrates me initiating the squat by pushing my hips back, but specifically getting a lot of motion via the lumbar spine.5

This won’t bode well for most lifters.

Is it wrong?

Well, no.

Plenty of lifters do this and move a lot of weight. However, what often works for powerlifters, wearing squat suits, won’t be the best fit for “natural” non-powerlifters, not wearing squat suits.

Plus I’m pretty sure a a piece of my soul dies every time I see it.

Instead, I prefer this approach:


Take in your air at the top, create a flexion moment (clamp down abs to prevent excessive lumbar movement), and squat DOWN by breaking with knees and hips simultaneously.

For most lifters, most of the time, this will be the better long-time fit in terms of being able to 1) not only squat a decent amount of weight, but also 2) make it less likely your lower back will hate you.6

CategoriesExercise Technique Program Design

30 Days of Deadlifts: Days 1-10

A few weeks ago I had an epiphany.

Maybe I should do a 30-day series on Instagram and cover something cool?

  • 30 Favorite Pictures of My Cat?
  • 30 Days of Omelets?
  • No, no, no…30 Days of Jason Bourne Fight Scene Reenactments?7

As you can tell, I didn’t go with any of those choices. But if you want me to let me know.

I went with deadlifts.

And I took 30 – admittedly not in a row – days to cover everything from technique tips and troubleshooting ideas to program design and different deadlift variations I like.

It was a huge hit and people seemed to get a lot out of it. And it just so happens T-Nation reached out and asked if they could publish the series on their site.

Days 1-10 were posted today and they include all the videos I filmed in addition to some added (written) commentary.

Enjoy.

—> BOOM SHAKA-LAKA <—

CategoriesExercise Technique

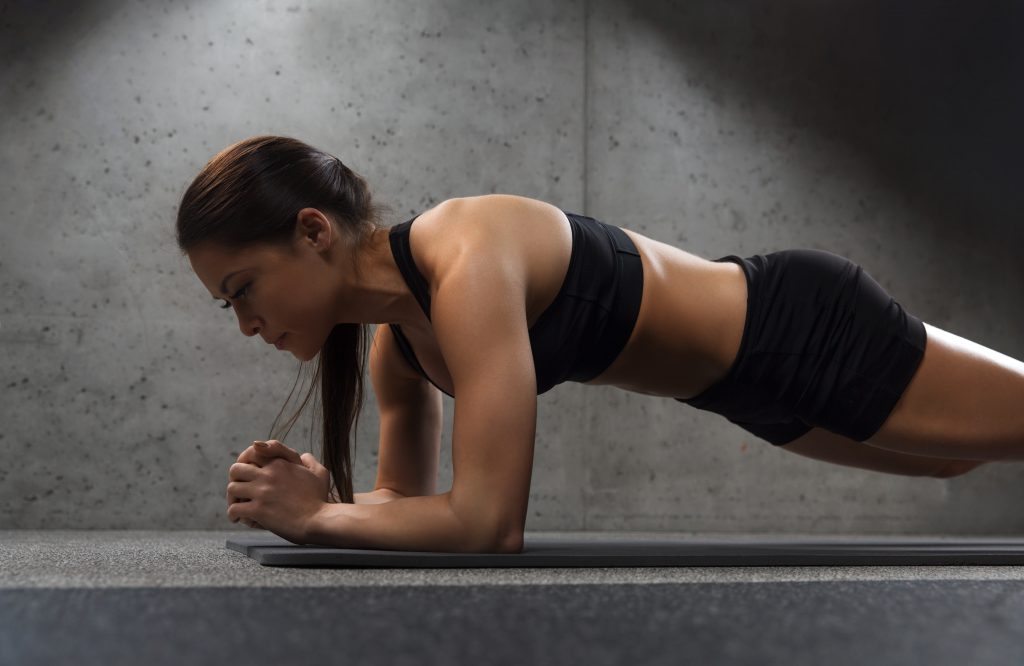
It’s Not What You Do, It’s How You Do It: A Better Plank

Copyright: undrey / 123RF Stock Photo


I know, I know.

Planks. Not the most exciting topic in the world.

I may as well post something on photosynthesis trends of oak trees in the Northeast, gas prices, or, I don’t know, what my kid had for breakfast this morning.

Everybody performs planks. And 90% of those people perform them incorrectly.

Today’s guest post by TG.com regular, Dr. Nicholas Licameli, sheds light on how to make your planks more effective.

HINT: It has zero to do with performing them for longer durations.

It’s Not What You Do, It’s How You Do It: A Better Plank

The plank.

We know it, we love it, and we know the benefits. However there is a simple way to make it more effective that you can implement immediately. It doesn’t involve any additional equipment and takes less than a second to do.

This simple modification will help not only those who are new to the exercise, but also those seasoned planking veterans.

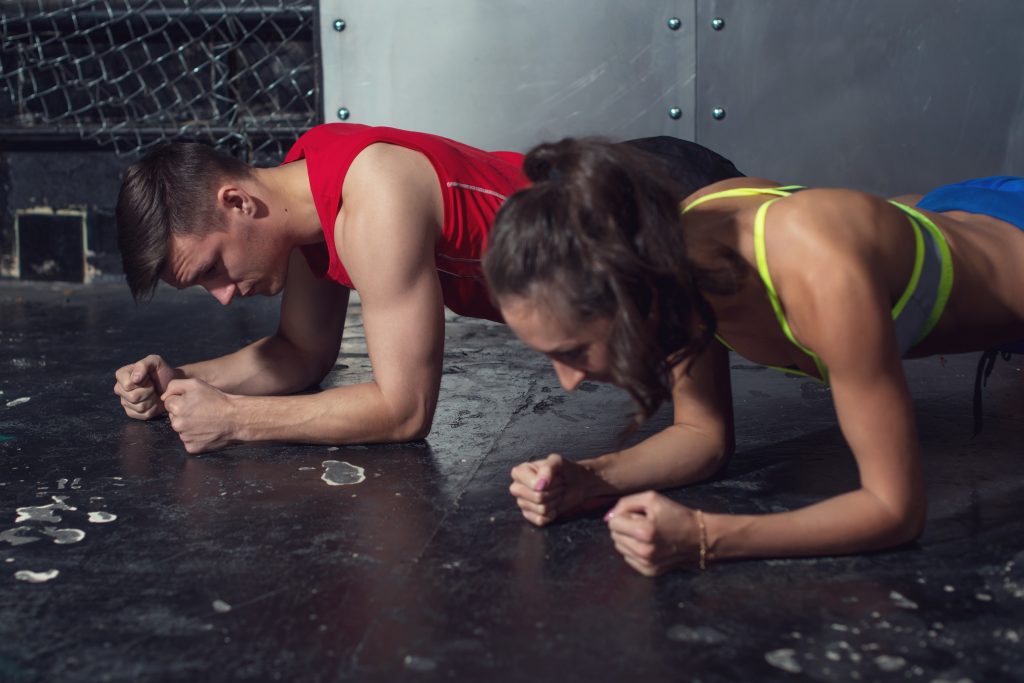
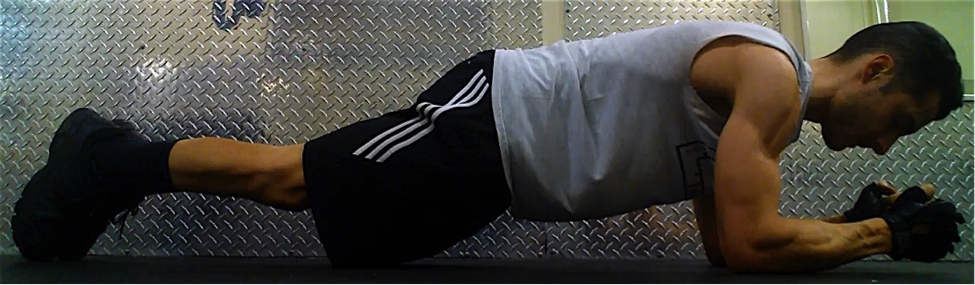
Take a look at the following two pictures.

Can you spot the difference?

It’s subtle, almost undetectable.

Here’s some more information: The plank on the top can be held for 3 minutes or more, while the plank on the bottom can only be held for 15-20 seconds max.

The plank on the top is engaging only a fraction of the core and abdominal musculature, whereas the plank on the bottom is recruiting nearly every muscle in the body, including the core and abdominals.

Form looks good in both: No sagging or lifting of the lower back and pelvis, serratus anterior is engaged for scapular stability, and the head, neck, and entire spine are in neutral. So what makes the bottom plank more effective than the top?

Let’s find out.

No, Wait, Don’t Go…the Plank IS a Big Deal

The plank is one of the best exercises for improving total body strength as well as the health of your spine. In order to perform the plank correctly and effectively, pay close attention to the position of the lower back and pelvis as well as the direction of the force being applied through the floor.

When in the plank position, imagine what would happen if all friction on the floor disappeared, almost as if doing a plank on ice. Which direction would your elbows and feet slide? Most likely, they would slide out from under you: your arms would shoot forward, your feet would shoot backward, and your face would be imprinted on the dirty gym mat that you sprayed with a dirty plastic bottle filled with an ambiguous pale blue liquid.

via GIPHY

Note From TG: No reason for this GIF other than to 1) I couldn’t find a video of someone falling during a plank and 2) it’s freakin hilarious. Sorry for the brief hijack Nicholas.

That is precisely the problem with the top picture.

You’ll notice that my toes are digging into the floor and isometrically pushing away, while my arms are isometrically pressing forward toward my head.

Biomechanically, I am isometrically pressing into shoulder flexion, ankle plantar flexion, hip extension, and spinal extension. While this may be a good way to hit the deltoids and calves (not really), it is not doing much for the core and abdominals.

Why?

Because the core, and more specifically the anterior core (the muscles on the front side), is responsible for spinal flexion and anti-extension. In order to maximally engage those muscles, you must train those movements.

This can be achieved by forcefully, and isometrically, pulling your arms and feet together. Now imagine doing it on ice. What would happen? Our arms and feet would slide toward each other and we’d assume a pike-like position with spinal flexion and anti-extension, which is just what we want.

And Bingo was his name-o…

Why Is This So Common?

Our bodies do not want to be wasteful, so they will do their best to use the least amount of energy necessary to complete a task, unless we tell it otherwise.

With the plank, sometimes due to our body’s natural compensations and other times due to conscious effort, we tend to get into the “position of least resistance,” usually for the sake of increasing the amount of time we can spend in the plank position.

In other words, we make the plank as passive as possible to increase its duration.

Some even wear their plank time like a badge of honor!

Hearing, “How long can you hold a plank?” is slowly becoming almost as common in gyms and health clubs as, “How much do ya bench, bro?”

That’s why it is important to remember the goal.

Unless you are a competitive planker and are scored by how long you can hold a plank, the goal of the exercise is not to increase its duration, but rather to train the core!

Doing planks is kind of like making a homemade dinner, cleaning the dishes, or having sex.

Just doing the activity doesn’t mean it will be good.

The effectiveness of the plank, as well as a homemade meal, the dishes, and sex, depends on the execution.

Don’t treat the plank like a marathon…treat it like a sprint.

Instead of thinking, “How long can I hold a plank for?” think, “How short can I hold a plank for?”

The idea being: The harder the contraction, the shorter the duration. The harder you contract and brace your core, the shorter the plank will be.

Tired of long sets of planks? Start squeezing!

Tips For A Better Plank

1. Squeeze your glutes and contract your abs (rectus abdominis AND transverse abdominis), which will pull your pelvis into a slight posterior pelvic tilt (think slightly rounding your back).

2. In order to contract your abs, you want to engage both your rectus abdominis (six-pack muscle) and transverse abdominis (deep stabilizer muscle, much like a corset). To contract the rectus abdominis, imagine bringing the ribs and front of the pelvis together. To contract the transverse abdominis, imagine the feeling when cold water reaches your navel when walking into a pool.

3. Keep your head and neck in a straight line. DO NOT LOOK UP. Your tailbone, mid back, and head should all be in line with each other (see picture below).

4. Isometrically pull your elbows and feet together. This is the key. Imagine doing a plank on ice or on a slippery hardwood floor with socks and a towel under your arms, as seen below.

5. Once you assume the proper position, maximally contract every muscle from your toes to your fingers, but DO NOT HOLD YOUR BREATH.

6. Imagine giving a big hug with your shoulder blades. Keep the shoulder blades protracted (pressed forward) and be sure they stay snug around the ribcage. This will help engage serratus anterior, which is an extremely important muscle for the health of your shoulders. It is also quite aesthetically pleasing when well developed.

7. When coming off of a plank, slowly lower your knees to the floor. DO NOT let your hips/pelvis drop to the floor.

Don’t rely on the traction of the floor to maintain the plank position, rely on your core.

Would you rather get to muscle fatigue after planking for 10 seconds or 3 minutes? Clearly, ain’t nobody got time for no 3-minute, ineffective planks. Try this modification out and I guarantee your planks will become instantly more effective and you will look at the plank in a new light and learn to love it.

For a video demonstration and explanation of everything I just wrote, be sure to check out my video right here:


About the Author

Nicholas M. Licameli, PT, DPT

Doctor of Physical Therapy / Pro Natural Bodybuilder

Every single thing he does, Nick believes in giving himself to others in an attempt to make the world a happier, healthier, and more loving place. He wants to give people the power to change their lives. Bodybuilding and physical therapy just act as mediums for carrying out that cause. Love. Passion. Respect. Humility.  Never an expert. Always a student. Love your journey.

YouTube: https://www.youtube.com/channel/UCAWFe5BmaJ_WFAh2aqsOg8g

Instagram: https://www.instagram.com/nicklicameli/

Facebook: https://www.facebook.com/nicholas.michael.58

CategoriesCorrective Exercise Exercise Technique

Don’t Let Your Clients Butcher These Three Exercises

Copyright: fizkes / 123RF Stock Photo

Deadbugs, Birddogs, and Glute Bridges…Oh My

I wrote a thing for the Personal Trainer Development Center.

I suspect it’ll get me nominated for a Pulitzer and statues will be erected in my likeness throughout cities across the world.

Or, you know, trainers/coaches will just start coaching deadbugs, birddogs, and glute bridges the right way.

Check out my latest article on their site HERE.

Categoriescoaching Exercise Technique

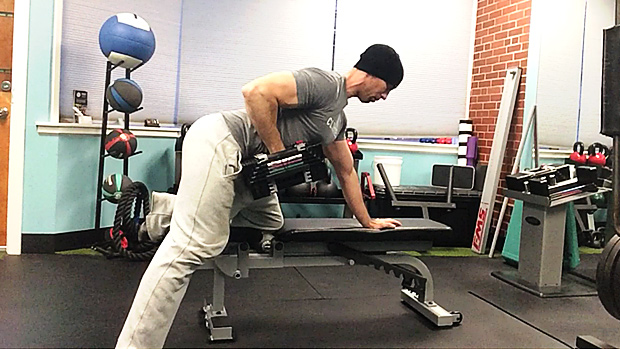
5 Dumbbell Row Mistakes and What To Do Instead

The dumbbell row is a common exercise performed in gyms everywhere and is a splendid choice for anyone interested in building a back the size of Nebraska.8

It’s a staple in my own programming (and that of my clients) because it offers a bevy of other benefits – shoulder health, emphasizes unilateral strength, promotes increased eccentric loading (they’re superb for accentuated eccentric sets), and it’s undeniably versatile, to name a few.

However, it’s an exercise that’s often butchered in terms of its execution, and as a result many trainees lose out on all those benefits

I wanted to highlight a few of the more egregious culprits in today’s post.

Copyright: huurah / 123RF Stock Photo

There’s No One Perfect Way, and I’m Not Saying You’re Wrong

Let me set the record straight out of the gate.

This post is not meant to be the end-all-be-all-Tony’s-right-and-you’re-wrong-so-STFU answer to everything dumbbell row.

I’ll be the first to admit there are many nuances of the exercise I’m omitting from this post. Truth be told I didn’t want to write a 3000 word article on the dumbbell row and make people want to commit seppuku out of sheer boredom.

  • 3ooo words on Why The Gummi Bears Were the Best Saturday Morning Cartoon of the 80’s = Pulitzer material.
  • 300o words on the DB Row = someone toss me a sword.

That said, my main objective here is to 1) point out a handful of technique flaws I’ve observed over the span of a 15+ year coaching career, 2) suggest some “fixes” and 3) hopefully keep my pants on in the process.

DB Row Mistake #1: Not Pushing Away


Understandably, when we’re performing a DB Row we should emphasize and be cognizant of what the working/moving arm is doing (more on this below).

However, it’s important to recognize that the supporting/non-moving arm is also a major player and is very much involved in the proper execution of this exercise.

Mike Robertson has pointed this out in the past, and it makes a ton of sense. I watch a lot of people “hang out” on their supporting side when performing a DB Row…more or less “dumping” into that shoulder.

This places the scapulae in a precarious position –  anteriorly tilted, often in more of a shruggy pattern – which isn’t doing anyone’s shoulder any favors.

Instead, you want to protract or “push away” on the supporting side for better positioning, stability, and, as a bonus, Serratus Anterior activation.

DB Row Mistake #2: The Path


Many people view the DB Row as two things:

  • A straight up and down motion.
  • An exercise that targets scapular retraction, namely the Rhomboids.

I view the DB Row as two things:

  • More of an arc motion (forward and backward).
  • An exercises that, yes, can (and kinda-sorta does) hit the rhomboids, but due to the increase line of pull (arc motion), is actually a superb exercise for maximal Lat engagement.

Strength coach Lee Boyce has hammered home this concept in the past, but it bears repeating here: the force angle of the DB Row – especially if it’s performed straight up and down – doesn’t lend itself as a great scapular retraction exercise.

Simply put: There are better options (Seated Row variations, bent over row, jumping into a live volcano).

Instead, you should treat the DB Row as more of Lat exercise.

Implementing more of a sweeping action or “arc” pattern with your arms allows you to match the fiber orientation of the Lats.

And that’s what it should target.

No diggidy, no doubt.

DB Row Mistake #3: Too Much ROM


More ROM isn’t always better.

A common mistake I often see trainees doing when performing a DB Row is allowing their elbow to travel too far past the midline of the body (glenohumeral extension).

Excessive glenohumeral extension (as what happens when the elbow travels past midline) can lead to excessive scapular anterior tilt and Anterior Humeral Glide, both of which will likely kill you.

Just kidding.

But they’re not going to make your shoulders (or elbows for that matter) feel great.

I like to cue my trainees to bring their elbows towards their hip or “back pocket” and that’s it. I’ll often have to place my hand just off the small of their back so they know when to stop.

Once they understand that, it’s makes all the difference in the world.

DB Row Mistake #4: Pinning the Shoulder Blade


Many people are cued to retract their shoulder blade at the top of the movement when they perform a DB Row.

Cool.

But then they keep it pinned there, in place, throughout the duration of a set.

Not cool.

And then this is how I react.

via GIPHY

When I coach the DB Row I encourage people to feel a slight stretch at the bottom of the movement.

The shoulder blades are meant to move around the rib cage.

Pinning them in place can lead to a litany of other situations – like Downward Rotation Syndrome – which you’re better off avoiding.

There are situations where I may cue someone to hold a retracted position more, but it’s rare.

Don’t be afraid to let those bad-boys explore their full movement capability.

DB Row Mistake #5: Going Too Heavy

Here’s a nice rule of thumb: If you look like you’re having an epileptic seizure – or it looks like you’re using an industrial strength Shake Weight – when performing a DB Row you’re likely not doing it correctly (or gaining much benefit other than stroking your ego)

I understand there’s a time and place for body english.

I do.

But as Eric Cressey poignantly Tweeted the other day:

Moreover, and as my colleague Chris Cooper succinctly reminded me of the other day, the DB Row is just as much of an upper back exercise as it is an ANTI-ROTATION exercise.

I prefer to encourage as rigid of a torso as possible during a set. There’s going to be “some” movement, mind you, but it shouldn’t be too prevalent.

When it is it’s often a sign someone is using too heavy of a load.

For a bit more of a the science and biomechanics of what I’m getting at – especially as it relates to the Resistance Curve and Strength Curve of rowing – I’d encourage you to check out THIS article by Nick Tumminello.

1100 Words

Boom shaka-laka.

CategoriesExercise Technique Program Design

8 Plank Variations That Don’t Suck

I know what you may be thinking.

“Really, Tony. An article covering planks? What’s next: Something on best exercises for a jacked Tibialis Anterior? Or, no, wait….NASCAR?”

I get it.

Planks aren’t the sexiest or most exciting topic on Earth. And they certainly aren’t an exercise that get people jazzed up to go to the gym and train.

Well, traditional planks aren’t anyway.

Today’s guest post by Cleveland based personal trainer, Michael Anderson, showcases some variations that may change your mind.

Copyright: dolgachov / 123RF Stock Photo

8 Plank Variations That Don’t Suck

The traditional front plank is one of the most well known and least useful exercises we have available to us.

There are various figures but the world record for a plank hovers between eight and ten hours. There are exactly zero useful strength exercises that you can do for eight hours.

The plank makes sense in theory: In that position you’re forcing your anterior core musculature to support your spine in a way it isn’t used to and will result in strength and stability increases.

Truthfully, it can be useful for this purpose, but it gets out of hand really quickly.

People always think that adding time to their plank is the right thing to do, but end up with some horrific Gollum-esque posture; neck cranked forward, low back sagging, butt up in the air just grimacing their way to an extra 5 seconds on their personal record.

I’m here to tell you that there are much better ways to train core stability (anti flexion / extension) than just hanging out watching the timer on your phone. In fact, I’ve got eight better planks you can try instead of the normal plank. I’ll even be a sweetheart and list them in what I believe is the easiest to hardest.

1. Foot March Plank


I like this as one of my first progressions from a static plank because it’s a very familiar position to most people.

Marching your feet just an inch or so off of the floor adds a substantial anti-rotation component to the exercise, and your client will recognize it very quickly.

2. Elbow Tap Plank


Like the foot march plank, this increases difficulty by taking away a point of contact but feels much more difficult than moving your feet.

I like to make my clients move through this very slowly and deliberately to help reduce the amount of hip swinging they get. I find it helps to keep your hands centered on your chest and adjust the width of your feet to increase or decrease difficulty.

3. Bent Knee Side plank with Clamshell


I actually think I dislike static side planks more than static front planks because people end up in really dog-shit positions really quickly.

A good “hack” to fix this is utilizing the bent knee side plank, which makes it easier to stay in a good position by shortening the length of the lever (your body).

To get even more out of this exercise, throw a band around your knees and hit a clamshell. You’ll be training anti-lateral flexion as well as a few aspects of your hips while you’re at it. I utilize these as both a core exercise and as a filler/activation exercise paired with squats or deadlifts.

4. Plate Drag Plank


This is very much a progression of the elbow touch plank and allows you to load it externally.

There are lots of other videos of people using kettlebells, sandbags and even heavy ropes to do these.

5. Side Plank with Wall Slide


The first time I did these was during Eric Cressey’s “Show and Go” program.

I saw them on the program for that day and watched his video and thought it would be no big deal.

Got set up for my first rep and as soon as I lifted my leg I folded like a chair.

My athletes have given this exercise various names like “The Devils Exercise” and “if I see this again next month I’m gonna punch you in the junk”.

But give them a shot, I swear you’ll like it…

6. Bench Plank with Row


This gets really brutal really fast.

I personally don’t really chase the weight of the row portion of the exercise as I prefer the plank to be the emphasis and to be controlled perfectly. It’s nice to get a little extra rowing in with this exercise, but always be in control of the dumbbell.

7. 8 Point Plank


I thought I’d throw a curveball at you by making the two most difficult variations here static planks!

I just learned this variation recently and it’s really pretty amazing.

I underestimated it at first and then found myself shaking like a leaf in a windstorm within five seconds of starting it.

Putting your knees on the ground and posteriorly tilting your pelvis will help to remove your quads and hip flexors from the equation and then moving your elbows out under your eyes lengthens the “bridge” a little more.

If it feels not so hard to you, then you really need to focus on that pelvic tilt!

8. RKC Plank


This is a static plank, but barely.

The technique described in the video is called the “Zip Up” technique and I like to go through those steps before every rep of this plank.

I typically ask my clients to do three, 10-second holds with a quick break in between each rep.

You end up with a 30 second plank, but the most intense 30 seconds possible. If you don’t say “holy shit” as soon as you finished, then you did it wrong.

Final Word

If you’re going to train your core, you might as well be doing something that’s legitimately effective and won’t take up 7 minutes per set.

Try these out and let me know how they go for you.

About the Author

Mike is a personal trainer and strength coach living in Cleveland with his fiance and adorable pit bull.

He is the owner of Anderson Strength and Fitness, the strength coach for Healthy Green Athlete and is an all around badass dude. You can follow him on Instagram HERE or shoot him an email at [email protected].

CategoriesExercise Technique Strength Training

Make the Back Squat Feel and Look Better

I’m currently in the throes of jet-lag sucktitude.

I’ll be back on my writing content horse next week, but I’ve got a treat for you today. TG.com regular contributor, Dr. Nicholas Licameli, is subbing in for me today and he went to TOWN in today’s guest post.

This is one of the most thorough articles I’ve read in a while on the topic with a metric shit ton9 of information with many additional links to help you nerd out a bit more if you so choose.

Enjoy!

Copyright: leaf / 123RF Stock Photo

Make the Back Squat Feel & Look Better

The squat is a topic that has gotten a great deal of attention among many fitness and medical professionals since mankind first started lifting heavy things against gravity. Since then, much of the conversation has changed (with the advent of civilizations, roads, running water, Instagram.

However much has stayed the same.

I understand this isn’t the first article written about the squat.

Some of the greatest minds in fitness and strength and conditioning have written on the topic, and I encourage you to dive into the multitude of references that I’ve provided.

My goals for this article are to help make your squat look and feel better, improve performance and effectiveness, un-complicate the complicated, and give you the confidence to perform this foundational movement without fear.

Should You Squat?

The short answer is yes.

via GIPHY

Unfortunately, there are those that say to avoid squatting.

As a physical therapist, I have to apologize because much of that flawed thinking stems from misinformed and unqualified professionals in the medical field that are pleasantly ignorant to current practices.

The squat and hip hinge are foundational to basically all movements in and out of the gym. 

Whether you’re hitting a PR on the platform or sitting down on the toilet, you are squatting and you better be using proper technique. I’ve treated injuries as a result of poor squatting in both of those previously mentioned instances. Why avoid the squat in the gym if we’re going to do it constantly throughout our day anyway?

I say train it rather than avoid it.

Why not be prepared and do it right?

The squat and hip hinge require total control of the deep abdominals as well as the hips, pelvis, and entire spinal column. We can all agree that teaching proper abdominal bracing, pelvic positioning, and proper lifting mechanics are of utmost importance for the treatment of musculoskeletal injuries including knee, hip, and low back pain. For some reason however, we don’t all agree that squatting is necessary.

Newsflash…when done correctly, THEY’RE THE SAME THING!

As both a doctor of physical therapy and professional natural bodybuilder, it should come as no surprise that in my opinion, people of all ages and from all walks of life should be squatting. This includes the young athlete just starting his/her training career, those recovering from injury, those trying to prevent injury, and even (and especially) the elderly.

No matter if you are an athlete or a great grandparent, we are all essentially “squatting” multiple times throughout our day, so why not train it, strengthen it, and perfect it?

You can release this muscle or stretch that muscle but if patients and clients don’t know how to squat and hip hinge, we are spinning our wheels and wasting valuable time.

How to Squat

While this isn’t a step by step “how to squat” article, here is a quick and dirty rundown of some things to keep in mind.

There is a plethora of information out there about thoracic spines, knees, ankles, spinal positioning, foot placement, etc., and sometimes it can complicate things, make people fearful, and mystify the movement.

Basically, a proper squat and hip hinge starts (obviously) at the hips with the spine in a neutral position (more on this later). After a breath in, tension should be kept throughout the body and throughout the movement. The entire spine, including the neck, mid back, and lower back, should be kept in a relatively stable and neutral position. The feet should remain actively planted on the floor with the weight evenly distributed.

More on all of this to come.


In the beginning of my lifting career, I struggled with finding the “groove” of the squat. This is partially due to improper mental cueing during the movement. Some of my mental cues during the squat were:

“Arch the back hard to avoid spinal flexion.”

“Keep the head and chest up so they remain in line with the horizon.”

“Sit back and push through the heels.”

“Always squat below parallel.”

While there could be worse things, especially considering that, like most beginners, my sources of information were muscle magazines and of course the biggest guy(s) at the gym, I think these cues can be quite misleading and detrimental to squat technique.

Here’s why.

“Arch the Back Hard to Avoid Spinal Flexion.”

Avoid a hard arch in the lower back.

Don’t let the lower back round of course, but rather maintain the natural arch of the lumbar spine.

Hard lumbar extension will crunch down on the delicate structures of the spine, put the glutes in a less than optimal position to stabilize the pelvis, and place the hip in slight flexion before the movement even starts.

Starting in hip flexion will cause the femur to run out of room in the acetabulum for hip flexion when you want it most…at the bottom range of the squat. This could result in femoral acetabular impingement (FAI) and labrum pathology.


Get out of that hard arch and find your neutral.

“Keep the Head and Chest Up So They Remain in Line With the Horizon.”

Keeping the head and chest up isn’t necessarily a bad thing, however if we achieve that position by hyperextending our backs and flaring our ribs forward, it becomes problematic and essentially unstable.

Cueing a slight posterior pelvic tilt prior to un-racking the weight and maintaining that position throughout should do the trick. This will place the spine and ribcage in more of a neutral position.

We maintain the position by taking a breath, contracting the upper back, lats, mid section (as if putting on a tight belt or walking into cold water up to your navel), pelvic floor (as if holding in gas or urine), and even the feet (more on this to come).

Check out my explanation of what it means to “contract your core” right here. Tony does an awesome job of explaining this here, as does John Rusin here. Quinn Henoch and Ryan Brown also hit the point home here. Eric Cressey nails the upper body and lat set up here.

“Sit Back and Push Through the Heels.”

It’s true that we don’t want to push through our toes and allow our heels to rise off the floor, however it is also true that we don’t want to shift our weight so far backward that the toes lose contact with the floor and most of the force goes through our heels.

Yes, we want to descend slightly backward, but the focus should really be on descending down between our hips.

When we say we put an adversary on “his/her heels,” we are saying that we put them in a vulnerable position and on the defense, which will likely lead to a step backward. Why would we want to put ourselves on our own heels while squatting?

A better cue is to have an “active foot,” evenly maintaining 3 points of contact with the floor: base of big toe, base of little toe, and heel. Tony explains this really well here. This foot position will help stabilize the hips and knees, as well.

Mastering the “active foot” takes practice, but once you feel it, there’s no going back.


For everything you (and your children and their children’s children) will ever need to know about squatting, check out this bad boy by Greg Nuckols.

Find Your Squat

Hey fellow millennials!

Remember what our mothers taught us…we are all special, we are all unique, everyone is a winner, Mufasa died of natural causes, and most importantly, we are all different!

When it comes to the squat, this last point is key.

We are all structured differently, which is why there is no particular squat that is perfect for everyone. Things like foot position, stance width, and squat depth will all be impacted by things like the size of our torsos, length of our femurs, and the structure of our hips and pelvis. We need to find the squat variation that best “speaks” to us.

The classic example of this is hip flexion range of motion and lumbar compensatory spinal flexion.

Much has been written about this topic, and to avoid making this more like a Harry Potter book rather than a guest post, I’m going to refer you to some excellent articles down below.

Keep in mind that a range of motion measurement taken while lying on a treatment table DOES NOT always necessarily correlate to what we observe during an actual movement pattern like a squat and vice versa.

That being said, a 2008 study (stolen by me from a fantastic article by Bret Contreras) showed a 60 degree difference in hip flexion range of motion between the least flexible (80 degrees) and most flexible (140 degrees) subjects out of a total of 200 hips.

That’s quite a large difference, considering exercises like a deep squat require about 120 degrees of hip flexion. Differences in femoral anteversion/retroversion (how much the head of the femur faces forward or backward), acetabular anteversion/retroversion (how much the the hip socket faces forward or backward), and inclination angle of the femoral neck (angle of the neck and shaft) are seen from individual to individual as well as from hip to hip within the same person.

These genetic structural differences all change an individual’s ability to squat.

Thanks Mom and Dad…

Pushing past end range hip flexion in the descent of a squat for the sake of going deep will cause compensations up and down the chain, particularly flexion of the lumbar spine, AKA the dreaded “butt wink” (cue the tire screech and screams).

While some amount of lumbar flexion and “butt wink” is acceptable (we’ll get to that in a minute), too much, too often, in an uncontrolled manner, can be problematic.

So you can see why being married to a certain squat variation can be inappropriate.

If you are an individual that is unable to squat deeply but force yourself to perform deep barbell squats because your lifting partner says so, you’re setting yourself up for injury and a faulty and uncomfortable squat.

When it comes to varying your squat type, be sure to know your goal.

  • Why are you squatting?
  • To improve overall strength?
  • Hypertrophy?
  • To get a stronger squat?
  • To impress a member of the opposite sex (spoiler alert, they don’t care)?
  • To be able to pick up your child without pain?

There are many variations of the squat.

The conventional barbell back squat is just one option and unless you are training for a powerlifting meet, where you will be required to perform the conventional barbell back squat, there is no reason to lock yourself into only one type of squat.

Why not try a goblet squat? Or a sumo squat? Or a front squat? Why not use dumbbells or kettlebells instead of a barbell? If structured correctly, any variation of the squat will improve strength and hypertrophy as well as train the hip hinge and proper bending/lifting mechanics.


What’s the take home? We are all structurally different and it is important to find the squat pattern that works best of us.

Here are some great resources that will help you find the squat pattern that works best for you and your anatomy:

Dean Somerset’s 3 part monster part 1, part 2, part 3, Ryan DeBell, Stuart McGill, Quinn Henoch, and of course, Tony.

Note From TG: Nicholas is kind to include me amongst such elite company (Note to Self: you owe Nick 1000 Predator handshakes), but mine is easily the least pithy of the bunch.

Neutral Spine…Does It Exist?

Yes and no.

Research has shown that lumbar flexion, particularly at the bottom of a squat (the previously mentioned butt wink), is quite natural in a squatting pattern, particularly at the point in the movement where the hips start to run out of space for further flexion.

I agree with Quinn Henoch that neutral spine is more of a range rather than a set position, so don’t lose sleep over a little spinal flexion.

How much excursion is too much?

You knew the answer before you asked it.

It depends!

That being said, you definitely want to avoid movement at the spine and pelvis as much as possible. A moving base causes leaked energy and therefore less stability and built up tension. This means less force produced, less strength, and less Instagram pictures with a bumper-plate loaded bar on your back.

Don’t Stop Squatting Because You Have Pain Or Feel Restricted

If you experience pain during a squat, SEE A QUALIFIED HEALTHCARE PRACTITIONER.

You want someone that will question the type of squat that hurts, ask when in the range of motion the pain occurs, analyze your squat pattern, ask about weekly volume and load, inquire about recovery and sleep, and do everything in his/her power to keep you squatting.

There are always ways to modify the squat in order to keep training this key movement pattern while training with an injury.

Sharp pain at the bottom of a squat?

Try using a more neutral spine with slight flexion using a goblet squat to free up some space in that acetabulum.

No good?

Try adding a band around the knees during a few warm up sets.

Still no good?

Add a box to squat to at a level just above where the pain is felt.


The point is, you deserve better than a rushed, “Stop squatting for 4 weeks, take these anti-inflammatories, and see me in a month.

Oh, and if that doesn’t work, try foam rolling, cupping, turmeric, an oxygen deprivation mask, and VooDoo floss bands in a bath of apple cider vinegar and creatine.”

Fixing the symptoms with things like medication and surgery without considering the cause is an all too common theme.

These things have their place, of course, however they must be used appropriately. For example, surgery to repair a labrum that was damaged after repetitive impingement due to faulty lumbo-pelvic mechanics would be like fixing ceiling tiles in your living room instead of fixing the leaky roof.

After the surgery, if the individual returns to squatting with the same mechanics that got him/her under the knife in the first place, what good has been accomplished? Doesn’t make sense to repair, install, and paint shiny new ceiling tiles without fixing the roof first. Check out a video I made on this a while back right here.

So What Can We Do To Improve How The Squat Looks And Feels?

This is a tough question, because, as you probably guessed, everyone is different and it depends.

I recommend seeking out a qualified healthcare practitioner that will assess, reassess, and give you the tools to improve your individual squat.

Gone are the days of performing long, drawn out warm ups in the name of injury prevention, mobility, and movement optimization. A warm up should increase your heart rate and mentally and physically prepare you for the specific movements of the day.

The warm up should be active, specific and purposeful, not a cookie cutter series of activities like flailing around on the dirty gym floor or jamming a lacrosse ball into your sciatic nerve in hopes to break up adhesions in your piriformis.

Things like static stretching and foam rolling are passive activities.

In contrast, light cardio, dynamic stretching, loaded eccentrics, and actually getting under the bar and grooving the squat movement with sub-max loads are all active.

Passive activities like foam rolling do have their place, but they should be used appropriately. The benefits of foam rolling are short-lived, so if you’re going to foam roll, I’ve found it best to do it in between warm up sets. Of course, the specific muscles you target will be individual to you, your body, and your squat. For more on this, check out my article and video as well as this fantastic episode of Mobility Myths by Quinn Henoch.

Don’t feel obligated to use cardio as the only way to increase heart rate.

A dynamic series/circuit of exercises, combined with specific mobility work using active techniques such as loaded eccentrics and reciprocal inhibition (here and here), followed by some squatting with bodyweight or just the bar, will increase your heart rate just fine, not to mention both physically and mentally prime your system.


You get more bang for your buck.

For more on a proper warm up, including explanations of how to put it all together, check out my current lower body warm up right here as well as a great hip mobility exercise not in included in my warm up video.

Also, Quinn Henoch (<— can you tell I have a little man-crush on him?) nails it in this episode of Mobility Myths about stretching.

And That’s That

I hope this helps in your journey to finding and perfecting your individual squat.

Remember, there is nothing to fear about the squat and there is no need to overcomplicate this foundational movement. Don’t forget to take advantage of all the resources provided in this article, as they are from some of the greatest minds this field has ever seen. Happy squatting!

Oh, and one more thing…knees drifting over toes is OK.

About the Author

Nicholas M. Licameli

Doctor of Physical Therapy / Pro Natural Bodybuilder

Youtube: https://www.youtube.com/channel/UCAWFe5BmaJ_WFAh2aqsOg8g

Instagram: https://www.instagram.com/nicklicameli/

Facebook: https://www.facebook.com/nicholas.michael.58

Every single thing he does, Nick believes in giving himself to others in an attempt to make the world a happier, healthier, and more loving place.

He wants to give people the power to change their lives. Bodybuilding and physical therapy serve as ways to carry out that cause. Nick graduated summa cum laude from Ramapo College of New Jersey with his bachelor’s degree in biology, furthered his education by completing his doctoral degree in physical therapy from Rutgers School of Biomedical and Health Sciences (previously the University of Medicine and Dentistry of New Jersey) at the age of 24, and has earned professional status in natural bodybuilding.

His knowledge of sport and exercise biomechanics, movement quality, and the practical application of research combined with personal experience in bodybuilding and nutrition allows him to help people in truly unique ways. Love. Passion. Respect. Humility.   Never an expert. Always a student. Love your journey.