CategoriesExercises You Should Be Doing Uncategorized

Exercises You Should Be Doing: This Is One That Will Make Your Shoulders Feel Better

When it comes to overall shoulder health there are a bevy of factors to consider:

  • Rotator cuff strength
  • Tissue quality
  • Overuse
  • Programming balance
  • Even exercise technique (and how joints are loaded)

All are important and things I consider myself when working with a new client who’s shoulder isn’t feeling great. However, there’s one “thing” that’s often overlooked in lieu of all the above:

  • Can the shoulder blade move freely on the ribcage?
Copyright: christinkls / 123RF Stock Photo

The Key to Shoulder Health = Scapular (and Ribcage) Movement

The shoulder blades are meant to move, plain and simple. Nothing extraordinary there.

  • Upward/downward rotation
  • Protraction/retraction
  • Anterior/posterior tilt

The ability to perform all of those actions is indicative of a “healthy” shoulder, and the platform for all that movement to take place come courtesy of the ribcage.

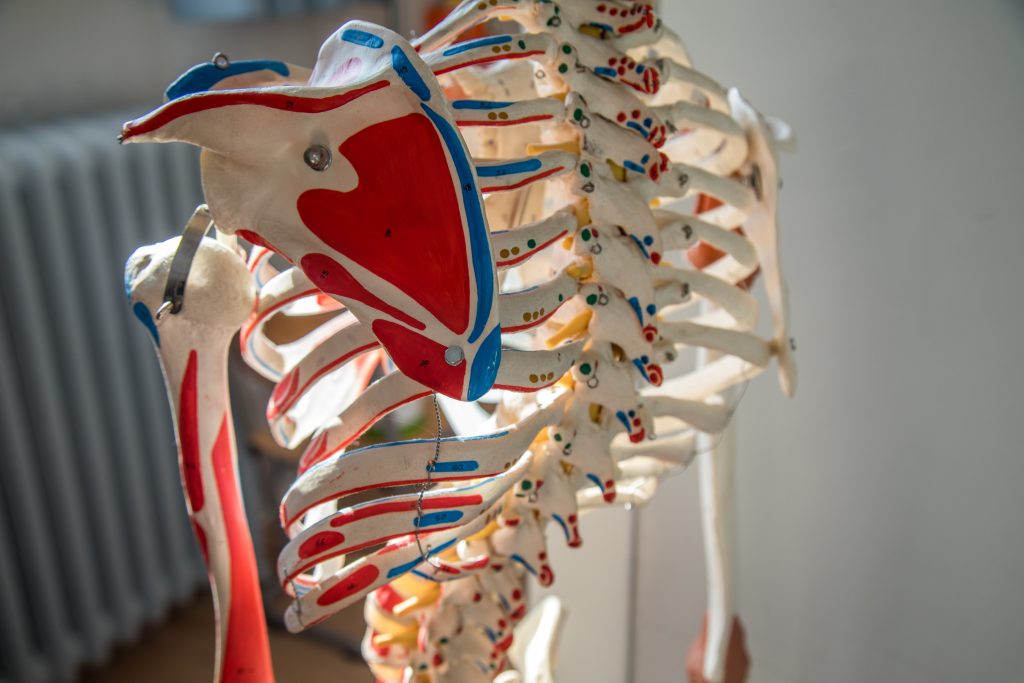
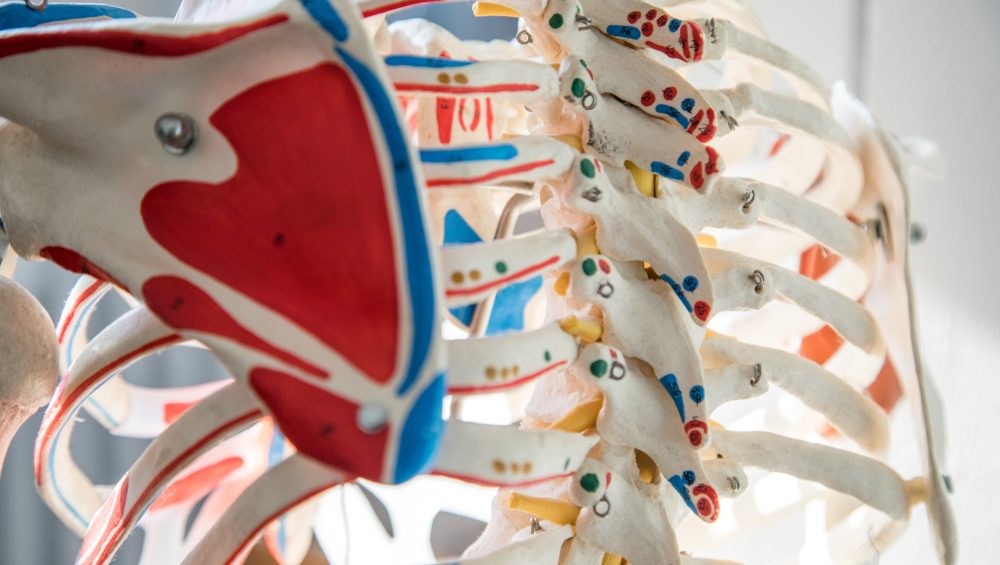
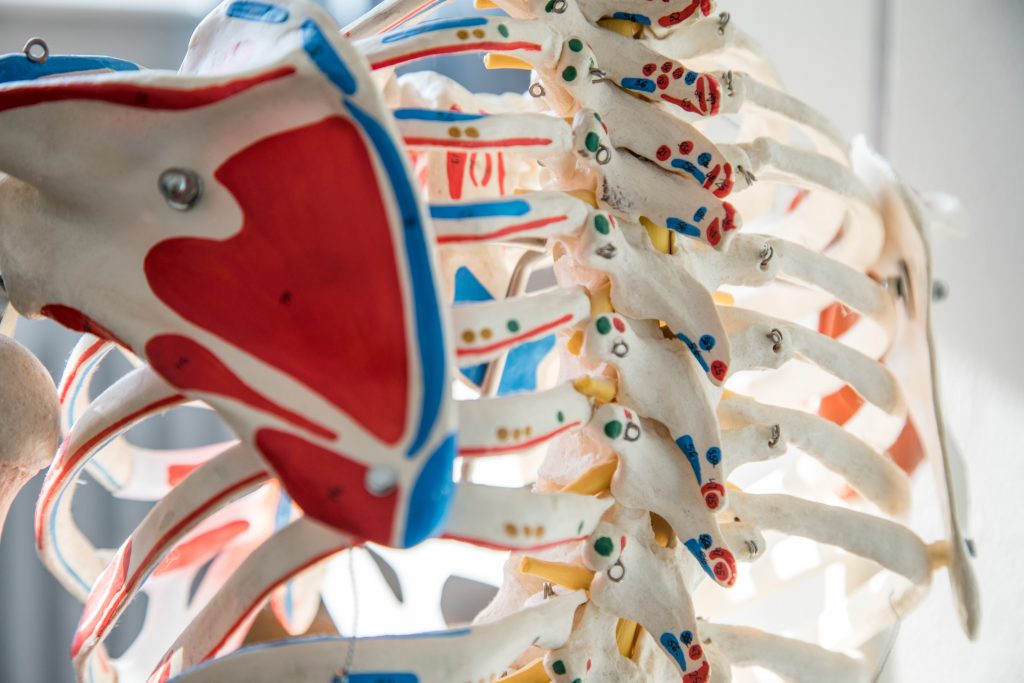
The ribcage is shaped in a convex manner.

The scapulae (shoulder blade) is concave, or rounded, in nature. The ability for the two to play nicely together is an often overlooked mechanism of what I like to call “my shoulder fucking hurts syndrome.”

Here’s a common example of what I mean.

The cue “pull the shoulder blades together and down” is a common one we use in the industry. And, you know what? It works splendidly when 1) you’re working with someone who’s stuck in a more flexed/rounded/computer guy posture and/or 2) the goal is to lift as much weight as humanly possible.

I.e., good luck bench pressing (or even squatting/deadlifting) appreciate weight with shoulder blades that aren’t “set” in a more stable position

That being said, too much of anything can have its inherent drawbacks.1.

The “together and down” cue can lead to overactive lats and a more extension-based pattern where the shoulder blades get stuck or cemented together – making it all the more more challenging for them to move about the rib cage.

My shoulder blades basically making out

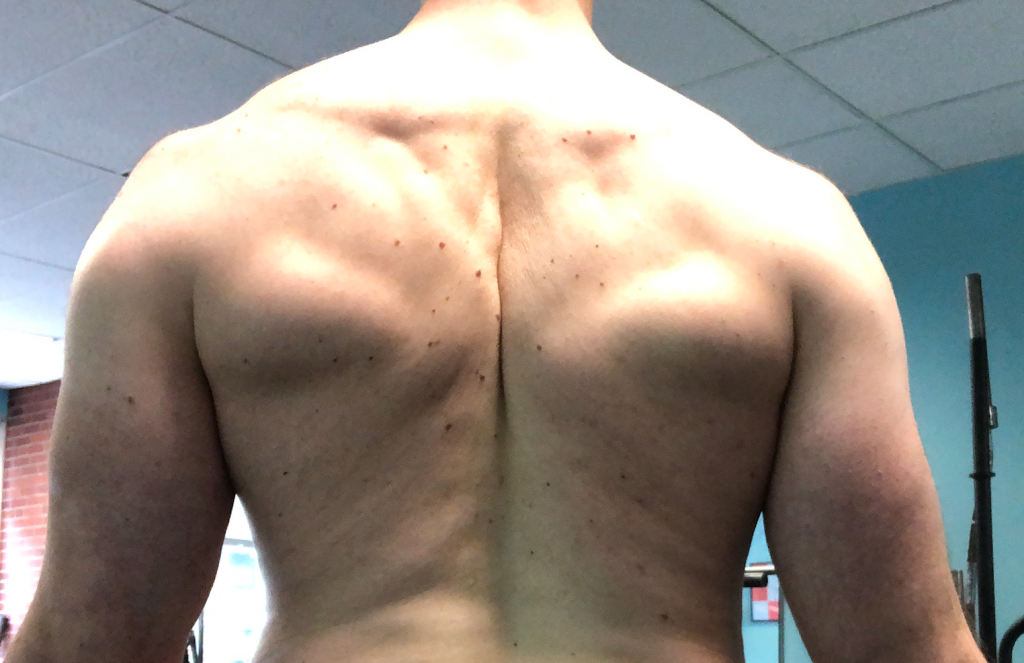
To that end one of my favorite ways to address this is to include more reaching drills into people’s training repertoire. That and BACK EXPANSION.

More to the point, what I’m really after is targeting the Serratus Anterior, or those finger-like looking thingamajiggies on the side of your ribs.

I’m starting to fall into the camp that addressing Serratus weakness is the answer to everything:

  • Shoulder pain?
  • Neck pain?
  • Back pain?
  • Snowblower won’t start?

More Serratus work my friend!

The power of reaching cannot be understated. That in concert with learning to expand the upper back (getting the ribcage to move, via breathing) can be a game changer for a lot of people.

Here’s an effective drill that addresses both.

Seated 1-Arm Reach-Row


Who Did I Steal It From? – Strength coach Conor Harris.

What Does It Do? – Via Conor himself:

“A stiff ribcage is one that lacks trunk rotation and the ability to expand with air. We can free up the ribcage through alternation + reaching of the arms (serratus/obliques) with an intention to pause and expand it posteriorly with air”

The reach engages the serratus/obliques (watch out for that side cramp) and closes off the front side of the body. Air has no where else to go but BACK; it feels wonderful.

Key Coaching Cues: Don’t be a hero. You DO NOT need a lot of weight to perform this exercise, it’s not the point. You’ll pull with one side (elbow to hip, no further) as you simultaneously reach with the other, free hand. From there, inhale through the nose, focus on “breathing into your back,” and then perform a full exhale.

Don’t rush the breaths.

Hold the position for a 2-3 breath count and that’s one repetition.

Perform 3-5 “reps” per side.

No diggidy, no doubt.

CategoriesExercises You Should Be Doing

2019 Best Exercises You Should Be Doing

More appropriately this should be titled 2019 Best Exercises (I Stole From Other Coaches) You Should Be Doing.

Nevertheless, I shared a bevy of (new to me) exercises in 2019 that garnered some interest on social media. Here are the ones that received the most traction.

Be sure to click the links so you can not only watch see the exercises in action, but also learn the why’s, key coaching cues, and, more importantly, to see how jacked I am.

Copyright: serpiandco / 123RF Stock Photo

2019 Best Exercises You Should Be Doing

Anti-Flexion Squat

I love squat and find a lot of valuing in them.

But they don’t ALWAYS have to be loaded heavy in order to reap the benefits.

Wall Press Single Leg RDL

This was the most shared exercises of 2019.

Angled Landmine Reverse Lunge

It never ceases to amaze me the versatility of the Landmine apparatus.

Hollow Position Hold Pull-Up

I didn’t just highlight LOWER body movements this past year…;o)

Here’s a lovely way to progress the pull-up from the floor.

Goblet Split Squat w/ COIL

I posted this one just last week and it received a great response.

CategoriesExercises You Should Be Doing

Best Articles of the Year 2019: Guest Posts

The week between Christmas and New Year’s I like to highlight a select number of articles featured on my site during the past 365 days.

First up were the the articles that resonated with you, the reader, as defined by analytics and what piqued your interest…HERE.

Next up were the articles that resonated with me and filled my writer’s love tank…HERE.

Today I’d like to direct your attention to the best GUEST POSTS of 2019.

Copyright: serpiandco / 123RF Stock Photo

Best Articles of  2019: Guest Posts

The State of Corrective Fitness 2019 – Kevin Mullins

This was FOUR part series DC based personal trainer, Kevin Mullins, wrote for the site that, if I were to be honest, is very much a Ken Burns’esque masterpiece.

IntroThe State of Corrective Fitness

Part ICorrecting the Shoulders

Part IICorrecting the Lower Back and Hips

Part IIICorrecting the Knees and Ankles

Individualizing Your Squat Stance – Sam Spinelli

Not everyone is meant to squat the same way or utilize the same variations. Here’s how to figure that shit out (my words, not Sam’s).

The Road to Recovery is Paved With More Training –  Michael Gregory

“Just rest” just isn’t going to cut it for most people.

What Makes an Athlete Fast? – Ricky Kompf

HINT: It’s not endless agility ladders drills and weekend speed camps.

The Lost Art of Adult Play – Shane McLean

As we grow older our fitness tends to get more and more robotic in nature. We sit in machines, performing endless, mindless repetitions, all while perusing our smart phones.

Shane showcases some ways to be less of a health/fitness zombie.

CategoriesExercises You Should Be Doing

Exercises You Should Be Doing: Goblet Split Squat with Coil

It’s been a minute since I’ve shared an Exercise You Should Be Doing.

Anyone who’s familiar with this series or has kept tabs on the types of exercises/movements I gravitate towards will dig this one.

Which is to say: It’s not flashy, it’s not sexy, and it doesn’t take a PhD to set up or perform.

Copyright: gekaskr / 123RF Stock Photo

Goblet Split Squat w/ Coil


Who Did I Steal it From? – My coach, Greg Robins, plugged this into my program this month. When I saw it, at first I was like “tha fuck!?!”

What’s up with this foo-fooey exercise?

But then I performed a few sets and was like “whaaaaaaaaaaaaaaaat.”

I like it a lot

(cue Dumb & Dumber voiceover).

What Does It Do? – Well, like any single leg variation it challenges balance, core/hip stability, and helps to “temper” any strength imbalances between one leg or the other. Too, it gives the spine a bit of a reprieve from aggressive axial loading.

What separates this variation, however, is the addition of the COIL (or rotation of the upper torso). This subtle tweak offers a bit of a varying training stimulus in that it takes us out of the traditional up/down, forward/back nature of exercise we’re accustomed to and adds rotation into the mix; or transverse plane motion.

The twisting action also leads to a bit more internal rotation of the front hip which feels divine (unless you’re someone with a history of FAI; in that you’ll probably want to avoid this one).

As a quick aside I had my wife perform this exercise the other day after she tweaked her lower back/SI joint and she loved it. As noted in THIS article written by Dr. Erika Mundinger on this site a few years back, introducing rotation can be a game changer for those with chronic SI joint issues.

Key Coaching Cues – This exercise is pretty self-explanatory.

  • Assume a split squat position.2
  • Whichever foot is in front rotate the opposite shoulder TOWARDS that direction making sure to keep the torso upright and shoulders back.
  • Perform the drill “squatting” up and down while maintaining the same torso position throughout. Perform  allotted reps (6-10) and then switch sides.
  • My god, you’re so hot.
CategoriesExercises You Should Be Doing

Exercises You Should Be Doing: Hollow Position Hold Pull-Up

A quick heads up: In celebration of its two-year anniversary of being released my good friend Meghan Callaway is putting her renowned Ultimate Pull-Up Program on sale all this week.

  • You can purchase it at 40% off the original price.
  • You also have the option of purchasing both her Ultimate Pull-Up Program & Ultimate Landmine Program as a packaged deal at a pretty sweet discount as well.
  • Also, and don’t quote me on this, Meghan is giving away a free hug/high-five (whichever is less weird to you) to anyone who purchases.

If you’re someone who has struggled conquering the pull-up or you’re a trainer/coach who wants a better understanding of how to program for any of your clients interested in performing their first pull-up (or doing more of them), you’d be hard pressed to find a more thorough resource.

I’ve used the program myself many times.3

Copyright: anzebizjan / 123RF Stock Photo

Exercises You Should Be Doing: Hollow Position “Pull-Up”

In light of Meghan’s re-release I wanted to share one of my favorite drills I love using with anyone interested in conquering their first pull-up.

I think there’s a common misconception that the only way to train the pull-up is by doing pull-ups. I mean, yes, that will be a thing – specificity matters – but if someone is unable to perform one, well, what do we do?

I’m a big fan of implementing FLOOR-BASED drills to help build context and confidence.

My starting point for pretty much everyone is to learn the correct way to perform a Hollow Position Hold.

Photo Courtesy of StrongFirst.com (Karen Smith)

  • Lie on your back.
  • Feet off the ground.
  • Arms, shoulders off the ground
  • Press/squeeze everything: feet, legs, abs, eyeballs, everything.

What’s so great about this drill – outside of allowing people a better appreciate of full-body tension and how much it really sucks – is that the position itself emulates how I’d want someone to hang from a bar when they attempt an actual pull-up; as the body is a more “connected” unit.

Again, context.

Now, there are numerous ways to progress the Hollow Body Hold.

  • Perform for “x” time (and then add more time each week, say 5-10 seconds).
  • Perform with an emphasis on a FULL exhale (and aim for “x” repetitions).
  • Juggle chainsaws (but only if they’re also lite on fire)
  • Perform the hold but add a little flair to it by having people press or rotate things:


Like I said there’s an infinite array of progressions and shenanigans to consider.

To up the “specificity” ante a little more, however, I really like adding a “pull-up” into the mix.


Who Did I Steal It From? – Another good friend of mine, Artemis Scantalides.

What Does It Do? – If anything I feel it provides a bit of an “ah-HA” moment for the trainee. Once they grab the stick or PVC pipe and begin to perform the “pull-up” in the hollow position a light goes off as if to say” oooooooh snap, now I get why we’ve been doing this stuff!!”

Also, context…;o)

Key Coaching Cues – I wouldn’t add this variation until someone is able to hold a strict hollow position for 30 seconds. Once they’re there hand him/her a stick and wammo-bammo…it’s pretty self explanatory.

One thing of note, though, is the breath.

It behooves everyone to start cueing/coaching an exaggerated exhale/snake breath with each repetition. As the trainee emulates the pulling motion (s)he should perform an aggressive exhale; this helps to maintain tension and core recruitment.

Also, because I said so.

2-3 sets of 6-10 repetitions should be money for most beginner and intermediate lifters.

CategoriesExercises You Should Be Doing

Exercises You Should Be Doing: Quadruped T-Spine Rotation with Lift Off

It’s a mouthful, I know.

But I couldn’t think of an alternative name for today’s edition of Exercises You Should Be Doing.

“Rotation Thingamajiggy” or “T-Spine Exercise That Makes You Feel Good” didn’t have quite the same ring to it.

Copyright: christinkls / 123RF Stock Photo

Exercises You Should Be Doing: Quadruped T-Spine Rotation w/ Lift Off

There’s no shortage of thoracic (middle back) mobility exercises out there. I for one prefer to keep a handful – say five or six – in my back pocket to use with the bulk of my clients.

I’d rather keep things simple, not bog people down with a litany of options, and stick with exercises that most people can do with little or no coaching.

I’m sure most people reading are familiar with your standard Quadruped Extension-Rotation  drill. Here’s a reminder just in case (that was filmed, it seems, in 1978):


There are a few nit-picky things I’ve changed in how I coach this drill of late:

  1. I prefer the ROCKED BACK version, where one’s butt rests on their ankles (assuming they have access to that range of motion in  their hips and ankles). In this case we’re taking joints out of the equation – in this case, the lower back – so there’s less opportunity to “cheat.”

  2. I also try to emphasize “pushing away” on the supporting arm side to help with more Serratus activation.

  3. Too, most people are unable to begin this exercise with one hand behind their head – they may not have access to the requisite external rotation and abduction – and all they end up doing is some sort of elbow going up and down while also doing a bang up job at jacking up their neck. Instead, I prefer more of a “rib grab” where each person grabs their underside and focuses on driving their opposite shoulder towards the ceiling.

But let’s assume we’re working with someone who CAN do all of the above. How can we progress the exercise?

  • Add a band? Sure
  • Pants off? Hell yeah.

What about adding a lift-off?

Huh?


Who Did I Steal It From? – Ottawa based personal trainer Elsbeth Vaino.

What Does It Do? – Allows us to use an external focus – in this case a wall – to gain just a bit more ROM out of the exercise and to add more time under tension.

Key Coaching Cues – I can’t reiterate enough that this is a PROGRESSION! There aren’t many people who will be able to be successful with this exercise out of the gate; it is 100% cool if you just stick with the run-of-the-mill, plain ol’ vanilla, Quadruped Extension-Rotation exercise.

That said, this iteration applies a bit of FRC (Functional Range Conditioning, popularized by Dr. Andreo Spina) where we provide a isometric contraction at a joint’s end range (technically a RAIL, or Regressive Angular Isometric Loading) to help nudge more stability in a new ROM (and thus, more controlled mobility within that same ROM).

The FRC system is waaaaaaaaaaaaay4 more detailed and expansive than my simple sentence suggests, but for the sake of this little snippit it will suffice.

Here I use the wall as a guide, and when I reach my end range I “lift off” and hold for a 3-5s count.

Things to watch out for:

  • Shrugging at the top.
  • Ensuring client is utilizing scapular posterior tilt as (s)he rotates.
  • Bears5

I like to use this drill as a FILLER exercise in between sets of Bench Press, Deadlifts, or Squats for 3-5 repetitions per side.

CategoriesExercises You Should Be Doing

Exercises You Should Be Doing: Angled Landmine Reverse Lunge

I’m horrible when it comes to naming exercises.

I mean, in this instance, should I have gone with the literal name: Single Stance to Reverse Lunge w/ Contralateral Hip Extension & Flexion?

Or, I don’t know, something like Cool Landmine Reverse Lunge Thingamajiggy?

Decisions, decisions.

As you can see, I chose something in the middle.

Shrugs.

Copyright: realstock / 123RF Stock Photo

Angled Landmine Reverse Lunge

Who Did I Steal It From? – Virginia based strength coach Vernon Griffith. If you’re not following him on Instagram you should be. There aren’t many coaches putting out better content than he at the moment.

What Does It Do? – Well, lets take a look at it in action first, shall we?


See what I mean about coming up with a suitable name now?

Anyway, what I like most about this variation is that I can lean into the plate/bar which provides just a smidge of balance, but still allows me to focus on one leg at a time.

As it happens, when I saw Vernon first demonstrate this exercise he ended up lowering the moving leg to his knee (a gentle tap to the floor) whereas I chose to lower so that my foot contacted the ground.

Both are viable options. However, I’d encourage people to start with my option and progress to Vernon’s.

What I also like about this drill is that because I am leaning INTO the plate/bar I get more (closed chain) hip abduction on the standing side.

End Result?: GLUTE O’CLOCK.

Key Coaching Cues: I caution anyone from using an aggressive weight here. I was only using a 25 lb plate in this video and a part of my soul died it was challenging. I prefer a Zercher (in the crooks of your elbows) hold for this drill, but you could also utilize a supinated or underhand grip too.

From there it’s a fairly intuitive exercise. As noted above the lean helps to provide a bit of balance and because the barbell is situated somewhat in a fixed path, you’ll have all the “guidance” you’ll need to make it pretty smooth.

GO SLOW.

The real benefit here is learning control and to recognize how to move through your hips and not to compensate via the lower back.

Aim for 8-10 repetitions/leg.

You’ll feel things firing you’ve never felt before.

Glutes, deep hip stabilizers, core, your eyeballs, everything.

CategoriesExercises You Should Be Doing

Exercises You Should Be Doing: Wall Press Single Leg RDL

Before we get to today’s “Exercise You Should Be Doing,” a quick parenting tip:

If or when your two year old wakes up from a nap and says his tummy hurts, and even if he seems in good spirits, don’t assume he’s just hungry (like I did) and then proceed to take him out for ice cream because it’s Easter.

Cause inevitably, what’s going to happen is what happened to me two hours later…..

…projectile vomit E.V.E.R.Y.W.H.E.R.E.6

Onward!

Copyright: tankist276 / 123RF Stock Photo

Wall Press Single Leg RDL

Who Did I Steal It From? – I honestly can’t remember, but my inclination is to say Chad Rodgers of Show Me Strength.

Or, I don’t know, maybe it was Jesus.

What Does It Do? – Well, before I say anything on that front I should probably show you what the heck it looks like, huh?


Pretty fancy.

I’ve long championed the notion that the single (or 1-Legged) RDL is fairly advanced exercise as it requires a hefty dose of “things” to pay nice together:

– Lumbo pelvic stability
– Core control
– Stable spine
– Balance
– Hip extension
– Lat activation
– Stark’s shaking hands with Lannister’s

Many trainees are unable to perform a traditional single-leg  RDL without my corneas resisting the urge to jump out of their sockets, which is why I’m such a stern fan of more “intermediary” variations such as the one that’s highlighted today.

It provides the support/balance many people need, albeit allows an opportunity to load the standing leg making it more or less a “fake 1-legged” version.

Key Coaching Cues: It takes a bit of trial and error and finesse to get the feel down, but one cue that helps a lot is to push the back foot INTO the wall while also pushing BACK with the standing foot.

This way you elicit a bit of a “wedge,” and thus more full-body tension.

From there, simply push the hips back towards the wall. I like to remind people they’re not lowering the weight with their arms, but rather pushing their hips back.

Continue as such until you feel the bulk of the pressure in the hamstring.

NOTE: The other advantage of this exercise is you can go heavier compared to traditional single leg RDL variations.

So, meatheads will love how this torches the hamstrings.

CategoriesExercises You Should Be Doing

Exercises You Should Be Doing: Supported Hip Airplane

This exercise is magic.

I mean, it pales in comparison to a Wingardium Leviosa spell – or even bacon wrapped dates (magic in my mouth) – but if you’re looking for a drill to add to your squat/deadlift warm-up, or to help with a pair of cranky hips, continue reading.

Copyright: jakkapan / 123RF Stock Photo


Giving credit where it’s due, I first learned of this exercise – well, technically, an iteration of it – via Dr. Stuart McGill while attending one of his workshops years ago.

He included it as a form of progression with regards to low back rehabilitation and performance. In his version, you don’t use anything as support and you then hold your arms out to your sides (like an airplane) and perform the drill.

I’m half convinced the only people who can do it well on the first try are 1) Dr. McGill and 2) Cirque du Soleil performers.

Nevertheless it’s a fantastic drill that stresses a “rigid” (or stable) spine while also performing a CLOSED-CHAIN exercise where the acetabulum – hip socket – moves along a fixed femur.

As much as I’m a fan, however, it’s also a fairly advanced drill and often cumbersome to master for many individuals.

Try this instead.

Supported Hip Airplane


Who Did I Steal It From?: My wife was actually given this exercise by Dr. Sarah Duvall a few weeks ago to help her with some annoying hip “stuff” she’s been dealing with for the past few years.

Within days of implementing this drill my wife saw a massive reduction in her symptoms and was also quoted as saying…

“Hip internal rotation is fucking magic.”

More on this in a bit, because it’s not technically working hip IR.

What Does It Do?: As noted above it’s primarily a closed-chain exercise (weeeeeeee) which allows for the more proximal joint (in this case the hip) to move across a fixed femur (the distal joint, the foot, is cemented to the ground).

When I posted this exercise up on my IG account I had several people keep me in check (and rightfully so) when I had mentioned this exercise helps encourage more hip internal rotation.

It kinda, sorta does.

As Movements 4 Life noted:

“It’s actually a discussion of motion vs position. At the top of the airplane the hip is externally rotatED. Then as you return back to neutral, you are technically going through internal rotation but you are still in a position of external rotation. I would actually encourage you to go beyond neutral to get into an internally rotated position.”

So, yeah, do that…;o)

Suffice to say:

1. I like this drill because it hammers home the point of rigid/stable spine while moving through the hip.

2. DON’T EVER SHOW ME UP LIKE THAT AGAIN MOVEMENTS 4 LIFE. I’LL CUT YOU.7

Key Coaching Cues: I cue up a “soft” knee on whatever leg someone stands on. The idea is to extend the inside leg so that the backside is long. If someone is unable to own that position, I’d encourage them to bend the leg at the knee to reduce the lever length.

Rotate up via the hip making sure to minimize motion from the spine. When in the maximally externally rotated position one can control, reverse the action by thinking about driving the top portion of the hip towards the opposite knee.

And, as noted above, don’t be scared to go past neutral and get into more hip internal rotation (that’s what the support is there for).

To progress, let go of the support.

I’ve been including this drill as part my my lower body warm-up for squats and deadlifts and my hips/glutes are thankful.

CategoriesExercises You Should Be Doing

Exercises You Should Be Doing: Reverse Nordic Curl

Anyone who’s visited the Nordic region of the world – generally considered to be Denmark, Sweden, Norway, Finland, and Iceland – knows they’re known for a few things:

  • Fjords
  • Vikings

And that’s pretty much it.

Copyright: NejroN / 123RF Stock Photo


Okay, that’s a bit of dearth representation of all the history, art, food, and culture the region has contributed to our benefit. I mean, there’s also Nordic walking, the Nordic Track, as well as the star of today’s blog post the Nordic Leg Curl.8

The Nordic Leg Curl (also known as the Natural Glute Ham Raise) is an awesome exercise that can be used as a posterior chain builder and strengthener, in addition to, when implemented accordingly, being a fantastic “rehab” exercise with regards to working with someone suffering from chronic hamstring strains.

To the latter point, because the eccentric – or lowering – component of muscular action can be prioritized, it’s just a nice way to overload the hamstrings in a way that’s unique to the mechanism of injury for chronic strains (I.e, the bulk of them generally occur when the hamstrings are eccentrically resisting knee extension).

You can read about them more in THIS article, or watch this video (courtesy of T-Nation and Bret Contreras):


Anyway, recently I came across the antithesis of the Nordic Hamstring Curl, and I wanted to share it today because I’ve been playing with it of late in my own training (and with a few clients).

The Reverse Nordic Curl

Who Did I Steal it From? – A few people, actually. Sivan Figan and Nick Tumminello have posted videos of it within the past few weeks, and Meghan Callway was a bit of inspiration as well. She posted a nifty Landmine variation HERE not too long ago.


I know, I know…I’m going to rot in YouTube hell for posting a vertical video. May the comment gods show me mercy.

What Does It Do? – I find it’s an excellent way to train the quadriceps eccentrically and to encourage more length in that area. It’s kinda-sorta a more “joint-friendly” variation of a Sissy Squat.

On an aside, from a rehab standpoint, given the bevy of research showcasing the efficacy of SLOW eccentrics on tendon healing & repair, I can see a lot of value for this exercise when working around knee woes.

Key Coaching Cues: Much like Meghan suggests with her Landmine variation, you want to make sure you ensure a “stacked” position throughout the duration of the exercise. Meaning your head, torso, hips, and knees should be “stacked” on top of one another the entire time.

In this case the band across the chest (cameo appearance of the NT Loop, HERE) adds a bit of accommodating resistance – you want to actively resist the aggressive pull of the band on the way down, as well as overcome the pull of the band on the way back up. I find, too, the band provides a bit more kinesthetic feedback to the lifter to better engage his or her’s core.

Slowly lean back making sure to maintain the canister (stacked) position, then use your quads to “pull” yourself back up. I am indifferent with regards to toes plantar or dorsiflexed. I’m sure there’s a nerdy explanation out there as to why one or the other is good or bad, I just can’t think of one.

Besides, Vikings are awesome.

Oh, lastly: I lean more on the idea that this exercise lends itself to a high(er) rep count, in the ballpark of 8-15 repetitions per set. Too, I’ve been tossing them in as an accessory movement towards the end of a squat or deadlift session. Honestly, I think you’ll be surprised by how much of a quad pump you’ll get from these.

Give em a try and let me know what you think.