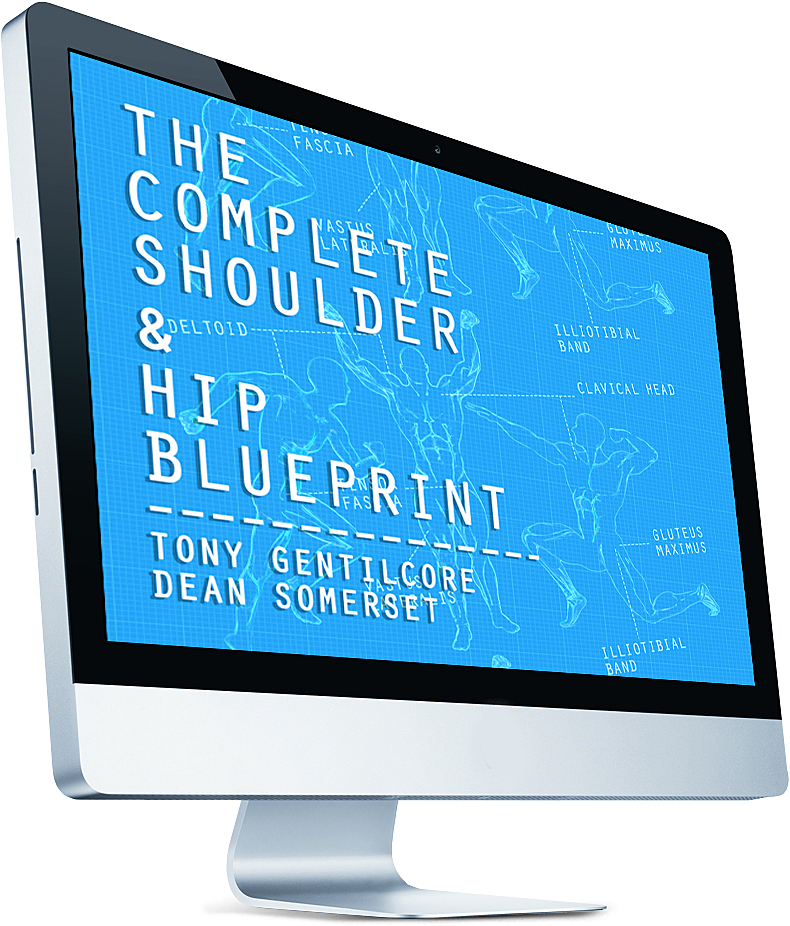
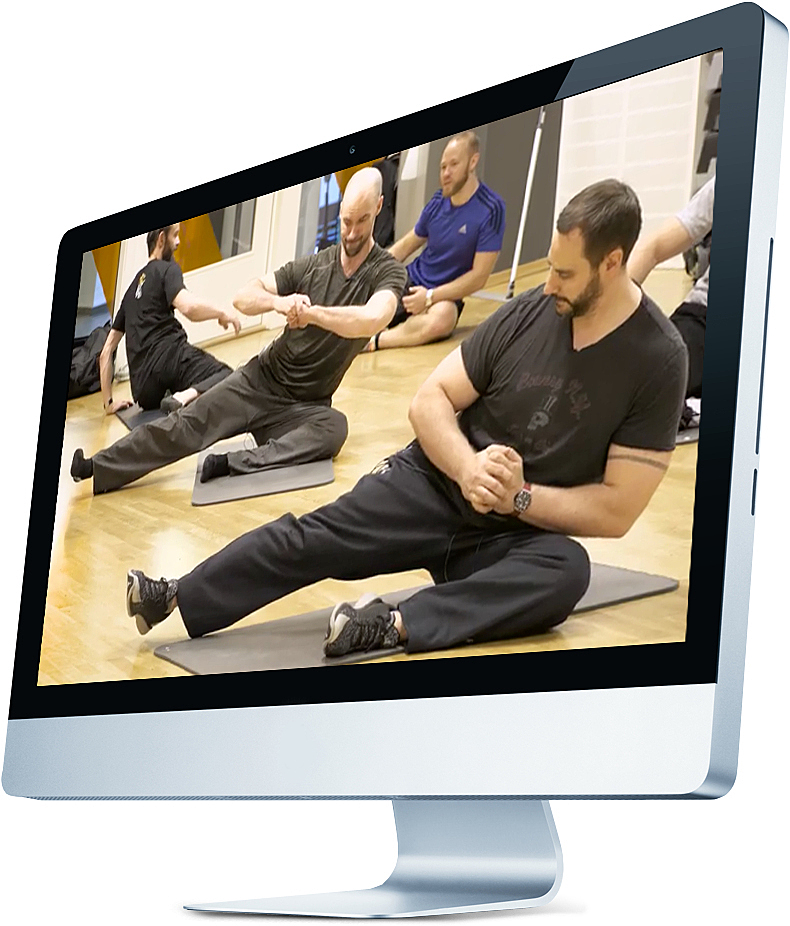
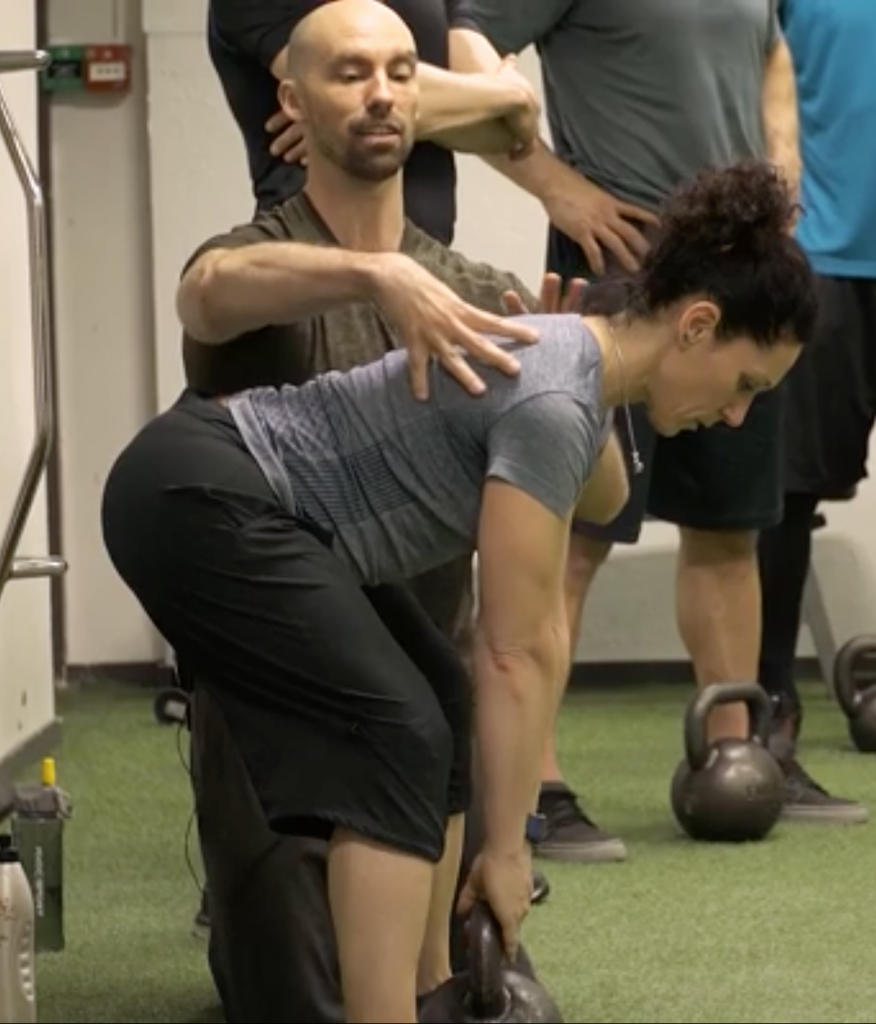
Dean Somerset and I have spent the better part of the past two years traveling all across North America and parts of Europe presenting our Complete Shoulder & Hip Workshop. All told, we’ve presented it 10-15 times1.
I’m not kidding, either: I…could…not…sleep last night.
I kept waking up every few hours as if I were 11 years old again waiting for Christmas morning to arrive. To say I am excited for this would be an understatement. There’s also a small fraction of me doing the best I can not to destroy the back of my pants out of shear terror.
As of this moment it’s 99.2% excitement, and 0.8% “hoooooooly shit this is happening.”2
I mean, there’s always a degree of vulnerability anytime you put something out there for the masses. However I KNOW this is going to be a resource that will help tons of people.
What Is It
The Complete Shoulder and Hip Blueprint is an 11+ hour digital product that takes you through the systems that both Dean and I use with our athletes and clients to improve upper and lower body function, strength, endurance, and resiliency.
We show you how to connect the dots between a thorough assessment, understanding what corrective strategies (if any) will work best, and how to build a training program to help you and your clients in the most direct way possible.
And there’s a few cat memes and light saber jokes tossed in for good measure.
Why This Matters to You
Are you a fitness professional? Do you work with people with shoulders? What about hips?
Well then, this sucker is right up your alley.
More specifically here’s what you can expect:
Help your clients get through common shoulder issues more effectively.
Streamline your assessment and program design, helping you get faster results and more efficient use of your time, and that of your clients’
Help you see the details of shoulder motion you didn’t notice before, and whether something you’re using in your exercise program is working or not.
Upgrade your exercise toolbox to address commonly overlooked movement issues.
You can help clients see IMMEDIATE improvements, sometimes in as little as a minute or two, which will help them buy in to your abilities.
Help you target in on what will work best for the person in front of you, saving you both the time spent on useless exercises or drills.
Connect the dots between assessments, mobility, strength, and conditioning program considerations
Break down a system you can use today with yourself or your clients to see instant benefit while removing the guess work.
And you don’t necessarily have to be a fitness professional in order to reap the benefits of this resource. Dean and I offer tons of practical information in the form of hands-on applications in addition to breaking down many common exercises such as the deadlift, squat, chin-up, and Landmine variations.
The Part Where I Entice You More (or Guilt You) Into Buying
Choose any of the following that resonates with you:
1. “What is this, Napster? Pay for something once, would you?”
2. “Pretty please?”
3. “I got kids! Well, I’ll have one soon, in January, and that shit’s expensive.”
4. “I’ve written tons of free content over the years. Each time I’ve written an article or blog post that’s helped you out, I put a dollar on your tab. It’s collection time, you son of a bitch.”
Okay, for real: I think it’s a great resource, I feel it’s going to help a lot of people, and I’d be honored if you’d consider checking it out.
We’ve put Complete Shoulder & Hip Blueprint on sale this week. From today through Saturday, November 5th you can purchase it at $60 off the regular price. What’s more there are Continuing Education Credits (CEUs) available through the NSCA, which makes this a solid professional development investment.
Today’s guest post comes courtesy of Gavin McHale, a Certified Exercise Physiologist from Winnipeg, Canada (in his words, straight north of Fargo). Gavin attended a workshop I did with Dean Somerset in Minneapolis a few weeks ago and he wanted to write up some of the things he picked up from it.
Read on to find a breakdown of how you can clean up your shoulders and hips, lift more weight and allow yourself to relax, just by changing the way you breathe.
4 Ways to Fire Up Your Belly
Let me paint you a picture.
A client or physical therapist refers someone to me and they walk in ready to get their ass handed to them. After our initial conversation, I tell them we’re going to start the session with some breathing drills.
They often glaze over and assume it means something else, until I tell them to lie down and take a deep breath.
“Wait, you just want me to breathe?”
“That is correct.”
Almost every time, I can provide a new client a take-home benefit with a couple of breathing cues, all inside the first 2 minutes on the gym floor.
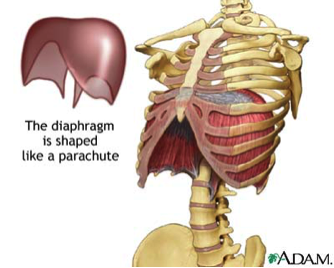
Image courtesy of Crossfit Southbay, via A.D.A.M
Why, you ask? Well there are lots of reasons why breathing is a good practice to get into, and I’m not talking about the breathing we do mindlessly, day-in day-out. I’m talking about mindful “diaphragmatic” or “belly” breathing.
We live in what I’d call a very sympathetic world. Our sympathetic nervous system, also known as fight-or-flight, is cranked up all the time. We have to drive to work in traffic, get a project done, feed the kids, manage the mortgage… you get the point.
All this stress kind of shuts down our parasympathetic nervous system, also known as rest-and-digest. You know, the one that fixes all our shit? Ya, that one.
The diaphragm is actually intended to be our body’s primary breathing muscle, but as a consequence of modern life, it’s been shunned like Tony and I are by all those cat haters (I see you). Instead, the much less efficient breathing muscles of the upper chest and neck then must take over, creating all sorts of issues.
Although it doesn’t look very sexy, diaphragamatic breathing allows us to create a better balance between fight-or-flight and rest-and-digest, and could be the key to fixing a lot of movement issues as well.
When we breathe, this dome-shaped muscle contracts, allowing the lungs to take in air. What we should see is the stomach rising as the dome compresses the abdominal cavity. This is why I tell my clients to try and “get fat” if they’re having trouble figuring it out. I often see the exact opposite, and while it may present a more pleasing side profile, it only allows the lungs to partially expand and results in weaker core stabilization.
So why do we do it?
Not only is it a good idea to get back to the muscles we should be using for an activity like breathing, but an under-active or dysfunctional diaphragm is going to lead to movement issues as well. Neck and shoulder issues are the bulk of what I see, but back and hip irritation have also been linked to breathing concerns.
Proximal stability leads to distal mobility.
If we can create more stability in the core and centre of the body, the limbs and other areas where we need to be more mobile are free to do their job as well.
Test/Re-Test
Below, I’m going to give you several tests to try based on areas that you may have trouble with or issues you want to clean up. The protocol here is to test the movement, correct with a breathing drill, the re-test to see if it got better.
If it did, great! If not, we may have to do some more digging. The breathing correctives are outlined at the end of the article.
1. Shoulder Issues
I found it very interesting how many people had shoulder pain and dysfunction when I first started training. I cleaned up their technique, had them pull way more than they pushed and focused on opening up their thoracic spine. Things got better, but never really got better, ya know?
Then I went further down the rabbit hole and recognized there was more to it. I realized that almost all shoulder problems are somehow tied to breathing mechanics, and a couple of simple drills can make a world of difference, especially when done consistently. Here are two (related) tests to see where problems may lie and outline the path to correcting them.
Shoulder Test/Re-Test #1: Active and Passive Shoulder Flexion
*Ideally, the shirt is off for all tests of shoulder function. Although it can be awkward, this allows someone to see exactly what the scapulae are doing during these movements.
You may have to stand against a wall to do this properly, but stand tall and proud and slowly brings your hands up over your head in front of you. Your ribcage should stay down (the back should stay against the wall) and the head should stay in a packed position (no poke-necks).
How high did your arms get? Was there any pain?
Here is Tony showing an example of a bad active shoulder flexion (left) and a good active shoulder flexion (right). If you’re not careful, you may think the “bad” test is better than the good one. A closer looks reveals that Tony is flaring his ribcage, overextending his lower back and poking his head forward. The test on the right is a true test of his active shoulder flexion. Not bad T, but why is your shirt still on?
The passive test is the same as the active test, only lying down on your back. The knees should be bent and feet flat on the floor or table. The ribcage should stay down and lower back flush to ensure a true test.
We will review correctives later in the article.
Shoulder Test/Re-Test #2: Scapulo-Humeral Rhythm (probably need a friend for this one)
Stand in the same position as your active shoulder flexion test, but this time we’re going to bring the arms overhead by your sides, trying to touch the backs of your hands together above your head.
As the arms move overhead, the scapula should rotate ½ as much as the humerus does. So, to get overhead (180 degrees total), the humerus should rotate upward 120 degrees and the scapula should rotate the remaining 60 degrees.
Image courtesy of BEST Performance Group
If there is any pain with this movement, you should see a registered healthcare professional (or refer to one, if you’re a trainer).
However, if you’re a trainer and you notice the scapula isn’t moving as it should (i.e. the medial border isn’t at 60 degrees) see if you just help it along by manually moving it to the desired position.
Better? Great, let’s get to breathing and fix that shit. Still painful? Refer.
2. Back Issues
Everyone who’s ever had or worked with people with back issues raise their hand! Ya, a lot of us have, myself included and it’s no fun. Whether it’s chronic back pain or a little tweak here and there, worrying about blowing your back out is a real concern for many people.
They’re scared to lift things around the house, scared to bend over the wrong way and especially scared to lift a shit-ton of weight off the floor in the gym (covered later). We can’t be having that… let’s fix it.
I said that lower back and shoulder issues can be related because their main structures are intimately connected via the thoracolumbar fascia. You can see the lats (major players in the shoulder) and the glutes (major players in the lower back) in the image below. If you have issues getting your arms overhead, you may very well have lower back problems as well, and vice versa.
Image courtesy of Neil Asher Healthcare
Back Test/Re-Test #1: Active Straight Leg Raise
This one is nice and simple. Lie on your back, legs straight. Lift one leg as high as you can before you stop or you feel pain. The knee should stay straight. Note how high you got. A good score is 90 degrees with no movement in the opposite leg.
Image courtesy of www.FunctionalMovement.com
Back Test-Re-Test #2: Passive Hip Rotation (bring that friend back, you’ll need em)
Lie flat on your back with legs straight and lift one leg. Bend the leg at the knee, coming up to 90 degrees hip flexion. Move the hip into external rotation (foot to opposite hip) and internal rotation (foot outside hip) while supporting the knee. Note the angle achieved with each movement. A good score is 90 degrees from midline for external rotation and 45 degrees for internal.
Photo courtesy of geekymedics.com.
LIFTING HEAVY A.F.
(if you have to ask what it means, you’re not ready for it)
There’s no question that if you’ve ever done a heavy squat or deadlift and not wrecked your back, you know that you need to be able to create massive amounts of tension through your core. If you can’t, you get hurt, pretty simple.
The diaphragm plays a massive role in stabilizing the core. It forms the lid on the “core box”, working with the obliques, QL, pelvic floor and transverse abdominus. Being able to take in air and maintain a high-pressure area in the abdominal cavity is crucial for lifting heavy (another reason I start with breathing drills).
RELAXATION
Remember that sympathetic world I spoke about earlier where most of us live that wreaks havoc on our breathing patterns? Needless to say, it can also create difficulty with relaxation and sleep.
I’m pretty sure most of us (and our clients) can agree we’d like to sleep better.
So, when you watch the videos below, don’t just put them in the “workout” box, but remember they can also have a positive impact on your ability to relax and even fall asleep.
Not only will these breathing drills assist in improving movement patterns, they’ll set up the context for creating tension before and during a heavy lift.
THE BREATHING CORRECTIVES
Prone Crocodile Breathing
If you’re new to the diaphragmatic breathing game, this is your place to start. Maybe you scored poorly on one of the above tests or you have an itch to throw more weight on the bar but aren’t yet comfortable doing so.
Either way, give this drill a shot before moving on.
Prone Lengthening
This one is particularly useful if you have trouble with your shoulder and/or struggled with the shoulder flexion and scapulo-humeral tests. Many people’s shoulder dysfunction comes from a number of factors, one of those being tight/ropey serratus anterior. This drill will help to release that muscle, allowing it to do it’s part in moving the scapula to get that arm overhead.
The serratus anterior (SA) works in concert with the upper traps (UT) and lower traps (LT) to allow the scapula to upwardly rotate.
Note From TG: props to Dr. Evan Osar for introducing me to this exercise a few years ago.
Crook Lying Belly Breathing
This is another great beginner drill as the lower back is supported and the table or floor can provide external feedback. This is also the best position for belly breathing, allowing the belly to fully expand. Along with the others, this one is great for those with back or hip issues.
Quadruped Breathing
This is another great drill for those with issues rotating that scap when going overhead. The serratus anterior is a massive player and if we can get it rotating properly (or at least better than it was), we may be able to provide relief and learn what it is we need to focus on moving forward.
So there you have it, a good, hard look at what we should be looking for and how to make it better, just by changing the way we breathe.
One final note for trainers, make sure you try these yourself as you may find that different cues work better. If you do, please tell me. I want to know all your secrets!
OBLIGATORY PROMOTIONAL PLUG FROM TG (sorry not sorry)
Pretty much everything discussed above is covered in more detail in mine and Dean Somerset’s Complete Shoulder & Hip Blueprint which is being released this week (Nov. 1st).
In fact the site goes LIVE tonight. You can check back HERE at midnight to get in on the action. It’s totally going to be like a Harry Potter book release! Except, you know, without wizards and Sorting Hats and shit.
Author’s Bio
Gavin McHale is a Certified Exercise Physiologist from Winnipeg, Manitoba, Canada (straight North of Fargo).
He loves getting people to lift things they never imagined they would both in-person and online.
He also likes to lift said heavy things and, much like Tony, loves cats.
Pat Davidson is a savage. He’s one of the most passionate and knowledgable coaches I know. What’s more, he’s someone who’s not afraid to express his opinion and tell it like it is. Case in point he was kind enough to take part in an interview as part of the re-launch of his flagship training program – MASS.
He….does…..not……hold…..back.
It’s amazing.
In the year or so since it’s original (soft) release it has accumulated a cult-following. It’s brutal, it makes people hate life, but no one – male or female – who has completed it has ever not gotten amazing results. I know, I’ve seen it in action.
It makes people into brick shit houses – hence the title of this post.
MASS is on sale starting today though the end of this week. Enjoy the interview.
Tony Gentilcore (TG):Pat, thanks for doing this interview: 1) can you give my audience a bit of your background and 2) can you do so with at least two f-bombs included.
Pat Davidson (PD): Hi Tony, I’d like to start off by saying thank you for letting me do this interview. You’re somebody I really respect in our industry, and getting the opportunity to do something in conjunction with you is big time.
It’s funny, I’ve done a number of podcasts and other kinds of interviews at this point in my life now, and this question always comes up, and I always think, “God, I fucking hate this question.” I feel animosity towards this question, because it’s so hard to know how to approach telling other people about yourself.
You have to come up with some kind of elevator pitch version of your professional life, and it always sucks. There’s virtually no way to accurately answer the question. So here’s my shitty answer to this question that provides evidence that I am a fucking authority in our field.
Note from TG:I could have just as well introduced Pat myself, told everyone he’s a savage, that he makes people into savages (as evident by his book MASS), and is one of the most passionate and intense people I have ever met in this industry. I’m pretty sure he found out arm wrestling a grizzly would increase protein synthesis by 22% he’d put it as A2 in a program.
My name is Pat Davidson. I have an B.A. in History, an M.S. in Strength and Conditioning, and a Ph.D in Exercise Physiology. I have worked as a professor for two different schools, Brooklyn College and Springfield College. I have also been the Director of Continuing Education and Training at Peak Performance in NYC.
My background in athletics has been that I played baseball and football in high school, tried to play baseball in college, but ultimately was too immature to be able to manage classes, sports, and partying as an 18 year old. After that I got into jiu jitsu, submission grappling, and MMA. I competed in those sports for 7 years.
I got more and more into the science and practice of training by the end of my MMA days and eventually just became a lifter. I did a few weightlifting meets, broke down physically from trying to do that sport, and then eventually made my way into strongman. I competed in strongman for about 3 years. During that time I finished top 10 at two National Championships, competed in two World Championships, and finished top 10 at Worlds once.
I’ve done my fair share of writing and speaking gigs in the field. These days I’m not competing in anything. I’m just trying to consume knowledge at the highest rate I possibly can, write more books, give more presentations, and be the best professional I can be.
TG: I had the chance to listen to you speak at a Cressey Sports Performance staff in-service something like two years ago, and I was so impressed not only by your knowledge base, but your passion as well. Watching and hearing you speak it was hard not to stand up and run straight through a brick wall.
I feel MASS is the end-result of both your knowledge and passion. Can you explain WHY you wrote this program (you know, other than making people hate life)?
PD: The reason I wrote MASS is actually a very straight forward concept. The project began when I was contacted by an editor from Men’s Health who commonly did stories with myself and a couple other guys at Peak.
He said that a new intern just showed up to start working with him. The kid was a former college cross-country runner, and he was essentially way too skinny to be working for Men’s Health. The editor and a couple other people thought it would be fun to see how much mass they could put on him for his 16 week internship, and they were hoping that I could put a program together for him.
I got to meet the intern for a day, do some measures on him, and, “teach” him how to do everything. He was about 5’8″, and slightly less than 130 pounds. He had no previous strength training experience. I could tell that he was a very driven young man though, and the cross-country background is one that from my experience comes with a psychological paradigm of not being afraid to work.
Wrestlers and racers are people who often times will do whatever it takes no matter how difficult. My challenge was that I had to come up with a plan that would give this person maximum results without hurting him, and this was especially difficult because of his lack of experience.
From my experience everyone does everything wrong, regardless of how well versed in training they think they are. I don’t feel comfortable having people do anything unless I’m there to watch and coach them…so I had to get outside my comfort zone in actually writing MASS. So I designed this thing to intrinsically reward him with the programming, push him to his physical limits, and make absolutely sure he wouldn’t get hurt.
He did phenomenally well on the program. He gained 19 pounds of lean body mass in the 16 weeks according to our InBody equipment at Peak, which is absolutely preposterous when you consider he started off in the 120s.
At this point in time, Men’s Health was going to do a big story on Peak, because Peak was getting ready to move into a 25,000 sqft futuristic palace gym in Manhattan. Included in the story on Peak was going to be the intern story as well, and they were going to do something like name the program, “Best Program of the Year” or something like that.
I saw this as a golden opportunity to possibly earn some money from this, and I put a book together that would go along with this program. So I sat down on a weekend where I had nothing else to do and I wrote the book. It was a grueling weekend, and I probably looked a little bit like a bleary eyed Unibomber by the end of it, but the book was done.
Unfortunately the Peak project fell through due to business side logistical complications, so the Men’s Health stories also never materialized, but by that point, MASS was born, and it has managed to create its own following, and it has steadily sold and continued to make people both hate and love me in expanding spheres.
TG: I have witnessed it in action – several coaches I know have done the program3– and can vouch for its effectiveness.
Straight up: would you agree most people DO NOT train nearly hard enough?
PD: I honestly don’t know if people don’t work hard enough. I think people are just disorganized with training. When I design training sessions, I think about things like somebody would if they had to design a factory assembly line to produce at the highest level of efficiency.
I have zero time to waste, I have a valuable commodity that I have to pump out, and I don’t care about your feelings.
I time everything. I’ve never been a huge fan of technology in the weight-room other than the clock.
I’m familiar with different energy systems, loaded movement types, types of muscular contractions, speed and agility, movement quality…you know, the endless list of qualities that actually need to be developed in a performance oriented gym.
There are so many qualities that are necessary for athletes that you need 15 day weeks and 34 hour days to actually do everything you need to do. You always have to scrap certain concepts and qualities, short time (I can’t have you sitting around for 6 minutes during rest periods to maximize your phosphagen system’s substrate stores), and generally compromise the perfect textbook physiology development of things…but you blend, mix and match, and do the smartest things you possibly can to make it look right, and let people feel like they’re having a worthwhile training experience.
With MASS, there was only one goal, and it was purely body composition optimization. I wasn’t trying to help people with peaking for a race or a strength contest, or get ready for the football season, so in reality organizing it was a breeze…no movement prep, no power production development, no reactive components.
It just comes down to what is the goal, and how do I get to the goal?
With body composition goals involving muscle mass, it’s not that hard…mechanical load, mechanical work, heat, and acidity…works every time.
People are willing to work hard to get there if they want that goal, and you can explain why those variables are the ticket to that goal. Now you just have to organize things for people to to do, and give them something they feel like is a meaningful challenge. That’s where the MASS book actually comes into play.
It’s written in a way that explains why taking a certain approach is the correct approach.
It explains why a certain mindset is the right way to carry yourself. It gives you the organization of the programming, which is very efficient, and basically guaranteed to change your body composition.
It gives you guidance, direction, and order. It will also motivate you, and the program itself will motivate you, because you have to keep trying to beat yourself, and if you actually manage to do so, you will feel rewarded.
I don’t think people are unwilling to work hard. Everybody who has done this program has worked hard and loved it. People just haven’t put themselves into the right situations or environments to be able to appropriately work hard in a very directed manner.
TG: Well stated my man, thank you. I respect your approach to training and program design because it’s simple. Nothing about MASS says “fancy” or “elaborate,” which is why I LOVE the constant references to Rocky IV. Why is it so hard for many people to understand this concept? That training doesn’t have to advanced or nuanced?
PD: This is a great question. I think I could answer this in a million different ways, but I’m going to stick with one thread here.
Our industry is generally full of people who were failed athletes…but specifically failed athletes who were incredibly driven, tried hard, and were willing to do whatever they had to do to make it.
Coaches are probably people who, when they were athletes, were the people that their coaches loved…because they were the scrappy athlete, the kid who studied the game…and they were rewarded for this behavior with the praise, attention, and approval of the coach…all of this creates a cycle.
The people who fit into this failed athlete/future coach pedigree are routinely the people who believe that if they just did this, “one thing” differently, then it would have been all different.
We are a population of people who are always looking for the secret ingredient…it’s this new thing where you press on weird spots and the person moves like a baby, and now they can magically move better forever…wrong…it’s this new thing where you find and feel your left pterygoid, and now you can throw a baseball 5 mph faster…wrong…it’s this new thing where you touch these lights on a board that light up randomly, and you can save any shot from any direction as a goalie…wrong.
The dirty secret is that consistency, habit, intelligence, and managing the big picture is the only thing that has ever and will ever matter.
Photo Credit: www.jtsstrength.com
When I think of improving performance, I’m always trying to improve biomechanics and fitness, because the two compliment each other. Biomechanics is this positional, mechanical, psycho-social, sensory, contextual, and environmental monster of inputs and outputs that the smartest people in our field spend their entire waking hours and lives trying to wrap their mind around to figure out.
And then you hear some ass-clown trainer spit the dumbest shit imaginable about how fucking ankle band lateral walks and spreading the knees are going to be the magic bullet fix for some jumbo shrimp looking 140 pound 20 year old bag of dicks that can’t do a fucking pull-up and runs a mile in 12 minutes.
TG: HAHAHAHAHAHA. How do you really feel Pat?
That’s the kind of shit that makes me want to tombstone piledrive somebody into that pit of needles from the Saw movie franchise.
All day in NYC I see trainers taking fat women and having them do endless stupid movement prep drills with them and overhead squatting them with dowels. Maybe this fat woman can’t move because her gut is in the way.
Maybe she just needs to do something she can’t fuck up, like the most basic hip hinge possible…and oh by the way a bench press is a good fucking exercise.
From what I can tell, almost everybody in our industry sucks at movement…and we try to do seriously fancy shit that we fuck up left and right.
Maybe your cocky trainer ass should stick to basics. If you suck at it, do you really think your dumbass motor moron client is going to have a fucking chance? Hell no dummy.
That person needs to sweat and do basics, and feel like they actually accomplished something.Give that person some damn pride, and let them work hard in a way where they won’t hurt themselves.
Christ, I could go on all day on this one, and you finally got me swearing…this one did it.4
No, trainer/strength coach, you never were going to make it in the sport you loved. The cream always rises to the top. No, you’re never going to be an elite weightlifter unless you started somewhere around 10…but feel free to destroy your joints in your pursuit of this goal.
No handstands are not going to improve anything other than your ability to do a shitty handstand because you didn’t start gymnastics when you were 8 years old.
Shut your mouth, do basic lifts, sprint, do agility drills, and probably some basic cardio, and guess what you’ll probably stop being as fat, weak, and hurt as you are right now. Fuck.
TG: WHEW – that was an EPIC rant Pat. I hope all the walls are safe wherever you were when you wrote that….;o)
I know it’s a cliche question – sorry – but can you give your “top 3” reasons why many people fail to see much progress in the gym? How is MASS going to address them?
PD: Top 3 reasons why people go nowhere in the gym.
1. People Pick the Wrong Exercises for Their Goals.
If your goal is to change body composition, you need to do as much mechanical work with load as possible. Mechanical work is the result of force times distance. Do not pick low force exercises with small excursions built into the movement. The right exercises are hinges, squats, split squats, presses, and pulls. I’m not against direct arm and calf work, but that’s the spices you sprinkle on at the end of cooking a dish.
2. People Pick the Wrong Sets and Reps Schemes.
Most People are weak and unimpressive. If I do a 5 rep set of bench press with such people, they might be using 145…but then I take 5 or 10 pounds away and they do it for 20. There’s no rhyme or reason to most people…their muscles aren’t working synchronously, they’re more psychology cases than physiology cases.
They’re going to build more strength doing 15 reps with slightly less weight compared to 5 reps with slightly more. People need practice and volume.
Everybody thinks they’re a damn international weightlifter who needs Prilepin’s table applied to all their programming. Do more mechanical work…push that variable and you’ll be amazed at what happens.
3. People Don’t Time Their Rest.
Easily the most powerful adjustment I’ve ever made. It’s so simple and so powerful. Nobody is accountable, and perception of time is something that nobody experiences accurately while exercising.
If you’re not timing things, you are wasting a ton of time, guaranteed. MASS addresses all of these factors. You’re going to deadlift, squat, press, and pull your face off.
Everything is timed.
Everybody sees crazy results.
TG: BOOM. Want to find out for yourself why MASS has garnered such a loyal following? Go HERE and see for yourself. It’s on sale this week only (until 10/23).
Today’s guest post comes courtesy of business/life/fitness writer and world-traveler extraordinaire, Anthony Yeung. The title says it all folks.
Jason Bourne is the badass to end all badasses. He’s not a British playboy like James Bond and he’s not a billionaire-wunderkind like Bruce Wayne.
Instead, he’s just a gruff and simple man who beats the crap out of people by using desk stationery — a pen, a rolled up magazine, and a book.
In this article, I’ll crack the code of actually BECOMING Jason Bourne with a five-step plan. I can’t guarantee you’ll be able to leap across buildings or get multiple passports… but I can guarantee you’ll increase your rating on the “Jason Bourne Scale of Awesomeness” and have A LOT of fun while doing so.
Enjoy!
1) Build REAL Strength and Power
Jason Bourne’s one-punch KO is a testament to his brute strength.
https://www.youtube.com/watch?v=-ugKCJsNyBQ
And his overall badassery.
Fortunately, if you read Tony’s blog regularly, you already have all the information you need to get strong as hell. (The man is WAY smarter and stronger than me.)
But I’ll simply review the basics and share a few add-ons that could help take your fitness to Bourne-levels.
1) Focus On the Big Lifts and Get Strong as Hell.
Your workouts should center on things like heavy squats, deadlifts, bench presses, rows, pullups, overhead presses, and lunges — basically, any exercise that targets a lot of muscles and creates a massive stimulus for growth. Also, go heavy with fewer reps to build that foundation of absolute strength.
From there, build “old-school strength” by doing lots of weighted carries for core, grip, and stability work.
It might help you KO someone… or open a pack of shaving razors without scissors.
2) Once You Have a Solid Foundation of Basic Strength (alactic), Develop Your Lactic Capacity with Complexes.
Jason Bourne’s fight scenes take a lot longer than a set of three fronts squats.
That’s where complexes come in: You’ll race through sets of different exercises without any rest or even setting down the weight. It’ll hammer every muscle in your body and crank up your work capacity, all in 1 – 2 minutes.
Here’s a dumbbell complex:
Romanian Deadlift x 6
Bent-Over Row x 6
Reverse Lunge x 6 each side
Dumbbell High Pull x 6
Overhead Press x 6
Front Squat x 6
Plyo Pushups x 6
For the final set of pushups, toss the dumbbells aside and do them on the floor. Rest for a few minutes and repeat the complex.
3) Free Your Body
Jason Bourne is like an MMA and parkour athlete wrapped together in a dark overcoat. Thus, to fight every kind of villain imaginable, scale walls, and leap across buildings, you have to be mobile, agile, and spry.
If you can’t touch your toes, however, start there. Use mobility drills, PRI exercises, and self-myofascial therapy to improve your range of motion, release chronically tight and toned muscles, and get more limber.
Next, work in all planes of movement. While traditional strength exercises are usually in the sagittal plane or frontal plane, incorporate modalities that builds free-flowing strength, endurance, and power.
My favorite method is Animal Flow, which is just a series of crawling patterns on steroids. It’s great for conditioning, stability, and developing complex movement patterns. It’s also very humbling: one full minute of crawling patterns could kick your ass.
4) Develop Power and Speed
Jason Bourne has blazing speed and lightning quick reflexes. Thus, not only can he demonstrate absolute strength, but he can also demonstrate that strength faster than anyone else.
While Olympic lift variations are great for this, I prefer kettlebell swings, snatches, and cleans because (1) their learning curve is quicker, (2) they improve stability/mobility, and (3) they can be used in conditioning drills.
TG Layering the KB Swing #1
TG Layering the KB Swing #2
From there, feel free to add high-speed work like sprints. Just follow Charlie Francis’s suggestion to stay above 95% max-effort — anything less will be too slow to create the right adaptations.
2) Condition Like a Badass
So Jason Bourne is strong… got it.
But he’s also conditioned like a badass too.
If you struggle to run a few miles, then sprinting through buildings, jumping through windows, and fighting Desh will be damn near impossible.
Step One: Develop a Massive Aerobic Base.
Developing an aerobic foundation actually improves your performance in high-intensity efforts and helps you recover (1) between bouts of high-intensity exercise and (2) after hard workouts.
There are many different ways to build an aerobic base, but two easy places to start are with cardiac output training and high-intensity continuous training.
Cardiac Output is basically any modality that keeps you in the 120 – 150bpm zone for 30+ minutes. You could go for a jog, a bike ride, or even do a circuit of various bodyweight exercises.
[Note from TG: if there’s ONE thing I’ve done a complete 180 on in recent years, it’s my thoughts on aerobic training or “cardio.” We need it. Don’t be one of those stupid “it will steal your gainz” bro-science boneheads.
For more information on WHY it’s important and HOW to implement it read THIS,THIS and THIS.]
High-Intensity Continuous Training (HICT) is where you do one explosive rep of an exercise every 3 – 5 seconds for 5 – 7 minutes while staying in the aerobic zone. This way, you’ll target your fast-twitch muscle fibers without exhausting them and help them become more fatigue-resistant as the cells create more mitochondria.
Once you have a strong aerobic base, layer on the anaerobic stuff, which you can get from typical HIIT workouts.
3) Get Lean (If You Ain’t Already)
Unlike James Bond, Bourne doesn’t need a tuxedo to look like a badass; most of the time, he’s wearing a T-shirt you could get at Goodwill.
But you can’t do that if you’re rocking a “Dad Bod.” Fortunately, you don’t need to get shredded — even in the most recent film, he looks like he’s around 10 – 15% body fat.
To drop any stubborn body fat, figure out your caloric defei
Dial in your diet.
“IS JASON BOURNE GLUTEN-FREE… OR IS HE PALEO?!”
My guess is that, if you asked that question, he would give you a cold stare.
Eat whole foods. As a rule of thumb, don’t eat things that come out of a box or can.
Protein: Lean meats, fish, nuts, eggs, good protein powders, bacon (because, duh), etc.
Carbs: Veggies (pile on the veggies), rice, potatoes, quinoa, whole grains, fruits, etc.
Fats: Olive oil, coconut oil, real butter, nuts, avocados, fish oil, flax oil, etc.
4) Improve Your Stress Response
“I can tell you the license plate numbers of all six cars outside. I can tell you that our waitress is left-handed and the guy sitting up at the counter weighs two hundred fifteen pounds and knows how to handle himself. I know the best place to look for a gun is the cab or the gray truck outside, and at this altitude, I can run flat out for a half mile before my hands start shaking.”
(Meanwhile, I barely remember MY license plate number.)
Bourne has RIDICULOUS awareness.
A lot of that comes from being a freak… but a lot of that also comes from eliminating your mind clutter and being completely in the present moment. It’s when we’re constantly worrying about the past, the future, or how our Fantasy Football team is doing, however, that we miss life’s little details.
Bourne can also handle A TON of stress without tapping into his “fight-or-flight” systems. (P.S. Building your aerobic system helps with this too. Woohoo!) I mean, sure, he had that car chase with Kirill, but SEE HOW FREAKIN’ CALM HE LOOKS:
Here’s how you’re going to increase your ability to tolerate stress without frying your sympathetic nervous system:
1. Meditate
Everyday, take a few minutes to relax, take a few deep breaths, and increase your awareness. I use the Headspace app, but feel free to explore the many different options and find something that works for you.
The key is that (1) you like it and (2) it helps you de-stress your mind.
“Do as many reps of a big lift as you can without tipping into a stress response.”
For example, set up a deadlift with a weight that’s hard, but still something you can do smooth, fast, and calmly. (“No grunting, no death metal, and no belts?! What is this — Planet Fitness?!”)
Then do 40 sets of 1 rep and keep your heart rate under 150 bpm. The next time you workout, try to do more sets or do a slightly heavier weight each workout while still staying stress-free. Over time, you’ll increase the amount of volume you can handle without stress.
5) Simplify
“I’m gonna ask you some simple questions. You’re gonna tell me the truth, or I swear to God, I’m gonna kill ya.”
Jason Bourne is all about simplicity. Think about it:
His wardrobe is as diverse as Ned Flanders. He doesn’t shop at Ed Hardy and his dark, muted colors would make any New Yorker proud. His haircut is something you can get at a barber college for $5. (Unlike Bourne, however, I recommend you smile occasionally.)
“I’m so happy!”
This is an optional step, but I encourage you to take a look at your life and take note of the superfluous things you can do without.
Do you have shirts you only wear once a year? A shelf full of books you never read? A cable television package you never use? Boxes full of random crap that take up space in your garage?
Perhaps you can donate or get rid of them.
It seems small — and even unrelated — but it all goes a long way in freeing your mind and simplifying your lifestyle. Now your possessions won’t possess you.
The result?
Being able to focus on what’s truly important and being able to control your life.
Oh, and please cut off your man bun.
About the Author
Anthony J. Yeung, CSCS, has been featured in Men’s Health, Muscle&Fitness, and Golf Digest and is the founder of GroomBuilder, the 8-week fitness program to transform the way guys look for your wedding.
Another fantastic guest post today from Shane McLean. This time he tackles the importance of unilateral strength training and offers some neat ideas as to the best accessory movements to compliment the “big 3.”
Don’t you love “that” guy who always stands between you and the dumbbells while doing single arm curls and making faces only his mother could love? What if I told you that he’s actually on to something, minus the faces and grunting?
Bilateral exercises (not biceps curls) should form the foundation of your strength program because this is where you’ll get most of your gains. However, unilateral training often gets neglected in the quest to get bigger and stronger because it’s just not as sexy (or cool) as a big squat, deadlift or overhead press.
However, unilateral training will help you get stronger, improve the big lifts (by shoring up weakness) and provide the following benefits.
Reduce Muscle Imbalances
Due to activities of daily living almost everybody has a dominant and non-dominant side. For instance, carrying more groceries on one side over the other over time may get one arm stronger.
During bilateral exercises such as a press or squat variation, your dominant side can pick up the slack for the weaker side.
Have you ever seen a lifter struggle to lock out one side over the other during a barbell bench press? I rest my case. Improving your “weaker” side will reduce your injury risk and help increase overall lifting numbers.
Improved Muscle Recruitment
Unilateral training makes you work harder and recruit more muscle fibers to perform the exact same movement, such as a split squat.
Taking one leg out of the equation forces your abductors and core to stabilize your pelvis while the working leg performs a split squat. Working more muscle with less weight will help correct strength imbalances between sides, also.
Core Work Without Crunches
When training unilaterally, you automatically throw your body off balance, forcing your core muscles to engage in order to keep yourself upright.
Trust me when I say that’s a good thing.
And we can double-down on the core training ante by utilizing offset loading:
Programming Guidelines
Unilateral exercises are best performed as an accessory movement after your big lift for the day.
Choose one or two single limb movements per session and perform three to four sets on both sides. The repetitions performed will depend on your goal.
For example:
Strength: 4 – 6 reps
Hypertrophy/Fat Loss: 8 – 15 reps
If you have a strength or muscle size imbalance always start with the weaker/smaller side first and let the weaker side determine the weight/reps you do on the stronger side.
Without further ado, here are my top two accessory exercises you should be doing to improve your squat, dead lift and press numbers. Sorry, this is a biceps curl free zone.
1) Deadlift
Suitcase Carries
Not only will carries change your life in three weeks, according to Dan ‘the man’ John, they can strengthen grip imbalances between hands which can be a limiting factor when pulling heavy from the floor or opening the pickle jar.
When you’re doing carries (you do, right?), pair them with a movement that doesn’t demand a lot of grip strength, so you can get more out of it. For example:
1A. Goblet squat/press variation.
1B. Suitcase carry- (25-50% of your bodyweight) 30 steps one hand then 30 steps with the opposite hand.
Form considerations – cues “shoulders down and back” or “chest up” work well here. Checking your form in a mirror will help if you having trouble knowing if you’re overcompensating or not.
Front Racked Kettlebell Bulgarian Split Squat
These were first introduced to me by Anthony Dexmier to improve my pulling ability from the floor. Let’s just say after doing them, we weren’t the best of friends.
Hardcore dead lifters knows that hip mobility, upper back strength and leg drive are essential elements for pulling heavy, and this exercise covers all those bases, if somewhat brutally.
Pairing this exercise with a single arm row variation is a real upper back whammy that you’re sure to enjoy. For example
1A. Front racked kettle bell elevated split squat – 12 reps on each leg
1B. 3 point dumbbell row – 12 reps on each arm
Form considerations – Perform a bodyweight elevated split squat and notice where your big toe is, and then place weight plate in front of it. This will give you a reference point and shorten your set up time between sets. This is courtesy of the one and only Jordan Syatt.
Keep a nice tall chest and your wrists in neutral during this entire movement and smile through the pain.
2) Bench Press
Landmine Press
The single arm landmine press is a mix between a vertical and horizontal movement which makes this great for individuals who lack the shoulder mobility for overhead pressing and for those looking to improve their press numbers.
Note From TG (to Shane): How could you not include a link to THIS article I wrote discussing how to assess overhead mobility and drills to help improve it?
Why Shane…….WHY?!?!?
The beginning of this exercise (initial push of the shoulders) is the hardest part of the movement. This will assist you with pushing the bar off your chest during the bench press or pushing the barbell overhead from a dead stop. The extra core work doesn’t go astray either.
This press can be done from a variety of positions. For example, it can be done standing, tall kneeling and this half kneeling variation courtesy of Eric Cressey:
Pairing this landmine variation with a hip flexor stretch works well and provides an active rest between sides and sets. For example
Form considerations- Make sure the barbell is close to the front of your shoulder and actively squeeze the barbell. This provides Irradiation, allowing you to produce more force and lift more weight. This also turns on the rotator cuff, which helps with shoulder stability.
Single Arm Dumbbell Floor Press
The reduced range of motion of the floor press makes this a great triceps builder (when the elbows are close to your side) and will assist you in getting stronger with the lockout part of any press variation.
The single arm variation will turn on your core and shoulder stabilizers due to the offset load that can get neglected during bench/overhead pressing. It’s a shoulder saver because it eliminates the lower half of the press where the shoulder is externally rotated and nasty things like shoulder impingements can happen.
Pairing this with a side plank or a suitcase carry gives your shoulders and core the extra work they deserve. For example
1A. Floor press
1B. Side plank variation 30 sec/ Suitcase carry – (25-50% of your bodyweight) 30 steps one hand then 30 steps in the opposite hand.
Form considerations- Grip the dumbbell tight or strangle the handle and keep the elbow close to your side but not touching. Touch the entire upper arm to the ground at the start of each rep.
3) Squat
Single Leg Negative Calf Raise
It’s a common issue to lack ankle mobility as we wear shoes that inhibit the movement of the ankles, like wearing high heels, for example. The ability to dorsiflex the ankle (how far the knees can go over the toes without raising the heel) can get compromised and this can show up in the squat.
As the squat movement has to come from somewhere, lacking dorsiflexion can negatively affect the joints further up the kinetic chain especially the knee, and who hasn’t had sore knees (and everything else) at the end of an intense squat session?
If hammering away at ankle mobility isn’t working for you, try this single leg negative calf raise drill from Dr. Ryan DeBell before your squat session. This will help with ankle dorsiflexion under load.
Form considerations- Having something solid to hold on to is a must. If you have pain bending the knee during this drill, please use a pain free range of motion. Do 5-10 reps on each leg before you squat. Your knees will thank you.
Barbell Reverse Lunge- Front Squat Grip
Most lunge variations are interchangeable because they work on knee stability (knees that go out instead of in) and core (reduced base of support) hip mobility (active stretch of the hip flexors) and help build your quad strength and size. Sounds like everything a good squat needs, right?
This variation does this and more. The front squat grip works on your anterior core upper back strength and thoracic mobility which are also needed for a strong squat.
Pairing this with an upper back or anterior core exercise in a superset works well. For example
1A. Barbell Reverse Lunge – Front Squat Grip – 8-12 reps on both legs
1B. Chin up
Or
1A. Barbell reverse lunge- Front squat grip 8-12 reps on both legs
Form considerations- Start on the light side until you nail the technique and feel confident that you’re not going to bite the floor. Keep the ears away from the shoulders and maintain an upright torso during this exercise.
Wrapping Up
Don’t forget about unilateral training when it comes to getting bigger, stronger and more awesome. Including these exercises into your routine will improve your lifting numbers and overall balance and will help keep you off the lifting DL.
You can throw in some single arm curls (for the girls) to keep Ron happy, if you must. J
Author’s Bio
Shane “The Balance Guy” McLean, is an A.C.E Certified Personal Trainer working deep in the heart of Dallas, Texas.
No, Shane doesn’t wear a cowboy hat or boots. After being told that his posture blows by Eric Cressey, he has made it his mission to rid the world of desk jockeys and have fun while doing so.
After all exercise is fun and never a “work” out.
You can follow Shane on Twitter HERE, and Facebook HERE.
Today’s post is more or less an addendum or brief update to THIS article I wrote a few months ago answering the question “how much weight should I be using?
For many lifters – rookies in particular – it’s a perplexing task to figure out what’s an appropriate load to be using on any given lift or exercise. Is it too little, too much, just right? It’s a Goldilocks paradox to say the least.
Some people have an innate sense of intuition that kicks in and are able to figure things out over the course of a few weeks or months. They’re able to adopt the concept of consistent progressive overload (making the effort to do more work over time) and make continued improvements and progress towards their goal(s).
[NOTE: keeping a daily training log helps tremendously here. If you’re not doing this 1) please smack your forehead 2) do it again and 3) no, really, do it.]
Others, however, lack the Spidey-sense. I mean, I get it: walking into a weight room is daunting enough. You have some guys grunting louder than an elephant passing a kidney stone, and the fume of AXE body spray you have to walk through is enough to give you a contact high. Those two things alone are super intimidating for some people.5
What’s more, there are a bevy of other factors to consider: optimal # of sets/reps, rest periods, tempo, exercise order, and, of course, how much weight to use? And then, most important of all, is technique on point? It’s no wonder some people end up feeling like this:
To no fault of their own many fall into the trap of “winging it” and haphazardly choosing a weight to use for any particular exercise and stay there; week in and week out, month after month, and in worse case scenarios, even years, and often end up frustrated due to lackluster results.
How many times have you heard this from a friend, family member, or colleague:
“Can you please put some pants on? I’ve been working out for [insert “x” number of weeks/months/years here] and I never seem to get results.”
My suspicion is that 9/10 times the culprit is the fact most people are UNDERestimating their ability and not challenging themselves enough.
This is where AMRAP (As Many Reps as Possible) sets can be handy. If I program an exercise for 8-10 reps, I’ll sometimes have the last set be for AMRAP. If, on the last set, they hit 10, maybe 11 reps I know they’re using a weight that’s challenging enough. If they end up hitting 23 reps I know they’re low-balling themselves and we need to up the load.
I’m fortunate in that I live in this pretty baller strength & conditioning bubble where I can control most – if not all – the variables when it comes to the clients and athletes I train.6
Especially for those I work with in-person.
I’m there to observe how they’re feeling on any given day, to watch technique and bar speed, and I can serve a judge and jury when it comes to weight selection during any given session.
Where things become suspect is when I’m not there to offer advice in person or when I’m working with a distance-based client and am unable to provide instant feedback.
How do I help them gauge whether or not they’re using enough weight? Or maybe too much? What happens then?
In recent years I’ve grown to be more of a fan of using percentage-based trainingwith the programs I write, particularly for those whom I do not work with in a one-on-one fashion. I’m a firm believer in programming out workouts with specific weight and rep guidelines – if for nothing else to give them a sense of purpose or “goal” for the day. Hit “this” number then do “that.”
That said, lifters don’t always feel the same everyday. Some days they feel like a rockstar and end up deadlifting a bulldozer for reps. Other days the feel like they got run over by a bulldozer, and what was planned for that day just isn’t going to happen.
This is where the concept of AUTOREGULATION enters the conversation. Coaches like David Dellanave and Jen Sinkler have done a fantastic job of speaking to this phenomenon (more specifically referred to as BIOFEEDBACK) in recent years and how it behooves trainees to use ROM testing to figure out what variation of a particular lift is the best fit for that day.
Here’s an example (say it’s deadlift day…yay):
Perform a toe touch screen, and note where you begin to feel tension.
Set up as if you were going to do a conventional deadlift and perform a few reps.
Re-test your toe touch. Is it better or worse?
If the former, you know you’re good to go with conventional deadlift that day. If it’s latter, maybe perform the same sequence, albeit with a sumo stance or Jefferson stance?
Re-test and see if there’s an improvement. If so, roll with that variation for the day.
Travis Pollen wrote an excellent review on the concept HERE.
We can take the idea of autoregulation and use it to dictate our loads on a daily basis too. More to the point: we can start to introduce the concept of Auto-regulatory Progressive Resistance Exercise (or APRE).
“A beginner gets stronger just by lifting. Any program works for a beginner. An intermediate powerlifter needs strength specific programming to get stronger. An advanced lifter with many years of competitive experience, lifting very heavy weights, needs to program recovery into his work outs. The beauty of the APRE (Auto-regulatory Progressive Resistance Exercise) programs is that all categories of lifters from novices to experts can benefit with this type of program.”
It’s by no means a new concept. Many coaches have written about it in the past (and I have linked to their respective articles in this post).
In short, APRE is a great way to introduce flexible training and to better match loads you use to how you feel on a daily basis.
I’ll explain in a second, but the cool thing about this approach – and as Eric Helms noted in THIS review via the NSCA – is that it proved very successful in one study compared to traditional linear progression with regards to strength gains.
“The APRE group improved by an average of 21 lb more in the 1RM bench press test, 35 lb more in the 1RM squat test, and three repetitions more in the bench press to fatigue test than the LP group.”
Granted it’s only one study – and a relatively short-lived one (6 weeks) at that – but holy shit.
APRE is a four set system. The first two are build-up sets with the second two involving two sets to failure. The third set is a “test” set where you perform as many reps as possible with your 3RM, 6RM, or 10RM. From there, depending on how many repetitions you get, you adjust the weight on your fourth (and last set).
This is a brilliant system, and one that can be implemented to help people better ascertain their weight selection on any given day depending on how they feel.
Lets use an example (squat – 6 RM protocol): 315 lbs
Set #1 = 50% of 6RM x 10 reps (155 lbs)
Set #2 = 75% of 6RM x 6 reps (235 lbs)
Set #3 (Test Set) = AMAP with 6RM (315)
Here is where day-to-day shenanigans come into play. How much sleep someone got the night before, hydration levels, stress at work, stress at home, and any number of other factors can affect performance on any given day. The TEST SET serves as a form or AUTOREGULATION.
Depending on the number of reps completed in the test set will dictate the load on the LAST set. See chart above.
Set #4 = ???
Can you see the value in this approach? Especially when it comes to weight selection with main lifts such as squats, deadlifts, and bench press?
I hope so, because it’s very effective and simple to implement. And I know what some of you may be wondering: “what about the 3RM and 10RM protocols?” Well, as it happens, Tim Henriques constructed a BOMB spreadsheet that you can download for free – HERE – which allows you to pluck in numbers at your discretion for each protocol. Holla!
Now you have no excuses not to push yourself harder in the gym. Go get it.
With more and more personal trainers entering the industry faster than Marvel and DC Comics can resurrect D-list characters to put into their movies7, it’s becoming more readily apparent how ill-prepared some (not all) are when it comes to writing effective training programs.
Today’s guest post, courtesy of Tennessee-based coach, Andy van Grinsven, helps to shed some light on the topic and remedy the situation. Enjoy.
Program Design Considerations For the New Personal Trainer: What You’re Missing
It’s five after, and my client is running late. Like an owl I spin my head round and round checking first the door, then the suspiciously empty squat rack, and back to the door, tapping my clip board with feverish anxiety.
My client arrives. “Hey there! How was your weekend? Ready to get started?” Like Fred Jones I wave of my arm as if to say “come on, gang!” I’m listening to my client while trying to break the speed-walking world record on my way to the rack.
Then it happens. Like a swarm of vultures a group of teenagers snag the only squat rack in the gym. Nut punch. Now what?
Personal trainers and coaches pride themselves in their ability to write programs: sets and reps, rest periods, organization, periodization, and all the other details that make a program, a program. And at the end of the day, we hope this program turns our clients into card-carrying certified badasses.
Any trainer worth his weekend certification can put together a program. It’s not that hard: pick some exercises, assign some stuff to them, and voila! You’re a coach.
But what happens when you actually hit the trenches and start training these clients? Does your program actually work? Does it fit the context of the gym and client? Does it make them better?
I’ve been training, largely in community gyms, for the better part of 7 years. I’ve written countless programs. However, the number of times I’ve been able to execute a program 100% as written is likely less than 10.
Why?
Because when life throws you a bunch of teenagers in the squat rack, you make do with what you’ve got left (after cursing the Gods, and maybe, crop-dusting them).
Suddenly, your perfect program gets shot down because the equipment you needed is occupied.
Or your client just got back from a 2-week vacation. Or your client slept poorly. Or they stayed up late watching Friends reruns.
Your program means nothing if it can’t roll with the punches.
Exercise selection, sets, reps, and rest periods are great. But there’s a few things you ought to consider along with the meat and potatoes of your program:
Program Design Considerations: What Your Certification Course Forgot to Mention
1.) WHO is your client?
Are they an athlete? Are they a bodybuilder? Powerlifter? Or just some regular Joe trying to lose
belly fat?
This question might sound silly, but you may be surprised to see many coaches and trainers blindly fit all their clients to one style of training:
Powerlifters like the “Big 3,” so every client is barbell benching, squatting, and deadlifting.
Bodybuilders chase max muscle, and often write programs with titles like “chest day” or “leg day.”
This is, of course, appropriate, if the client is a powerlifter or bodybuilder. But what if they’re not? How do you write a program for the regular Joe?
Do both styles of training, and the tools they prefer, have a place in your program? (<–the answer is probably, yes)
2.) What’s Important?
You’ve got your exhaustive list of exercises: squat variations, different hand position, barbells, TRX, medicine balls, boxes, and the list goes on.
In this crazy world of fitness and exercises, which ones are most important for your client? What do you choose, and how do you implement them?
Develop your own “10 Most Important Things” list. This list will serve as the foundation for your program design.
Here are my 10 Most Important Things (in no particular order):
Squat
Hip Hinge
Push-ups
Chin-ups
Lunge
Row
Carry
“Power movement”
Crawl
Anti-movements (planks, Pallof presses, etc.)
For me, these 10 represent the most important things I need to coach all my clients. The style of squat; the type of hip hinge; how many push-ups they can do; and the “power movement” will all differ client-to-client, but they’re all things my clients will do with me. If I’ve covered these 10 things, we’re going to be in good shape for both the gym and life.
If you must leave your client with only 10 things, what would they be?
3.) What Are the Client’s Goals?
I get it: squatting is a ton is fun. Being super strong is awesome. But does your client want to squat a metric shit-load? Do they even know if they do or don’t? Further, how strong is “strong enough?”
Remember: you’re in business to help your client. If being as strong as humanly possible is their goal, then get after it. If not, reassess “why” you’re designing your program to include heavy squat sessions. They might not be appropriate for this client, or many of your others.
Now before you go writing me off as some soft coach, hear me out: I agree that everyone needs to be “strong.” Helping your client get stronger is helping them build muscle, boost confidence, and reduce their risk of injury.
But, how we get them stronger is through progressive overload, not necessarily the tool: dumbbells, barbells, and TRX each provide a stimulus to help your client get stronger.
I encourage you to evaluate how you define strong and evaluate the methods you use to make your clients strong.
Sometimes, a goblet squat is all you’re ever going to need.
4.) What Does Your Client Need?
You’ve established the client’s goals: shed body fat, get stronger, and look great naked again.
What if your client wants to squat a brick shit-house, but can’t squat to parallel with body weight?
Maybe they want to run next year’s full marathon, but they’re carrying an extra 50 pounds of fat.
Get your clients to their goals, but assess their needs along the way. If they have the body awareness of a 2-year old and joint mobility that would make the Tin Man cringe, we’ve got some work to do first.
Whether these things pan out during your first few sessions or are discovered through your screen is up to you, but make sure you’re using the safest and most effective methods for their abilities right now, and not where they think they are.
5.) What CAN You Do?
It’s not what you want to do, it’s what you can do.
There have been numerous times I’ve walked into the gym, program in hand, and had to make adjustments, X-out exercises, and switch my order.
Why? The teenagers in the squat rack. My client didn’t sleep well. The lat-pulldown is out for maintenance.
What are you going to do now?
1. Roll with it
I’m all for program writing and I love the enthusiasm but have progressions, regressions, and other options that can get the job done.
For most everyone, like 99% of the people you’re going to work with, it won’t matter whether you squat them with a bar, dumbbell, or kettlebell. It won’t matter if your hip hinge movement is KB swings instead of deadlifts. It won’t matter if you choose to do push-ups over DB presses.
All that will matter is that you’ve provided a stimulus and a fun training experience.
Why? Because good, hard work, trumps no work at all. And in the grand scheme of things, most of your clients just want to move well and feel well, get a good workout in, and be on their way.
2. Assess Readiness
Many coaches, many smarter and more experienced than I, will use Heart Rate Variability or some other tool to assess “readiness” of the client or athlete before the training sessions starts.
If you have the tools and like to use them, great. If not, borrow my “RPF,” or 0-10 Rating of Perceived Feels scale:
A zero (0) on the scale roughly means “Andy, I’d rather throat punch you than work out today.”
Ok. No problem. Maybe we’ll de-load or reduce the volume on some things.
A 10 on the scale roughly means “Andy, I’d like to fight Superman today.” Great! Let’s get after it: slap on more weight; more sets; and more intensity.
Your 0-10 might mean different things to you and your client, but make it fun and relatable. At the very least, you’ll get a laugh out of them with the silliness.
My RPF scale is a simple, subjective tool that gives you an idea of the state your client is in before you start hitting the weights. Make changes accordingly.
Conclusion
Writing a program doesn’t have to be complicated, however, these are considerations most don’t take into account when designing a program.
It’s easy to jot down the program that *you* would want to do, but is it appropriate for the client? Is it appropriate for the context of the gym and client’s goals?
Answer these questions before you even sit down to write the program, and have progressions, regressions, and built-in flexibility with your exercise selection.
If you can do that, I promise you’ll write better programs and rarely run into trouble.
About the Author
Andy is a personal trainer and strength coach based in Nashville, TN. He likes deadlifting, coffee, and BBQ. His clients range from college age to retirement, but the message is still the same: lift safely and progressively, then rule the world. You can find him on Facebook and Instagram, or on his website HERE.
Today’s guest post comes courtesy of Dallas based personal trainer, Shane McLean. If you forced me to make a short list of things I love, that list would include things like ice-cream (all of it), GoodFellas quotes, anything my cat does, old-school Transformers cartoons, and an empty laundry mat.8
And, you know, my wife would make the list too. Oh, and deadbugs. The exercise…not, literally, dead bugs. Gross.
Read below to watch some (hopefully) new-to-you variations.
Ever witnessed a “watch me pull a rabbit out of my hat” moment?
Mine was around three years ago at a fitness mastermind in Frisco, Texas which had the one and only Eric Cressey in attendance.
During his demonstration he got hold of a minor league baseball player who presented with limited shoulder flexion. After some positional breathing exercises and a few deadbug reps, the player then stood up and demonstrated his improved shoulder flexion range.
It was just like magic.
Ever since then, the deadbug has been a staple programs for myself and my clients. You could almost say it was love at first sight, if you believe in that kind of stuff.
Tony has written extensively on this subject, so I will not harp on, but the benefits of deadbugs are numerous, including
Reinforces contra lateral limb movement
Improves lumbo- pelvic stability
Reinforces correct breathing patterns
Being on the floor provides you with more stability and kinesthetic feedback
Prevents misalignment and encourages good posture
It’s definitely an exercise that provides a lot of ah-ha moments when done correctly. It may look easy to the meatheads who have never done it before, but once I drag them away from the mirror, they know it’s the real deal.
But when they ask me why it is called the deadbug, the best explanation I can give is this.
If you need to be reminded of what the dead bug is, watch Tony perform this with impeccable form.
Notice how serious he is:
Correct deadbug form consists of:
Low back in neutral (encouraging posterior pelvic tilt)
Breathing in through the nose before the rep starts and fully breathing all the air out through your mouth during the rep
Slow and controlled limb movement
No rib flaring and arching of the low back
The standard deadbug is a great warm up exercise and can be used for recovery/mobility purposes between sets of lifting heavy. This is the version you should be doing the majority of the time.
However, like a lot of things that we do over and over again, we get bored and need a little spice. When you’ve nailed the standard version and want to upgrade, take a few of these variations out for a test drive.
You’ll be the coolest person in the gym. Trust me, I’m a trainer.
1) Pullover Deadbug
Kettlebells and the deadbug is a match made in heaven, like peanut butter and jelly or bicep curls and mirrors.
The instability and the resistance of the kettlebell combined with the standard deadbug movement put extra demand on your core stability, shoulders and lats.
Did I mention it also works the chest? Now I have your attention.
Pairing this exercise with a movement that demands core stability and a neutral spine works best. For example
1A. Squat/Deadlift Variation
1B. Pullover Deadbug 6- 8 reps per leg
Or seeing you’re already down on the floor, pair it with a single arm floor press for a great upper body/core workout.
1A. Pullover Deadbug 6-8 reps on each leg
1B. Single Arm KB Floor Press
2) Weighted Deadbug
Adding light weight plates in each hand (2.5-5 pounds) slightly increases the intensity, but the real benefit is that the resistance helps slow down the movement as the weight plate descends towards the floor.
You get to enjoy the deadbug even more.
Typically, I use this movement as part of a warm up, but if you’re feeling extra ambitious, pairing this with a plank variation will give your core a double whammy.
For instance:
1A. Weighted deadbug 6-8 reps each leg
1B. Plank with plate switch (Thanks Tony)
3) Stability Ball Deadbug
The virgin deadbuger can run into trouble with contra lateral limb movement and often extend the same arm and leg. They get frustrated and can feel uncoordinated.
Enter the dragon stability ball.
Using the stability ball as a reference point helps teach the movement because using the same arm/leg will cause the stability ball to drop to one side and the client will feel the tension required for correct form as well.
Actively pressing your opposite arm/leg into the ball combined with diaphragmatic breathing will light a candle under your core that you’re sure to enjoy.
I program this variation into the warm up but this can be included in a core tri-set. For example.
1A. Stability Ball Deadbug 6-8 reps on each side
1B. Stability Ball Hip Ext./Hamstring Curl 12 reps
1C. Stability Ball Rollout 8-12 reps
A young Eric. Those were the days.
5) Bosu Ball Deadbug
Yes, the Bosu ball is good for something.
Bosu balls’ instability is excellent for upper body/core work and can take your deadbug to the next level. You’ll have to work to find your balance point but if you fall off, at least it’s not very far.
Please make sure no one’s filming, for your sake.
Pairing this with any Bosu ball exercise works as long as it’s not squats. For example
1A. Bosu Ball Deadbug 6-8 reps on each side
1B. Bosu Ball Side Plank 30 seconds on each side
https://youtube.com/watch?v=tjzuv9O6Q1E
Bonus – Click HERE for another great variation of the deadbug Tony highlighted a few weeks ago on this blog: Deadbug with Extension + Reach.
Wrapping Up
The deadbug, and its variations, deserves a prime time position in your routine because of all the benefits it provides. Don’t worry, you’ll will not look weird because all the cool kids are doing it.
About the Author
Shane “The Balance Guy” McLean, is an A.C.E Certified Personal Trainer working deep in the heart of Dallas, Texas.
In case you aren’t picking up what I’m putting down from the title of this post, what you’re about to read is not about climate change, political reform, or ranking the best painters and architects from the Rococo Era.9
No, no…what you’re about to embark on is a little journey and discussion on pecs. You know, these guys:
Every since man first noted how lifting heavy things – rocks, tree trunks, people – over and over again often resulted in a more muscular physique, he’s been obsessed with building his pectoral muscles, or pecs for short.10
“Obsessed” is a bit of a downplay here. You know how young teenage girls are obsessed with Justin Bieber and how their lives were ruined the other day when he decided to delete his Instagram account?
Well, that pales in comparison to how much guys are obsessed with training their chest. Take that away from them, and you’re bound to see an uptick in the sales of pitchforks.
So, um, yeah…guys like to train their pecs.11The question, then, is why do so few have sub-par pec development?
Walk into just about any gym on the planet on Monday, Tuesday, Wednesday, Thursday, Friday, Saturday, or Sunday and you’re bound to see any number of guys finishing up the 47th set of bench press.
What gives?
NEWSFLASH: The Bench Press Isn’t a Super, Duper Pec Developer to Begin With
[Cue Dramatic Chipmunk here]
https://www.youtube.com/watch?v=a1Y73sPHKxw
Sorry fellas: it isn’t.
I get it. Me saying the bench press isn’t the most “pecy” exercise is akin to me saying Kate Upton isn’t attractive, or that pizza isn’t delicious, or that The Empire Strikes Back isn’t the best Star Wars movie.12
Don’t get me wrong, it’s still a very effective exercise to build both mass and strength (there’s a reason why the bench press is 1/3 of the holy trinity or “Big 3” of any successful strength & conditioning program). Hoisting a barbell off your chest thousands of times is going to result in something happening.
However, if you want to get geeky about it, and if your goal is to actually build your pecs (and not necessarily gain some powerlifting street cred), then you could make an argument that the bench press isn’t the ideal way to go about things.
Your pec (namely, Pectoralis Major) muscles have two origin points:
Clavicular Head – on the anterior border of the (medial half) of the clavicle.
Sternal Head – on the anterior surface of the sternum.
As far as actions are concerned, the Clavicular Head aids in flexing the humerus; the Sternal Head aids in extension and adduction of the humerus…neither of which are optimally “stimulated” with the bench press.
Do the pecs get targeted during a set of bench press? Yes, absolutely. Does the bench press, typically, allow for a person to use the most weight in overloading their chest musculature? Yep. And does Dr. Brad Schoenfeld, in his recently released book, Science and Development of Muscle Hypertrophy state, repeatedly, that one of the major drivers of hypertrophy (muscle growth) is mechanical tension?
YES…GOSH. GET OFF MY BACK!
The bench press can (and should) be part of an overall approach to building pecs that would make Superman swoon. However, as Schoenfeld notes:
“Research indicates that mechanoreceptors are sensitive to both the magnitude and temporal aspects of loading.”
In non-Elvish speak this basically refers to the differentiation of peak concentric, eccentric, and isometric actions of muscles and how research demonstrates that time under tension is often the de-facto consideration with regards to hypertrophy.13
Cool, we’re all on board with that.
However, in addition, Schoenfeld notes:
“Mechanoreceptors also appear to be sensitive to the type of load imposed on muscle tissue. Stretch-induced mechanical loading elicits the deposition of sarcomeres longitudinally.”
During the barbell bench press, the pecs are rarely (if ever) taken through their full ROM, and this can be a significant strike against why it’s not the best choice when it comes to developing pecy pecs.
https://www.youtube.com/watch?v=1ytCEuuW2_A
What to do, what to do?
1) Relax, You Don’t Need To Ditch the Bench Press
Not that I was worried this was going to happen, mind you.
The bench press is still relevant to the discussion…it’s just sometimes, you know, a bit overplayed. To that end, it bodes in your favor to experiment. Flat, decline, incline, close-grip, wide-grip, rest/pause, clusters, high-rep, low rep, whatever the case me be…..use them all.
However, if your goal is to really engage the pecs you may be better off doing all of the above with DUMBBELLS.
Dumbbells allow for a bit more wiggle-room with ROM (humeral extension), in addition to involving more of an adduction component.
Also, if you wanted to up the ante even more, try some squeeze presses:
2) Perform More DB Flyes
Yeah, I said it. DB flyes, yo.
Now, of course, I wouldn’t say this should be your main movement of the day (since you’re less likely to use a ton of weight on these compared to bench variations), however flyes are an excellent secondary or accessory movement to compliment things.
Namely because they really work the pecs in adduction…..something that doesn’t happen with a barbell.
These can be tricky with regards to shoulder health, so if you’re someone with a history of shoulder issues, one way to make these are more “user friendly” is to perform Pause DB Floor Flyes:
https://www.youtube.com/watch?v=d1lVf6–0aQ
Doing so will help you stay out of end ranges of motion that may compromise the shoulder, yet you’re still working the pecs in an action they’re designed to do (at least concentrically): humeral adduction.
3) Push-Up Adduction Holds
I stole this concept from fellow strength & performance coach, Eric Bach. Assume the starting position of a push-up, but then instead of going up and down…try to “bunch up” the floor with your hands and hold for a 10-20s count.
You want to talk about feeling a major burn/pump in your pecs, this it. And, to bring flyes back into the conversation try this killer superset I also stole from Eric Bach:
A1. Push-Up Adduction Hold x 10-20s
A2. Pause DB Floor Flyes x 8-10
A3. Bounce a quarter off your chest x infinity.
4) Add Accentuated Eccentrics
The idea of accentuated eccentrics was first introduced to me by Christian Thibaudeau back in the early 2000’s.
It’s no secret to any meathead that the eccentric portion of a lift (yielding, lowering) is where we’re strongest and where the most muscle damage occurs.
This can elicit profound gains in muscle and strength.
One method to take advantage of that fact is accentuated eccentrics, the more popular of which are super slow eccentrics and negative training.
This technique is fairly simple: using a moderate to heavy load (60-85% of your max) you execute a super slow yielding phase while lifting (overcoming) the bar explosively. The following table gives you the parameters to use depending on the load you select:
Load
Yielding Portion
Reps/Set
Load
Yielding portion
Reps/Set
60%
14 sec.
3
75%
8 sec.
2
65%
12 sec.
3
80%
6 sec.
1
70%
10 sec.
2
85%
4 sec.
1
This type of accentuated eccentric training is fairly easy to do and can yield impressive muscle size and tendon strength improvements.
Negative Training
“Negatives” basically refer to performing only the yielding portion of an exercise and having spotters lift the bar for you. You should use a load that’s between 110 and 130% of your maximum when performing negatives. The time of the action (lowering) depends on the load:
10 seconds if the load is 110-115%
8 seconds if the load is 115-120%
6 seconds if the load is 120-125%
4 seconds if the load is 125-130%”
Another, albeit less sexy approach, is to add an accentuated eccentric during a set of push-ups. I know Dr. John Rusin is a fan of these. Often I’ll have my athletes/clients perform a set of 5-10 reps and then hold their last rep in the bottom position for a count of 10-20s:
Again it’s a nice way to emphasize the eccentric portion of a lift AND increase time under tension (under stretch).
And that’s it on my end.
Have any tricks of the trade to add yourself? Share them below in the comments section or mozy on over to Facebook and leave a comment there.
Except, you know, in this case “it” has less to do with the Night King, White Walkers, and the impending doom of man, and more to do with shoulder and hip assessment, corrective exercise, strength & conditioning, and programming strategies to optimize performance in the weight room.
Dean Somerset and I filmed our Complete Shoulder & Hip Workshop in Oslo, Norway this past spring and we’re excited to give everyone a sneak peak on what to expect:
Yes, the music is a bit dramatic. We were originally gonna go with “Wu-Tang Clan Ain’t Nuthin to F*** Wit” or “You’re the Best Around” from the Karate Kid soundtrack, but figured both were a bit more dramatic.14
In any case, we’d be honored for you to take a look. And stay tuned for a release date in the very near future.