I had to take a break from The Fitness Summit last year for two reasons:
1. Eating way too many cookies.
2. But mostly because I succeeded in making a baby and my wife would have tossed me so much shade if I was all like “Hey Babe, going to KC for three days. Toodles.”
Well this year I’m back and excited to take part in a Fitness Summit first. Dean Somerset and I will be putting on a Pre-Conference day where we’ll spend a few hours test driving some new material as a follow-up to our Complete Shoulder & Hip Blueprint.
Tentatively titled The More Completer Hip & Shoulder Blueprint.
We’ll be taking deep dive into squat and deadlift technique: discussing ankle, foot, hip and upper extremity considerations in conjunction with regressions/progressions and programming. Whether you’re a coach or just someone who likes to lift heavy things you’ll undoubtedly learn something. And if not, cool, you still get to hang out with us for a few hours.
Registration is now open for returning and new attendees. Come experience one of the best fitness events of the year.
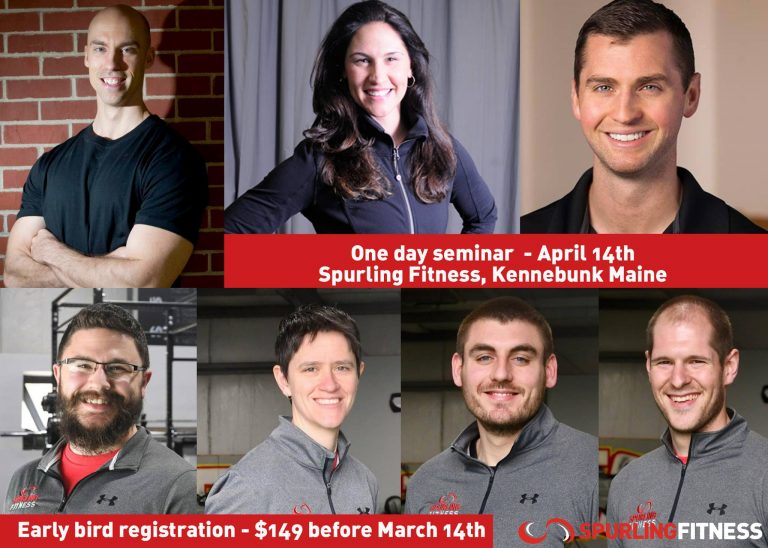
I’m excited to announce that both myself and my wife, Dr. Lisa Lewis, will be presenting at the inaugural Spurling Spring Seminar at Spurling Fitness in Kennebunk, ME in a few months.
If you live in New England and you’re a fitness professional you won’t want to miss it. Early bird special is currently in effect.
Having the ability to differentiate between what you think should be happening and what actually is happening is often what separates the good coaches from the excellent ones.
As a self-described Diet Coke fan I approve this message.
Thanks TC!
Social Media Shenanigans
Twitter
General Rule: For optimal performance you want to “pin” shoulder blades together and down (think: bench press). For optimal health you want the shoulder blades to MOVE (think: push-ups). Protraction/reaching is kind of a big deal.
Straight sets, pyramid sets, drop sets, cluster sets…
…it can all be rather confusing to the newbie lifter, or even seasoned veteran. How many sets should you do? What exercises are the best fit? What about rest? Is it normal to not feel the right side of your face?
All are pertinent questions and with today’s guest post Dallas based personal trainer, Shane McLean, helps to clear the air.
When I first started lifting, I had no idea about all the different types of sets.
When I went to the gym, I would saunter over to the dumbbell rack and bust open my biceps with some curls.
And when I did curls, I did them it front of the mirror and the whole gym knew about it.
However, my biceps remained small and so did I.
That’s until I started learning about all the set schemes that exist in the iron universe. Like most boys when they started out lifting weights, I did the workouts from muscle magazines hoping that it would make me look like the guys on the cover.
That didn’t work out at all but, it was the first time I heard about pairing sets together, known as supersets. You mean you could pair exercises together, increase training efficiency and build muscle all at the same time?
My mind was blown.
This led me further down the rabbit hole of all the different set methods which in turn led me to be armed with a coffee cup, a clip board, a stopwatch and telling people what to do with a dumbbell while wearing comfortable pants.
Yes, that’s right I’m a Personal Trainer.
Now you can benefit from my 25 years in the iron game, with eight of those years writing programs for people that get results.
Read on and learn things.
NOTE: These are guidelines and there will be exceptions to the information presented here.
1) Straight Sets
What Are They? – Doing just the one exercise for one or multiple sets with rest in between sets
The Best Use For Straight Sets? – They’re often used for barbell exercises like deadlifts, squats, presses and rows. All your energy is focused on getting stronger with that one move.
Types of Exercises That Straight Sets Work Best For? – Compound barbell/dumbbell like those discussed above.
How Many of Sets Should You Do?– It depends on how many reps in each set. More reps mean less sets and less reps mean more sets. Another factor is load. The closer you are to your one rep max, you’ll do less reps more sets and vise versa.
For example- 3 sets – 3 reps 90% 1 rep max. Or 4 sets of 5 reps 83% 1 rep max.
How Much Rest Between Sets?– usually 2-3 minutes rest between sets.
2) Supersets
What Are They?– Is one set of an exercise is performed directly after a set of a different exercise with minimal rest in between them.
The Best Use For Supersets?– They’re ideal for building muscle, fat loss and for those who have a limited amount of time to train.
Types of Exercises Supersets Work Best For?– Really anything goes here. Barbell, dumbbells, kettlebell, bodyweight, resistance bands and machine exercises all work. You can use compound (exercising multiple muscles groups) or isolation (single muscle) exercises.
Different Types of Supersets
1. Compound supersets, when both exercises work a similar body part.
For example:
1A. Squat
1B. Lunge
2. Non-competing supersets, pairing a lower body exercise with an upper body exercise.
For example:
1A. Squat
1B. Dumbbell bench press
3. Isolation/compound supersets which you pair a single joint exercise with a compound movement or vise versa.
For example:
1A. Triceps extension variation
1B. Barbell bench press
How Many of Sets Should You Do? – Anywhere from 2- 5 sets (depending on how much time you have to train) and repetitions can range from anywhere between 6- 15 reps per set.
How Much Rest Between Supersets? – Limited rest between the exercises themselves and anywhere between 60-120 sec rest between supersets.
3) Tri-Sets
What Are They? – Doing 3 different exercises back to back to back.
The Best Use For Tri-Sets?– They are ideal for fat loss, muscle building and for people who want maximum training efficiency.
Types of Exercises Tri-Sets Work Best For?– Really anything goes here also. Barbell, dumbbells, kettlebell, bodyweight, resistance bands and machine exercises all work. Furthermore, having all the equipment close to you will cut down on transition time between exercises.
Different Types of Tri-Sets
You can use them to bring up a lagging body part.
For example, shoulders:
1A. Single arm shoulder press
1B. Lateral shoulder raises
1C. Reverse fly
Or mobility tri sets to help improve your movement.
For example, hip mobility exercise for the squat:
1A. Goblet squat
1B. Push up
1C. Half kneeling hip flexor stretch
Or when pushed for time you can combine strength and cardio exercises to get the best of both worlds.
For example:
1A. Leg exercise
1B. Upper body exercise
1C. Cardiovascular exercise 30- 60 seconds
How Many of Sets Should You Do? – Usually 3- 4 sets and anywhere between 6- 15 reps per exercise.
How Much Rest? – Limited rest between the exercises and 90-120 seconds rest after each tri-set.
4) Timed Sets
What Are They?– Doing an exercise for certain amount of time or completing the programmed reps in a certain amount of time.
The Best Use For Timed Sets?– They can be used for building muscle but they’re excellent for incinerating body fat.
Types of Exercises Timed Sets Work Best For?– Any piece of equipment that allows for an easy transition between exercises is a winner. For example, barbell, dumbbell, bodyweight, kettlebell and resistance bands.
Different Types of Timed Sets
Every minute on the minute sets where you complete a certain amount of reps and then rest the reminder of the minute before moving on to the next exercise.
For example:
1A. Goblet squat- 8 reps
1B. Row- 8 reps
1C. Goblet reverse lunge- 8 reps on each leg
1D. Chest press- 8 reps
1E. Biceps curls – 8 reps
Or you can scrape the reps and it’s just you versus the stopwatch where you try to do as many reps as possible in a pre-determined timeframe. For example, a full body circuit using bodyweight, barbells and dumbbells.
1B. Push variation- Incline push up, Push up or Dumbbell bench press.
1C. Single leg exercise- Reverse lunge, Forward lunge or Side lunge
1D. Pull variation- Rack pull, Dumbbell bent over row or Standing cable row.
1E. Core- Alternating side plank, Mountain climbers or Front plank.
How Many of Rounds Should You Do? – It depends how long you’ve got to train. Using the above examples, these circuits takes 5 min to complete so 3- 5 rounds would suffice.
How Much Rest?– You rest when you’re done.
5) Ladder Sets
What Are They? – One big superset when you compete the reps of both exercises in an ascending or descending order. For example, 10-9-8-7-6-5-4-3-2-1 or 1-2-3-4-5-6-7-8-9-10.
Best Use For Ladder Sets – They’re great way to finish your training and to add volume to a body part that needs working on. Furthermore, they can be used for a stand-alone training when pushed for time.
Types of Exercises Ladder Sets Work Best For?– Bodyweight, kettlebells, medicine balls, battle ropes and dumbbells work great.
For example, the kettlebell swings/medicine ball slam combo:
Instructions:Do 20 reps each of the swings and the slams and go down by 2 each time you perform a round until you reach two reps for each exercise (for example 20-18-16-14….2). If you don’t have access to medicine balls, substitute in battle rope slams.
Battle Rope Slams
Med Ball Rotational Slam
https://youtube.com/watch?v=YHgXAFY4H1Q
How Many Rounds Should You Do?– Just one will do, if you’re doing it right.
How Much Rest? –Again, you’ll rest when you’re done.
6) Cluster Sets
What Are They?– Sets with a predetermined rest period between reps within the same set.
For example:
Load the barbell to 85-90% of your maximum, a weight you could normally lift 3 times.
Do one rep and rack the bar.
Rest 10 seconds.
Do another rep and rack the bar.
Rest for 10 seconds.
Do this 4-6 times total
Best Use For Cluster Sets– They’re best used for building strength but be warned, when using heavier weights with shorter rest periods while increasing volume can lead to fatigue.
For example, (4×2) x5 sets – is 5 total clusters of 4 mini sets of 2 reps with 10 seconds rest in between. That’s 40 reps at 85-90% of your 1 rep max.
Types of Exercises Cluster Sets Work Best For?– Barbell exercises like squats, presses and rows but can be used for chin-ups also.
How Many Sets Should You Do?– Anywhere from 3- 6 clusters.
How Much Rest Between Clusters? – 3 minutes or more between clusters because of their demanding nature.
7) Drop Sets
What Are Drop Sets? – Is a method where you perform an exercise and then reduce the weight (usually 15- 30% drop) and continue for more reps until you reach failure.
Best Use For Drop Sets– Ideally, it’s your last set of the day. This method is used to add muscle and volume to a body part. However, it’s not for the faint of heart because you will feel the burn.
Types of Exercises Drop Sets Work Best For – Barbell, dumbbell and machine exercises.
A Different Type of Drop Set
Rather than dropping the weight and lifting till failure, you can perform mechanical drop sets where you use the same weight the entire time. You start an exercise in a mechanically weaker position to one in which you’re in stronger position.
For example, the dumbbell bench press mechanical drop set:
https://youtube.com/watch?v=KfYNhAGAm0w
This is a truly sadistic method for building muscle, but it works. If you want more ideas, read this excellent article by John Romaniello.
How Many Drop Sets Should You Do? – Once per training and probably no more than twice per week.
How Much Rest? – If you’re doing it right, you’ll need a nap.
Wrapping Up
Wow, you got to the end and you’re probably hungry. Please go get some protein.
Now, you’re armed with the knowledge to take your training to the next level and to hulk smash your way through any plateaus. Happy lifting.
About the Author
Shane “The Balance Guy” McLean, is an A.C.E Certified Personal Trainer working deep in the heart of Texas. Shane believes in balancing exercise with life while putting the fun back into both.
I’ve had the honor of presenting at two previous iterations of the Motivate & Movement LAB (the brainchild of MFF’s Harold Gibbons) and it’s unequivocally one of the most unique events in the fitness industry.
Think: TED Talk, but with deadlifts and lots of f-bombs.
Anyways, the next LAB is this coming February, and will feature myself, Dan John, Pete Dupuis, my wife (Dr. Lisa Lewis), and several of the MFF coaching staff including Brian Patrick Murphy and Amanda Wheeler.
I had to take a break from The Fitness Summit last year for two reasons:
1. Eating way too many cookies.
2. But mostly because I succeeded in making a baby and my wife would have tossed me so much shade if I was all like “Hey Babe, going to KC for three days. Toodles.”
Well this year I’m back and excited to take part in a Fitness Summit first. Dean Somerset and I will be putting on a Pre-Conference day where we’ll spend a few hours test driving some new material as a follow-up to our Complete Shoulder & Hip Blueprint.
Tentatively titled The More Completer Hip & Shoulder Blueprint.
We’ll be taking deep dive into squat and deadlift technique: discussing ankle, foot, hip and upper extremity considerations in conjunction with regressions/progressions and programming. Whether you’re a coach or just someone who likes to lift heavy things you’ll undoubtedly learn something. And if not, cool, you still get to hang out with us for a few hours.
Registration is now open for returning and new attendees. Come experience one of the best fitness events of the year.
I’ll go a head and say it: I feel this is one of the single most important courses I have ever taken.
If you train women it behooves you to understand the intricacies surrounding this topic: pelvic floor dysfunction, prolapse, incontinence, etc.
Dr. Sarah Duvall covers everything from assessment/screening to corrective exercise (tons of attention to proper breathing mechanics) to training considerations immediately postpartum (1-4 weeks) onward to a year plus.
What’s more, what I truly dig about Sarah’s approach is that she advocates women to eventually “lift shit to fix shit” (my words, not hers). Sooooo, there’s that.
FYI: TODAY (1/26) is the last day to register for this go-round. However you can use the coupon code TONYG at checkout for an additional $50 off your purchase. You know, cause I’m awesome.
Is it supposed to happen? Does it get better? What can you do to lessen the amplitude?
Lance chimes in with some simple advice.
Social Media Shenanigans
Twitter
DB presses hurt your shoulders? Maybe try a neutral grip. Squatting hurts your lower back? Maybe brace more or don’t squat so low (to a box). There I just fixed the issue without giving you 147 different “corrective exercises” to try.
If you missed Part I of Dr. Licameli’s guest post, you can check it out HERE. Now, you could read today’s post and get the gist of what was said yesterday, but you run the risk of missing out on some nitty-gritty details.
Kinda like watching Blade Runner 2049.
You could watch it without watching the original, but you’re missing out on some important context.
*** This is the part where’d you know what points 1-4 were all about.
5) Don’t Push Through Pain…Not All The Time, Anyway
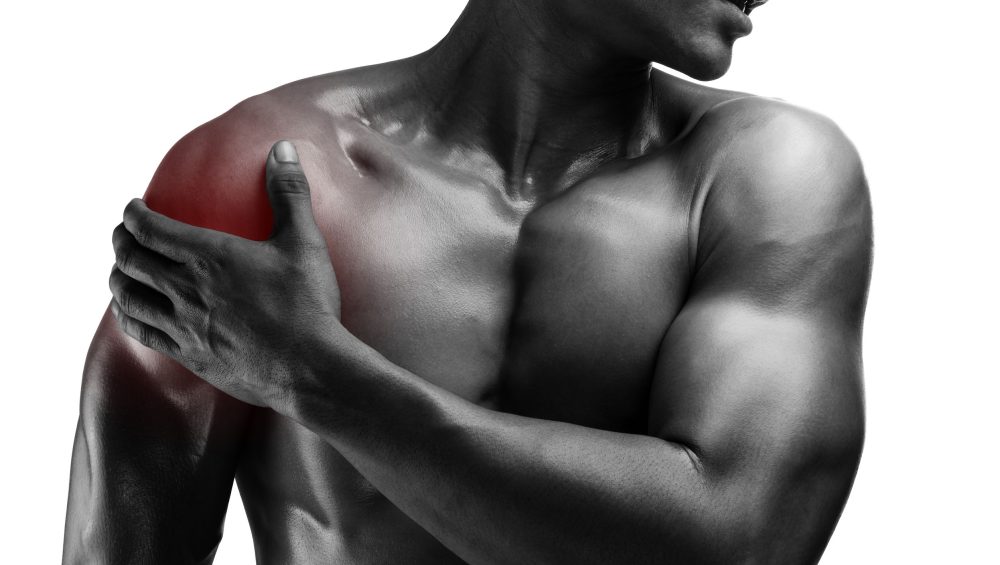
There is good pizza and there is bad pizza. There is good pain and there is bad pain. Differentiating the difference is of utmost importance when training the shoulders.
We’re not talking about delayed onset muscle soreness (DOMS), which is felt 1-2 days after training.
We’re talking about pain during training.
What follows are some guidelines to help you navigate your way through pain.
KEEP IN MIND, THESE ARE GENERAL GUIDELINES. IF YOU HAVE PAIN, BE SURE TO SEE A QUALIFIED HEALTHCARE PRACTITIONER!
I stress finding a qualified healthcare practitioner. A qualified healthcare practitioner will explain all of this, in addition to providing several options to keep you training while recovering from injury.
Let’s face it…not all physical therapists have spent much time under a bar. Some have spent time at the bar or even at barre class, but many have no experience or expertise in weight lifting or bodybuilding. You deserve your goals to be taken seriously. You deserve more than things like, “stop squatting for 4 weeks” and standing internal and external rotation with a band to “strengthen” the rotator cuff…or is it rotator cup…no, it’s rotary cuff…rotary club!
That’s it.
Characteristics of good pain:
-How Does It Feel?: Muscle burn; usually symmetrical right to left.
-Onset: Gradually increases as the set progresses.
-When Does It Stop?: At the completion of a set.
Characteristics of bad pain:
-How Does It Feel?: Sharp, numb, tingling; intensity may be asymmetrical right to left.
-Onset: Quickly; may be felt after only the first few reps
-When Does It Stop?: Days, weeks, months…; stays well after the set is completed, however may also end at the completion of a set.
If you find yourself experiencing bad pain, it may not be the end of the world. Bruce Lee also said, “Be like water.”
Water has the flexibility to take the shape of whatever container it is placed in, while still maintaining its identity…water.
In a similar way, our training can be modified without losing its identity or effectiveness. Try to modify your training. Sharp pain when pressing overhead with a barbell? Try a landmine press. Unable to perform a reverse flye? Try a face pull. Keeping the same exercises and modifying training volume may also do the trick.
6) Don’t Overdo It With The Classic “Rehabilitation” And “Injury Prevention” Exercises. There Are Hidden Benefits In Some Classic Movements.
It is no one’s fault but our own that, as a profession, physical therapy has a certain reputation when it comes to injury and injury prevention. The misconception is that in order to reduce pain or prevent injury, a hefty dose of classic “rehabilitation” exercises need to be added into an already packed training regimen.
For me, and many out there like me, gone are the days of separating “therapeutic exercise” from “regular training.” Say goodbye to blocking off a half hour pre and post workout to foam roll and perform straight leg raises and clamshells. If you look closely, you can find what you need for healthy shoulders right there in your existing training routine. Here are some examples:
Face Pull: Trains scapular retraction and external rotation. Great for scapular stability, rotator cuff strengthening, and balancing out internal vs. external rotation.
Farmer Carry/Overhead Carry: Excellent way to train postural, scapular, and global rotator cuff stability, not to mention full body/core strength.
Plank on Ball with Protraction and/or the Ab Wheel: Great way to dynamically train serratus anterior, core stability, and scapular stability.
Plank with Band Around Wrists with Protraction: Great way to train external rotation as well as dynamically train serratus anterior, core stability, and scapular stability
Landmine Press: With proper scapular movement (more on this to come), this is an excellent exercise to dynamically strengthen serratus anterior and improve scapular neuromuscular control.
Pull-up/Pull-down: With proper scapular depression at the initiation of the pull, this is a fantastic exercise to target the lower traps, which play a key role in scapulohumeral mechanics. Full range of motion and a long eccentric will also help lengthen the lats, which can limit shoulder mobility.
Squats/Deadlifts: Train “shoulder packing” position. A proper warm-up prior to these lifts will also include thoracic mobility work.
Seek out experts like Tony Gentilcore (obviously), Andrew Millett, John Rusin, Jeff Cavaliere, Quinn Henoc, Mike Reinold, Mike Robertson, Eric Cressey, Dean Somerset, Zach Long, Joel Seedman, Ryan DeBell, Teddy Willsey, and many more.
But if you have pain, GO SEE A QUALIFIED HEALTHCARE PRACTITIONER FIRST!
7) Symmetry…Don’t Forget External Rotation and Thoracic Mobility
As previously mentioned, weightlifters tend to be very “internal rotation dominant,” and for good reason.
Let’s look at the muscles that internally rotate the shoulder.
Just to name a few: pec major, lats, subscapularis, teres major, front deltoid.
Let’s take a look at the muscles that externally rotate the shoulder: infraspinatus, rear deltoid, teres minor.
The muscles that internally rotate the shoulder are of greater number and greater size (the pecs and lats are two of the strongest muscles of the upper body). The external rotators are less in number and much smaller. Give those external rotators a fighting chance to create some balance! Don’t neglect them!
It’s important to note that just performing an equal amount of presses and rows/pull-downs will not improve shoulder rotation symmetry because, as previously mentioned, both the pecs and the lats internally rotate the shoulder. So even though pull-downs and rows are “back” exercises, they still train the lats and therefore still train internal rotation.
Some of my favorite exercises to train external rotation are face pulls, W raises/pulls, reverse flyes with external rotation bias, wall slides with a band, and planks with a band around the wrists.
Adequate thoracic mobility is crucial to optimal shoulder function. If the scapulae are the foundation of the shoulder, the thoracic spine is the ground on which the foundation is built.
Thoracic mobility should be included in almost every warm-up, regardless of the body part being trained. One of my favorite thoracic mobility exercises is a kneeling protraction sit-back into a lat stretch with deep breathing. Be sure to check out this video of a sample lower body warm-up routine that includes this exercise.
8) Don’t Pin Down The Scapulae
It happens all the time.
An idea comes out and soon gets morphed into an extreme.
“Dynamic stretching may be better than static stretching pre-workout” turns into, “Don’t ever do static stretching because it’s a waste of time.”
“Foam rolling may help improve short-term soft tissue restriction and range of motion” turns into “I have to foam roll for 30 min when I wake up as well as pre workout, post workout, and before bed in order to break up adhesions and prevent injury.”
The idea of “shoulders down and back” seems to have experienced a similar course. Yes, keeping the shoulders in a retracted and depressed position with a properly extended thoracic spine will place the muscles, nerves, and joints in a structurally advantageous position as well as open up the subacromial space by about 30%. It also allows for unrestricted overhead shoulder range of motion.
However, the scapulae must move, and they must move correctly. The scapula is the base and foundation of the shoulder and dysfunction can most certainly lead to injury.
Note From TG: Check out THIS article I wrote a while back touching on the same topic; in this case how it relates to performing a DB Row correctly.
Generally, the scapula remains relatively stationary during the first 30 degrees of shoulder abduction (lifting the arm out to the side as in a lateral raise), with the movement coming primarily from the glenohumeral joint. As abduction continues past 30 degrees, the scapula begins to move and the glenohumeral joint and scapulothoracic joints move in about a 2:1 ratio.
This means that at 120 degrees of abduction, the glenohumeral joint has contributed about 80 degrees and the scapula has contributed about 40 degrees. If the scapula remains pinned “down and back,” range of motion will be restricted and the glenohumeral joint will be forced to overcompensate. This dysfunction will likely limit performance and increase risk of injury.
In addition to upward rotation, the scapula also needs to protract (glide forward) during both overhead and pulling movements. Serratus anterior is one of the main muscles responsible for protraction as well as for adhering the concave surface of the scapula to the convex surface of the ribcage. Pinning the scapulae down and back is not what we need…we need controlled, scapular motion.
I’m Done
If at least one person benefits from these tips, I have done my job. My hope is that you will keep these tips in mind and reap the benefits of strong, healthy shoulders. You’re putting the work in, now let’s capitalize on it.
About the Author
Nicholas M. Licameli
Doctor of Physical Therapy / Pro Natural Bodybuilder
Every single thing he does, Nick believes in giving himself to others in an attempt to make the world a happier, healthier, and more loving place. He wants to give people the power to change their lives. Bodybuilding and physical therapy serve as ways to carry out that cause. Nick graduated summa cum laude from Ramapo College of New Jersey with his bachelor’s degree in biology, furthered his education by completing his doctoral degree in physical therapy from Rutgers School of Biomedical and Health Sciences (previously the University of Medicine and Dentistry of New Jersey) at the age of 24, and has earned professional status in natural bodybuilding. His knowledge of sport and exercise biomechanics, movement quality, and the practical application of research combined with personal experience in bodybuilding and nutrition allows him to help people in truly unique ways. Love. Passion. Respect. Humility. Never an expert. Always a student. Love your journey.
I’ve had the honor of presenting at two previous iterations of the Motivate & Movement LAB (the brainchild of MFF’s Harold Gibbons) and it’s unequivocally one of the most unique events in the fitness industry.
Think: TED Talk, but with deadlifts and lots of f-bombs.
Anyways, the next LAB is this coming February, and will feature myself, Dan John, Pete Dupuis, my wife (Dr. Lisa Lewis), and several of the MFF coaching staff including Brian Patrick Murphy and Amanda Wheeler.
2) Appearance on the All About Fitness Podcast
Host Pete McCall does a superb job with this podcast and keeps things light and entertaining.
In this episode I discuss my journey towards my 600 lb deadlift.
You can go HERE (Episode 85) or HERE (Episode 85) via iTunes.
I’ll go a head and say it: I feel this is one of the single most important courses I have ever taken.
If you train women it behooves you to understand the intricacies surrounding this topic: pelvic floor dysfunction, prolapse, incontinence, etc.
Dr. Sarah Duvall covers everything from assessment/screening to corrective exercise (tons of attention to proper breathing mechanics) to training considerations immediately postpartum (1-4 weeks) onward to a year plus.
What’s more, what I truly dig about Sarah’s approach is that she advocates women to eventually “lift shit to fix shit” (my words, not hers). Sooooo, there’s that.
FYI: Use the coupon code TONYG at checkout for an additional $50 off your purchase.2
Per the usual Mike takes a rather complicated topic and dumbs it down for us peons. I REALLY liked his breakdown on the differences in adaptations between aerobic training and anaerobic, and how it’s the former (aerobic) that will likely help with better progress in the weight-room.
The deep squat screen can tell you a lot about a person. It can tell you his or her’s ability to achieve adequate ankle dorsiflexion, as well as much hip mobility, thoracic extension, and shoulder flexion they have.
About the only thing is doesn’t tell you is their favorite installment in the Fast & Furious franchise.
But what does the deep squat really tell us? Travis sheds some light.
Very comprehensive article that covers a litany of popular recovery strategies:
– Those that work well
– Those about which science is uncertain
– Those that don’t seem to work as planned or much at all.
Social Media Shenanigans
Twitter
Be sure to “finish” your push-ups. Scaps shouldn’t be retracted, touching, or making out at the top. Think about pushing away so they move around rib cage (protract) on each rep.
I took a brief blogcation this past week because I was down in Dallas, TX visiting family (and eating copious amounts of carrot cake). It was cold as balls down there – in the 20’s, what the hell? – only to return to Boston two days ago to be met with even colder than balls weather…something called a “Bomb” Cyclone.
Parts of downtown Boston flooded and now there’s about two feet of ice in the streets. Thankfully none of that affected us. What’s more, with the wind-chills today, it’s reported we’ll see balmy temperatures of -30 degrees.3
We’re hunkered inside with really nothing to do so I figured I may as well cut my blogation short.
I’ve had the honor of presenting at two previous iterations of the Motivate & Movement LAB (the brainchild of MFF’s Harold Gibbons) and it’s unequivocally one of the most unique events in the fitness industry.
Think: TED Talk, but with deadlifts and lots of f-bombs.
Anyways, the next LAB is this coming February, and will feature myself, Dan John, Pete Dupuis, my wife (Dr. Lisa Lewis), and several of the MFF coaching staff including Brian Patrick Murphy and Amanda Wheeler.
I always appreciate the content Brad puts together and the cool things that can be done with some of the ACUMobility protocols.
In this article/video Brad breaks down squat assessment and in particular hones in on both one’s ability to rotate their tibia and adductor length and how they can affect squat performance.
REALLY enjoyed this article from the guys over at The Strength House (Greg and Tony). If you’re looking for some quick-n-dirty ways to add muscle….density sets are a fantastic way to do so.
Social Media Shenanigans
Twitter
Heading into 2018 it stands to reason many are making their fitness goals a priority. Sweat less the details (optimal program, diet, etc) and sweat more on being CONSISTENT with something.
The blogcation continues. Today I’m going to highlight some of the best guest posts from this past year.
Guest posts played a crucial role on the site in 2017. Having a kid, while one of the most rewarding things in my life, was also one of the most time-suckiest things too.
For obvious reasons I just didn’t have as much free-time to write as much as I would have liked.4Thanks to everyone who pinch-wrote for me.
It’s one of THE most annoying injuries that can happen to an athlete or lifter. In this post physical therapist and strong AF strength coach, Sam Spinelli, sheds some light on how to conquer it.
There will always be gyms who compete only on price and price alone. However, most people’s health and fitness is worth way more than $10 per month and free tootsie rolls.
It ain’t easy to be “healthy.” It takes effort, dedication, and consistency. However, there are simple tricks you can use to make it easier and more palatable to fit your lifestyle.
There’s a stark difference between a fitness celebrity who has an IG account with lots of selfies and someone who’s actually a fitness professional and knows what the heck they’re talking about.
Whether you’re a fan of undulated periodization, block periodization, or plain ol’ vanilla linear periodization….writing effective training programs is a must if you want to be known as a legitimate coach or personal trainer.
Look at the magazine cover above. What do you see?
Airbrushing, yes.
But look at the words and titles…..lose, lose, slim, guilt-free, sexy…all are words used to insinuate women need to be less or that they’re not good enough now.
Sometimes you write something you feel is going to resonate so hard and be such a hit with your readers you’ll make a draft of your Pulitzer acceptance speech before you click “publish.”
And then there’s articles like this one…..LOLs.
I thought it was going to be hit and I thought I was being clever. Come on….how many people have tried to tie in boy bands when discussing the rotator cuff?
But, well, sometimes you miss.
Maybe this is a perfect example of people not recognizing greatness until after the fact. Maybe I’m a literary version of Van Gogh?
It was a tumultuous year in many ways – I think many of us are a little fatigued from the events of this past year – but on a personal level quite a profound one too.
Despite the subsequent sleep deprivation – earning my parenting stripes – I still somehow managed to put up 192 blog posts in 2017.7 Today I wanted to highlight the Top 5 posts that received the most web traffic.
These are the articles that resonated the most with you, my readers.
This was hands down the most popular article of 2017, and was also the latest entry to make the list (I wrote this in early December).
It all started with the image above of a woman performing a cable pull-through. I used it in a presentation I was giving and unfortunately my immature reaction to it made some women who were present uncomfortable.
It was a hard article to write, but something I felt needed to be done.
I guess this was the year of self-introspection and calling myself out. We can always improve, and in this case a slight lapse in customer service led to an embarrassing “call out” by a client of mine.
There’s a notion of late they every workout has to be a ball-buster. That if you’re not swimming in a pool of sweat or if you can’t feel the right side of your face that it was an ineffective waste of time.
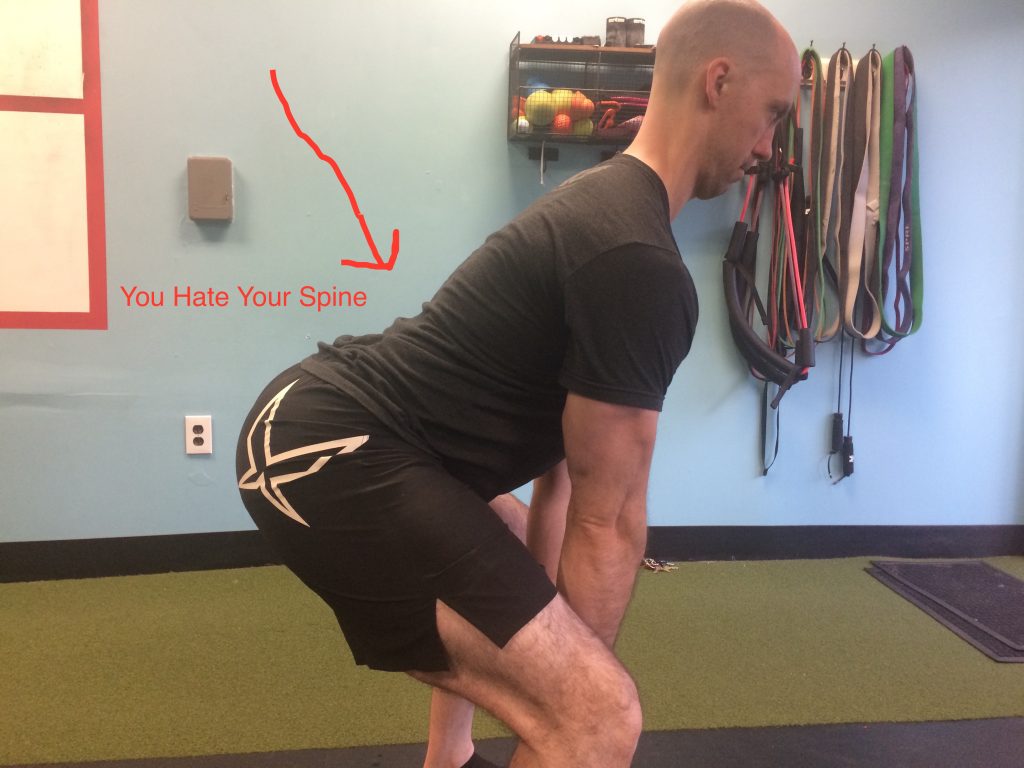
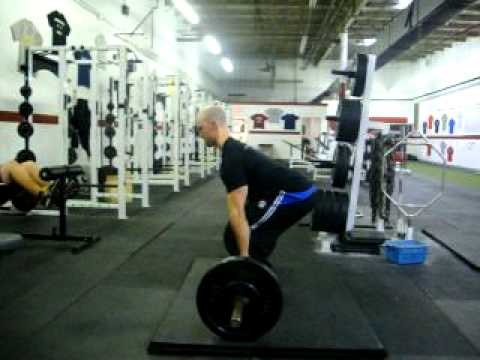
The better title of this post should be: “10 Steps To Ensure You Won’t Destroy the Back Of Your Pants (With Your Spine) When You Deadlift.”
The deadlift, as with any compound movement, requires precision and attention to detail in order to 1) Perform it well 2) Not get hurt and 3) To have any shot at lifting appreciable weight. There are many moving parts to the lift, however, to speak candidly, of the “Big 3,” the case could be made it’s the least technical.8
This is not to insinuate it’s altogether easy or simple. Simple in concept? Yes. I mean, picking a barbell up off the ground and locking it out isn’t rocket science. Simple in execution? Well, that’s where things get a bit more complicated.
Below are some overarching (<—Ha, pun intended) “themes” with regards to setup and execution of the deadlift I feel are important across the board.
The internet likes to argue. It’ll argue whether or not the dress was gold or blue (remember that stupid debacle from a few years ago?), DC vs. Marvel, high-bar vs. low bar squats, and/or who’s the most bad-ass He-Man character not named He-Man.
Cyclone anyone?
More cogent to the topic at hand, people will also argue on the internet that anyone who SUMO deadlifts is cheating.
The prevailing, uppity, train of thought is that, because one is closer to the ground when performing a SUMO deadlift (compared to a conventional stance) it’s easier and thus it’s cheating…and somehow less relevant of a lift.
To which I say: bull to the shit.
Unless your name is Professor Dumbledore and can somehow make someone’s femur change length when they switch from a conventional stance to SUMO stance…the whole “it’s less ROM, it’s easier” argument is a moot one.
The moment arm (femur) doesn’t miraculously change from conventional to SUMO stance.
It’s just…..different.
What you lose in the sagittal plane during conventional, you gain in frontal plane when performing SUMO style deadlifts.
Generally speaking (due to the moment arms and levers at play):
Conventional Pulls: easier/faster off the ground, harder at lockout.
SUMO Pulls: harder/slower off the ground, all out sexification at lockout.
Stephanie Cohen hit a 525 lbs deadlift at a bodyweight of 123 lbs recently. It was done SUMO.
True to form, (some of) the internet projectile vomited all over itself calling her out, saying it didn’t count, and that it’s not real powerlifting (I guess because she was using straps?).
1. Hahahahaha. I have to assume most commenters calling her out couldn’t sniff her warm-up weight.
2. Um, the lift didn’t take place at a powerlifting meet. So thanks for making the stupidest argument you could possibly make.
[For the record: most powerlifters I know are some of the most respectful, courteous, and supportive people I know. They would never turn their nose to such an impressive lift.]
Step one to successful deadlift technique is to figure out what style feels best FOR YOU.
What feels better? What feels more powerful and stable? Which one places you in the best position possible?
Some people will do well with conventional style, while others may prefer SUMO. Both are fine.
Relax internet.
2) Get Your Air, Set Your Ribcage
Gone are the days of cuing people to excessively arch their backs. Gross, repetitive extension can have just as many negative ramifications on spine health as gross, repetitive flexion.
Ideally we want to shoot for more of a canister (or pillar) position where the pelvis and ribcage are “stacked” on top of one another. Most specifically, the pelvic floor and diaphragm are stacked on top of each other.
I like to cue people to get a big gulp of air and aim for 3D expansion (breathing into their stomach, sides, and back) before bending over to grab the bar.
Admittedly it takes a bit of practice but makes a profound difference in how the lift feels.
3) Chest Up, Show Me Your Logo
This is a cue I stole from Eric Cressey and a staple at Cressey Sports Performance. Generally speaking I like to see the following on the deadlift setup:
Shoulders above chest
Chest above hips
Hips above knees.
This isn’t the case for everyone, mind you, but a good rule of thumb to follow. This will ensure most people stay in a “neutral” position and offset the bulk of shear forces on the spine.
I’ll often stand in front of an individual and just say “show me your logo the entire time” as he or she descends down to the bar.
The end result should look like the picture above.
If not, this happens:
4) Armpits Over Barbell, Max Hamstring Tension
Regardless of style of pull, the goal with one’s set up should be armpits over the bar with maximal hamstring tension.
This will help ensure 1) hips are as close to the bar as possible (without making it too squatting. In that case the hips are actually further away….laterally) and 2) people will be less likely to pull via the lower back.
5) Turn Lats On
The lats are a big player with regards to deadlift technique. You want to make sure they’re “set” to help with upper back stiffness during the lift itself.
The best cue I’ve used to help with this is to tell someone to “squeeze the oranges in your armpits.”
Works like charm.
6) Pull Slack Out of the Bar or Bend the Bar
7) Push Away
The deadlift is just as much of a PUSHING exercise as it is pulling. You want to generate force into the ground and drive AWAY, thrusting your hips forward as you stand up.
People who solely focus on pulling the weight up – via their back – are often the ones that complain about it low back pain the most.
8) Finish at Top or Stand Tall
A common mistake I see some trainees make is either not getting their hip through at the top (AKA: the sexy stripper butt) or going too far.
“Hump the bar” at the top. Finish. Stand tall. All are cues I’ve used that work and get people to finish with their glutes.
9) Don’t Let Go
On the descent, don’t let go.
Stay engaged.
It’s here where I’ll often see people round their shoulders or lose their upper back position. And it makes me sad.
Keep your abdominals engaged (and keep squeezing that orange), even on the way down.
NOTE: Disregard for max effort pulls….;o)
10) Reset or Peel the Shoulders
There’s a time and place for tap-n-go deadlifts, but I have to admit I rarely use them. Instead I’ll tell people to “reset” between each rep – albeit it’s brief – to gulp their air, “peel their shoulders back,” and to make sure they’re in a good position for the next rep.
The video below is of me demonstrating this with a dumbbell, but you should still get the gist:
These Aren’t Set in Stone
None of what I said above is concrete.9 There will always be some slight deviations based off someone’s anatomy, ability level, and goal(s).
However, I have found that for most people, most of the time, they all work really well to get people’s technique in check.








 Nicholas M. Licameli