CategoriesAssessment

You’re Probably Not Broken

The fitness industry preys on dysfunction.

It seeks out the broken, the weak, and the (seemingly) frail, chews them up, and then spits them out.

One 24 session pack at a time.

I hate it.

I HAAAAAATE it.1

We need to do a better job at championing success and cementing the notion that (most) people aren’t as broken as they’ve been led to believe.

Copyright: flynt / 123RF Stock Photo

Come At Me, Tony

This is not an attempt at me saying dysfunction is a myth.

There are certainly any number of people walking into a gym on any given day with any number of “issues” that require a bit more, shall we say, TLC.

  • Lack of scapular upward rotation.
  • History of disc herniations.
  • Poor t-spine extension.
  • Gonorrhea.
  • You know, stuff like that.

That being said, I’m tired of coaches and personal trainers defaulting to verbiage that assumes everyone is broken because they can’t squat to a certain depth or lack 4.2 degrees of big toe dorsiflexion and then in order to fix said “things” they have to complete a laundry list of corrective exercises or go through an eleven week seance in order to begin actual exercise.

via GIPHY

Sometimes, actually a lot of the time, we just need to kinda-sorta remind people that they can do stuff.

Take overhead mobility (shoulder flexion) for example.

I’m a firm believer people need to earn the right to overhead press, and putting someone though a simple overhead mobility screen is a simple way to ascertain that information.


My good friend and London based trainer, Luke Worthington, has a really nice way of stating things:

“Can you do it? Can you really do it

Observing a task as simple as an overhead reach, we should be asking ourselves where that motion came from…

…was it true motion from the shoulder (scapulae)? Or was some of that motion ‘borrowed’ from other segments?”

To that point, but to expound a bit further, it’s imperative to observe active vs. passive range of motion. I.e., comparing what they can do (active ROM) to what you, the coach, can help them do (passive ROM).

This is an important component of coaching.

As coaches we’ll see a limitation in active ROM and immediately think we have to start smashing, thrashing mobility, and/or putting someone through the gauntlet of corrective exercise purgatory in order to “fix” it.

Don’t forget passive ROM.

Because if you can nudge more ROM just by helping them a teeny, tiny bit…it’s not mobility issue. They have access to that ROM, but are unable to control it.

Here’s an Active vs. Passive screen in action:


To Summarize (for those who are too uppity to watch a less than three minute video):

  • Jonathan had limited active ROM with shoulder flexion.
  • Jonathan had access to more passive ROM when I helped him.
  • I then had him hold his end range to remind the brain that “oh, I’m okay, I got this.”
  • Jonathan improved his active ROM without me stretching him or showing him a litany of mobility drills.
  • My butt looks amazing.

Now, of course we’d have to perform a few simple drills to “cement” that new ROM before we started training, but the more cogent point I’m trying to make here is that…

JONATHAN…ISN’T…BROKEN.

I just had to provide a window where his brain had to figure shit out, which in turn resulted in him turning some shit on, which in turn allowed him to do some shit.

How’s that for simplifying things?

It’s not lost on me there’s much more to it than that. This is just me pausing the Rotisserie and cooking one part of the chicken.

If I want to cook the entire chicken – which I do, it’s delicious – I’d still want to address other stuff like tissue quality (pecs & lats), anterior core strength, not to mention upper trap, serratus activation, etc.

But, pretty cool nonetheless.

Want More Tidbits Like This That Will Melt Your Face?

Well, you’ll have to wait a few more weeks.

The DIGITAL Strategic Strength Workshop is coming soon!

CategoriesAssessment Program Design

30 Days of Shoulders: Days 11-20

I’m writing this from my most favorite place in the world…

…a room full of cute and cuddly kittens.

Just kidding, I’m in London.

I’m here because I have a few speaking engagements lined up –  a half-day Shoulder workshop for a crew of Equinox trainers in Kensington on Saturday, my Coaching Competency Workshop in Dublin on Sunday, and then mine and Luke Worthington’s Strategic Strength Workshop back here in London next week.

Spots are still available for both the Dublin and London events (wink, wink, nudge, nudge).1

I just checked into my hotel after an overnight flight from Boston and I feel like a zombie.

Needless to say I am not in the writing mood, but I do\ have a little sumthin, sumthin to share today.

Copyright: luislouro / 123RF Stock Photo

30 Days of Shoulders: Days 11-20

This is Part II of my latest series over at T-Nation.com dealing with anything and everything shoulders: How to make them bigger, how to make them feel less like a bag of dicks, you know, the usual.

You can check it out —> HERE (also includes link to Part I in case you missed it).

Enjoy and keep your eyes peeled for Part III coming next week!

CategoriesAssessment Corrective Exercise Program Design

30 Days of Shoulders: Days 1-10

I’m willing to bet that if you’re reading this if you have two shoulders.1

I’m also willing to bet that, given the two shoulder scenario, and given this is a blog dedicated towards strength & conditioning, you’re interested in:

  • Keeping your shoulders healthy.
  • Making your shoulders stronger.
  • Building shoulders that resemble boulders.
  • Argon. You know just because it’s a cool element.2
Copyright: restyler / 123RF Stock Photo

30 Days of Shoulders: Days 1-10

My latest article (which is a three-part series) just went live T-Nation.com today, and it covers anything & everything as it relates to shoulders.

Check it out…HERE.

CategoriesAssessment personal training Program Design

Static Posture: It’s Just Information

Posture.

This is not an exhaustive blog on the topic.

It’s more like an amuse bouche or bite-sized commentary on a pet peeve of mine: Fitness professionals who place waaaaay too much emphasis on it (often times to the detriment of the client/athlete).

As well as a scenario where we might pay a little closer attention to it.

I like cheese.

Copyright: lculig / 123RF Stock Photo

Posture: It’s Just Information

Take a look at this picture.

What do you see?

I see two shoulder blades that are making out.

C’mon you two, get a room. Goddammit, I can’t take you anywhere.

The therapist or coach (or someone more mature) with a keen(er) eye may likely say something to the effect of:

  • Overactive rhomboids (excessive scapular adduction/retraction).
  • A more downwardly rotated scapular position (depression).
  • An “interesting” shade of blue on the walls.

Now, to be clear: I am NOT someone who places a ton of credence on one’s static posture. While we’re getting better of late, I think the industry as a whole has gotten into a bad habit of placing all if its eggs into the posture basket…

…labeling people as dysfunctional the second we see forward head posture or a hair that’s out of place.

I’ve witnessed some coaches reaching for their “corrective exercise” bag of tricks before they’ve even seen the person they’re assessing do anything:

“Okay Mr. Smith, I notice you exhibit a slight kyphosis in your upper back, your right shoulder is a bit internally rotated, and it looks as if your left eyeball is lower than the right.

Weird.

But here’s the deal: You should purchase a 424 pack of training, and maybe, just maybe, after 62 weeks of dedicated corrective training where we dive deep into some transverse fascial line reactive neuromuscular breathing techniques we’ll be able to progress towards looking at a barbell.

I’m pumped. How about you?!”

via GIPHY

This is not to short-change the importance of someone’s static posture and the information you can glean from it. Of course, if someone walks in with a lengthy injury history and it hurts to blink, then, yeah, it’ll have a bit more weight.

However, we can’t assume that just because a particular person presents with “y” – posturally speaking – that that automatically means “x.” I’ve seen some individuals walk in for their initial assessment with questionable (textbook) posture only to reveal the cleanest health history you’ve ever seen.

Zero injuries. Zero discomfort. Zero fucks to give.

Static posture is nothing more than information.

No one is a walking ball of fail because he or she presents a certain way.

Besides, we also need to respect that “good” or “bad” posture is relative to the load in addition to the task at hand. The latter point is especially cogent to the conversation because as my good friend Alex Kraszewski notes in presentation for The Trainers’ Toolbox:

“Posture/position will govern where motion is available from, as well as who much and where load is distributed. The task will dictate the appropriate range of posture available.”

How I want someone to “look” when attempting a challenging set of deadlifts is quite different compared to someone who’s just sitting there in front of me, sitting.

What’s more,

Anyway, back to the original picture above.

You forgot didn’t you?

Here, this one:

This is a very common theme or resting “presentation” amongst athletes – especially overhead athletes – as well as fitness professionals who 1) stand a lot during the day and 2) lift heavy things for a living.

Again, nothing is cemented as an absolute here, but if an individual walks in complaining of shoulder pain, and you ask him/her to take off their shirt (don’t be creepy about it) and their shoulder blades rest in a more retracted and downwardly rotated position, we can deduce that said individual (may, not always) need to work on more protraction  to nudge them back to a more neutral position.

Neutral Scapular Position = Superior/inferior border of the scapulae rests between 2nd-7th thoracic vertebral levels, medial border is ~1-3″ from midline.

Photo Credit: MikeReinold.com

Someone “locked” in a more downwardly rotated position will almost always have a hard time achieving ample scapular UPWARD rotation (protraction is part of this equation), which is kind of a big deal for overall shoulder health & performance.

But don’t assume, you should check.

This is why it’s crucial to include both load AND movement in the initial assessment; sometimes scapular position will clean up on its own with minimal intervention.1

But let’s assume it doesn’t, and the person has been complaining of shoulder ouchies.

What then?

Here are a few drills I like to use and I offer for your consideration:

NOTE: I will say the bigger umbrella theme here is addressing ribcage/thorax position. The position of the shoulder blades are at the mercy of the T-spine.

1. Deadbug w/ Reach


I have a crush on deadbugs and their infinitesimal variations.

They’re a bonafide rockstar when it comes to improving anterior core strength and lumbo-pelvic control (which comes in mighty handedly when you’re working with someone who’s stuck in a more extended position).

Simply “reach” towards the ceiling as you extend your legs towards the floor and perform a FULL exhale with each repetition.

2. Deadbug w/ Loaded Reach


Same as the above, but now we add a smidge of load in the form of a med ball, kettlebell, dumbbell, a basket of He-Man figures, anything.

Sometimes adding a very slight load here can help clients/athletes “feel” the protraction more.

3. Quadruped Band Protraction – off Foam Roller


This is a drill I stole from my good friend and business partner, Dean Somerset.

He’s Canadian.

4. Forearm Wall Slides – off Foam Roller


1. You can blame my buddy Justin Kompf for the verticalness of this video.

Amateur hour.

2. This was/is a staple exercise from my days at Cressey Sports Performance. Start with a foam roller against the wall with your forearms against the foam roller. Protract (push away) from the foam roller and then slide up the wall making sure not to crank into your lower back and flair your rib cage.

Reset at the bottom.

Repeat.

It won’t take long for it to be Serratus O’clock.

CategoriesAssessment coaching Corrective Exercise Exercise Technique

The “My Shoulder Hurts” Checklist

“Wha, what was that? Was that him?”

It was 1:30 AM, maybe even 2:17 (it’s always a blur, sucky, and when it’s that late doesn’t it even matter?) as my wife nudged me to see if the baby was alright. I turned over to my left, peeled my eye open just enough to press the button to turn the screen to the monitor on, and indeed it was our newborn, Julian, making his case for one of the two of us to get our asses out of bed and ascertain the situation.

Julian, during one of his non-Gremlin moments

Our little guy passed the 4-week old mark earlier this week and in that time Lisa and I have had a crash course in sleep deprivation training (I’m basically a Navy SEAL by now) in addition to learning baby-speak, or what I like to call “What are you trying to tell me? Please stop crying. I’ll do anything. No, really, anything………”

[Jumps off roof] 

We don’t have much to complain about in the grand scheme of things. Julian has been awesome. Much like any baby in the history of ever, and as any parent in the history of ever knows, when your newborn starts crying it’s indicative of one or two factors to get them to (hopefully) settle back down:

  1. They need a diaper change.
  2. They need to be fed.
  3. They need to be swaddled,
  4. They need their binkie.
  5. They need to be swung or need movement (or maybe they’re overstimulated).
  6. WILDCARD: They need more cowbell.


As time passes you learn to not panic, run through the checklist, and before long you’re a first class baby-calmer-downer.

It’s funny, though.

Since I’ve been neck deep in baby shenanigans the past few weeks it’s been a trip to see how I make connections and correlations between that and stuff I see and come across in my professional life… training and coaching athletes/clients. One of the purest examples is something I witness on an almost weekly basis.

Many of the new people who start with me are beginner or intermediate level meatheads (male and female) who, for whatever reason(s), have been dealing with a pissed off shoulder that inhibits their ability to train at the level or intensity they’d like. It’s frustrating on their end and it’s my job as the coach to try to peel back the onion and see what may or may not be the root cause or causes.

Copyright: staras / 123RF Stock Photo

The “My Shoulder Hurts” Checklist

1) Technique

Most commonly people will note how bench pressing bothers their shoulder(s). Working on their technique is the baby check list equivalent of blow out explosive diarrhea.

I.e., It’s code mother-fucking red.

Following the mantra “if it causes pain, stop doing it” is never a bad call, and I am all for nixing any exercise or drill that does such a thing. However, I don’t like to jump to conclusions too too quickly. Sometimes making a few minor adjustments to someone’s technique or setup can make all the difference in the world.

Almost always I’ll have to spend some time on their set-up. I like to cue people to start in a bridge position to drive their upper traps into the bench and to set their scapulae (together AND down).

We can make arguments as to what this is actually doing. Some will gravitate towards it improving joint centration. Cool (and not wrong). I like to keep a little simpler and note that all it really does is improve stability.

Stability = strength

Another thing to note is many people tend to flare their elbows out too much when they bench which leaves the shoulders out to dry and in a vulnerable position.


MINOR NOTE: Since recording that video above (two years ago), I have since changed my views slightly thanks to some cueing from Cressey Sports Performance coach Tony Bonvechio. Elbows tucked on the way down is still something I’m after (albeit some are too aggressive at the expense of placing too much valgus stress on the elbows). However, when initiating the press motion, in concert with leg drive, allowing the elbows to flare out a teeny tiny bit (in an effort to keep the joints stacked and to place the triceps in a more mechanical advantage) will often play huge dividends in performance.

In the end, much of the time it comes down to people not paying any attention to how crucial their set-up is. It’s amazing how often shoulder pain dissipates or disappears altogether with just a few minor adjustments.

2) What People Don’t Want to Hear: Stop Benching, Bro

This is where the Apocalypse begins. Telling a guy (usually not women, they could care less) that he should probably stop benching for the foreseeable future is analogous to telling Donald Trump he can’t Tweet.

The thing about holding a barbell is that it “locks” the glenohumeral joint into internal rotation which can be problematic for a lot of people and often feeds into impingement syndrome.

[The rotator cuff muscles become “impinged” due to a narrowing of the acromion space.]

NOTE: I hate the term “shoulder impingement” because it doesn’t really tell you anything. There are any number of reasons why someone may be impinged. Not to mention there are vast differences between External Impingement and Internal Impingement….which you can read about in more detail HERE.

If bench pressing hurts, and we’ve tried to address technique, I’ll often tell them to OMIT barbell pressing in lieu of using dumbbells instead. With DBs we can utilize a neutral grip, externally rotate the shoulders a bit more, and open up the acromion space.

Or, maybe they can still barbell press, albeit at a decline. When you place the torso at a decline the arms can’t go into as much shoulder flexion and you’re then able to avoid the “danger zone.”

Something else to consider is maybe pressing off a foam roller. Sure, you won’t be able to use as much weight, but as Dr. Joel Seedman explains in the video below you’ll be able to work on better joint centration AND the scapulae can actually move (an important variable discussed more below).


If all else fails, sadly, you may have to be the bearer of bad news and tell someone that (s)he needs to stop benching for a few weeks to allow things to settle down.

3) Let the Scaps Move, Yo

Above I mentioned the importance to bringing the shoulder blades together and down in an effort to improve stability.

If you want to lift heavy shit, you need to learn to appreciate the importance of getting and maintaining tension. That said, if lifting heavy shit hurts your shit, we may need to take the opposite approach. Meaning: maybe we just need to get your shoulder blades moving.

When the scaps are “glued” together and unable to go through their normal ROM it can have ramifications with shoulder health. Push-ups are a wonderful anecdote here.

Unlike the bench press – an open-chain exercise – the push-up is a closed-chain exercise (hands don’t move) which lends itself to several advantages – namely scapular movement.


4) More Rows

This one will be short and sweet. Perform more rows. Many trainees tend to be very anterior dominant and spend an inordinate amount of time training their “mirror muscles” at the expense of ignoring their backside. This can lead to muscular imbalances and postural issues.

This makes me sad. And, when it happens, a kitten becomes homeless.

You sick bastard.

The easy fix is to follow this simple rule: For every pressing motion you put into your program, perform 2-3 ROWING movements. Any row, I don’t care.1


5) Address Scapular Positioning

I’m going to toss out an arbitrary number and I have no research to back this up, but 99% of the time when someone comes in complaining of rotator cuff or shoulder issues the culprit is usually faulty scapular mechanics. Sometimes people DO need a little more TLC and we may need to go down the “corrective exercise” rabbit hole.

The scapulae perform many tasks:

  • Upwardly and downwardly rotate
  • Externally and internally rotate
  • Anteriorly and posteriorly tilt.
  • AB and ADDuct (retract and protract).
  • Will clean and fold your laundry too!


They do a lot. And for a plethora of reasons, if they’re not moving optimally it can cause a shoulder ouchie. Sometimes people are too “shruggy” (upper trap dominant) with overhead movements, or maybe they’re stuck in downward rotation? Maybe they can’t protract enough and need more serratus work? Maybe they lack eccentric control and need a heavy dose of low trap correctives?

It dumbfounds me the number of times I have had people come in to see me explaining how they had been to this person and that person and NO ONE took the time to look at how their shoulder blades move.

I don’t like to get too corrective too soon (as I prefer to not make my clients feel like a patient), but if I’ve exhausted all of the above and stuff still hurts….it’s time to dig deeper.

If only there were a resource that dives into this topic in a more thorough fashion.

Hmmmm…………..Sha-ZAM.

CategoriesAssessment coaching Corrective Exercise Exercise Technique Program Design

A Peek Inside Complete Shoulder and Hip Blueprint

WHEW – talk about a whirlwind day yesterday. I spent the bulk of it glued to my laptop1 making sure things ran smoothly with the launch, answering questions and emails, and trying to stay on top of social media engagement.

1) THANK YOU to everyone who has gone of their way to mention and/or plug Complete Shoulder and Hip Blueprint. Your support means a lot.

2) To those who may be on the fence, how about a sneak peek?

Copyright: eenevski / 123RF Stock Photo


This sucker contains 11+ hours of content covering everything from upper and lower extremity assessment, corrective exercise strategies, numerous hands-on breakouts, as well as program design and exercise technique troubleshooting (with maybe, 37 seconds worth of Star Wars references).

Here are two sneak peak segment from both Dean and I.

The One Where Tony Discusses Scapular Motion


The One Where Dean Talks Hip Integration (and makes a bunch of fitness pros groan)


And there is tooooooons more where that came from.

If you’re a fitness professional I can almost guarantee you’ll pick up something valuable (hopefully several) that will help your clients or athletes. And even if you’re not a fitness pro, and just like listening to two dudes talk shop about training or you’re just looking to pick up some cool new exercise variations to keep your shoulders and hips healthy this resource would be a home run.

cshb-screen

Complete Shoulder and Hip Blueprint is on SALE all this week (until midnight on Saturday, November 5th) at $60 off the regular price.

CategoriesAssessment Corrective Exercise Exercise Technique personal training Program Design

Complete Shoulder and Hip Blueprint Now Available

I gotta say, I could barely sleep last night.

Dean Somerset and I have spent the better part of the past two years traveling all across North America and parts of Europe presenting our Complete Shoulder & Hip Workshop. All told, we’ve presented it 10-15 times1.

hipshoulder-landscape

I’m not kidding, either: I…could…not…sleep last night.

I kept waking up every few hours as if I were 11 years old again waiting for Christmas morning to arrive. To say I am excited for this would be an understatement. There’s also a small fraction of me doing the best I can not to destroy the back of my pants out of shear terror.

As of this moment it’s 99.2% excitement, and 0.8% “hoooooooly shit this is happening.”2

I mean, there’s always a degree of vulnerability anytime you put something out there for the masses. However I KNOW this is going to be a resource that will help tons of people.


What Is It

The Complete Shoulder and Hip Blueprint is an 11+ hour digital product that takes you through the systems that both Dean and I use with our athletes and clients to improve upper and lower body function, strength, endurance, and resiliency.

We show you how to connect the dots between a thorough assessment, understanding what corrective strategies (if any) will work best, and how to build a training program to help you and your clients in the most direct way possible.

And there’s a few cat memes and light saber jokes tossed in for good measure.

dean-tony-cshb

Why This Matters to You

Are you a fitness professional? Do you work with people with shoulders? What about hips?

Well then, this sucker is right up your alley.

More specifically here’s what you can expect:

  • Help your clients get through common shoulder issues more effectively.
  • Streamline your assessment and program design, helping you get faster results and more efficient use of your time, and that of your clients’
  • Help you see the details of shoulder motion you didn’t notice before, and whether something you’re using in your exercise program is working or not.
  • Upgrade your exercise toolbox to address commonly overlooked movement issues.
  • You can help clients see IMMEDIATE improvements, sometimes in as little as a minute or two, which will help them buy in to your abilities.
  • Help you target in on what will work best for the person in front of you, saving you both the time spent on useless exercises or drills.
  • Connect the dots between assessments, mobility, strength, and conditioning program considerations
  • Break down a system you can use today with yourself or your clients to see instant benefit while removing the guess work.

And you don’t necessarily have to be a fitness professional in order to reap the benefits of this resource. Dean and I offer tons of practical information in the form of hands-on applications in addition to breaking down many common exercises such as the deadlift, squat, chin-up, and Landmine variations.

tony-dl-technique

The Part Where I Entice You More (or Guilt You) Into Buying

Choose any of the following that resonates with you:

1. “What is this, Napster? Pay for something once, would you?”

2. “Pretty please?”

3. “I got kids! Well, I’ll have one soon, in January, and that shit’s expensive.”

4. “I’ve written tons of free content over the years. Each time I’ve written an article or blog post that’s helped you out, I put a dollar on your tab. It’s collection time, you son of a bitch.”

Okay, for real: I think it’s a great resource, I feel it’s going to help a lot of people, and I’d be honored if you’d consider checking it out.

We’ve put Complete Shoulder & Hip Blueprint on sale this week. From today through Saturday, November 5th you can purchase it at $60 off the regular price. What’s more there are Continuing Education Credits (CEUs) available through the NSCA, which makes this a solid professional development investment.

—> Complete Shoulder & Hip Blueprint <—

CategoriesAssessment Corrective Exercise mobility Program Design

4 Ways to Fire Up Your Belly

Today’s guest post comes courtesy of Gavin McHale, a Certified Exercise Physiologist from Winnipeg, Canada (in his words, straight north of Fargo). Gavin attended a workshop I did with Dean Somerset in Minneapolis a few weeks ago and he wanted to write up some of the things he picked up from it.

Read on to find a breakdown of how you can clean up your shoulders and hips, lift more weight and allow yourself to relax, just by changing the way you breathe.

Copyright: sunlight19 / 123RF Stock Photo


4 Ways to Fire Up Your Belly

Let me paint you a picture.

A client or physical therapist refers someone to me and they walk in ready to get their ass handed to them. After our initial conversation, I tell them we’re going to start the session with some breathing drills.

They often glaze over and assume it means something else, until I tell them to lie down and take a deep breath.

“Wait, you just want me to breathe?”

“That is correct.”

Almost every time, I can provide a new client a take-home benefit with a couple of breathing cues, all inside the first 2 minutes on the gym floor.

Image courtesy of Crossfit Southbay, via A.D.A.M

Why, you ask? Well there are lots of reasons why breathing is a good practice to get into, and I’m not talking about the breathing we do mindlessly, day-in day-out. I’m talking about mindful “diaphragmatic” or “belly” breathing.

We live in what I’d call a very sympathetic world. Our sympathetic nervous system, also known as fight-or-flight, is cranked up all the time. We have to drive to work in traffic, get a project done, feed the kids, manage the mortgage… you get the point.

All this stress kind of shuts down our parasympathetic nervous system, also known as rest-and-digest. You know, the one that fixes all our shit? Ya, that one.

The diaphragm is actually intended to be our body’s primary breathing muscle, but as a consequence of modern life, it’s been shunned like Tony and I are by all those cat haters (I see you). Instead, the much less efficient breathing muscles of the upper chest and neck then must take over, creating all sorts of issues.

Although it doesn’t look very sexy, diaphragamatic breathing allows us to create a better balance between fight-or-flight and rest-and-digest, and could be the key to fixing a lot of movement issues as well.

When we breathe, this dome-shaped muscle contracts, allowing the lungs to take in air. What we should see is the stomach rising as the dome compresses the abdominal cavity. This is why I tell my clients to try and “get fat” if they’re having trouble figuring it out. I often see the exact opposite, and while it may present a more pleasing side profile, it only allows the lungs to partially expand and results in weaker core stabilization.


So why do we do it?

Not only is it a good idea to get back to the muscles we should be using for an activity like breathing, but an under-active or dysfunctional diaphragm is going to lead to movement issues as well. Neck and shoulder issues are the bulk of what I see, but back and hip irritation have also been linked to breathing concerns.

Proximal stability leads to distal mobility.

If we can create more stability in the core and centre of the body, the limbs and other areas where we need to be more mobile are free to do their job as well.

Test/Re-Test

Below, I’m going to give you several tests to try based on areas that you may have trouble with or issues you want to clean up. The protocol here is to test the movement, correct with a breathing drill, the re-test to see if it got better.

If it did, great! If not, we may have to do some more digging. The breathing correctives are outlined at the end of the article.

1. Shoulder Issues

I found it very interesting how many people had shoulder pain and dysfunction when I first started training. I cleaned up their technique, had them pull way more than they pushed and focused on opening up their thoracic spine. Things got better, but never really got better, ya know?

Then I went further down the rabbit hole and recognized there was more to it. I realized that almost all shoulder problems are somehow tied to breathing mechanics, and a couple of simple drills can make a world of difference, especially when done consistently. Here are two (related) tests to see where problems may lie and outline the path to correcting them.

Shoulder Test/Re-Test #1: Active and Passive Shoulder Flexion

*Ideally, the shirt is off for all tests of shoulder function. Although it can be awkward, this allows someone to see exactly what the scapulae are doing during these movements.

You may have to stand against a wall to do this properly, but stand tall and proud and slowly brings your hands up over your head in front of you. Your ribcage should stay down (the back should stay against the wall) and the head should stay in a packed position (no poke-necks).

How high did your arms get? Was there any pain?

Here is Tony showing an example of a bad active shoulder flexion (left) and a good active shoulder flexion (right). If you’re not careful, you may think the “bad” test is better than the good one. A closer looks reveals that Tony is flaring his ribcage, overextending his lower back and poking his head forward. The test on the right is a true test of his active shoulder flexion. Not bad T, but why is your shirt still on?

The passive test is the same as the active test, only lying down on your back. The knees should be bent and feet flat on the floor or table. The ribcage should stay down and lower back flush to ensure a true test.

We will review correctives later in the article.

Shoulder Test/Re-Test #2: Scapulo-Humeral Rhythm (probably need a friend for this one)

Stand in the same position as your active shoulder flexion test, but this time we’re going to bring the arms overhead by your sides, trying to touch the backs of your hands together above your head.

As the arms move overhead, the scapula should rotate ½ as much as the humerus does. So, to get overhead (180 degrees total), the humerus should rotate upward 120 degrees and the scapula should rotate the remaining 60 degrees.

Image courtesy of BEST Performance Group

If there is any pain with this movement, you should see a registered healthcare professional (or refer to one, if you’re a trainer).

However, if you’re a trainer and you notice the scapula isn’t moving as it should (i.e. the medial border isn’t at 60 degrees) see if you just help it along by manually moving it to the desired position.

Better? Great, let’s get to breathing and fix that shit. Still painful? Refer.

2. Back Issues

Everyone who’s ever had or worked with people with back issues raise their hand! Ya, a lot of us have, myself included and it’s no fun. Whether it’s chronic back pain or a little tweak here and there, worrying about blowing your back out is a real concern for many people.

They’re scared to lift things around the house, scared to bend over the wrong way and especially scared to lift a shit-ton of weight off the floor in the gym (covered later). We can’t be having that… let’s fix it.

I said that lower back and shoulder issues can be related because their main structures are intimately connected via the thoracolumbar fascia. You can see the lats (major players in the shoulder) and the glutes (major players in the lower back) in the image below. If you have issues getting your arms overhead, you may very well have lower back problems as well, and vice versa.

Image courtesy of Neil Asher Healthcare

Back Test/Re-Test #1: Active Straight Leg Raise

This one is nice and simple. Lie on your back, legs straight. Lift one leg as high as you can before you stop or you feel pain. The knee should stay straight. Note how high you got. A good score is 90 degrees with no movement in the opposite leg.

Image courtesy of www.FunctionalMovement.com

Back Test-Re-Test #2: Passive Hip Rotation (bring that friend back, you’ll need em)

Lie flat on your back with legs straight and lift one leg. Bend the leg at the knee, coming up to 90 degrees hip flexion. Move the hip into external rotation (foot to opposite hip) and internal rotation (foot outside hip) while supporting the knee. Note the angle achieved with each movement. A good score is 90 degrees from midline for external rotation and 45 degrees for internal.

Photo courtesy of geekymedics.com.

LIFTING HEAVY A.F.

(if you have to ask what it means, you’re not ready for it)

There’s no question that if you’ve ever done a heavy squat or deadlift and not wrecked your back, you know that you need to be able to create massive amounts of tension through your core. If you can’t, you get hurt, pretty simple.

The diaphragm plays a massive role in stabilizing the core. It forms the lid on the “core box”, working with the obliques, QL, pelvic floor and transverse abdominus. Being able to take in air and maintain a high-pressure area in the abdominal cavity is crucial for lifting heavy (another reason I start with breathing drills).

RELAXATION

Remember that sympathetic world I spoke about earlier where most of us live that wreaks havoc on our breathing patterns? Needless to say, it can also create difficulty with relaxation and sleep.

I’m pretty sure most of us (and our clients) can agree we’d like to sleep better.

So, when you watch the videos below, don’t just put them in the “workout” box, but remember they can also have a positive impact on your ability to relax and even fall asleep.

Not only will these breathing drills assist in improving movement patterns, they’ll set up the context for creating tension before and during a heavy lift.

THE BREATHING CORRECTIVES

Prone Crocodile Breathing

If you’re new to the diaphragmatic breathing game, this is your place to start. Maybe you scored poorly on one of the above tests or you have an itch to throw more weight on the bar but aren’t yet comfortable doing so.

Either way, give this drill a shot before moving on.


Prone Lengthening

This one is particularly useful if you have trouble with your shoulder and/or struggled with the shoulder flexion and scapulo-humeral tests. Many people’s shoulder dysfunction comes from a number of factors, one of those being tight/ropey serratus anterior. This drill will help to release that muscle, allowing it to do it’s part in moving the scapula to get that arm overhead.

The serratus anterior (SA) works in concert with the upper traps (UT) and lower traps (LT) to allow the scapula to upwardly rotate.

Note From TG: props to Dr. Evan Osar for introducing me to this exercise a few years ago.


Crook Lying Belly Breathing

This is another great beginner drill as the lower back is supported and the table or floor can provide external feedback. This is also the best position for belly breathing, allowing the belly to fully expand. Along with the others, this one is great for those with back or hip issues.


Quadruped Breathing

This is another great drill for those with issues rotating that scap when going overhead. The serratus anterior is a massive player and if we can get it rotating properly (or at least better than it was), we may be able to provide relief and learn what it is we need to focus on moving forward.

So there you have it, a good, hard look at what we should be looking for and how to make it better, just by changing the way we breathe.

One final note for trainers, make sure you try these yourself as you may find that different cues work better. If you do, please tell me. I want to know all your secrets!

OBLIGATORY PROMOTIONAL PLUG FROM TG (sorry not sorry)

Pretty much everything discussed above is covered in more detail in mine and Dean Somerset’s Complete Shoulder & Hip Blueprint which is being released this week (Nov. 1st).

hipandshoulderfb-banner

In fact the site goes LIVE tonight. You can check back HERE at midnight to get in on the action. It’s totally going to be like a Harry Potter book release! Except, you know, without wizards and Sorting Hats and shit.

Author’s Bio

gavinGavin McHale is a Certified Exercise Physiologist from Winnipeg, Manitoba, Canada (straight North of Fargo).

He loves getting people to lift things they never imagined they would both in-person and online.

He also likes to lift said heavy things and, much like Tony, loves cats.

Check him out at www.gavinmchale.com.

CategoriesAssessment Corrective Exercise mobility

Stop Cranking on Your Shoulders for More Mobility

Seriously, stop it.

For many people the first choice when their shoulder begins to hurt or if they lack mobility is to start cranking and yanking on it. This is rarely the right approach, and as Andrew Millett (my good friend and Boston based physical therapist) points out in today’s post…there a far better and far more effective approaches.

Enjoy.

45885490 - man with pain in shoulder. pain in the human body. black and white photo with red dot

Copyright: staras / 123RF Stock Photo

The shoulders, specifically, the glenohumeral joints, are typically very mobile joints. They need to flex, extend, abduct, adduct, horizontally abduct and adduct and internally and externally rotate in multiple planes and positions in relation to the body. Even though the shoulders are a common area of mobility, many people will present with limitations in at least one aspect of glenohumeral motion.

There are various reasons why someone may have limited shoulder mobility.

Bony Limitations

bone

photo credit: pediatric-orthopedics.com

People who engaged in various overhead sports such as baseball, softball, etc. have been shown on multiple studies to have changes to the glenoid and humeral head. In baseball players specifically, they can appear to have a loss of internal rotation range of motion as compared to their non-throwing shoulder and an increase in external rotation range of motion as compared to their non-throwing shoulder.

This change in range of motion is commonly due to humeral retroversion. Humeral retroversion is the alternation of the humerus and humeral head in relation to the glenoid fossa from years of repetitive overhead activity, specifically throwing.

gird

Photo credit: opensiuc.lib.siu.edu

This is typically only seen in overhead athletes. This differentiation in range of motion side to side in external and internal rotation is considered “normal” for this population. As long as External + Internal Rotation aka Total Motion is within 5 degrees of the non-involved shoulder, then that is considered normal.

Note from TG: In other words, loss of IR in a throwing shoulder is an adaptive response and is normal! It doesn’t necessarily have to be fixed.

With that said, we do not want to crank on someone who has “normal” total motion, but may lack internal rotation on one side versus the other. Asking your patient or client if they engaged in overhead sports as a child is a good clue to this. Then measuring their motion will give more information.

We will get into more detail later on how to improve their motion if their is more than a 5 degree difference in total motion.

Another bony limitation at the shoulder can be acromion type. The acromion is a bony structure that is present in all people that is part of the scapula.

acromion

Photo credit: ipushweight.com

All acromions are not created equal though. There can be 3 varying types of acromions.

acromion-type

Photo credit: cursoenarm.net

As you can see in the picture above, a type I acromion is relatively normal in appearance. In type II and III, there is more of a curved/hooked appearance to it. This alteration in can cause pain and limited motion when reaching overhead.

The only way to definitively know if someone has a type II or III acromion is through radiographic imaging. Programming may need to be altered to more horizontal pulling/pushing variations instead of overhead work if someone doesn’t have full overhead mobility due to a type III acromion.

For most people with a type II acromion, physical therapy can help to improve range of motion and decrease the effect of the acromion on shoulder motion and pain. For most people with a type III acromion, more often than not, surgical intervention is what will help.

Capsular Limitations

In the majority of the joints in the body, there is something called a “capsule” surrounding the joint. A capsule is synonymous to a ziploc bag encompassing the joint.

In this capsule, there are “folds” in certain aspects depending on where the arm is positioned. Due to an old injury, surgery, etc., this capsule can become “tight or stiff.” Now, without getting into too much detail about why it is tight/stiff or why there are capsular limitations, the only way to determine if there is capsular limitations, is by a licensed healthcare practitioner, ie. PT, chiropractor, etc.

Typically, older populations may have more capsular limitations OR if someone has had a long standing injury or prior surgery to the shoulder, they may present with decreased ranges of motion because of the capsule.

The only other area that can be attributed to decreased ranges of motion due to the joint capsule itself that affects the shoulder, would be the thoracic spine. Lack of thoracic spine extension and/or rotation can limit shoulder flexion, external rotation, etc.

To test for limited thoracic spine mobility, try Quadruped Passive Thoracic Rotation:


Normally, passive rotation should be 50 degrees in the general population. If it is less than that, that can significantly limit shoulder range of motion.

Soft Tissue Restrictions

Now, this is the more common of all three of the factors that can limit shoulder mobility. Excluding clients who are hyper-mobile, the majority of clients and patients have some form of increased soft tissue tone in one if not more areas of their body.

At the glenohumeral joint, there are a few “big” than can contribute to limited shoulder mobility.

muscles-of-shoulder

Photo credit: www.smogshoulder.com

Muscles that can limit shoulder flexion are:

  • Pectoralis Major/Minor
  • Teres Major
  • Latissimus Dorsi
  • Subscapularis

Muscles that can limit shoulder abduction are:

  • Pec Major/Minor
  • Teres Major
  • Latissimus Dorsi
  • Subscapularis

Muscles that can limit shoulder external rotation are:

  • Pec Minor
  • Teres Major
  • Latissimus Dorsi
  • Subscapularis

Muscles that can limit shoulder internal rotation are:

  • Infraspinatus
  • Teres Minor

Now, you’re probably thinking that I just “copied and pasted” most of those muscles from one section to the other. The latissimus dorsi is a huge contributor to limited overhead shoulder mobility due to its attachment on the trunk into abduction and flexion. It can also limit external rotation as it is a shoulder internal rotator.

Pectoralis minor can limit overhead motion because of its attachment on the coracoid process of the scapula and the rib. Decreased pectoralis minor tissue extensibility can cause an anterior tilt of the scapula limiting humeral motion on the glenoid.

Subscapularis can limit overhead motion due to its attachment on anterior side of the scapula and on the humerus. Teres major attaches on the scapula as well as on the humerus and can limit overhead mobility as well.

Infraspinatus and Teres Minor limit internal rotation of the shoulder due to its attachment points on the humerus and scapula.

Typically, one if not more than one of the aforementioned muscles can limit overhead mobility. Instead of performing intense stretches and forcing the glenohumeral joint into motions it just does not have, we need to ASSESS and then ADDRESS any limitations that are present.

Assessment

Active Motion

To assess someone’s active ranges of motion, ask them to move.

Have them perform:

Shoulder Flexion

active-shoulde-flexion

Shoulder Abduction

active-shoulder-abduction

Shoulder Medial Rotation

active-shoulder-medial-rotation

Shoulder Lateral Rotation

active-shoulder-external-rotation

“Normal” ranges of motion for general population clients would be:

Shoulder Flexion: 180 degrees OR humerus in line with the client’s ear.

Shoulder Abduction: 180 degrees OR humerus in line with side of body

MRE: 3rd digit finger tip to contralateral inferior angle of scapula

 LRF: 3rd digit finger tip to superomedial border of contralateral scapula.

Now that you have assessed someone’s active motion, we need to assess it passively to fully determine if someone has a true mobility limitation.

Passive Motion

Perform the same motions passively into flexion, abduction, MRE, and LRF. Do not force these motions or push through tightness or pain. If you cannot passively bring the client’s arm to the aforementioned areas mentioned in the Active Motion section, then we know the client has a true mobility limitation.

Addressing the Issue

If someone presents with limitations in passive shoulder flexion, abduction, MRE, or LRF, performing some form of Self-Myofascial Release (SMR) can be beneficial.


Then, re-test passive motion to see if there has been an improvement in mobility. If there has, then you know you have worked on the appropriate areas.

If there has NOT been an improvement in mobility, refer out to a manual therapist (PT, sports chiropractor, massage therapist, etc.)

If the mobility has improved, then we want to use appropriate mobility drills to help groove the patterns that were just improved.

Horizontal Adduction/Posterior Rotator Cuff Stretch


Key Points:

  • Make sure to keep scapulae retracted by using wall or door jam.
  • Once scapulae is fixed, gently bring arm across body.
  • Hold 5-8 seconds pre-training or 30 seconds post-training.
  • By fixating scapulae, it will provide a more focused stretch to the posterior aspect of the shoulder.

Latissimus Dorsi Stretch


Key Points:

  • Use opposite side hand to fix scapulae to rib cage.
  • Once scapulae is fixed, hold onto a stationary object and sit back.
  • Gentle stretch should be felt in the lat.
  • By fixating the scapulae to the rib cage using the opposite hand, it provides a truer stretch to the lat vs tractioning the glenohumeral joint.

 Motor Control

Once there has been an improvement in mobility, we want to make sure that the brain and the body knows how to access that “new” mobility. We need to make sure to re-pattern the proper movement patterns to avoid falling back into an poor compensations.

For shoulder re-patterning, various movements that help to promote proper movement patterns such as:

Forearm Wall Slides


Back to Wall Shoulder Flexion


Quadruped Assisted Reach, Roll, and Lift


Now that we have improved the mobility by addressing increased soft tissue tone, re-patterned those movement patterns, now we want to incorporate them all together.

Movements such as:

Turkish Get-Up


Kettlebell Bottoms Up Baby Get-Up


There you have it! Instead of mindlessly stretching your shoulder, address any potential limitations and get back to training effectively!

About the Author

Andrew Millett is a Metro-West (Boston) based physical therapist

Facebook: From The Ground Up

Twitter: @andrewmillettpt

Instagram: andrewmillettpt
CategoriesAssessment Corrective Exercise

The Power of Test, Re-Test: How to Supercharge and Add Value to Your Assessment

During the Complete Hip & Shoulder Workshop in Seattle last weekend I spoke on the importance of the test/re-test concept with regards to assessment.

It’s nothing fancy or elaborate.

You test something – whether it be range of motion or maybe a strength discrepancy – implement a “corrective” modality if something’s deemed out of whack, and then re-rest that shit to see if it worked.

If it did….you’re Gandalf.1

If not…#awwwwwkward.

The test/re-test approach helps set the tone for any future “corrective” strategies or programming considerations you’ll do as a coach or trainer.

In addition, and something I’d argue is equally as important, it also provides an added layer of value to the assessment.

If you’re able to demonstrate to someone a significant change or improvement in ROM or reduction in pain/discomfort by implementing a drill or two, and it’s something they’ve been struggling with despite countless interactions with other fitness professionals, what’s the likelihood they’ll bust out their checkbook or Bitcoin wallets (<—depending on their level of geekery)?

I suspect highly likely.

It demonstrates a perceived level of “mastery” and knowledge-base towards the assesser (you) and, in a roundabout, reverse psychology kind-of-way, delves into the “pain center” of the assessee (athlete/client).

In this example it can refer to literal pain such as a banged up shoulder, knee, or lower back. But it can also speak to pain in the figurative sense too. Someone who’s frustrated and “had it up to here!” that they can’t lose weight, or maybe an athlete who was cut from their high-school team would have a degree of “pain” that would incentivize them to take action.

Show someone success or a clear path of action, however little, and they’re putty in your hands.

Of course this assumes you’re not some shady shyster who tries to up-sell the benefits of some super-secret concurrent, 47-week, Easter-Bloc training program you copied from Muscle & Fitness or, I don’t know, organic raspberry ketones laced with mermaid placenta.

People who promote and use smoke-and-mirror tactics are the worst.

But lets get back to the topic at hand.

Test/Re-Test

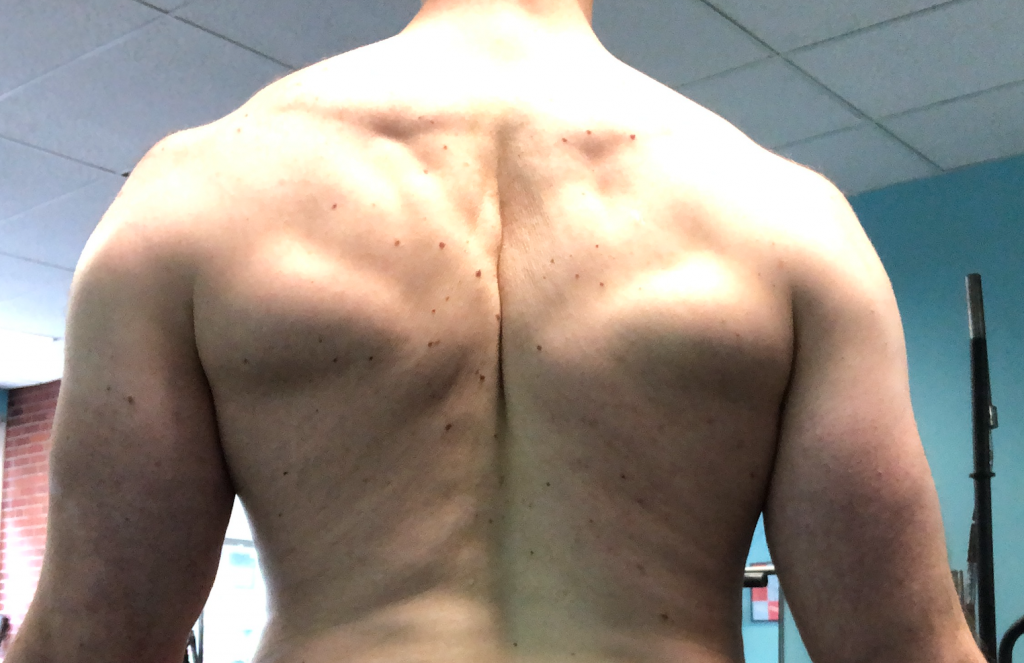
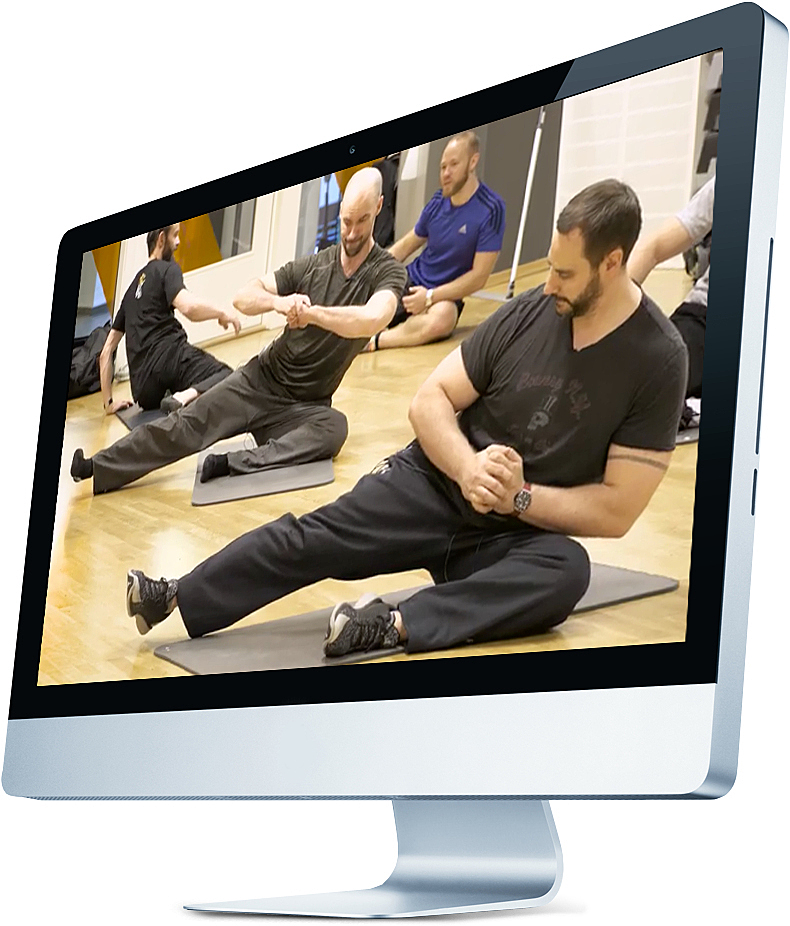
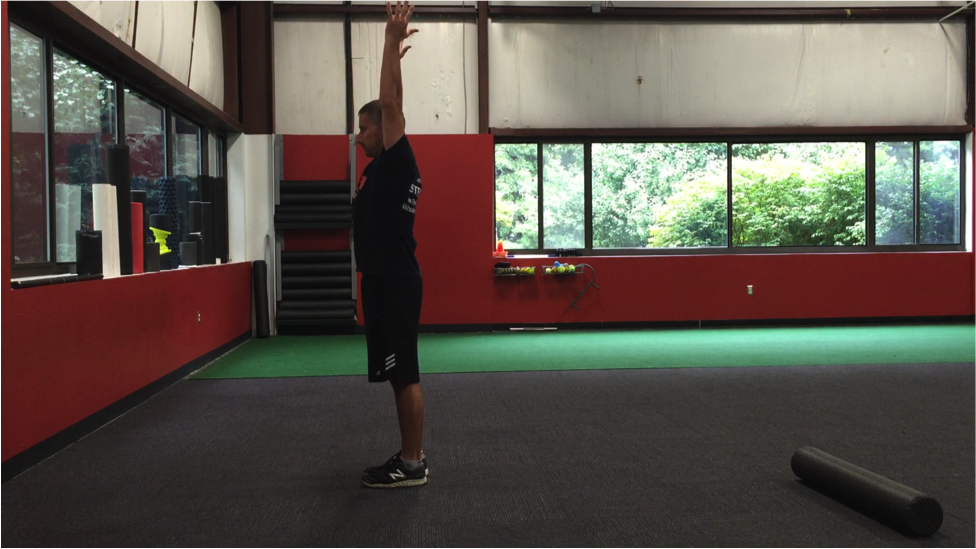
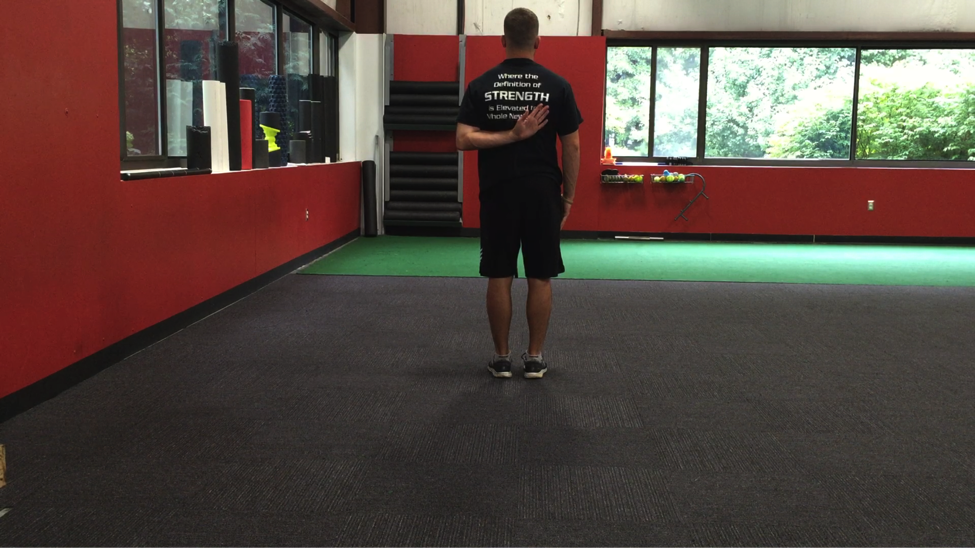
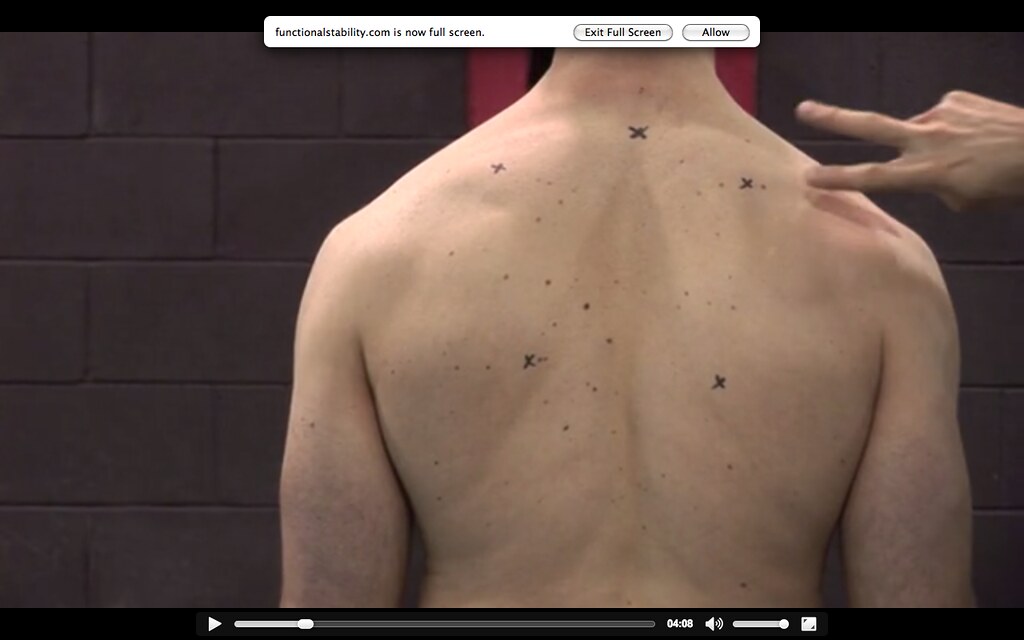
One of the main screens I use with my athletes and clients is their ability to lift or elevate their arms above their heads.

Shoulder flexion is important for everyone, not just overhead athletes and CrossFitters.

If someone lacks shoulder flexion, and they’re an athlete, it’s going to affect their performance. A baseball pitcher may be “stuck” in gross shoulder depression, which in turn will have ramifications on scapular positioning and kinematics, which in turn will result in faulty mechanics and compensatory issues up and down the kinetic chain.

Conversely, regular ol’ Hank from accounting, who likes to hit the gym hard after work, if he lacks shoulder flexion, he too could have numerous issues arise ranging from shoulder and elbow pain to lower back shenanigans.

Shoulder flexion – and the ability to do it – is a big deal in my opinion. And it’s a screen that should be a high-priority in any fitness professionals assessment protocol.

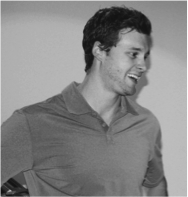
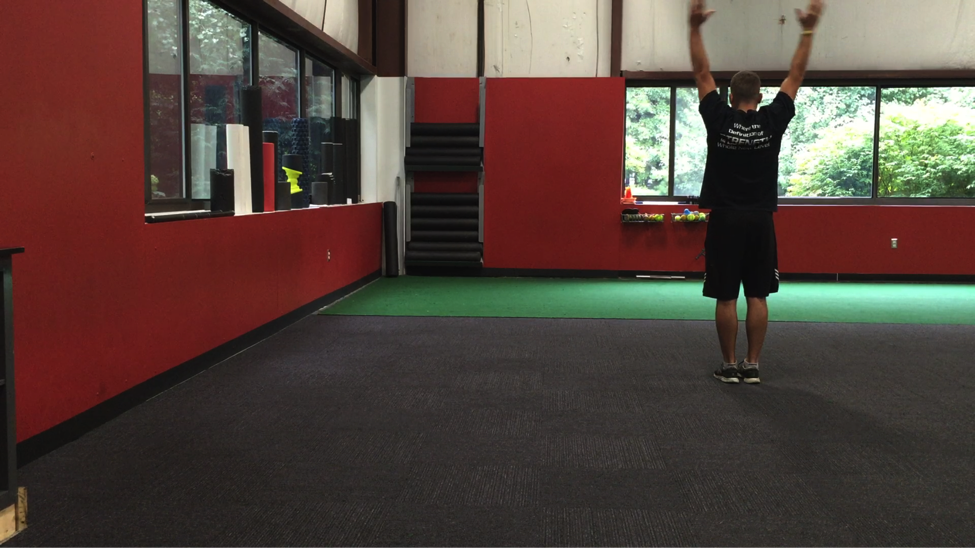
So lets say I’m working with someone who lacks shoulder flexion. I test it both actively (standing, picture above) and passively (on a training table).

I surmise that it’s limited and that it may be feeding into why a particular person’s shoulder has been bothering him or her.

I can use the test/re-test approach to see if I can nudge an improvement.

Now, as I’ve learned from many people much smarter than myself – Mike Reinold, Sue Falsone, Dr. Evan Osar, Dr. Stuart McGill, Papa Smurf, etc – you shouldn’t rely on any ONE screen/corrective.

Everyone is different, and what works for one person might not even scratch the surface for another.

With regards to addressing (lack of) shoulder flexion2, there are a handful of “go to” strategies I like to use.

And then it’s just a matter of seeing which one sticks.

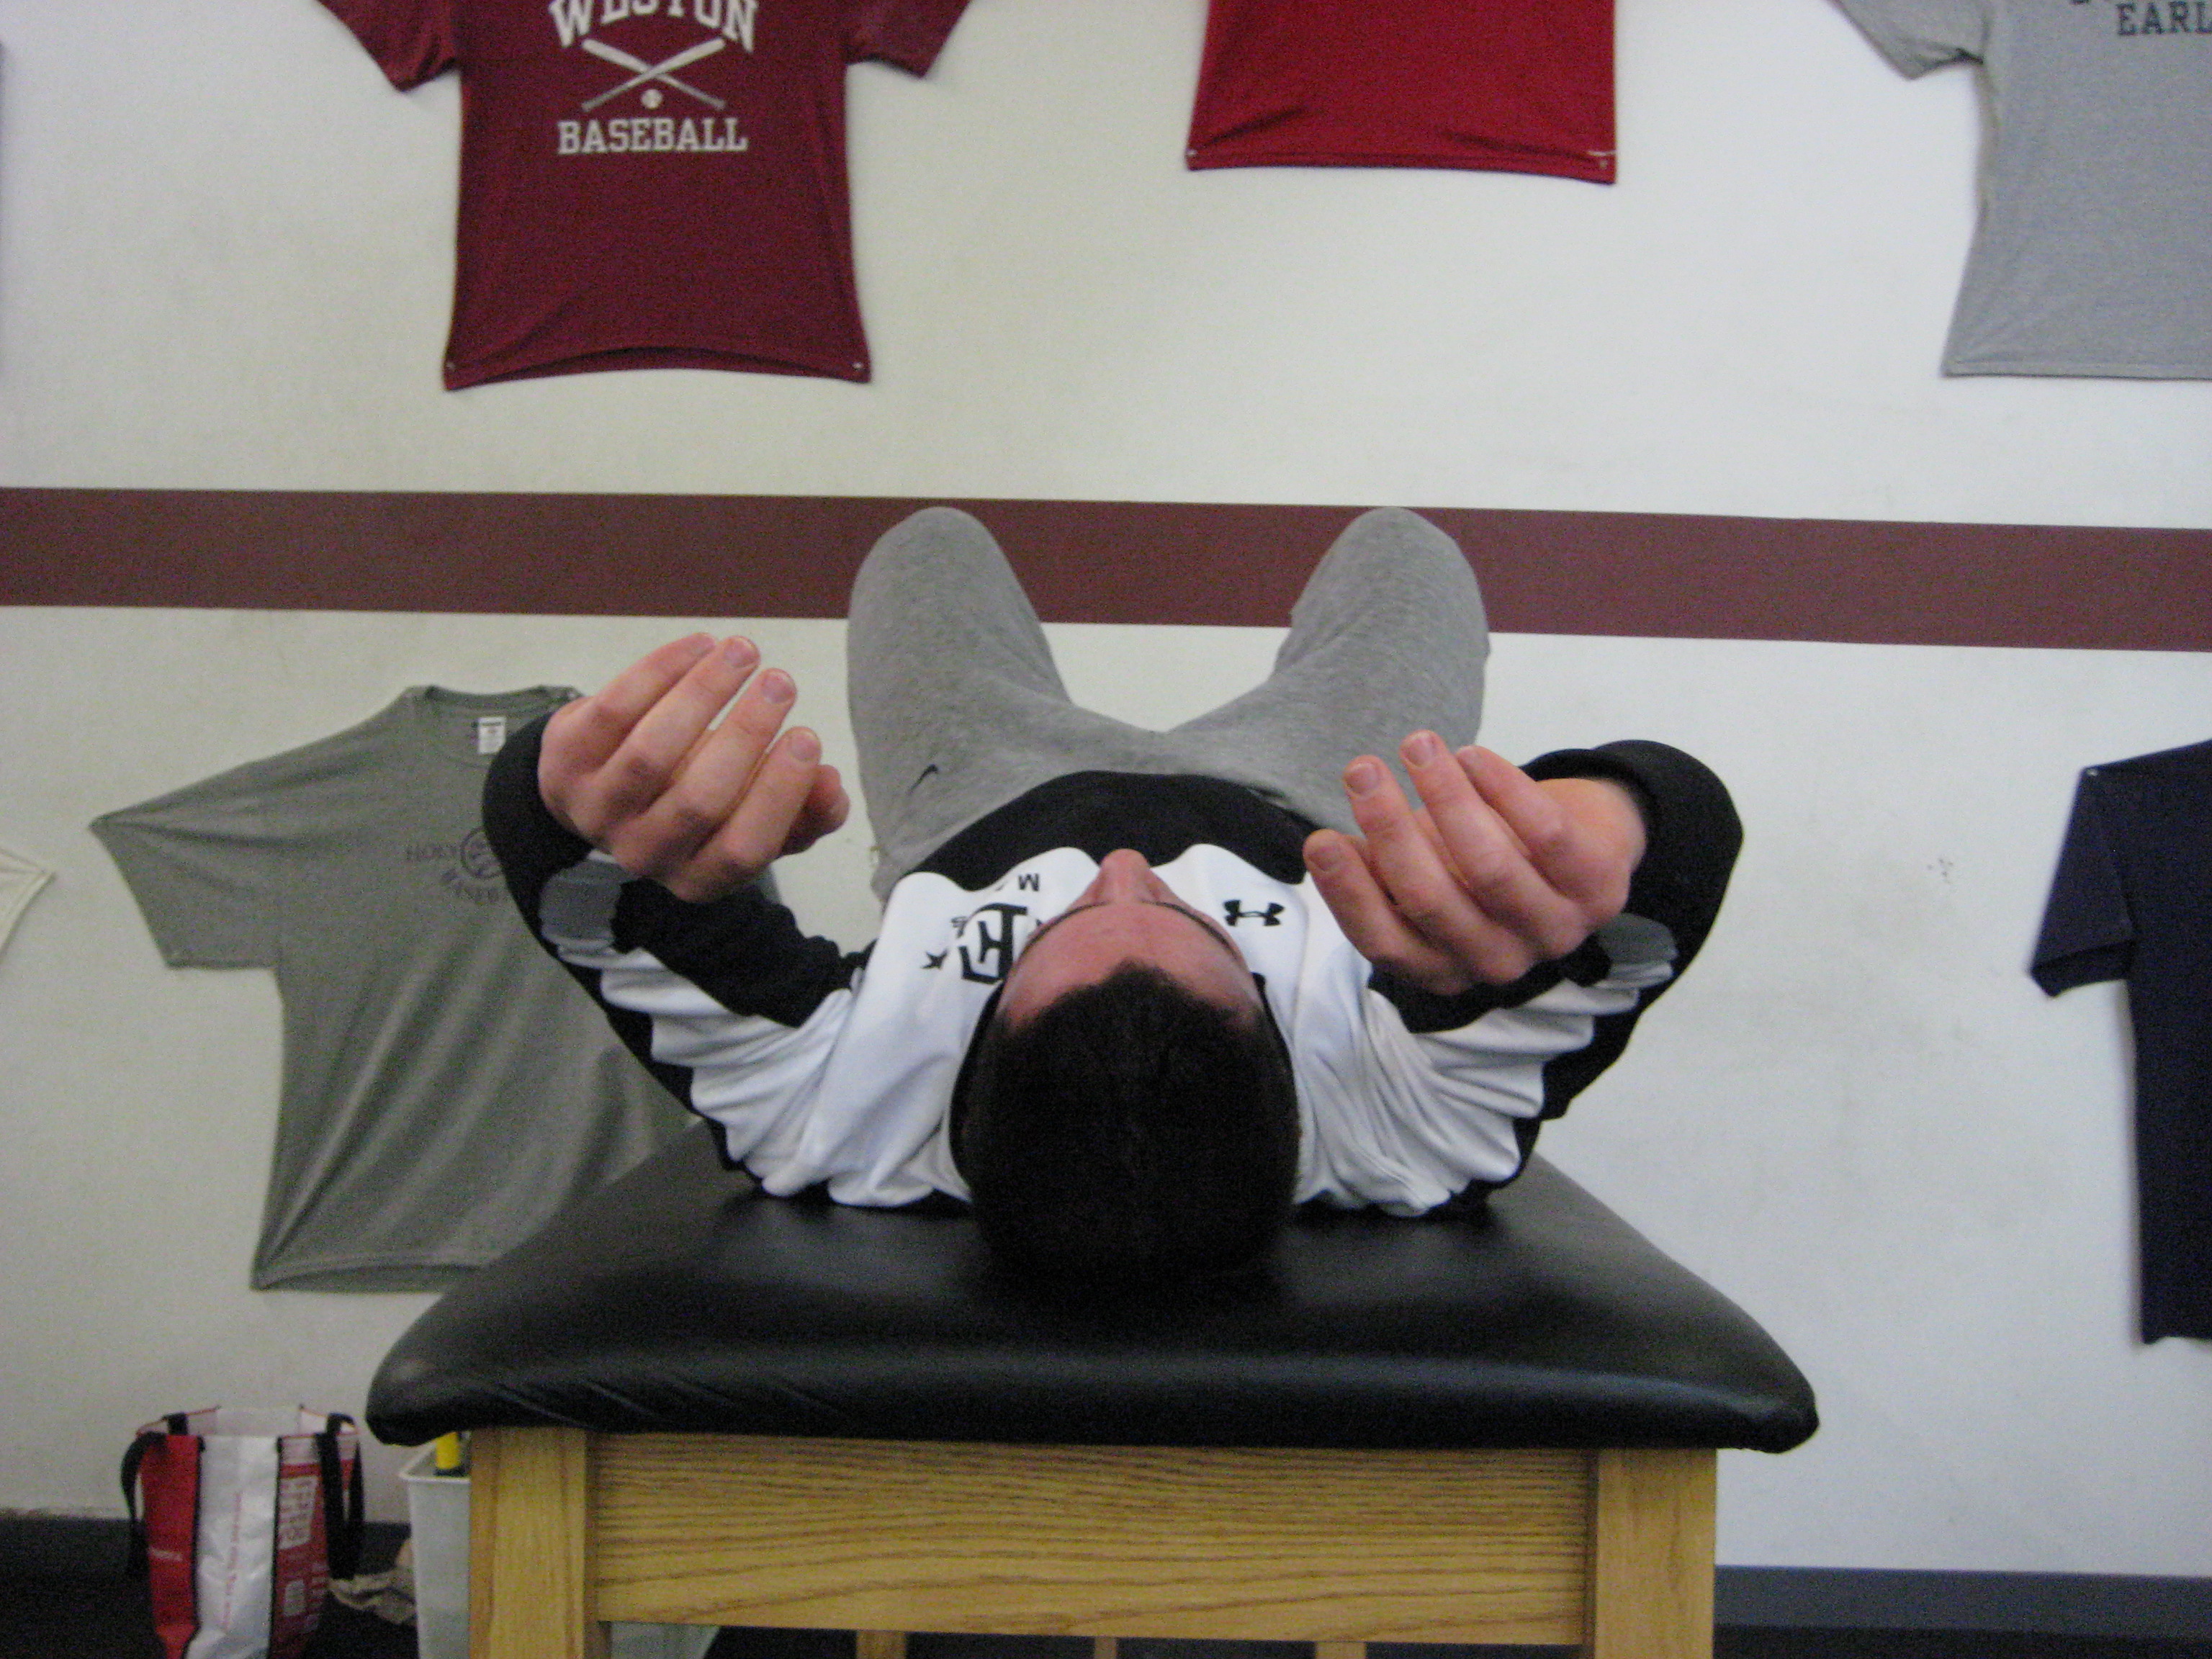
1) Encouraging a Better Position

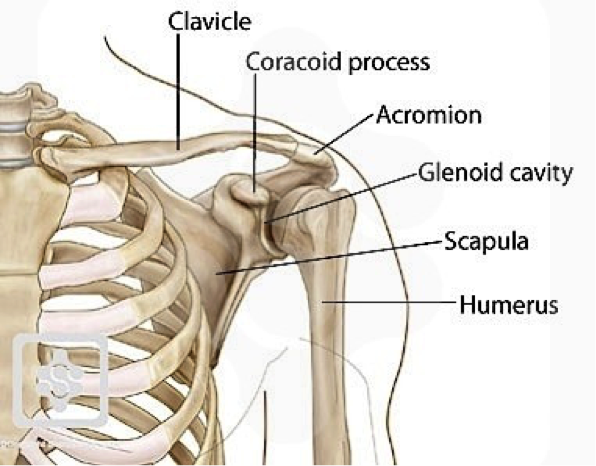
In order to elevate the humerus (arm) above your head, the scapulae (shoulder blade) needs to do three things:

  • Upwardly rotate
  • Posteriorly tilt
  • Protract

The ability to do so is vastly correlated with the thorax. Those who are super kyphotic (ultra rounded upper back) will have a hard time elevating their arms overhead. Often, the simple “fix” here is to foam roll the upper back and work on more t-spine extension and you’ll almost always see an improvement.

Bench T-Spine Extension


Side Lying Windmill


But what about the opposite? Those who are stuck in more “gross” extension and downward rotation?

I.e., the bulk of athletes and meatheads.

Here the shoulder blades can be seemingly “glued” down.

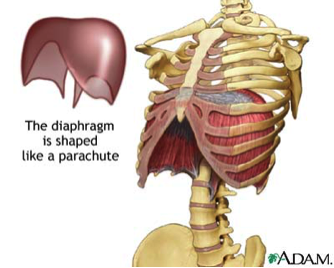
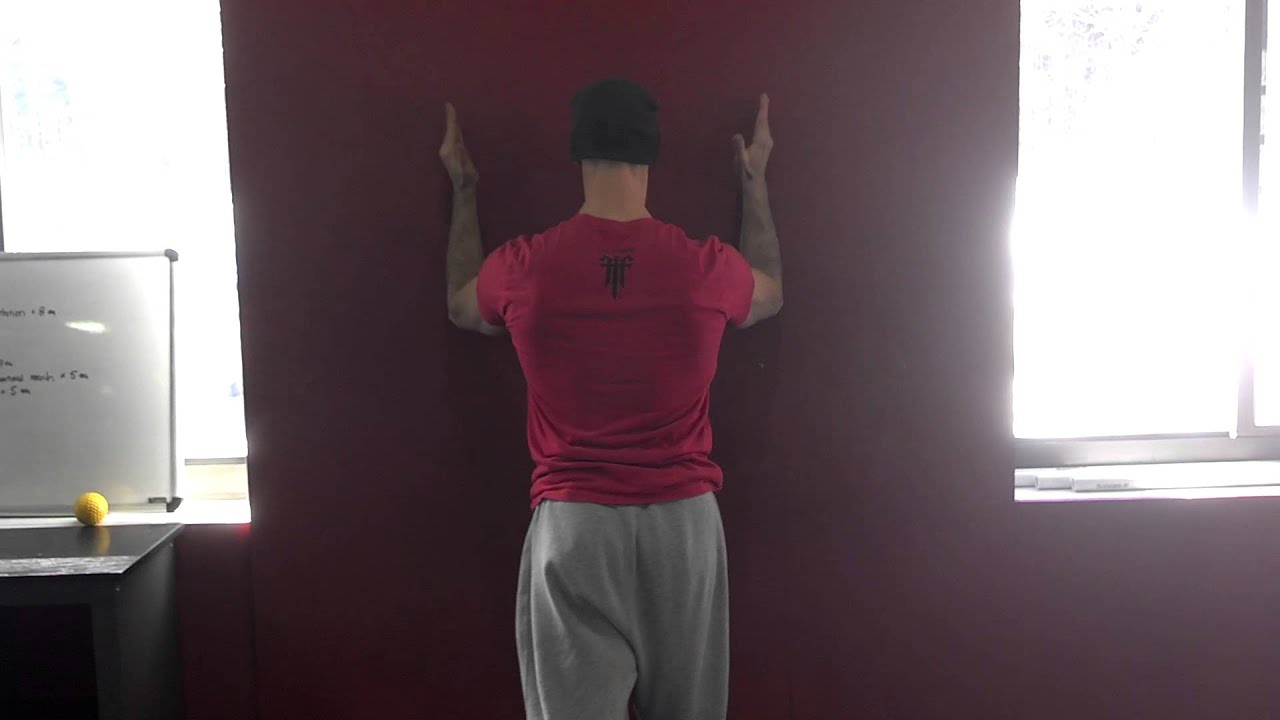
In that case some positional breathing drills to “un-glue” the shoulder blades (and to encourage more 3D or 360 degree expansion of the ribcage/thorax) would be highly advantageous.

All 4s Belly-Breathing


It’s amazing what a few minutes of this drill can do with improving shoulder flexion ROM, without having to yank or pull or “smash” anything.

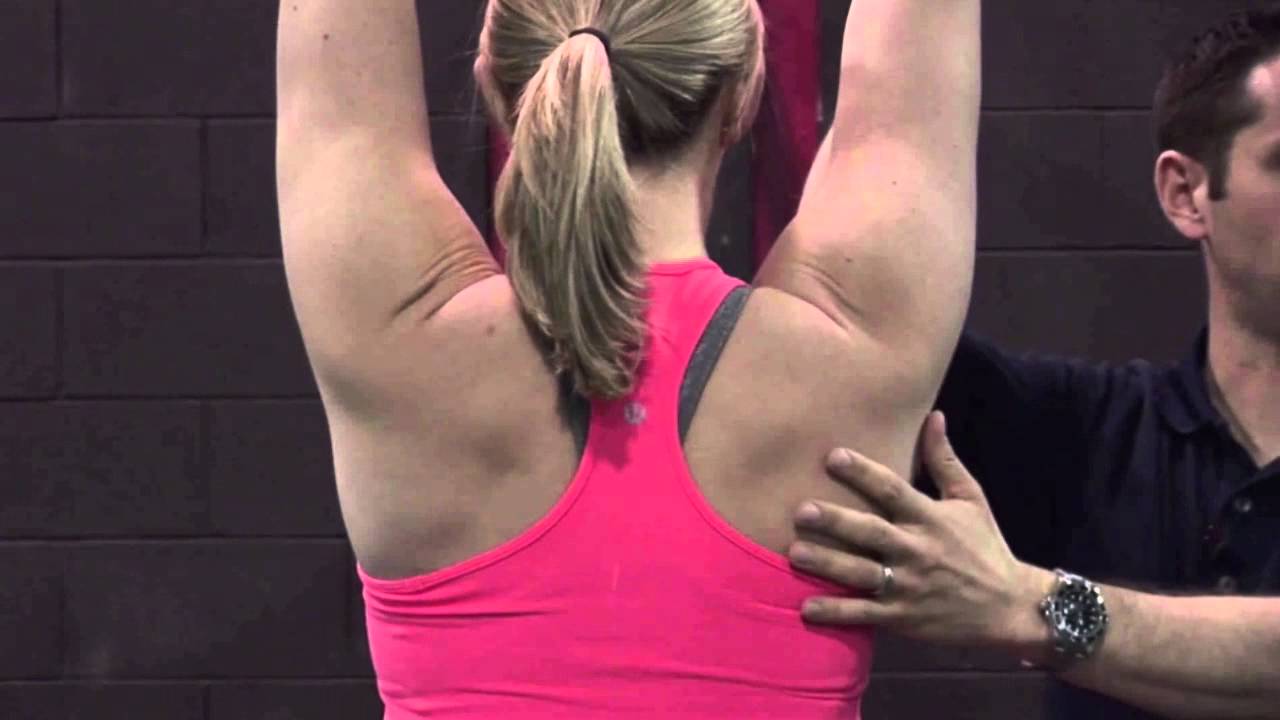
2) Allow the Shoulder Blades to Move

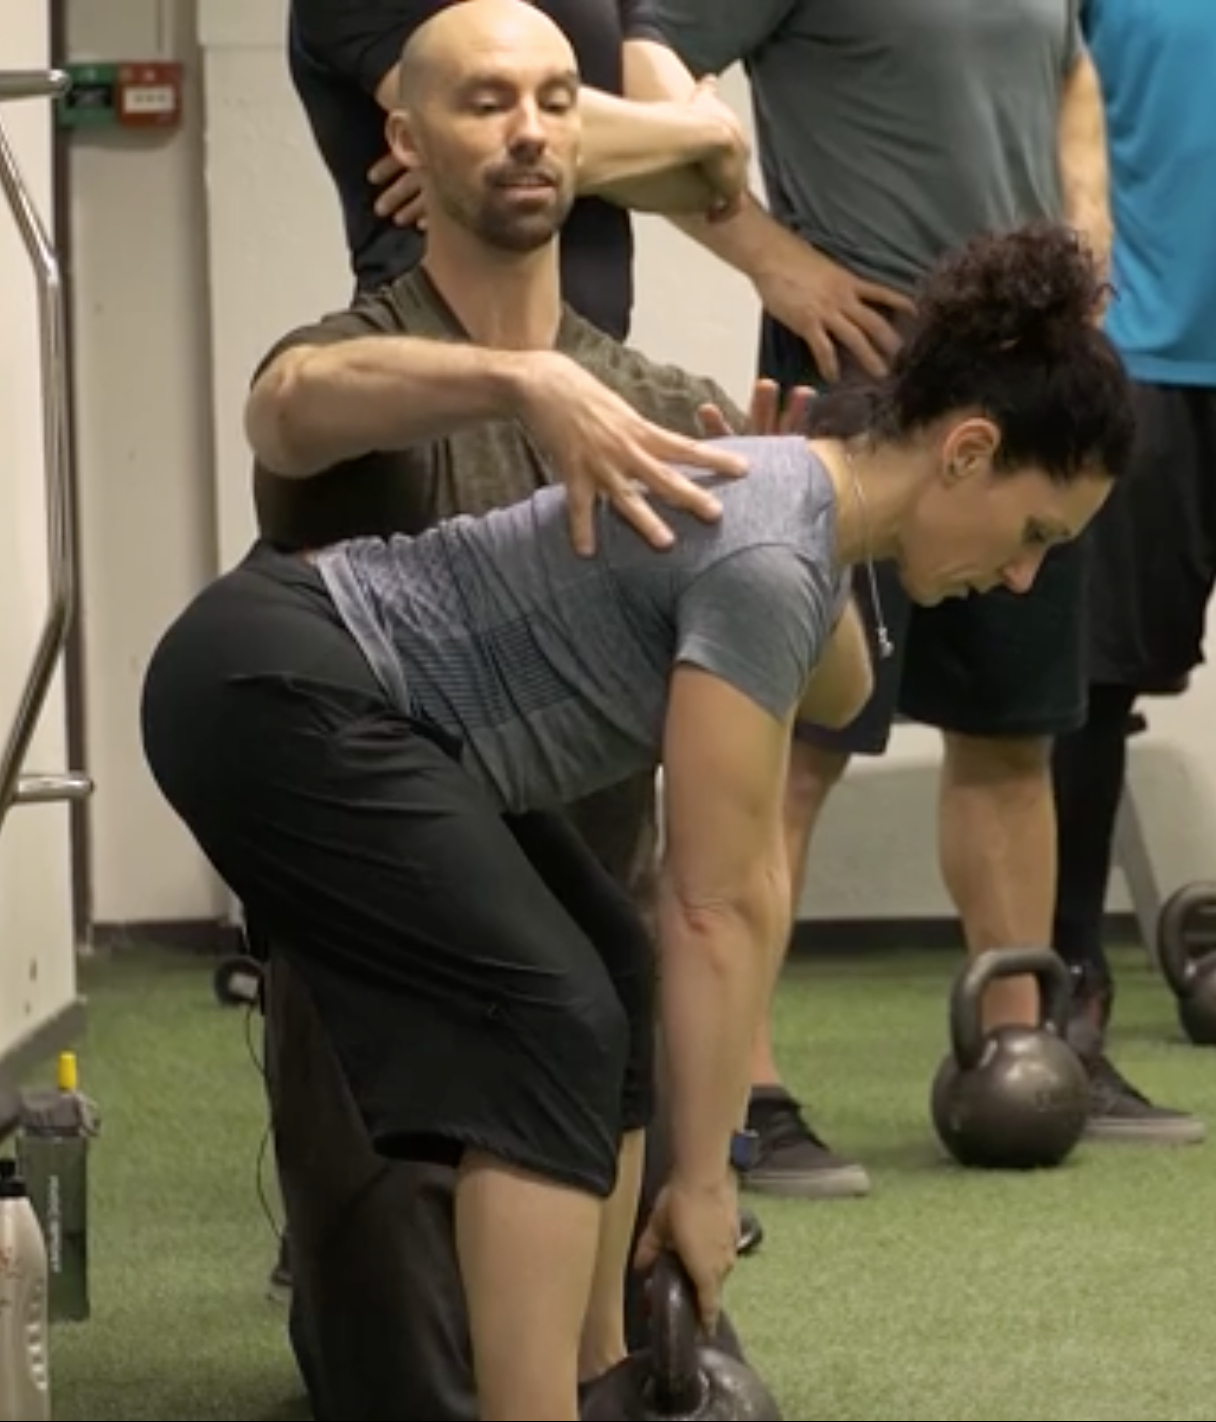
Some people simply don’t know how to allow their shoulder blades to move. A prime example is this past weekend.

An attendee who’s a personal trainer – but also competes in figure – mentioned how her shoulders (especially her left) had been bothering her for eons, and she couldn’t figure out why.

We had her perform this drill.

1-Arm Quadruped Protraction


In reality, both protraction and retraction are occurring, but many people have a hard time with the former.

The idea here is to learn to gain movement from the shoulder blade itself and not via the t-spine.

Here’s another angle (because, triceps):

https://www.youtube.com/watch?v=eyNFNxqFlSc


After a few “passes” with this drill, she saw an immediate improvement in her ROM. What’s more, the following day when she showed up for Day #2, the first thing out of her mouth was “my shoulder feels amazing today.”

That’s a win.

3) Pin and Go

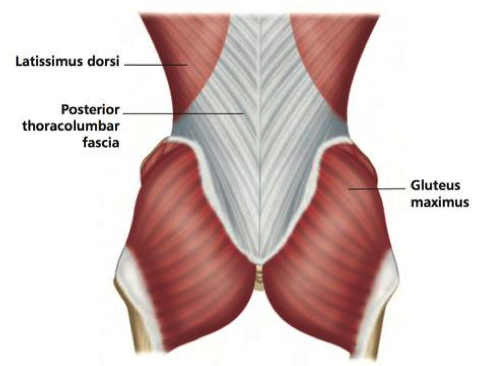
Another route to take is to have the person foam roll their lats. Not many people do this, and there’s a reason why: It’s un-pleasant.

I’ll have the person spend a good 30 seconds or so on each side and then have them stand up and perform a simple SMR drill using a lacrosse ball against a wall.

They’ll “pin” the teres minor down (basically, find the tender spot behind their shoulder and hold it there) and then work into upward rotation.

https://www.youtube.com/watch?v=9OiGt_O1FvY


Another five or so passes here, and I’ll re-test.

Many times I’ll see a marked improvement in their shoulder flexion.

Caveat

NONE of this is to insinuate that anything mentioned above will work for everyone. The idea is to understand that it’s important to “test” a number of modalities and then re-test to see if you find an improvement.

If you do, you’re likely barking up the right tree which will make your corrective approach and subsequent strength training more successful.

If you don’t, well, my bad…..;o)