Ask ten different people their opinion on what traits or characteristics make for a great or “successful” coach – in this case strength coach, personal trainer – and you’re bound to get ten different answers and iterations.
Some people will use adjectives like strong, looks the part, experienced, knowledgable, professional, motivating, or “destroy the back of my pants scary.”
Others will use less germane markers such as bald, has an epic beard, or sleeps with a copy of SuperTraining underneath his or her’s pillow at night.
All are important (some more so than others) and all can be used to describe many strength coaches – or any kind of coach for that matter.
It should go without saying, but this is not an exhaustive list.
Today, though, I’d like to cover some less obvious characteristics I feel constitutes a great strength coach and/or personal trainer. Some are based off of my own personal experiences, while others fall into the camp of “it’s true because it’s my blog, and because I said so.”
1. Coaches Coach
Seems like an obvious point to start with, right? But it amazes me how many “coaches” out there don’t train anybody.
Like, ever.
Such is the paradox of this technological age we live in. The internet has made everyone into an expert or authority all because 1) they say so and/or 2) because # of followers = the pantheon of expertise.
Listen, having thousands of followers on Twitter or Instagram is impressive. Anytime you have that many people interested in what you have to say, you’re obviously doing something right.
But don’t call yourself a coach or “expert” if you’re not actually coaching people.
And this is where things get little murky and where the weeds get a little higher.
This isn’t to disrespect or devalue those who make a living online. I get it. We live in the 21st century and if nothing else, the pandemic taught us that we should be ready, willing, and able to pivot to the online space when needed.
I have many friends and colleagues who do really well for themselves coaching people in a distance based fashion:
They’re able to help more people this way.
They get people results.
I can’t bemoan that.
I do it too.
However, I also still spend 15-20 hours per week in my studio coaching athletes and clients in person. That’s still very important to me. It keeps me fresh and in touch with my coaching skills. And I can guarantee many coaches online who are crushing it were FIRST doing so with in-person coaching. If you can’t coach a deadlift in person, the likelihood you’ll be able to do so over a WiFI connection with someone hundreds of miles away is pretty slim.
Moreover, if I’m going to sit here and write blog posts and articles about how to train people, I better be practicing what I preach.
But that’s just me, I can’t speak for everyone.
That’s a degree of integrity I am not willing to give up.
2. Embrace Your Coaching Style
I always gain of sense of entertainment when other coaches come to observe me coaching. I think many are surprised to recognize that I’m fairly tame in my approach.
Sure, I’ll get animated, crank up the music, and pump people up when it’s needed and warranted. But for the most part I’m about as laid back as it gets. What can I say…
To be clear: No one – coaches, pirates, airplane pilots, Orcs – is 100% introverted or extroverted. We’re all a mix-n-match of the two. What I find unfortunate is that it’s the more introverted side of the spectrum that tends to get society’s consternation.
Introversion is often seen as aloofness or worse, a weakness. When all it really means is that some people are mentally drained in more social environments and need a little more kitty cuddles “me time” to re-charge.
As such, those who are more introverted are often forced to be something they’re not…much to the detriment of their comfort level, happiness, and ability to not toss their face into a brick wall.
Extroversion – while having its own set of advantages and disadvantages – is seen as a strength and preferred trait in our society.
We introverts have a ton to offer as coaches – we tend to be better listeners and are more patient as an example. I’d encourage anyone who falls into this camp to embrace their introversion, understand that compromises are going to have to be made of course (read my article linked above), and that preferring to hang out with a book on a Friday night is total boss status.
3. Pull Coaching vs. Push Coaching
It’s been pointed on many occasions in recent years – especially by the likes of Nick Winkelman and Brett Bartholomew – the power of using EXTERNAL (as opposed to using internal) cues when coaching – particularly when working with beginner or intermediate level lifters.
To Summarize:
Internal Cues = Specific bodily actions or what it’s doing in space.
External Cues = Intent, distance, or an action.
ExerciseInternal CueExternal Cue
1. Deadlift “Chest up.” “Show me the logo on your shirt.”
2. Squat “Knees out.” “Spread the floor.”
3. Bench Press “Arch your back.” “Meet the bar halfway.”
4. Sprinting “Extend your hip.” “Push the ground away.”
External cuing tends to have more “sticking” power and resonates more with most lifters. Nick Tumminello has a nice way of putting it:
“Speak client, not trainer”
Taking things a step further, I really love the idea of “Pull” coaching vs. “Push” coaching – a concept I stole from my good friend and colleague Tony Bonvechio.
Pull Coaching = Helping someone solve their own problems…listening to understand, asking questions, paraphrasing, suggesting options.
Both scenarios have efficacy and have their time and place. However, I’d argue we need more of the former compared to the latter. As a coach I want to EDUCATE my athletes and clients to be their own best asset; to figure shit out if I am not there. I don’t want them to have to rely on me for everything.
Like:
When to add weight to any given exercise.
When to temper their workouts and when to push themselves further.
How to make simple exercise substitutions if equipment availability is an issue.
To understand why burpees (and kipping pull-ups) are straight up dumb.
And, do I really need to remind you to g0 Watch Beef on Netflix? FOR THE LOVE OF GOD!!!!
You know, the important stuff.
I think far too many coaches and personal trainers push at the expense of pull. Strive to empower your clients by making them more competent and encourage more autonomy (making their own choices).
4. Insatiable Desire to Get Better
Dan John sits in the front row whenever he attends a workshop or seminar. Mike Boyle still attends numerous events every year and is never afraid to backtrack or admit when he’s wrong. Ali Gilbert is the same. Eric Cressey just bragged the other day he’s listened to 25 books on Audible this year.
On 2x speed (the psychopath).
All of them have decades of coaching experience, and all are still striving to get better.
Who in the holy f**k are you?
You’ve got it all figured out huh? No need to continue to learn from others, right? It’s YOUR way or the highway? Everyone else is a moron? Got it.
A-hole.
5. Lets Stop With the “Grinding” and “Hustling”
While it’s a bit more toned down now, I’m so sick of seeing stuff like this.
We see them on social media all the time.
The “Grinders.”
The ones who are soooooo busy and soooooo swamped and have sooooooo much more of a work ethic than everyone else.
Listen, I can appreciate people with work ethic. And I’ll be the first one to champion hard work and the notion that nothing happens without some degree of sacrifice, uncomfortableness, and inconvenience. And yes, long-ass hours.
But please, spare us the inspirational quotes and grandstanding because you happened to get up before 5 AM two days in a row or, I don’t know, haven’t eaten a carb since March.
Grinding is four tours of duty in Iraq and Afghanistan. Grinding is raising a child as a single parent. Grinding is going through intensive chemotherapy and still putting a smile on your face. Grinding is listening to your co-worker brag about their CrossFit workouts and attempting to keep your eyes from rolling out of their sockets every time (s)he waxes poetic about how you’re going to die tomorrow for drinking a Diet Coke.
It has nothing to do with how superior you are because you avoid seed oils or because you train eight clients per day, six days per week.
Speaking of which:
To the “rise and grinders”…I love the work ethic, but there’s only a finite # of hours per week you’re an affective coach.
You’re not the same coach at the end of the day as you are at the start. You’re not the same coach at the start of a week as you are at the end. Touting the early wake-up times and hustle mentality isn’t the long-term flex you think it is.
It’s not a coincidence most trainers/coaches putter out after two years. They inevitably hate life.
I understand bills need to be paid, and I want to reiterate that I also understand there will be a window of time where long hours are going to happen. But be cognizant that there are only a finite number of hours where you’re an affective coach and where you’ll inevitably burn out.
There’s is a healthy balance and I hope you can find it.
Note From TG:This is a re-publication (with updated edits/additions) of an article I wrote a few years ago. I figured since I’m currently working with four women at the moment – three in person, and one distance based – who are pregnant, it was something I felt required a little dusting off.
Hope you enjoy it.
Okay, I know what some of you may be thinking: What does someone who has succumbed to male pattern baldness, hates The Notebook1, and pees standing up know about the female body, let alone speaking to something that’s arguably the most precious, magical, and delicate time of a woman’s life?
(insert shrug emoji here)
Close-up pregnant woman doing exercise indoors.
What to Expect (In the Gym) When Expecting
Well, first off: Not for nothing, I took health class in 9th grade, so I know where babies come from Smarty Pants. For those who don’t know, when a man and a woman love one another they place a note in a bottle and throw it into the sea.
Eventually a mermaid reads it, sends her pet seahorse to the Galapagos Islands where he then relays the message to Henry the stork.
And wah-lah…a baby arrives nine months later.
Don’t argue with me, it’s science.
Secondly, in the just over two decades I’ve been a strength coach I’ve worked with and trained a few dozen women through their pregnancies and I thought I’d share some of my own thoughts on the topic because I feel much of the information out there directed towards women is regurgitated, archaic, hogwash.
Admittedly I have a strong viewpoint and recognize that not everyone will agree with me (and that’s cool). But it’s my hope that this post at least opens up the conversation and helps encourage people to think outside the box.
For me there’s a massive dichotomy between what I do and what most (not all) of the research says we should be doing when working with someone who’s pregnant.
Obligatory Disclaimer: Every pregnancy is different; each woman needs to consider her own specific situation. And, to cover your bases, it’s best to consult with your physician. Preferably one that lifts…;0)
No one should be made to feel guilty or lazy if they need to take it easy; the health of the baby and mother are paramount.
While it always comes down to the individual, their comfort level, their ability to listen to their body, as well as their past training history, I find it somewhat disheartening that there are health professionals out there (both primary and tertiary, as well as many of us in the fitness industry), and even more articles, that suggest “training” should orbit around light walking and what mounts to folding laundry.
For me, when I’m working with someone who’s expecting, it’s about preparing them for something a helluva lot more significant than lifting pink dumbbells (or for that matter anything I’ll ever have to do as a member of the Y chromosome club).
I mean, I think it’s an accomplishment I can grow chest hair, but if you’re able to grow and push a human being out of your body, that’s next level shit.
If that’s the case, you’re also capable of lifting a barbell off the ground.
Repeatedly.
But let me be clear, and this is going to serve as the proverbial umbrella of the entire conversation:
It ALWAYS comes down to the woman’s comfort level.
Regardless of one’s experience in the gym, whether they’re a seasoned veteran or a newbie, I always instruct the women I work with to listen to their body. After a few hundred thousand years of evolution, the human body is pretty smart, resilient, and will let you know when it’s pissed off or doesn’t like something.
Now, I’m not insinuating that every expecting mother out there should go out and try to hit a deadlift PR on a weekly basis or snatch a mack truck over their head. But I’m certainly in the camp that feels we can offer a lot more than simply telling them to “go walk on the treadmill” or what mounts to playing patty cake for shits and giggles.
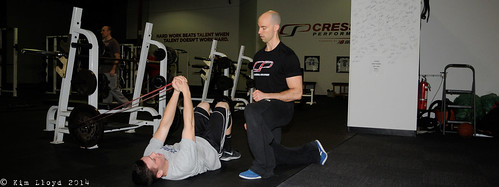
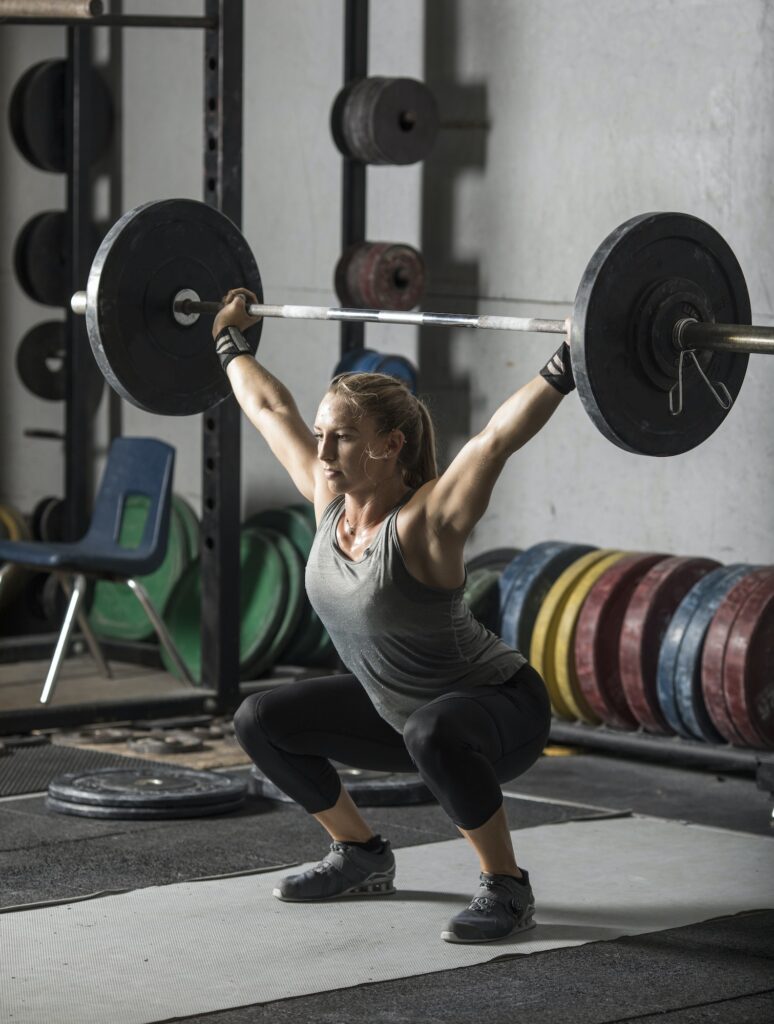
As an example, here’s one of my former female clients, Whitney, when I was a coach at Cressey Sports Performance performing some heavy(ish) deadlifts at roughly 32 weeks out.
And I say “heavy(ish)” because the weight in this video was no where near her best effort.
Because this is a gargantuan topic and because my head is spinning in several different directions – and because it’s something I can’t possibly cover in one simple blog post – I’m just going to shoot from the hip and blurt out some thoughts in random order.
Stuff
1. Before I begin I’d be doing a huge disservice to the discussion if I didn’t point people in the direction of Dr. Laura Latham,Julia Ladewski, and Stacey Schaedler all of whom are three very strong (and very smart) women who have written extensively on women training through their pregnancy.
Likewise, I’d be remiss not to mention Dr. Sarah Duvall’s excellent Pregnancy & Postpartum Corrective Exercise Specialist Certification – it’s not only THE best resource on the topic of training during pregnancy and postpartum, but, if I’m be honest, its THE best course I’ve ever taken.
2. Lightsaber Self-Defense Against the Dark Arts (and fit-fluencers)
3. CPR.
To quote the Dr. Duvall herself:
“You gotta lift shit to fix shit.”
If you’re a trainer, strength coach, physical therapist, or I don’t know, an Orc – it stands to reason this information applies to 50% of your current/potential client roster…
…you WILL need to know this stuff.
I’d also be remiss not to point to THIS amazing archive on the Girls Gone Strong website – everything from myths about strength training during pregnancy to pelvic floor dysfunction is covered. In addition, HERE is a FREE 5-day course by GGS dedicated to trainers who work with postpartum clients.
(On that same front, if anyone reading has any high-quality websites, blogs, or general information they’d like people to know about PLEASE link to them in the comments section below).
2. Just to give you a little insight into the type of information being regurgitated out there, one of the women I used to train had a friend who told her that when she was pregnant, her physician recommended that a great way to get more protein in her diet was to pound milk shakes.
Many women fall into the trap of “Well, I’m eating for two now,” and interpret it as a free-pass or opportunity to ramp up their caloric intake. Granted, there’s no doubt the metabolic demands of the body increases when another human being is growing inside of it, but lets not get too carried away here.
Most of the research and material I’ve read says that an increase of 400 kcals per day is more than enough to cover one’s bases, and to ensure adequate fuel for the body and the growing fetus.
Giving that a little perspective, 400 kcals mounts to roughly four (standard) tablespoons of peanut butter.
That’s it.
No need to go crazy with pizza buffets, a baker’s dozen from Krispy Kreme, or a daily liter of Coke challenge (the drink, not the drug). Don’t try to fool yourself into thinking that just because you’re pregnant, means you can go bonkers with the calories.
I am not saying it’s wrong, and I can attest to the weird food cravings that come about. For instance my wife was obsessed with tacos for a four-week span, and I’d be lying if I said I wasn’t more than happy to hit up our local taqueria several times per week; it’s not like she had to pull my arm.
However, just take this as a little dose of “tough love” and expectation management.
“Eating for two” is a bit overplayed and overstated.
3. While the topic of nutrition is HIGHLY individual, when in doubt stress protein. But really, I don’t care what side of the fence you preside on…low carb, Paleo, Vegetarian, Vegan, or whether you only eat foods that start with the letter Q:
The important thing to remember is to provide adequate calories.
Need a little nudge? Check out THIS amazing infographic from Dr. John Berardi of Precision Nutrition.
4. KEEP THINGS SIMPLE FOR THE LOVE OF GOD
But remember…
It all comes down to what THEY’RE comfortable with.
If I’m working with a current client it’s really more a matter of tempering down intensity (load) than it is reneging on any specific exercise. All of the women I am working with currently still deadlift, squat, row, press, etc. As their body changes we’ll of course modify things, but for all intents and purposes it’s business as usual.
I just make sure to check in prior to each session to see how they’re feeling and will make a judgement call on whether or not to adjust a specific session or not.
If I am working with a new client through her first pregnancy I will spend a fair amount of time on proper breathing mechanics and honing in on teaching basic stuff like Goblet Squats, TONS of core stability work (think planks, chops, lifts, Farmer carries, and Pallof Presses), teaching a proper push-up pattern, band resisted hip thrusts(<— video of my wife doing them at 24 weeks), single leg work, and the like.
You’ll notice it’s not that much different than working with a new client who isn’t pregnant, and that’s the point…
…a pregnancy doesn’t automatically mean you’re unable to go to the gym.
The last thing I want is for them to feel like a delicate flower.
Remember: Our job as their coach is to prepare them for something bigger…child birth. Assuming a thorough assessment, taking into consideration any contraindications, using appropriate progressions/regressions, and always checking in on comfort level, a barbell, used in a controlled setting, is no more dangerous than bathing in a tub of seed oils while drinking a diet soda on a yacht full of Paleo CrossFitters.
Likewise, HERE are some thoughts on postpartum considerations for those curious.
Putting things into context, Whitney G (from the deadlift video above) had been training with me for three years, and I knew she knew what she was doing – so I felt completely comfortable throwing deadlift and squat variations (and she still did chin-ups!) into her programs.
Speaking of chin-ups here’s my wife, Lisa, using (natural) progressive overload to complete a rest/pause set.
A video posted by Tony Gentilcore (@tonygentilcore) on
5. Look at Cara, another mom-to-be I worked with a few years ago who was still training and getting after it 34 weeks into her pregnancy.
Here she was deadlifting 200 lbs for eight reps:
Cara trained with me at CSP for well over two years prior to becoming pregnant, and, slight humble brag, was coached very well. We had no problems staying on task with her training when she was expecting.
Which is to say…while certain “tweaks” and modifications were made trimester to trimester, we were still able to maintain a significant training effect.
While she’s definitely an exception to the rule, despite being a first-time mom, she never experienced any morning sickness – something she attributed to not flaking on her training.
From Cara herself:
It was hard to find information specific to heavy weight lifting. Most “advice” given about exercise has to do with cardio, probably because that’s what doctors expect most women are doing. In general, there’s an attitude that if you are already fit, you can continue what you are used to. So I made my own decision to continue what I was doing, to the best of my ability, just paying attention to what felt comfortably to me personally. Taking longer breaks, adjusting weights and positions as needed.
Others might think I lift “too much” or let my heart rate get “too high” but I don’t believe in one-size-fits-all limits on what pregnant women should be doing. We’re all accustomed and able to do different things when not pregnant, and I think the same can apply during pregnancy.
6. By that same token, I don’t want to give the impression that every woman who’s pregnant has to lift heavy things. There are quite a number of other things to pay close attention to.
Shedding some light here are a few thoughts provided by Boston-based trainer Laura DeVincent, who’s Pre/Post Natal Certified through FitForBirth:
The first ten minutes of a session are spent diaphragmatic breathing, which I think is vital for keeping connected with the core. Although kind of awkward to coach, kegals are also important to prevent problems down the road. The next 30-40 minutes are spent on corrective exercise and strength training, and the last 10 minutes are spent interval training.
7. Expounding a bit further, something else to consider is stretching. Does it have a place? Many women (and fitness professionals) are under the assumption that stretching is an important factor, but I’d actually caution against it in this case.
In fact I’m actually not a huge fan of stretching in general – as most people suck at it, only stretch what they’re good at, and, what’s more, you’re not actually “stretching” anything anyways (only increasing the tolerance to stretching).
But that’s a debate for another time.
As the pregnancy progresses the body produces more of a hormone called Relaxin, which, as the name implies, makes the tendons and ligaments (soft tissue) “relax” or more “pliable” as the body gets closer and closer to the due date.
This can make activities such as running, yoga, and group classes not as much of a better or “safer” alternative as many will have you think.
Mirroring my thoughts, Laura notes:
In my experience, most women that are used to doing group ex classes feel nervous doing intense plyometric and cardio workouts, so they love the fact that they can get intense with weight training!
What most women deem “intense weight training” can be left to interpretation, but it stands to reason that contrary to popular belief, weight training can be argued to be SAFER than most other options…if for no other reason(s) than it is generally more controlled, can be more easily individualized, and focuses more on improving stability (via strengthening).
8. Taking it a step even further, and touching on the whole heart rate issue, my good friend Dean Somerset offers his insight as well:
The big cautions come from not wanting to have large blood pressure fluctuations early on in the pregnancy or having too much of an anaerobic load that would cause stress to the fetus. If the muscles are pulling all the oxygen and not enough is going to the fetus, it can cause some issues, so most cardio is best performed beneath anaerobic threshold, or in short bursts where fatigue isn’t a major factor.
Loading tends to have to be decreased over time due to changes in core stability, pelvic dilation, presence of lumbosacral ligamental laxity, and increasing pressure on the bladder and bowels. It’s cool to deadlift in the second trimester, but something to avoid in the third trimester in favour of squatting, moving from a conventional stance to more of a sumo stance as the pregnancy goes on.
I’m not going to sit here and diss on CrossFit – because there is plenty about CrossFit that I like.
All I’ll say is that if you’re someone who’s pregnant and you’re still adamant on going to CrossFit every week (and that’s completely fine), please, please, PLEASE use some common sense and recognize that it’s okay to pump the brakes a bit and not feel like you’re going to cough up a spleen when you train.
9. Shedding some more light on this topic, here are some sage words from strength coach, John Brooks:
The problem with training pregnant women is no two pregnancies are the same. With our first born my wife hit rep PRs into the early third trimester, did chins, and lots of unilateral leg work deep into the pregnancy. This latest (due in march) had some complications and bleeding early on, so she was on pelvic rest (which means you can pretty much do somewhere between jack and crap) now she’s back up to some basic body part split stuff. Totally different response to training stress in those conditions.
I’ve worked with a couple other women who didn’t have complications and for me the HR monitor was the key, Keep their HR down below threshold, keep a training effect going, and (especially if this is the second+) no movements that abduct the legs either quickly or under load (if you don’t know why ask your mother).
10. And bringing everything to a nice succinct stopping point, I want to share one of my former distance coaching client’s, Laura, (whom I trained through her second pregnancy), perspective on everything:
I was one of those lucky women Tony trained through a pregnancy. During this time, I also regularly attended kettlebell classes in preparation for my RKC certification, which I passed 7 month after delivery.
With solid programming from Tony that included a lot of heavy compound lifts and modifications where necessary (no barbell glute thrusters), I was fitter at the end of the pregnancy than I had been at the beginning, with a slew of new PRs in my pocket as well – including squats and deadlifts.
My daughter presented in a posterior position (sunny side up), but I only had to go through 20 minutes of pushing — believe me that’s rare. With doctor approval, I was back swinging kettlebells in the gym the day after I was home from the hospital, and I healed like a champ.
Now, I’m not trying to blow sunshine up my own butt, but how many women do you know who are back in the gym a mere day after returning from the hospital? [Pats self on back].
Mind you: This SHOULD NOT be considered a standard goal for everyone.
That said, there’s no way Laura could have done that – let alone even think about doing it – if she had only resorted to yoga classes and basing all of her training sessions around weights that are lighter than the purse she carries around on her shoulder.
11. Something else to think about is the fact that Laura had a very progressive MD (which is rare, but a breath of fresh air) and midwife, who, according to her, “understood that pregnancy is not an illness or handicap.”
As well, according to her, “I also took a lot of comfort from the wonderful book Exercising Through Your Pregnancy by James Clapp, which examines study after study showing the value of continuing to engage in strenuous exercise during pregnancy.
The book also provides advice for people who go into pregnancy in more of a de-conditioned state.
So there you have it
While not an exhaustive list, and certainly a topic which deserves someone taking a more proactive approach into what’s the right course of action for HER, I feel this post provides a rather unique (and dare I say: anti-status quo) approach to how women should go about exercising through their pregnancy.
I’m in no way saying that my opinion is right or should be considered the gold standard. But it deserves every bit as much consideration as all the other advice being given.
Coming full circle, isn’t it funny how people will often scoff, give double takes (or worse panic) if they see a pregnant woman lifting appreciable weight in the gym, yet fail to recognize that women have been partaking in far superior activities – walking across continents, manually plowing fields, hunting, and gathering – loooooong before barbells existed.
Eric Malzone is one of my favorite people. I first”met” Eric several years ago when he invited me to take part in an invite only mentorship he was offering alongside several other fitness professionals he invited to take part.
It was a lovely experience and I met a handful of lifetime friends from that group.
Eric is a genuine soul and he’s given more to the industry than he’s taken. I love my chats with him, and my recent one with him – on his Future of Fitness Podcast– was no different.
The State of Coaching 2023
I can’t recall verbatim what we discussed in it’s entirety – I mean, we recorded this episode back in March – but what I CAN tell you is that we had an authentic conversation on what it means to be a coach and what it means to actually be coaching.
And, in all likelihood, there was a reference or two (or three) to deadlifts and Lord of the Rings.
You can listen to the episode wherever it is you tend to listen to such things:
Me making a cameo on a podcast centered around endurance sports? Admittedly, the last time I was on a bike was when I was 12, and I am pretty sure the longest distance I’ve run in the past decade is however long the sidewalk is in front of my apartment building.
I lift heavy things. I tell people to lift heavy things. What in the hell am I doing on a podcast for triathletes?
I mean, what’s next?
‘Tony muses on his favorite hand soap recipes!”
“Tony waxes poetic about when’s the ideal time to plant your radishes!”
“Crochet your next epic pair of mittens – Tony Gentilcore speaks!”
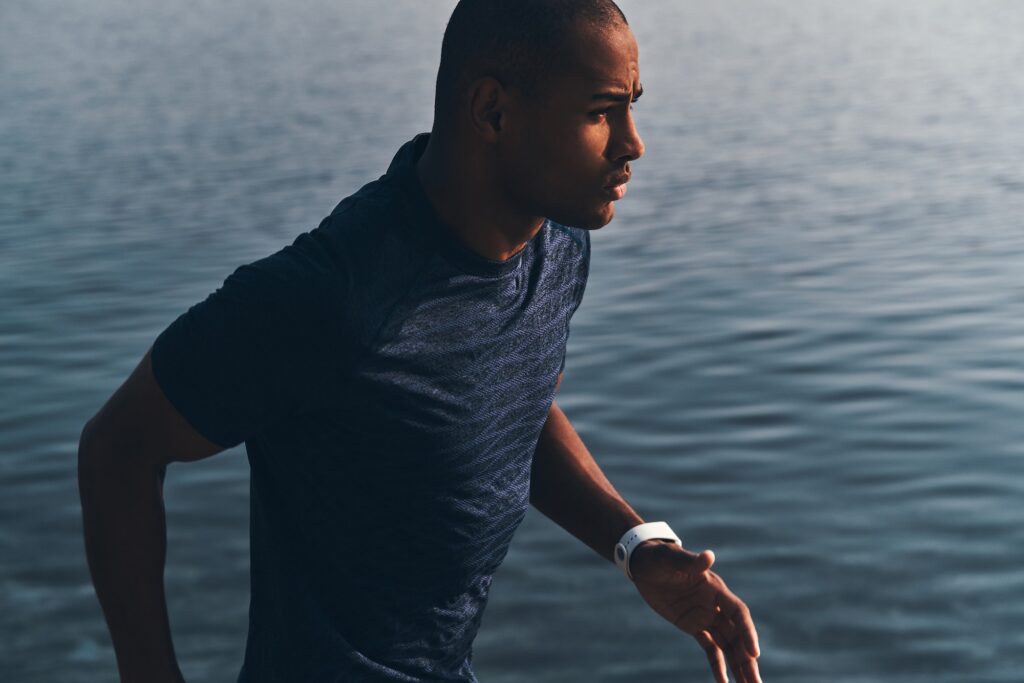
I Actually Do Know a Thing or Two About Training Endurance Athletes
As a personal trainer and strength coach residing in Boston, it’s only inevitable I’d end up working with endurance athletes. I’ve worked with a few triathletes and marathoners throughout the years and they need what everyone else needs…a base of strength to help build the other attributes and qualities they’re looking to improve upon to succeed in their sport(s).
As it happens this isn’t the first time I have been invited onto this particular show. The host, Menachem Brodie, is a good friend of mine and we share many common coaching philosophies when it comes to working with this population.
In this episode we discuss:
How should you (strength) train through your season?
Should you skip training if you feel sore or have tightspots?
Should you snow plow through and lift heavy shit anyways if you don’t feel 100%?
How can a coach find a client’s or athlete’s “trainable menu” to work around nagging injuries?
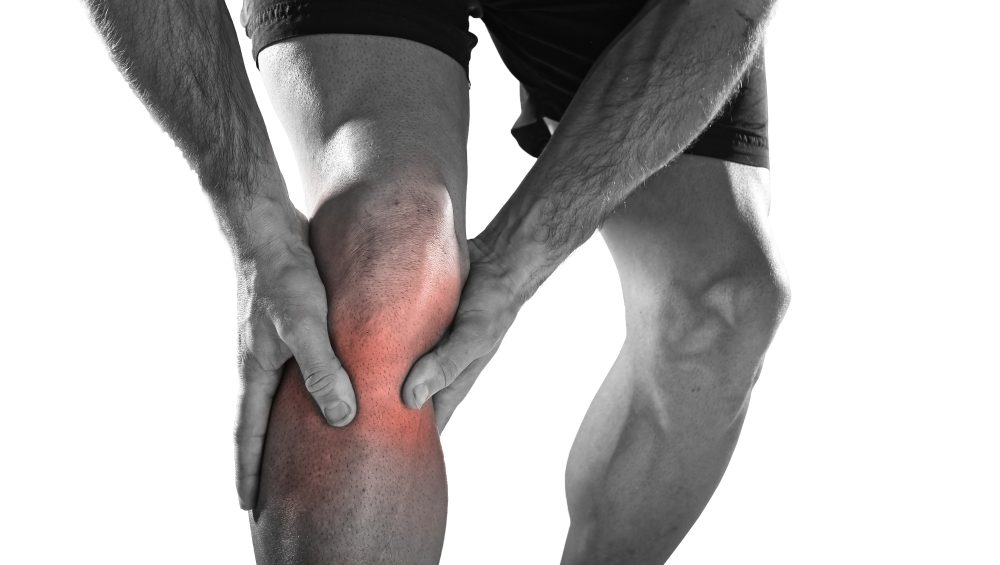
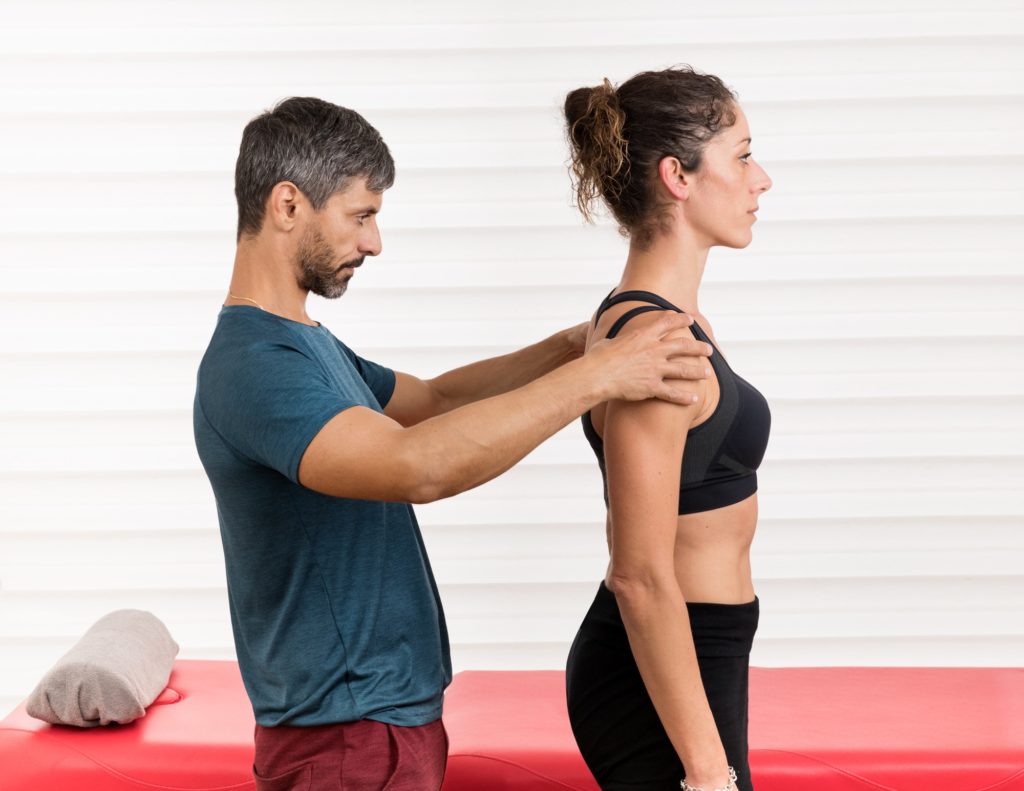
Today’s post was inspired by a client of mine who came in for their training session recently but confessed that their knee wasn’t feeling so great.
Given there were a bunch of squats on the agenda that day this wasn’t ideal news to hear. However, rather than sound the alarm and nix squatting altogether I wanted to see if I could alleviate their symptom(s) with a simple intervention.
But this “trick” I’m about to show you has worked wonders – as in instant relief – for various clients of mine who have complained of cranky knees.
A few brief notes:
1. I receive no affiliate income or kick-back (other than unlimited hugs) from ACUMobility for recommending their product(s).
2. It’s unfortunate many health/fitness professionals fail to look BELOW the knee with regards to knee health and function. The knee joint is pretty stupid and is often at the mercy of either the hip or ankle. By all means I’d be remiss not to encourage practitioners (which isn’t my role as a lowly strength coach) to assess the knee to see if there’s any nefarious nonsense happening there.
However, in my own experience, when trying to dig a bit deeper as to WHY someone’s knee may be bothering them (outside of the actual knee itself), the lower leg gets the shaft.
3. One component is looking to see if the individual can actually rotate their tibia (lower leg bone) in relation to the femur. Many patellar tracking issues, for example, can be attributed to a lack of tibial rotation…
If I were to make a list of what ACTUALLY affects patellar tracking the most it would likely look like this:
1. Lack of ability to rotate tibia.
2. ITB/adductor “tightness.”
.
.
5. Lower leg (calf) griminess (<– technical term). See below.
18. Brexit.
19. Kitty cuddles.
.
.
.
277. Belly button lint.
.
.
.
412. Weak VMO
The tibial rotation thing is something I do want to address and is something I may write about in more detail soon. In the meantime, if you just can’t wait that long, Dean Somerset and I JUST ANNOUNCED we’ll be in Athens, Greece this October to reunite after 3+ years (and a pandemic) to put on our popular Complete Shoulder & Hip Blueprint Workshop – where we discuss this topic in more detail (and much, much more).
(Side Note: If traveling to Athens isn’t in the cards you can always follow along at home with our digital course HERE).
But First…
A caveat.
With regards to “general” knee pain I’ll typically start with a technique audit and then make some modifications in terms of volume/load and which variation of those exercises someone performs.
Sometimes the fix is some coaching to help clean up someone’s form.
Likewise, sometimes the fix is modifying the lift ever so slightly – reducing ROM, widening their stance, changing foot position – to make the lift (in this case, barbell squat) more tolerable.
I’ll always start there because it’s the lowest hanging fruit at my disposal and it ensures the client will still elicit a training effect. That and I’m a big fan of avoiding making my clients/athletes feel like a patient.
After that I’ll attempt to address tissue quality…particularly in the calves (an often neglected area).
Ouch (I mean, Great)
The gastronemius (or gastroc for those of us who are lazy) is a bi-articular muscle that crosses both the ankle AND knee joint.
It’s a nasty area that, for lack of a better term can “get nasty as fuck.”
I often find if I have someone work on their tissue quality in this area that they’ll find immediate relief in their knee(s) because it helps “unglue” their tibia to rotate more during the squat motion.
It’s not fun, but it works:
Try this the next time your knees toss you some attitude.
The prevailing thought, it seems, is that admitting ignorance is a sign of weakness or that you’ll somehow lose credibility points for not knowing the answer to a client’s question…
…as if the fitness industry’s equivalent of Unella is stealthily lurking somewhere to shame walk you down a corridor for not memorizing every delicate step of the Kreb’s Cycle.
Listen, there are some things a personal trainer/coach likely should have a firm grasp on:
The muscles of the rotator cuff?…✅
How to program around low back or knee pain?…✅
How many calories in a gram of protein?…✅
Who Mel Siff is?…✅
But you can’t expect to know EVERYTHING about anything:
Where’s the Levator ani located?…🤷♂️
And, more importantly, what the hell is the Levator ani?…🤷♂️3
What are the benefits and pitfalls of concurrent periodization?…🤷♂️
What’s the atomic number of Adamantium?…🤷♂️
Maybe you knew the answer to all of the above, and if so, can we hang out? But if not, and on the off-chance someone in your life – whether it be a client, colleague, or your second cousin on your stepmother’s side – asked, and you didn’t know the answer, how would you handle it?
Rather than play hero, pretend to be an all-knowing smarty pants Spartan Jedi Wizard deadlifting demigod, and manufacture some false, pseudo-intellectual response…I’ve found it to be best practice to be honest with clients.
Simply put, to say…
“I don’t know.”
This bleeds of authenticity and I’ve found that, 100% of the time, clients appreciate and respect the honesty. Kind of like when you do someone a solid and let them know they’ve got something in their teeth.
I’ve never lost a client because I was unable to answer their question regarding the functions of the psoas muscle or, I don’t know, the efficacy of heart rate variability training in undertrained grizzly bears.
Namely because 1) I TOTALLY KNOW WHAT THE FUNCTIONS OF THE PSOAS ARE and 2) the latter is ridiculous.
But too, it just never happened.
If I don’t know the answer to a question or a client asks to dive deeper into something I have little expertise in, I’ll say “I don’t know,” followed by “but I know someone who does. I’ll ask them.”
This happened to me not long ago.
I had a client express interest in learning more about the Olympic lifts. Up until that point she and I had been working together for several months focusing on the basic barbell lifts – deadlift, squat, bench press, etc.
She was a stark newbie when she walked into CORE the first day but had made a ton of progress in a short amount of time. It wasn’t long before she started asking whether or not I’d be willing to add OLY lifts into her programming?
(cue crickets chirping on my end)
Full Disclosure: I don’t have a lot of experience performing – let alone teaching – the OLY lifts. I even wrote about why I don’t include OLY lifting in my programs HERE. TL/DR version: I’m more qualified to fly an Apache Helicopter than teach a passable barbell split jerk.
Without blinking an eye I connected her to a handful of coaches in the Boston area more equipped to help her out.
And it couldn’t have worked out more splendidly.
She sent me the most gracious email a few weeks later saying how much fun she was having and that she had “found her people.”
Some people reading may say something to the effect of “dude, Tony, you lost a client. That’s the opposite of what I want to happen to me.”
Touche.
In the literal sense I did lose a client.
However, what do you think is the likely outcome when she’s approached by one of her family members or friends or colleagues asking if she knows of any reputable trainers in the area?
She’s going to refer them to this guy that’s what’s going to happen.4
If There’s Two Things to Remember From This Post…
1. Your clients won’t care that you don’t know the answer to something. Saying “I don’t know” is the responsible response.
Followed by “but I will try my best to find the answer for you.”
2. Don’t think pointing your clients towards other fitness professionals (especially locally) is a poor business decision. In my experience every time I’ve done so has resulted in the same client referring more people to me. Once they understand you have their best interests in mind they’ll often reward you with unabashed loyalty.
3. Just to be clear: I don’t know shit about fuck when it comes to the Kreb’s Cycle.
Outside of majoring in “Humanities” during my first few years in college, and taking the obligatory Introduction to Philosophy class to fulfill my course requirements, I don’t consider myself much of a philosophical person.
I’m not one to sit around and contemplate the meaning of life, why we’re all here, or to argue about which came first: the CrossFitter or the comment from the CrossFitter that they do CrossFit?
I tend to leave those sort of things to people who are way smarter than myself and drive Priuses.
Start a conversation with me on Star Wars mythology or the writings of Kurt Vonnegut (or bring up the best Jason Bourne fight scenes) and you’ve got my attention.
So, yeah, I don’t consider myself a philosophical person per se. I put my socks on like everyone else. But something struck a chord and jostled my thought process recently as I was listening to a podcast.
And it was this one simple quote: “Discomfort builds growth.”
The easy analogy here – and most fitting – are the things we do in the weight room.
I don’t know about you, but I don’t go to the gym day in and day out because it tickles.
I do it because I want to feel strong, look strong, and have pecs that can deflect bullets.
However, how many times have we noticed someone do the same routine, with the same exercises, in the same order, with the same amount of weight, routinely, who look exactly the same and are just as strong as they were three years ago?
Hell, I’m sure everyone reading knows a friend, family member, colleague, arch nemesis who falls under this umbrella.
I’ve worked with countless people in my career as a personal trainer and strength coach.
98.5% of them “get it.”
Meaning, they know they have to put in the work in order to get the results they’re after. They don’t just expect muscles to magically appear or to walk underneath a rainbow and lose five dress sizes.
They have to EARN it.
They’ll do what they’re told – throw some barbells around, push the Prowler, swing some kettlebells, perform endless numbers of push-ups and chin-ups, tolerate Wu-Tang Wednesdays – and love to hate it.
It not so many words (and at the risk of being overly cliche)…
They’re Comfortable With Being UN-Comfortable
This isn’t to say one must train to the point of passing out or shitting their liver in order to reap any benefits. That’s a bit much.
Conversely, just because you “showed up” and made an appearance at the gym doesn’t really mean anything.
Why drive to the gym only to walk on the treadmill?
For many, they’re lucky if they elevate their heart rate during their “workout” any higher than if they just stayed home and watched an episode of The Last of Us.
Very generally speaking, those people who have physiques and fitness levels we most admire (and desire) are those who strive for, nay, ACCEPT discomfort.
It’s physiology.
The human body is a highly adaptive “machine.” The reason why many people never seem to make routine progress in the gym is because they continue to do the same things they ALWAYS do. Even worse, they continue to do things that they’re good at or that’s “easy.”
I don’t blame them – it’s human nature.
I know I’ll catch some flak for saying this, but a glaring example would be people who tend to gravitate towards “cardio.”
Performing dedicated (steady state) cardiovascular work is important and it does serve as an component to a well-rounded fitness program. But I do feel it’s often drastically OVER-emphasized because, well, it’s easy.
And we’ve established that people like easy.
And while I don’t want to make this into some anti-cardio diatribe, one of the main reasons why I feel there comes a point of diminishing returns is because you have do MORE of it (steady state cardio) in order to get the same training effect.
As one becomes more “efficient,” they have to do more work in order to burn the same amount of calories.
And just working out for the sake of burning calories is kinda lame. As my friend Bryan Krahn has noted in the past:
Here’s a thought. Say you hit the treadmill for three 1-hour runs per week. What does it do? Well, it burns a bunch of calories, improves your cardio vascular capabilities, yadda yadda. Fantastic. And that’s about it.
Now let’s say you swap the cardio for three 1-hour martial arts classes. You’ll burn a similar amount of calories but also work different movement planes and improve flexibility — things that basic gym training doesn’t address.
(A big part of my training code is to expose yourself to new things, identify any weaknesses, and then address them. I call it having no holes in your game.)
The same mindset can be applied to lifting weights as well. In order for a muscle to grow you need to apply enough of a stimulus to break down the actual muscular filaments – actin and myosin. Assuming ample recovery (and calories) are applied…you progressively get bigger and stronger.
Again, many trainees miss the mark here.
There’s a lack of intentand purpose in the way a lot of people train. I can’t help but think some people feel so long as you walk into a gym and look at a dumbbell you’re going to get results.
This Applies to Life Too
Throwing myself in the spotlight I can think of a handful of scenarios where leaning into some discomfort served a greater good in my life.
Some of you reading will remember a time when meeting someone over the internet was borderline creepy. By today’s standards it’s no big deal, but back in 2004 it would raise some eyebrows.
I met Eric Cressey on the internet.
Eric and I knew each other via various training forums online (most notably T-Nation.com). When he graduated from UCONN he landed a job as a personal trainer in Ridgefield, CT.
I was still in central NY working as a trainer myself and Eric got a hold of me one day and mentioned that he had gotten a job at a gym and that the people who owned it were still looking for another trainer. Knowing that I wanted to get the hell out of dodge, he thought that maybe I should look into it?
I did.
I was hired, and in less than two weeks, despite some major reservations and second guessing myself, I was moving to Connecticut to start a new job with a dude I had met over the internet and whom I had only met once in person.
Understandably, I had to assure my mom that I wasn’t going to get murdered.
In the end, I think it all turned out pretty well…;o)
And then there was the one time my wife, Lisa, had me try a sip of her whisky I had brought home from my trip to Scotland. It was like taking a sip of battery acid. Disgusting. The only thing I grew in that case was more chest hair.
I guess you win some, you lose some.
Discomfort, trying new things, taking risks, doing things differently, challenging yourself…both in the gym and in life.
In general, it’s purposeful use of exaggeration as a rhetorical device or figure of speech. It’s often used in writing (and communication as a whole) to evoke strong feelings and reaction from the audience. These reactions can range from a chuckle and an “aww shucks” eye roll to someone getting punched in the throat.
Hyperbole is everywhere (politics, dating, sports, Thanksgiving dinner) – for better or for worse.
More innocuous and inane examples of hyperbole – the “aww shucks” variety – would be:
I’m so hungry I could eat a horse.
“So and so” is about as intelligent as a ham sandwich.
As a writer I love hyperbole because it can be a useful tool to add a bit of panache and entertainment value to a blog post or article in order to maintain people’s attention for more than 27 seconds.
Where I hate it is where this particular blog post comes into play.
A few weeks ago I was perusing Twitter when my feed fed me this piece of gargantuan eye wash (because, of course):
“STOP DOING BARBELL SQUATS!!! It’s a useless exercise that does way more harm than good to your body.”
This, my dear reader, is a choice example of the latter example of hyperbole mentioned above. You know, the kind that makes you want to wash your eyes with broken glass.
Now, I don’t know the person who wrote it (I’m choosing not to directly mention them here), and I have zero insights into why this person is so vehemently against barbell squats. What I do know – from checking out this person’s profile – is that they’re a Chiropractor, they seem to build a lot of their online persona around this idea that most people lack mental toughness, and that “bad posture” is the reason why most people are in pain.
Not for nothing, but…
…I’d make the case that the reason why a lot of people are in pain is because they’re chronically weak (muscularly), not because their TL junction needs adjusting every two weeks.
(Which, not ironically, can be improved, drastically – and long-term – with some properly progressed strength training.6 If you don’t force the body to adapt to load or stress, then how can you really expect meaningful change? If the only intervention is adjusting and cracking someone’s bones to fit some “textbook perfect posture” narrative, and it’s something that needs to be repeated over and over and over again, to me, this is akin to using nothing but a band-aid to address a knife wound).
But let’s move beyond that.
The thing that rubs me the wrong way with this person’s train of thought is that it’s so egregiously self-aggrandizing. One thing that I despise in this industry – and something that makes me lose a lot of respect for someone when they do it – is thinking that THEIR WAY is the ONLY way to do something.
The easy comparison here is Mike Boyle.
I was in the room when, back in 2005, while recording Functional Strength Coach, he revealed to the strength & conditioning world that he no longer included back squats in his athletes’ programs.
I’m pretty sure this was the collective mood in the room when he said it:
He wasn’t tarred and feathered by the entirety of the profession, but in the years since he’s routinely received flak for his stance.
However, I’ve always respected his take and have never taken issue with it.
Why?
Because he’s never said:
“Stop doing barbell squats with YOUR athletes.”
He’s only said:
“I’ve stopped doing a barbell squats with MY athletes.”
Moreover, he’s always followed that up with a sound rationale & explanation of why he came to that decision in the first place. And whether or not you agree with him isn’t the point:
They’re HIS athletes.
My man is still producing bonafide beasts in the weight-room and on the playing field.
Hard to argue with results.
Bringing things back to our friend from above.
Where I take issue is the insinuation that barbell squats – of any kind, in any situation, with any person, at any moment in time, even if they’re YOUR client and not mine – is dangerous or turning everyone into spinal compression walking balls of dysfunction.
To steal a quote from strength coach Gerry DeFilippo on that matter:
“How about this. Do exercises that fit your anatomical parameters and needs. More information, less fear mongering/cancelling of exercises.”
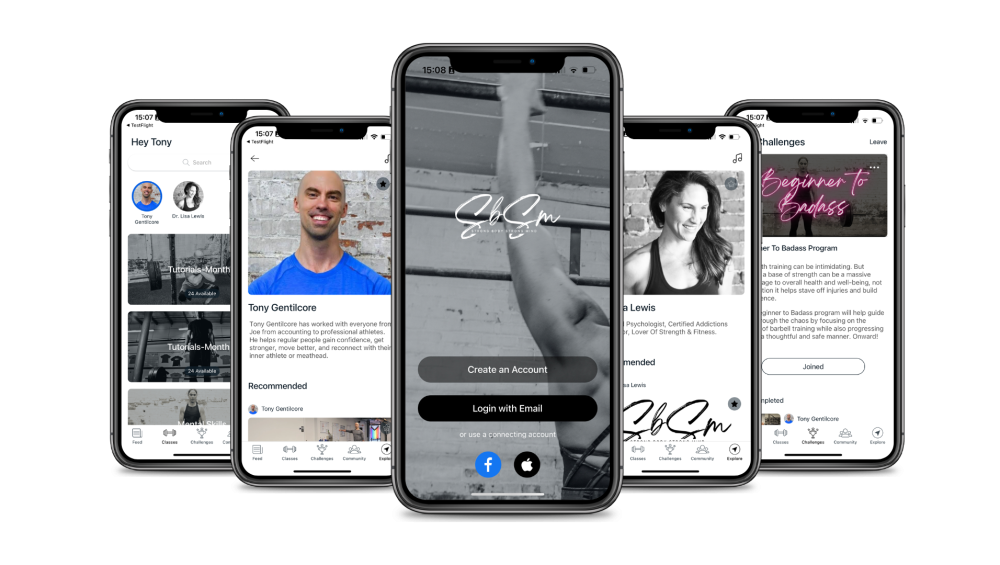
Our App: From Strength Coach Tony Gentilcore and Psychologist Dr. Lisa Lewis
Most of you may already know that my wife, Dr. Lisa Lewis, Psychologist (and household director of talking about feelings), has been my partner in our Strong Body, Strong Mind initiative:
…to mesh together both physical and mental strength training for optimal health and functioning.
After years of presenting together at conferences, seminars, and private workshops, we are THRILLED to release programming in an easy-to-access, affordable application.
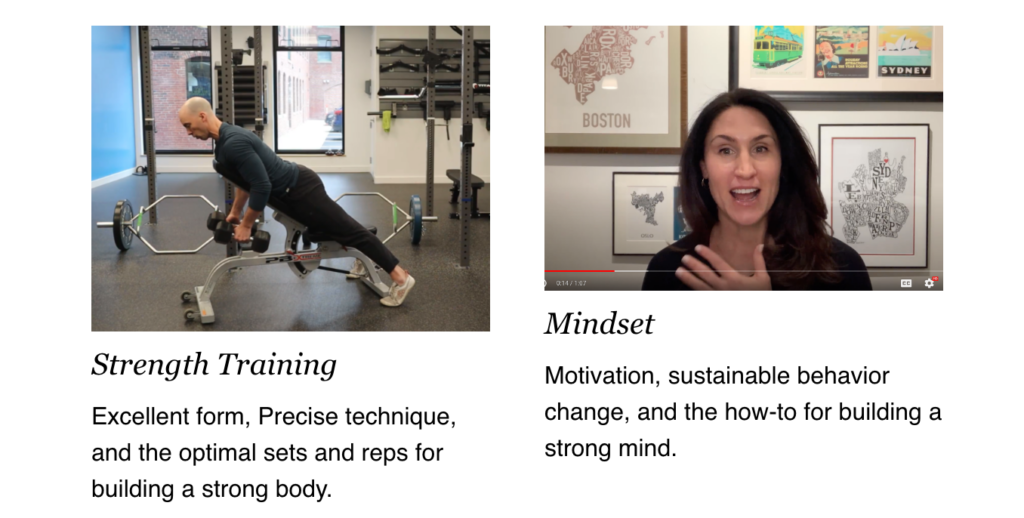
The inaugural program offered in the Strong Body, Strong Mind app is called “Beginner to Badass” and is specifically designed for those who are stark beginners to barbell training or just looking for some direction.
Whether you (or someone you know) is brand new to lifting weights, returning after a break, or just looking for a nuts and bolts program, Beginner to Badass can meet those needs.
What to Expect From the Program
👉 3 months (3x per week; 36 total sessions) of appropriately progressed strength training. NOTE: You will need access to barbells, dumbbells, etc in order to follow this program.
👉 Videos that demonstrate proper technique alongside voice prompts & coaching cues to help you execute every exercise like a pro.
👉 My biceps looking extra bicepy.
👉 A “Mindset Minute” that coincides with every workout session to help you build resilience and persistent habits.
What Not to Expect
❌ Novelty – Exercise variety has a time and place, but a beginner strength training program isn’t one of them. Using one of my more astute and colloquial quotes:
“The greatest gap is most people’s training isn’t lack of novelty, but rather lack of mastery.”
This is the Beginner to Badass program’s glue.
❌ Guarantees or Promises – I could sit here and regal you with grandiose claims like “I guarantee your bench press will increase 50 lbs in five weeks” or “I promise your pecs will be able to cut diamonds” following this program, but that would be disingenuous.
Because the fact is…I don’t know!
What I do know is that you will learn more about what unabashed consistency can do for progress in addition to gaining more confidence including more barbell training to your repertoire.
❌ Lumberjacks – sorry?
We hope you’re as excited as we are to get started.
I’ve been woefully negligent with my writing prowess of late.
But it’s for good reason.
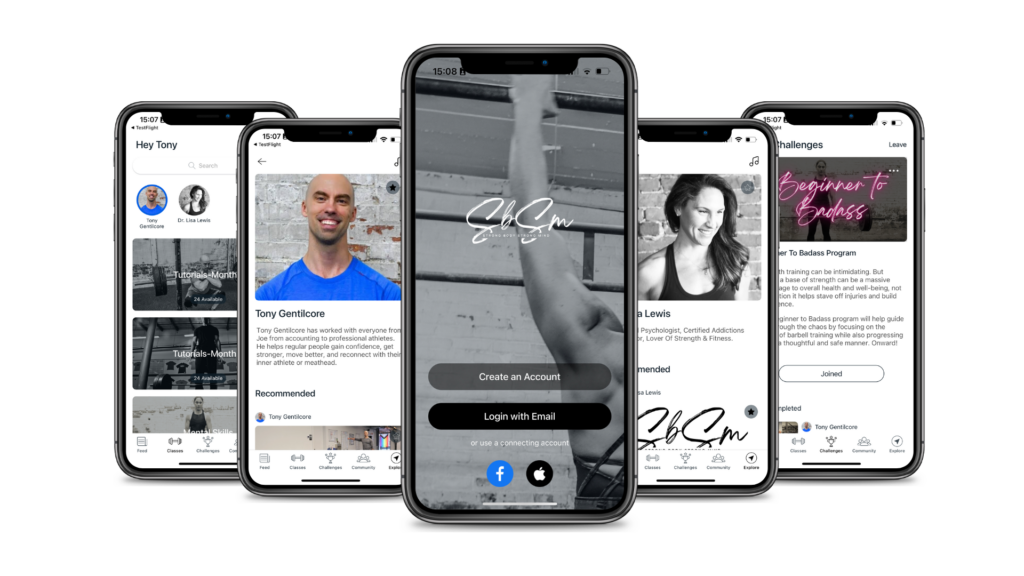
My wife, Dr. Lisa Lewis, and I have been busy for the past few months developing a wellness/fitness app!
Strong Body, Strong Mind
The app is called Strong Body, Strong Mind and we firmly feel it’s going to be quite different than the bulk of fitness apps out there.
How/why?
For starters, the obvious: This app will provide both structured strength training AND mental skills guidance to bolster motivation and confidence.
I’ll be taking the reigns on the training side of the app. The “Beginner to Badass” program is designed to guide those interested in starting a barbell-based strength training program but have otherwise been intimidated to do so on their own.
My goal with this app is to make strength training accessible to the masses and to demonstrate how to properly progress from a beginner to being able to beat Jason Bourne in a hallway battle royale.
Lisa will run the show on the psychological/mindset side. She’s an actual Doctor of Psychology (not an Instagram mindset coach) and has over two decades of experience.
Plus she’s a doctor who actually lifts!
Each workout will have a “Mindset Minute” to coincide with it, and will focus on anything from how to stay motivated when beginning a new exercise routine to ways to overcome speed-bumps with lack of consistency.
In short: Lisa’s there to Jedi mind-trick you into kicking ass and taking names. And maybe, if all goes to plan, get you to summon the force with the strength of your butt cheeks (that’s how it works, right?)
More details will be coming in a few days when the app is officially launched. For now, I hope this serves as a bit of an Amuse Bouche of the awesomeness to come.