Categoriescoaching personal training Program Design Strength Training

Are the Weights You’re Using Heavy Enough? Too Heavy?

Today’s post is more or less an addendum or brief update to THIS article I wrote a few months ago answering the question “how much weight should I be using?

Copyright: maximkostenko / 123RF Stock Photo


For many lifters – rookies in particular – it’s a perplexing task to figure out what’s an appropriate load to be using on any given lift or exercise. Is it too little, too much, just right? It’s a Goldilocks paradox to say the least.

Some people have an innate sense of intuition that kicks in and are able to figure things out over the course of a few weeks or months. They’re able to adopt the concept of consistent progressive overload (making the effort to do more work over time) and make continued improvements and progress towards their goal(s).

[NOTE: keeping a daily training log helps tremendously here. If you’re not doing this 1) please smack your forehead 2) do it again and 3) no, really, do it.]

Others, however, lack the Spidey-sense. I mean, I get it: walking into a weight room is daunting enough. You have some guys grunting louder than an elephant passing a kidney stone, and the fume of AXE body spray you have to walk through is enough to give you a contact high. Those two things alone are super intimidating for some people.1

What’s more, there are a bevy of other factors to consider: optimal # of sets/reps, rest periods, tempo, exercise order, and, of course, how much weight to use? And then, most important of all, is technique on point? It’s no wonder some people end up feeling like this:


To no fault of their own many fall into the trap of “winging it” and haphazardly choosing a weight to use for any particular exercise and stay there; week in and week out, month after month, and in worse case scenarios, even years, and often end up frustrated due to lackluster results.

How many times have you heard this from a friend, family member, or colleague:

Can you please put some pants on? I’ve been working out for [insert “x” number of weeks/months/years here] and I never seem to get results.”

My suspicion is that 9/10 times the culprit is the fact most people are UNDERestimating their ability and not challenging themselves enough.

This is where AMRAP (As Many Reps as Possible) sets can be handy. If I program an exercise for 8-10 reps, I’ll sometimes have the last set be for AMRAP. If, on the last set, they hit 10, maybe 11 reps I know they’re using a weight that’s challenging enough. If they end up hitting 23 reps I know they’re low-balling themselves and we need to up the load.

I’m fortunate in that I live in this pretty baller strength & conditioning bubble where I can control most – if not all – the variables when it comes to the clients and athletes I train.2

Especially for those I work with in-person.

I’m there to observe how they’re feeling on any given day, to watch technique and bar speed, and I can serve a judge and jury when it comes to weight selection during any given session.

Where things become suspect is when I’m not there to offer advice in person or when I’m working with a distance-based client and am unable to provide instant feedback.

How do I help them gauge whether or not they’re using enough weight? Or maybe too much? What happens then?

In recent years I’ve grown to be more of a fan of using percentage-based training with the programs I write, particularly for those whom I do not work with in a one-on-one fashion. I’m a firm believer in programming out workouts with specific weight and rep guidelines – if for nothing else to give them a sense of purpose or “goal” for the day. Hit “this” number then do “that.”

That said, lifters don’t always feel the same everyday. Some days they feel like a rockstar and end up deadlifting a bulldozer for reps. Other days the feel like they got run over by a bulldozer, and what was planned for that day just isn’t going to happen.

35136856 - view of tired girl after weight lifting

Copyright: bialasiewicz / 123RF Stock Photo

This is where the concept of AUTOREGULATION enters the conversation. Coaches like David Dellanave and Jen Sinkler have done a fantastic job of speaking to this phenomenon (more specifically referred to as BIOFEEDBACK) in recent years and how it behooves trainees to use ROM testing to figure out what variation of a particular lift is the best fit for that day.

Here’s an example (say it’s deadlift day…yay):

  • Perform a toe touch screen, and note where you begin to feel tension.
  • Set up as if you were going to do a conventional deadlift and perform a few reps.
  • Re-test your toe touch. Is it better or worse?
  • If the former, you know you’re good to go with conventional deadlift that day. If it’s latter, maybe perform the same sequence, albeit with a sumo stance or Jefferson stance?

  • Re-test and see if there’s an improvement. If so, roll with that variation for the day.
  • Travis Pollen wrote an excellent review on the concept HERE.

We can take the idea of autoregulation and use it to dictate our loads on a daily basis too. More to the point: we can start to introduce the concept of Auto-regulatory Progressive Resistance Exercise (or APRE).

To quote the great Tim Henriques:

“A beginner gets stronger just by lifting. Any program works for a beginner. An intermediate powerlifter needs strength specific programming to get stronger. An advanced lifter with many years of competitive experience, lifting very heavy weights, needs to program recovery into his work outs. The beauty of the APRE (Auto-regulatory Progressive Resistance Exercise) programs is that all categories of lifters from novices to experts can benefit with this type of program.”

It’s by no means a new concept. Many coaches have written about it in the past (and I have linked to their respective articles in this post).

In short, APRE is a great way to introduce flexible training and to better match loads you use to how you feel on a daily basis.

It’s not so much a workout as it is a guideline.

Here’s an easy breakdown taken from Myosynthesis.com:

3RM Protocol 6RM Protocol 10RM Protocol
50% of 3RM – 6 reps 50% of 6RM – 10 reps 50% of 10RM – 12 reps
75% of 3RM – 3 reps 75% of 6RM – 6 reps 75% of 10RM – 10 reps
Reps to failure with 3RM Reps to failure with 6RM Reps to failure with 10RM
Adjusted reps to failure Adjusted reps to failure Adjusted reps to failure

And to adjust after the test set:

Reps in third set (6RM protocol) Adjustment for fourth set (kg)
0-2 -2.5 to -5
3-4 0 to -2.5
5-7 No change
8-12 +2.5 to +5
> 13 +5 to +7.5

I’ll explain in a second, but the cool thing about this approach – and as Eric Helms noted in THIS review via the NSCA – is that it proved very successful in one study compared to traditional linear progression with regards to strength gains.

“The APRE group improved by an average of 21 lb more in the 1RM bench press test, 35 lb more in the 1RM squat test, and three repetitions more in the bench press to fatigue test than the LP group.”

Granted it’s only one study – and a relatively short-lived one (6 weeks) at that – but holy shit.

APRE is a four set system. The first two are build-up sets with the second two involving two sets to failure. The third set is a “test” set where you perform as many reps as possible with your 3RM, 6RM, or 10RM. From there, depending on how many repetitions you get, you adjust the weight on your fourth (and last set).

This is a brilliant system, and one that can be implemented to help people better ascertain their weight selection on any given day depending on how they feel.

Lets use an example (squat – 6 RM protocol): 315 lbs

Set #1 = 50% of 6RM x 10 reps (155 lbs)

Set #2 = 75% of 6RM x 6 reps (235 lbs)

Set #3 (Test Set) = AMAP with 6RM (315)

Here is where day-to-day shenanigans come into play. How much sleep someone got the night before, hydration levels, stress at work, stress at home, and any number of other factors can affect performance on any given day. The TEST SET serves as a form or AUTOREGULATION.

Depending on the number of reps completed in the test set will dictate the load on the LAST set. See chart above.

Set #4 = ???

Can you see the value in this approach? Especially when it comes to weight selection with main lifts such as squats, deadlifts, and bench press?

I hope so, because it’s very effective and simple to implement. And I know what some of you may be wondering: “what about the 3RM and 10RM protocols?” Well, as it happens, Tim Henriques constructed a BOMB spreadsheet that you can download for free – HERE – which allows you to pluck in numbers at your discretion for each protocol. Holla!

Now you have no excuses not to push yourself harder in the gym. Go get it.

Categoriesmuscle growth Program Design Strength Training

The Pecification of Pecs

In case you aren’t picking up what I’m putting down from the title of this post, what you’re about to read is not about climate change, political reform, or ranking the best painters and architects from the Rococo Era.3

No, no…what you’re about to embark on is a little journey and discussion on pecs. You know, these guys:

27301664 - strong athletic man fitness model torso showing six pack abs. holding towel

Copyright: pjphotography / 123RF Stock Photo

Every since man first noted how lifting heavy things – rocks, tree trunks, people – over and over again often resulted in a more muscular physique, he’s been obsessed with building his pectoral muscles, or pecs for short.4

“Obsessed” is a bit of a downplay here. You know how young teenage girls are obsessed with Justin Bieber and how their lives were ruined the other day when he decided to delete his Instagram account?

Well, that pales in comparison to how much guys are obsessed with training their chest. Take that away from them, and you’re bound to see an uptick in the sales of pitchforks.

So, um, yeah…guys like to train their pecs.5 The question, then, is why do so few have sub-par pec development?

Walk into just about any gym on the planet on Monday, Tuesday, Wednesday, Thursday, Friday, Saturday, or Sunday and you’re bound to see any number of guys finishing up the 47th set of bench press.

What gives?

NEWSFLASH: The Bench Press Isn’t a Super, Duper Pec Developer to Begin With

[Cue Dramatic Chipmunk here]

https://www.youtube.com/watch?v=a1Y73sPHKxw


Sorry fellas: it isn’t.

I get it. Me saying the bench press isn’t the most “pecy” exercise is akin to me saying Kate Upton isn’t attractive, or that pizza isn’t delicious, or that The Empire Strikes Back isn’t the best Star Wars movie.6

Don’t get me wrong, it’s still a very effective exercise to build both mass and strength (there’s a reason why the bench press is 1/3 of the holy trinity or “Big 3” of any successful strength & conditioning program). Hoisting a barbell off your chest thousands of times is going to result in something happening.

However, if you want to get geeky about it, and if your goal is to actually build your pecs (and not necessarily gain some powerlifting street cred), then you could make an argument that the bench press isn’t the ideal way to go about things.

Your pec (namely, Pectoralis Major) muscles have two origin points:

  • Clavicular Head – on the anterior border of the (medial half) of the clavicle.
  • Sternal Head – on the anterior surface of the sternum.

As far as actions are concerned, the Clavicular Head aids in flexing the humerus; the Sternal Head aids in extension and adduction of the humerus…neither of which are optimally “stimulated” with the bench press.

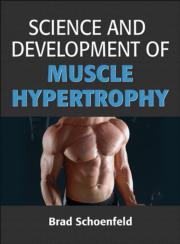
Do the pecs get targeted during a set of bench press? Yes, absolutely. Does the bench press, typically, allow for a person to use the most weight in overloading their chest musculature? Yep. And does Dr. Brad Schoenfeld, in his recently released book, Science and Development of Muscle Hypertrophy state, repeatedly, that one of the major drivers of hypertrophy (muscle growth) is mechanical tension?

YES…GOSH. GET OFF MY BACK!

The bench press can (and should) be part of an overall approach to building pecs that would make Superman swoon. However, as Schoenfeld notes:

“Research indicates that mechanoreceptors are sensitive to both the magnitude and temporal aspects of loading.”

In non-Elvish speak this basically refers to the differentiation of peak concentric, eccentric, and isometric actions of muscles and how research demonstrates that time under tension is often the de-facto consideration with regards to hypertrophy.7

Cool, we’re all on board with that.

However, in addition, Schoenfeld notes:

“Mechanoreceptors also appear to be sensitive to the type of load imposed on muscle tissue. Stretch-induced mechanical loading elicits the deposition of sarcomeres longitudinally.”

During the barbell bench press, the pecs are rarely (if ever) taken through their full ROM, and this can be a significant strike against why it’s not the best choice when it comes to developing pecy pecs.

https://www.youtube.com/watch?v=1ytCEuuW2_A


What to do, what to do?

1) Relax, You Don’t Need To Ditch the Bench Press

Not that I was worried this was going to happen, mind you.

The bench press is still relevant to the discussion…it’s just sometimes, you know, a bit overplayed. To that end, it bodes in your favor to experiment. Flat, decline, incline, close-grip, wide-grip, rest/pause, clusters, high-rep, low rep, whatever the case me be…..use them all.

However, if your goal is to really engage the pecs you may be better off doing all of the above with DUMBBELLS.

Dumbbells allow for a bit more wiggle-room with ROM (humeral extension), in addition to involving more of an adduction component.

Also, if you wanted to up the ante even more, try some squeeze presses:


2) Perform More DB Flyes

Yeah, I said it. DB flyes, yo.

Now, of course, I wouldn’t say this should be your main movement of the day (since you’re less likely to use a ton of weight on these compared to bench variations), however flyes are an excellent secondary or accessory movement to compliment things.

Namely because they really work the pecs in adduction…..something that doesn’t happen with a barbell.

These can be tricky with regards to shoulder health, so if you’re someone with a history of shoulder issues, one way to make these are more “user friendly” is to perform Pause DB Floor Flyes:

https://www.youtube.com/watch?v=d1lVf6–0aQ


Doing so will help you stay out of end ranges of motion that may compromise the shoulder, yet you’re still working the pecs in an action they’re designed to do (at least concentrically): humeral adduction.

3) Push-Up Adduction Holds

I stole this concept from fellow strength & performance coach, Eric Bach. Assume the starting position of a push-up, but then instead of going up and down…try to “bunch up” the floor with your hands and hold for a 10-20s count.


You want to talk about feeling a major burn/pump in your pecs, this it. And, to bring flyes back into the conversation try this killer superset I also stole from Eric Bach:

A1. Push-Up Adduction Hold x 10-20s
A2. Pause DB Floor Flyes x 8-10
A3. Bounce a quarter off your chest x infinity.

4) Add Accentuated Eccentrics

The idea of accentuated eccentrics was first introduced to me by Christian Thibaudeau back in the early 2000’s.

It’s no secret to any meathead that the eccentric portion of a lift (yielding, lowering) is where we’re strongest and where the most muscle damage occurs.

This can elicit profound gains in muscle and strength.

One method to take advantage of that fact is accentuated eccentrics, the more popular of which are super slow eccentrics and negative training.

Taken from Thibaudeau’s Accentuated Eccentric Training article from T-Nation:

“Super Slow Eccentrics

This technique is fairly simple: using a moderate to heavy load (60-85% of your max) you execute a super slow yielding phase while lifting (overcoming) the bar explosively. The following table gives you the parameters to use depending on the load you select:

Load Yielding Portion Reps/Set Load Yielding portion Reps/Set
60% 14 sec. 3 75% 8 sec. 2
65% 12 sec. 3 80% 6 sec. 1
70% 10 sec. 2 85% 4 sec. 1

This type of accentuated eccentric training is fairly easy to do and can yield impressive muscle size and tendon strength improvements.

Negative Training

“Negatives” basically refer to performing only the yielding portion of an exercise and having spotters lift the bar for you. You should use a load that’s between 110 and 130% of your maximum when performing negatives. The time of the action (lowering) depends on the load:

10 seconds if the load is 110-115%

8 seconds if the load is 115-120%

6 seconds if the load is 120-125%

4 seconds if the load is 125-130%”

Another, albeit less sexy approach, is to add an accentuated eccentric during a set of push-ups. I know Dr. John Rusin is a fan of these. Often I’ll have my athletes/clients perform a set of 5-10 reps and then hold their last rep in the bottom position for a count of 10-20s:


Again it’s a nice way to emphasize the eccentric portion of a lift AND increase time under tension (under stretch).

And that’s it on my end.

Have any tricks of the trade to add yourself? Share them below in the comments section or mozy on over to Facebook and leave a comment there.

CategoriesAssessment Corrective Exercise Strength Training

Strong Traps, Healthy Shoulders

A funny thing happens whenever I inform someone (namely, guys) they need to hit their upper traps more. The immediately go into Bane mode:

Visions of heavy barbell shrugs, breaking Batman’s back, and walking around asking people “do you feel in charge?” run rampant.

It’s all well and good, I have nothing against shrugs. I draw the line against breaking people’s backs though. BAD BANE, NO!

Shrugs are undoubtedly a great exercise to build the upper traps. And the upper traps are kind of important when it comes to the ability to bring one’s arms overhead – they’re one of three muscles that help to upwardly rotate the scapula.

Via my time as a coach at Cressey Sports Performance (and even now) I work with a lot of people with shoulder issues. Training the upper traps directly has gotten a bad rap in recent years. But for athletes and lifters who are stuck in spine-extension based postures and can’t raise their arms overhead, training the upper traps can be a game changer for overall shoulder health and performance.

The key? Ensure they’re trained with upward rotation.

Continue reading my latest article on T-Nation.com HERE.

CategoriesAssessment coaching personal training Program Design Strength Training youth/sports training

Addressing the Stone Cold Facts of Training Athletes

Remember that show diary on MTV? You know, the one that aired back in the early to mid-2000s?

The documentary style show centered mostly on musicians and celebrities and followed them through their daily lives.

Each episode started with said celebrity looking into the camera and saying…..

“You think you know, but you have no idea.”

And then for the next 60 minutes we got a true taste of the celebrity lifestyle, given an opportunity to witness their trials and tribulations with the paparazzi, hectic travel schedules, demands on their time, and what it’s like to demand a bowl full of green only M&Ms in their dressing room (and actually get it), not to mention the inside scoop on what it’s really like to be able to bang anyone you want.

Stupid celebrities. They suck….;o)8

Sometimes I feel like strength coaches should have their own version of the show diary, because when it comes to training athletes I feel like many people out there “think they know….

“…..but they have no idea.”

Oh snap, see what I just did there?

While I don’t think it’s rocket science, I’d be lying if I said there isn’t a lot of attention to detail when it comes to training athletes – or any person for that matter – and getting them ready for a competitive season. Everyone is different, with different backgrounds, ability level, injury history, strengths, weaknesses, goals, anthropometry, as well as considerations with regards to the unique demands of each sport and position(s) played.

By contrast, there are numerous parallels in training despite athletic endeavors or whether or not someone is an athlete to begin with.

We can take the Dan John mantra of:

Push, pull, hinge, squat, lunge, carry

Do those things, do them well, and do them often….and you’ll be better off than most. It’s complicated in its simplicity.

Much like Dan I prefer to train everyone I work with as if they’re an athlete. There’s something magical that happens when I can get Joe from accounting or Dolores from HR to deadlift 2x bodyweight or to start tossing around some medicine balls. Even better if it’s done while listening to Wu-Tang Clan.

They wake up!

They’re less of a health/fitness zombie, haphazardly meandering and “bumping” into exercises. Once they start to train with intent and purpose – and move – it’s game time.

That said, lets be honest: when it does come to training athletes there are many other factors to consider; many more than an article like this can cover. However, I do want to discuss a few philosophical “stamps” that some coaches deem indelible or permanent when it comes to training athletes, when in fact they’re anything but.

1) Strong At All Costs

There’s a part of me that cringes to admit this, but it needs to be said: strength isn’t always the answer.

Don’t get me wrong, I still believe strength is the foundation for every other athletic quality we’d want to improve.

If you want to run faster (<— yes, this matters for endurance athletes too), jump higher, throw things harder or further, or make other people destroy the back of their pants, it’s never a bad thing to be stronger.

When working with athletes, though, there’s a spectrum. If you’re working with a college freshman who’s never followed a structured program and is trying to improve their performance to get more playing time, you can bet I’ll take a more aggressive approach with his or her’s training and place a premium on strength.

When working with a professional athlete – who’s already performing at a high level, and is worth millions of dollars – is it really going to make that much of a difference taking their deadlift from 450 lbs to 500 lbs?

Moreover, we’ve all seen those snazzy YouTube and Instagram videos of people jumping onto 60″ boxes:


It may get you some additional followers and IG “street cred”…but man, the risk-reward is pretty steep if you ask me. I’m not willing to risk my career (and that of my athletes) for some stupid gym trick.

Besides, if I wanted to I’d up the ante and have them do it while juggling three chainsaws. BOOM! Viral video.

To that end, I like Mike Robertson’s quote which sums my thoughts up the best:

“I think athletes need to be using the weight room as a tool to improve efficiency and athleticism, not simply push as much weight as possible – MR”

2) You Don’t Have to OLY Lift

Some coaches live and die by the OLY lifts, and I can’t blame them…..they work. But as with anything, they’re a tool and a means to an end. They’re not the end-all-be-all-panacea-of-athletic-and-world-domination.

I don’t feel any coach should receive demerit points – or be kicked out of Gryffindor – because he or she chooses not to implement them into their programming.

Lets be real: If you know you have an athlete for a few years, and have the time to hone technique and progress them accordingly, the OLY lifts are a good fit. It’s another thing, too, if you’re competent.

I for one am never guaranteed four years with an athlete, nor am I remotely close to feeling competent enough to teaching the OLY lifts. And that’s okay….

I can still have them perform other things that’ll get the job done:

Jumps:

https://www.youtube.com/watch?v=QUbClRjpLGk


https://www.youtube.com/watch?v=kn5v85ekXFs


NOTE: both videos above courtesy of Adam Feit.

Starts/Acceleration

5 yd Starts

https://www.youtube.com/watch?v=TklqD8uN_Ds


5 yd Jog to 10 yd Acceleration

https://www.youtube.com/watch?v=HM-BPJKTslg


Change of Direction

Up 2, Back 1 Drill

https://www.youtube.com/watch?v=YSFDp1QSA2w


That One Time I Looked Athletic

Medicine Balls Drills

Scoop Toss


OH Stomp


Kettlebell Swings


Punching Ramsay Bolton in the Mouth

No video available.9

3) Single Leg Work Matters

This is probably the part where some people roll their eyes or maybe scroll past, but hear me out.

I think it’s silly when I see coaches on Facebook argue over bilateral vs. unilateral movements and try to win everyone over as to which is best.

They’re both fantastic and warrant attention.

Where I find the most value in single leg training:

  • Serves as a nice way to reduce axial loading on the spine when necessary.
  • It can be argued all sports are performed – in one way or another – on one leg, so from a specificity standpoint it makes sense to include it.
  • Helps to address any woeful imbalance or weakness between one leg and the other.
  • Places a premium on hip stability and core/pelvic control.

All that said, I do find many people are too aggressive with their single leg training. It’s one thing to push the limits with your more traditional strength exercises like squats and deadlifts, but when I see athletes upping the ante on their single leg work to the point where knees start caving in and backs start rounding that’s when I lose it.

I’m all about quality movement with any exercise, but more so with single leg training. I’d rather err on the side of conservative and make sure the athlete is owning the movement and not letting their ego get in the way.

Like that one time I posted this video and Ben Bruno shot back a text showing me a video of Kate Upton using more weight than me. Thanks Ben! Jerk….;o)

Unfortunately, some coaches are so set in their ways that they’ll never cross the picket lines. They’re either team bilateral or team unilateral.

How about some middle ground with B-Stance variations?


4) Recognize Positions Matter

I’m not referring to Quarterback or Right Fielder here. But rather, joint positions and how that can play into performance in the weight room and on the field.

If you work with athletes you work with extension.

As I noted in THIS post, anterior pelvic tilt is normal. However, when it’s excessive it can have a few ramifications, particularly as it relates to this discussion.

Without going into too much of the particulars, people “stuck” in extension will exhibit a significant rib flair and what’s called a poor Zone of Apposition.

Basically the pelvis is pointing one way and the diaphragm is pointing another way, resulting in a poor position; an unstable position.

Anyone familiar with the Postural Restoration Institute and many of their principles/methods will note the massive role they’ve played in getting the industry to recognize the importance of breathing.

Not the breathing that’s involved with oxygen exchange – evolution has made sure we’re all rock stars on that front.

Instead, PRI emphasis the importance of the reach and EXHALE; or positional breathing.

It’s that exhale (with reach) that helps put us into a more advantageous position to not only encourage or “nudge” better engagement of the diaphragm, but also better alignment….which can lead to better stability and better ability to “display” strength.

NOTE: this is why I’m not a huge fan of telling someone to arch hard on their squats.


When joints aren’t stacked or in ideal positions, it can lead to compensation patterns and energy leaks which can compromise performance.

5) You Need to Control Slow Before You Can Control Fast

It’s simple.

Learn More With Elite Athletic Development 3.o

Mike Robertson and Joe Kenn released their latest resource, Elite Athletic Development 3.0 this week.

I can’t begin to describe how much information they cover, but if you’re someone who trains athletes then this is a no-brainer.

Many of the concepts I discuss above are covered, in addition to twelve more hours worth of content over the course of ten DVDs

Point Blank: You’ll learn from two of the best in the biz.

The seminar is on SALE this week at $100 off the regular price, and it ends this Friday (7/22), so act quickly.

Go HERE for more details.

CategoriesCorrective Exercise personal training Rehab/Prehab Strength Training

Bridging the Gap Between Physical Therapy and Strength and Conditioning. How Much of a Gap Is There?

Today’s guest post comes courtesy of Andrew Millett – a good friend of mine and brilliant physical therapist outside of Boston.

The term “bridging the gap” is always brought up when the discussion of physical therapy and strength and conditioning comes up. There’s no doubt a melding of the two when discussing the most successful outcomes for patients and athletes. However, in a day and age where more and more personal trainers are taking it upon themselves to play the role of “therapist” (and vice versa), it’s important to note that, while it behooves us to dip our toes in both ponds, there IS a distinction between the two.

And we need to respect that.

Enjoy.

Bridging the Gap Between Physical Therapy and Strength and Conditioning

In the fields of strength and conditioning, human performance, physical therapy, etc., we interact with people on a daily basis.  We learn about their family, their job, their goals, and what they want to get out of their training or rehab.  The majority of the people in this field did not get into their respective field for the money.

I am not saying that any of these fields can’t be lucrative.  The majority of us share a common bond:  the desire to help people.

Whether you are a physical therapist trying to help someone get rid of their pain and get back to doing what they want to be doing or a personal trainer trying to help someone lose some weight, most of us want to help people.

When we see a client who is in pain or has some type of movement dysfunction, most of us want to help them get out of pain, whether or not we are a healthcare practitioner.  Personal trainers, strength and conditioning coaches, etc. are well-qualified to assess and correct movement.

There are many schools of thought such as the Functional Movement Screen (FMS), Selective Functional Movement Assessment (SFMA), and Functional Range Conditioning (FRC) – to name a few – that teach trainers and coaches how to assess movement so that they can make their programming more effective based off of how their client presents on their assessment.


More often than not, a strength coach or trainer will see a movement fault they would like to fix in order to optimize their client’s training in order for their client’s to succeed.  There is nothing wrong with wanting more for your client and for your client to achieve their goals.  When assessing a client, if some type of movement limitation is present (I.e., decreased joint mobility and range of motion), then by all means, use the tools in your toolbox to attempt to correct it.

Tools such as a foam roller, lacrosse ball, or other self-myofascial release device, can be beneficial in attempting to increase soft tissue flexibility that could be limiting a client’s movement pattern.


Self-myofascial release can be very effective for improving movement quality and at reducing pain.  By doing something such as this, you are doing your due diligence in trying to help your client to the best of your abilities.

If you use an implement suggested above and someone moves or feels better, GREAT!

If someone doesn’t move or feel any better after something like that, then as Charlie Weingroff has said,

“4th and 10, you have to punt.”

As he described in his DVD, Training = Rehab, if you have a client who has some type of mobility limitation and they aren’t improving, “punt” them, not literally, to another provider…I.e., physical therapist, sports chiropractor, or a massage therapist.

If someone has pain, punt!  Per the Functional Movement Screen (FMS), if someone presents with pain, the test is over and they should be referred to a healthcare practitioner.

Now, if you referred all of your clients who are in pain to another healthcare practitioner, you would probably have a lot of free time on your hands.

Most clients have some type of ache or pain they are dealing with.

By “punting” them, this does not mean you have to get rid of them.  You can use a multi-disciplinary approach and continue to train them without worsening their pain or dysfunction while they are treated for whatever ails them.

Don’t try to be a jack of all trades and a master of none.  Don’t try to be the strength coach or personal trainer who trains their clients, but also attempts to treat their pain or soft tissue dysfunction by performing some form of manual therapy.

This is where you need to know what you are good at and what someone else may be able to do better.  If a patient or client presents to me and I know another practitioner that is better at it than me, they are definitely going to continue their care with that better clinician.

Keep the manual therapy to the physical therapists, sports chiropractors, etc.  These clinicians have hours upon hours of training on various manual therapy techniques to assist in improving movement, pain, and dysfunction.

By meeting with local PTs and chiropractors in your area and developing a network of providers you can refer to, you should have no problem sending a client to a colleague who can help improve their current state.  Your client will think the world of you for having the humility to refer them out to someone who can help them properly.

Even if the physical therapist helps decrease their pain, that client will always remember that you had their best interests at heart and you were thinking of them first.

Think of your client’s needs first, not your ego!

Now, just because I am a physical therapist, doesn’t mean I am not going to “bash” on personal trainers and strength coaches.  I have a background in physical therapy and strength and conditioning.  I consider myself a hybrid physical therapist, bridging the gap between rehab and strength training.

I know that I am not the smartest trainer or coach out there.  I have the confidence in my skill-set to start the programming process and teach and help clients squat, deadlift, lunge, carry, push/pull, etc.

There eventually comes a time where I can have a personal trainer or strength coach take over and continue the process.  My goal for my clients when they leave me is that they have some type of basic foundation of the various movements just mentioned so they can effectively and safely progress towards their health and fitness goals.

If you are a physical therapist, sports chiropractor, etc. and you either do not have the confidence in how to teach basic movements and program them OR you have not educated yourself on how to program and teach basic movements, then leave that to the strength and conditioning or personal training professionals.

The message goes both ways: as much as we encourage personal trainers not to be too “bridge gappy,” the same goes for physical therapists.

The major point of this post is not to bash either side of the health and performance spectrum.  The point is that we need to coexist and develop connections with various healthcare and performance disciplines so that we are in the position to help the most important person in this process:  the client or patient.

About the Author


Andrew Millett is a Metro-West (Boston) based physical therapist

Facebook: From The Ground Up

Twitter: @andrewmillettpt

Instagram: andrewmillettpt
Categoriescoaching Exercise Technique Strength Training

Big Rock Cues That Work For Pretty Much Everyone

As I’ve gotten older I’ve learned to be more succinct in many facets of my life.

– When I was 25 I’d consider it a travesty if I didn’t spend at least two hours in the gym. Now? A few “top sets” of my main movement, followed by an accessory movement to compliment that movement, and 45 minutes later I’m good.

– I’ve learned to trim my prose over the years, too. One of the best pieces of advice I ever learned on the topic came from my good friend (and my former editor at T-Nation.com), Bryan Krahn.

“Write your first draft, and then cut 20% of it, no matter what. Get rid of the fillers, fluff, and extraneous jargon10 that doesn’t do anything to support your message.”

– When I first met my wife and was wooing her I was all about impressing her with my collection of vintage Teenage Mutant Ninja Turtles t-shirts culinary skills. I remember a time or two11 attempting to drum up a four-course meal without burning down my apartment.

Now? “Babe, how about some tacos?”

The same can be said about my coaching career.

In a presentation I did last weekend at Iron Village Strength & Conditioning in Beverly, MA titled The Art of Coaching I discussed how, early in my career, I made the mistake of trying too hard to win-over my clients with big words like reciprocal inhibition, proprioceptive neuromuscular facilitation, post activation potentiation, and plethora (<— because, you know, that word is a boss).

Moreover, I made another huge mistake: Peppering my clients with too many coaching cues.

A set of squats would sound like this:

“Okay, squeeze the bar.”

“Push your knees out.”

“Don’t forget to spread the floor with your feet.”

“Big air!”

“Chest up.”

“Drive out of the hole.”

“Finish with your hips.”

“Stay tight, stay tight, I said STAY TIGHT!”

It was a juxtaposition on how not to coach clients. More often than not, they would end up feeling overwhelmed, frustrated, and thiiiiiiis close to wanting to drop kick me in the kidneys.

So today I’d like to share some succinct, BIG ROCK cues I feel work for pretty much everyone. At the expense of sounding like a fitness cliche, less coaching is more.

The Deadlift: Place Shoulder Blades in Your Back Pocket/Squeeze the Orange in the Armpit

Anything we can do to ensure (and maintain) upper back tightness throughout a set is going to be money. I could wax poetic and quote Dr. Stuart McGill here and all the work he’s done over the past 10-15 years to demonstrate how counteracting sheer force is kind of important for spinal stability and reducing the likelihood of back injury.

Instead, go read Ultimate Back Fitness and Performance.

“Place shoulder blades in your back pocket” or “squeeze the orange in your armpit” do an amazing job at engaging the lats, which are a big player in spinal stability.


The Squat: Sit Down, Not Back

Like many young, impressionable coaches at the time, back in 2002-2005 I read many, many articles written by Dave Tate and the crew over at Westside Barbell.

And why wouldn’t I? If you were (and still are) remotely interested in getting yourself or your clients strong, you’d be hard pressed to find better information. More to the point, if you were/are a powerlifter or training powerlifters those were the guys to read.

There’s no question there’s validity in using the cue “sit back” when coaching the squat. We can break down the biomechanics and draw lever arms…but at the end of the day, if the goal is to lift as much weight as humanly possible it makes sense to target the hips and posterior chain more by sitting back.

However, as the years passed and as I coached the squat more, I started to see a trend where people’s lower backs started flipping them the middle finger. They didn’t feel good.

This is when I started putting two and two together and understanding that the cues that work very well for powerlifters – specifically, geared powerlifters, where squat suits help with providing more stability – don’t necessarily jive well with un-geared lifters.

The cue “sit back” (and subsequently: arch!) places a lot of people in a compromising position where they fall into excessive anterior pelvic tilt, which can promote a more unstable position…to the point where they’re relying more on their “passive restraints” (ligaments) and bone(s) to stabilize their spine and not their “active restraints” (muscles).

“Sit Down, Not Back” (bracing abs, moving through the hips (not initiating with lower back), and pushing knees forward/out) works very well here. The squat is equal parts knees coming forward and hips going back

You know, a squat.

NOTE: Yes, there is still a forward lean in the torso. Relax. Deep breaths, internet.

Individual differences need to be taken into consideration, of course, in terms of injury history12 mobility restrictions, anthropometry, stance width, depth, etc, but I’d encourage you to give this cue a try and see if it feels better.

The Bench Press: Wrapping the Barbell

The bench press is a much more nuanced lift than some people give it credit for. As far as technique is concerned, I find it’s a black hole for many lifters – myself included.

There are many things to consider here.

For starters: is it Monday?

Secondly, cues like “meet the bar with the chest,” “shoulder blades together and down” and “put force into the ground with your feet” (leg drive) all have merit.

However, one cue that has resonated with me (and that of my clients) is the idea of wrapping the barbell. It’s a great way of ensuring lat activation/upper back stiffness without having to cue someone to “turn your lats on” when they have no idea what the fuck that even means.

Cressey Sports Performance coach, Miguel Aragoncillo, explains it better than I:


These Cues Don’t Mean I’m Right13

My objective here was not to insinuate these are the best cues for everyone. Only “pretty much everyone.” (<— It’s a fact. A true, fact).

Rather, the idea was to demonstrate various cues that have worked for me and my athletes/clients throughout my time as a coach. They may not be a good fit for you and your clients, and that’s cool. I’d be honored if you’d consider them nonetheless.

If not, “I HATE YOU. YOU’RE RUINING MY LIFE!!!”

[Slams door]

CategoriesProgram Design Strength Training

Stronger Back = Better Everything

What’s more impressive or baller than a muscular, strong-looking backside?14

Any Joe Schmo can walk around with decent sized biceps or a six-pack that would make Tyler Durden jealous. Walk into any commercial gym and you’ll see both.

However, it’s a bit of a rarer occurrence to see someone with an impressive upper back. Not JD Salinger making a public appearance rare or even unicorn rare; but rare nonetheless.

It’s a shame, too, because having a strong upper back provides many advantages.

1) It Makes You Look Yoked

Remember that opening scene from the movie Troy when Achilles (<— I know, second Brad Pitt reference in less than ten seconds. Last one I promise) “fights” Boagrius?

To help jog your memory, this is Boagrius:

You can’t technically see his upper back, but do really need to in order recognize he’s a ginormous human being?

Yeah, sure, the fight between him and Achilles was over in a blink of an eye, but we’re still talking about those traps.

And speaking of traps, who can forget Tom Hardy in the movie Warrior.

For starters, it’s a fantastic movie about brothers, fathers, and some of the best MMA fight scenes ever filmed – even my wife liked it.

Secondly, between his role as Tommy in Warrior (as well as Bane in The Dark Knight Rises), Hardy pretty much sealed the title for “Best Traps in Hollywood” and subsequently spawned a tsunami of “Get Traps Like Tom Hardy” workouts.

Traps, indeed, are the new abs.

2) Increased Overall Strength (DUH)

Having a bigger “anything” generally assumes increased strength. Trying really hard not to include a penis joke here.

A larger muscle can generate more force. More force equates to increased strength. Increased strength is never a bad thing.

To be more specific, though, having a bigger/stronger upper back can have huge carryover to improved performance in many lifts – especially as it relates to the “big 3.”

Squat

Having a bigger/stronger backside can translate very well to a better squat.

  • A bigger upper back makes it easier to allow the bar to rest on the “shelf.”
  • The back musculature must fire isometrically during a set to prevent falling forward and to prevent any excessive rounding.
  • Anyone who thinks the lats aren’t involved with squat performance is kidding themselves. The lats have attachment points in the intertubicular groove of the humerus, scapulae, portions of the vertebrae (T7-T12), the thoraco-lumbar fascia, as well as the iliac crest.
  • Activating the lats during squats provides significant more spinal stability and allowance of force transfer between the lower/upper halves of the body. This is partly the reason why people can back squat more than they can front squat.

Bench Press

Ask any powerlifter what’s more important for a big bench press – chest or upper back – and most will likely say “both!,” however default to the upper back (and technique) as being more of a limiting factor.

Chad Wesley-Smith of Juggernaut Training likes to use the analogy of the upper back serving as a “base of support” during the bench press. A thicker/wider upper back will:

  • Get you closer to the barbell (less distance the bar as to travel).
  • Assuming technique is on point, will act as a “springboard” to propel the barbell off the chest.

Deadlift

Similar to what was noted above with squats, a bigger/stronger backside will almost always equate to a better, less vomit-in-my-mouth looking deadlift.

Everything – traps, rhomboids, lats, erectors – work in concert, isometrically, to counteract both compressive and shear forces playing tug-of-war with your spine.

The stronger your back, the stronger your deadlift.

3) Illusion of a Bigger Chest

I work with a lot of men who’s #1 goal is to have more sex have a bigger chest. Common sense tells us that in order to have larger chest muscles (pecs) we need to train them.

And I agree.

Unfortunately, guys tend to be so enamored with training their chest that “chest day”  becomes “chest week.”

52 weeks a year.

As a result, many are left with an overly kyphotic posture (rounded upper back and shoulders) because they’ve developed a muscular imbalance between their front and backside, which ends up “hiding” their chest development.

So what ends up happening?

More chest exercises.

Which only feeds into the problem.

Many are left flummoxed when I suggest the answer is to perform more BACK exercises. Often, the answer is to strengthen and focus more on their backside, which will then “open” things up and give the illusion of a larger chest.

It’s like being Gandalf. Except, you know, not.

Back Strategery

Which leads us to the obvious question: Tony, will you just STFU and tell me WTF do I do?

This is a blog post, not a dissertation on anything & everything back training…but I’d be remiss (and an a-hole) if I didn’t provide at least some actionable advice.

1) Horizontal Pulls vs. Vertical Pulls

It’s generally accepted that back training can (and should) be divided into two camps: horizontal pulls and vertical pulls.

According to lore – and every bodybuilder in the history of ever – horizontal pulling tends to target upper back thickness, while vertical pulling tends to target width.

Bodybuilders are jacked and know a thing or two about putting on muscle, so who are we to disagree?

Horizontal Pulls = deadlifts, bent over rows, Seal Row, Yates row, DB rows, chest supported rows, Batwing rows, inverted rows (which are more of a hybrid, but certainly fall into this category), etc.


Vertical Pulls = chin-ups, pull-ups, lat pulldowns.

This is not an exhaustive list, but hopefully gets the point across.

If you’re someone who follows more of an Upper/Lower split during the week (4x per week), it may help to divide your upper body pulling days into horizontal vs. vertical.

If you’re someone who follows more of a full-body split (say, 3x per week) you could approach your back training in an A/B fashion.

A = horizontal pulls.
B = vertical pulls.

Week 1 = A, B, A
Week 2 = B, A, B

So on and so forth.

2) Train Your Back More Often

I honestly feel back training is something most people could get away with doing every training session. This doesn’t mean, of course, you need to go heavy or balls-to-the-wall every time.

On days you squat or deadlift or both if you’re a badass (or Wolverine), your back is getting plenty of work, and it probably wouldn’t bode well to follow suit with some heavy Bent-Over Rows or Pendlay Rows.


You can, however, toss in some moderate to high(er) rep (not to failure) accessory work afterwards in the form of DB rows or maybe some Band Face Pulls.

In any given week I like to include at least ONE heavy (3-5 reps) horizontal pulling variation, in addition to a moderate (8-12) and high-rep (12+) variation.

The same goes for vertical pulling – although, options are a little more limited here.

It’s undulated periodization 101.

It may look something like this:

Day 1

A. Deadlift: 3×4-6
B1. Speed Squat: 6×2
B2. Speed Chin-up/Pull-Up: 6×3
C1. Flat Bench DB Press: 3×10
C2. 1-Legged Hip Thrust: 3×8-10/leg
D. Band Face Pulls 3×15-20

Day 2

A1. Front Squats: 3×4-6
A2. 1-Arm DB Row: 3×8-12/arm
B. Speed Bench Press 6×3 OR DB Bench Press 4×6-8
C1. 1-Arm Landmine Press 3×10/arm
C2. Hinge Row: 3×10
D1. DB Goblet Squat: 3×8
D2. Pallof Press 3×8/side

Day 3

A1. Bench Press: 4×5
A2. Weighted Chin-Up: 4×3-4
B. Speed Deadlift: 6×1
C1. Cable Pull-Through 3×10-12
C2. Ab Rollout 3×10-12
D1. Seated Cable Row: 2×10
D2. High Rep Band Tricep Pressdowns: 2×20

And then you can tinker with varying set/reps each week.

3) Sneak It In

You can also “sneak” more back exercises into the mix and increase volume.

  • Pair a light row exercise with all warm-up sets on bench press.


  • Every time you walk past a chin-up/pull-up bar during a workout, perform 1-3 reps. Or, perform 1-3 reps every time you go to get a drink of water.
  • One option I like is to combine a unilateral row exercise with any additional speed (or technique) work I have a client perform. So, if I have someone doing 8 sets of “technique” work on squats, I’ll pair that with 8 sets of 1-Arm DB Rows (albeit only 4 sets per side)
    • Set of Squats paired with 1-Arm DB Row – Right Arm Only
    • Set of Squats paired with 1-Arm DB Row – Left Arm Only
    • Fist Pumps x Infinity.

I don’t know, just some ideas.

Categoriesspeed training Strength Training

Getting My Athleticism Back

The saying “if you don’t use it, you lose it” can be applied to many facets of life. Vacation time for some people applies here. Within some companies here in the U.S, if you don’t use your vacation time, you lose it.

Which is BS.

And, of course, I could easily toss in an obligatory dick joke here.

But I won’t.

Because I’m mature.


Athleticism is another one of those “things” we tend to lose when we don’t use it. In fact, I’d garner a guess that athleticism is one of the first attributes that diminishes once many of us enter into adulthood.15

But for the sake of brevity, and legally speaking, lets just say adulthood is when someone hits the age of 18.

At this age, unless you’re a high-level athlete and offered/recruited to play a sport at the next level (college), you typically either:

1. Go to college, stop playing sports, and discover beer.

2. Not go to college, stop playing sports, and get a boring desk job. Or, live in your parent’s basement and play World of Warcraft.

OR

3. If you’re me: go to college, play sports, watch way too much 90210, not hang out with chicks, stay active (even after college), still not hang out with chicks (at this point watch way too much Alias), eventually get a job in the fitness industry, get jacked, playing “sports” gets diluted to slow-pitch softball leagues, start working with high-level athletes, still stay jacked though, finally find a chick that will hang out with me, and eventually realize that, while certainly not un-athletic, I’m not close to where I once was.

That sound like you too?

Now, I’m not insinuating athleticism in this case means you’re ready to enter the NFL Combine or that you could win American Ninja Warrior.

Understandably, athleticism can mean different things to different people. But again, for the sake of brevity, lets just say athleticism can equate to the ability to do several things such as sprint, jump, hop, skip, punch a zombie in the throat, change direction, shuffle, accelerate, decelerate, and just move without looking like a drunk pirate.

IMPORTANT NOTE: Many people confuse athleticism with conditioning

And that’s not what I am referring to.

Yes, athletic drills can be a form of conditioning…however, that’s not their main objective. There’s a lot of technical proficiency and skill involved with developing specific athletic skills and athleticism in general.

Too, athleticism favors those who started at an early age. We’re motor learning sponges when we’re young. Not so much as adults when motor patterns and CNS pathways have been engrained for far too long.

Elite athletes and people who stay active their entire lives can do stuff without even thinking about it.

They can change direction on a dime or catch a frisbee with pulling a hamstring.

They can react.

They have to work at it, of course, and they’ve accumulated hours upon hours of “purposeful practice,” (in the form of actual practice and casual recreational activity) but they make athleticism look easy and seamless.

You don’t become more athletic by incessantly accumulating more and more fatigue. Mind you: the most successful athletes in the world are able to perform at a high-level – repeatedly – in the presence of fatigue. They do need to develop conditioning and endurance amongst many other abilities.

However, I feel many people operate under the assumption that conditioning (or getting tired) is equivalent to athleticism. 

And it’s not.

Hitting up your local CrossFit joint is cool. I think that’s amazing. There are many amazing athletes involved with it.

But don’t assume that just because you’re completing some crazy WOD 3x per week, gasping for air by the end, and are thiiiiis close to shitting a spleen, that you’re somehow improving your athleticism.

Getting My Athleticism Back

Make no mistake: I can still move well. I haven’t turned into the Tin Man or anything (although, lets be honest: dude could dance).

I still participate in athletic endeavors and sometimes look athletic when I demonstrate exercises and drills. However, as a former athlete (and as someone who trains athletes) I’d be lying if I said I was happy with my current situation.

Slight abject disdain would seem more fitting

Which is why I was so happy to see Jen Sinkler type these words the other day:

“I missed feeling athletic in almost any situation. I missed it lot.

So, I told my friends Angie Brambley Moyer and Tim Moyer, both world-class strength-and-sport coaches, that I wanted to get it back. That I wanted to get it allllll back.

I ALSO told them that I wanted to invite others who were in the same boat — former athletes, not-yet athletes, or current athletes who wanted to level up their game — to join me in my quest.

I was positive there were others who, like me, wanted to become lean, mean, athletic machines. Again, or for the very first time.

I was right.”

I’m Not Alone!!

I think many fitness professionals feel the same way I do. We’re in an industry where we often put other’s health, well-being, and goals before our own.

Likewise, there are many people reading who, despite being former athletes themselves, don’t have as much pep in their step as they used to.  Or, maybe there are some reading who have never played a sport in their life, but would like to be able to perform a pro-agility without breaking their hip?

I’m taking some initiative and putting myself through the Lighting & Thunder program. I’m even setting my ego aside and starting with the beginner program.

Here’s what I did today:

5 Yd Starts

https://www.youtube.com/watch?v=TklqD8uN_Ds


  • Objective here is to drop down into a proper starting “athletic” position (weight forward, CoG low).
  • Think long backside (toss back arm back as aggressively as possible)
  • Push away as fast as you can (aggressive first step).

5 Yd Jog to 10 Yd Sprint (With Stop Within 10 Yds)

https://www.youtube.com/watch?v=HM-BPJKTslg


  • Objective here is more or less the same as above (except without the athletic start position).
  • When you transition into sprint, you should get low and have an aggressive lean with positive shin angle.
  • You still want an aggressive backside.
  • Also, you want to “stutter step” to a stop within 10 yds, which works on deceleration and better emulates athletic activities.

5 Yd Jog to 10 Yd Sprint (To Coast)

  • I didn’t take a video of this.
  • Just imagine the same video as above, except me without a shirt on or something. Or pants.
  • Also, no need for aggressive deceleration…just a “coast” to finish.

Up 2, Down 1 Drill

https://www.youtube.com/watch?v=YSFDp1QSA2w


My sock game is ON-POINT!!!

  • This drill helps to hammer home the start/stop/start/stop nature of athletic activities and sport.
  • Performing this drill with hands touching the floor helps to cue weight forward and low (you’d obviously not do this in a REAL sport).
  • Important to note that if you stop with right foot forward, you’d want to tap floor with left hand (and vice versa).
  • Rest is 1:3 ratio. Rest for 3x as long as it takes to to complete the drill. This ensures ample recovery for top performance with each set.

It’s nothing fancy, but it doesn’t need to be.

I’ll be doing this program 1-2x per week all summer. If day 1 is any indication, I’m going to be Carl Lewis by September.

You Should Join Me

Lightning & Thunder is on sale now for HALf-OFF until Friday, June 3.

On top of being a top-rate speed/agility program, what’s great about it is that it can easily compliment any strength program.

It comes with a strength program in fact.

However, for those who purchase Lighting & Thunder via the links provided by the end of June 3rd, I’m going to offer you a FREE month of my Group Training Membership on Exercise.com.

NOTE: I’m only going to email the discount codes out to the exact same email address you use to purchase L&T.

You get two killer programs for one!

So, to review:

1. It was bullshit when Kelly chose Brandon over Dylan on 90210. I mean, it’s freakin Dylan McKay. How do you say no to someone like that?

2. The Lighting & Thunder program is pretty baller.

3. I’m doing the entire thing myself, even starting with the beginner program cause I’m cool like that.

4. You should totally do it with me.

5. As incentive…go HERE, and then I’ll send you a code for a FREE month in my Group Training Membership.

6. We’ll be BFFs.

CategoriesExercise Technique Strength Training

Why Performing 1-1/2 Reps Will Alter Your Life Forever

The title of this post might be construed as a tad exaggerative in tone.16

For the sake of brevity: anything labeled “life altering” should be reserved for stuff like winning the lottery, beating cancer, or, I don’t know, a really, really, really good steak.

Or having your own lightsaber.

So please forgive the sensationalism. What follows next will, in fact, not alter your life in any way, shape, or form.

Except for increased strength, muscle mass, and overall increased levels of badassery.

The Deets: 1-1/2 Reps

The idea of utilizing 1-1/2 repetitions (reps for short) isn’t anything new. My good friend, Ben Bruno, has been a huge fan of them for years.

Basically you take an exercise and “extend” the set by incorporating a “1/2 rep” in between full-ROM reps.

The idea serves a few purposes/benefits:

  1. Increased Time Under Tension.
  2. Can be used to address a technique flaw/weakness (which should be the main objective of accessory work anyways).
  3. Awesome alternative to use as a finisher at the end of a workout. They also serve as a nice way to increase total work done in any given session.
  4. Improved mental toughness. Or, put in other words: they fucking make you hate life.

Here’s Ben performing some chin-ups (with a 100 lb weight-vest no less) using the 1-1/2 method:


And here he is performing 1-1/2 reps with Front Squats:


I like to use the 1-1/2 method with the bench press, as I feel it helps trainees to:

  • Better appreciate what it means to keep the lats on, the upper back tight throughout, and to learn to “meet” the bar with the chest.
  • To help trainees imbue a better sense of time under tension. I.e., it’s a killer way to elicit a chest pump and overall chest hypertrophy. And, at the end of the day, a bigger chest is going to (probably) produce more force.

Some Things To Consider/Pontificate

1) Your bench set-up is going to be crucial.

There’s a sense of poignancy that festers inside me whenever trainees take a haphazard approach with their bench set-up. It’s like a Greek tragedy.

If I had to choose a few big-hitting, big-rock cues that tend to have a universal carryover, they’d include:

  • Learn to drive the upper back INTO the bench.
  • Shoulder blades should be “pinned” together and down (retracted and depressed) to provide more stability.
  • GET A HAND-OFF


  • Let be bar “settle” before you begin.
  • Think about wrapping your hand AROUND the bar (I.e., lat activation).
  • You don’t have to have a super aggressive arch in lower back – there’s a degree of mastery and personal comfort insinuated here – however, an arch (even a slight one) is advantageous.
  • Pull the bar down to your chest.
  • Chest meets the bar, rather than bar meets chest.
  • Leg Drive, leg drive, leg drive.

https://www.youtube.com/watch?v=Fj9RnZJqpOE


2) I prefer to use the 1-1/2 rep method as an accessory exercise to the bench press, rather than as the”main gig.”

It implies a bit more of an “accessory movement” vibe.

I feel it works wonders with helping trainees to learn to keep their chest UP throughout the duration of a set. Many make the mistake of allowing the chest to collapse or “cave in,” which manifests into a domino effect of losing upper back stiffness, scapulae position, elbow position, and a muffled leg drive.

Here’s what it looks like in action:


During the 1/2 rep portion (where I press the barbell half-way up) I have to cue myself to maintain lat activation, upper back stiffness, chest UP (to meet the bar), and to make sure my chest doesn’t deflate at any point during the set.

It’s harder than it looks.

Generally, it’s best to use sub-maximal loads on these – in the 60-75% range. You can strive for “x” number of reps, say 6-8 for 2-4 sets. Or, another way to implement these is with AMRAP sets.

NOTE: AMRAP = As Many Reps As Possible

My coach, Greg Robins, has been using this approach in my training.

After my main bench movement of the day I’ll follow that with something like this:

ONE set at 75% of 1RM for AMRAP.

Rest 60-90s

ONE set at 70% of 1RM for AMRAP.

It’s killer, but man, the pump is awesome.

And please, feel free to experiment with these. You can use this method with bench pressing, squats, chin-ups, row variations, single-leg variations, bicep curls, and deadlifts (just be careful).

Try them out, and let me know what you think.

CategoriesCorrective Exercise Program Design Strength Training

The Pendulum Swing

I’m still in Europe. Thankfully I have some coaches pinch-hitting for me while I’m away providing some awesome content. 

Today I have a great post from Pittsburgh based strength coach and physical therapy student, Michael Mash.

Užívat si (<— Enjoy in Czech)17

What You Need to Know

  1. With the popularization of core stability training, true rotational movements have erroneously gotten a bad rap.
  2. Mobility and soft tissue work have done wonders for various populations, but if you’re stretching and mobilizing for an hour before you even start your workout, something’s wrong.
  3. Squats and deadlifts are fantastic foundational exercises, but they are simply not enough to effectively train the core.
  4. While it has good intentions, the term “functional training” has recently been abused. Real functional training is actually quite simplistic.
  5. Evidence-based practice has enhanced the way we view clinical practice and strength training, but it is simply a tool in the toolbox.

Fitness trends act like a pendulum. As soon as the newest idea hits the mainstream and peaks, a group of people who adamantly oppose it return it to the other end of the spectrum. What we can learn from this phenomenon is this: the answer often lies right in the middle.

Core Stability Training

Quite possibly one of the most popular fitness buzz words of the last decade, core stability training has made a huge impact on how we train our midsection for health and performance.

Characterized by learning to properly move at the hips and upper extremities while keeping the spine stable, core stability training can be categorized into different planes of movement.

For example, anti-extension exercises such as the RKC plank, challenge the core’s ability to resist extension, whereas the barbell torque, an anti-rotation exercise, involves moving a barbell from side-to-side while maintaining a rigid core.

The barbell torque, performed with arm movement and a rigid core, is a fantastic anti-rotation exercise.

Popularized by Dr. Stuart McGill, while anti-rotation exercises are fantastic for those in both the rehabilitation and performance worlds, they seem to have been associated with the trend to completely STOP doing rotational core exercises.

What gives?

The last time I checked, the torso does actually have the capability to rotate and does so quite frequently on the field. Although, solely training core stability might not directly encourage an athlete to run around the field like a stiff board, promoting movement fluidity and rotational power with TRUE rotational core exercises does have merit.

Barring any contraindications such as previous or current hip/lumbar pathologies, rotation at the core is pivotal for successful sports performance, so let’s train it!

Exercises such as cable chops and medicine ball throws will train core rotation in the standing posture to promote both movement fluidity and increase performance!


Mobility and Soft Tissue Work

Oh mobility and soft tissue work!

Can’t live with it, can’t live without it!

The rise of mobility and soft tissue work has done wonders for both the banged-up lifter population and the elite athlete. Mobility and soft tissue work are paramount for success and have helped extend careers and led to more pounds lifted on the platform.

Once again, like core stability training, what started as a great idea to reduce pain and increase performance, now has turned into people flopping around on foam rollers, smashing and flossing each and every muscle, and twisting themselves up into a pretzel for 45-minutes before they even begin their workout!

This is a major problem.

I emphasize, do not take this babble to be anti-mobility work rhetoric, quite the contrary.

In order to set yourself up for success and time efficiency, your mobility and soft tissue work needs to be succinct, effective, and goal driven. Often times, what happens is the complete opposite.

Let me propose to you an example.

You are someone who has “tight” hamstrings. You spend the first 5 minutes of your routine foam rolling.

Next, you get out your spikey ball, because the roller wasn’t good enough, and you start rolling with that. Then you perform some mobility work such as single-leg toe touches, walking kicks, yoga push-ups, and finish off with a healthy dose of static stretching from 5 different angles. Fast-forward 6-months, and guess what? You STILL have “tight” (and I use that word loosely…no pun intended) hamstrings.

My point is this: It is IMPERATIVE that you monitor for results with your targeted mobility and soft-tissue work. Your warmup should be no more than 10 minutes at most, and if you are not seeing the results you want, reassess, or see a qualified professional for some advice instead of endlessly spinning your wheels.

Squats and Deadlifts Only for Core

With the popularization in core training, came a concurrent rise in the notion that it’s all a pile of bologna.

Yep. You heard me right.

“Look at all these wacky core exercises. You don’t need those. Just squat and deadlift. That’s all you need!”

Going along with our pendulum analogy, with the rise of core stability training, came the rise of those who said all you need to do is squat and deadlift.

Again, the answer lies in the middle.

Here’s the bottom line: although you don’t need to perform a million different core exercises, squats and deadlifts alone are NOT enough. I’ve worked with clients capable of squatting and deadlifting a brick house but the second you challenge them in with dead-bug progressions such as the hollow-body hold, they can’t maintain proper positioning without holding their breath or slipping into anterior pelvic tilt.


Although you must brace the core in a 360⁰ manner to encourage maximal stability during squats and deadlifts, they essentially only train the in an anti-flexion manner, a.k.a preventing your spine from crumbling into a pile of Lego blocks during the lift.

While the barbell lifts with ALWAYS serve as the pivotal foundation of exercise prescription, adding in a few extra rotary, lateral flexion, and flexion (or “anti” movements, again BOTH have their place), will take minimal time and promote a more complete core training experience to enhance performance and reduce the risk of injury.

Functional Training

What once started as a great idea to promote enhanced daily function, has turned into people single-leg squatting on a Bosu ball while juggling in one hand and reading a book in their other hand to their imaginary friend.

Functional right?

So let me ask you this. What does functional training mean to you?

From what I understand, the premises of functional training is utilizing exercise techniques to promote function in ever day life and sports performance. In life we bend down to pick things up off the ground, reach overhead to reach and cupboards, and carry things around, do we not?

Progressively loading human patterns IS FUNCTIONAL. It literally doesn’t get more “functional” than loading squats, deadlifts, carries, and presses. Barbell training IS functional training.

Teach grandma how to pick a barbell off the ground with a correct hip-hinge pattern and suddenly she has more ease playing with her grandchild who’s sitting on the floor…funny how that works.

Training the Farmer’s Walk suddenly makes carrying groceries in from the car that much easier.


I’m not against functional training, I’m against what functional training has become. True functional training entails progressively loading basic human movement patterns to increase quality of life, rehabilitate from injury, and increase sports performance.

Evidence-Based Practice

The rise of evidence-based practice (EBP) has drastically improved the practices of physical therapy and strength & conditioning.

Constantly questioning the methods we employ is paramount to ensure practitioners are constantly learning and providing the best possible care for their patients and clients.

With that being said, we must view EBP for what is it, an important tool in the clinical toolbox, not the end-all be-all solution for everything.

Solely relying on EBP can limit creativity. Suddenly clinicians and strength coaches become hesitant to employ a technique or exercise because there’s insufficient evidence to support its use.

Here’s the truth: strength coaches and rehab professionals in the trenches DRIVE evidence-based practice.

In order for there to BE evidence, someone has to be grinding away utilizing innovative techniques and seeing results beforehand.

Do you think evidence-based practice was a part of King Arnold’s success back in the ‘70s? I don’t think so, but if he had it on his side, he may be done even better (if that’s even possible)!

Incorporate a healthy mixture of your experience, the latest evidence, and your patient/client’s values to maximize outcomes.

Conclusion

The pendulum often swings from both ends of the extremes in the fitness industry, but it ALWAYS finds its way back to the center. When new ideas rise to the mainstream, it is often associated with major backlash by a group of those who believe the complete opposite! Always question the latest and greatest fitness trends, because the REAL answer always lies somewhere in the middle!

About the Author

Michael Mash, SPT, CSCS, FMSC is a physical therapy student and strength coach located in Pittsburgh, PA. He started his company, Barbell Rehab and Performance, with the mission to bridge the gap between physical therapy and strength & conditioning by implementing barbell lifts into clinical practice.

Follow Michael at his website BarbellRehabandPerformance.com and on Facebook and Instagram (@barbellrehab))